This post is a long-winded way of saying "Don't buy JDM projector-style headlights". If you already know why, then you'll have to wait until my next post for something new.
When I searched the internet for 300ZX headlights, I found two more-or-less distinct price points for them. At the time I hadn't noticed that the lower priced lights were usually prefaced with “JDM" (Japanese Domestic Market) or the word “Fairlady” which is what the 300ZX is called in Japan.
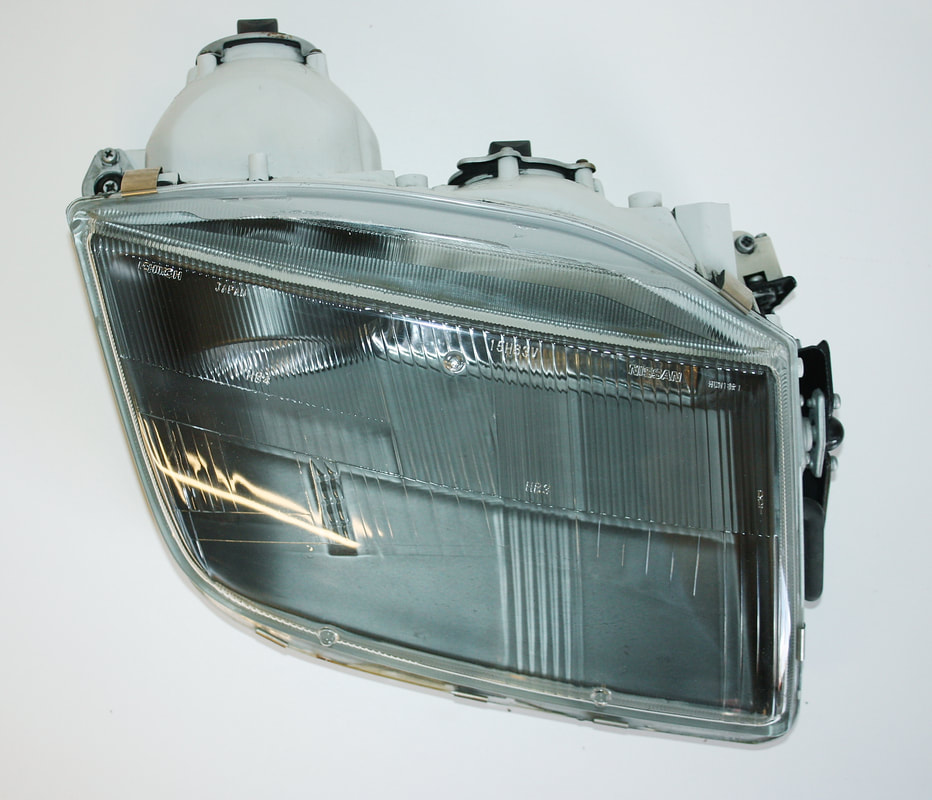
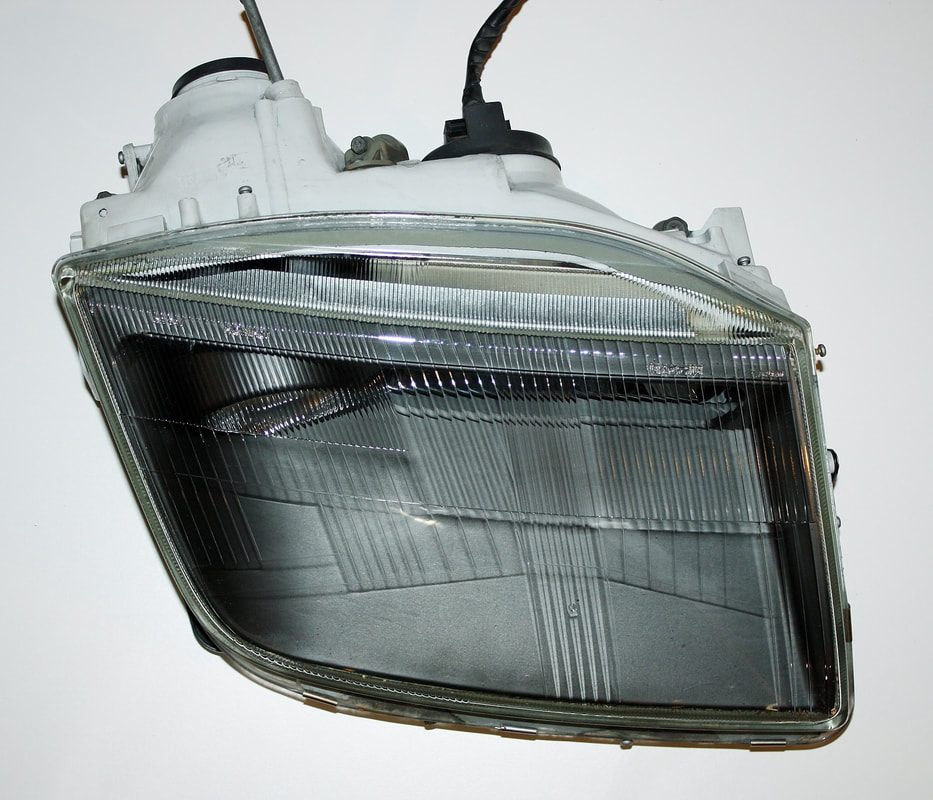
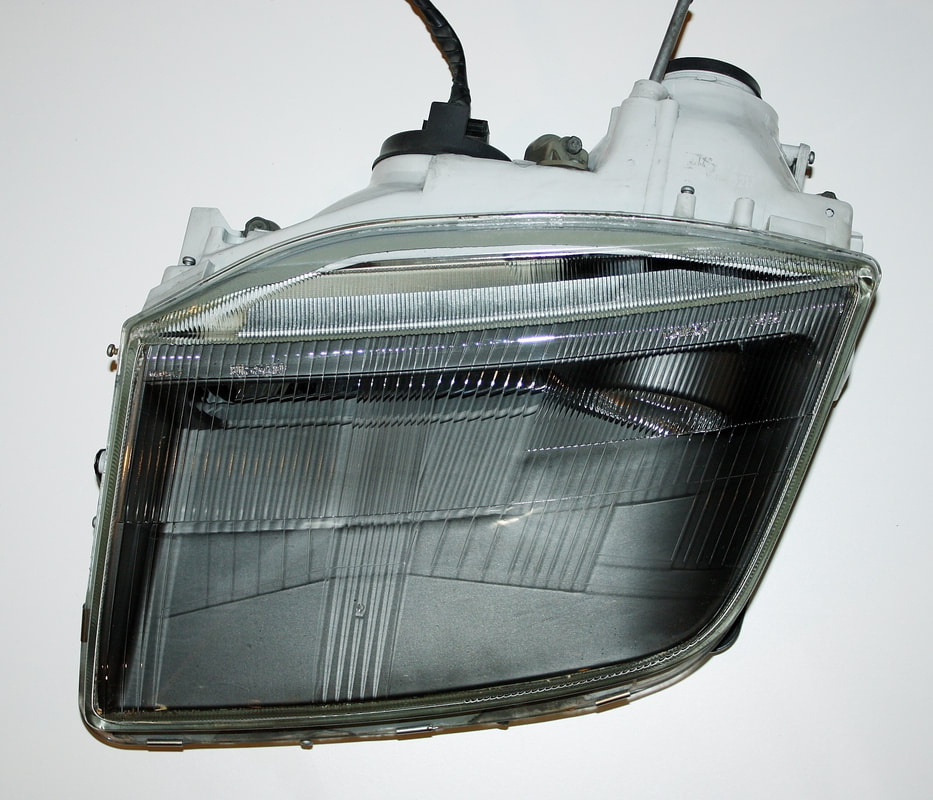
It was only after I bench-tested the headlights on my garage wall that I found something amiss. The low beam pattern from the projector lights looked like this:
When I searched the internet for 300ZX headlights, I found two more-or-less distinct price points for them. At the time I hadn't noticed that the lower priced lights were usually prefaced with “JDM" (Japanese Domestic Market) or the word “Fairlady” which is what the 300ZX is called in Japan.
It was only after I bench-tested the headlights on my garage wall that I found something amiss. The low beam pattern from the projector lights looked like this:
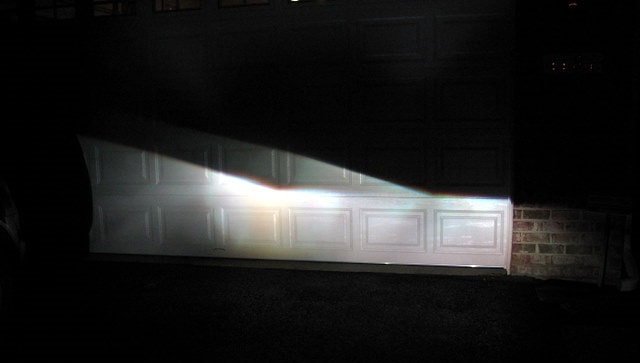
The projector beams joggled upward toward the left(!)... into the oncoming traffic. That's when I realized that the Japanese drive on the opposite side of the road, and that JDM lights are illegal for use “as-is” in North America. So rather than write off $300 worth of lights, I decided to see if I could modify them.
The shield which cuts off the upper half of the projector beam is only accessible once the main outer glass lens on the headlight is removed. It was held onto the plastic housing really well with caulking around its perimeter, but after 45 very long minutes of heating it with a blow dryer, the caulking finally let go.

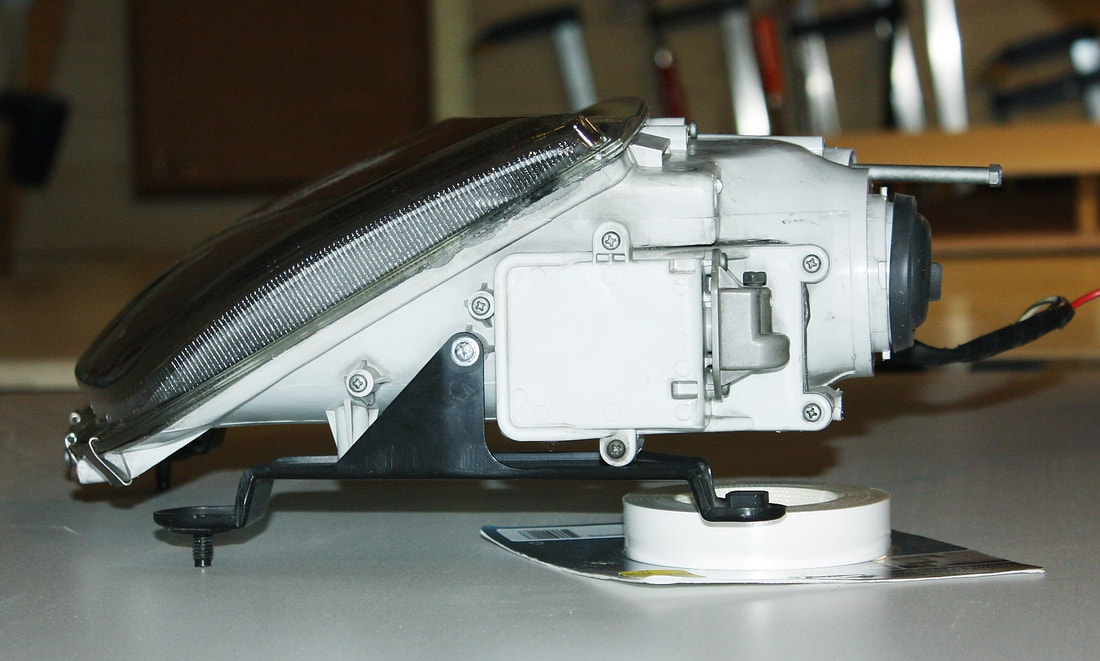
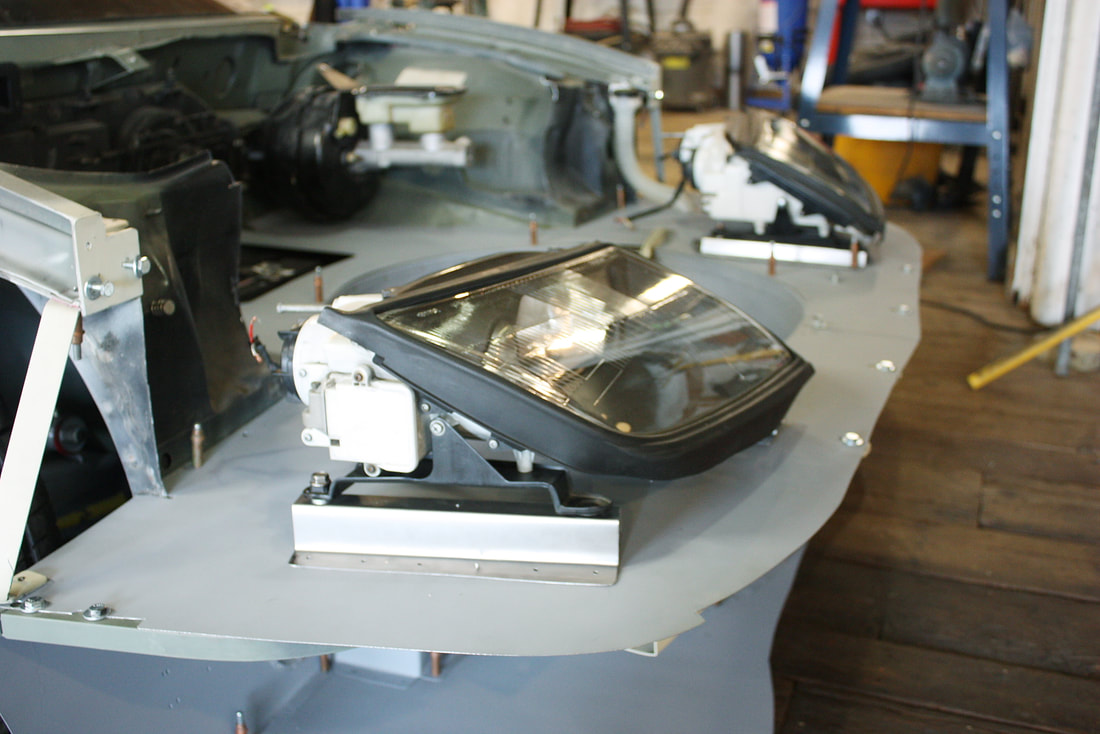
Once the outer lens was removed, the large black bezel was next, followed by the rectangular high beam reflector, and finally the projector. Here are all the parts:
Once the outer lens was removed, the large black bezel was next, followed by the rectangular high beam reflector, and finally the projector. Here are all the parts:

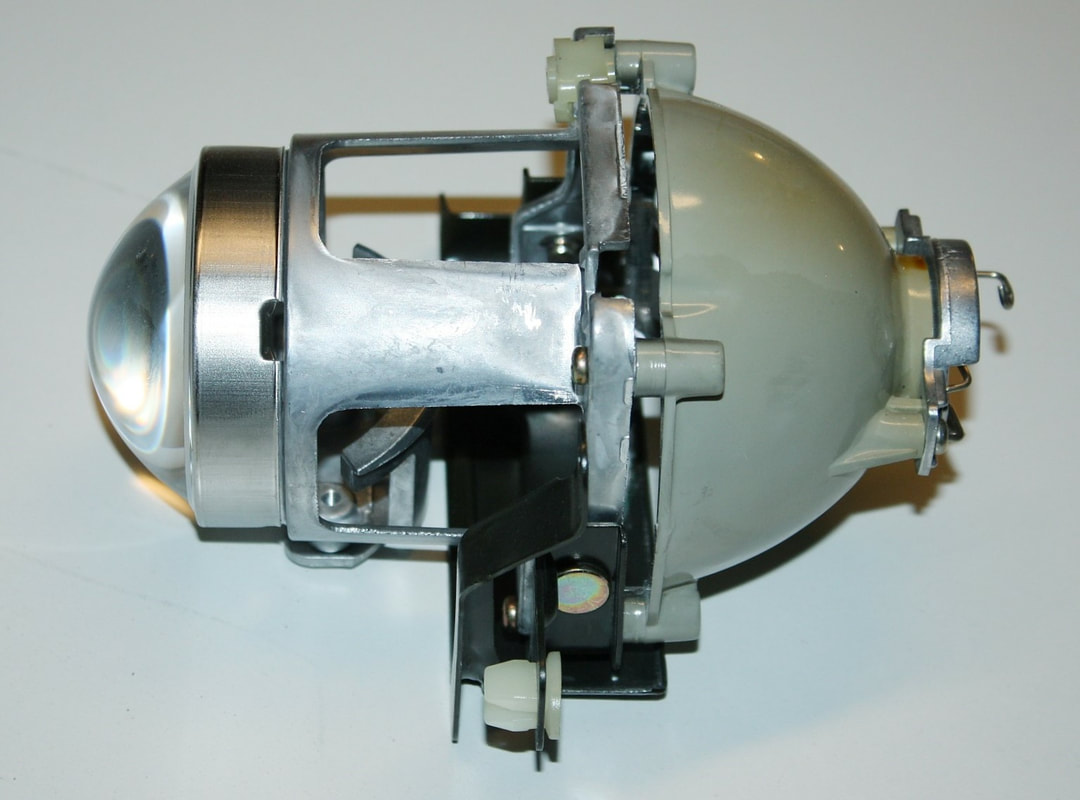
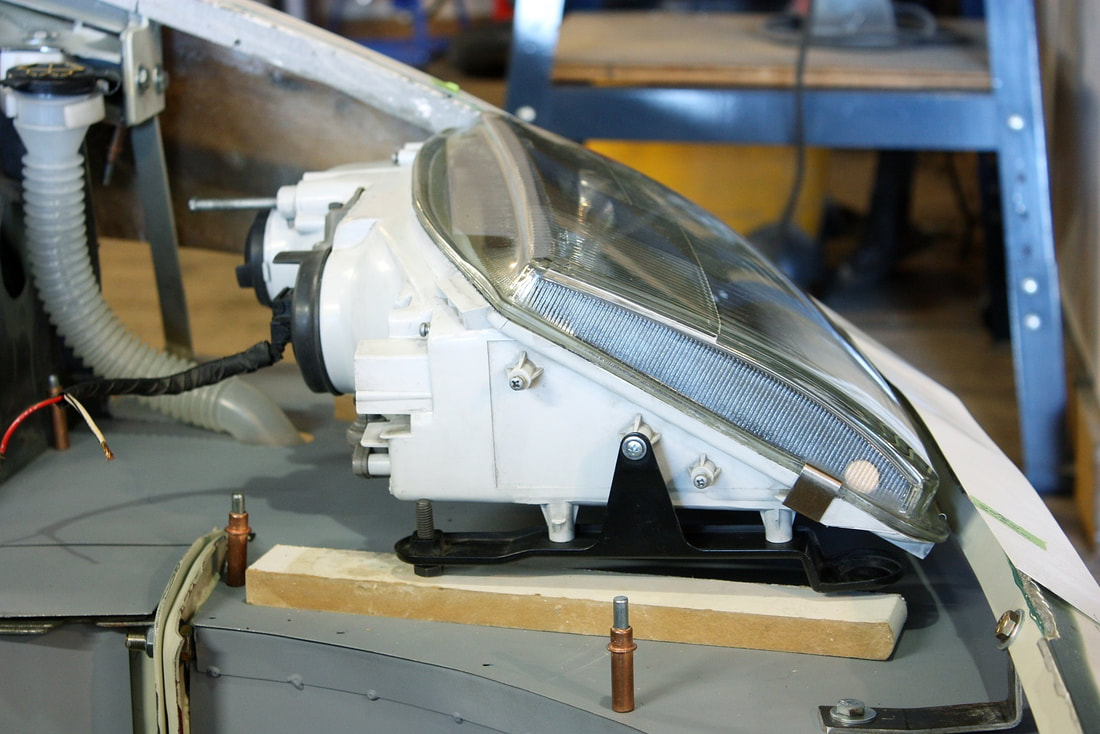
This is what the projector assembly looks like when it's all together. It's a complete stand alone unit with its own gimbals for vertical and horizontal adjustment.
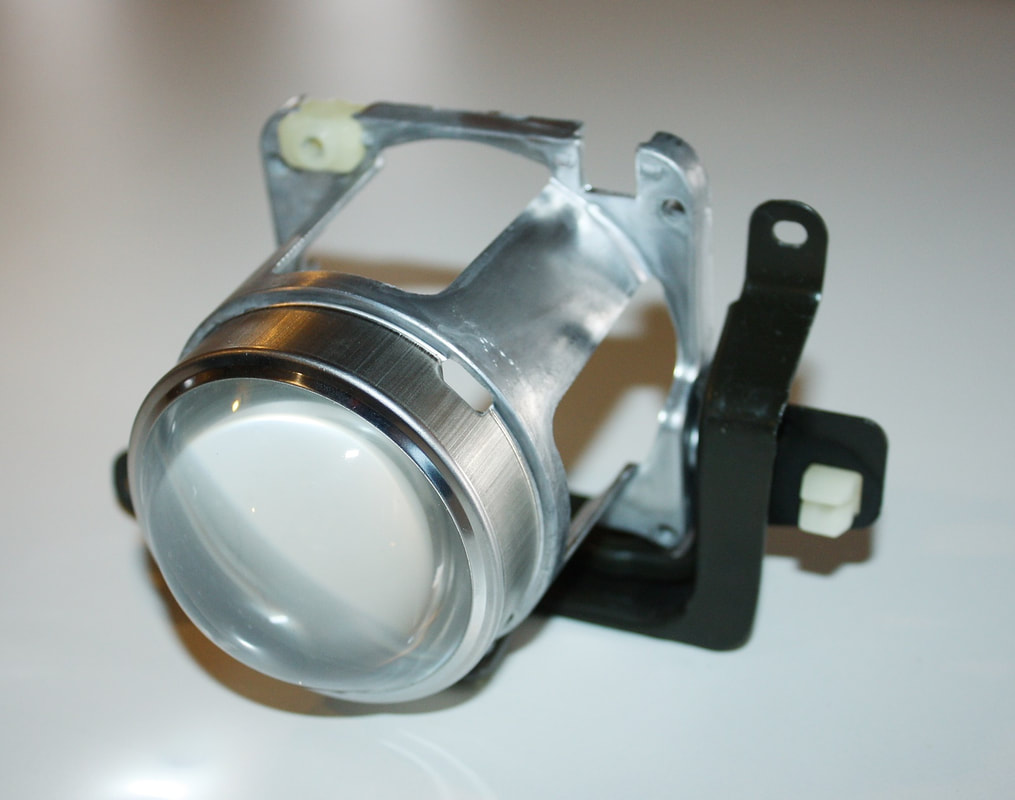
This is the projector lens assembly after the reflector had been removed:
And here’s the view of the lens assembly from the backside showing the offending beam cutoff shield in the center:
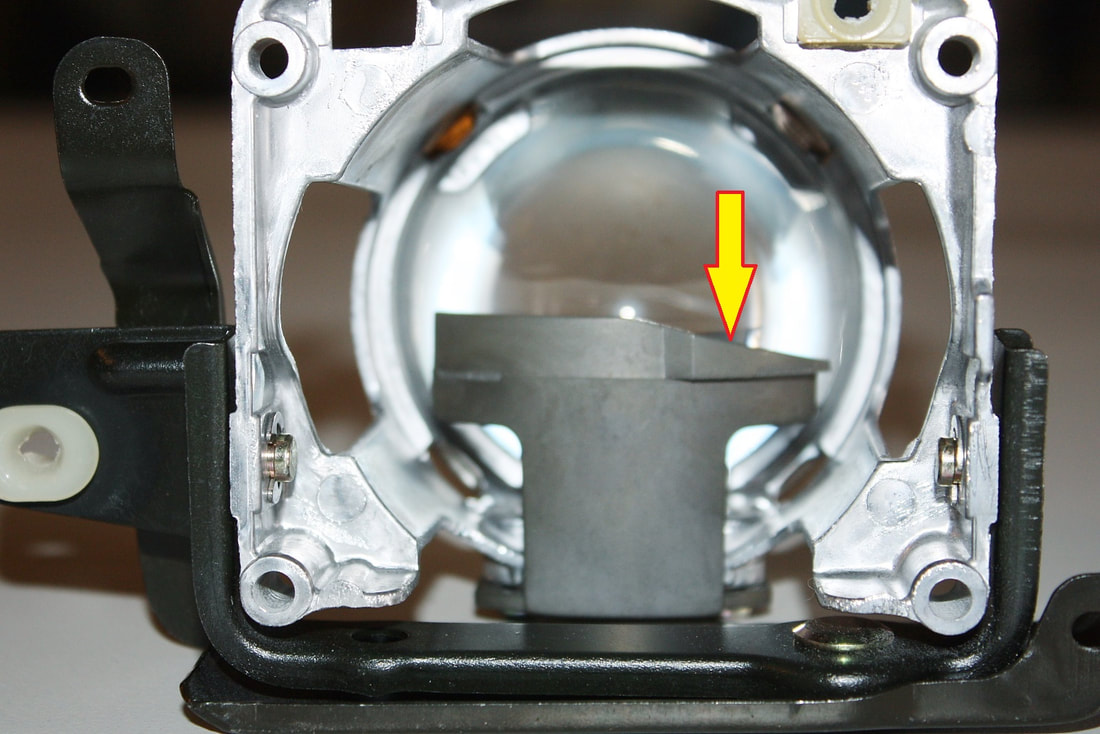
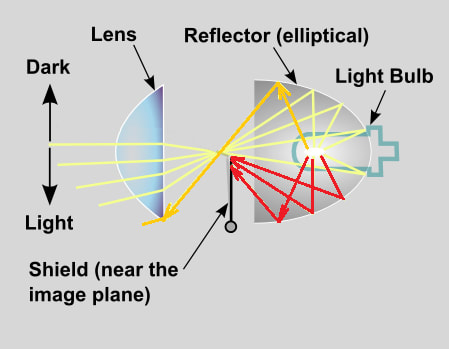
At first glance it looks to be the right shape with the shield dropping off to the right, but the rays hitting the shield are reversed since they bounce off the reflector’s mirror first. What's up is down, and what’s left is right. Here's a little schematic showing how the shield’s shape and location are critical:
At first glance it looks to be the right shape with the shield dropping off to the right, but the rays hitting the shield are reversed since they bounce off the reflector’s mirror first. What's up is down, and what’s left is right. Here's a little schematic showing how the shield’s shape and location are critical:
Before knowing the shield was a cast part, I thought I’d be able to flip it around, or worst case scenario fabricate a new one. Flipping it turned out to be a dead-end since the shield is curved, and making a new one seemed a tough challenge for the same reason. It would also have to withstand the intense heat focussed on it without warping.
That’s when I started looking for more reasons to justify replacing both lights with USDM models. For starters, I found the housing around one of the adjuster screws was cracked:

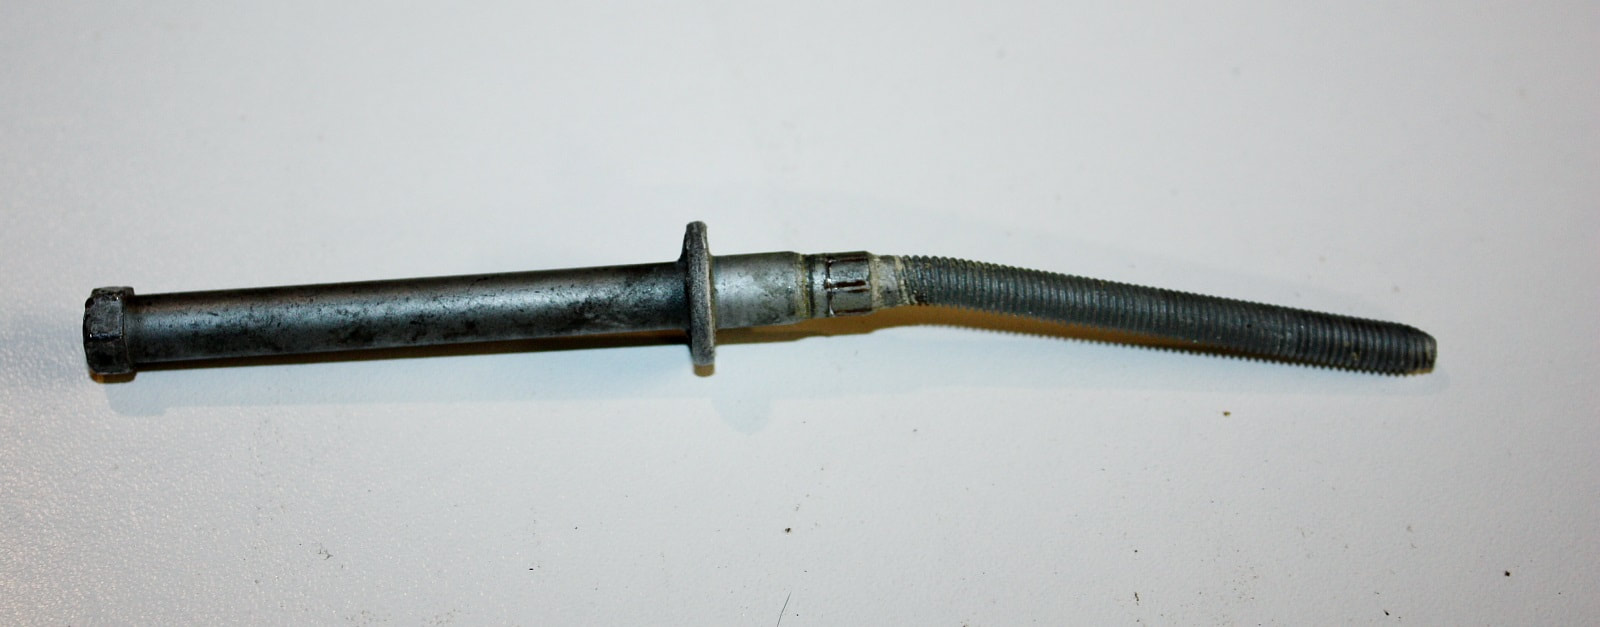
The adjuster screw had obviously been hit hard enough to bend it and break the housing:
Then I noticed neither high beam adjuster screws did anything, so I removed the little right angle drive gear boxes to inspect them…:
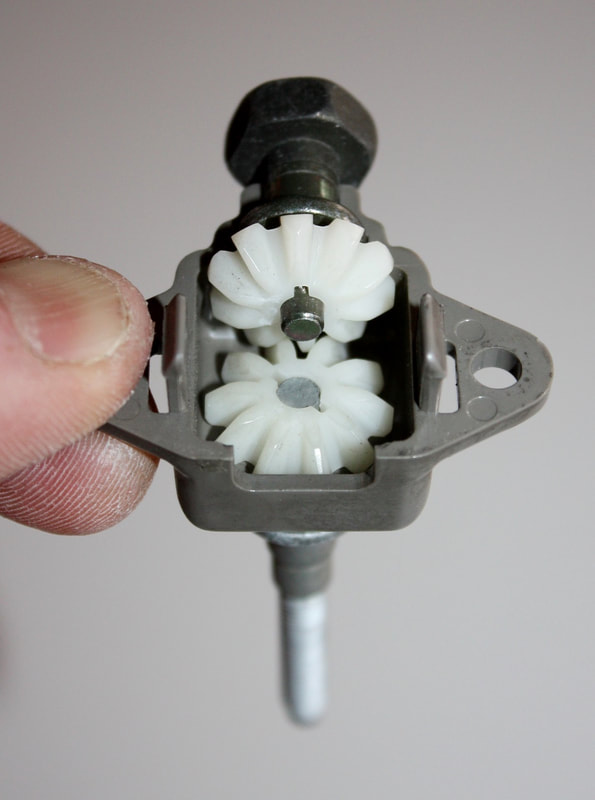
… only to find that one gear in each adjuster was cracked and slipping on its shaft:

They were cracked because the worm gears they were attached to, (the ones that actually push the lights up and down or side to side) were seized. Someone then over-torqued the adjusters causing the plastic gears to break.
So, I found enough reasons to start looking for new lights. Much to my surprise, a scrap yard in my home province was selling a USDM light for all of $30! When it arrived, I was quite happy with the condition, but was soon faced with more decisions.
There are several means to tell the JDM and USDM light assemblies apart… some trivial, some significant. For starters, the USDM lights are marked “DOT”:
There are several means to tell the JDM and USDM light assemblies apart… some trivial, some significant. For starters, the USDM lights are marked “DOT”:

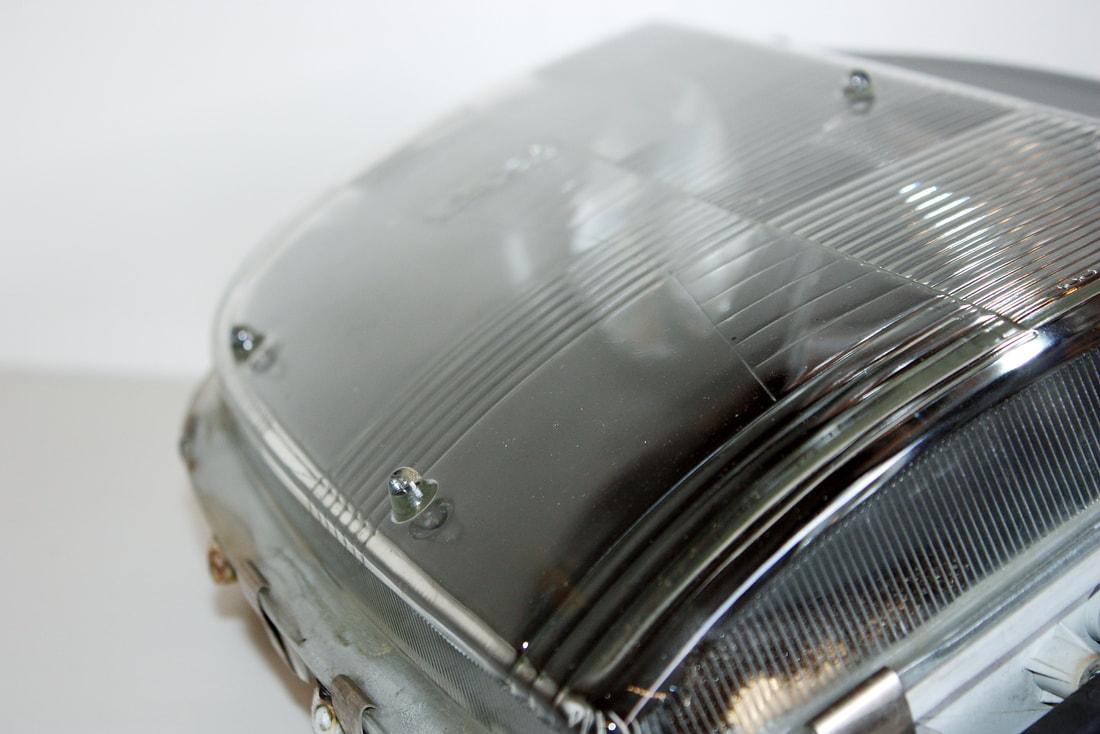
The US models have three raised glass dots on the lenses to mount a specialized headlight aiming tool:
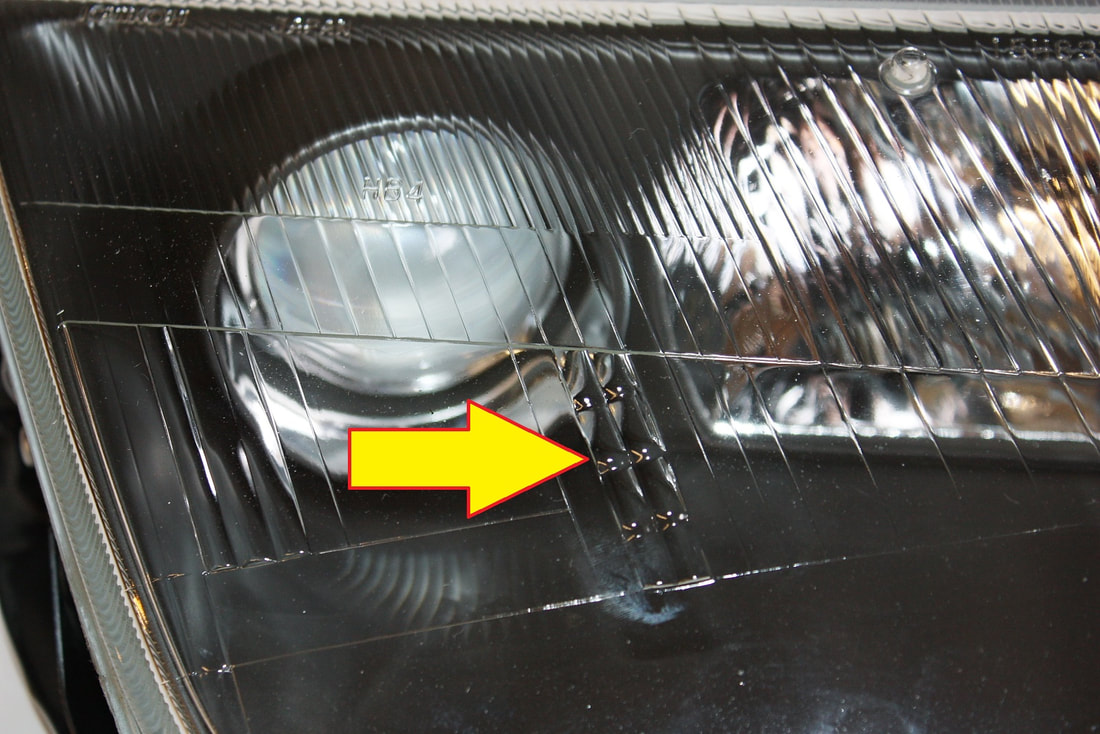
And there are slight differences in the fluting in the lenses too… the JDM lights don’t have this set of eight little mini-lenses in front of the projector:
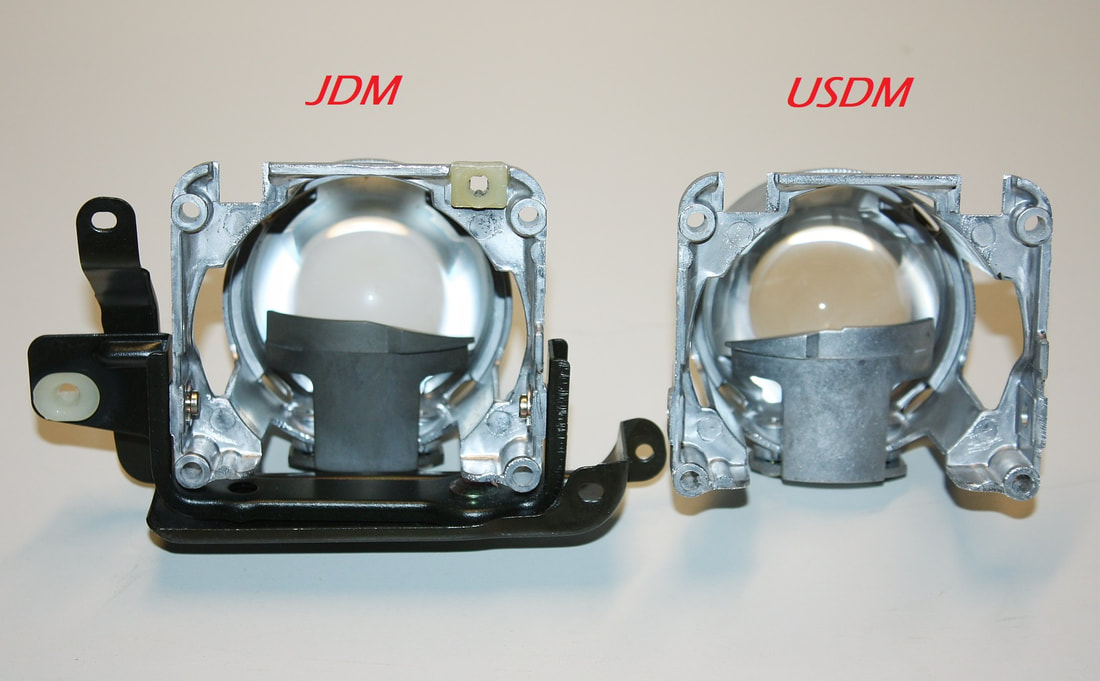
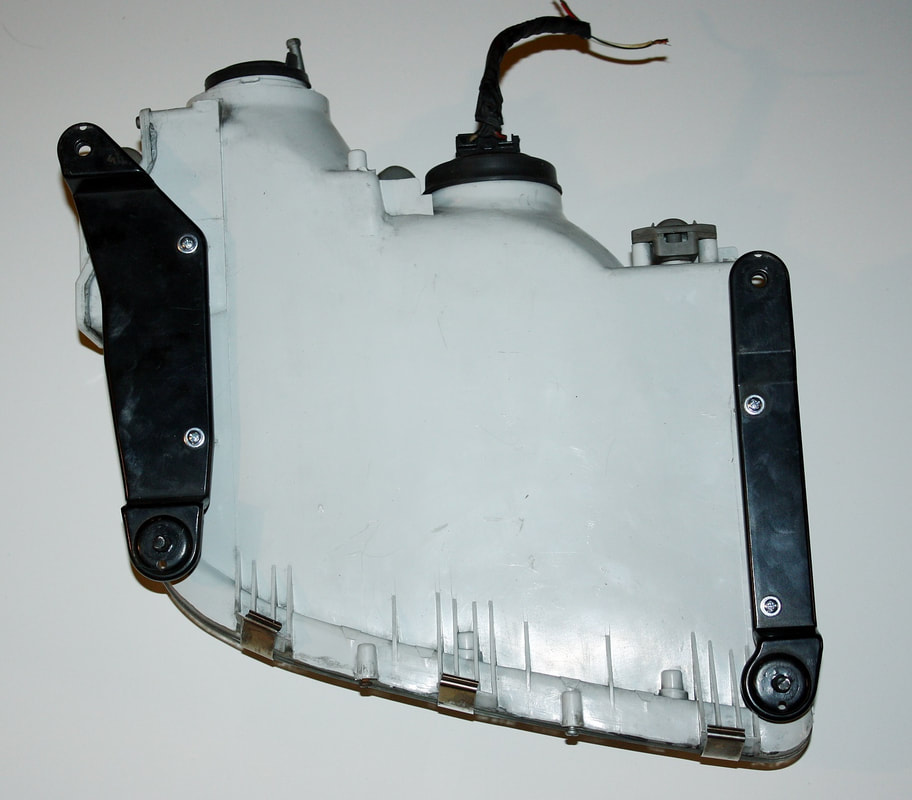
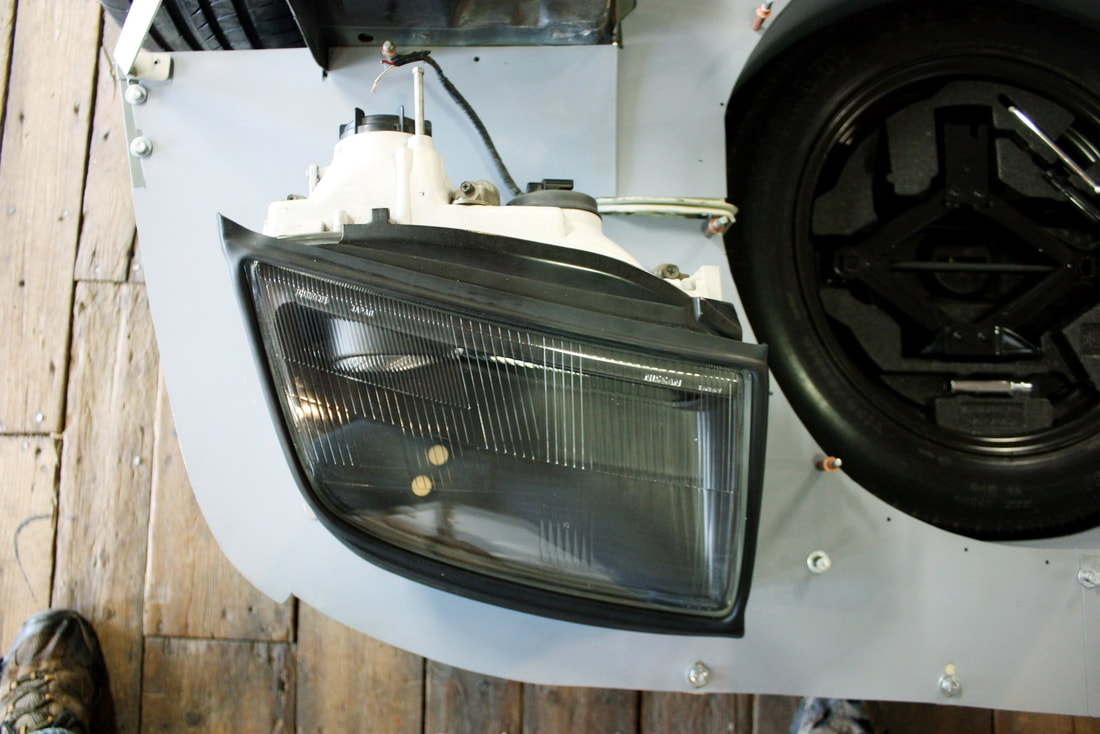
By far the two biggest external differences between the Japanese and US model lights are the main plastic housings and the mounts, neither of which are interchangeable. Here are the two side by each:
By far the two biggest external differences between the Japanese and US model lights are the main plastic housings and the mounts, neither of which are interchangeable. Here are the two side by each:
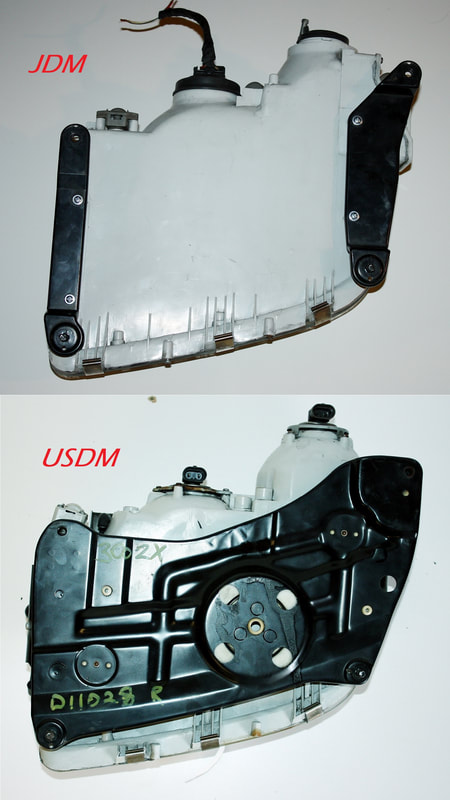
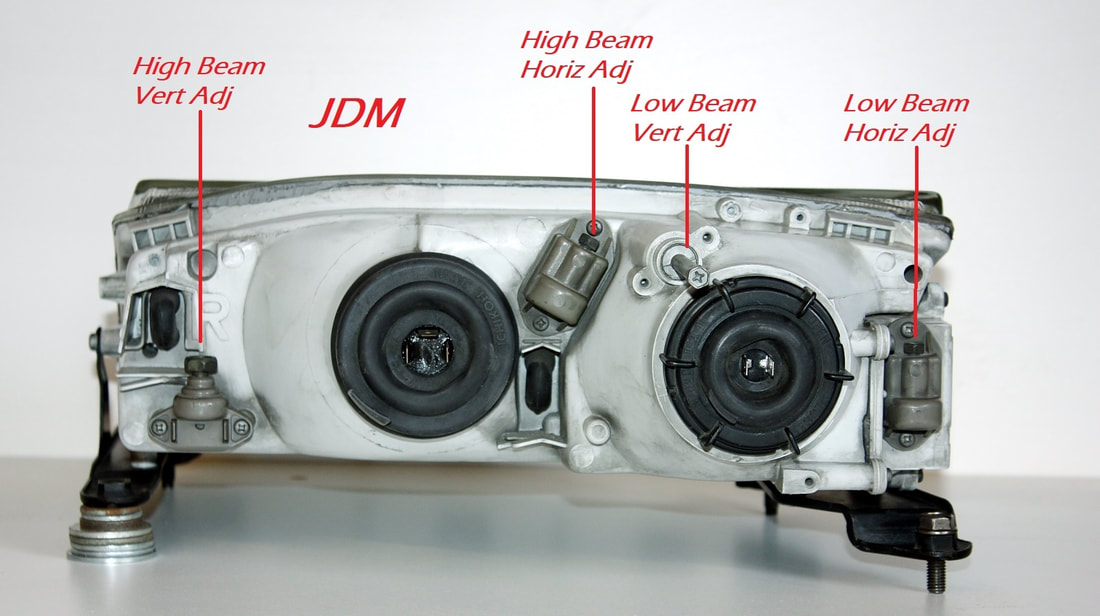
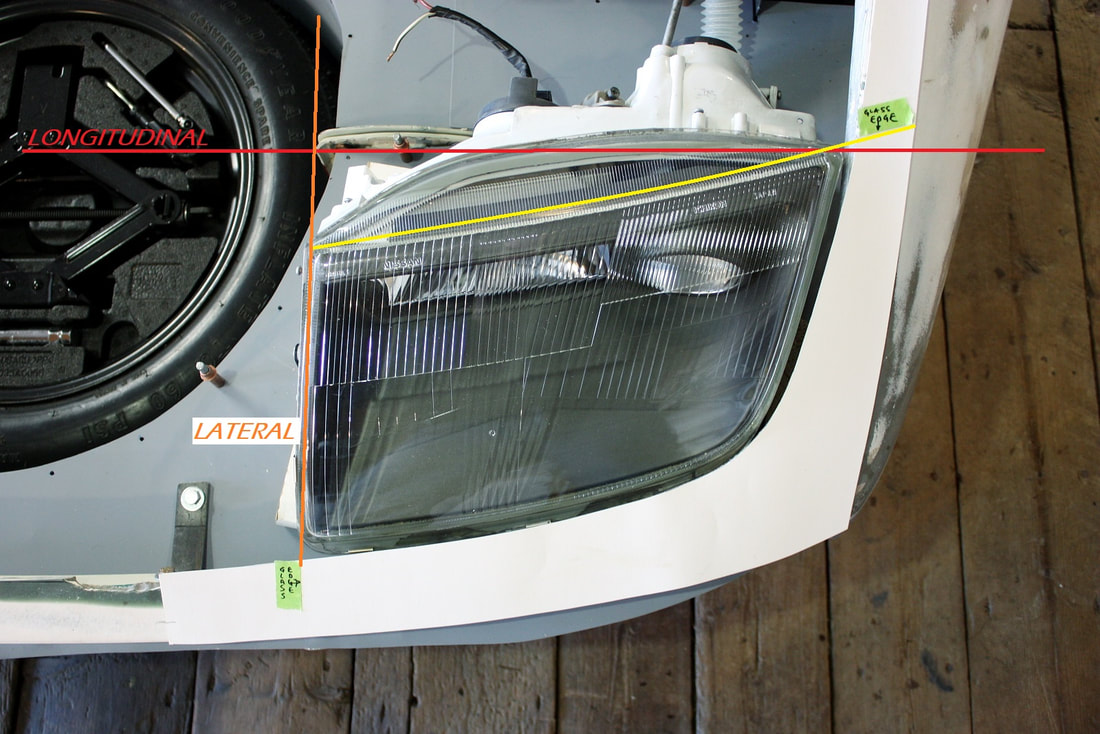
The reason for the different mounting systems is to accommodate the difference in headlight alignment philosophies. The JDM headlight assemblies are bolted rigidly to the chassis as-is, and each have a total of four independent vertical and horizontal adjustments which tilt or rotate the high and low beam reflectors inside the housing.
The reason for the different mounting systems is to accommodate the difference in headlight alignment philosophies. The JDM headlight assemblies are bolted rigidly to the chassis as-is, and each have a total of four independent vertical and horizontal adjustments which tilt or rotate the high and low beam reflectors inside the housing.
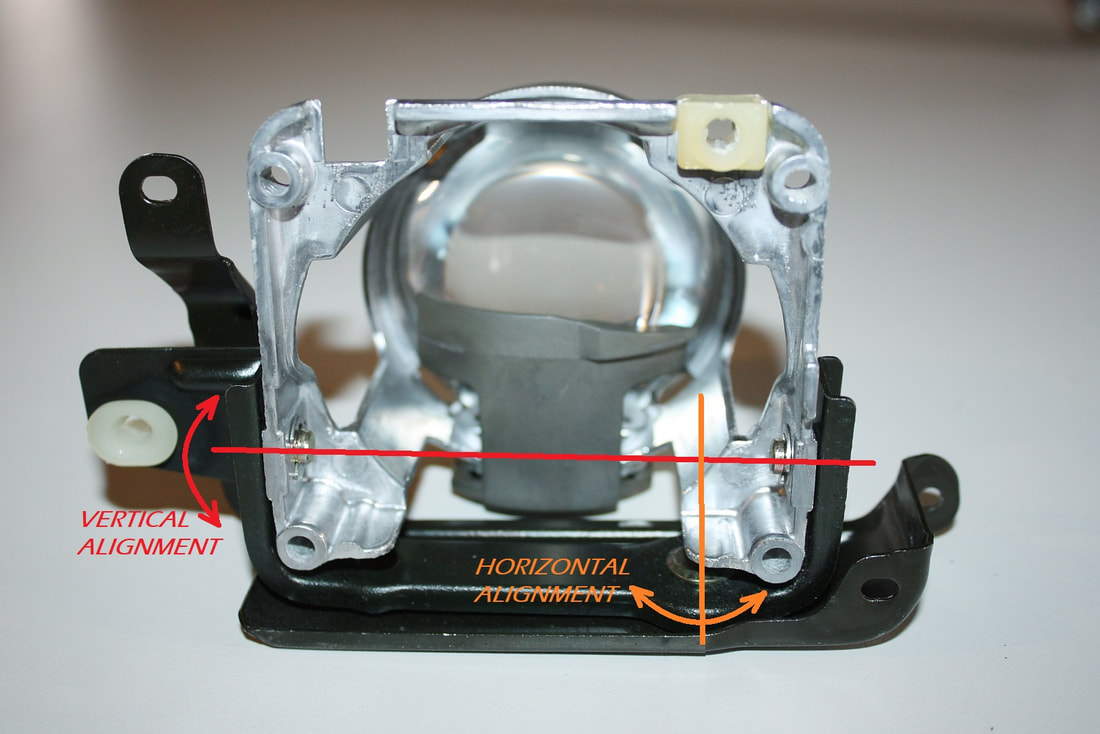
Internally, each reflector is mounted on a gimbal that is pushed or pulled by worm gears attached to the external adjusters. Here’s an example showing the gimbal mechanism (black brackets) on the projector lens:
Internally, each reflector is mounted on a gimbal that is pushed or pulled by worm gears attached to the external adjusters. Here’s an example showing the gimbal mechanism (black brackets) on the projector lens:
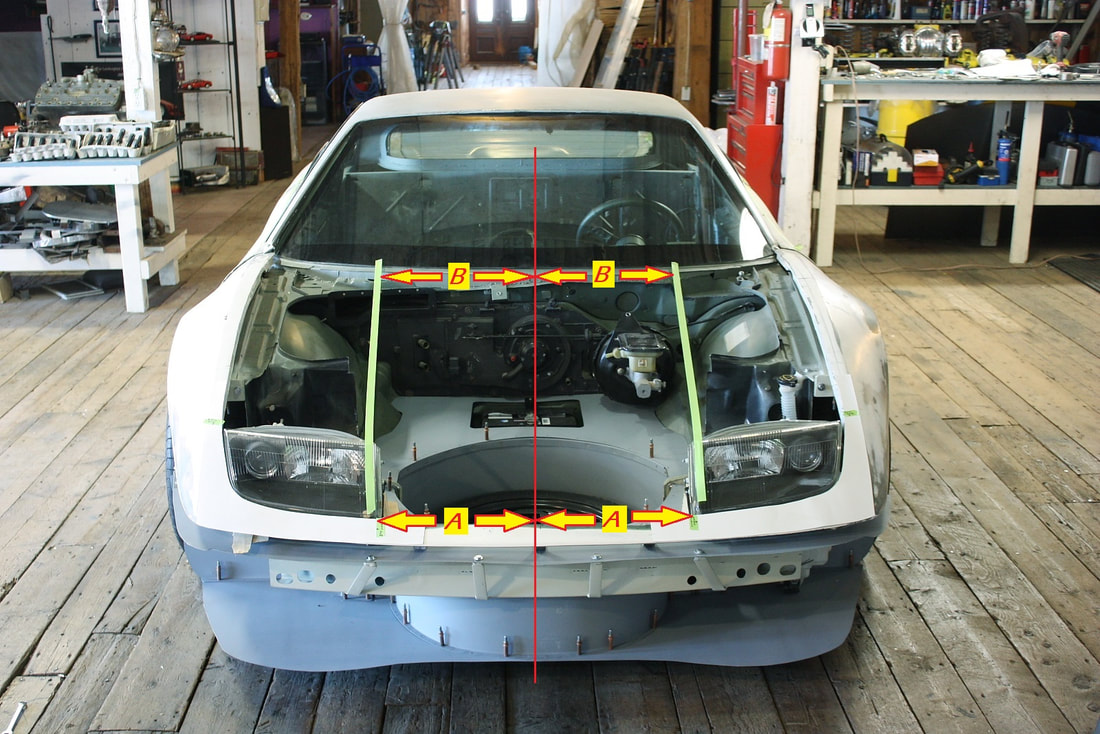
In contrast, the USDM models only have a vertical adjuster for the high beam reflector, and a horizontal adjuster for the low beam reflector. The two reflectors are aligned with respect to each other at the factory, and the adjustment screws (the inner–most arrows) are potted-over with an anti-tamper compound (the other two potted-over screws are simply reflector mounts):
In contrast, the USDM models only have a vertical adjuster for the high beam reflector, and a horizontal adjuster for the low beam reflector. The two reflectors are aligned with respect to each other at the factory, and the adjustment screws (the inner–most arrows) are potted-over with an anti-tamper compound (the other two potted-over screws are simply reflector mounts):
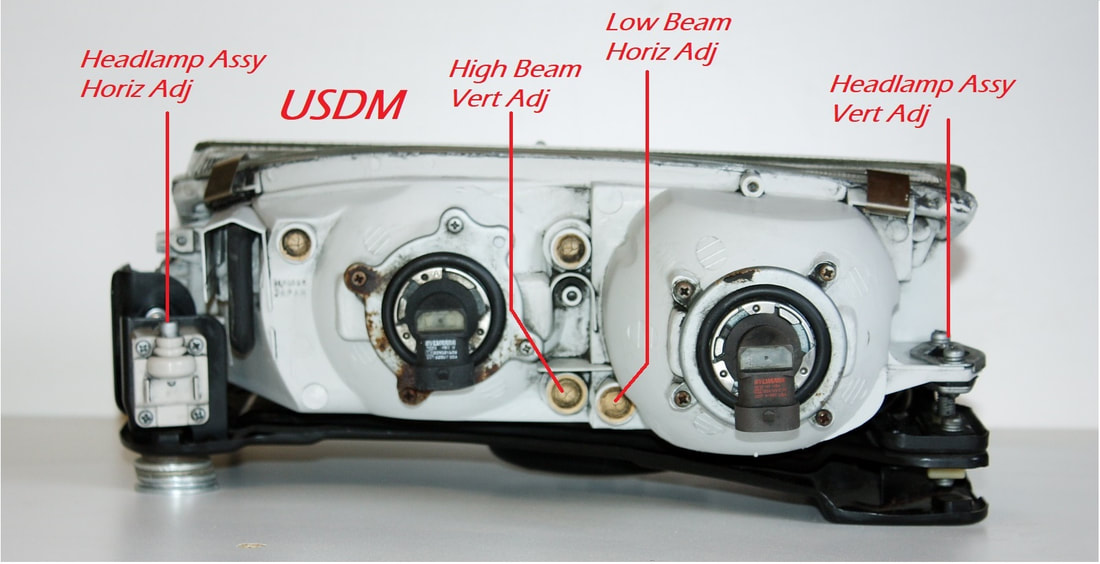
The entire headlight housing is then mounted to a large external gimbal mount allowing the assembly as a whole to be tilted vertically or rotated horizontally via the two outer-most adjusters in the photo above.
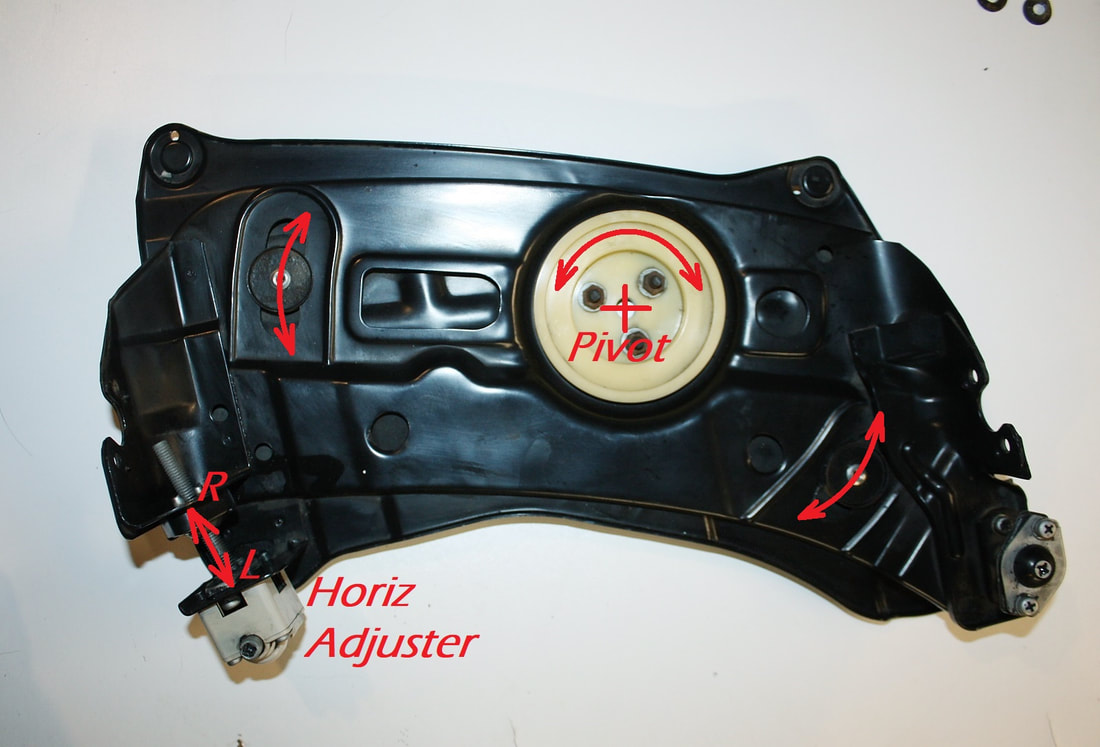
Left to right adjustment is made turning the horizontal adjuster:
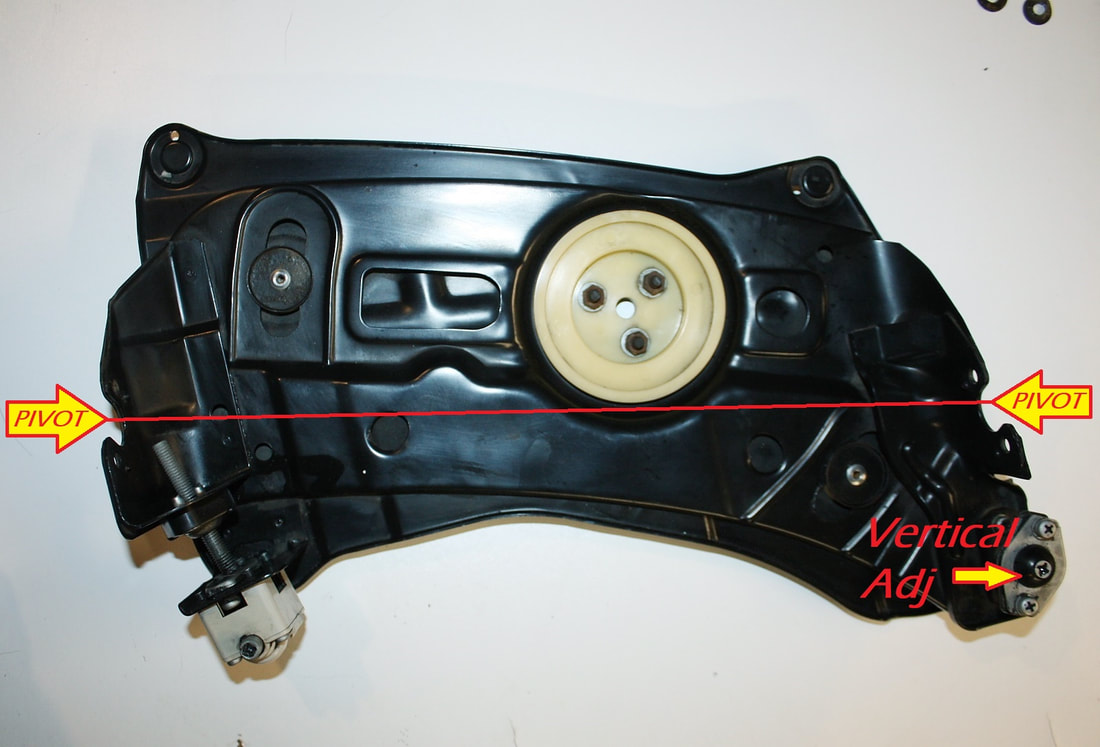
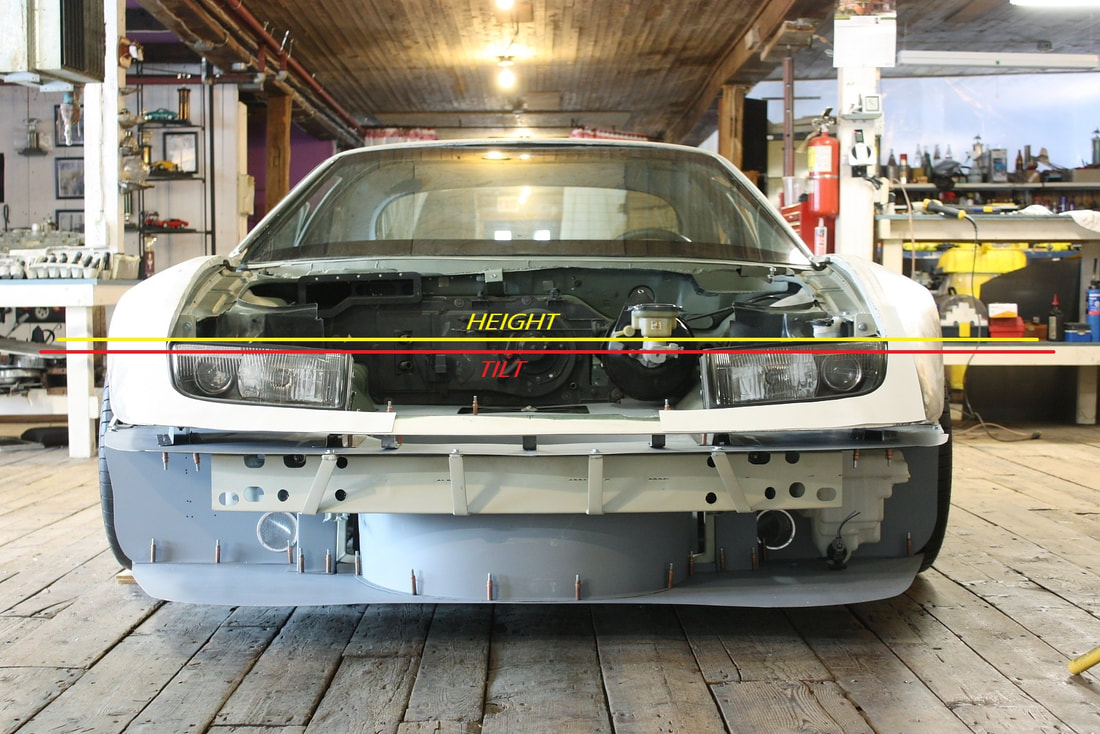
And up and down adjustments are made through the vertical worm-drive. The pivots for this axis are part of the plastic headlight housing and aren't shown.
And up and down adjustments are made through the vertical worm-drive. The pivots for this axis are part of the plastic headlight housing and aren't shown.
So, back to my newest dilemma: which parts to use?
To some, it might seem obvious to use the entire USDM headlight assembly. But I won’t. The reason: I want tight, equal gaps between the body panels that surround the headlights and the headlights themselves. But the alignment system on the USDM model moves the entire headlight assembly in relation to the body, not just the internal reflectors.
Since I know I’ll need a lot of re-aiming based on the non-stock angles I’ve mounted my headlight assemblies to the chassis, it would be impossible to aim the USDM beams properly without having the headlight housings at some cock-eyed angles in relation to the surrounding body panels.
Using the JDM light housings with the fixed exterior mounts, but independently adjustable, gimbal mounted, high and low beam reflectors, along with the USDM projector shield should yield what I want: tight gaps and good aim.
So I disassembled the USDM headlight and removed the projector lens assembly. Here are the two models side by each:
I could’ve swapped just the shields at this point, but rather than mess with their precise location (they have slotted mounting holes), I left the shields in place and simply moved the gimbal mechanism over to the USDM lens assembly.
The rest was a reverse of the teardown procedure. I unstuck and lubricated the seized worm screws, straightened out the bent adjuster, epoxied the cracked housing around the adjuster screw, and opted to use the JDM glass headlight lens since it was cleaner looking without the three glass bumps noted earlier. Yeah… it’s not DOT approved, but only I (and the few people reading this blog) will ever notice!
I still need to find a solution for the cracked bevel gears in the adjusters, and to find one more USDM headlight assembly (or simply a US shield) for a reasonable price to start the process all over again for the other light…
The moral of the post is that anyone planning to use projector lights from Japanese, British, or Australian spec’d cars should know that they’re illegal to use on North American streets.

 RSS Feed
