With the summer long gone and property renos and farm chores on hold until the warm weather returns, it’s back to the project car. Yay!
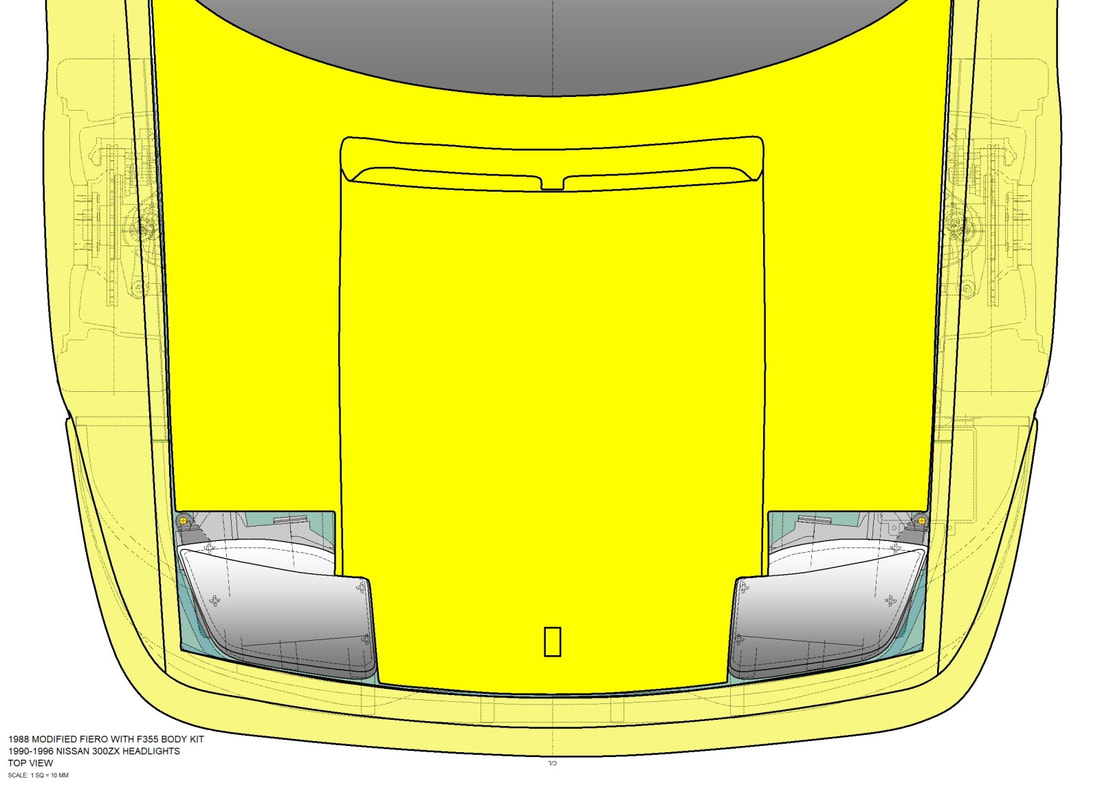
In my last post I left off with the outer hood skin stripped of its inner liner and chopped up in the area of the headlights to make room for the Nissan 300 ZX units. My chopping was far from being over though. But before I got neck deep into the modifications pool again, I decided to wade in by updating my drawings. I try to keep them current since they give a different perspective than what is possible by simply standing next to the car. So here's where I left off in the spring:
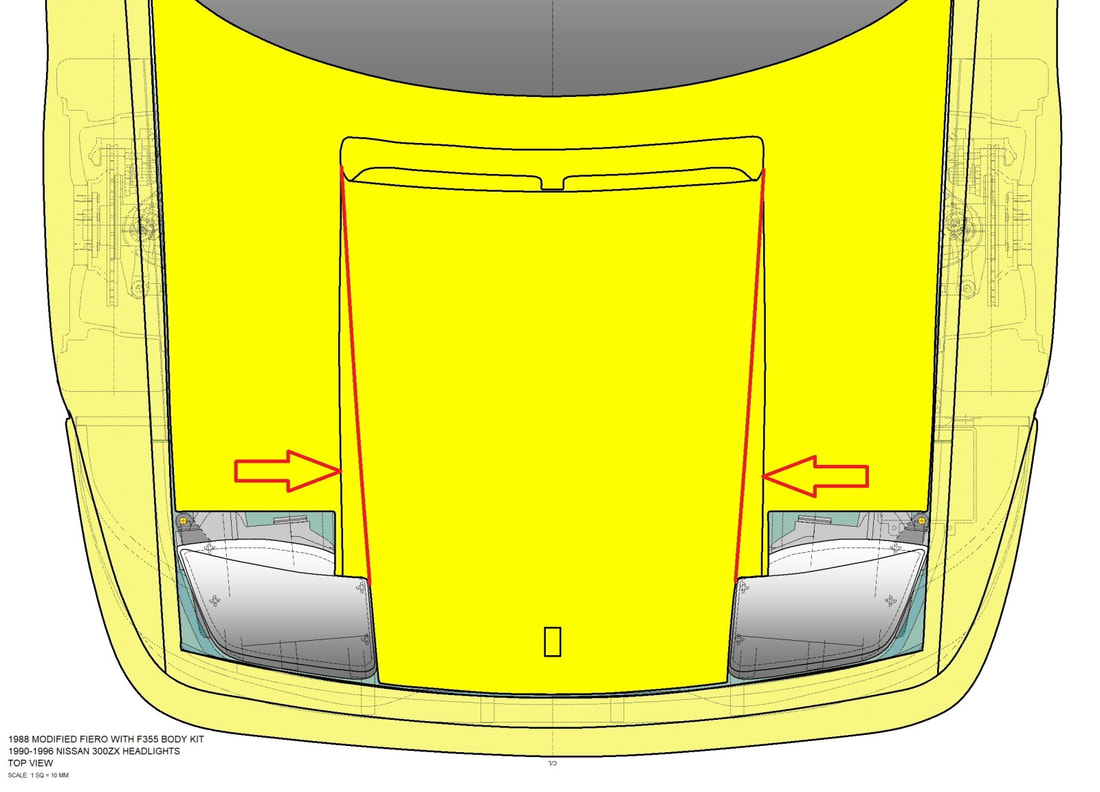
I’ve already mentioned that the decorative creases down the center of the F355 hood no longer aligned with the much wider Nissan headlights, so something had to be done to correct that. The simple solution (at least on paper) was to re-angle the creases until they met up with the inner edges of the light lenses, like so:
I’ve already mentioned that the decorative creases down the center of the F355 hood no longer aligned with the much wider Nissan headlights, so something had to be done to correct that. The simple solution (at least on paper) was to re-angle the creases until they met up with the inner edges of the light lenses, like so:
The hard part was following through! I considered several options including building up the lower, center section of the hood with new fibreglass and re-sculpting the lines with the new angles, or cutting up and grafting new creases on from a spare IFG hood. I finally decided to chop up and realign the parts from the CK355 hood.
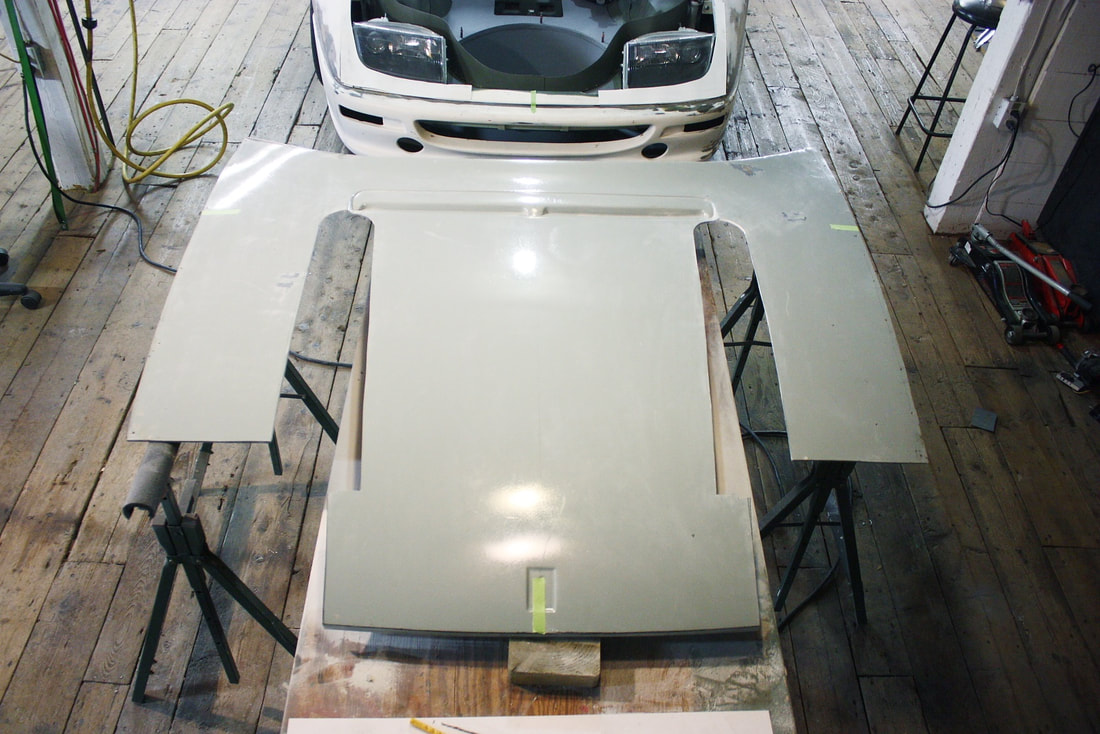
Step 1 was to cut out the creases. I decided to leave 2” up either side of each crease, like this, to give lots of room to blend in the seams later on:
The hard part was following through! I considered several options including building up the lower, center section of the hood with new fibreglass and re-sculpting the lines with the new angles, or cutting up and grafting new creases on from a spare IFG hood. I finally decided to chop up and realign the parts from the CK355 hood.
Step 1 was to cut out the creases. I decided to leave 2” up either side of each crease, like this, to give lots of room to blend in the seams later on:
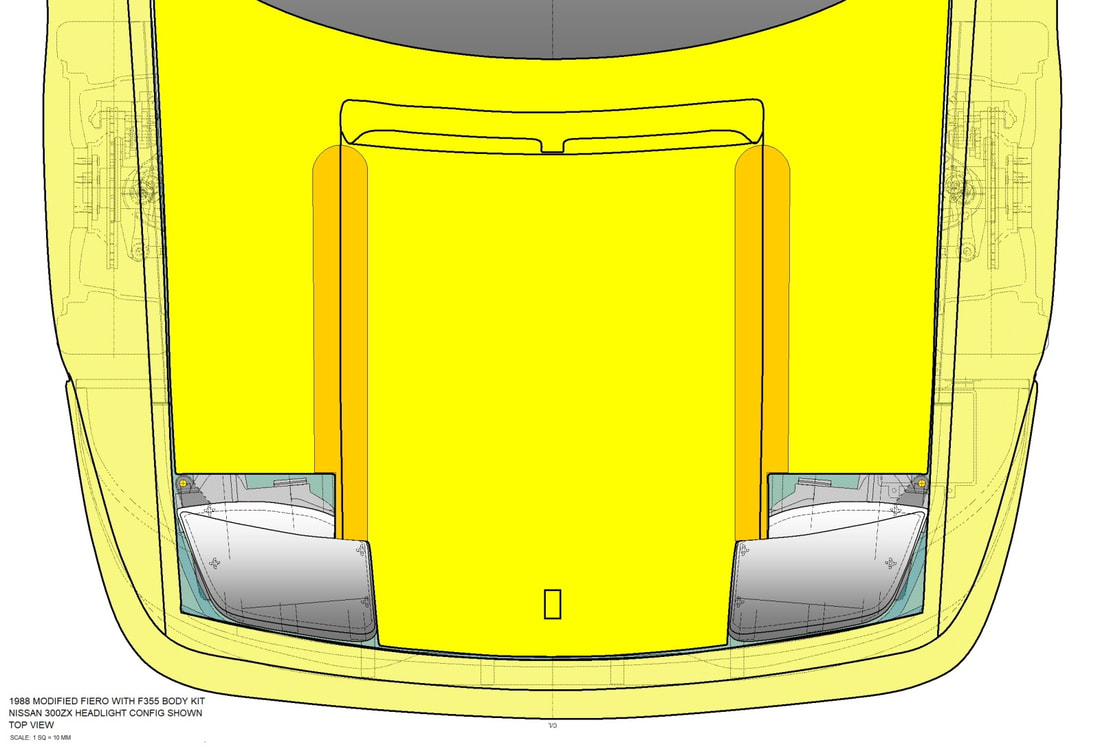
I rounded the cut-outs at the HVAC inlet to lessen the concentration of stresses in that area that would otherwise arise with sharp corners.
After the creases were to be cut out, step 2 would be to cut a further wedge shaped piece out of each side of the hood to allow me to swivel the creased pieces into their new orientation:
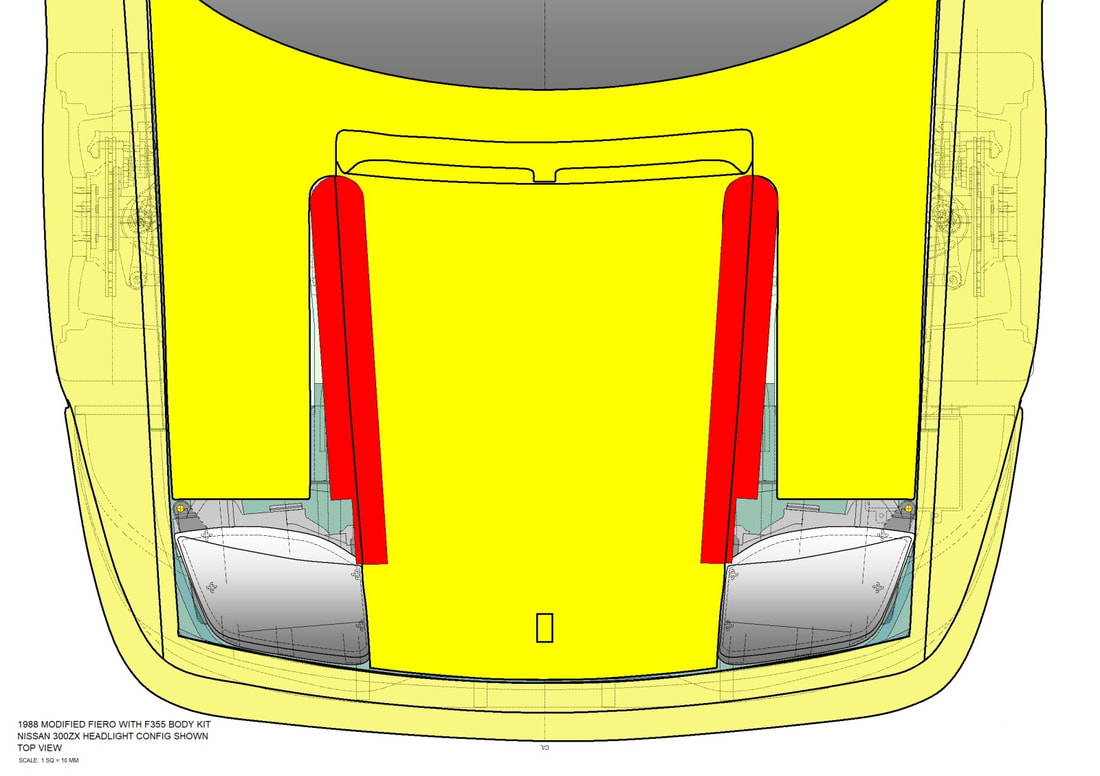
Of course there would be more to do once that was done, but that’s where I decided to put the computer aside and get down to actual work.
I started by making a cardboard template to play around with, and eventually traced the first set of cuts onto the hood:
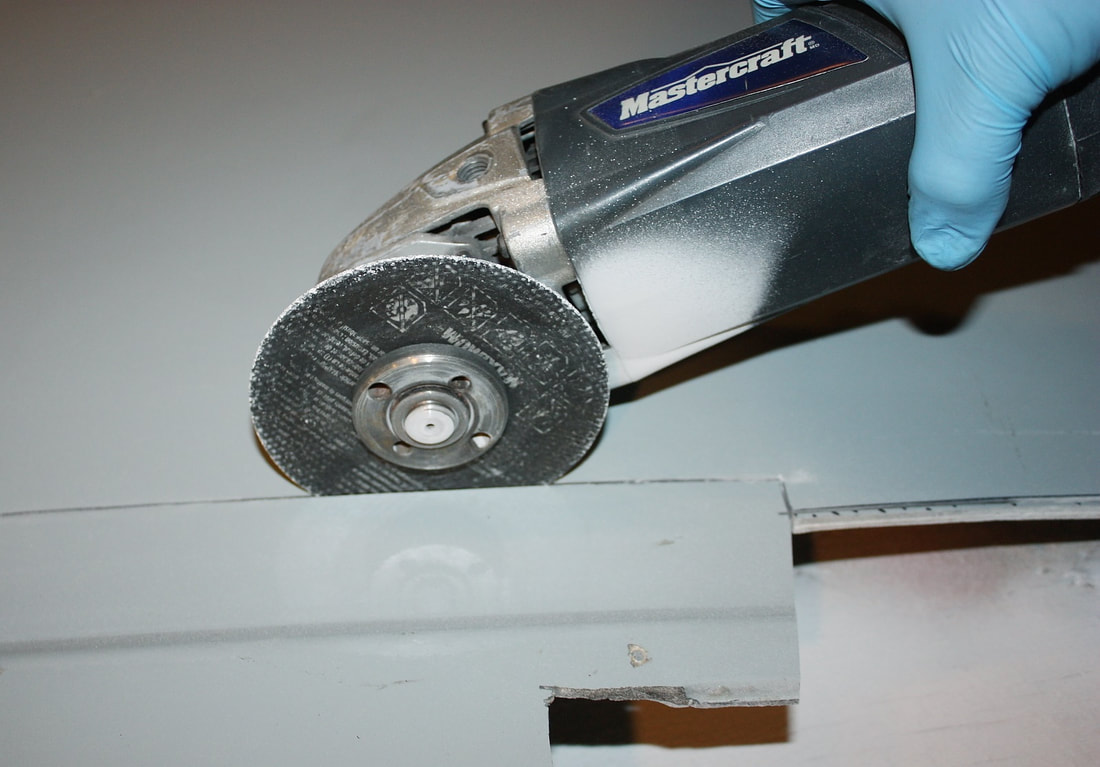
Then, with a thin cut-off wheel in my angle grinder, I took a deep breath (through my mask), and committed myself to the plan… and started making a million airborne fibreglass splinters!
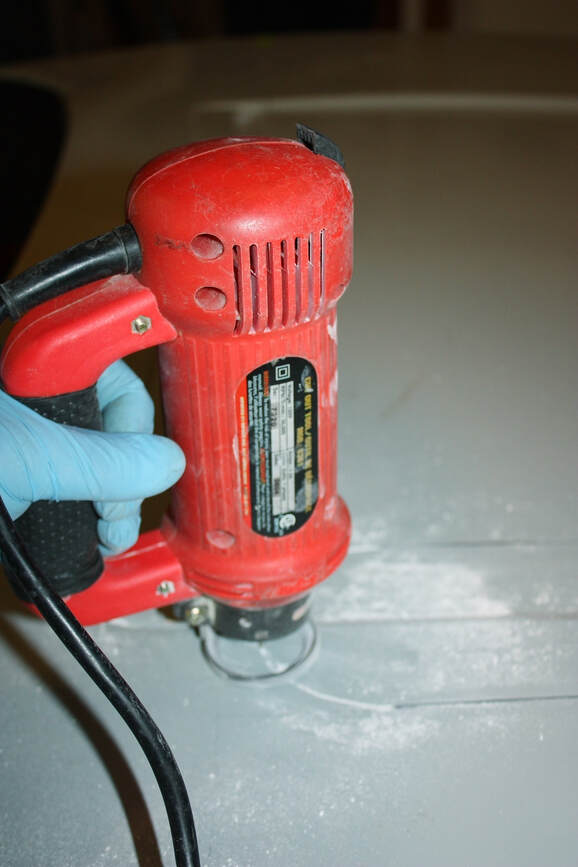
To cut out the rounded section near the HVAC inlet, I chucked up a thin bit the zip-tool and did the best I could to stay on the line. I practiced on a scrap piece of fibreglass to get the feel for it, and although it worked like a charm, my camera insisted on focussing on the top rather than the tip of the tool:
To cut out the rounded section near the HVAC inlet, I chucked up a thin bit the zip-tool and did the best I could to stay on the line. I practiced on a scrap piece of fibreglass to get the feel for it, and although it worked like a charm, my camera insisted on focussing on the top rather than the tip of the tool:
One cut down, one to go!
I must say the first cut took nearly six months to commit to do, and it was painful to start chopping up an otherwise good hood, but it’s amazing how easily and quickly the second one was done:
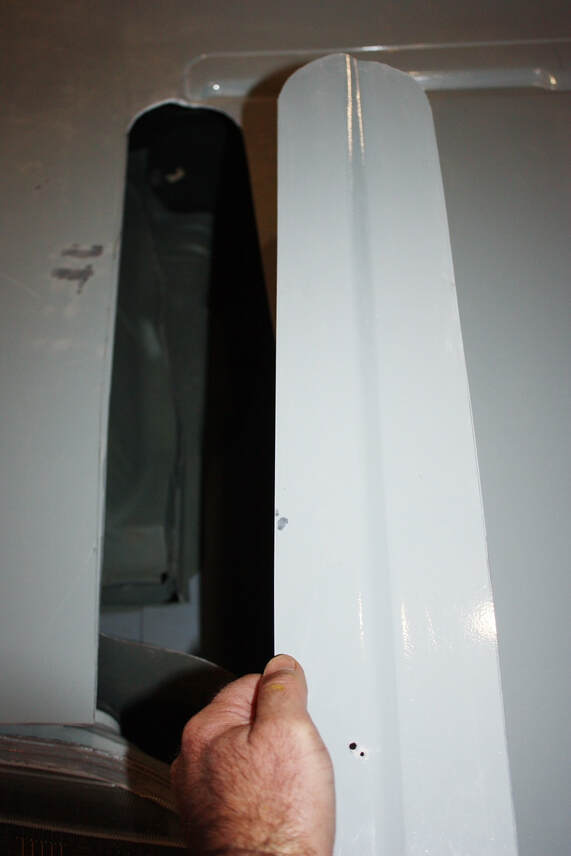
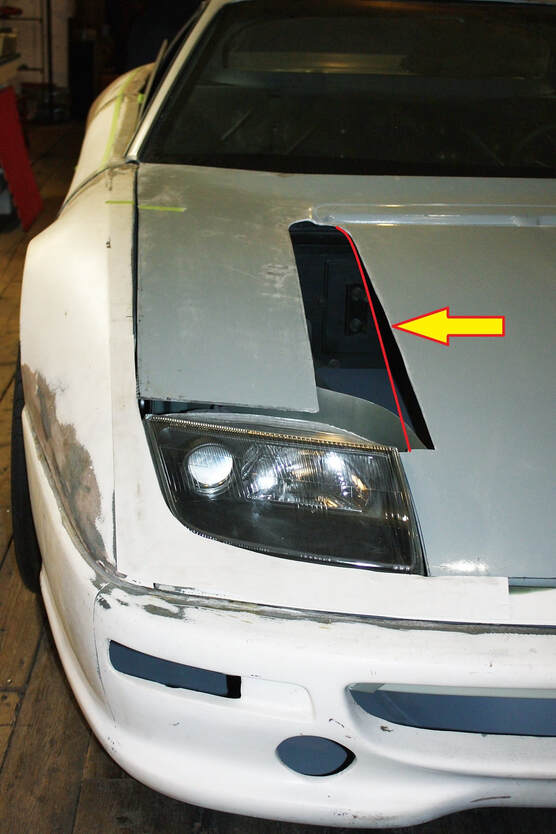
To rotate the freshly cut pieces into their new orientations, I then needed to make the slots in the hood even bigger. I took out a long narrow triangular piece running up the inboard side of each slot:
To rotate the freshly cut pieces into their new orientations, I then needed to make the slots in the hood even bigger. I took out a long narrow triangular piece running up the inboard side of each slot:
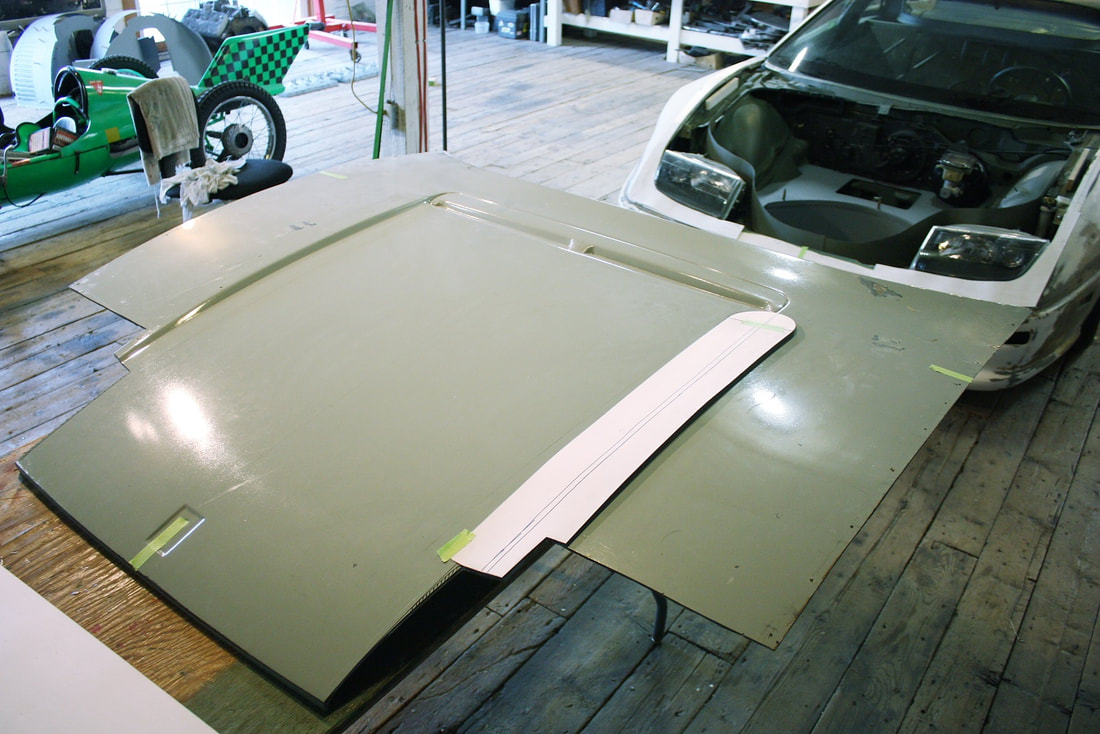
Then, once the (very flexible) hood was laid onto the chassis and aligned with some marks I had made earlier (the green masking tape), I stepped back to see what kind of mess I had made. Good thing I’m not a pessimist. The hood, lacking any cross-car rigidity drooped in the middle from the unsupported weight of the center section… but that was fully expected:
Then, once the (very flexible) hood was laid onto the chassis and aligned with some marks I had made earlier (the green masking tape), I stepped back to see what kind of mess I had made. Good thing I’m not a pessimist. The hood, lacking any cross-car rigidity drooped in the middle from the unsupported weight of the center section… but that was fully expected:
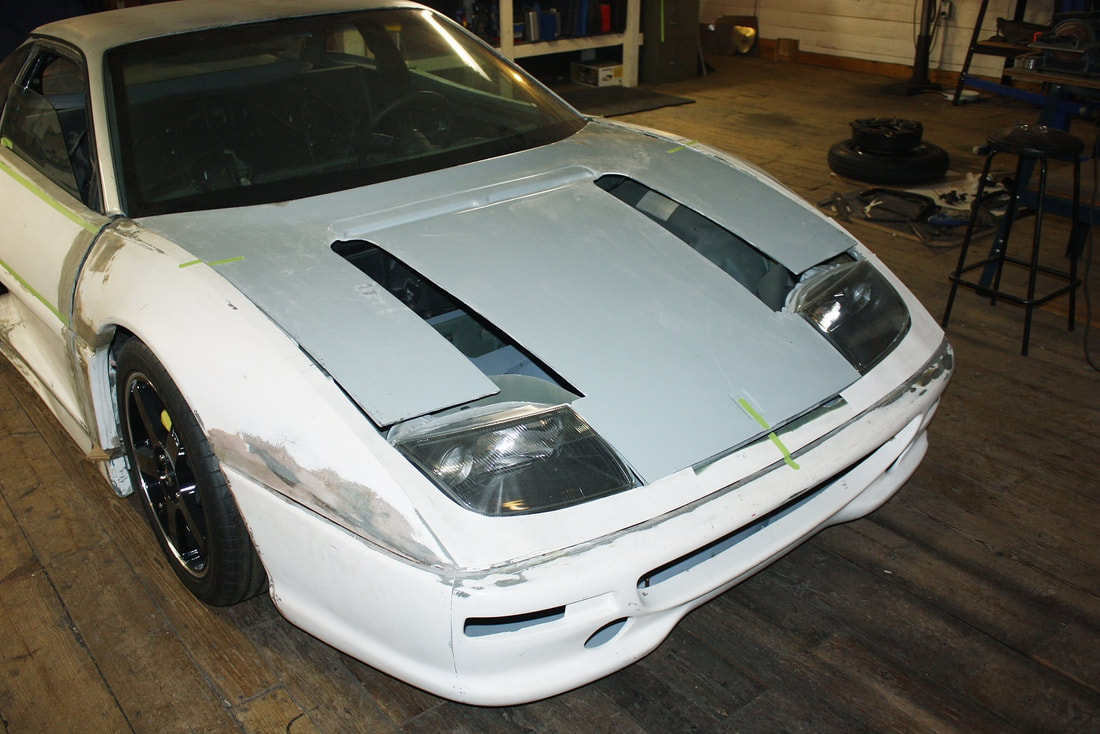
Despite the hood sagging out of shape, I mocked up the crease pieces into their new orientation to get an idea how this was going to look:
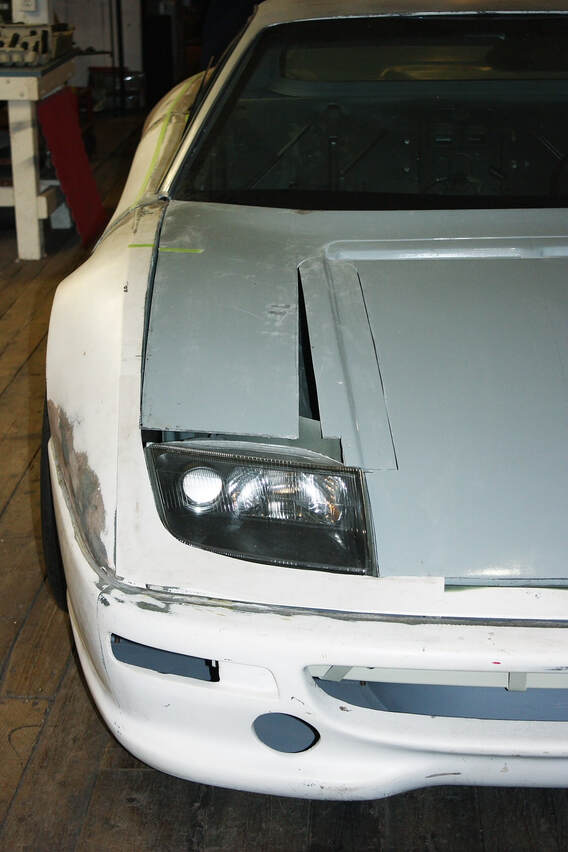
If you squint your eyes and ignore the warped hood edges, the sagging center, and the other missing pieces, and focus only on the hood creases, it’s already starting to look better.
OK. That’s a bit of a stretch. But there’s more to come.
If you squint your eyes and ignore the warped hood edges, the sagging center, and the other missing pieces, and focus only on the hood creases, it’s already starting to look better.
OK. That’s a bit of a stretch. But there’s more to come.

 RSS Feed
