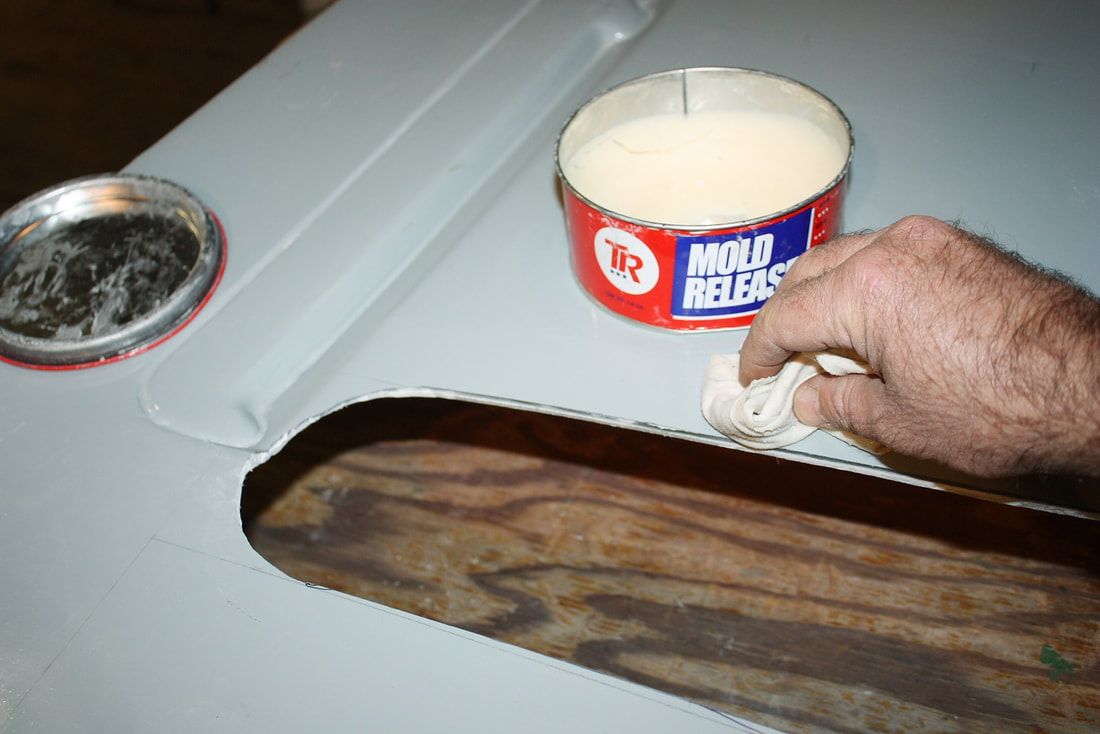
At this point the hood had lost all of its rigidity, which wasn’t entirely a bad thing. I’ve mentioned before that the outer hood skin wasn’t molded with the same curvature as the two front fenders, so this allowed me to do something about that.
The first step was to reattach the pieces I cut out of the hood in my last post. That meant figuring out a way to keep the loose pieces flush to, and aligned in the same plane as the outer skin, while adding layers of fresh fibreglass and resin to the back side. Since the hood would be upside down during the first “go” at gluing these pieces together, I applied some mold release wax to keep any oozing resin from running through the crack and sticking to the outer skin:
Then I cut ¼” thick plywood strips, 4” wide, to bridge the inboard seams with 2 inches of overlap on either side of each seam. The 2” overlap assured me that the main hood and mating pieces would remain in the same plane while bonding:
Then I cut ¼” thick plywood strips, 4” wide, to bridge the inboard seams with 2 inches of overlap on either side of each seam. The 2” overlap assured me that the main hood and mating pieces would remain in the same plane while bonding:
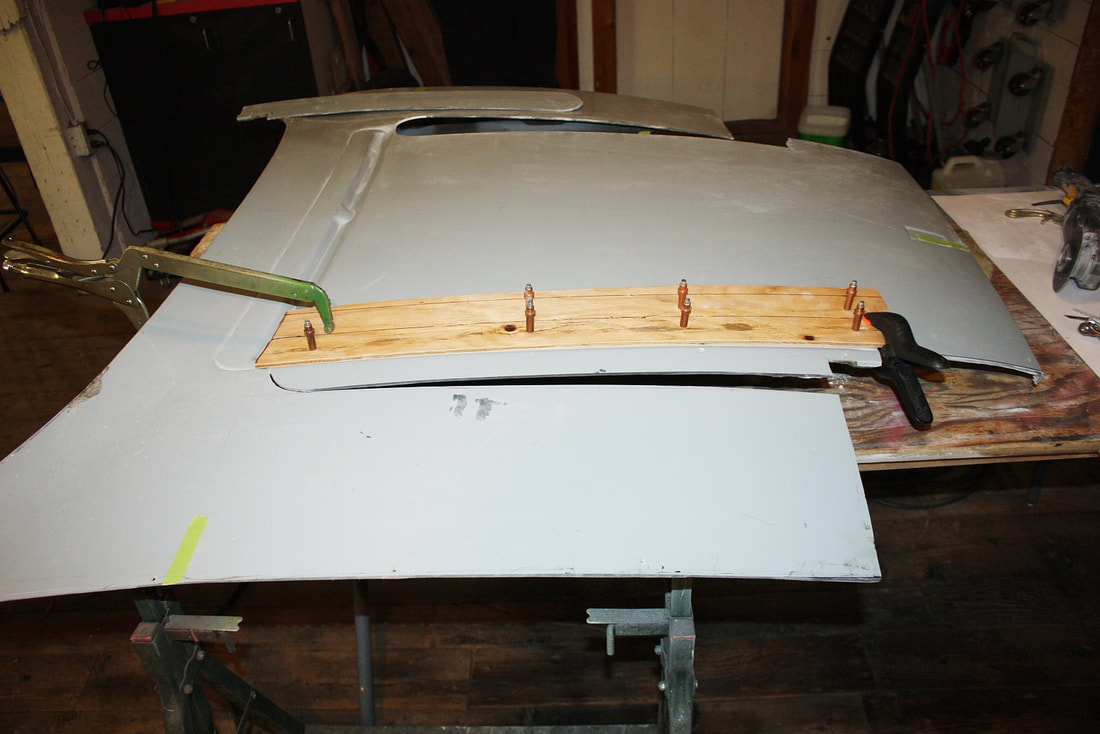
I used Cleco fasteners to pinch the plywood, the hood, and the mating pieces together. The tiny 3/32" holes drilled through the fibreglass for the Cleco’s to work will be filled in later with resin to reduce any chance of the holes reappearing in the finished paintwork:
I used Cleco fasteners to pinch the plywood, the hood, and the mating pieces together. The tiny 3/32" holes drilled through the fibreglass for the Cleco’s to work will be filled in later with resin to reduce any chance of the holes reappearing in the finished paintwork:
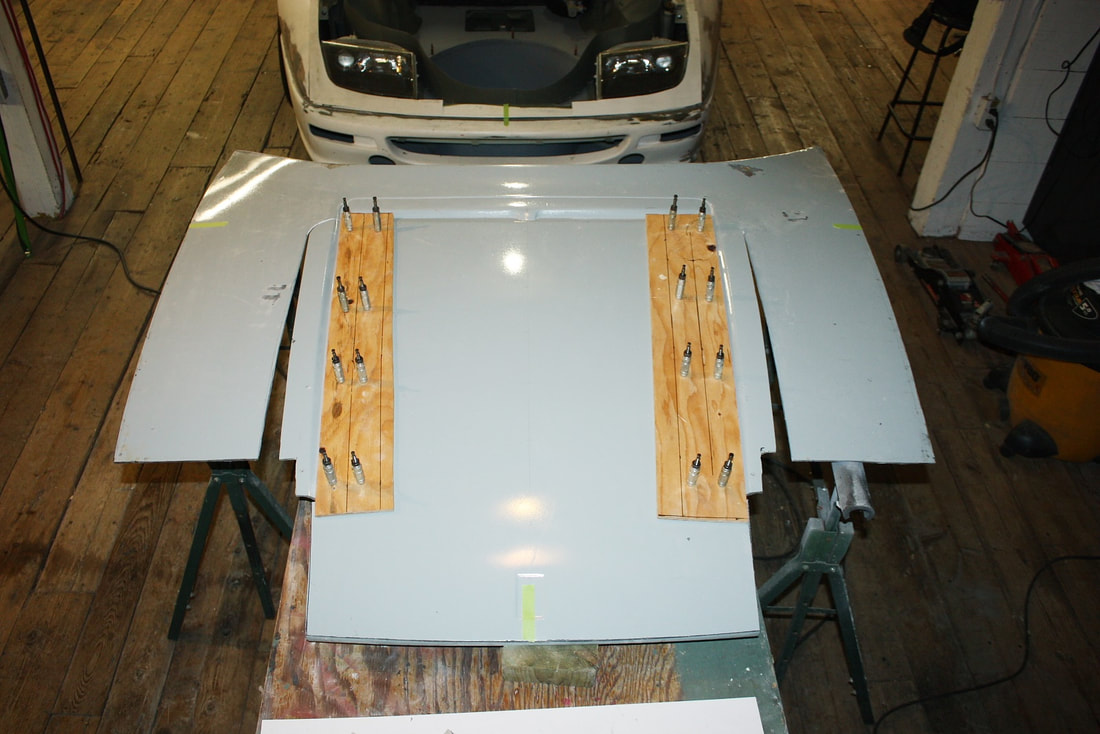
Then I flipped the hood upside-down to begin preparing the two seams for bonding. At this point I wasn’t addressing the triangular shaped cut, just the tight seam running down the middle of this next photo:
Then I flipped the hood upside-down to begin preparing the two seams for bonding. At this point I wasn’t addressing the triangular shaped cut, just the tight seam running down the middle of this next photo:

The best way to make a butt seam as strong as possible is to grind away a tapered edge on either side of the seam, and build up a multi-layered fibreglass patch over a progressively wider swath to maximize the surface area of the bond, like so:
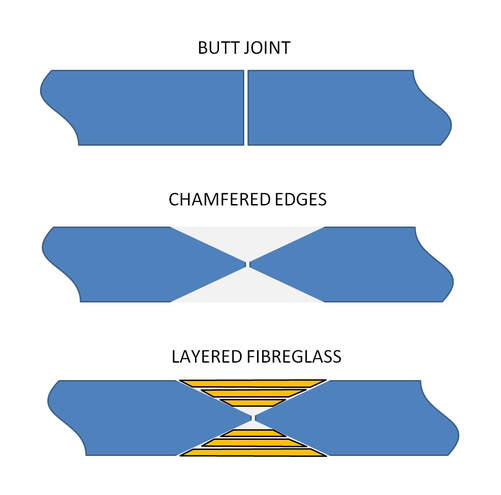
For the strongest repairs, the parent material is ground down halfway through on one side, patched, and then flipped over and repeated for the other side. Judging how far to grind through a thin panel isn’t always easy, but luckily for me, the makers of the CK3 hood sandwiched a middle layer of white matt between inner and outer layers.
I used my 1” wide air-powered belt sander to grind away a channel down the middle of each seam, knowing that I'd gone deep enough once I’d ground through the white layer:
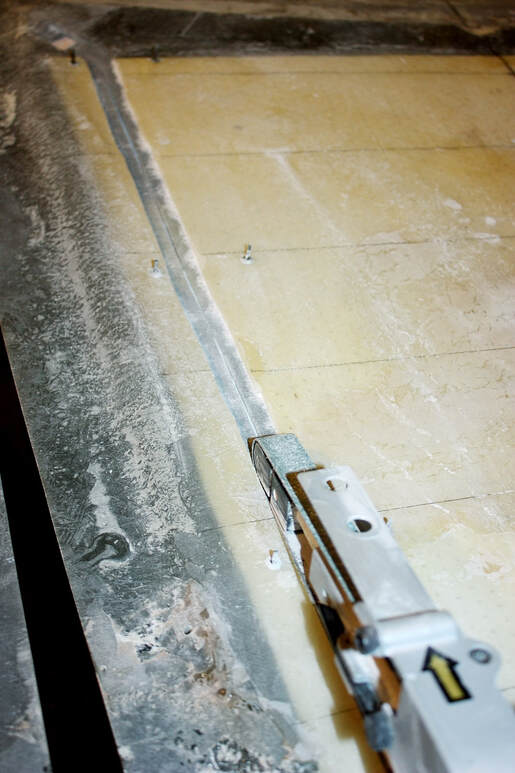
Then, using the belt sander again, I chamferred the edges of the channel I’d made a further 1-1/2” wide on either side, resulting in a 4” wide bevelled groove:
Then, using the belt sander again, I chamferred the edges of the channel I’d made a further 1-1/2” wide on either side, resulting in a 4” wide bevelled groove:
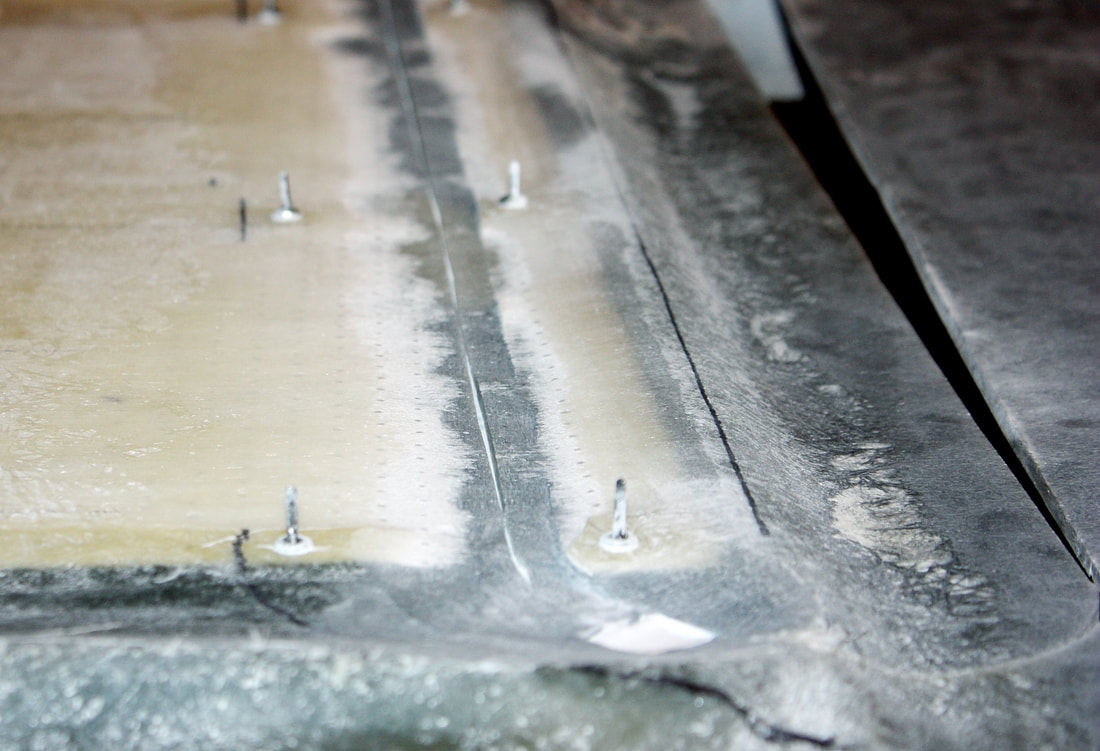
I did this for both left and right seams, then cut three different width pieces of fibreglass matt for each side: one 1” wide, one 1-3/4” wide and one 4” wide. I cut holes in the matt where the Cleco fasteners would poke through so as not to gum them up with resin:
I did this for both left and right seams, then cut three different width pieces of fibreglass matt for each side: one 1” wide, one 1-3/4” wide and one 4” wide. I cut holes in the matt where the Cleco fasteners would poke through so as not to gum them up with resin:
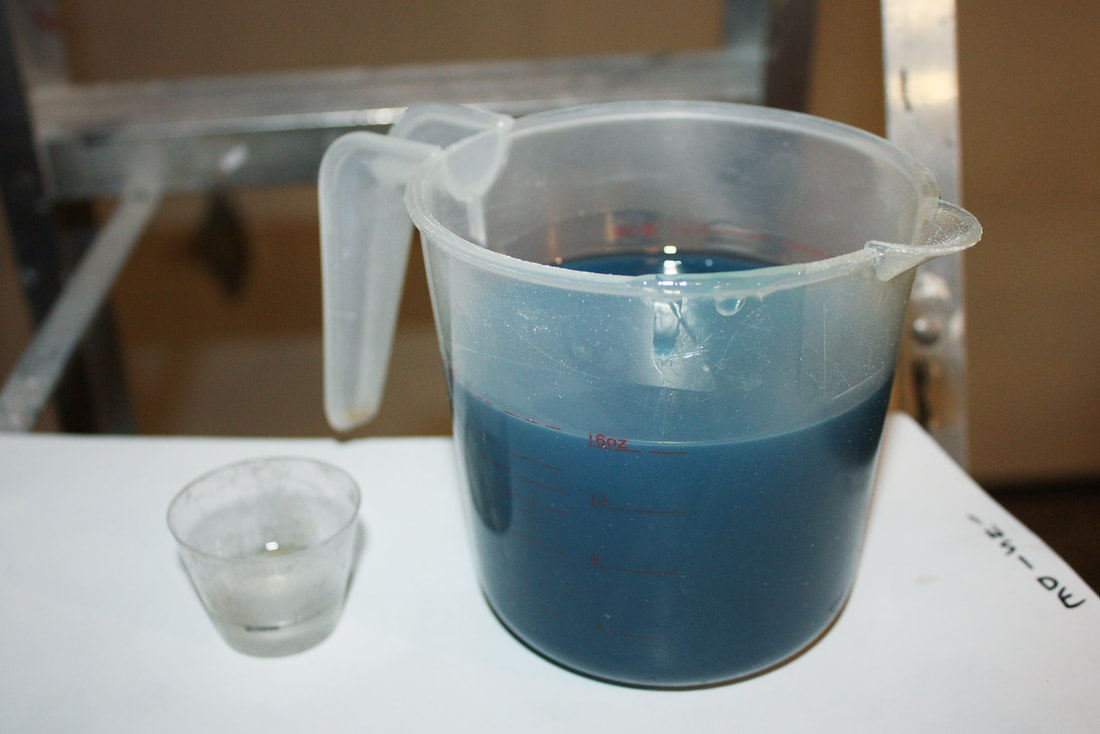
Next up, I mixed the polyester resin and hardener. I usually mix 16 oz of resin at a time since that’s about all I can manage properly before it starts setting up in the measuring cup. The amount of catalyst for that much resin is 1/8 oz if it’s a warm day, but you can add up to 50% more catalyst if it’s a cooler day. My shop was at 15 degrees C so I mixed in the additional 50%.
Next up, I mixed the polyester resin and hardener. I usually mix 16 oz of resin at a time since that’s about all I can manage properly before it starts setting up in the measuring cup. The amount of catalyst for that much resin is 1/8 oz if it’s a warm day, but you can add up to 50% more catalyst if it’s a cooler day. My shop was at 15 degrees C so I mixed in the additional 50%.
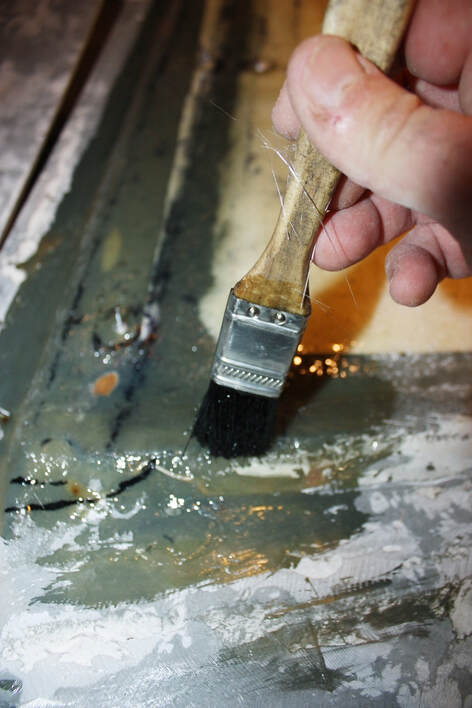
Using a cheap paint brush that I’d chopped the bristles down to about half their length, I wetted the chamfered area of the hood and laid in the progressively wider strips of fibreglass one at a time. I took turns alternately laying a strip in place and saturating it with resin using the brush, before adding the next layer until all three layers were in place:
Using a cheap paint brush that I’d chopped the bristles down to about half their length, I wetted the chamfered area of the hood and laid in the progressively wider strips of fibreglass one at a time. I took turns alternately laying a strip in place and saturating it with resin using the brush, before adding the next layer until all three layers were in place:
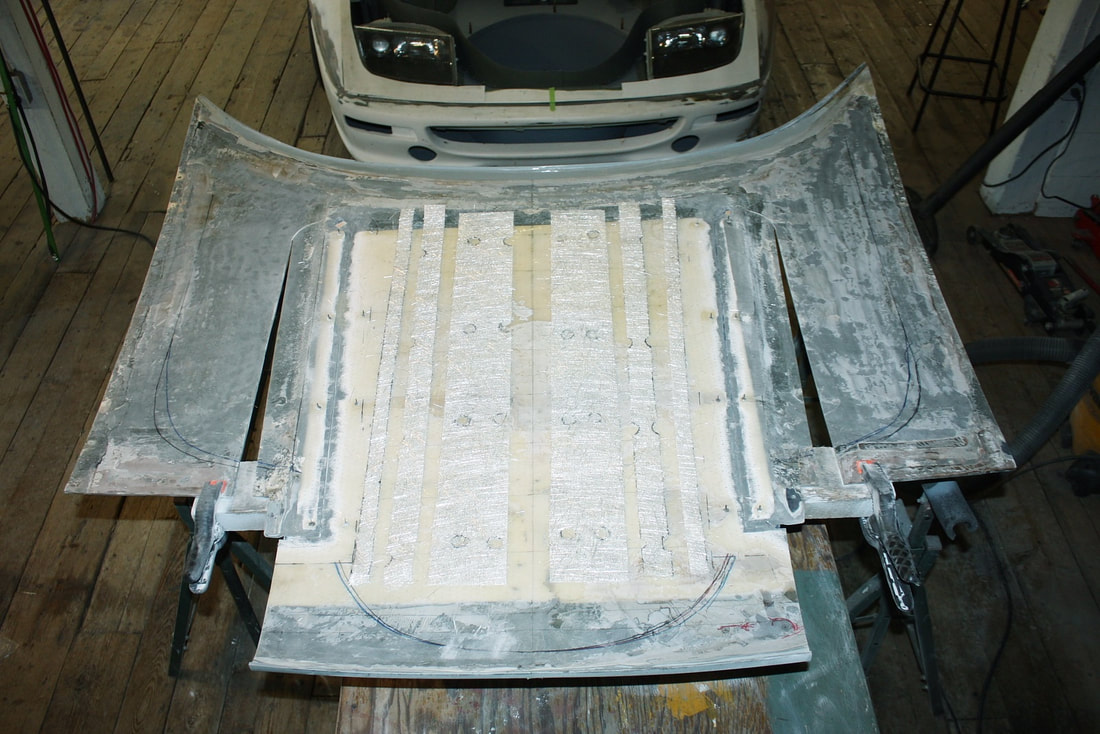
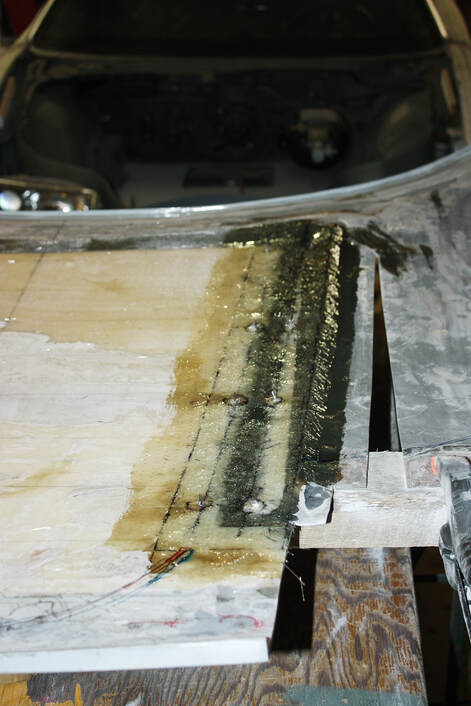
Here’s what the underside of the passenger side hood looked like when done:
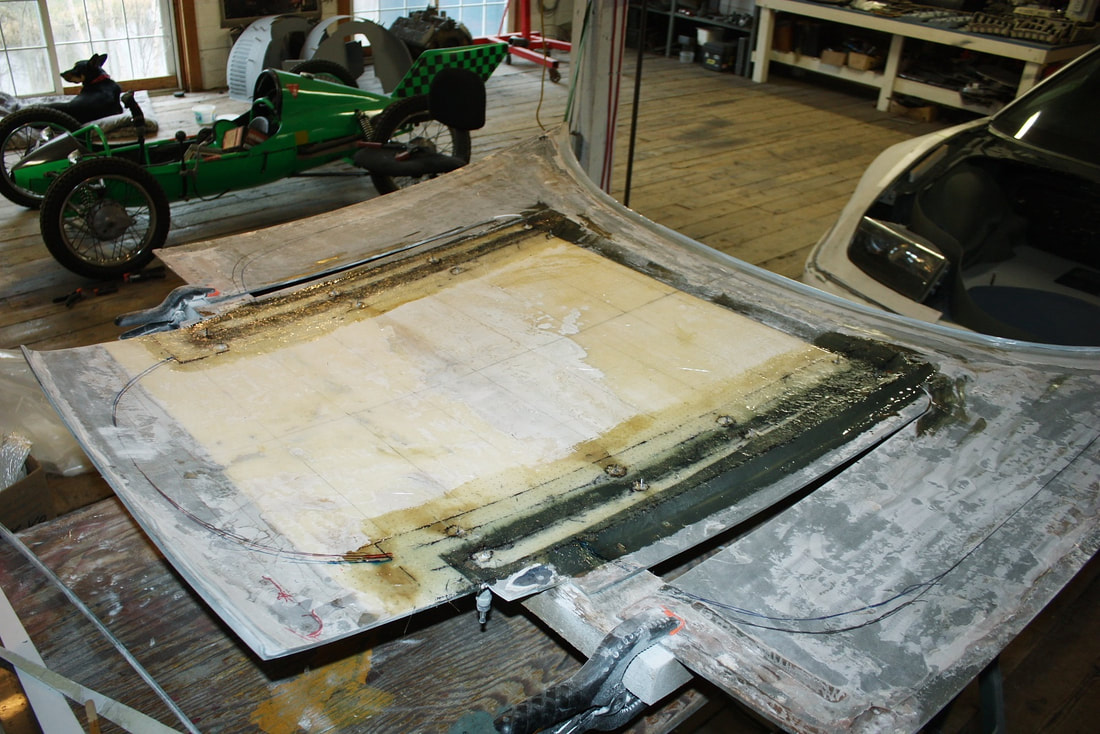
And here’s both sides curing away in the relative heat of my now very stinky shop:

 RSS Feed
