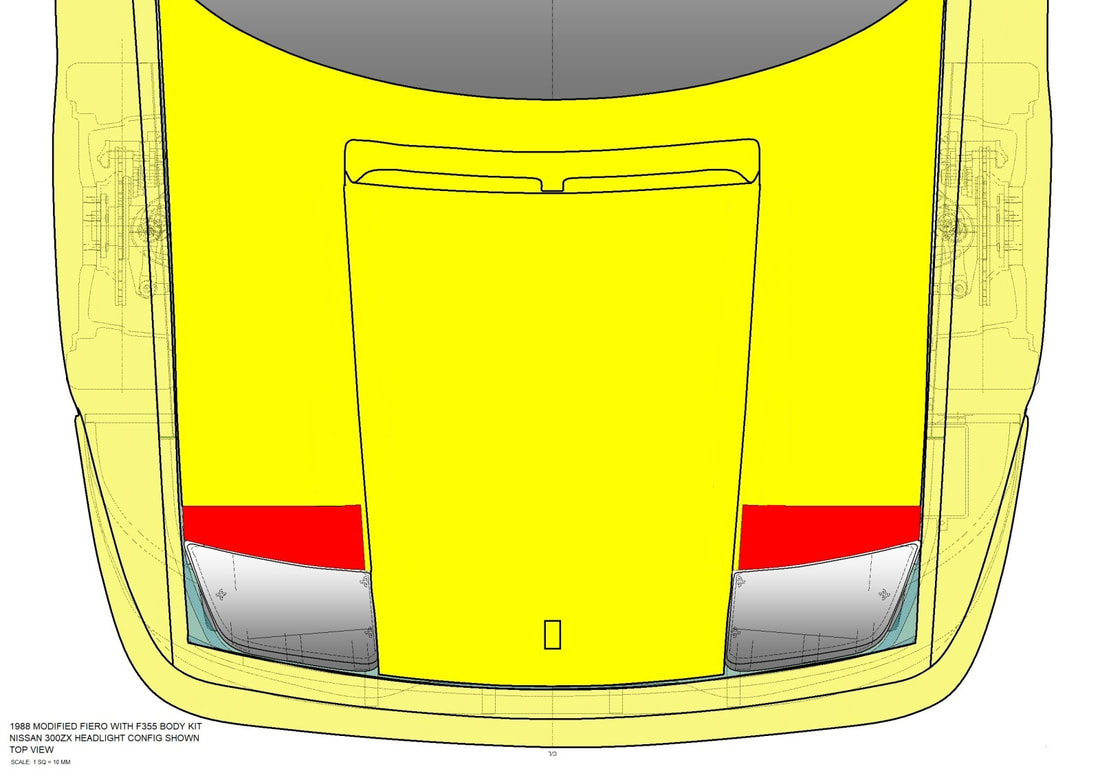
The last major fix to the outer hood skin was closing off the extra-large OEM-style holes surrounding the Nissan 300ZX headlights. The new headlights didn’t reach as far back up the hood as the Ferrari pop-up headlights so that meant more fibreglassing was in the works. The red area is where I needed to extend the hood to mate up with the headlights:
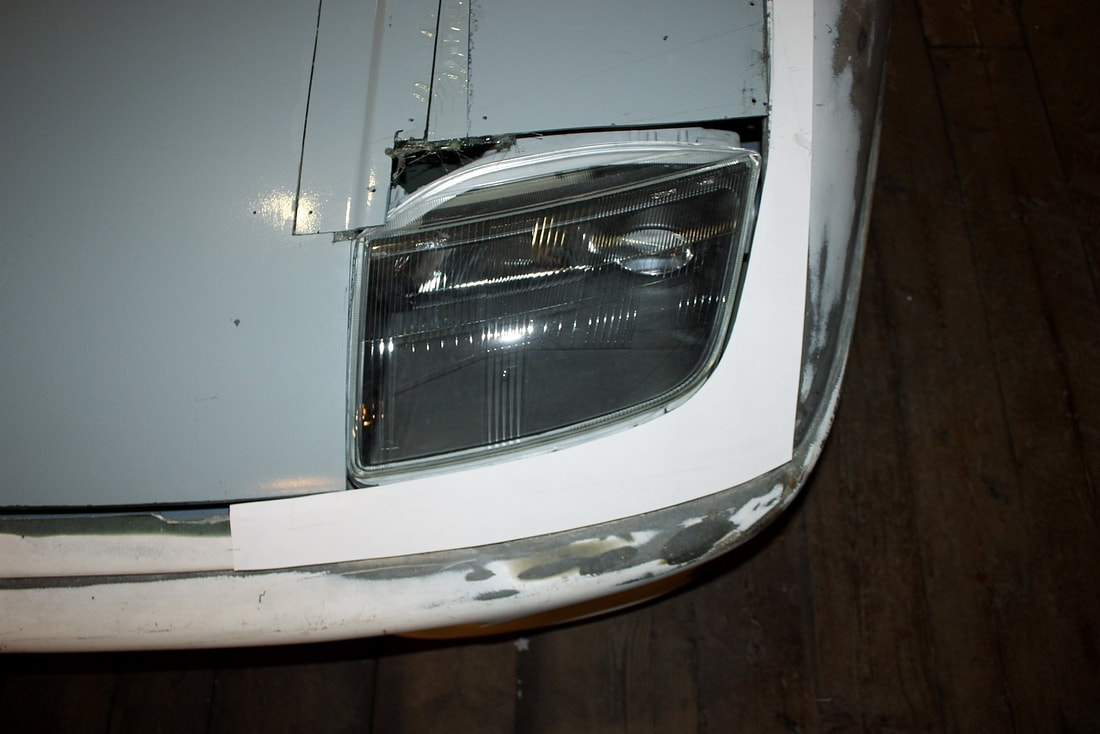
And here’s what the hood actually looked like on the car.
I’m not planning on using the rubber surround that normally accompanies the Nissan lights, rather, I’ll be finishing the fibreglass edges so they end up with a tight gap all the way around each light. I measured carefully and created unique cardboard templates for each side since the holes were slightly different shapes. Here’s the passenger side:
I’m not planning on using the rubber surround that normally accompanies the Nissan lights, rather, I’ll be finishing the fibreglass edges so they end up with a tight gap all the way around each light. I measured carefully and created unique cardboard templates for each side since the holes were slightly different shapes. Here’s the passenger side:
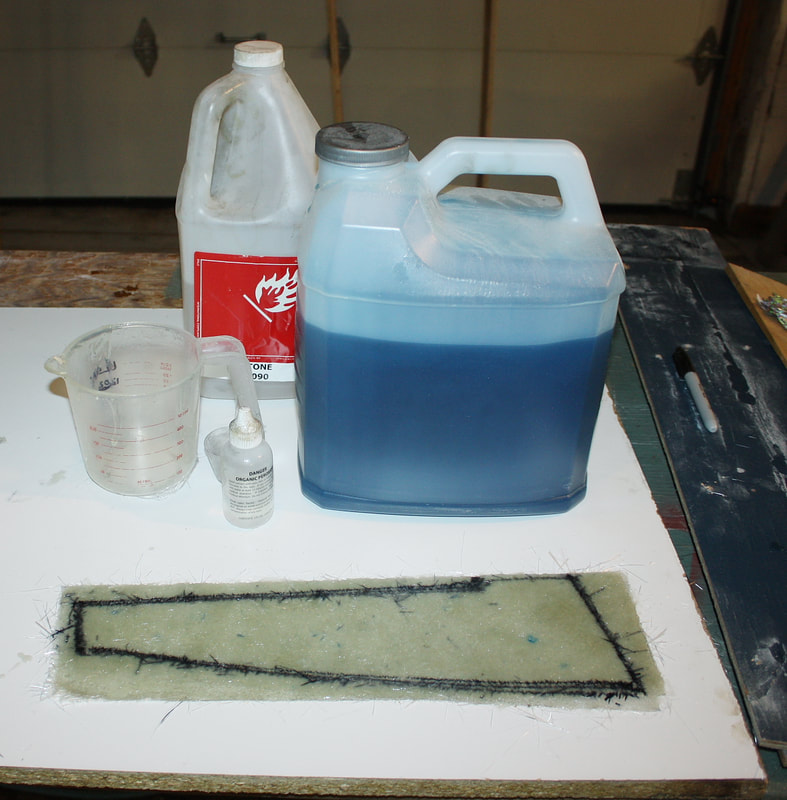
With the templates made, I traced them onto some fibreglass mat, and cut out three layers per side. Since the parts were essentially flat pieces, I laid them out onto a melamine panel to saturate them with resin. Polyester resin doesn’t stick to the melamine, and once cured, the fibreglass parts end up with a nice smooth finish on one side:
With the templates made, I traced them onto some fibreglass mat, and cut out three layers per side. Since the parts were essentially flat pieces, I laid them out onto a melamine panel to saturate them with resin. Polyester resin doesn’t stick to the melamine, and once cured, the fibreglass parts end up with a nice smooth finish on one side:
After the resin cured, I lifted the new pieces off the melamine panel, and carefully trimmed them to fit up against the hood edges as precisely as possible for a strong joint. I left the edge butting up against the headlight unfinished for now:
After the resin cured, I lifted the new pieces off the melamine panel, and carefully trimmed them to fit up against the hood edges as precisely as possible for a strong joint. I left the edge butting up against the headlight unfinished for now:
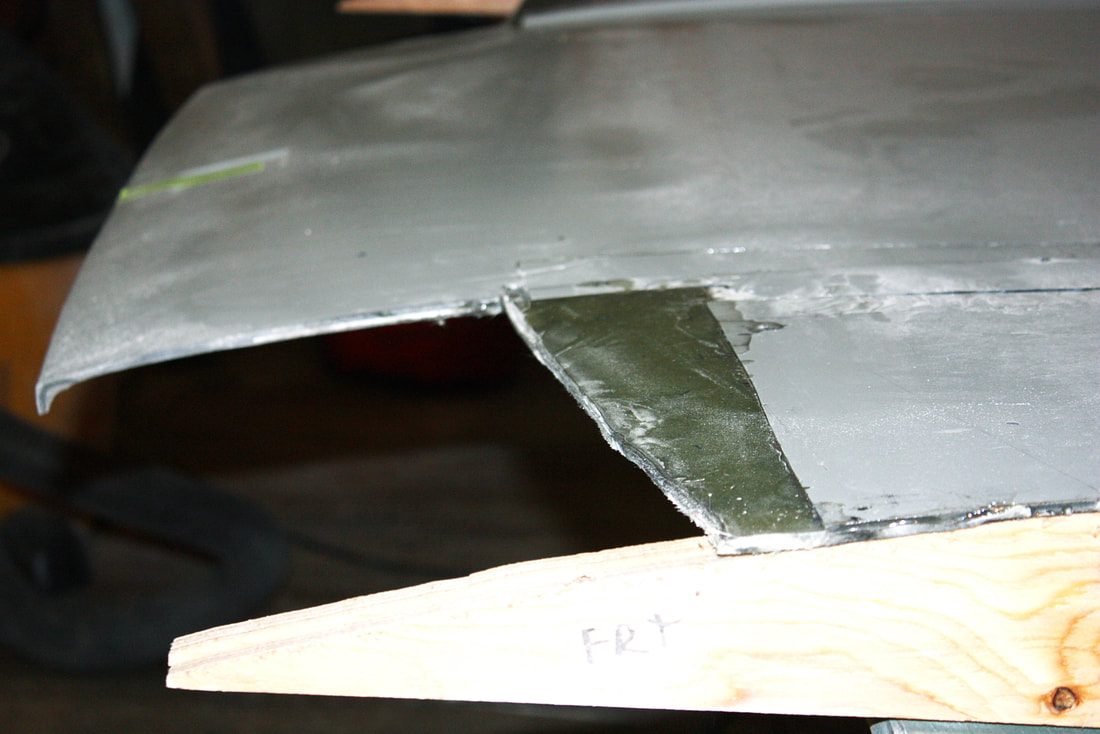
With the new pieces aligned and held firmly in place, I turned the hood over and fibreglassed the remaining 3 layers for each side from underneath:

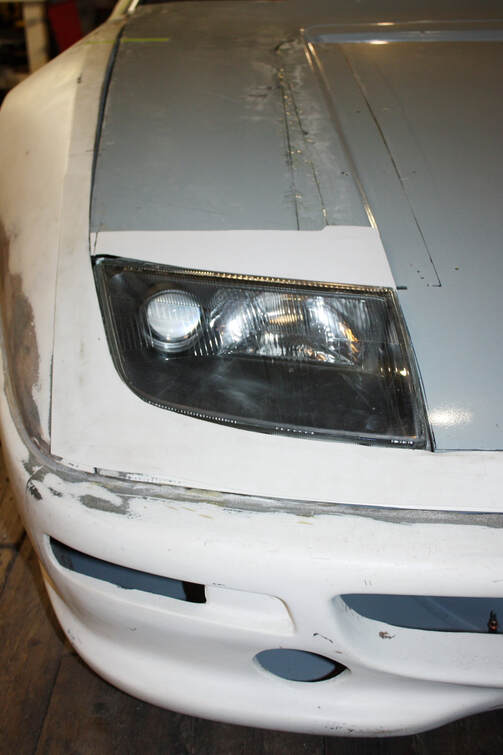
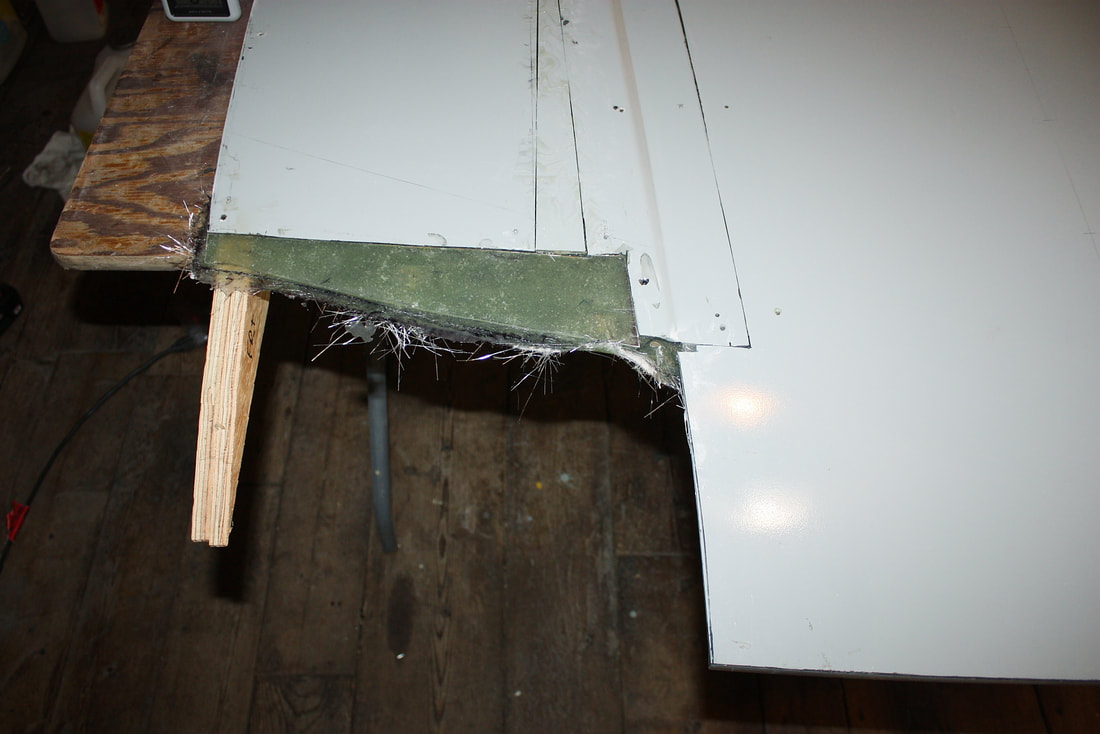
Once the resin had cured, I was able to flip the hood right side up again and inspect the repairs for level and alignment with the rest of the hood. Both sides turned out remarkably well, however the top seams will still need to be chamfered and layered with new fibreglass to complete the repair, as with all of the upper hood seams:
Once the resin had cured, I was able to flip the hood right side up again and inspect the repairs for level and alignment with the rest of the hood. Both sides turned out remarkably well, however the top seams will still need to be chamfered and layered with new fibreglass to complete the repair, as with all of the upper hood seams:
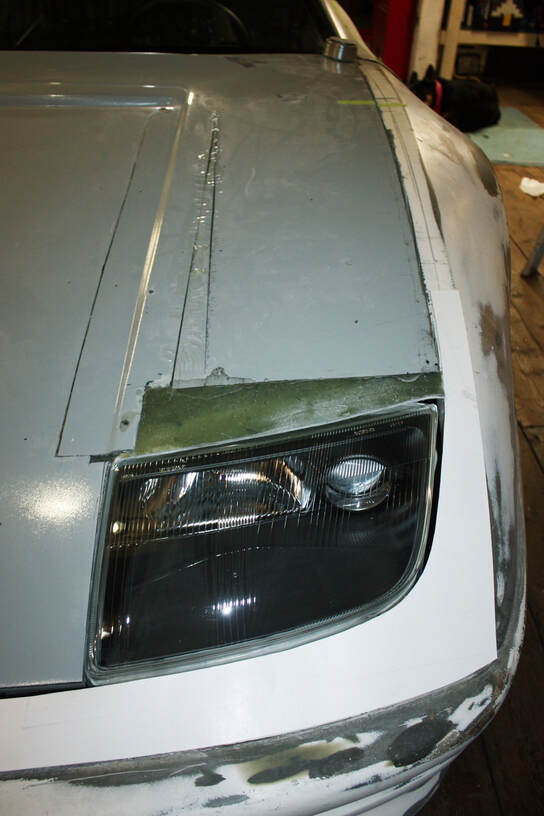
To get the final contour of the new panel fitting just right around the headlights, I used my cardboard templates one last time to trace the edge that butted against the headlight. Then I used the angle grinder to remove all of the extra material, leaving an 1/8” that I would sand by hand. Here’s the result:
To get the final contour of the new panel fitting just right around the headlights, I used my cardboard templates one last time to trace the edge that butted against the headlight. Then I used the angle grinder to remove all of the extra material, leaving an 1/8” that I would sand by hand. Here’s the result:
Next up: re-curving the hood.

 RSS Feed
