My last couple of posts concentrated on getting rid of the play in the door hinges, and relocating them to ensure consistent placement of the doors no matter their position, open or closed. It was a crucial step prior to working on the gaps between panels. There are two processes in creating even gaps: opening up the tight spots, and closing the wide ones. This post is about addressing the tight areas on the passenger door skin.
When I originally mounted the body panels, I installed them to optimize the best general appearance rather than concerning myself with the gaps between panels… adjusting gaps is often easier than adjusting entire panels later. In that regard, when I installed the passenger door panel, it had several “hard rubs” that I knew I’d have to address. Each of these areas are shown in the illustration below:
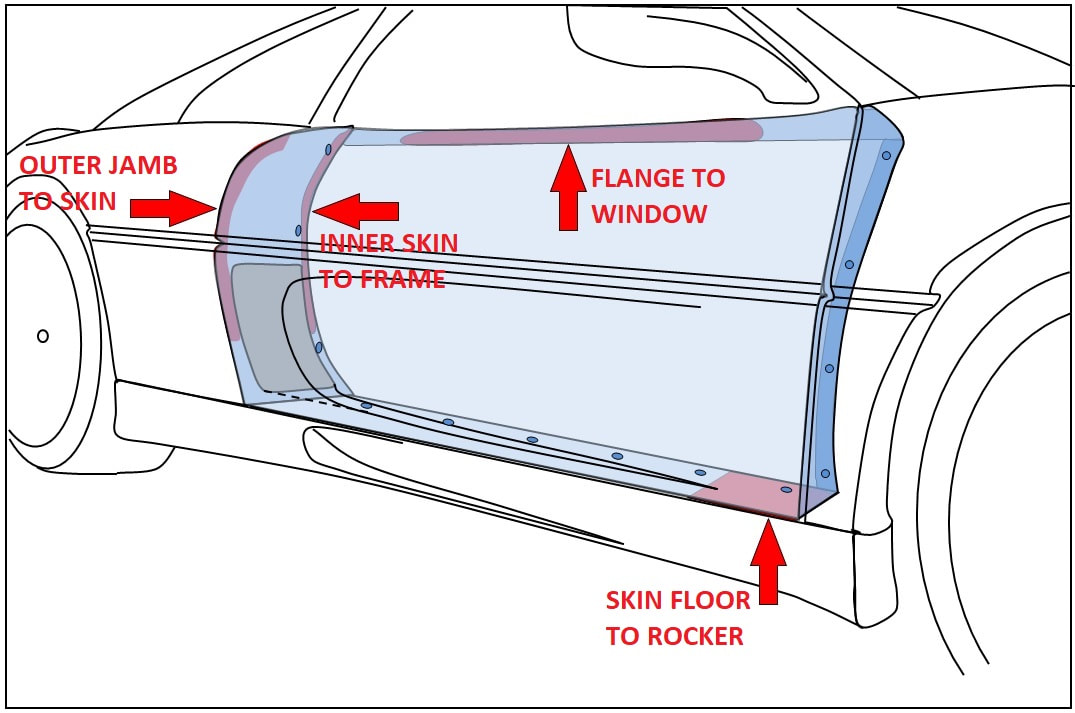
Each rub area applied unwanted pressure to the door skin, warping it slightly, or displacing it an undesired direction. It would have been futile to start shaping the door skin with fillers until the panel was free-floating. No part of the door shell could be allowed to touch the chassis except the hinges, latches, and rubber seals.
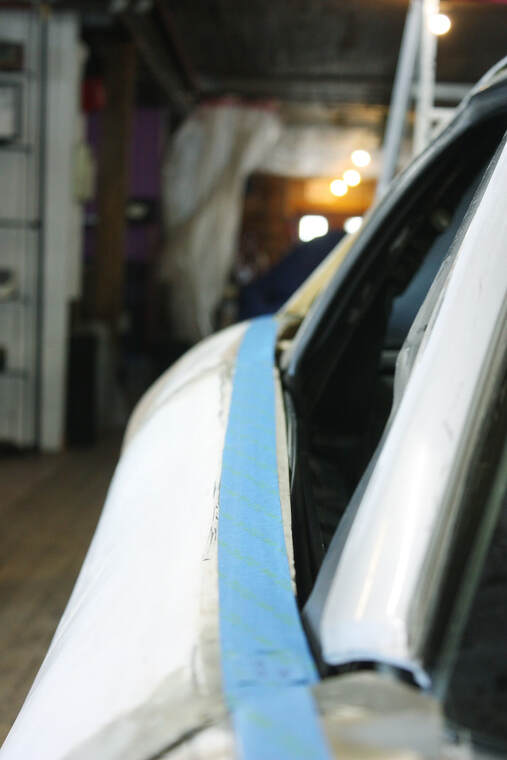
I started by ensuring the skinless metal door opened, closed, and latched easily. Then I installed the door skin and found it took several attempts slamming the door to make it latch in the fully closed position. The interference was coming from somewhere around the latch, but with the door closed it was difficult to pinpoint exactly where. So I lined the door jamb in blue masking tape and slammed the door several times to see where the problem area was:
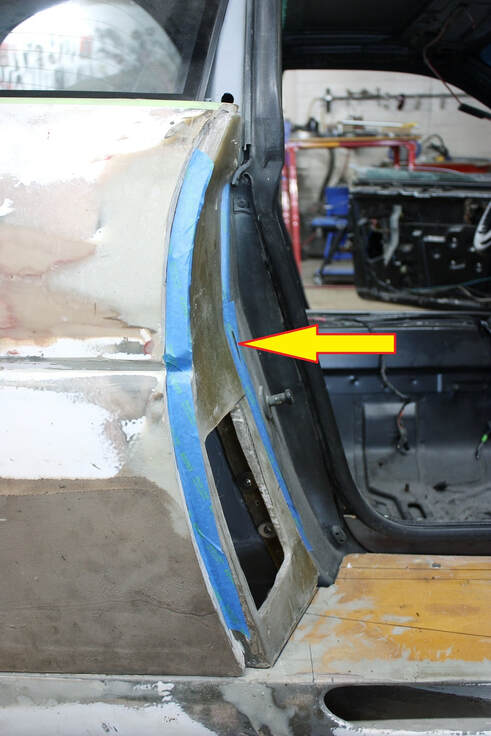
The masking tape tore where there was no clearance, showing me exactly where to focus my attention. It was an easy fix… I simply trimmed the inside edge of the door's rear bulkhead here:
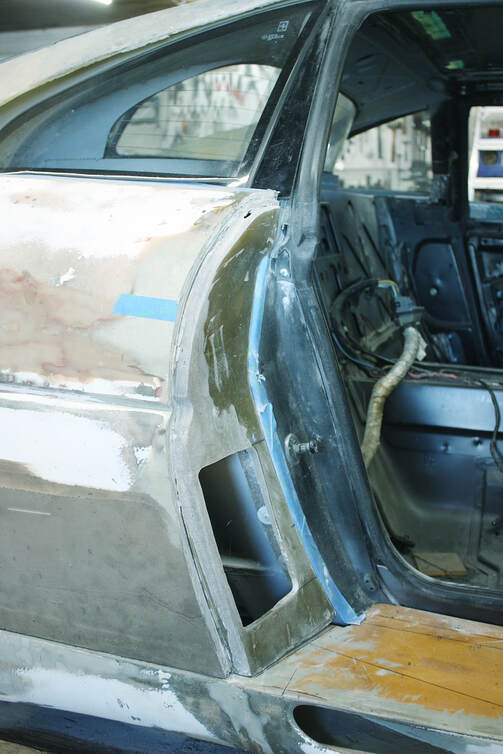
But curing one problem led to another… trimming the rear bulkhead allowed the door skin to sit closer to the jambs, creating new areas of interference. This next photo shows three new places where the door skin made contact with the jamb:
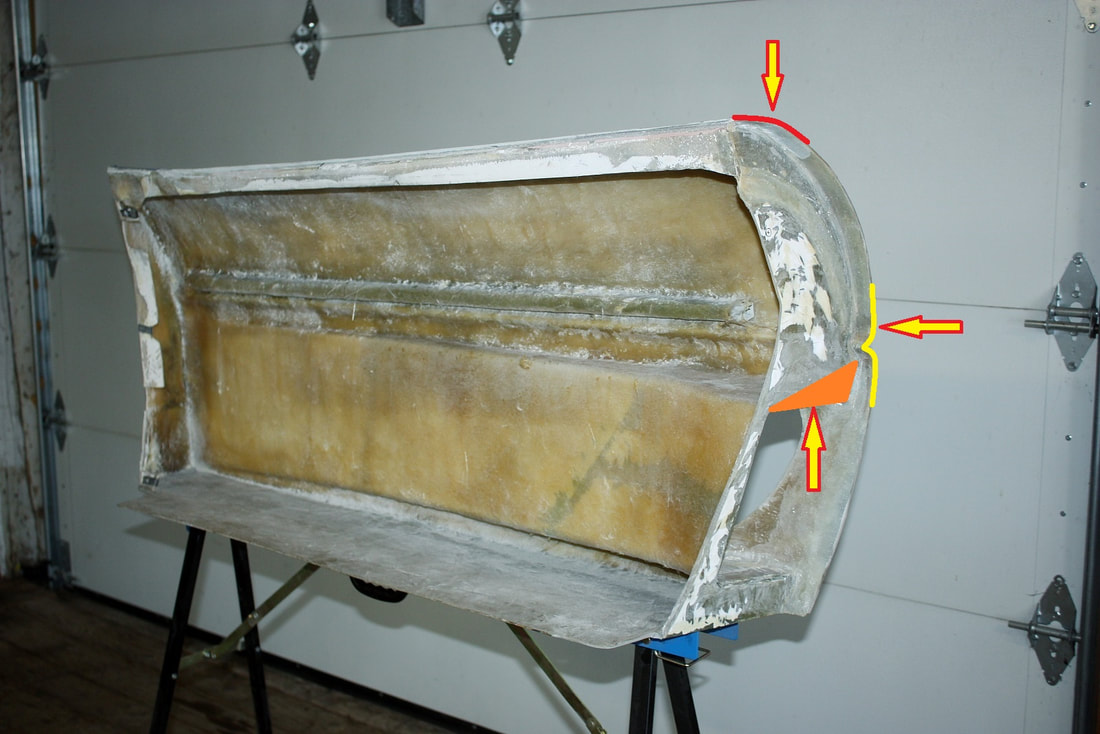
When the red area contacted the jamb, it forced the door skin to rise upward, the yellow contact area forced the door skin outward by several millimeters, and the orange shaded part acted like a wedge shoving the door skin forward. Nothing could be done to the door itself in these areas since it was the correct shape, and secondly, it was too thin to shave. So I focused on modifying the door jamb instead:
In the above photo the roughed up areas of the jamb are where I was able to shave up to a ¼” of fibreglass off allowing the door skin to close without contact. Good thing the jamb was about a ½” thick! I will have to reinforce some areas later when I remove the rear quarters.
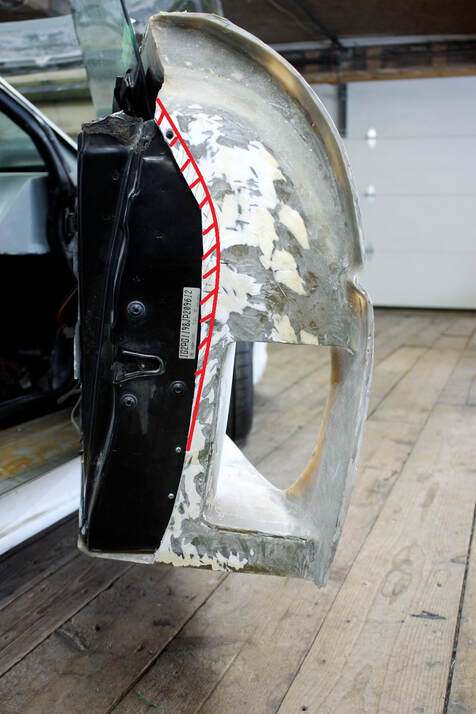
Next up was the top of the door skin. The inside edge along the window had been made perfectly straight when in fact it should’ve had the same gentle curvature as the window. That meant when the door skin was installed properly, it was jammed up hard against the middle of the glass. This next photo shows the extent to which I had to grind down the inner top edge of the door skin to make clearance for the window... follow the inside edge of the blue masking tape line:
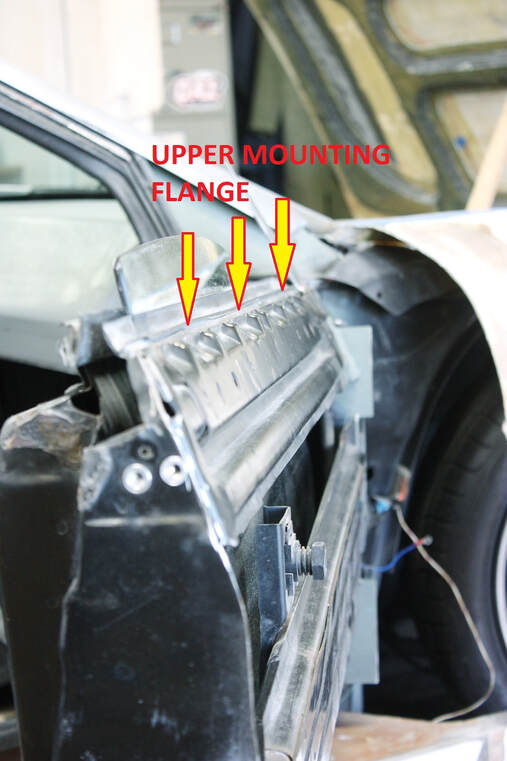
The danger in grinding this edge too far down was that it could weaken or even break through the fibreglass return lip shown here…
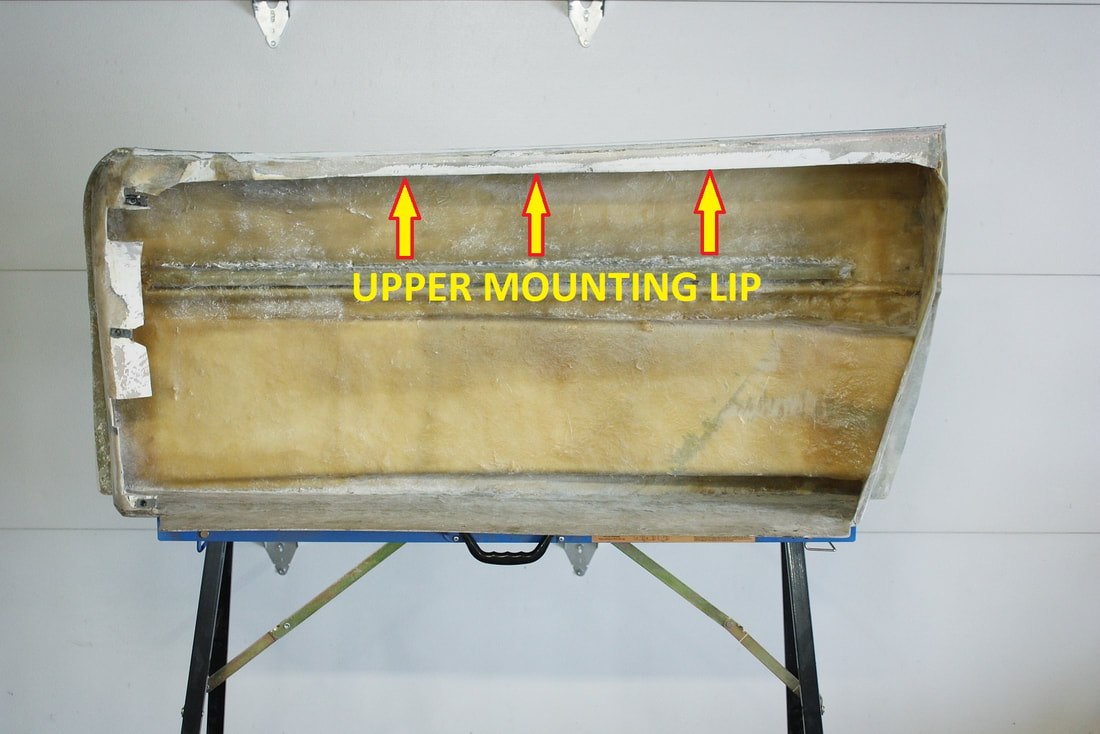
That lip is used to hang the top of the door skin onto the metal door along this flange:
Luckily the fibreglass lip was thick enough to take the modification with ease.
Once the door skin cleared the glass, I reinstalled it and assessed the last of the four major areas of interference… the door-to-rocker-panel:
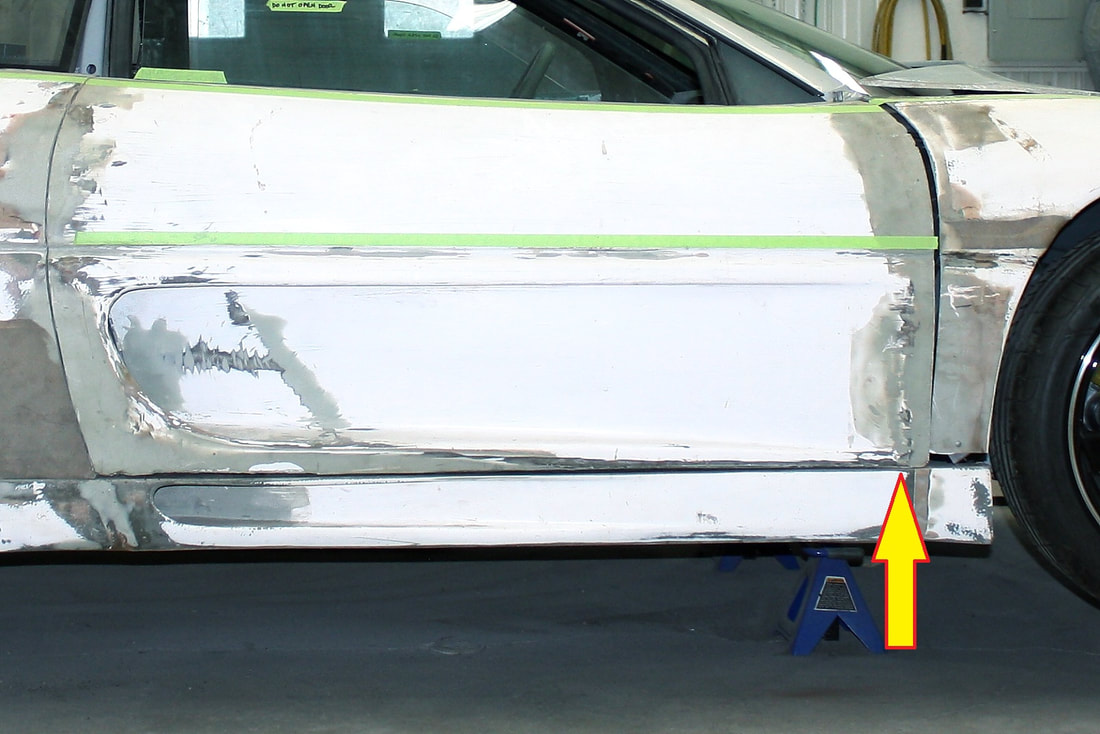
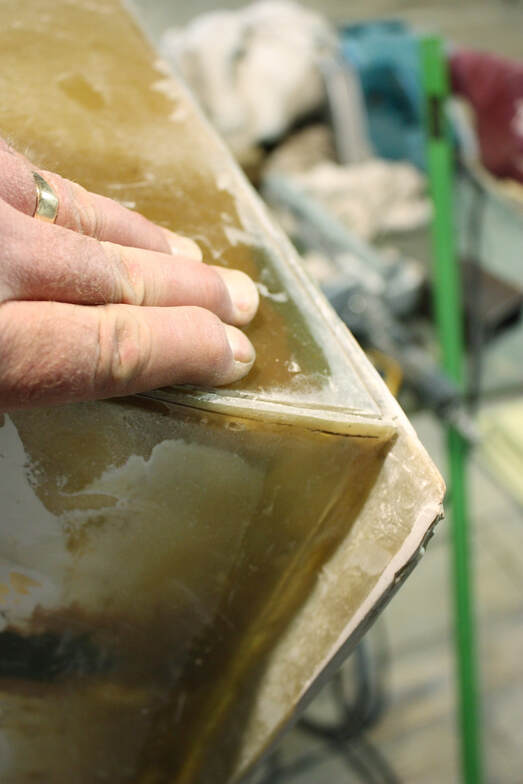
Recall this IFG kit came with the rockers molded as an integral part of the door. The previous owner had done the work to separate them, which included having to make a new top surface for the rocker panels, and new floors for the doors. The floor skin of the passenger door had been made nice and flat, it simply had been bonded to the shell with a ¼” droop at the front, producing the interference. This photo shows the underside of the door panel, but doesn’t capture the slight droop:

The simple cure was to slice the floor skin along its front and outside edges (where it wouldn't be seen) and bend it upwards to eliminate the sag. Here, I had already made the cuts and was using finger pressure to recess the floor up into the door:
I used a wood clamp to hold the sectioned floor where I wanted it…
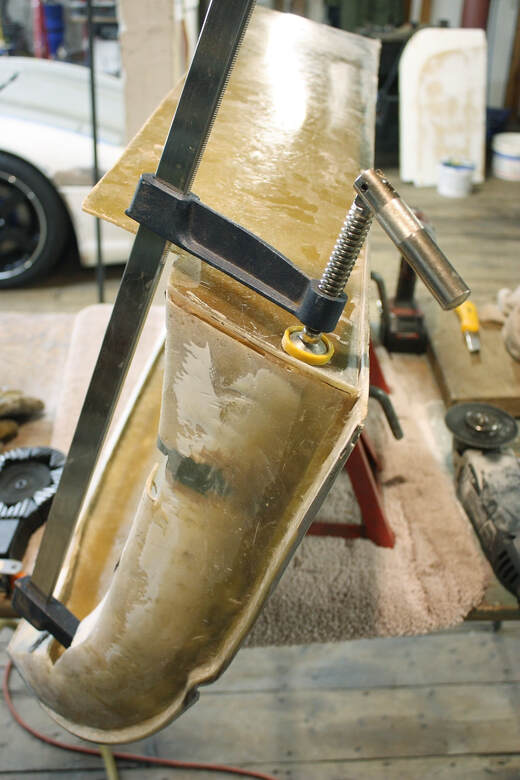
… then righted the door skin, and fibreglassed the panel in its new location with several layers of 1.5 oz mat:
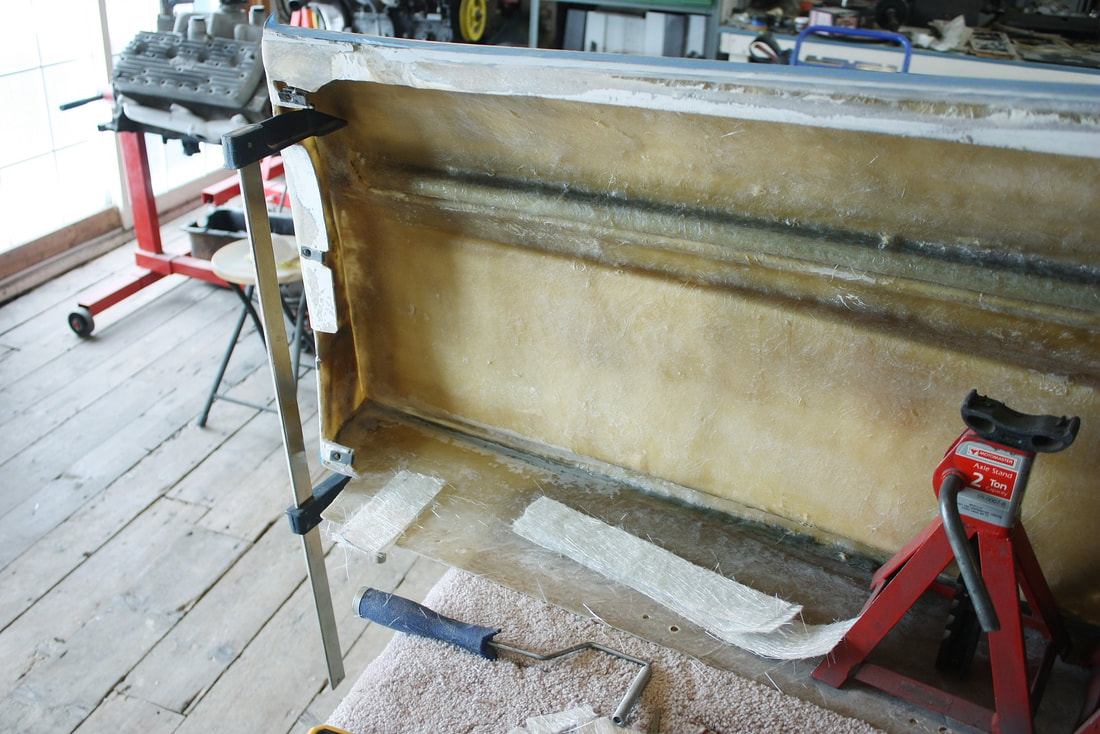
Once the resin had firmly cured, I removed the clamp and ground down the bottom edge of the outer skin until it was flush with the new floor. My handy air powered 1” belt sander made quick work of this:
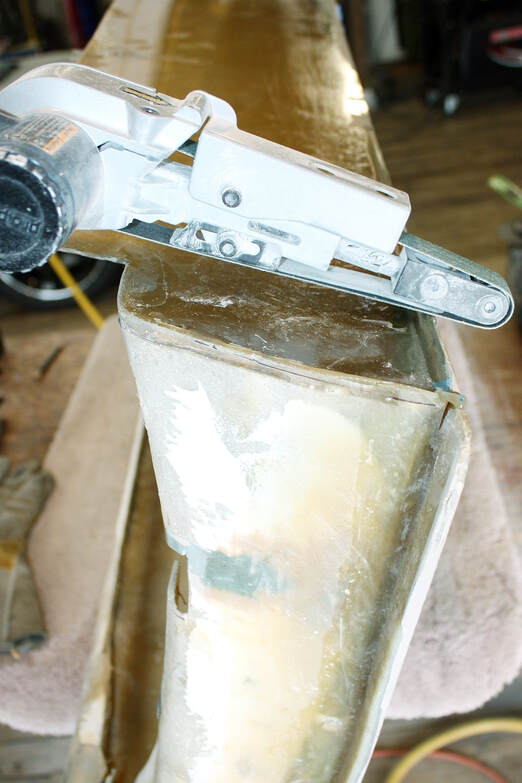
Finally, I remounted the door shell and checked the success of the repair:
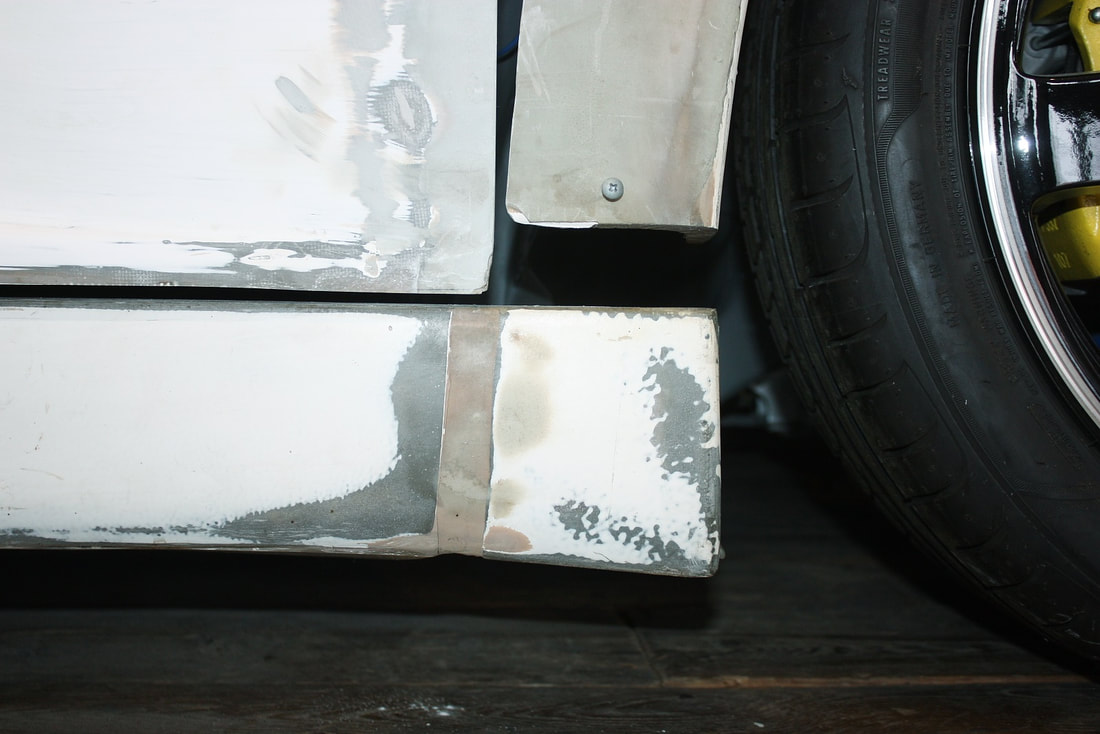
Perfect! That cured the rub, but obviously there was more to be done to get an even gap along the entire bottom length. But at least now I could start working on closing the gaps. That’s up next.

 RSS Feed
