Having spent the last three posts re-hinging and de-conflicting passenger door interferences, I finally get down to the nitty-gritty of body shaping in this post.
To kick it off, the passenger door’s front edge needed the same treatment I had applied to the driver’s door in Post #165: the door skin was too long, so I marked the new shape and cut the front edge back to the A-pillar:
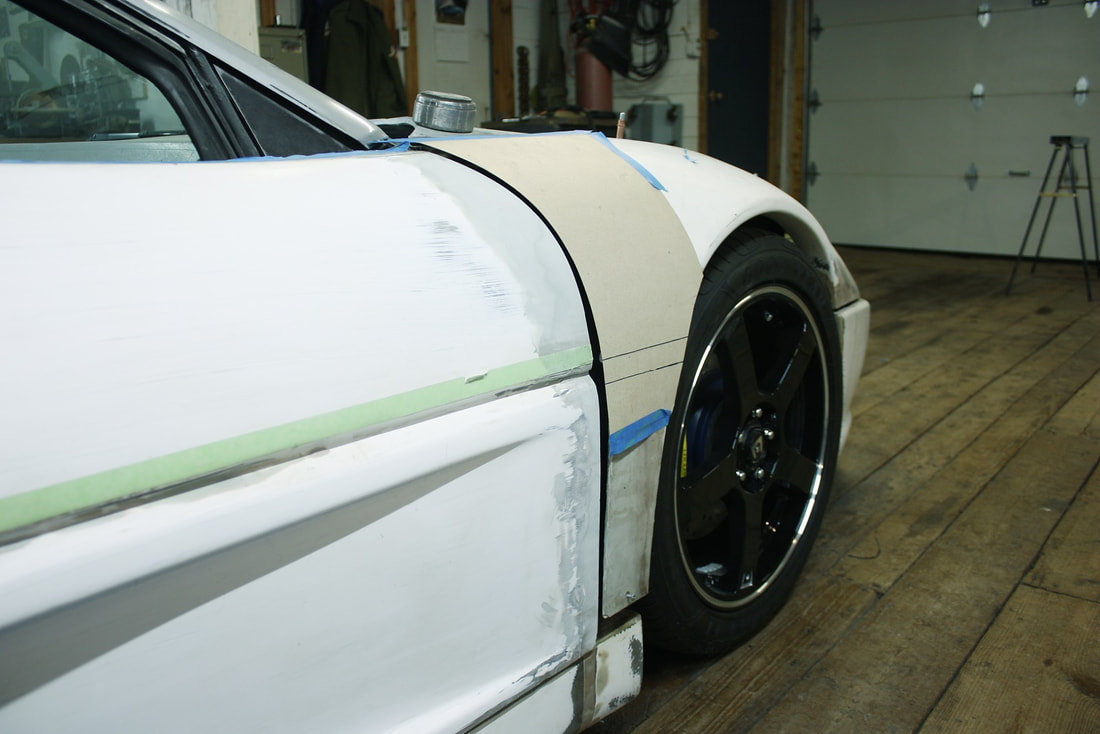
That left such a gaping hole in front of the door that I decided to make a rough cardboard template to bridge the gap to help me visualize the flow of the body lines. The template wasn’t perfect because I couldn’t replicate the compound curves, but I could see beyond the limitation of the cardboard:
That left such a gaping hole in front of the door that I decided to make a rough cardboard template to bridge the gap to help me visualize the flow of the body lines. The template wasn’t perfect because I couldn’t replicate the compound curves, but I could see beyond the limitation of the cardboard:
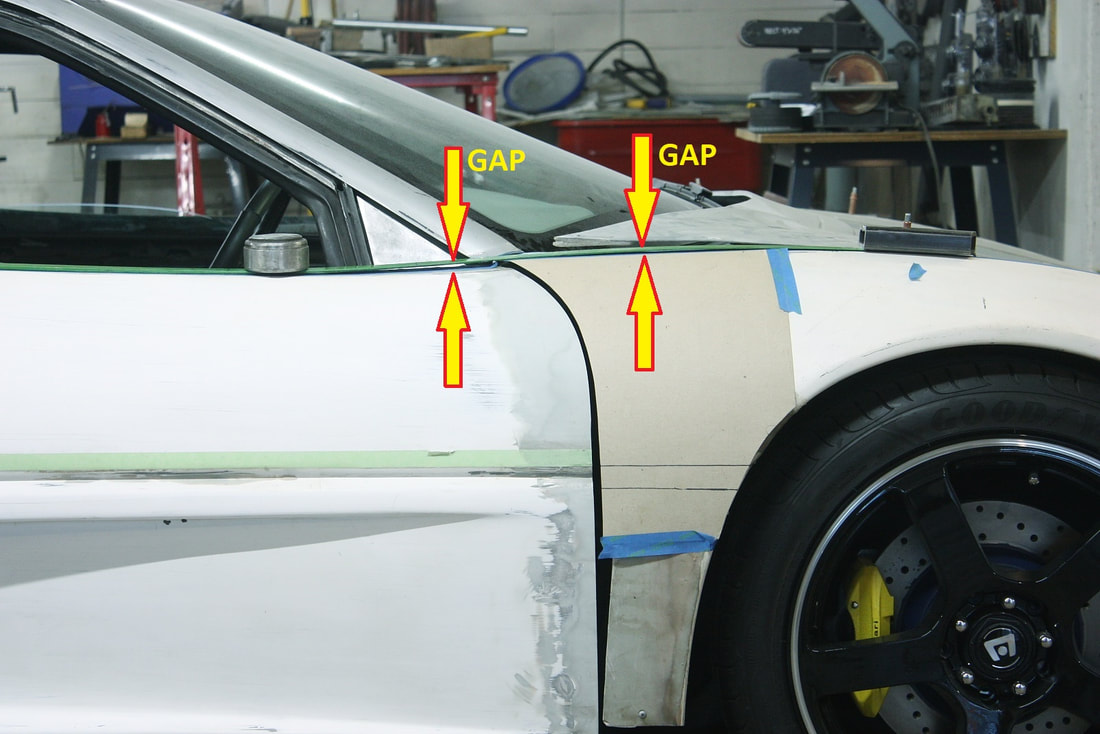
The template did highlight two things: first, since the fender was at the correct height, the top of the door clearly wasn’t arched high enough at the front. That meant I’d have to raise not the whole door, just the front top edge of it.
Second, the top of the fender near the A-pillar was too flat to carry a flowing line onto the door even if the door was modified.
It’s usually hard to capture subtle body line problems like these in photos so I used a flexible drawing bow laid flat along the top of the door, extending onto the top of the fender to highlight the difference in lines. By its very nature, the bow traces a smooth flowing arc no matter how it’s flexed, so by weighing it down where I wanted the inflexion points, it automatically traced the additional curvature needed by each panel to bridge the gap with a continuous line. Any air space below the bow demonstrated where the panels were too low:
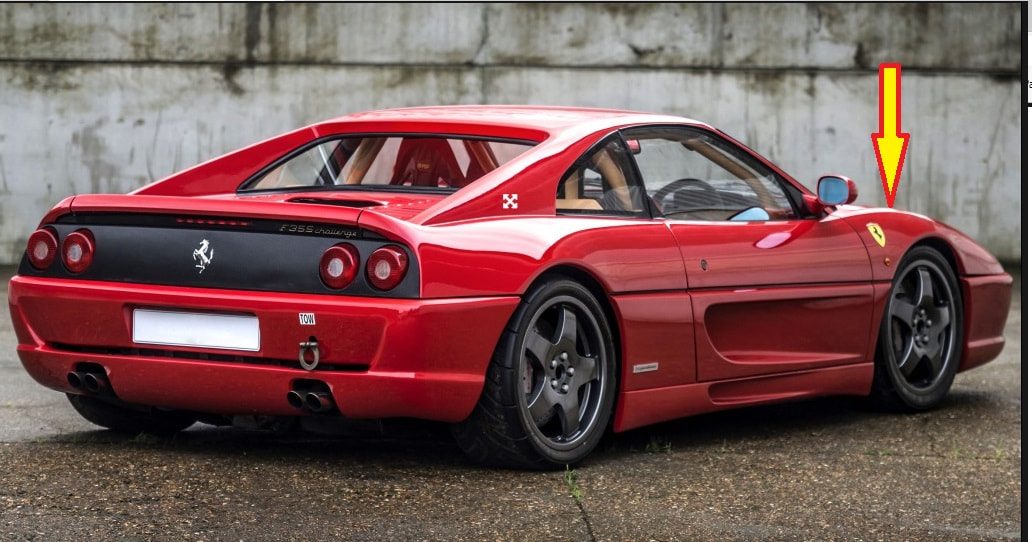
That placed the peak of the front fender arch about midway between the centerline of the wheel arch and the base of the A-pillar, which I found curious. Often, the peak of a fender is located at the wheel centerline so I had to research images of authentic F355’s to make sure I wasn’t about to make a mistake. Luckily, the peak of the authentic Ferrari’s fender appears to coincide with where mine would fall, and it had the same dramatic “swoop” from the mirror to the wheel center:
That placed the peak of the front fender arch about midway between the centerline of the wheel arch and the base of the A-pillar, which I found curious. Often, the peak of a fender is located at the wheel centerline so I had to research images of authentic F355’s to make sure I wasn’t about to make a mistake. Luckily, the peak of the authentic Ferrari’s fender appears to coincide with where mine would fall, and it had the same dramatic “swoop” from the mirror to the wheel center:
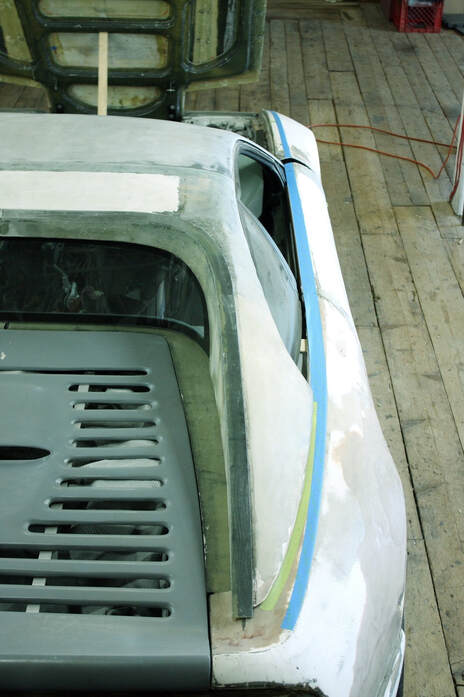
That gave me a working plan for the side view of the upper body line, but I still needed to map out the top view since it was all over the place on the IFG kit. Here’s an image showing the crease that delineates the vertical surfaces from the horizontal ones on the authentic car:
That gave me a working plan for the side view of the upper body line, but I still needed to map out the top view since it was all over the place on the IFG kit. Here’s an image showing the crease that delineates the vertical surfaces from the horizontal ones on the authentic car:

Notice the flat surface along the tops of the doors and fenders. It starts out quite wide at the rear of the car and gradually tapers as it makes its way to the A-pillars. From there, it widens slightly to accommodate the junction at the pillar, fender, door, and hood. The outside edge is nevertheless a continuous, flowing line front to rear.
That crease along the top of the panels on the IFG kit was anything but a flowing line, so I marked out where it should’ve been with blue masking tape:
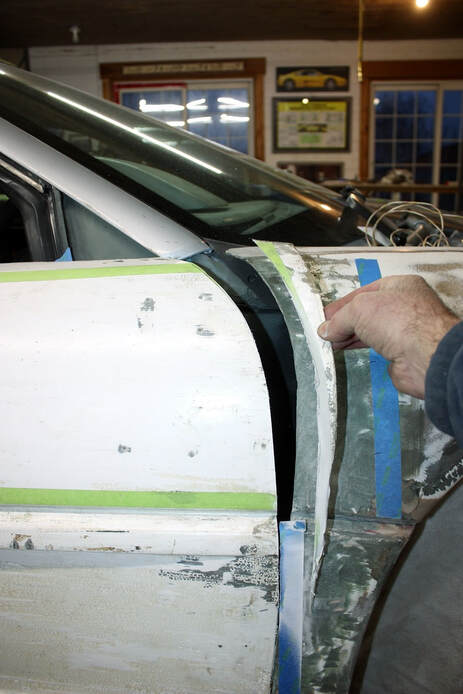
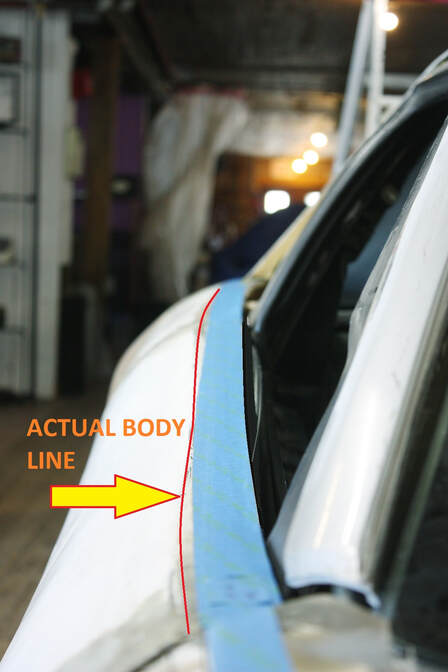
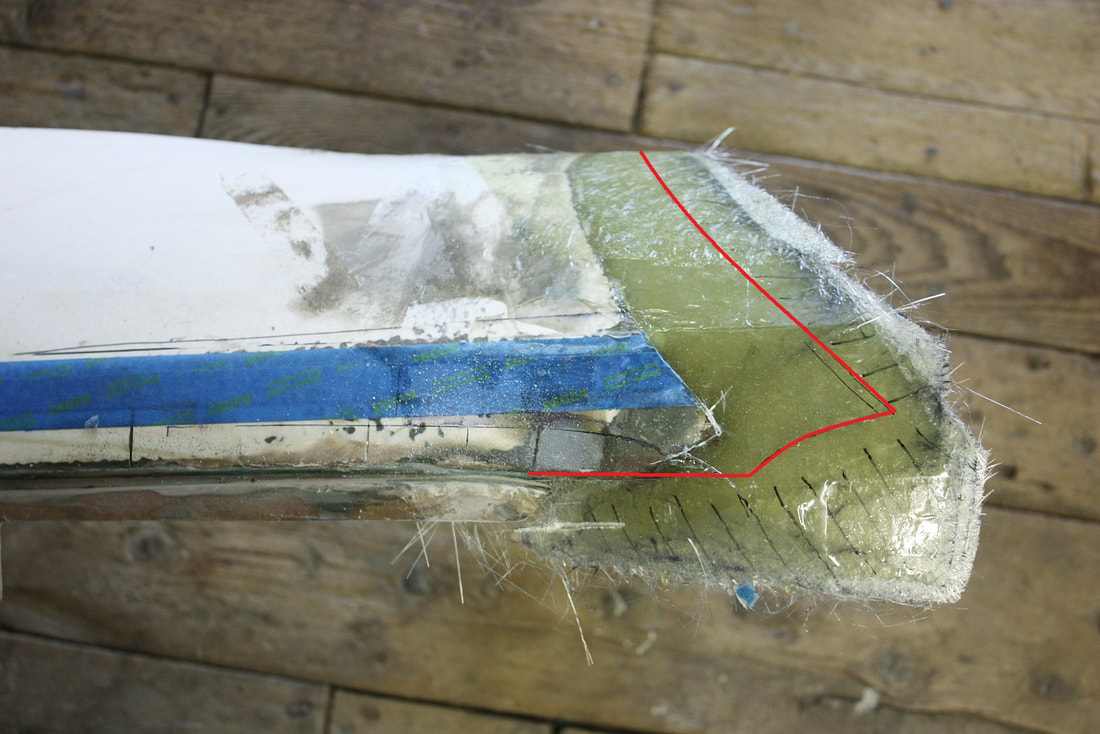
The red line in this next photo shows where the actual crease was along the door top. To raise the top edge of the door, I needed the tape line to know where to slice the door:
The red line in this next photo shows where the actual crease was along the door top. To raise the top edge of the door, I needed the tape line to know where to slice the door:
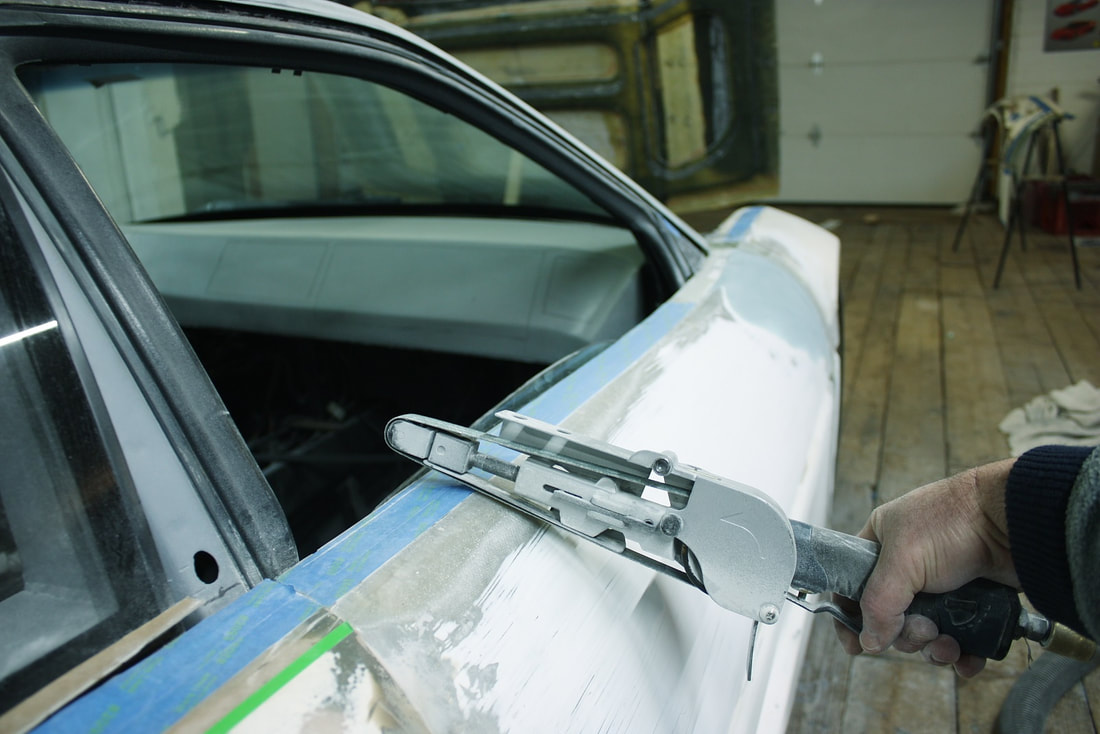
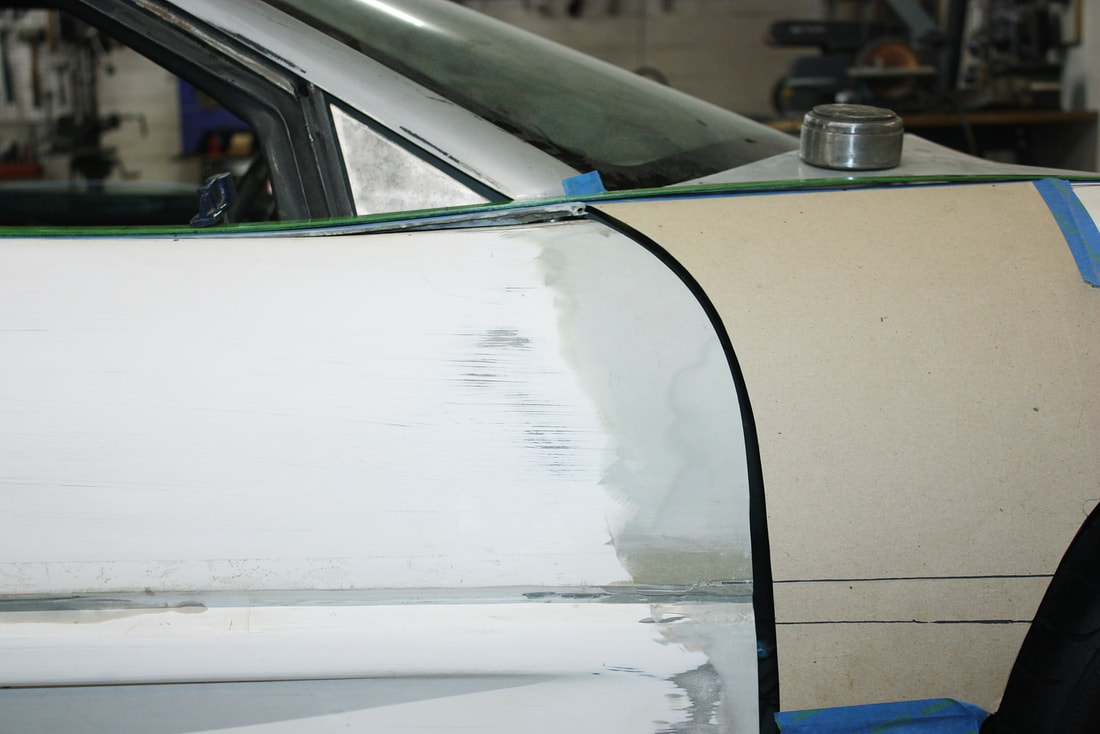
My next step was to grind the top of the door skin to straighten the crease from the red line to the edge of the masking tape. I did this quickly using my 1” pneumatic belt sander. (Notice the green pin-striping tape in this next photo… it marks where the crease is wrongly located on the rear quarter panel!):
My next step was to grind the top of the door skin to straighten the crease from the red line to the edge of the masking tape. I did this quickly using my 1” pneumatic belt sander. (Notice the green pin-striping tape in this next photo… it marks where the crease is wrongly located on the rear quarter panel!):
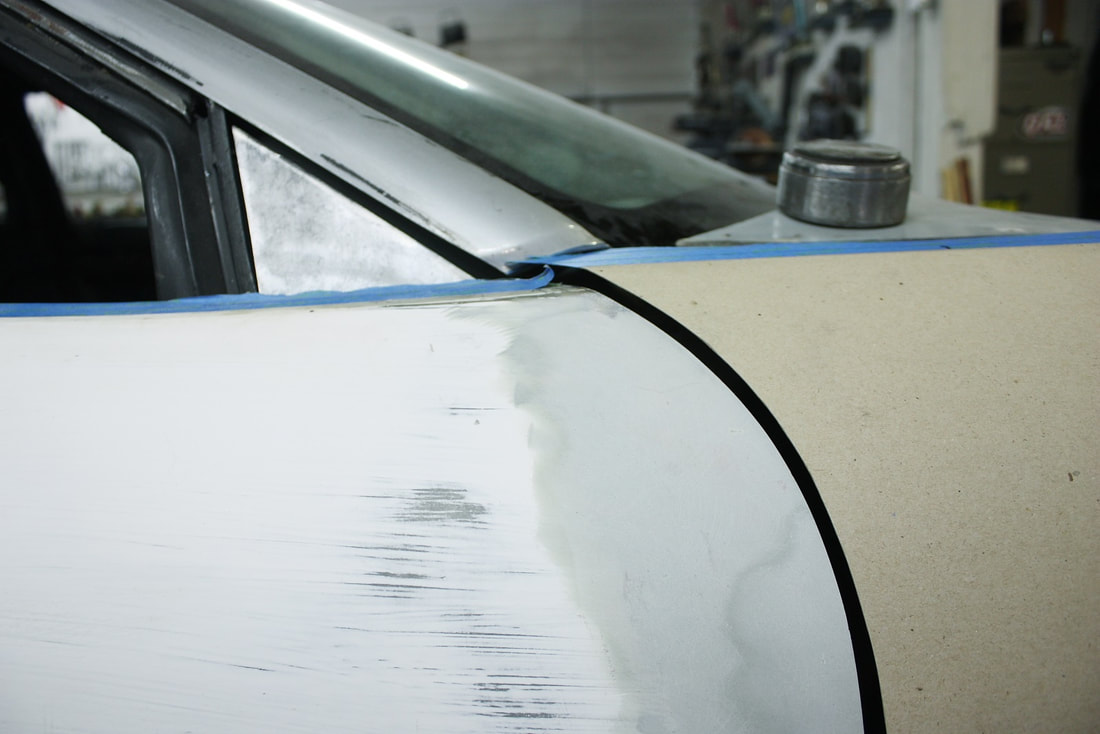
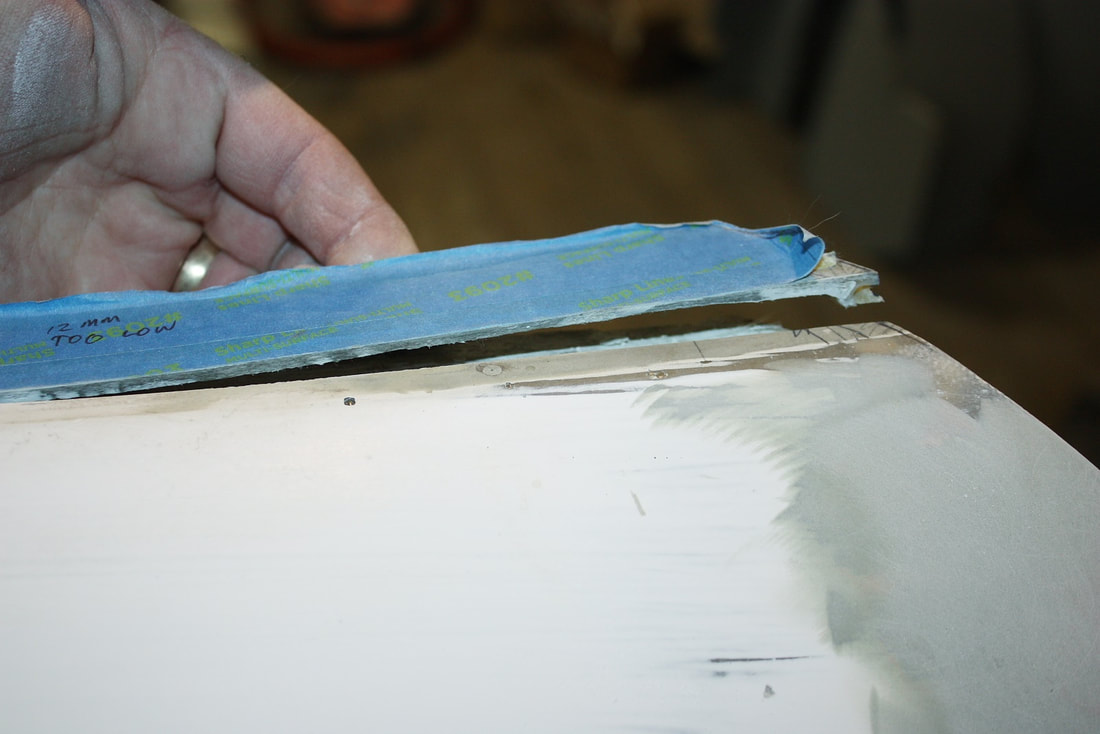
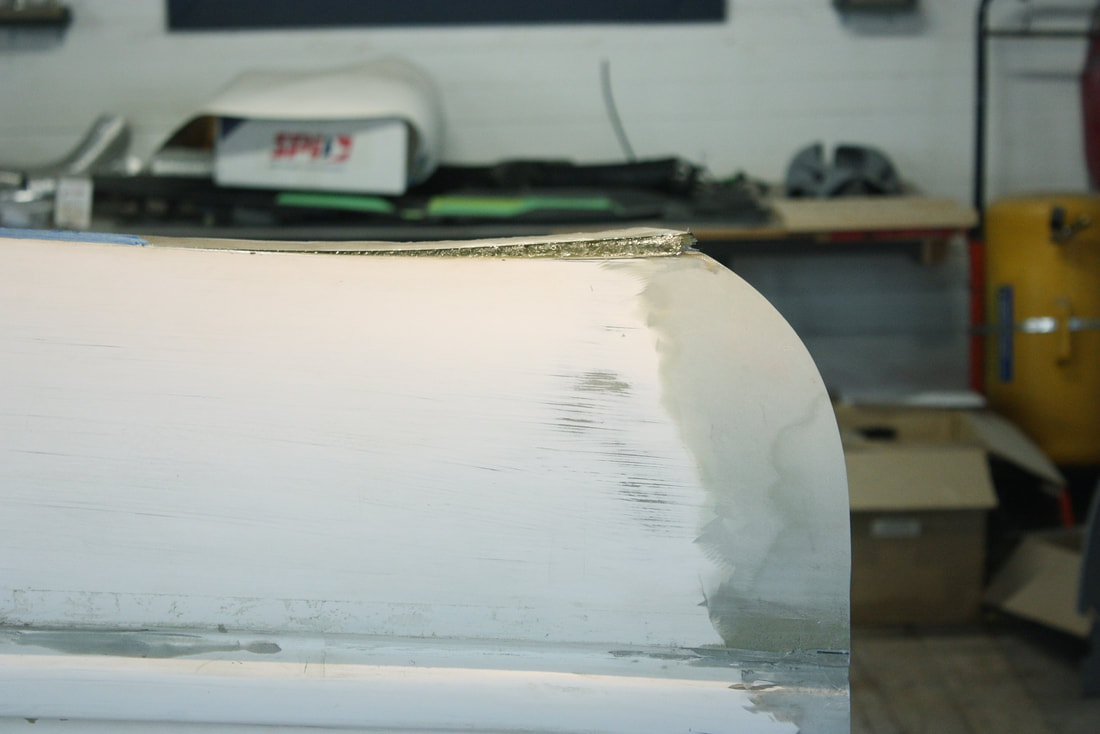
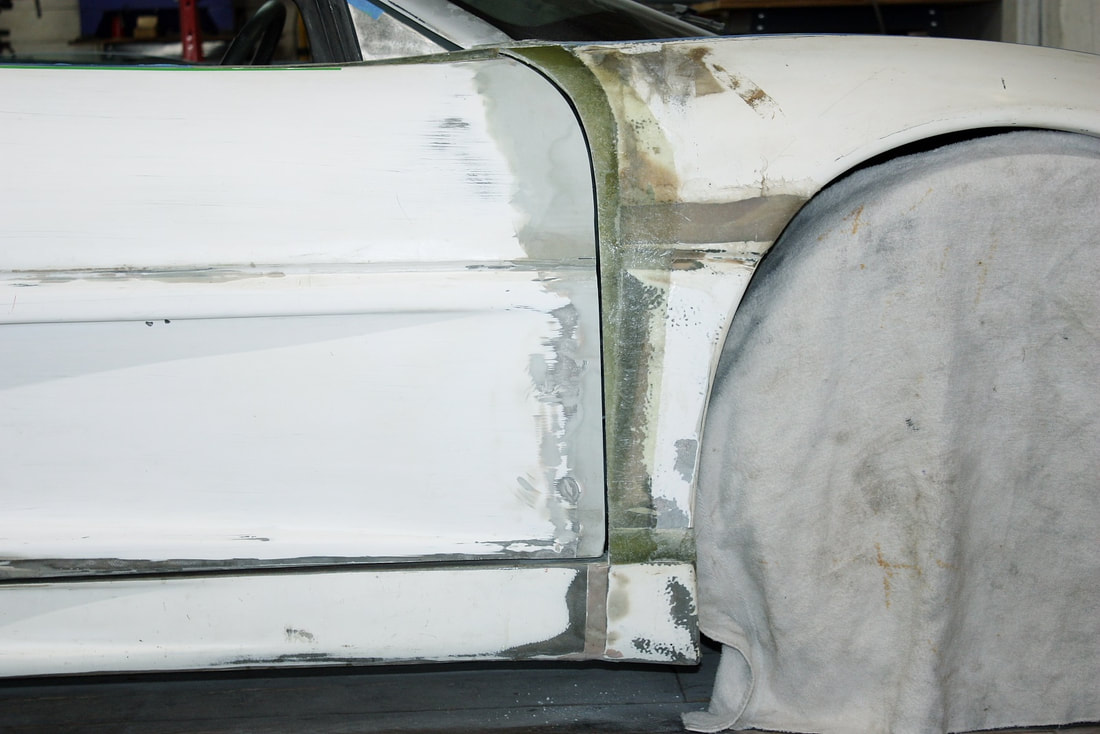
With the door crease properly located from the top view, it was time to revisit the side view again. Here’s a close-up of the 12 mm mismatch in height with the fender:
With the door crease properly located from the top view, it was time to revisit the side view again. Here’s a close-up of the 12 mm mismatch in height with the fender:
I sliced the upper surface of the door skin along the crease extending about 30 cm back from the front edge to coincide with the lowest point of the body line on the door. Then, I simply flexed the piece upwards at the front edge like so:
I sliced the upper surface of the door skin along the crease extending about 30 cm back from the front edge to coincide with the lowest point of the body line on the door. Then, I simply flexed the piece upwards at the front edge like so:
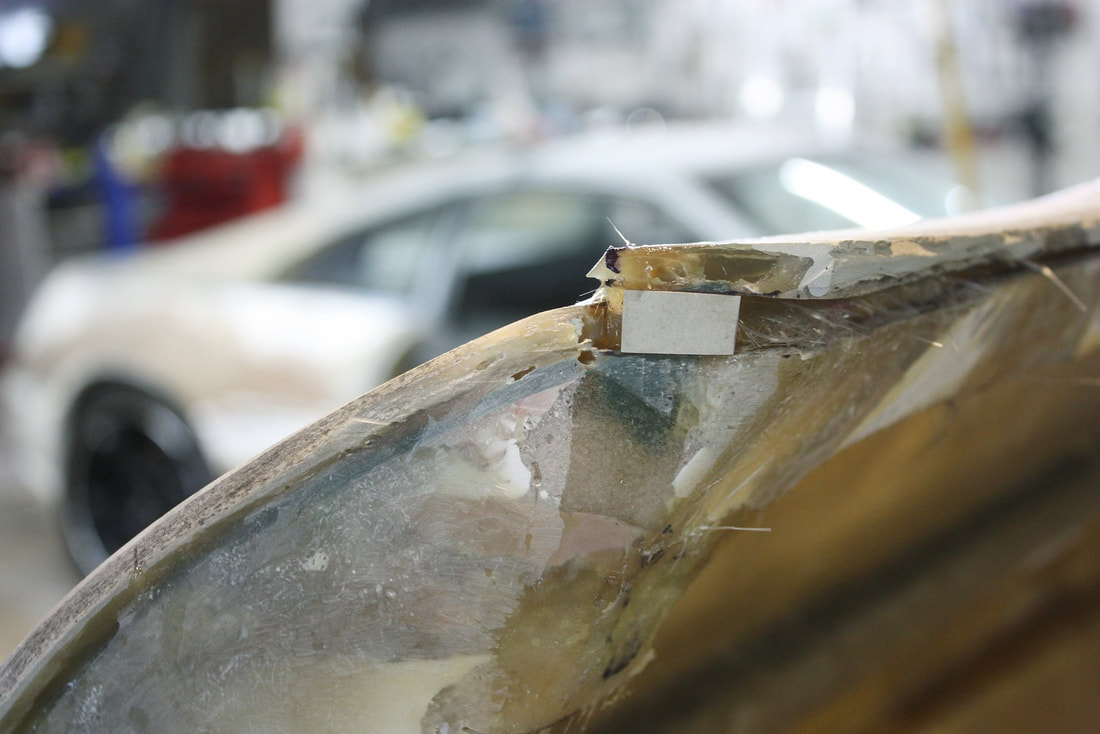
I reinstalled the door skin, laid out my drawing bow once again, and propped up the front edge of the sliced panel with a fibreglass shim until it matched the height of the fender and curvature of the bow:
I reinstalled the door skin, laid out my drawing bow once again, and propped up the front edge of the sliced panel with a fibreglass shim until it matched the height of the fender and curvature of the bow:
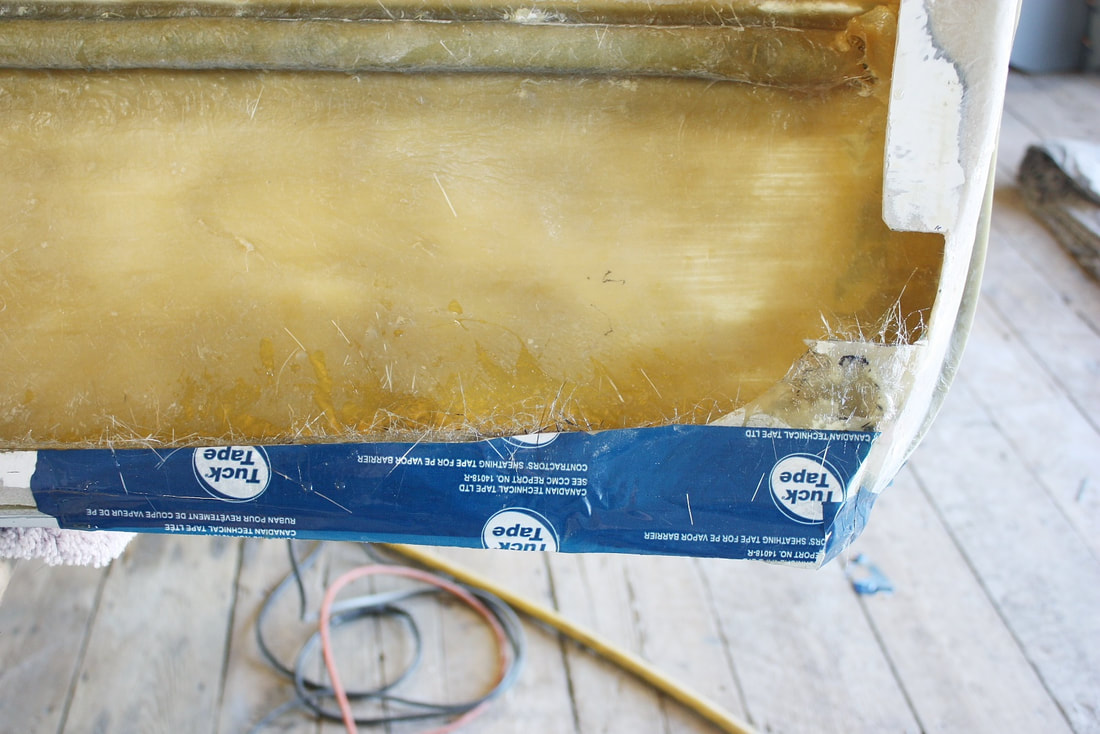
I then removed the door skin, flipped it upside down, and closed off the gap along the slice with some cellophane tape to act as a barrier to keep the polyester resin from draining out while I reinforced the cut from the inside:
I then removed the door skin, flipped it upside down, and closed off the gap along the slice with some cellophane tape to act as a barrier to keep the polyester resin from draining out while I reinforced the cut from the inside:
I used four layers of 1.5 oz mat on the inside of the door to re-bond the top edge to the rest of the door skin. After it cured, I took off the tape and had a nice solid repair to work with:
I used four layers of 1.5 oz mat on the inside of the door to re-bond the top edge to the rest of the door skin. After it cured, I took off the tape and had a nice solid repair to work with:
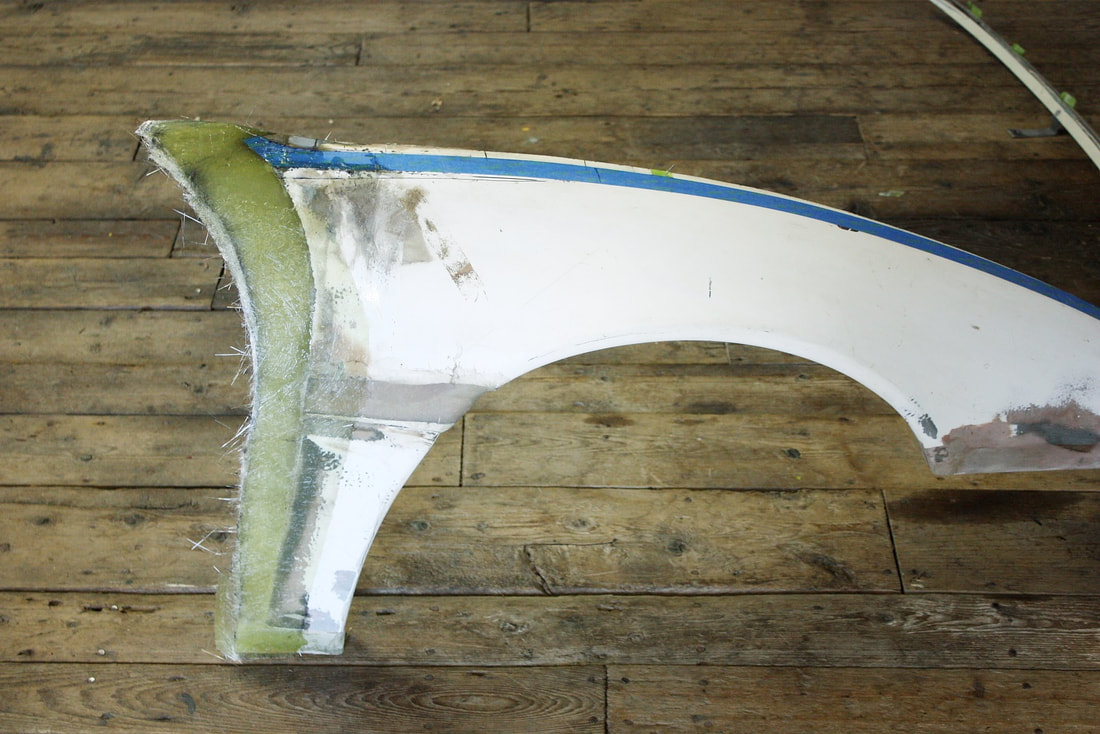
Before blending the door top with the rest of the door and the fender, I needed to ditch the cardboard fender template and make an actual fibreglass extension to the front fender. I taped up the template to make it impervious to resin, then used it to make a rough form directly on the fender. I took the time to make a make-shift mold to extend the bottom of the fender down to the rocker panel as well.
I added five layers of 1.5oz mat to the inside surface, let it cure, removed the template, and added another layer on the outside of the skin. Here’s the rough fix:
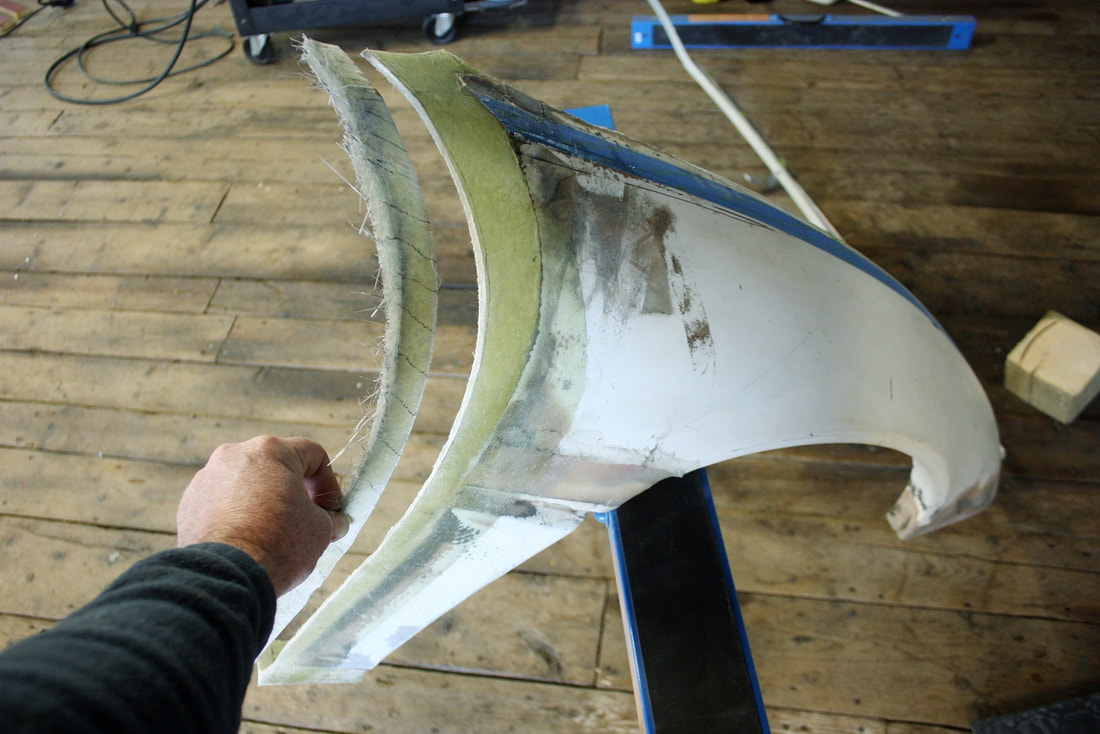
I always make fibreglass pieces an inch longer than necessary since the resin tends to de-saturate around the edges before it cures. This way, once the excess is cut off, the remaining piece is fully saturated:
I always make fibreglass pieces an inch longer than necessary since the resin tends to de-saturate around the edges before it cures. This way, once the excess is cut off, the remaining piece is fully saturated:
The fender could now be reinstalled and used as a guide to blend the heights of the door and the fender together at the same time. Here’s the naked car:
The fender could now be reinstalled and used as a guide to blend the heights of the door and the fender together at the same time. Here’s the naked car:
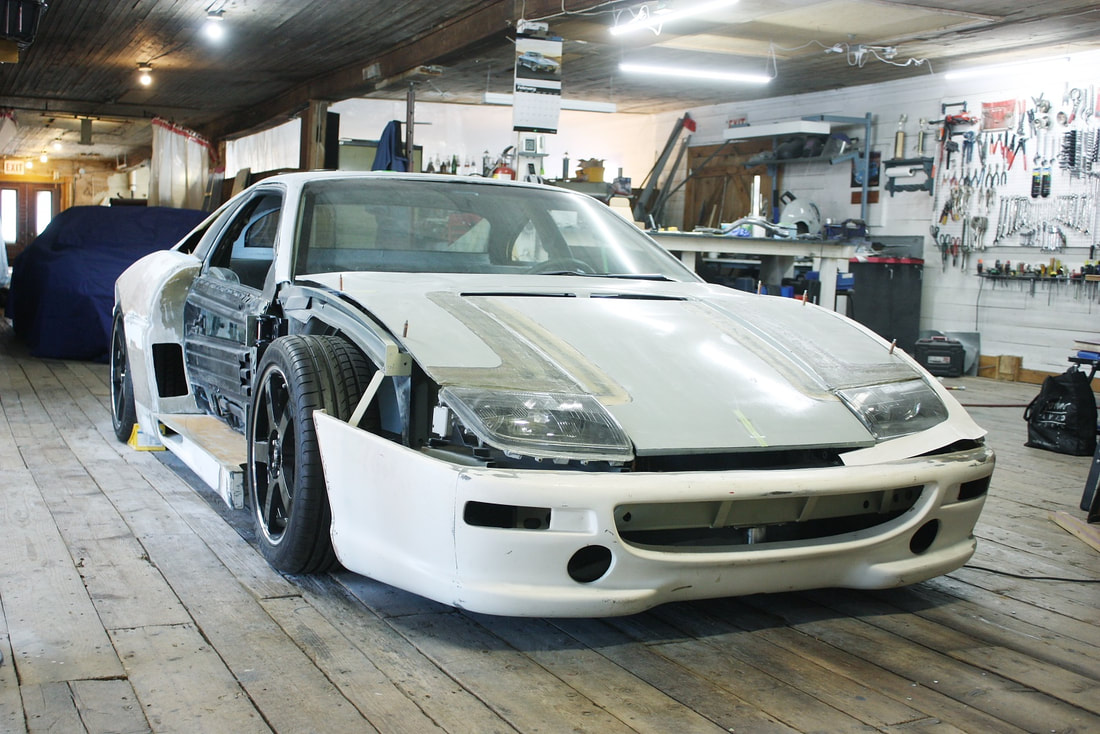
And here’s the door and fender reinstalled with a new gap roughed in, ready for some filling of the front upper edge of the door. Note that the fender arch hasn't been repaired yet:
And here’s the door and fender reinstalled with a new gap roughed in, ready for some filling of the front upper edge of the door. Note that the fender arch hasn't been repaired yet:
Next up, the door skin gets acquainted with some short strand fibreglass putty.
Next up, the door skin gets acquainted with some short strand fibreglass putty.

 RSS Feed
