With the passenger door ready for primer/filler, I focused on the driver’s door next. I wasn’t looking forward to it because not only did it have more problems than the passenger door, but they were way worse.
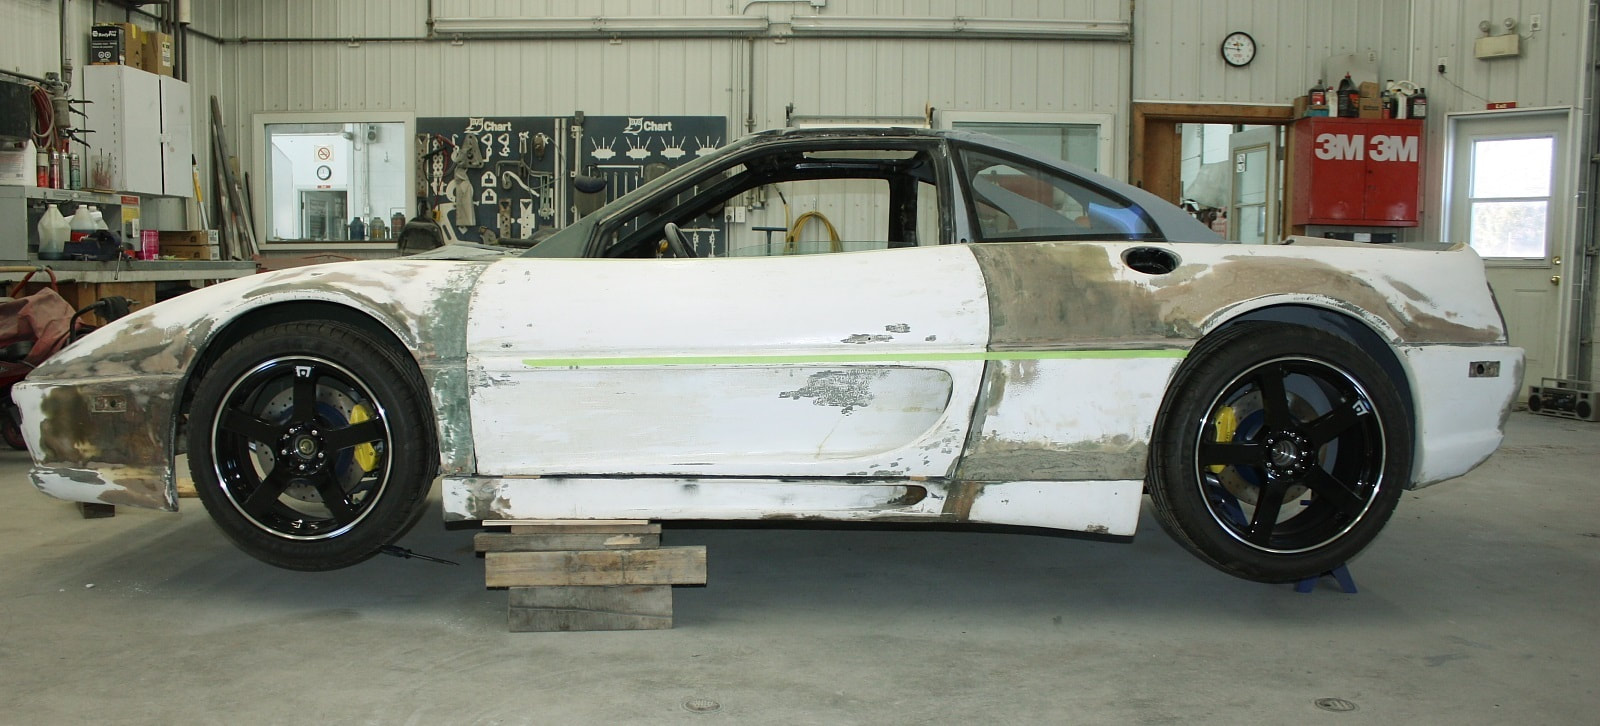
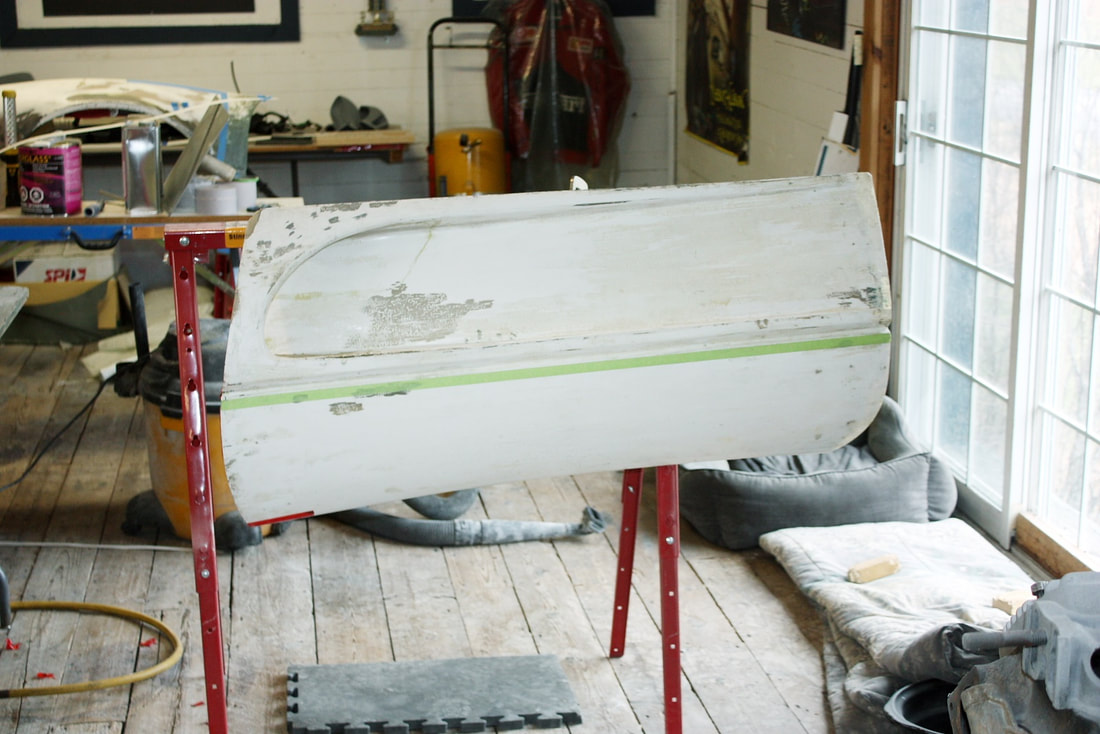
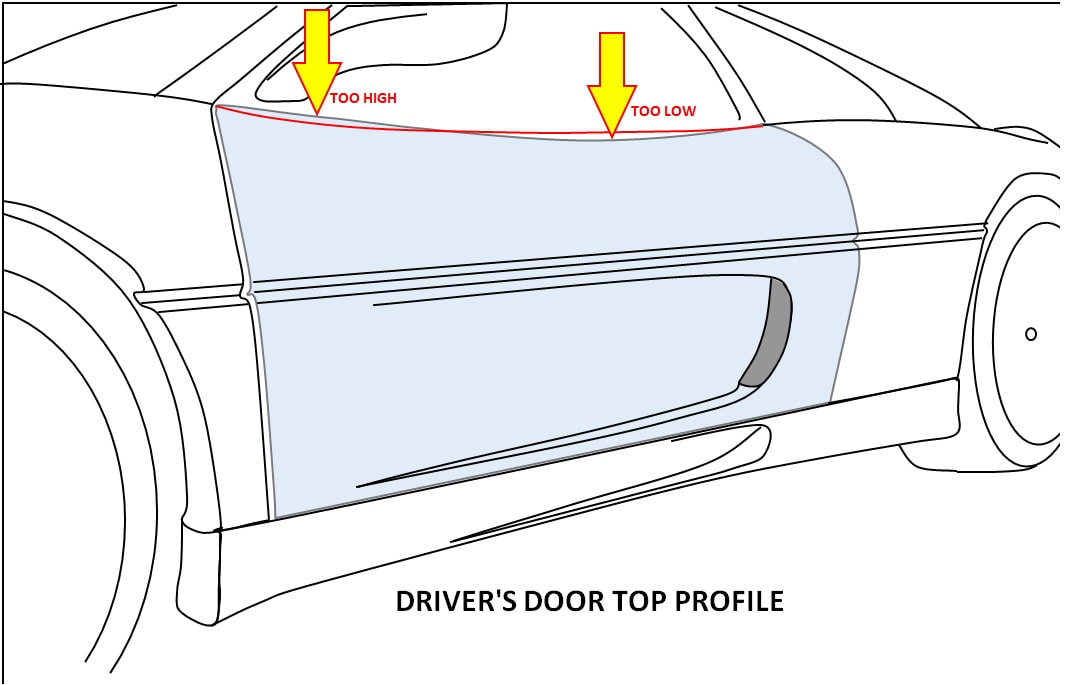
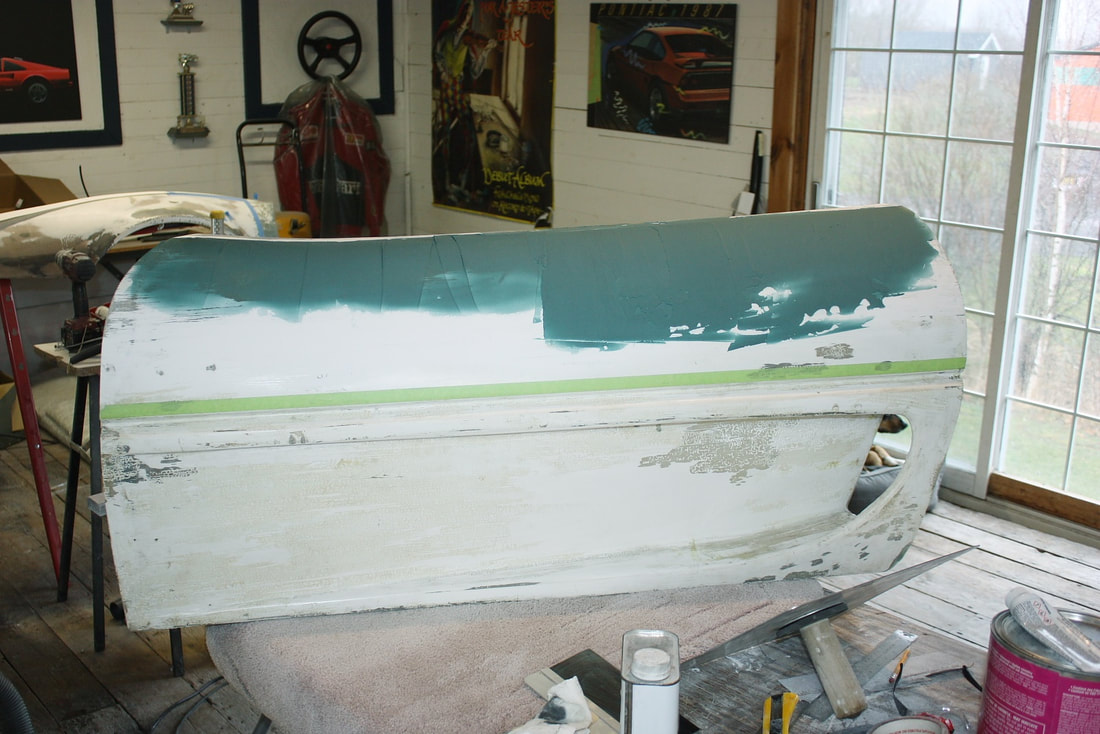
The biggest problem was figuring out how to correct the main body line running from front to rear fender along the top of the door. This is an early photo of the body, but it’s the one that shows the issue best:
With the passenger door ready for primer/filler, I focused on the driver’s door next. I wasn’t looking forward to it because not only did it have more problems than the passenger door, but they were way worse.
The biggest problem was figuring out how to correct the main body line running from front to rear fender along the top of the door. This is an early photo of the body, but it’s the one that shows the issue best:
The swoopy upper body line didn’t peak above the rear wheel where it was supposed to, rather, it peaked just aft of the door and petered out from there.
The swoopy upper body line didn’t peak above the rear wheel where it was supposed to, rather, it peaked just aft of the door and petered out from there.
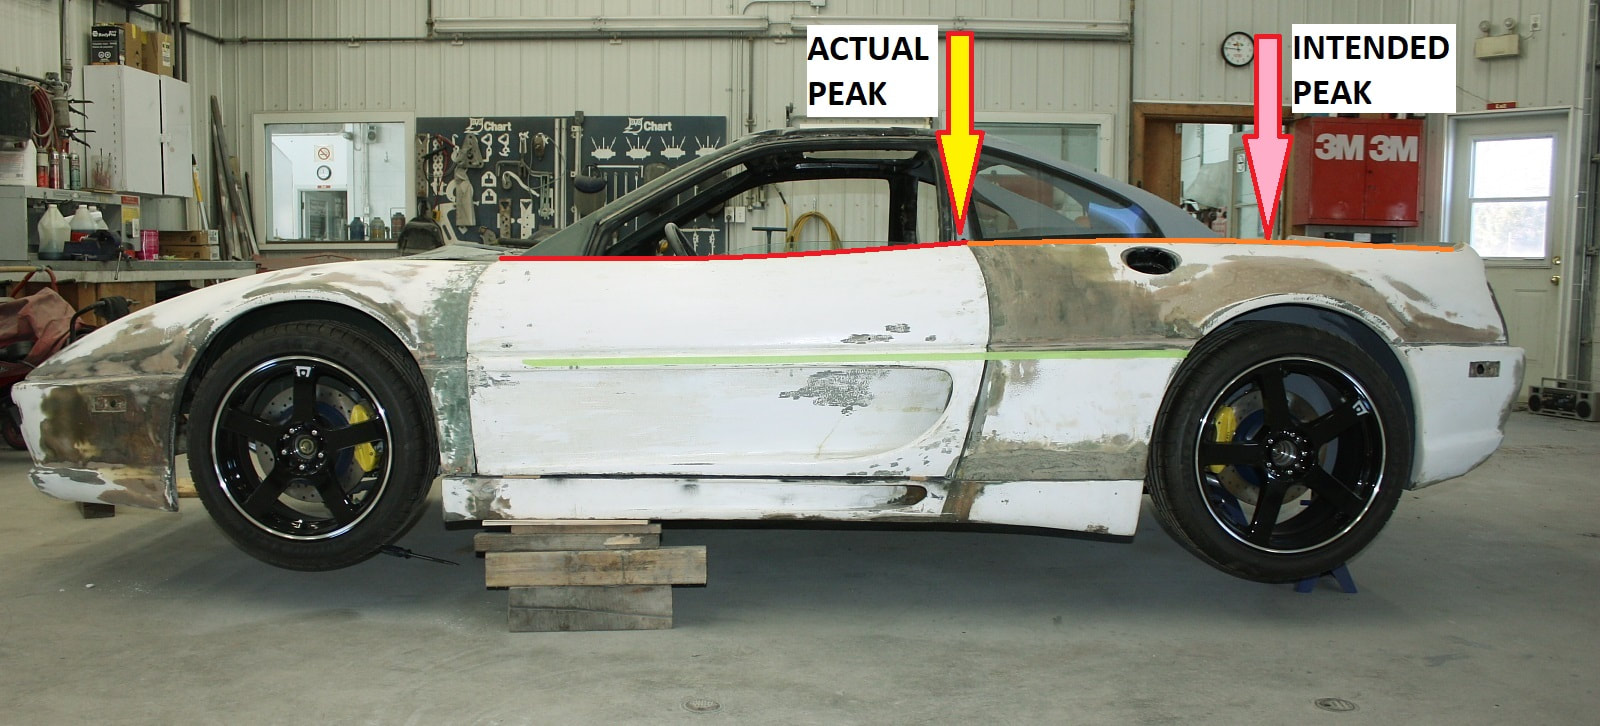
The problem started about midway along the door where the top surface ramped up too quickly toward the rear. It appears the door sat about a ½” inch higher than the quarter panel so the quarter was built up rather than lowering the door line. That altered the overall body line from a sexy snake to a squashed pear.
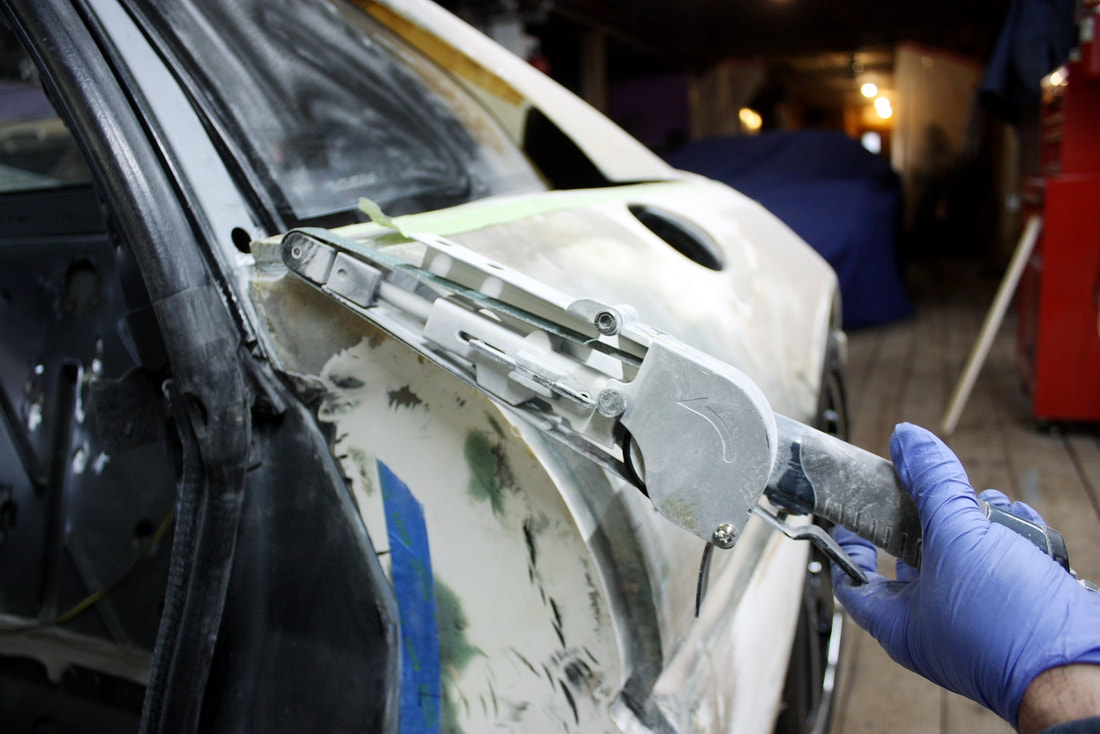
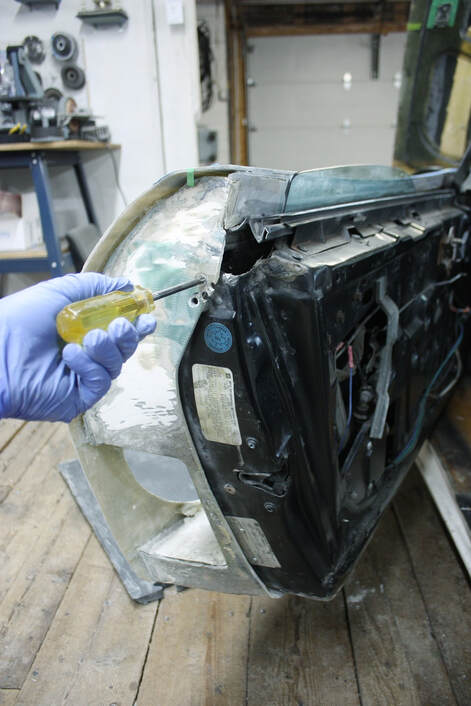
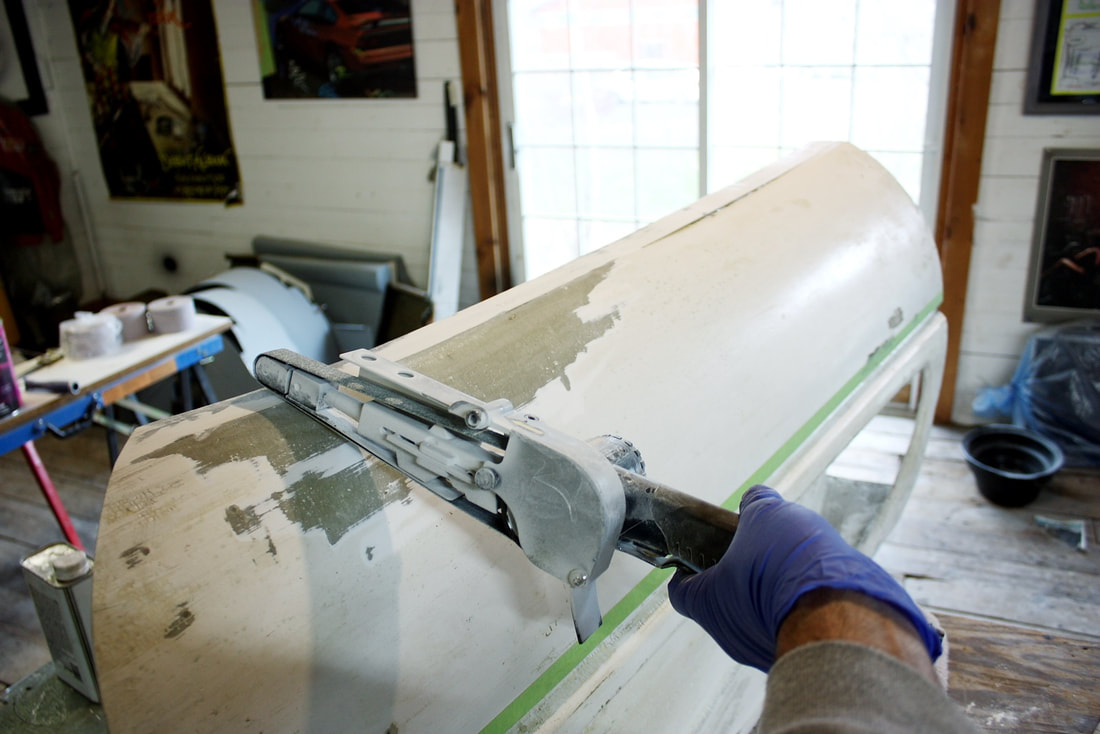
I needed to reshape both the door and the quarter. I couldn’t lower the ramp angle of the door top without first making room for it by reshaping the door jamb. As expected, there was an abundance of filler in the jamb so I donned my face mask and ground it away with my 1” wide pneumatic belt sander:
The problem started about midway along the door where the top surface ramped up too quickly toward the rear. It appears the door sat about a ½” inch higher than the quarter panel so the quarter was built up rather than lowering the door line. That altered the overall body line from a sexy snake to a squashed pear.
I needed to reshape both the door and the quarter. I couldn’t lower the ramp angle of the door top without first making room for it by reshaping the door jamb. As expected, there was an abundance of filler in the jamb so I donned my face mask and ground it away with my 1” wide pneumatic belt sander:
Next, since the top of the door ramped up about a ½” too high at the back edge, I decided to take a two-pronged approach to lower it. I first dropped the entire door skin on the metal door frame by about a ¼”:
Next, since the top of the door ramped up about a ½” too high at the back edge, I decided to take a two-pronged approach to lower it. I first dropped the entire door skin on the metal door frame by about a ¼”:
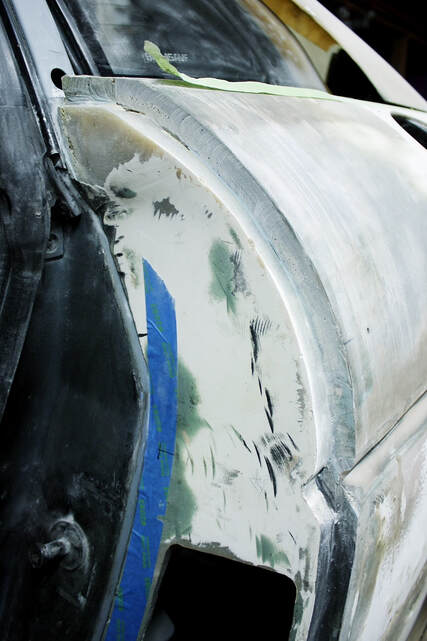
That addressed half of the height problem, and it also improved the gap between the door bottom and the rocker panel substantially. So far so good… 1-1/2 birds with one stone:
That addressed half of the height problem, and it also improved the gap between the door bottom and the rocker panel substantially. So far so good… 1-1/2 birds with one stone:

Next, I wanted to change the angle of the door top starting about midway along its length, but realized the door skin was hard up against the window. So I marked out the gentle curvature of the window using masking tape and left extra room for the dew wipe…:
Next, I wanted to change the angle of the door top starting about midway along its length, but realized the door skin was hard up against the window. So I marked out the gentle curvature of the window using masking tape and left extra room for the dew wipe…:
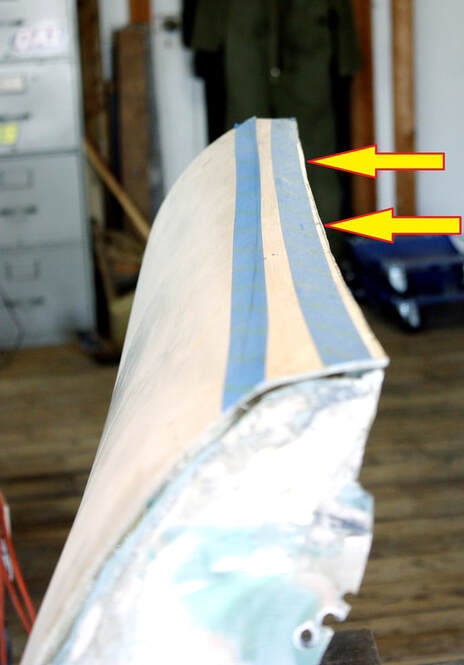
…then I ground down the return flange at the top of the door to clear the window (disregard the other tape lines):
…then I ground down the return flange at the top of the door to clear the window (disregard the other tape lines):
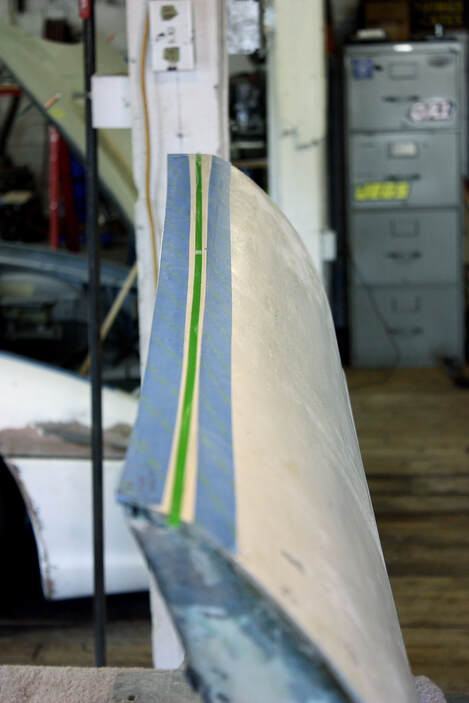
That finally let the door skin sit in the door frame properly, so I then mapped out the rest of the cosmetic problems in case some of them could be solved simultaneously:
That finally let the door skin sit in the door frame properly, so I then mapped out the rest of the cosmetic problems in case some of them could be solved simultaneously:
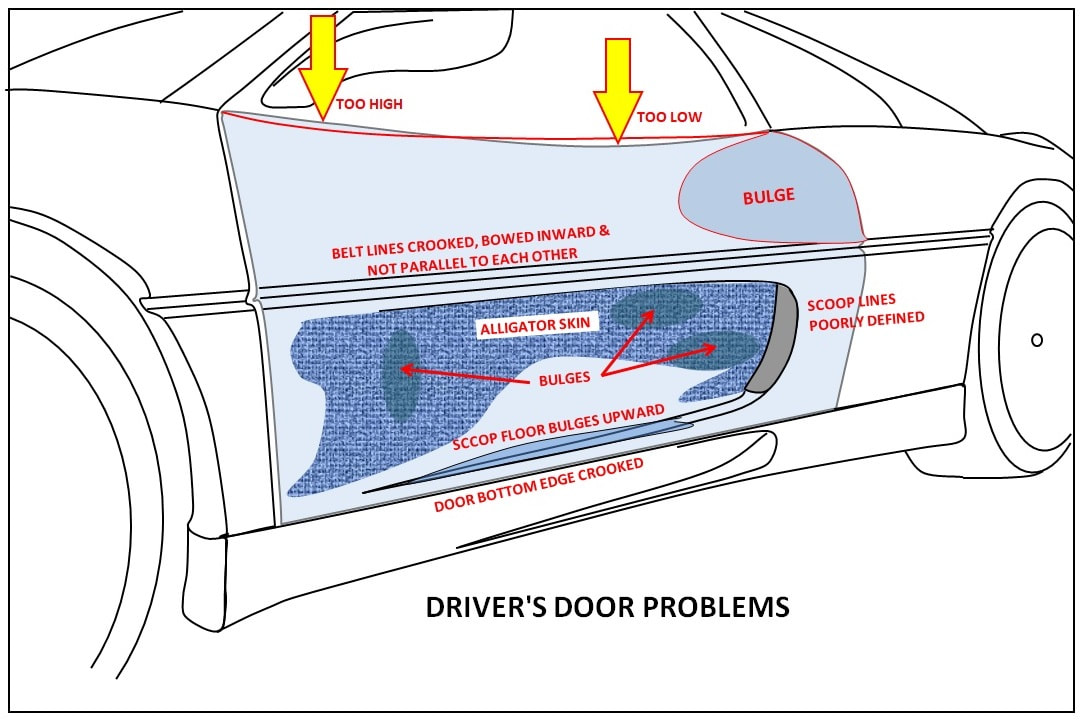
Many of the problems were similar to those on the passenger door, but there were new ones too: the door top edge followed a totally different profile; the rear bulkhead was barely attached to the rest of the door; about 80% of the scoop’s vertical wall looked like alligator skin; and a large hole had been cut in the "ceiling" of the scoop for a door handle.
I realized I couldn’t reshape the door top surface without first reinforcing the rear bulkhead otherwise the door would literally fall apart as I started slicing. But perhaps I could work the two issues together. So I made a cardboard template of the passenger door’s top and superimposed it onto the driver’s door to map out where the changes needed to happen to get them the same.
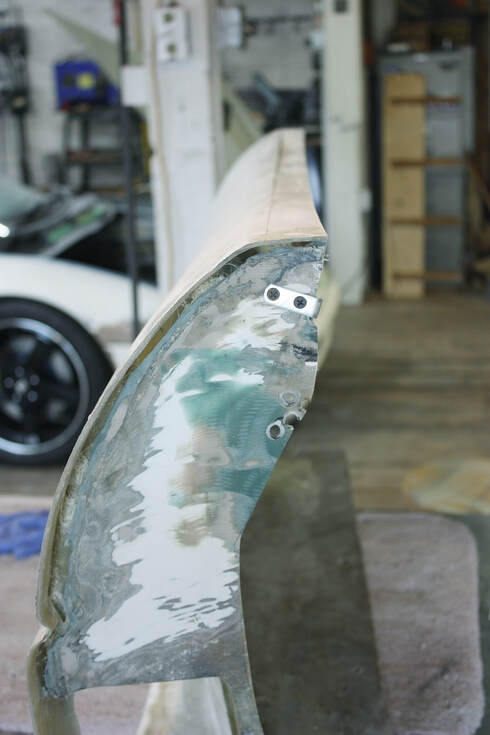
The first order of business was to change the tilt of the upper door surface as viewed edge-on from the rear:
Many of the problems were similar to those on the passenger door, but there were new ones too: the door top edge followed a totally different profile; the rear bulkhead was barely attached to the rest of the door; about 80% of the scoop’s vertical wall looked like alligator skin; and a large hole had been cut in the "ceiling" of the scoop for a door handle.
I realized I couldn’t reshape the door top surface without first reinforcing the rear bulkhead otherwise the door would literally fall apart as I started slicing. But perhaps I could work the two issues together. So I made a cardboard template of the passenger door’s top and superimposed it onto the driver’s door to map out where the changes needed to happen to get them the same.
The first order of business was to change the tilt of the upper door surface as viewed edge-on from the rear:
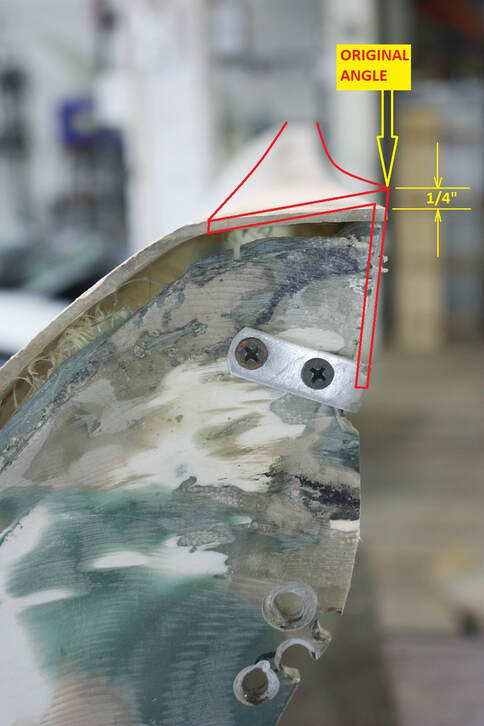
I first separated the upper surface from the aft bulkhead (which honestly didn’t take very much), slit it a dozen inches down its length, then twisted it down ¼”… exactly the amount I needed to finish lowering the back corner of the door from the side view. I temporarily locked it in place using a metal bracket screwed to the rear bulkhead while I got ready to permanently fibreglass it in place. It was also a perfect opportunity to reinforce the bond between the outer skin and the rear bulkhead. Notice the large gap between the two:
I first separated the upper surface from the aft bulkhead (which honestly didn’t take very much), slit it a dozen inches down its length, then twisted it down ¼”… exactly the amount I needed to finish lowering the back corner of the door from the side view. I temporarily locked it in place using a metal bracket screwed to the rear bulkhead while I got ready to permanently fibreglass it in place. It was also a perfect opportunity to reinforce the bond between the outer skin and the rear bulkhead. Notice the large gap between the two:
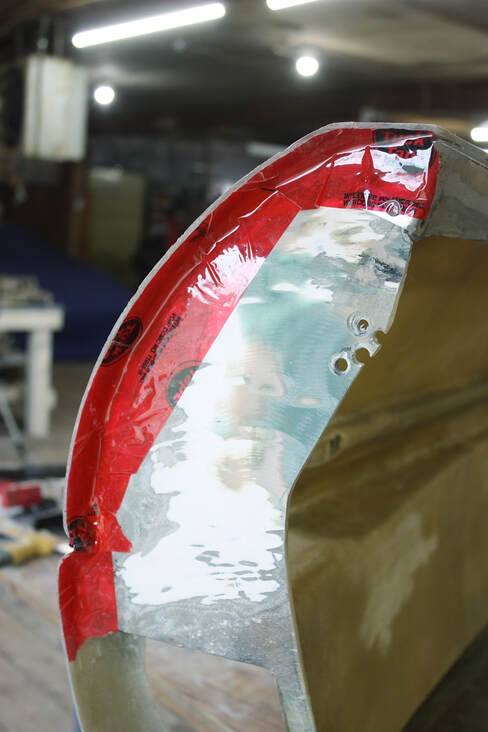
I used some packing tape to keep the resin I’d be applying to the inside of the door from oozing through the gap to the outside:
I used some packing tape to keep the resin I’d be applying to the inside of the door from oozing through the gap to the outside:
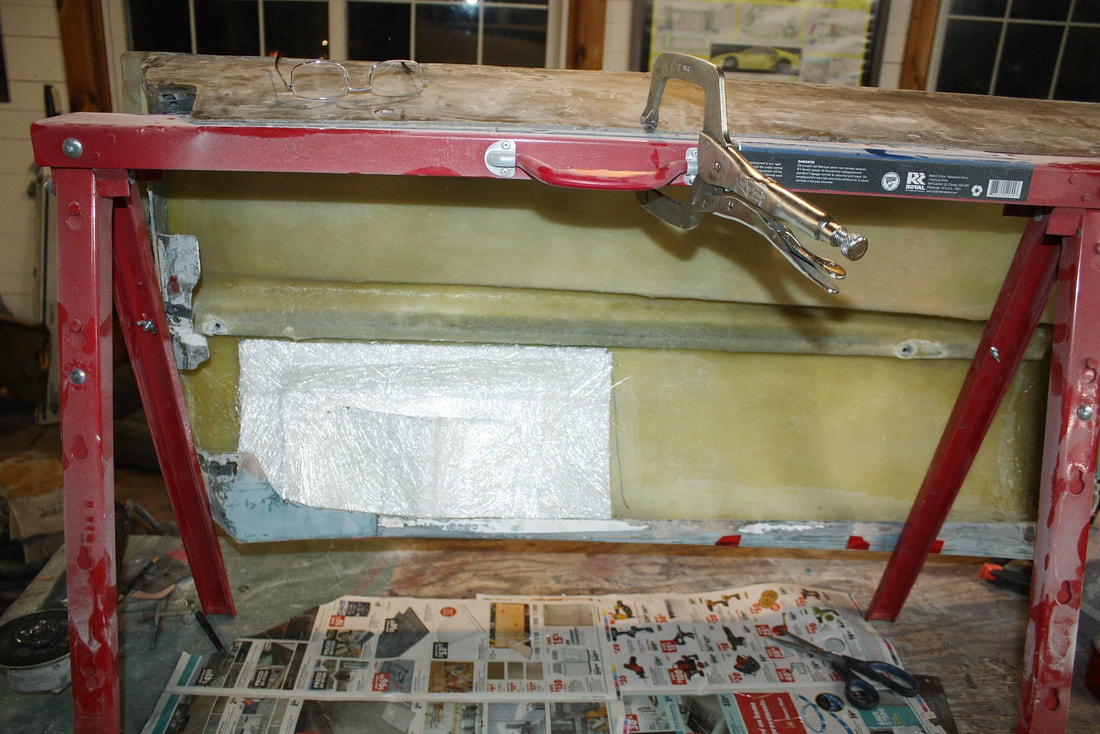
Then I flipped the door upside down on a sawhorse to keep any excess resin in the top half of the door where it might be useful as opposed to running down to the bottom of the door:
Then I flipped the door upside down on a sawhorse to keep any excess resin in the top half of the door where it might be useful as opposed to running down to the bottom of the door:
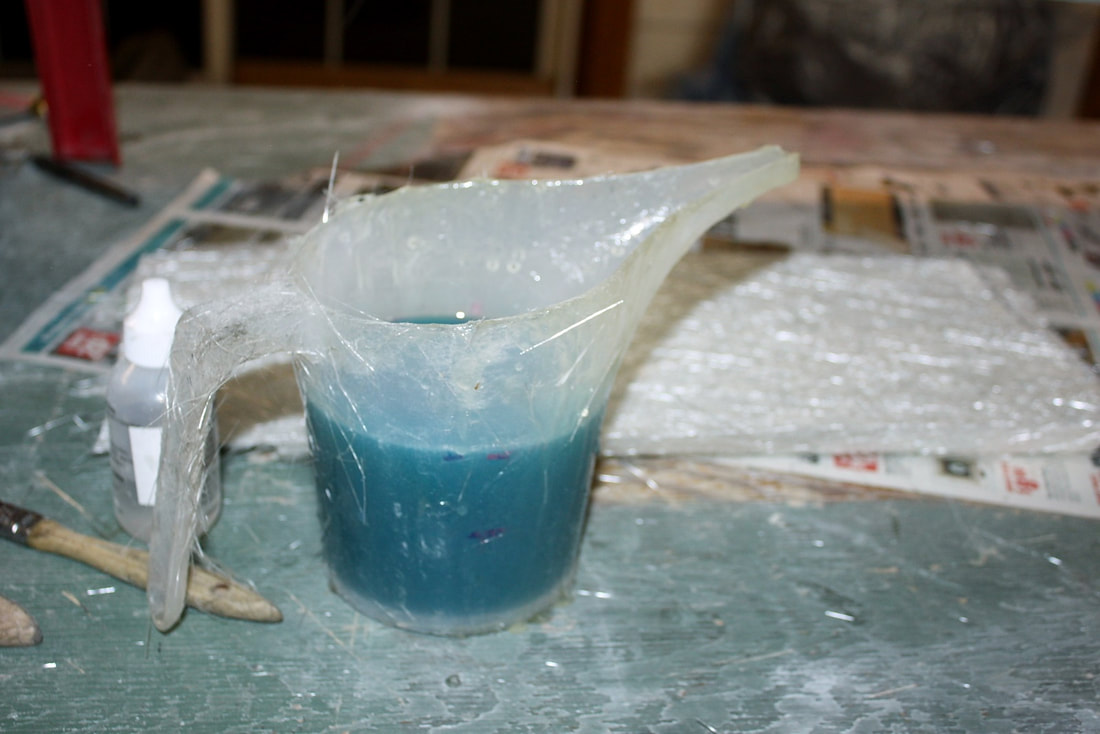
Then I mixed up a cup of polyester resin…:
Then I mixed up a cup of polyester resin…:
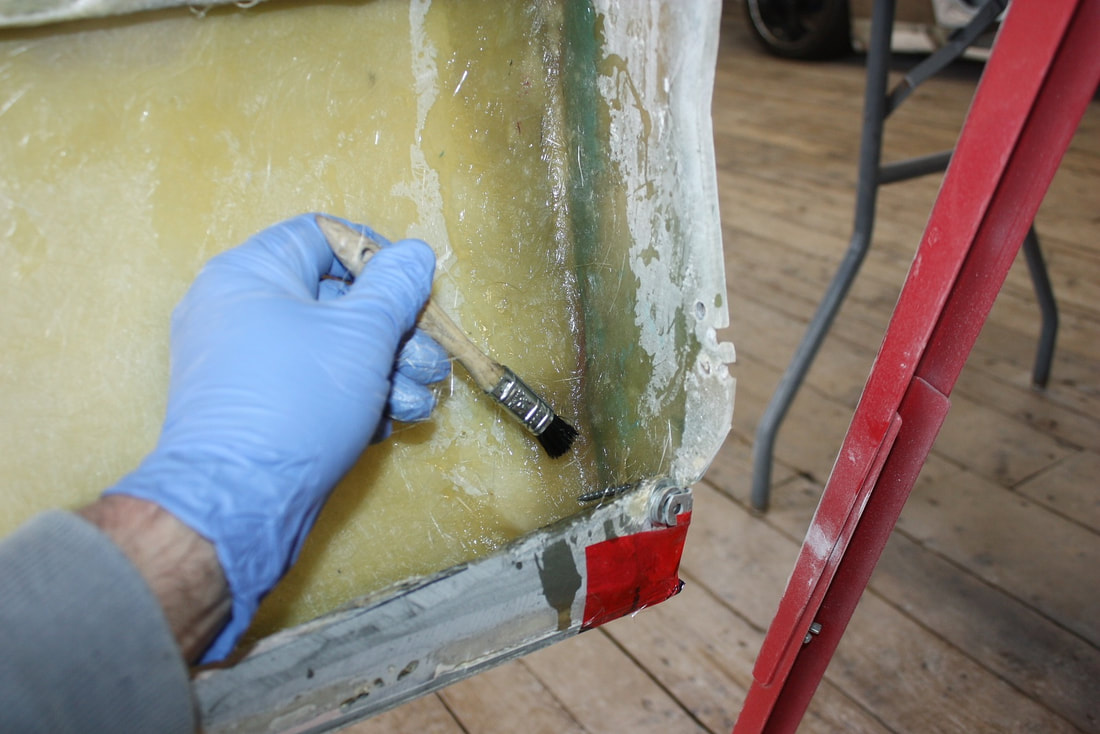
…and saturated four strips of 1.5 oz mat to secure the rear bulkhead and the top edge at the new tilt:
…and saturated four strips of 1.5 oz mat to secure the rear bulkhead and the top edge at the new tilt:
Next, to get the top of the driver’s door to match the profile to the passenger door, I needed to lessen the “swoop” on the aft half and increase it in the front like the red line here:
Next, to get the top of the driver’s door to match the profile to the passenger door, I needed to lessen the “swoop” on the aft half and increase it in the front like the red line here:
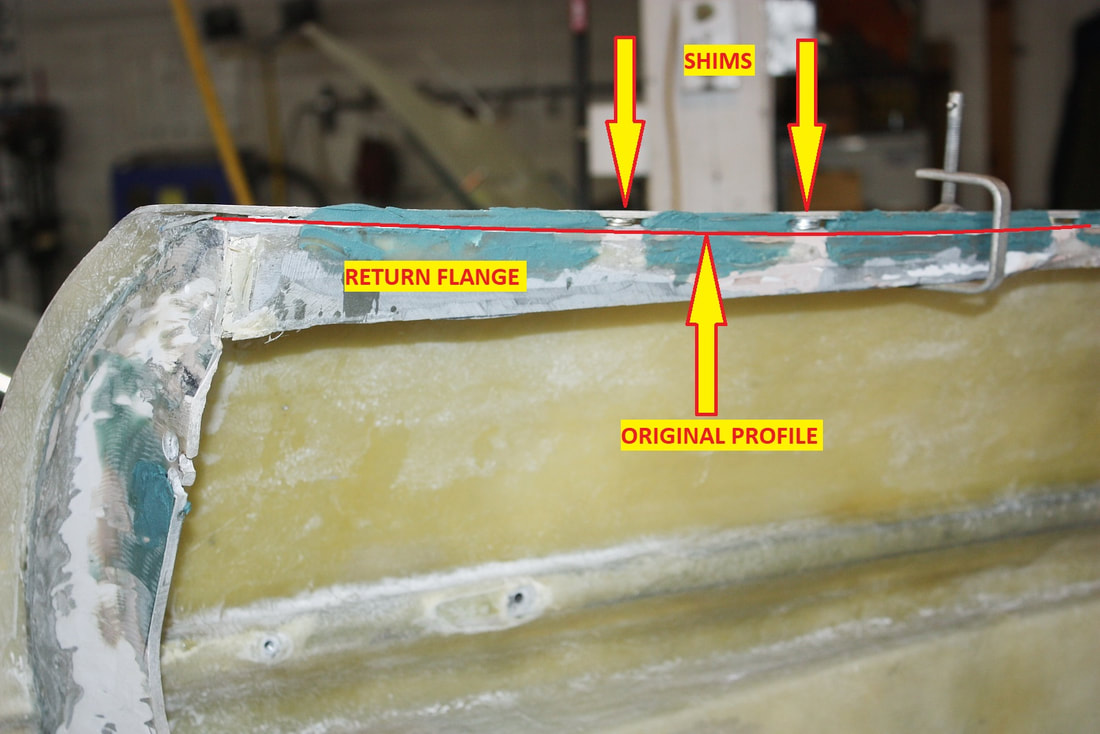
To lessen the curvature on the aft end, I sliced along both sides of the upper surface freeing it up from the return flange and the outer door skin, then propped it up higher using some metal washers as shims on top of the return flange, then stuffed the gap with short strand filler to temporarily hold its new shape like so:
To lessen the curvature on the aft end, I sliced along both sides of the upper surface freeing it up from the return flange and the outer door skin, then propped it up higher using some metal washers as shims on top of the return flange, then stuffed the gap with short strand filler to temporarily hold its new shape like so:
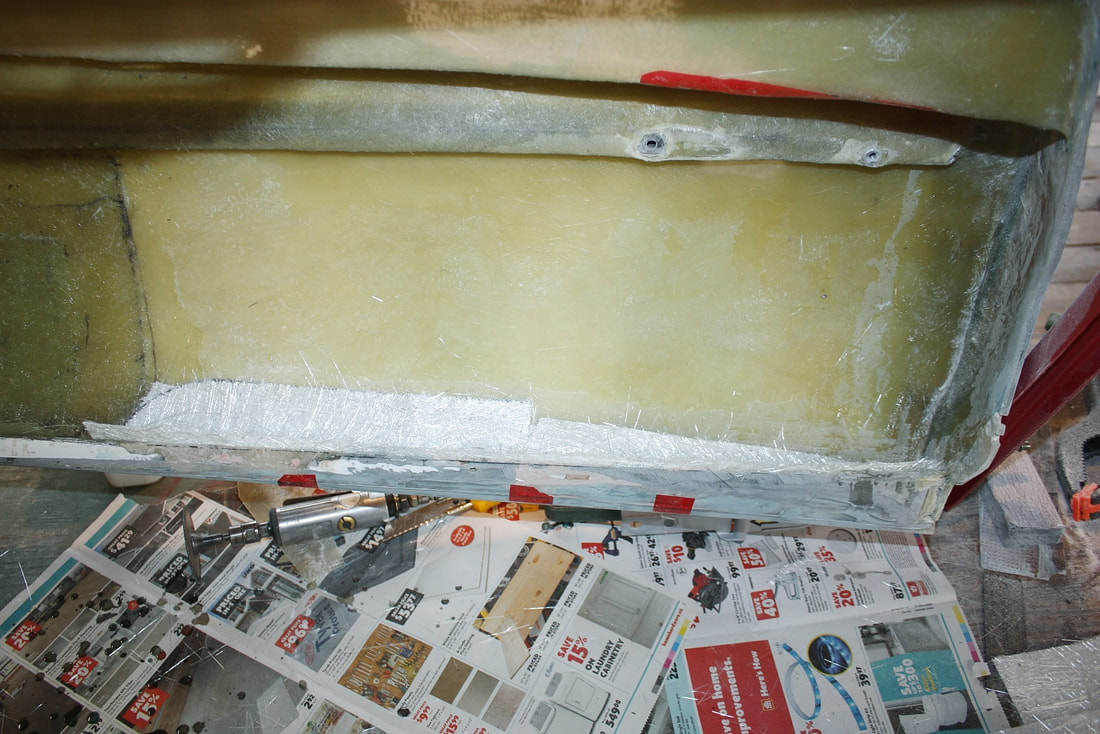
Once the filler hardened I knocked out the shims, plugged the holes with tape, and laid up some mat strips to permanently bond the top edge to the rest of the door skin:
Once the filler hardened I knocked out the shims, plugged the holes with tape, and laid up some mat strips to permanently bond the top edge to the rest of the door skin:
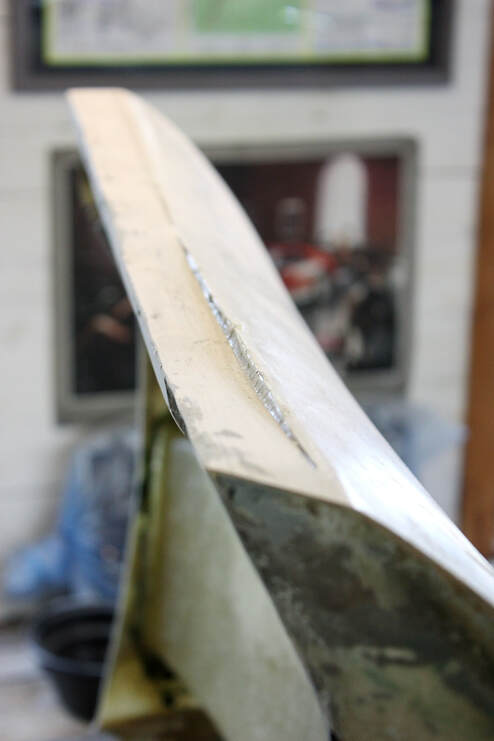
For the front end of the door, I did the reverse. I needed to lower the top edge and give it more swoop so I sliced the first 20” along the outer edge:
For the front end of the door, I did the reverse. I needed to lower the top edge and give it more swoop so I sliced the first 20” along the outer edge:

Then sliced a very thin D-shape out of the return flange using my cardboard template from the passenger door:
Then sliced a very thin D-shape out of the return flange using my cardboard template from the passenger door:
By pinching the door top surface down onto the newly shaped return flange, I got the profile I was looking for:
By pinching the door top surface down onto the newly shaped return flange, I got the profile I was looking for:
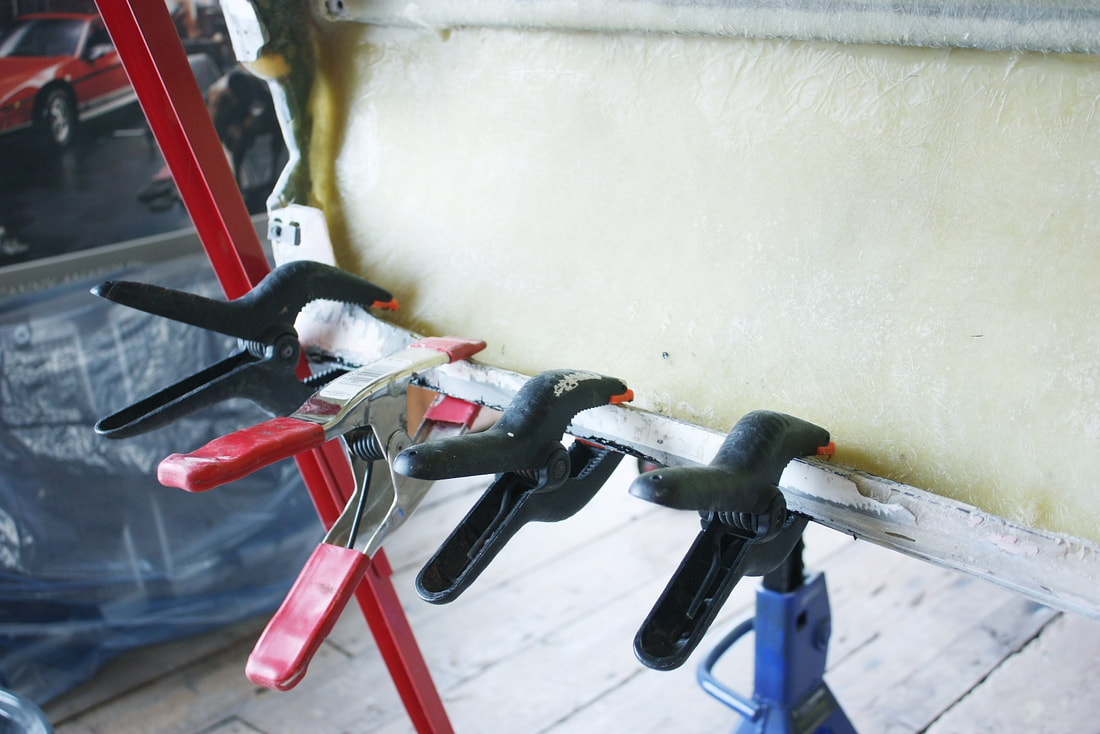
Using clamps and more fibreglass mat I bonded the forward end of the door top back to the rest of the door with the proper contour (again... here the door is upside down):
Using clamps and more fibreglass mat I bonded the forward end of the door top back to the rest of the door with the proper contour (again... here the door is upside down):
Once resin hardened, I trimmed off the excess fibreglass with a die grinder:
Once resin hardened, I trimmed off the excess fibreglass with a die grinder:

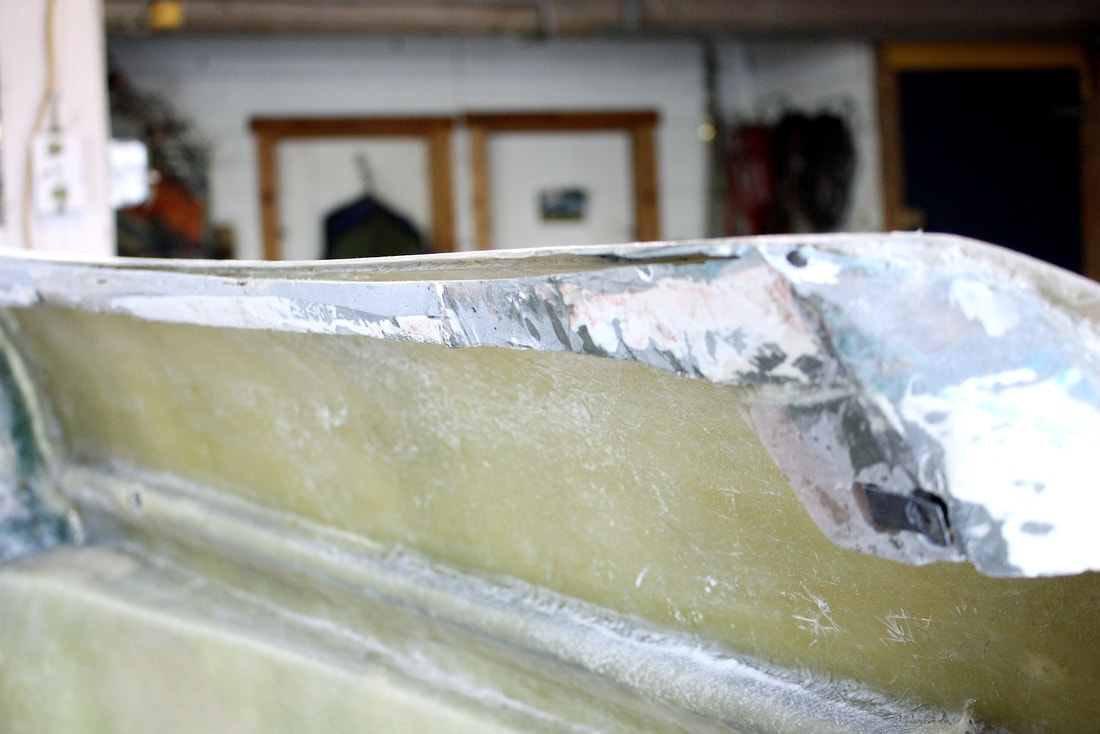
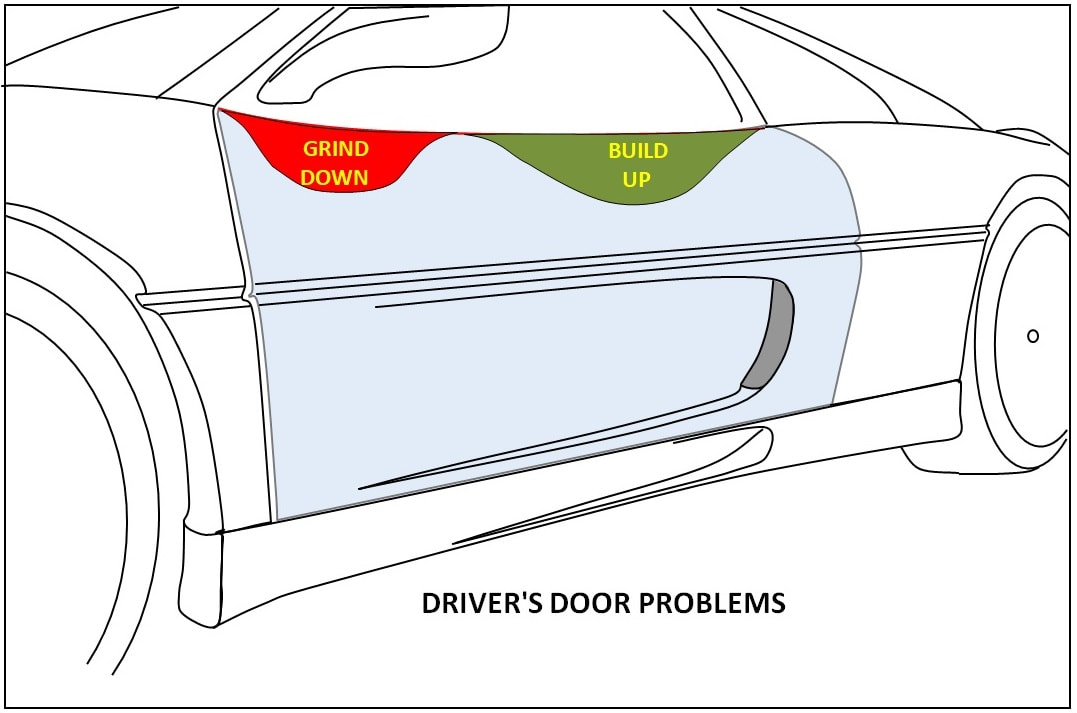
All this work and still the only thing I accomplished was reshaping the 1.25” wide flat surface at the top of the door. The rest of the outer door skin was still shaped to meet up with the door top’s old profile so it stuck too far up (and out) at the front of the door…:
All this work and still the only thing I accomplished was reshaping the 1.25” wide flat surface at the top of the door. The rest of the outer door skin was still shaped to meet up with the door top’s old profile so it stuck too far up (and out) at the front of the door…:
…and was sunken too low for the back half of the door. The back half I could build up, but the front half had to be ground down:
…and was sunken too low for the back half of the door. The back half I could build up, but the front half had to be ground down:
Unfortunately the skin at the front of the door was thinner than the amount it had to be ground down, so I added several extra layers of mat on the inside to give it more bulk:
Unfortunately the skin at the front of the door was thinner than the amount it had to be ground down, so I added several extra layers of mat on the inside to give it more bulk:
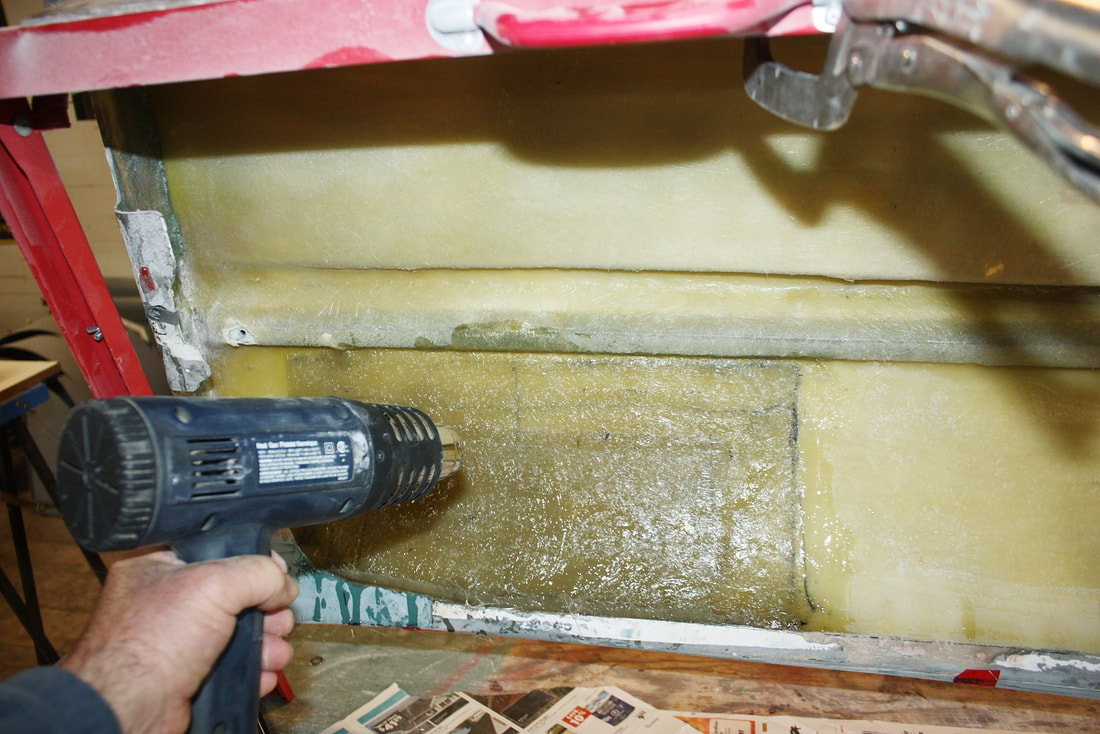
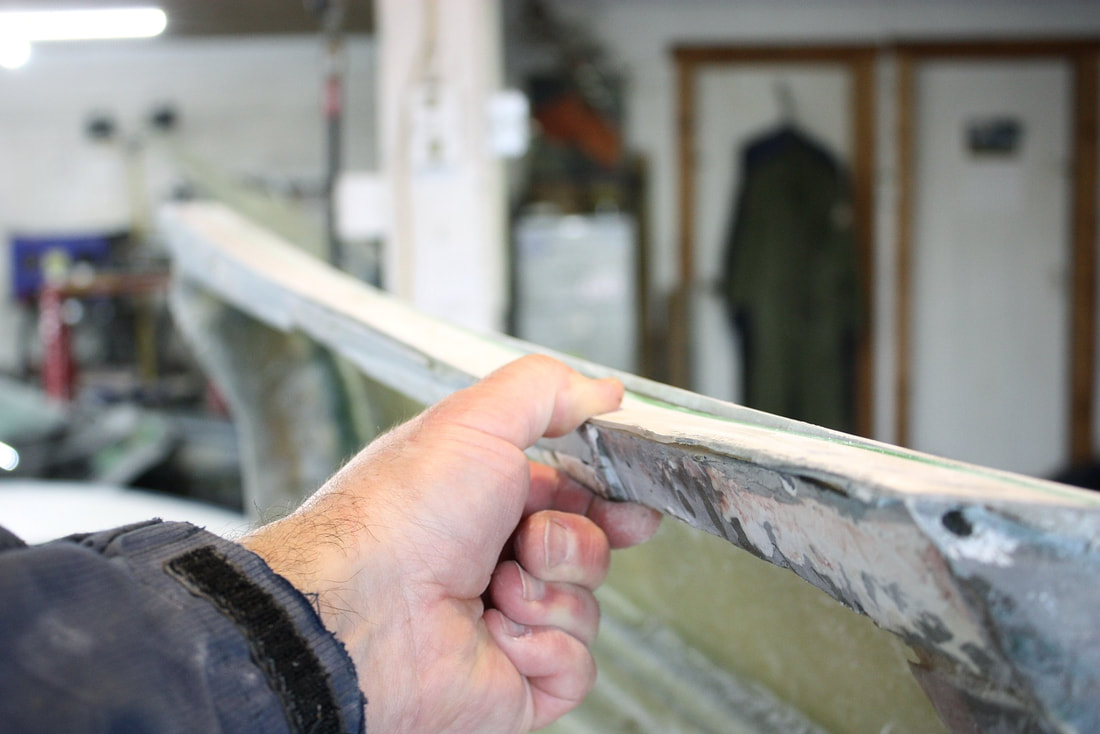
With the added thickness, I was able to use my 1” pneumatic belt sander to reduce the profile of the door skin to match that of the top edge:
With the added thickness, I was able to use my 1” pneumatic belt sander to reduce the profile of the door skin to match that of the top edge:
The only thing needed after that was a thin skim coat at the front and a thicker filler coat on the back half of the door:
The only thing needed after that was a thin skim coat at the front and a thicker filler coat on the back half of the door:
Once sanded smooth, I was ready to move on to the next problem area on the driver’s door.
Once sanded smooth, I was ready to move on to the next problem area on the driver’s door.

 RSS Feed
