In my last post I covered many of the problems with both rocker panels and made plans for addressing them. Some were cosmetic, others were structural. In this post, I tackle the problems with big structural underpinnings.
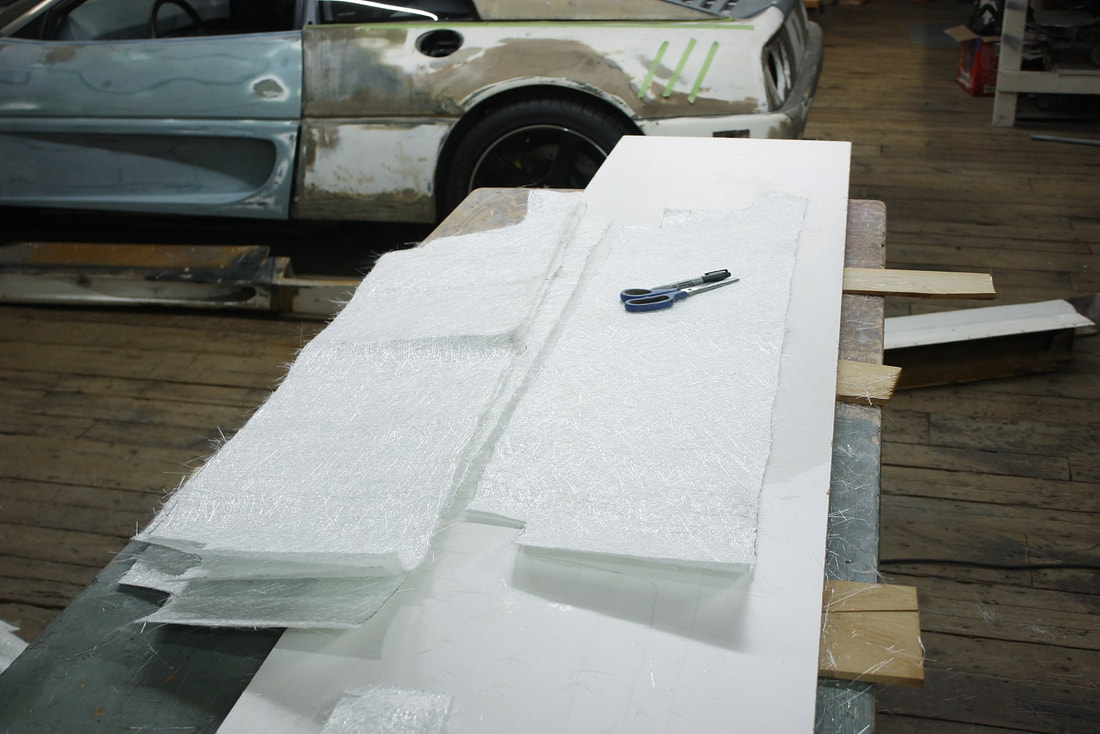
For starters, I knew I needed new fibreglass door sills, so while they were still intact I traced the general shape onto some 1.5 oz mat:
In my last post I covered many of the problems with both rocker panels and made plans for addressing them. Some were cosmetic, others were structural. In this post, I tackle the problems with big structural underpinnings.
For starters, I knew I needed new fibreglass door sills, so while they were still intact I traced the general shape onto some 1.5 oz mat:
I cut a total of four layers for each door sill to end up with a sill that would be about 3/16” thick once saturated with resin:
I cut a total of four layers for each door sill to end up with a sill that would be about 3/16” thick once saturated with resin:
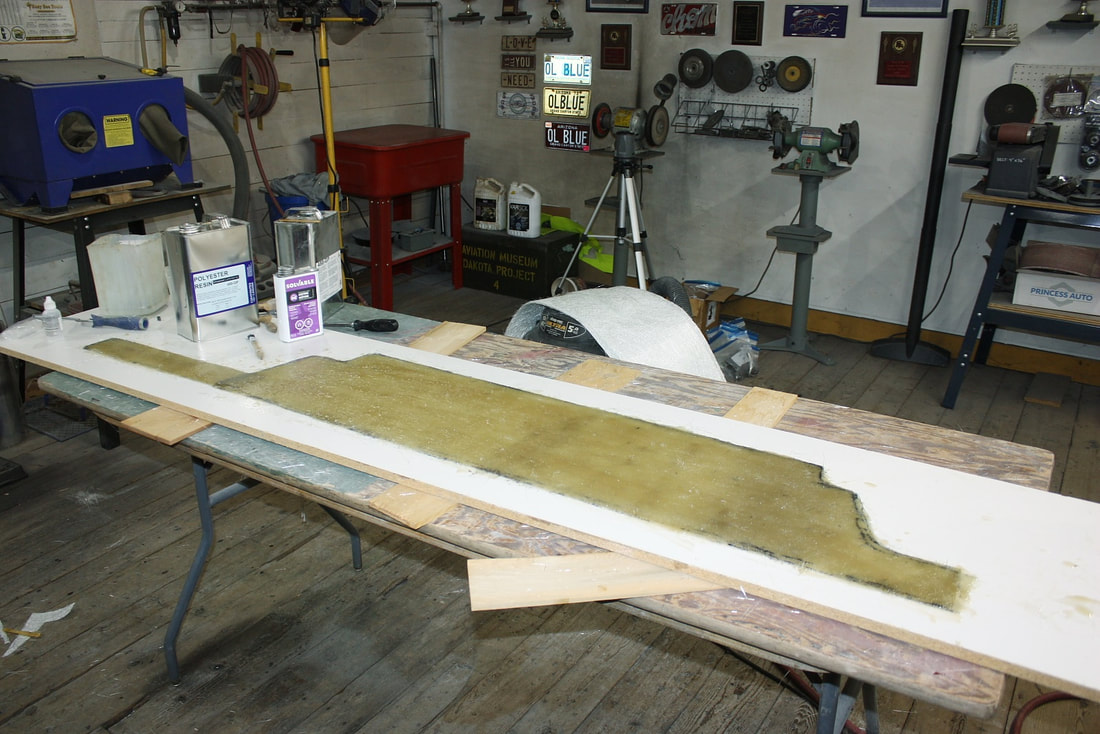
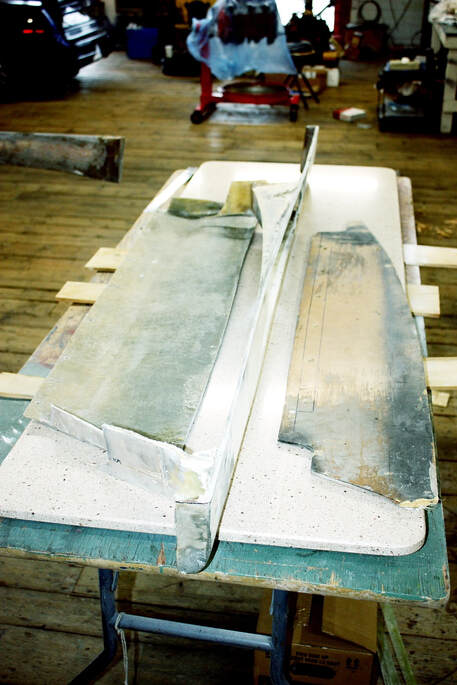
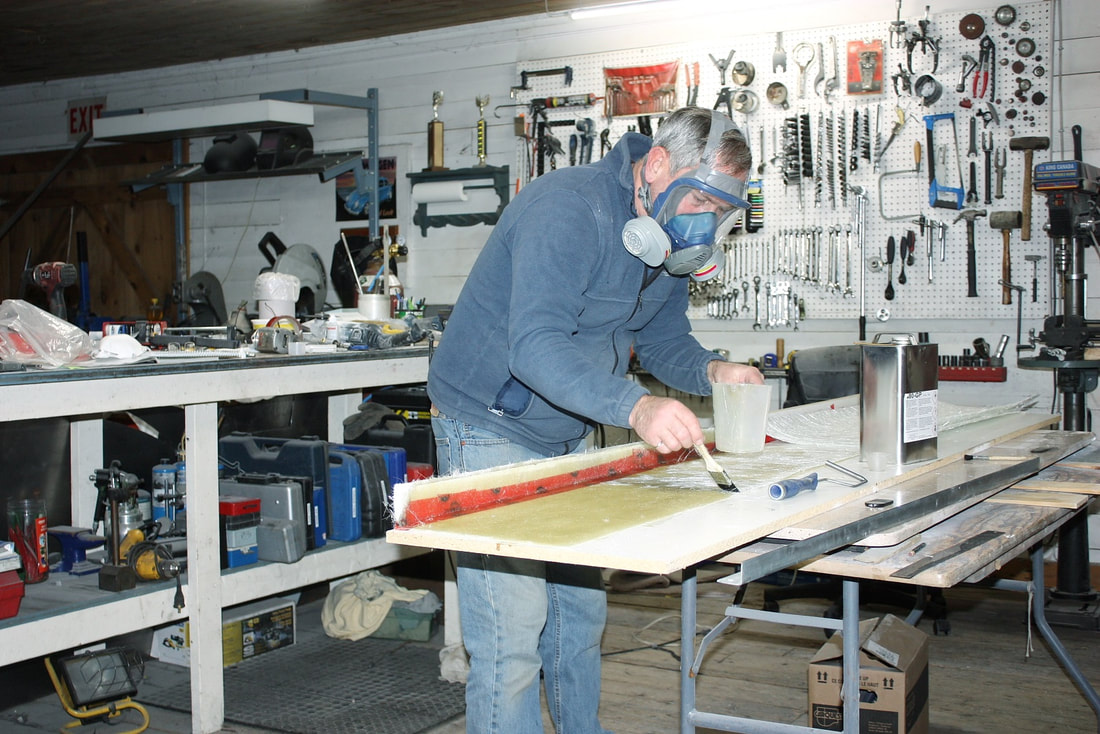
As with other large flat panels I’ve made before, I laid up the door sills on a piece of Melamine particle board since it provides a nice smooth surface that the resin doesn’t stick to. (The cedar shakes under the particle board are to level it out):
As with other large flat panels I’ve made before, I laid up the door sills on a piece of Melamine particle board since it provides a nice smooth surface that the resin doesn’t stick to. (The cedar shakes under the particle board are to level it out):
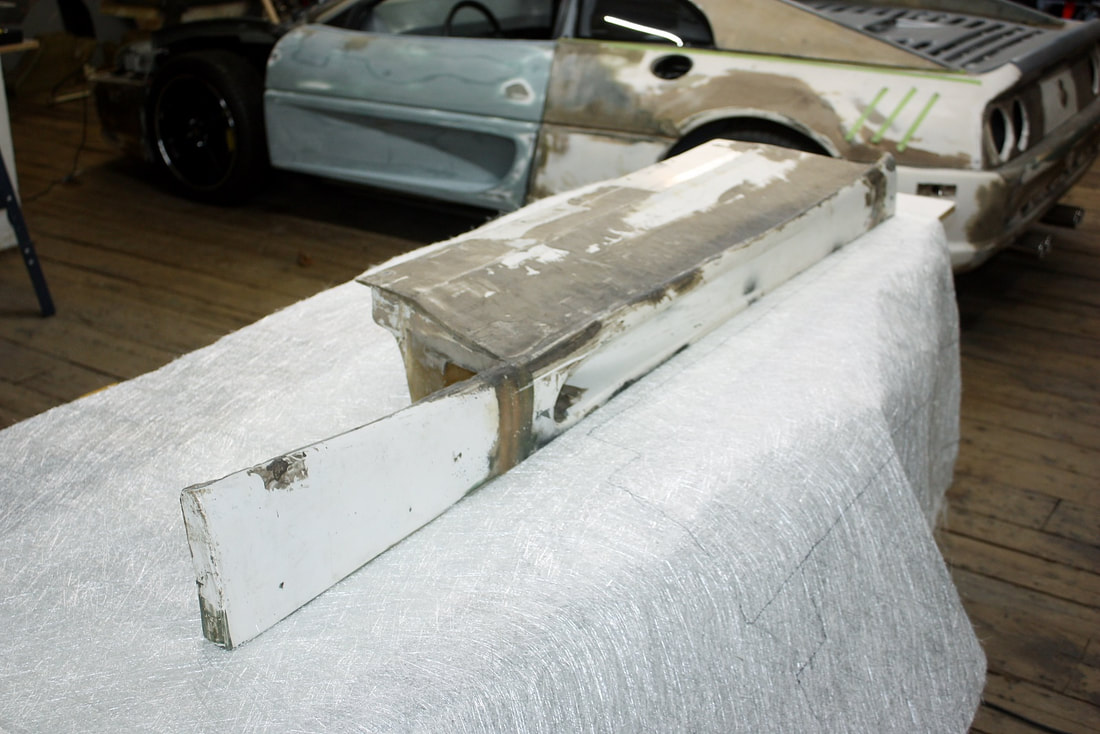
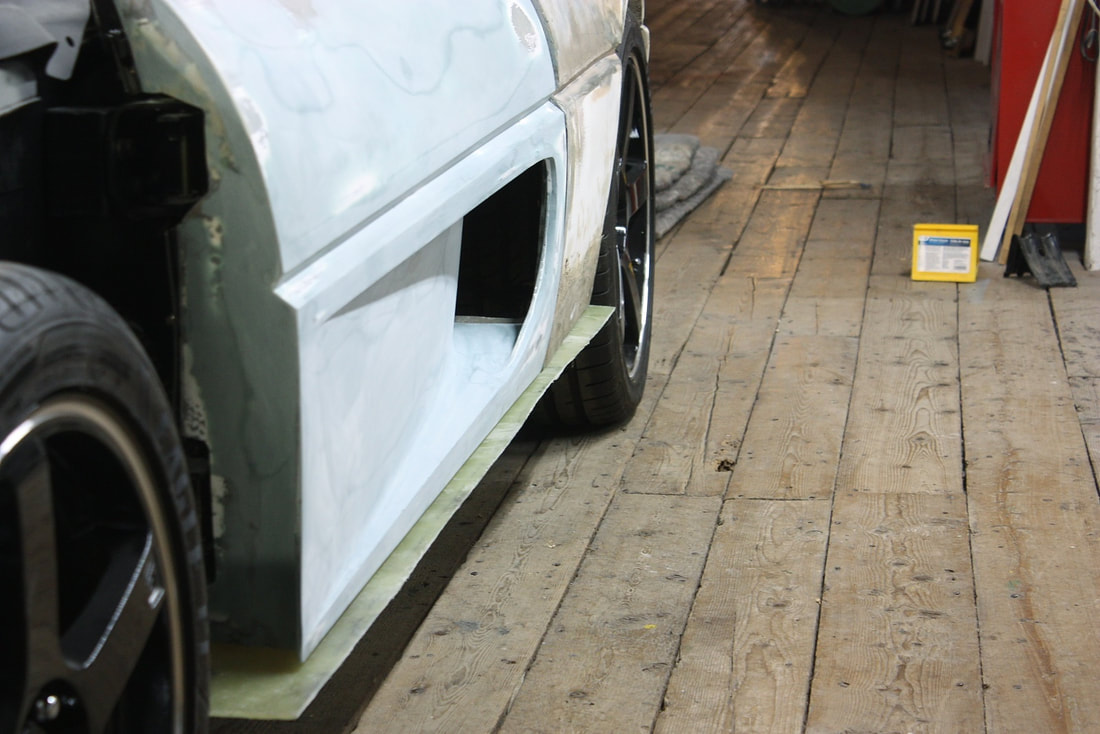
Once the new sills had cured for two days I trimmed them, drilled mounting holes, and mocked them up on the chassis to locate the outer edge in relation to the door skin:
Once the new sills had cured for two days I trimmed them, drilled mounting holes, and mocked them up on the chassis to locate the outer edge in relation to the door skin:
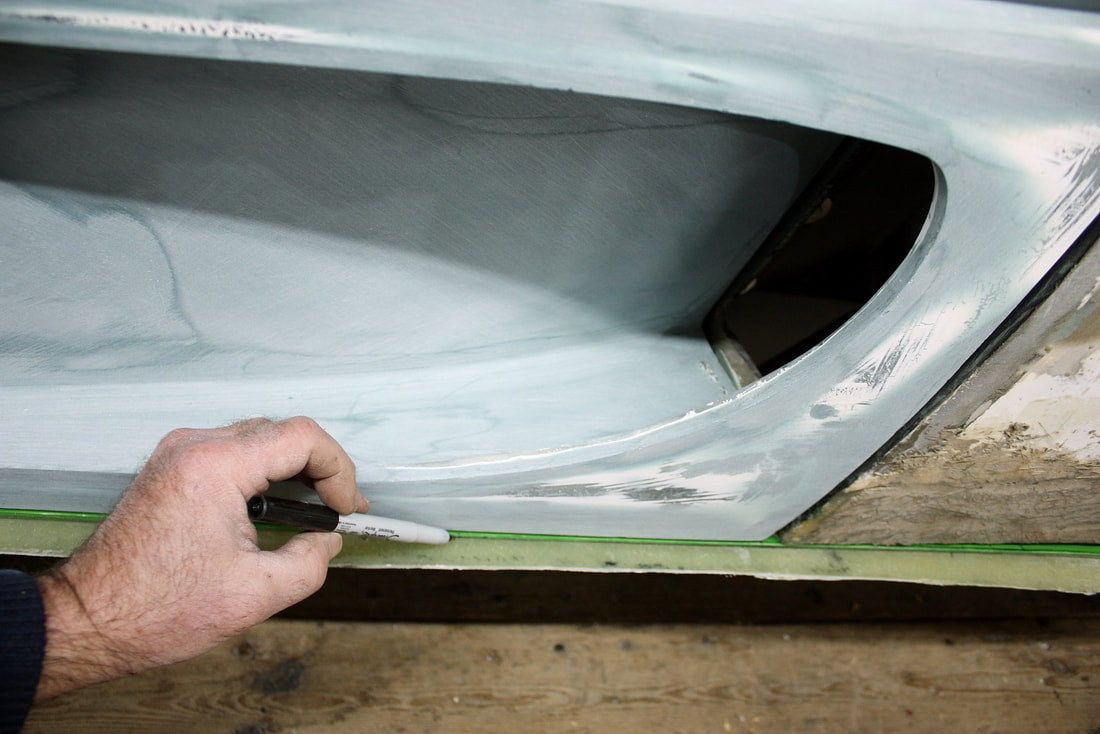
I left them extra wide to be able to mark and trim them up flush with the bottom edge of the doors:
I left them extra wide to be able to mark and trim them up flush with the bottom edge of the doors:
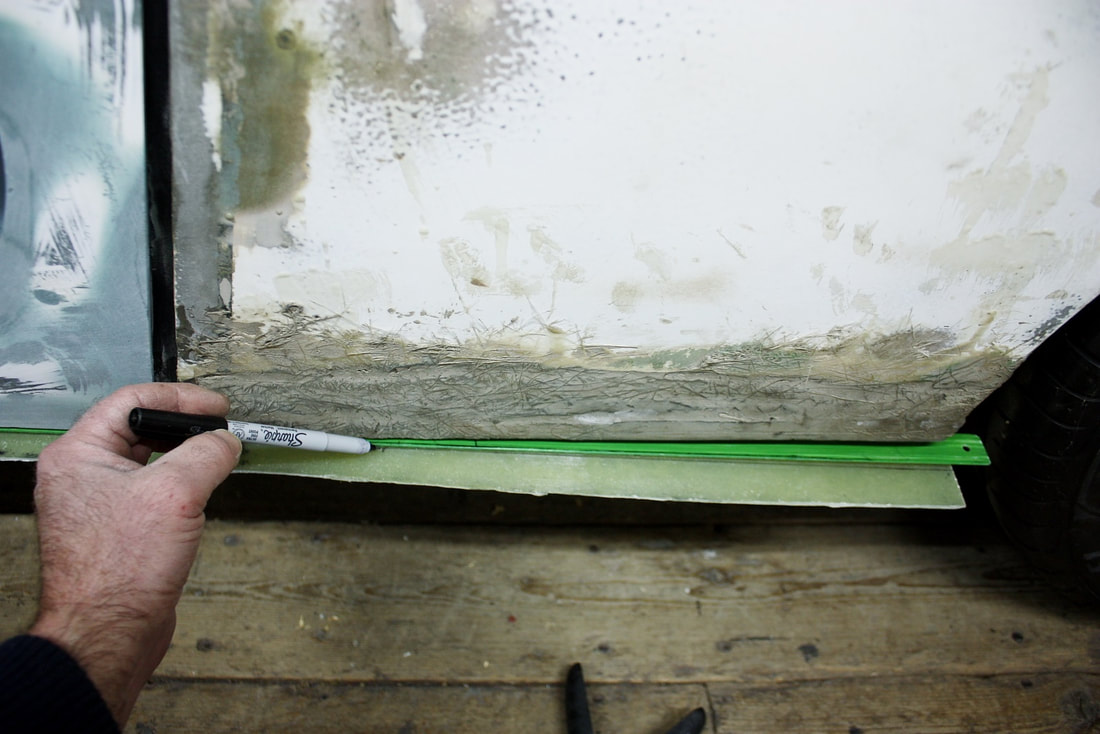
Because the rear quarters weren’t properly shaped yet, I couldn’t use them as I did with the bottom edges of the doors to mark where the rocker should be trimmed. Instead, I used a long straight-edge (green stick) along the door bottom and extended a straight line back to the rear wheelhouse:
Because the rear quarters weren’t properly shaped yet, I couldn’t use them as I did with the bottom edges of the doors to mark where the rocker should be trimmed. Instead, I used a long straight-edge (green stick) along the door bottom and extended a straight line back to the rear wheelhouse:
I took the sill off the chassis to make the final cut with a thin cut-off wheel in my angle grinder, then mocked it up again to check fitment:
I took the sill off the chassis to make the final cut with a thin cut-off wheel in my angle grinder, then mocked it up again to check fitment:
Now that I had a pair of perfectly flat, perfectly straight door sills, I focused on removing the MDF sills on both rockers. Once again I used my angle grinder with a cut-off wheel but had to be careful not to cut into the underlying rocker scoops:
Now that I had a pair of perfectly flat, perfectly straight door sills, I focused on removing the MDF sills on both rockers. Once again I used my angle grinder with a cut-off wheel but had to be careful not to cut into the underlying rocker scoops:
I cut the sills outdoors despite the chilly temps to minimize the amount of dust in the shop, then brought them inside to finish them up. The MDF had been bonded solidly to the top of the scoops causing me to have to deal with those areas separately:
I cut the sills outdoors despite the chilly temps to minimize the amount of dust in the shop, then brought them inside to finish them up. The MDF had been bonded solidly to the top of the scoops causing me to have to deal with those areas separately:
I needed a chisel to scrape the remnants of the MDF off the scoop top:
I needed a chisel to scrape the remnants of the MDF off the scoop top:
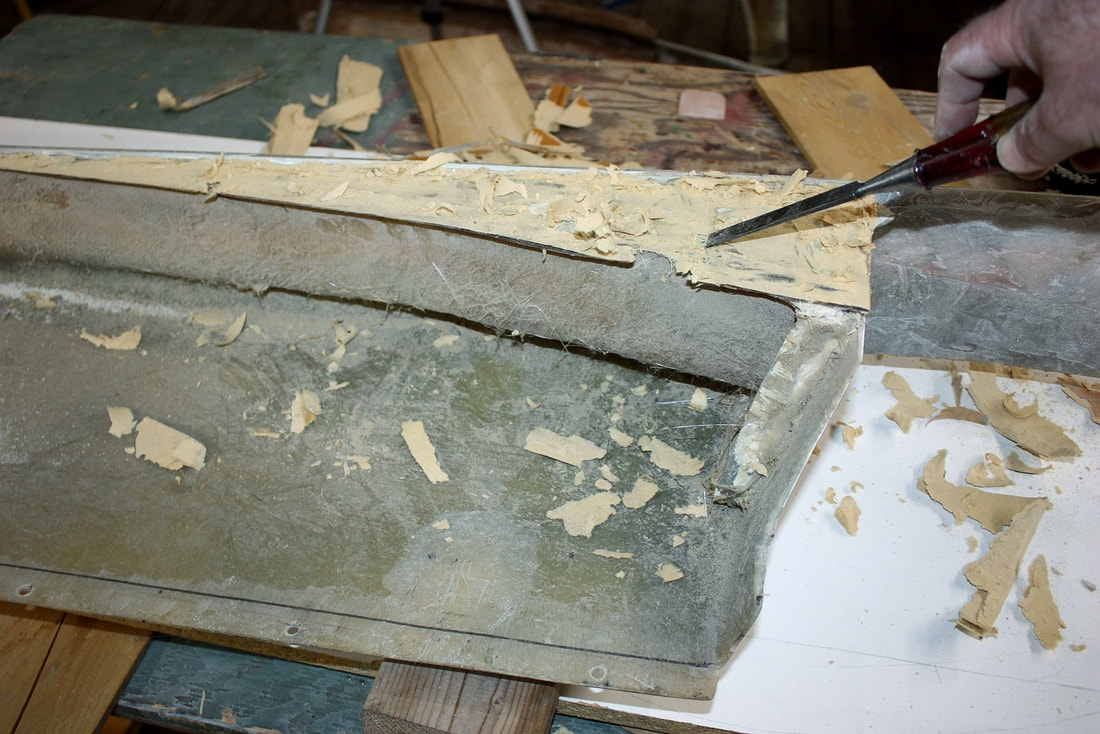
Once all the MDF was shaved clean, I had a fairly smooth surface on top of the scoop on which to bond my own sills. Here’s the driver’s side rocker panel, less the MDF door sill:
Once all the MDF was shaved clean, I had a fairly smooth surface on top of the scoop on which to bond my own sills. Here’s the driver’s side rocker panel, less the MDF door sill:
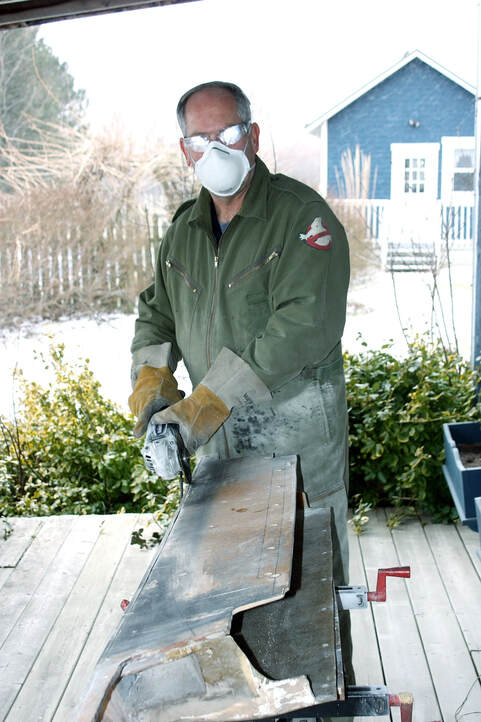
Next, I moved on to addressing the rocker skid plates, or rocker bottoms. They had been remolded by the previous owner to hide lower hanging steel rocker reinforcements since his car was destined to be a convertible. With my car being a coupe, his fibreglass rocker mods unnecessarily reduced my ground clearance by 25mm, so that needed to be changed! Here, I was finishing off the last few mms with a hand saw to avoid a mishap with the clumsier angle grinder:
Next, I moved on to addressing the rocker skid plates, or rocker bottoms. They had been remolded by the previous owner to hide lower hanging steel rocker reinforcements since his car was destined to be a convertible. With my car being a coupe, his fibreglass rocker mods unnecessarily reduced my ground clearance by 25mm, so that needed to be changed! Here, I was finishing off the last few mms with a hand saw to avoid a mishap with the clumsier angle grinder:

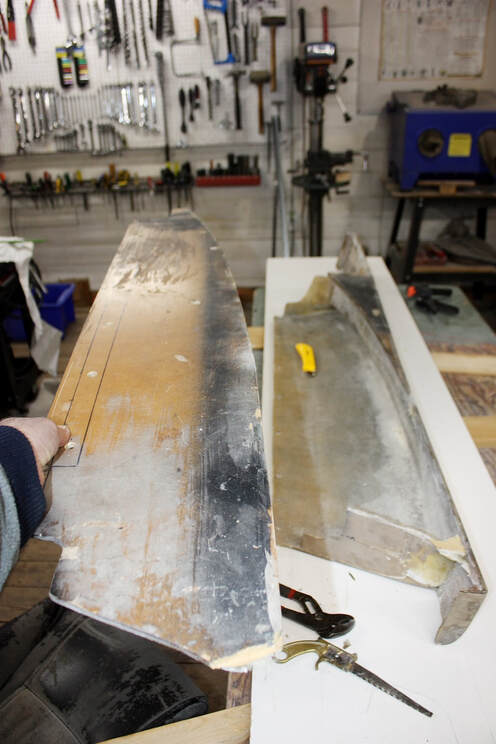
This next photo is the passenger side rocker with both the sill and skid plate lopped off. The outer faces of the rocker panels were the only parts I was keeping. Even then, they would need some serious tweaking. I did consider tossing both rockers out and starting fresh, but decided to keep plugging and chugging:
This next photo is the passenger side rocker with both the sill and skid plate lopped off. The outer faces of the rocker panels were the only parts I was keeping. Even then, they would need some serious tweaking. I did consider tossing both rockers out and starting fresh, but decided to keep plugging and chugging:
One last modification to the LH rocker was needed before I could start rebuilding. I needed to shorten the passenger side by 20mm to make it the same length as the driver’s side. I cut out the offending length from the seam where the front fender extension met up with the central door section (upside down in this photo):
One last modification to the LH rocker was needed before I could start rebuilding. I needed to shorten the passenger side by 20mm to make it the same length as the driver’s side. I cut out the offending length from the seam where the front fender extension met up with the central door section (upside down in this photo):

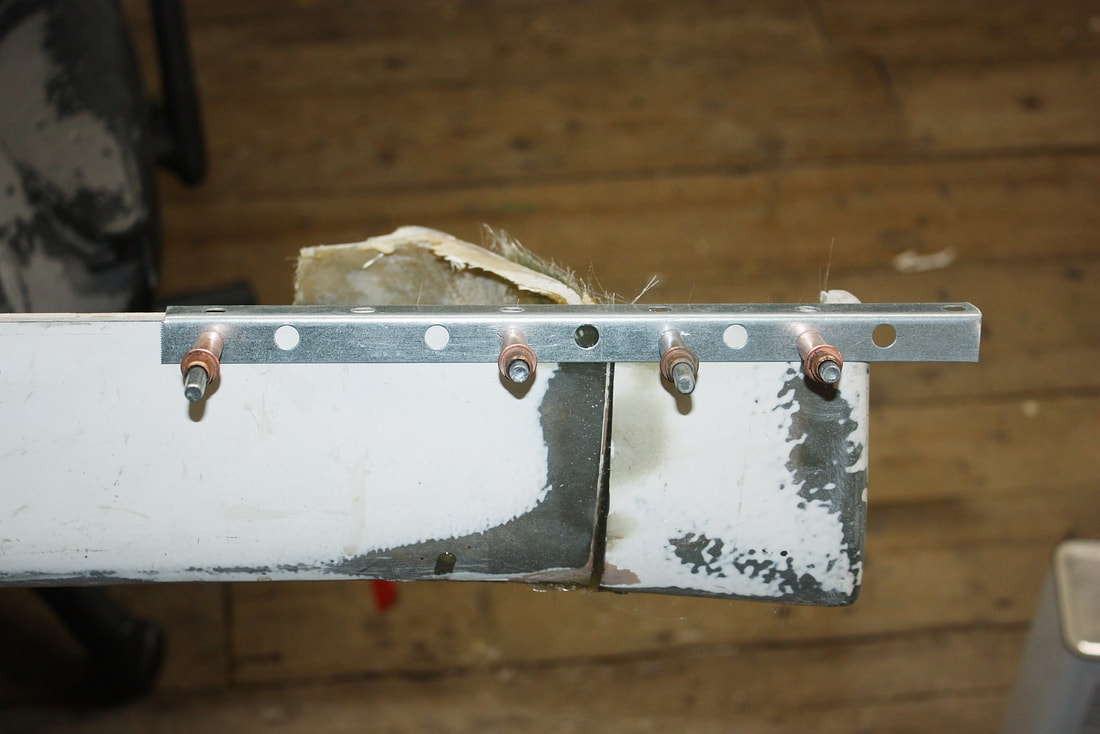
To reattach the end, I temporarily fastened a length of angled steel to draw the piece in-line with the rest of the rocker in three dimensions:
To reattach the end, I temporarily fastened a length of angled steel to draw the piece in-line with the rest of the rocker in three dimensions:
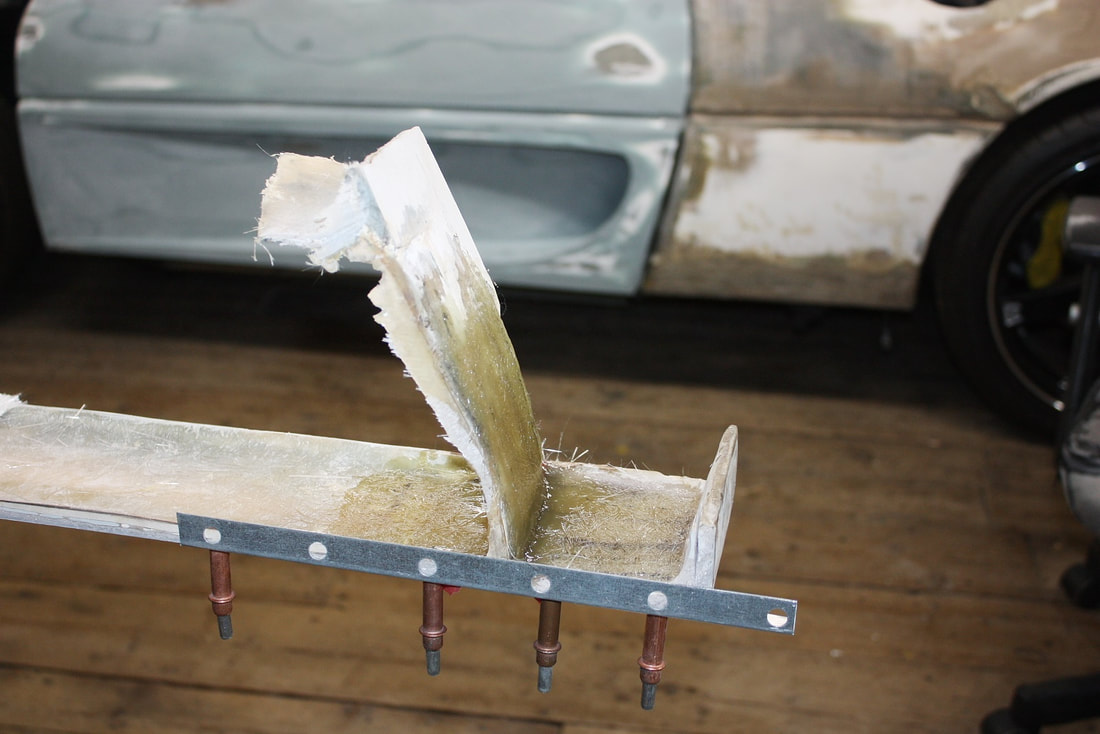
Then I glassed it to a small bulkhead on the hidden side with several layers of fibreglass mat, like so:
Then I glassed it to a small bulkhead on the hidden side with several layers of fibreglass mat, like so:
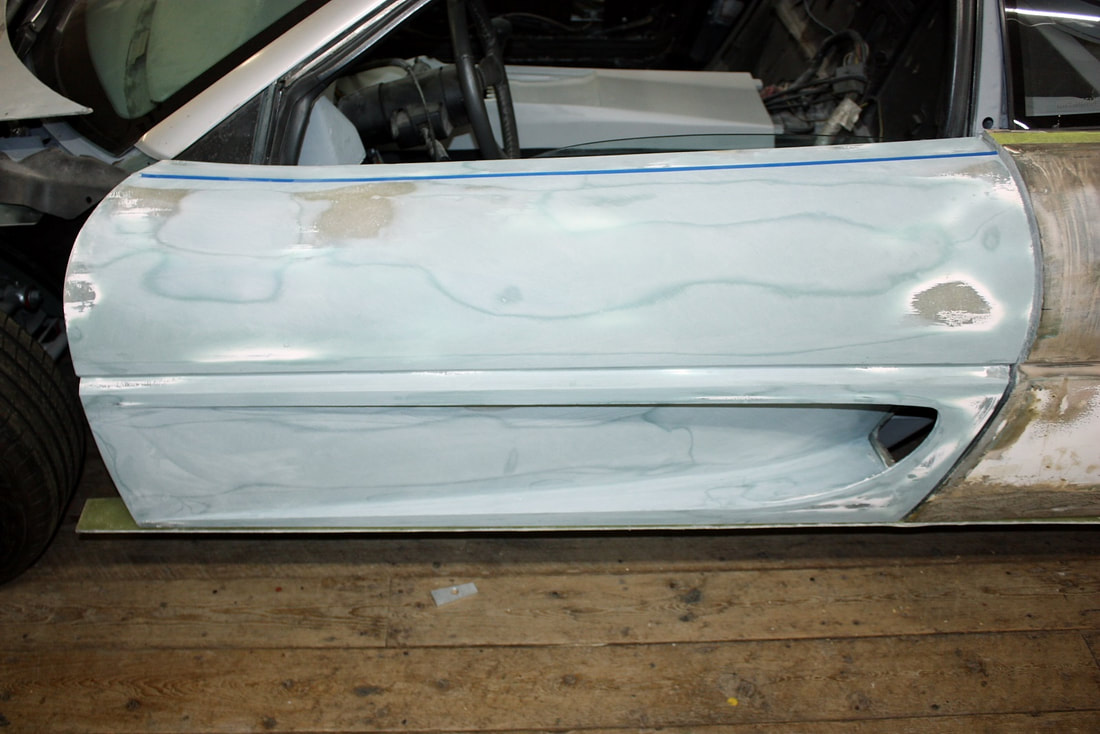
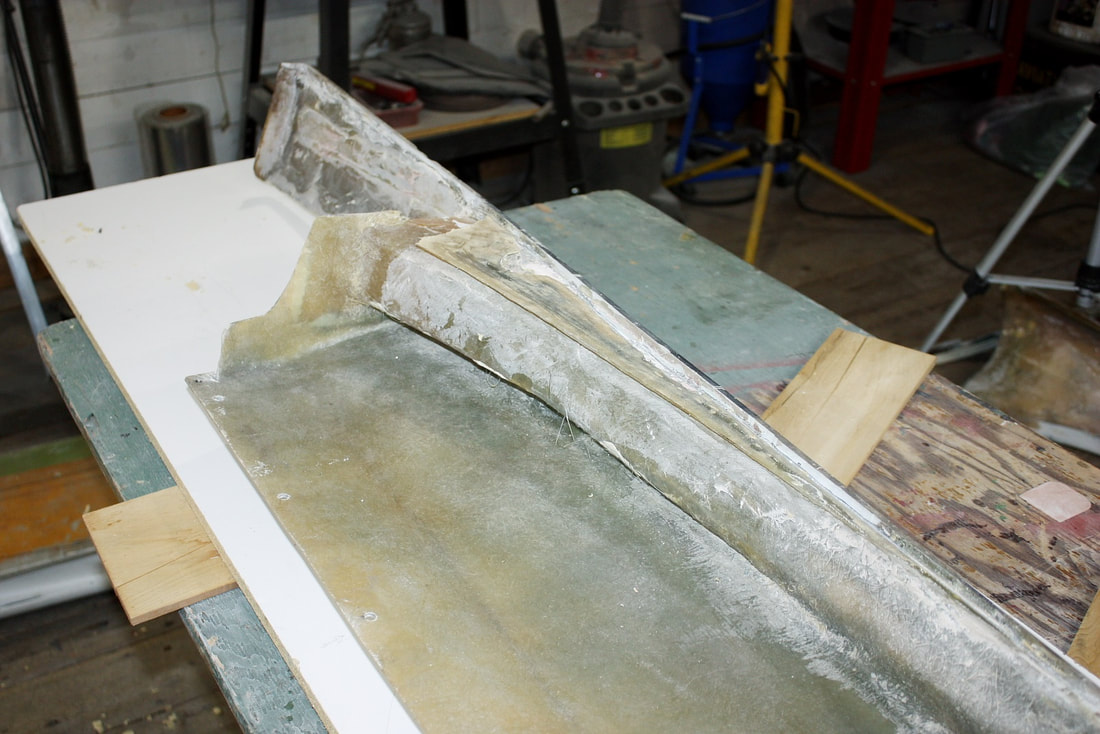
Having cut off both the sills and the rocker bottoms, the outer faces with the integral scoops had become much more flexible, which turned out to be a good thing! Recall from my last post that both rockers were “coke-bottle” shaped, and the “ramps” leading up to the scoop openings were terribly wavy:
Having cut off both the sills and the rocker bottoms, the outer faces with the integral scoops had become much more flexible, which turned out to be a good thing! Recall from my last post that both rockers were “coke-bottle” shaped, and the “ramps” leading up to the scoop openings were terribly wavy:

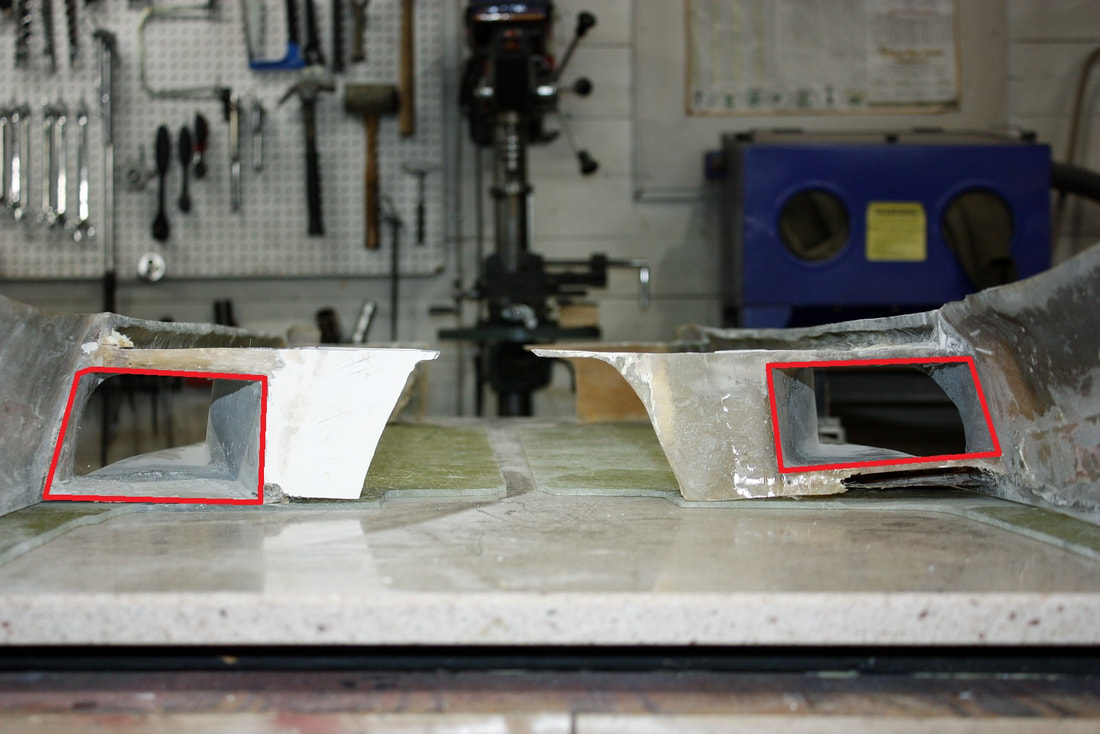
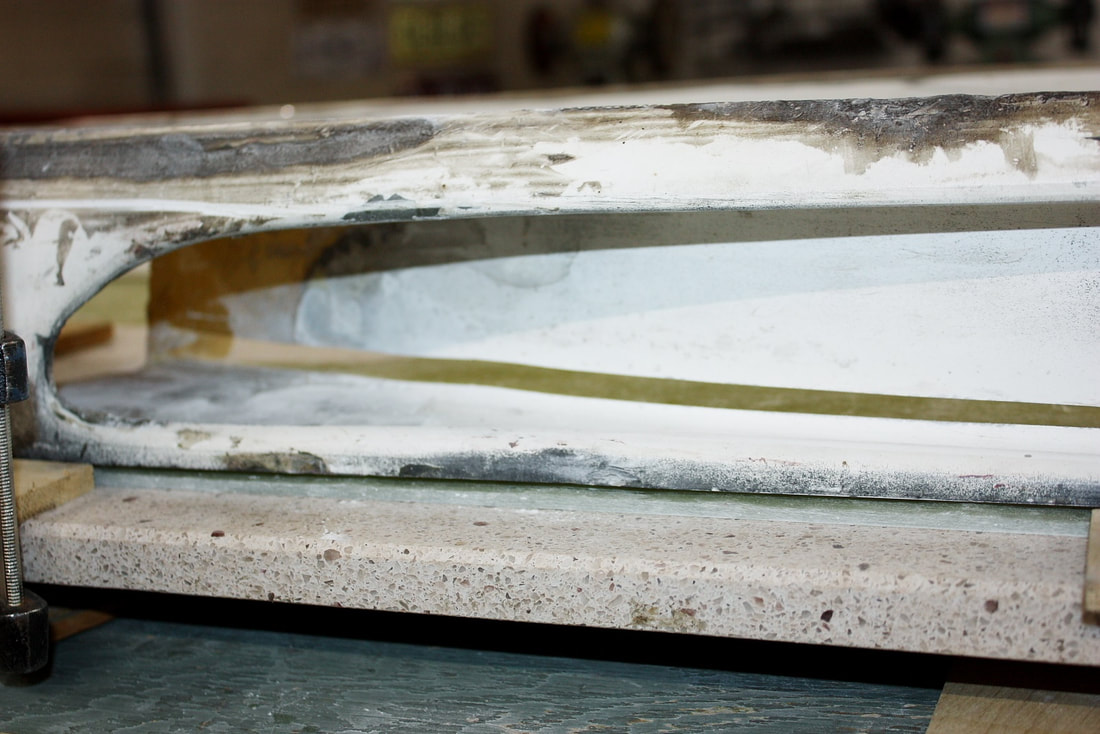
From this view (from behind and upside-down), the difference in the shape of the scoop openings is really obvious too. Neither scoop was bonded to the rockers at the same height or twist angle, and they were both different sizes!:
From this view (from behind and upside-down), the difference in the shape of the scoop openings is really obvious too. Neither scoop was bonded to the rockers at the same height or twist angle, and they were both different sizes!:
I was faced with the same problems on the much larger door scoops, so I tacked them the same way. I made two long slices up the length of the scoops to separate the scoop “ceilings” from the walls, like so:
I was faced with the same problems on the much larger door scoops, so I tacked them the same way. I made two long slices up the length of the scoops to separate the scoop “ceilings” from the walls, like so:
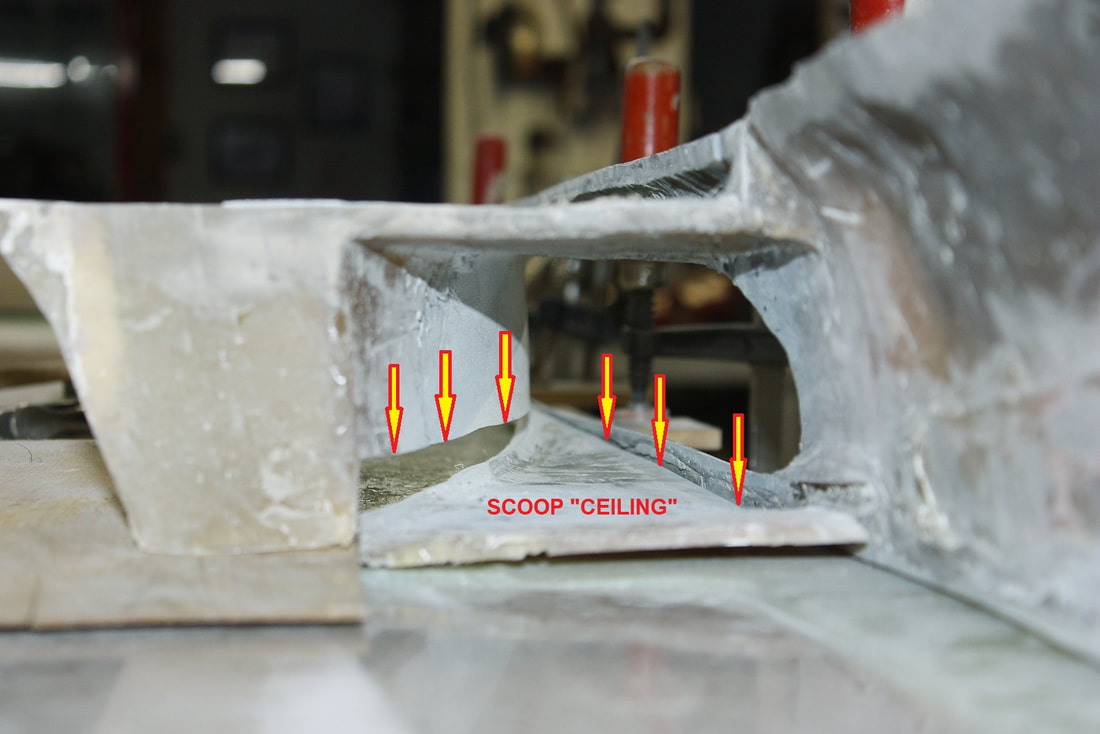
These slices allowed me to match the size and shape of both scoop openings, remove the twist in the lead-up ramps, and easily bend the coke-bottle shape out of the rockers themselves.
The next step was to bond the rockers to the sills to keep them from returning to their old shapes. Here, they’re awaiting a generous scuffing using 80 grit paper along the mating surfaces to promote adhesion:
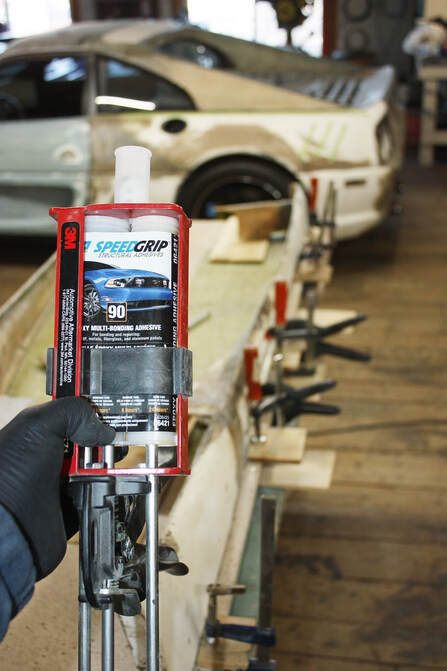
Bonding the rockers to the sills had to be done in two steps. I needed a quick and dirty way to temporarily hold the pieces in their relative positions, followed by final structural bonding using fibreglass and resin.
For the first step, I used Norton SpeedGrip 90 Minute Epoxy. It’s a two part catalyzed adhesive for general automotive panel bonding:
I applied a generous amount of epoxy (the black goo below) to the mating surfaces on the rockers and sills where I had previously prepped with 80 grit sandpaper:
I applied a generous amount of epoxy (the black goo below) to the mating surfaces on the rockers and sills where I had previously prepped with 80 grit sandpaper:
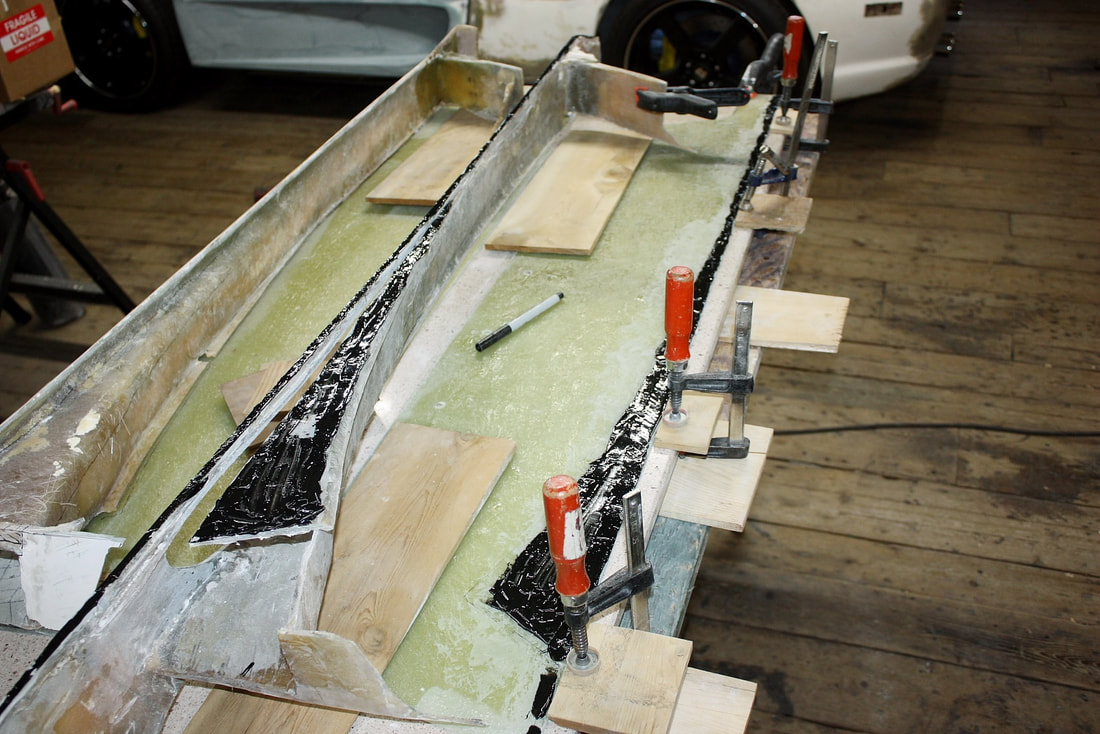
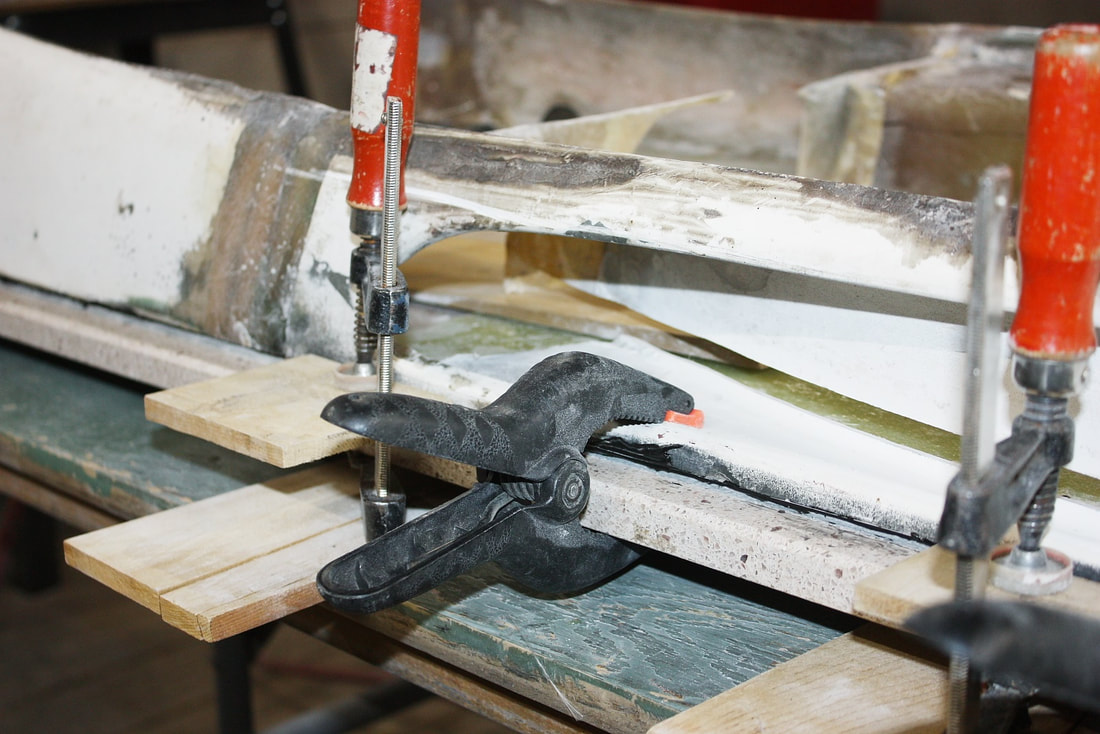
Then I glued both rockers to their respective sills using a series of clamps and wooden alignment blocks to draw the coke-bottle shaped rockers into alignment with the outside straight-edge of the new sills until the epoxy hardened:
Then I glued both rockers to their respective sills using a series of clamps and wooden alignment blocks to draw the coke-bottle shaped rockers into alignment with the outside straight-edge of the new sills until the epoxy hardened:
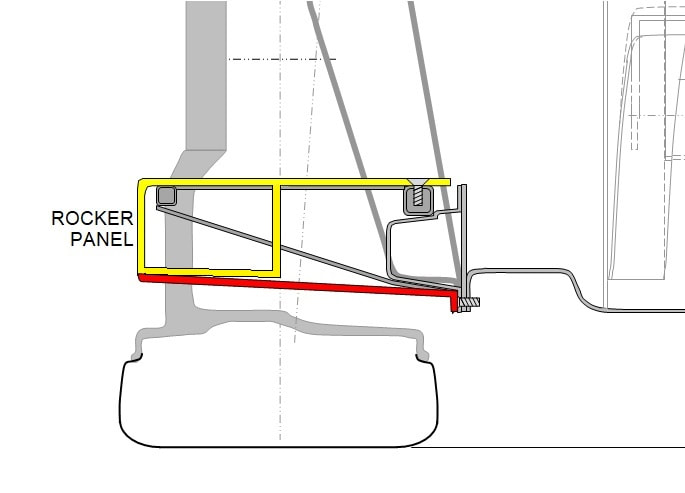
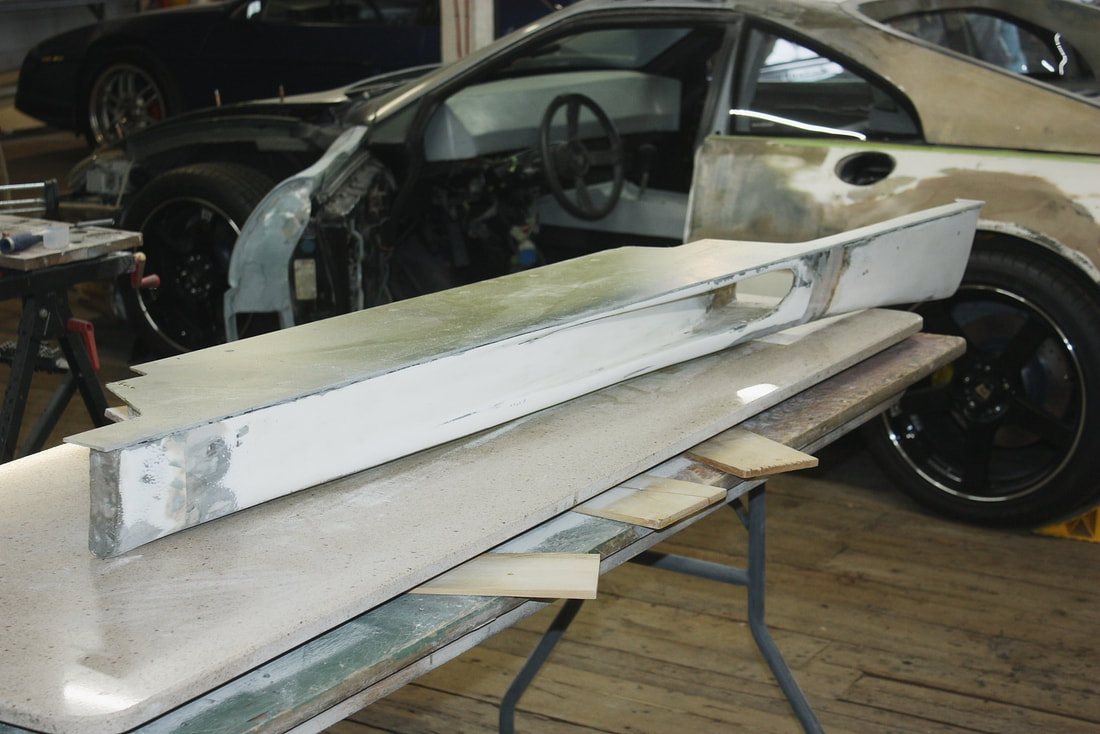
Once the epoxy had set, I removed the clamps and was happy the work was starting to pay off. The outside face of the rockers were now arrow-straight. But they were still weak without the added structure of the bottom panels, so fabricating new rocker skid plates was my next step (see red line in the drawing below):
Once the epoxy had set, I removed the clamps and was happy the work was starting to pay off. The outside face of the rockers were now arrow-straight. But they were still weak without the added structure of the bottom panels, so fabricating new rocker skid plates was my next step (see red line in the drawing below):
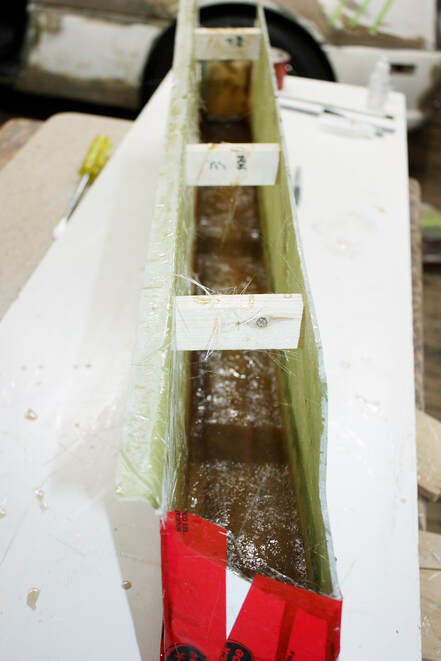
The rocker bottoms needed to be molded into an “L” shape to provide a mounting surface to the factory weld flange. The molded-in flange would also provide additional rigidity to the otherwise flat panel. Being simple flat panels, I again used the Melamine particle board as a molding surface but added a Melamine lip to mold the flange at right angles to the main surface:
The rocker bottoms needed to be molded into an “L” shape to provide a mounting surface to the factory weld flange. The molded-in flange would also provide additional rigidity to the otherwise flat panel. Being simple flat panels, I again used the Melamine particle board as a molding surface but added a Melamine lip to mold the flange at right angles to the main surface:
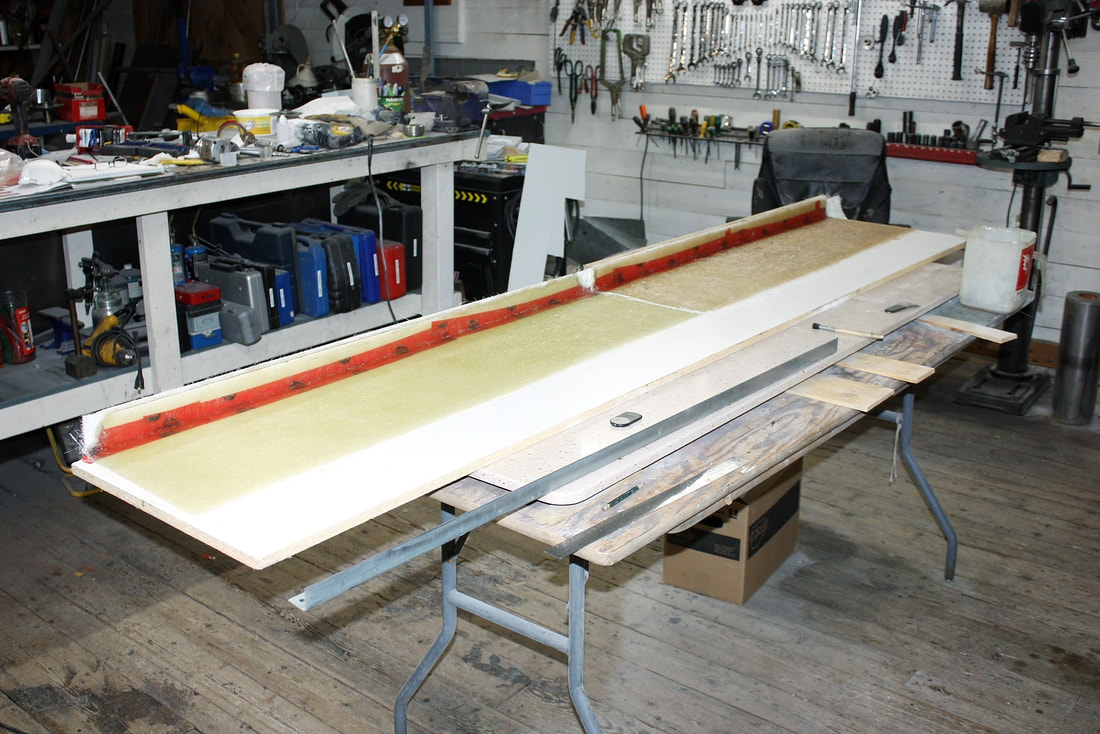
I used red tape at the junction between the horizontal and vertical boards to keep resin from creeping in the seam. Again, I used four layers of 1.5 oz mat and about 7 cups of resin to completely saturate each bottom:
I used red tape at the junction between the horizontal and vertical boards to keep resin from creeping in the seam. Again, I used four layers of 1.5 oz mat and about 7 cups of resin to completely saturate each bottom:
Once they had properly cured, I trimmed up and fitted the rocker bottoms, mocked them up on the chassis with the upper halves, and made a few marks to help align the parts once they were removed for bonding:
Once they had properly cured, I trimmed up and fitted the rocker bottoms, mocked them up on the chassis with the upper halves, and made a few marks to help align the parts once they were removed for bonding:
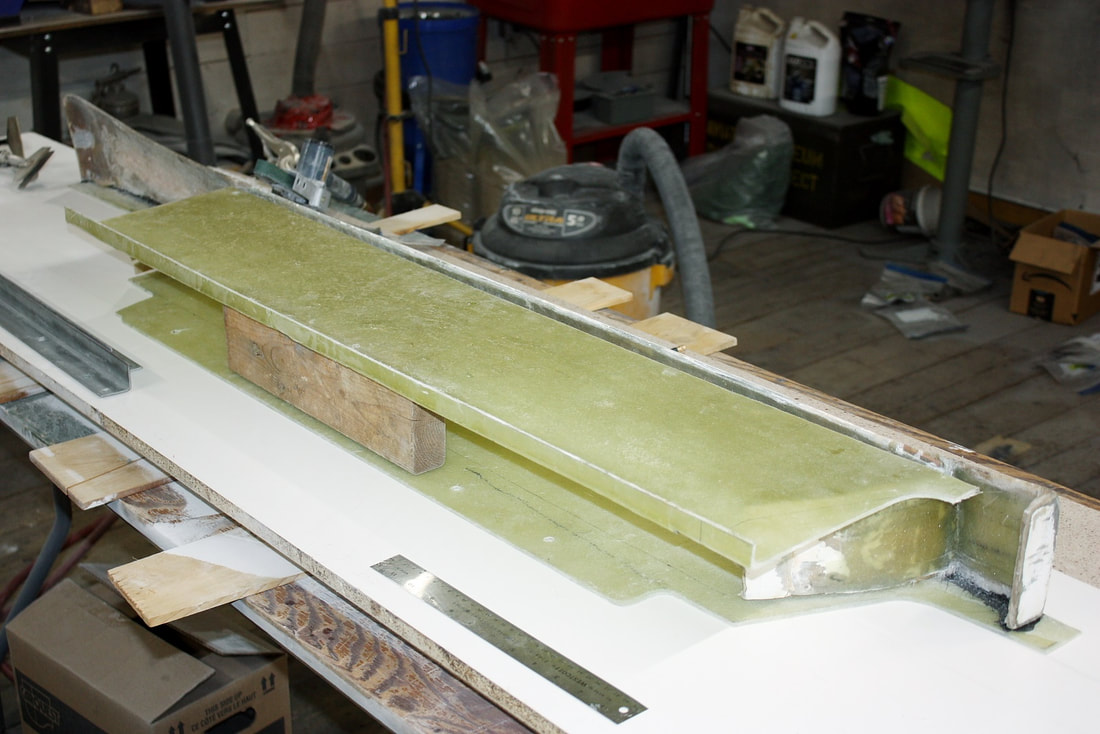
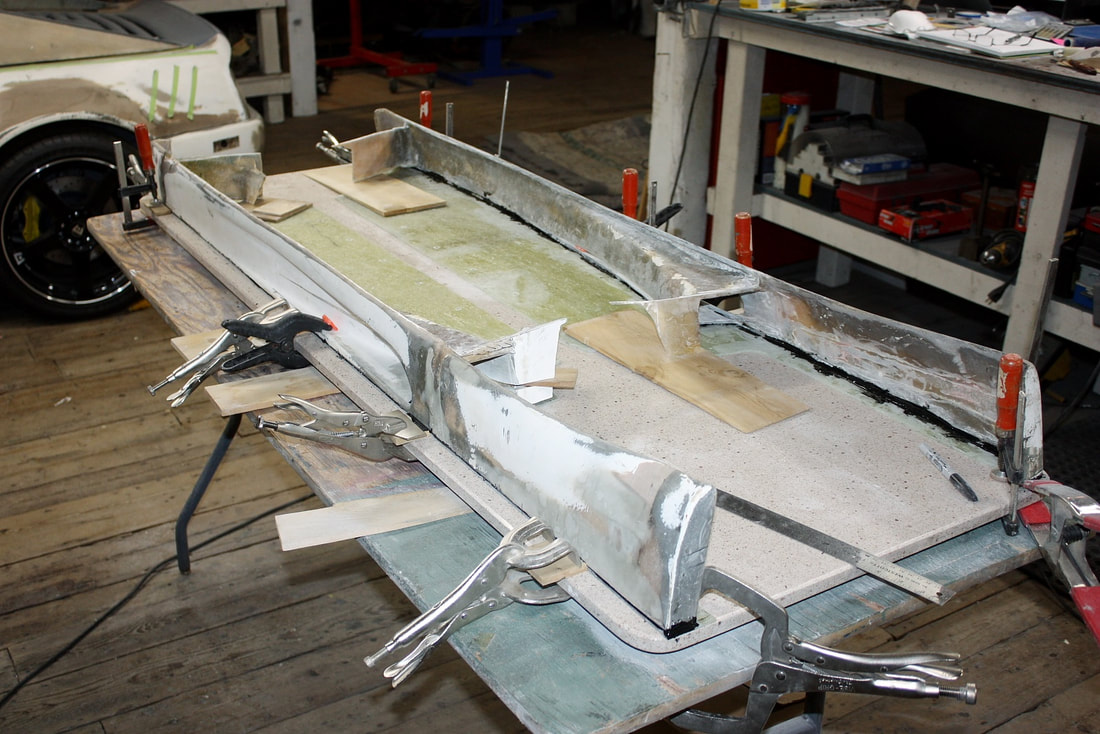
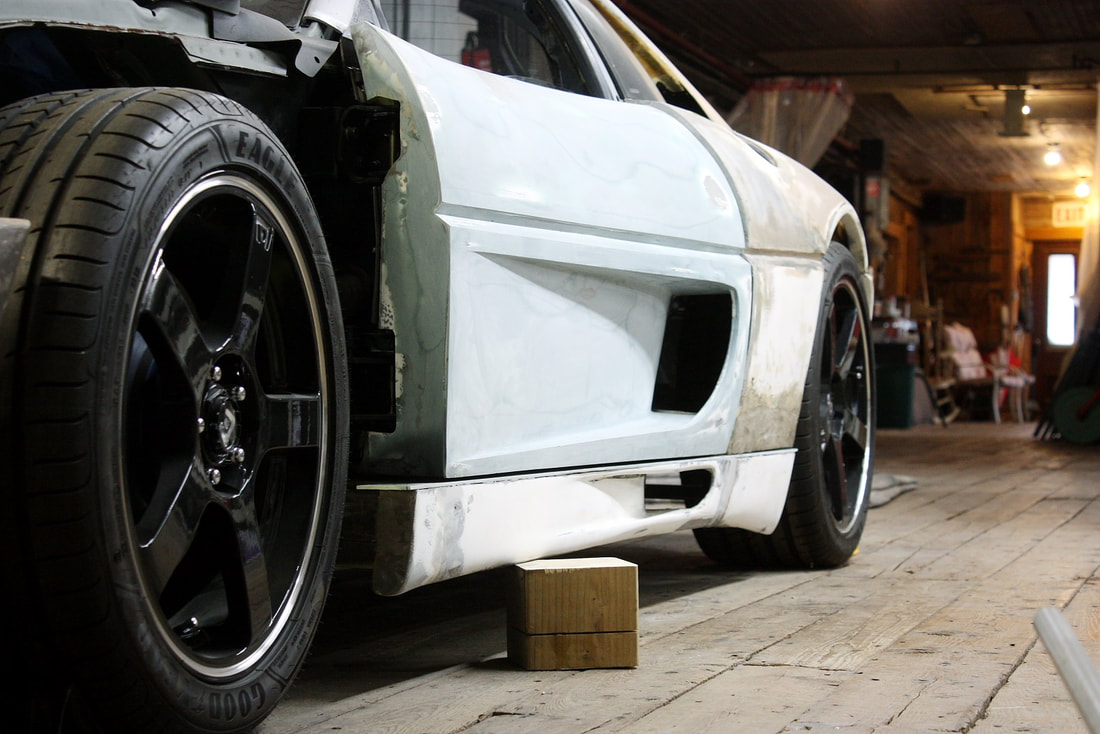
To keep the two halves spread apart at just the right width, I temporarily screwed some 90 mm wooden spacers between the bottoms and sills, like so:
To keep the two halves spread apart at just the right width, I temporarily screwed some 90 mm wooden spacers between the bottoms and sills, like so:
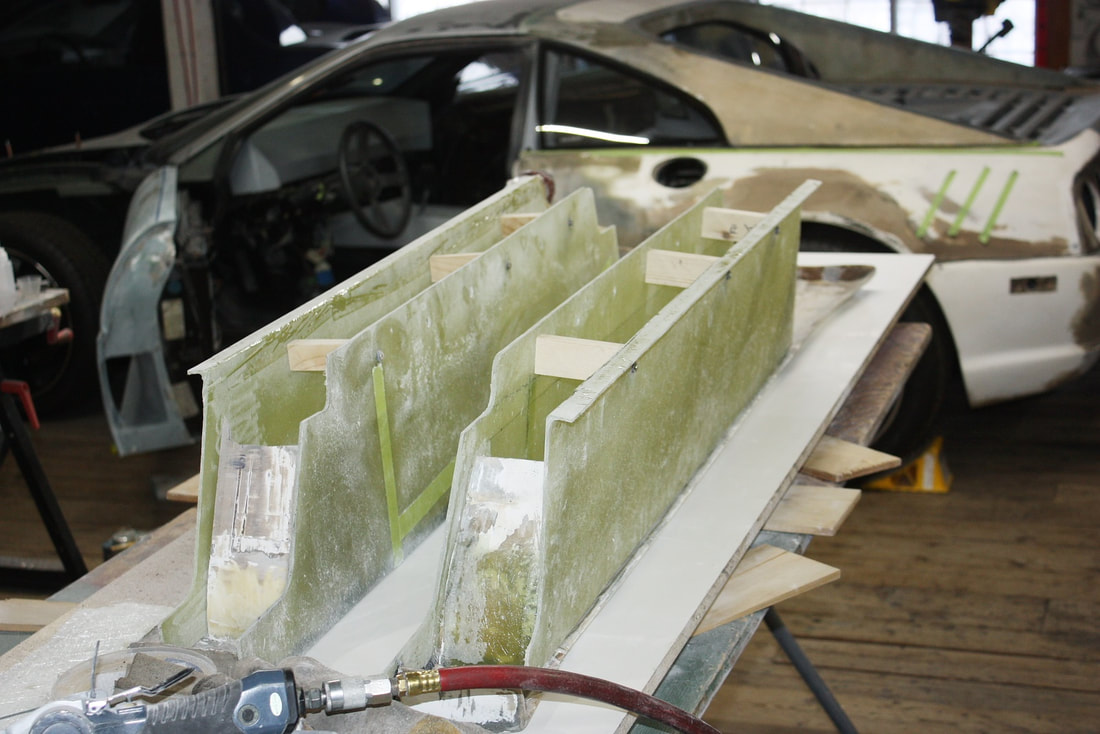
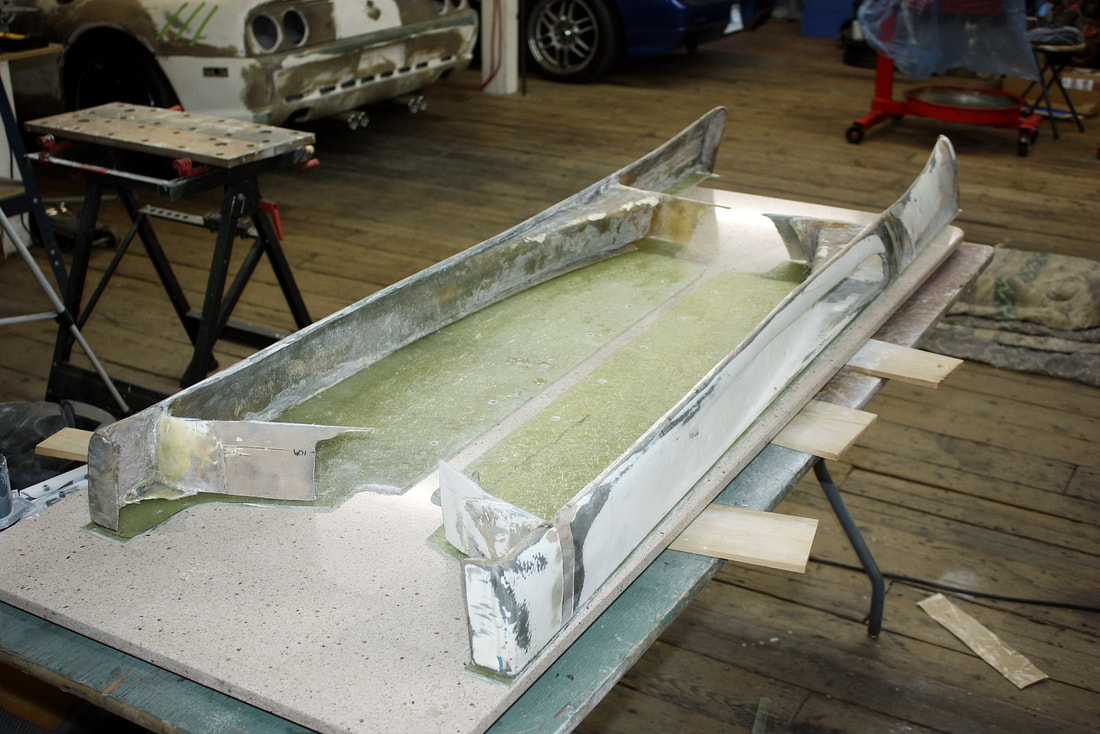
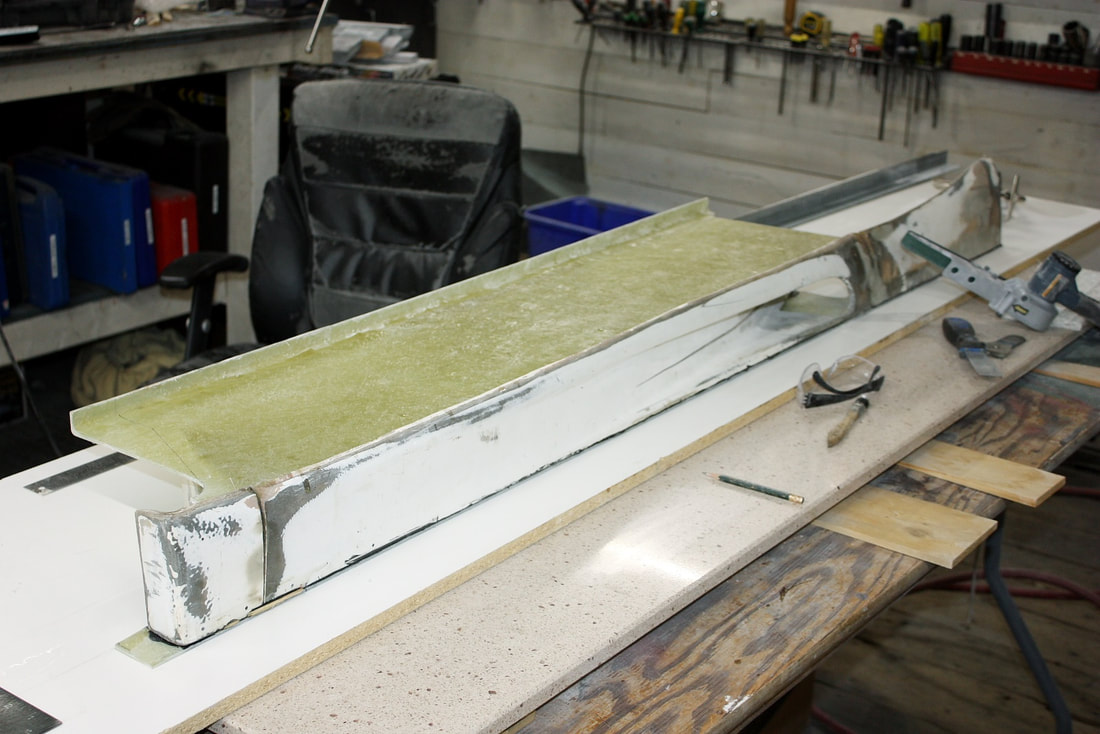
With both rocker halves spaced and aligned properly, I mixed up some polyester resin and laid up several new layers of fibreglass on the inside hidden surfaces. This effectively made all three pieces of each rocker into one again:
With both rocker halves spaced and aligned properly, I mixed up some polyester resin and laid up several new layers of fibreglass on the inside hidden surfaces. This effectively made all three pieces of each rocker into one again:
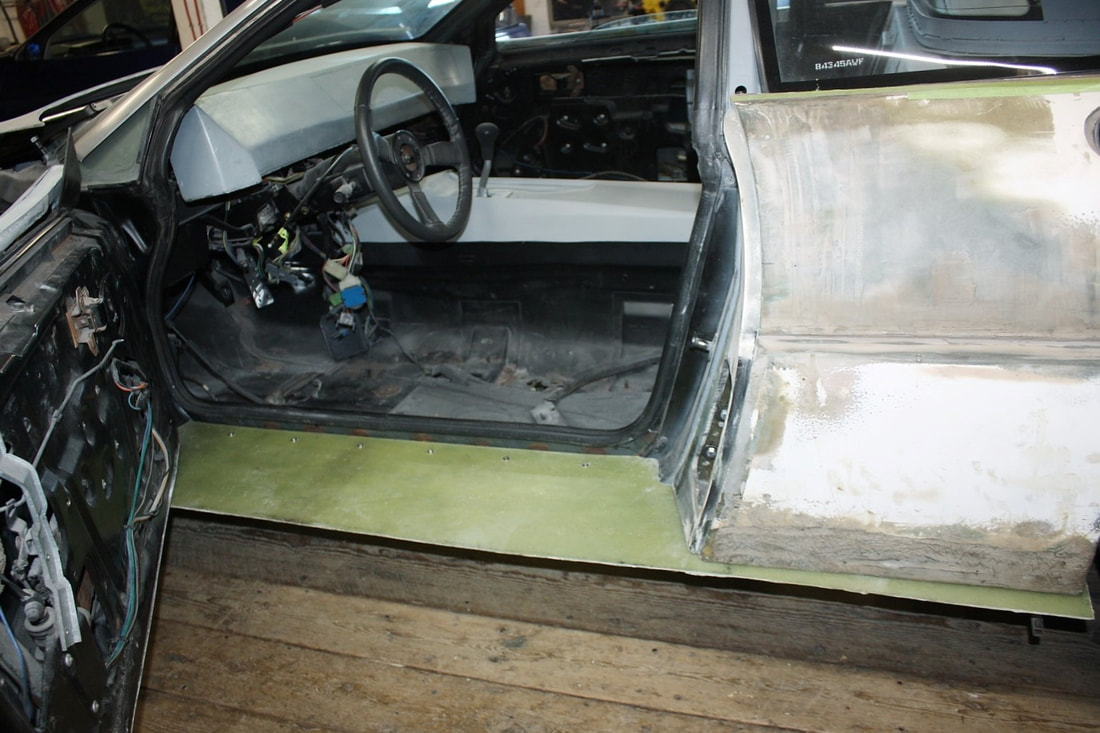
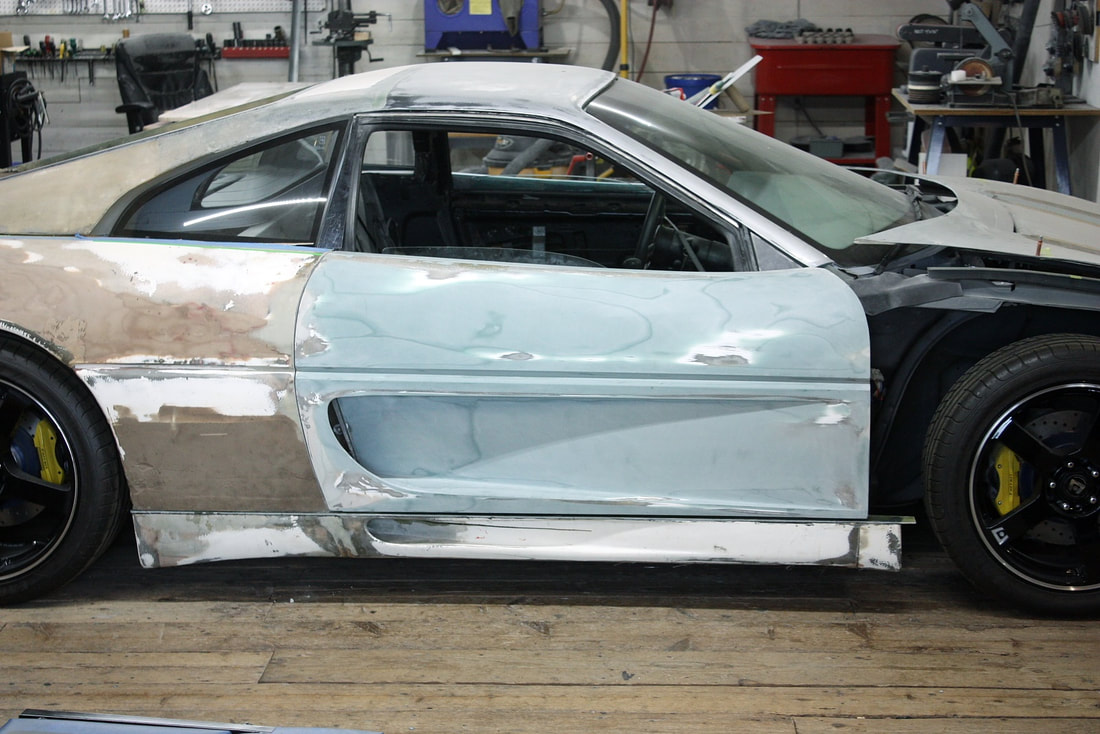
I refit them to the chassis and stepped back to check out how things were coming along. The door-to-sill gaps were clean and straight, I gained an extra inch of ground clearance, and I now had fibreglass door sills, so I was happy:
I refit them to the chassis and stepped back to check out how things were coming along. The door-to-sill gaps were clean and straight, I gained an extra inch of ground clearance, and I now had fibreglass door sills, so I was happy:
The remaining rocker lines still needed attention, though that work was for the “cosmetic” department, which is where I directed my attention next:
The remaining rocker lines still needed attention, though that work was for the “cosmetic” department, which is where I directed my attention next:

 RSS Feed
