My last post pointed out many of the problems with the LH rear quarter panel. The skin surface wasn’t at the same height as the door, the hip had no “swoop”, and the door gap was uneven. In this post I tackle all three of these cosmetic challenges.
Like a stereotypical plastic surgeon, I took out my Sharpie and drew my nip & tuck plan right on the patient’s skin. I didn’t take pictures before I started grinding and hacking away, so here’s what my plan was digitally:
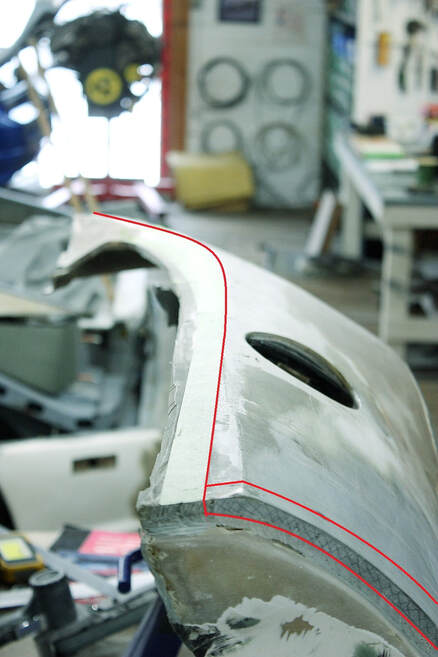
I was able to re-profile a 3/4” wide swath down the outer skin around the door jamb by grinding the area boxed in red, shown above. I had to remove a depth of 3/8” from the quarter panel to be flush with the neighbouring door skin. Amazingly, I didn’t grind all the way through the fibreglass!
I was able to re-profile a 3/4” wide swath down the outer skin around the door jamb by grinding the area boxed in red, shown above. I had to remove a depth of 3/8” from the quarter panel to be flush with the neighbouring door skin. Amazingly, I didn’t grind all the way through the fibreglass!
The goal of this was to create a reference surface on the quarter panel, level with the door skin, so that I could work on the panel off of the car and still be aware of the target shape.
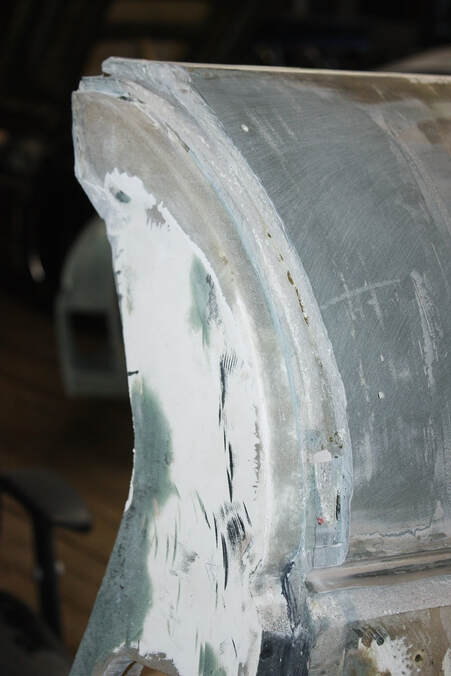
My next step was to “shrink” the rest of the fibreglass quarter panel skin down to the contour of the door. I wasn’t able to grind it all away because the skin wasn’t thick enough everywhere, and because it would’ve taken a lot more time and effort than Plan B.
Plan B was to make a few strategic slices in the skin, displace it inwards, and bond it in its new location, like this:
The goal of this was to create a reference surface on the quarter panel, level with the door skin, so that I could work on the panel off of the car and still be aware of the target shape.
My next step was to “shrink” the rest of the fibreglass quarter panel skin down to the contour of the door. I wasn’t able to grind it all away because the skin wasn’t thick enough everywhere, and because it would’ve taken a lot more time and effort than Plan B.
Plan B was to make a few strategic slices in the skin, displace it inwards, and bond it in its new location, like this:
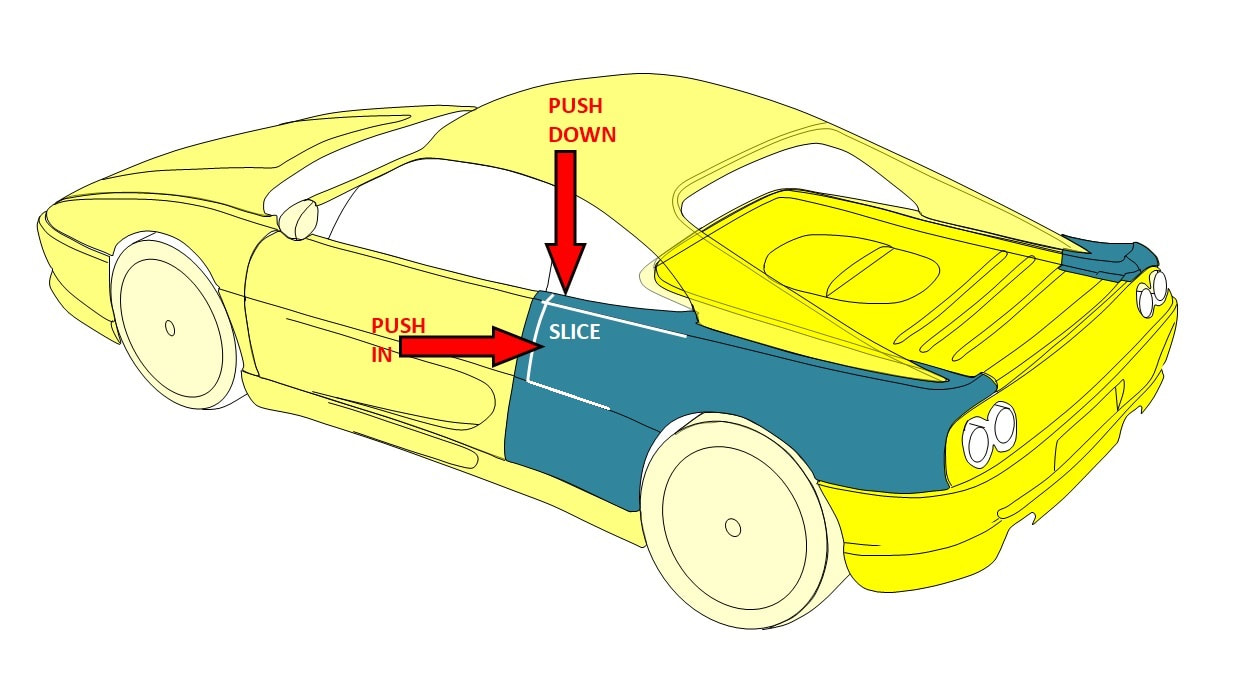
I had to drop the forward edge of the narrow upper surface, and pinch the broad, curved portion of the skin above the belt line, inboard. I used a cut-off wheel in my die grinder to make long horizontal slices to create as little stress as possible on the flex point of each panel:
I had to drop the forward edge of the narrow upper surface, and pinch the broad, curved portion of the skin above the belt line, inboard. I used a cut-off wheel in my die grinder to make long horizontal slices to create as little stress as possible on the flex point of each panel:
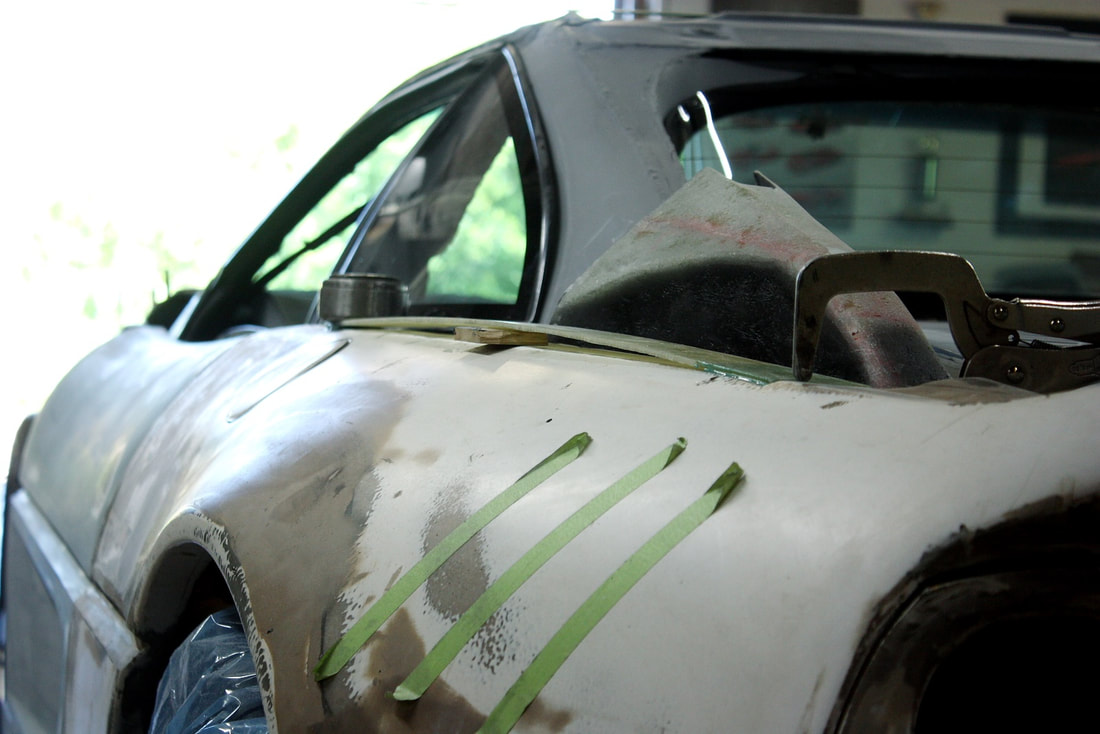
Here’s a close up of the narrow upper surface (green tape) showing by how much the flat “crown” needed to be lowered:
Here’s a close up of the narrow upper surface (green tape) showing by how much the flat “crown” needed to be lowered:
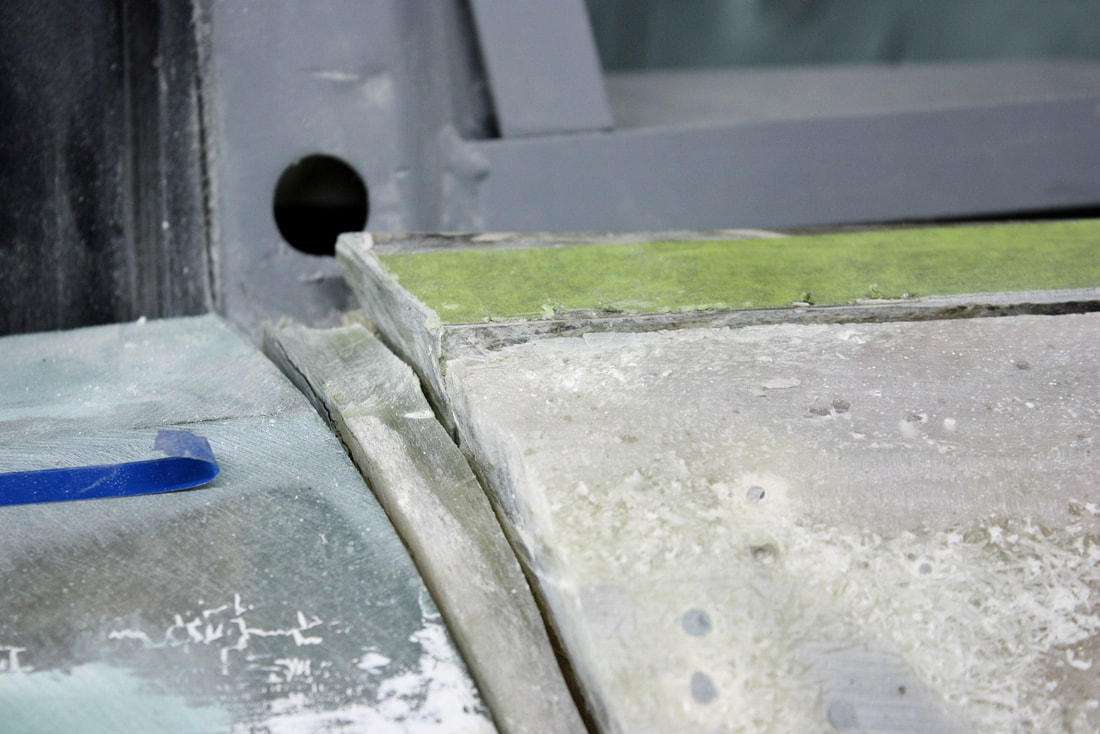
And here’s a close up of the broad, curved portion, showing how much it would need to be shrunken inboard:
And here’s a close up of the broad, curved portion, showing how much it would need to be shrunken inboard:
The long slices I’d made, made it pretty easy to displace the quarter panel skin to match the level of the door, with just hand pressure:
The long slices I’d made, made it pretty easy to displace the quarter panel skin to match the level of the door, with just hand pressure:
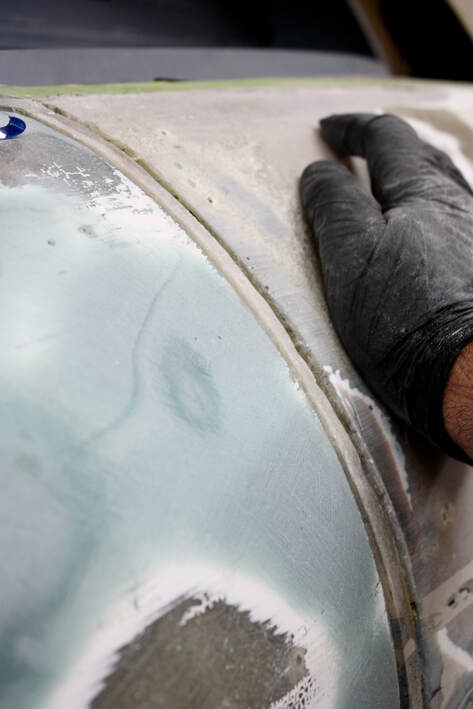
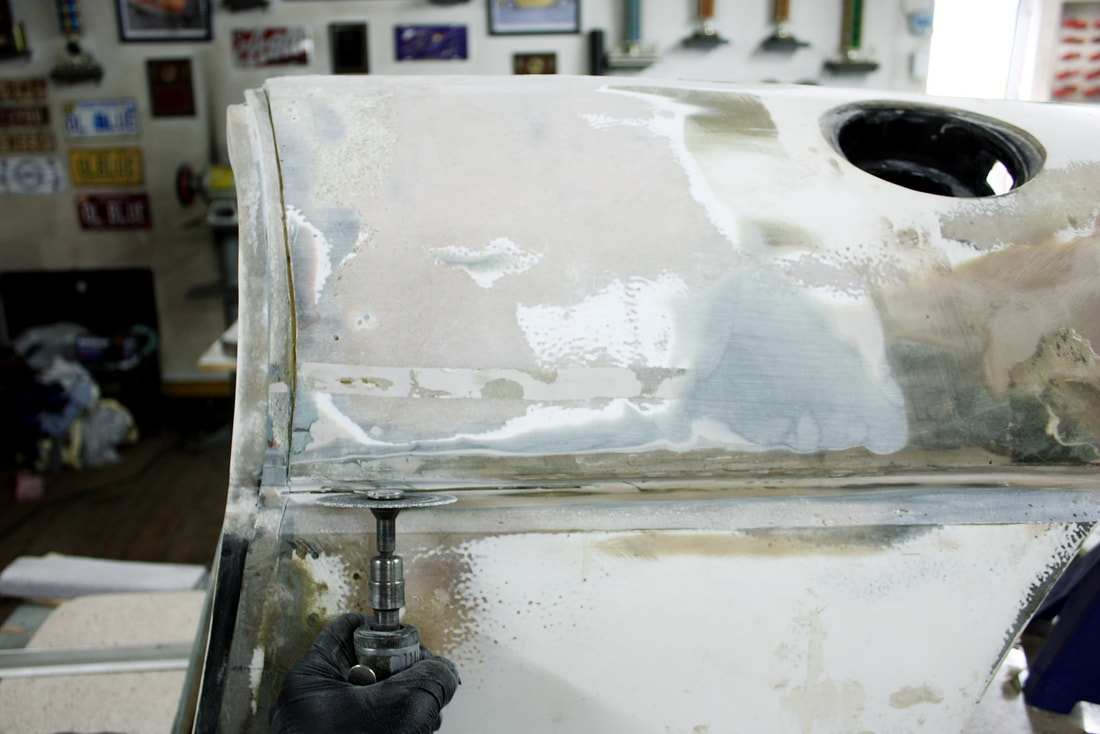
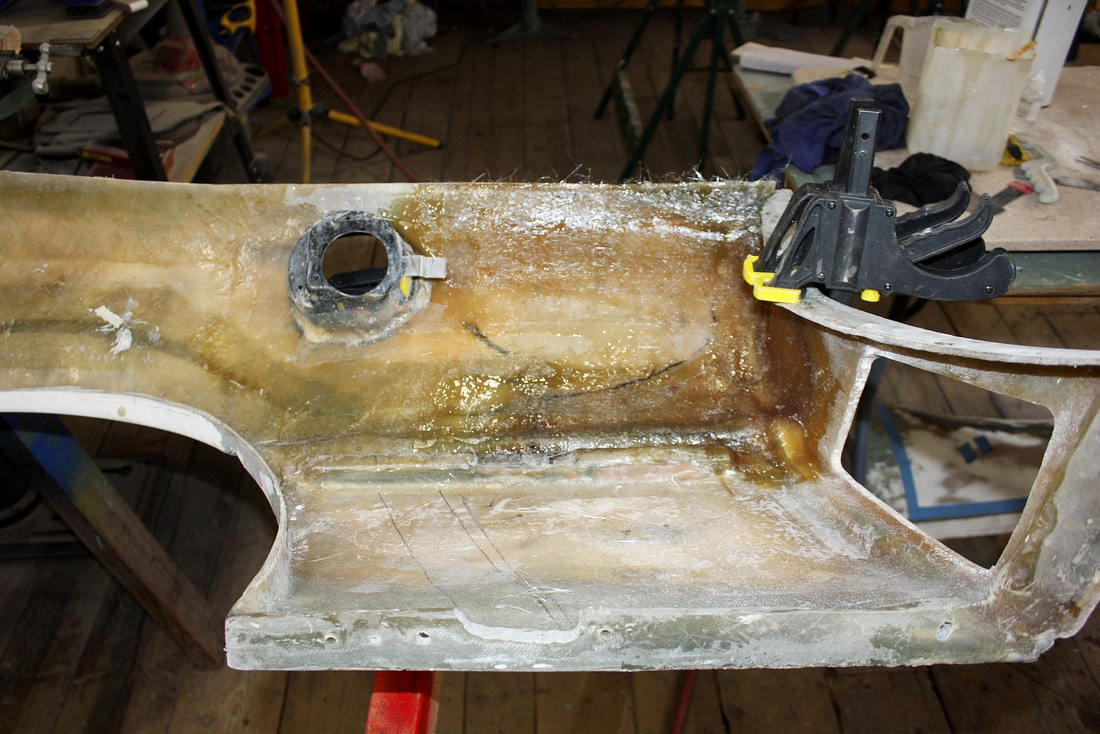
At this point I was ready to remove the panel from the chassis and bond the outer skin to the door jamb at its new location. I ground the inside surface of the quarter with 60 grit sandpaper to make a good mechanical bond with polyester resin, and clamped the skin into place:
At this point I was ready to remove the panel from the chassis and bond the outer skin to the door jamb at its new location. I ground the inside surface of the quarter with 60 grit sandpaper to make a good mechanical bond with polyester resin, and clamped the skin into place:
Then I cut a couple layers of 1.5 oz mat, mixed up some resin, and completed the first stage of the skin graft from the inside:
Then I cut a couple layers of 1.5 oz mat, mixed up some resin, and completed the first stage of the skin graft from the inside:
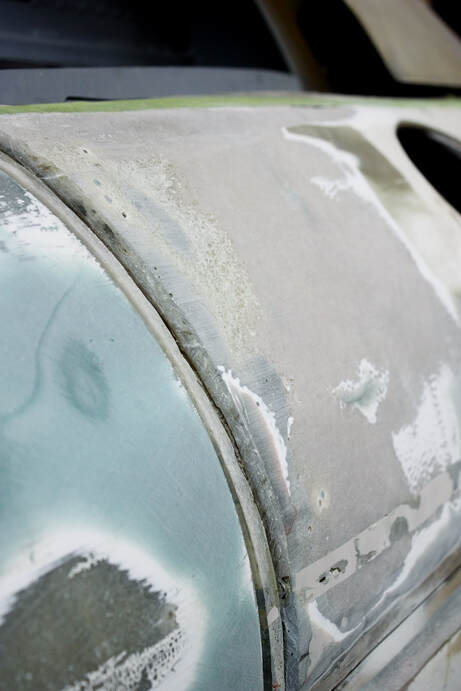
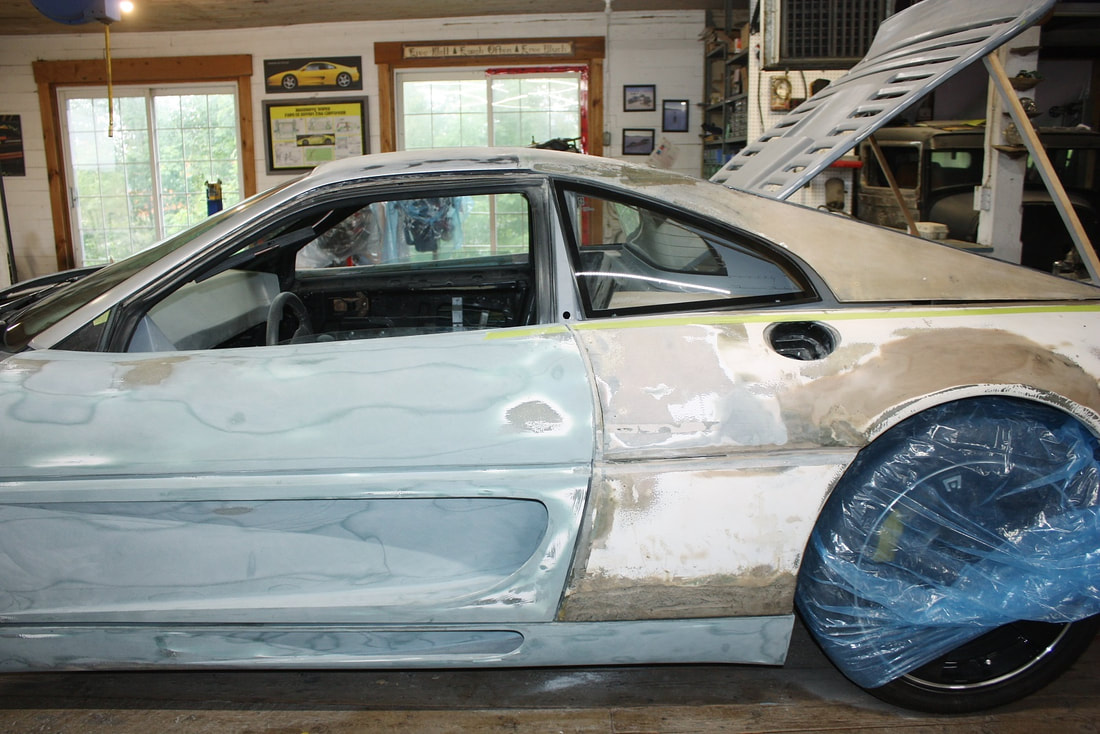
Once it cured, I reinstalled the rear quarter panel on the car and took a step back. The nip & tuck definitely moved the crown in the upper surface in the right direction… it no longer peaked at the door jamb, but it was still flat aft of the gas filler port:
Once it cured, I reinstalled the rear quarter panel on the car and took a step back. The nip & tuck definitely moved the crown in the upper surface in the right direction… it no longer peaked at the door jamb, but it was still flat aft of the gas filler port:
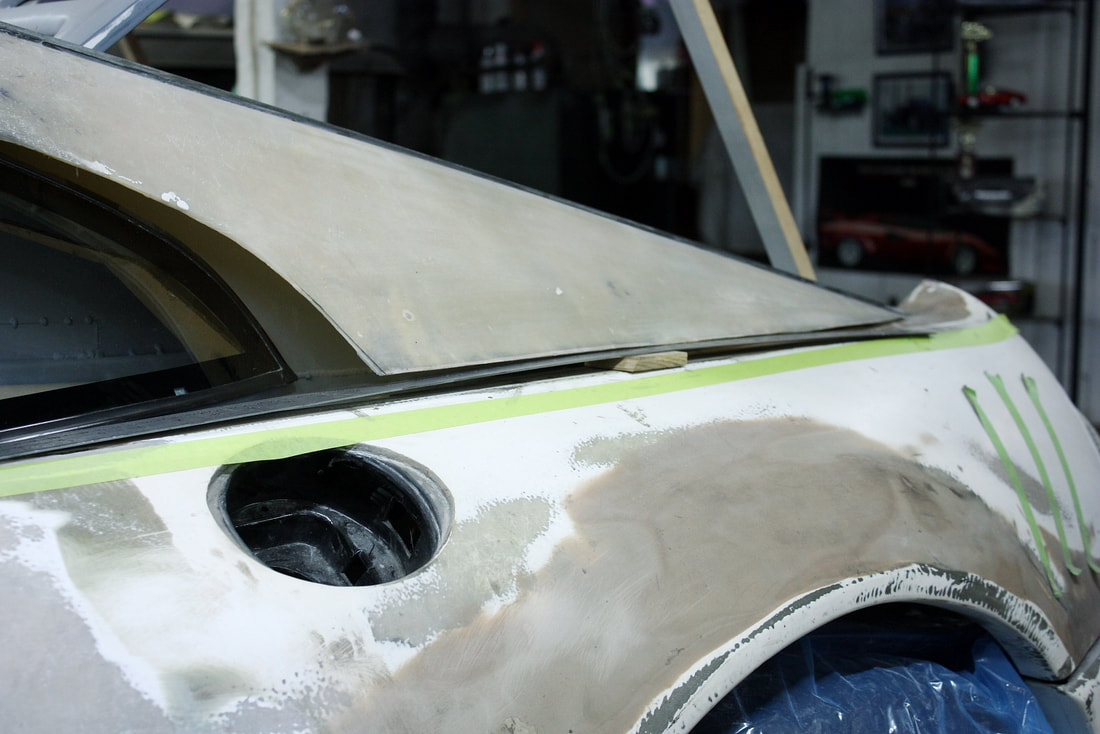
To move the peak of the crown over the wheel center, I had to add more material on the outside from about midway along the quarter window to the ducktail spoiler on the back. Here, I was playing around with a long steel yard stick to help visualize how much more I needed to raise the arch:
To move the peak of the crown over the wheel center, I had to add more material on the outside from about midway along the quarter window to the ducktail spoiler on the back. Here, I was playing around with a long steel yard stick to help visualize how much more I needed to raise the arch:
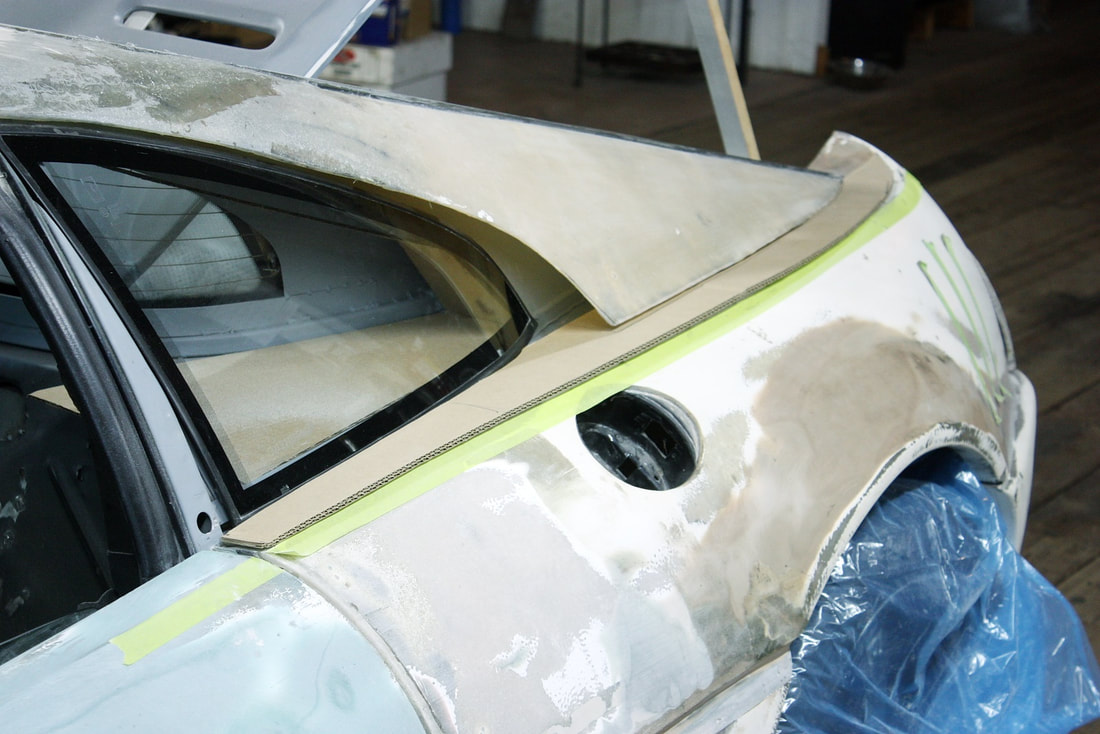
Once I had the right profile, I made a cardboard template of the upper surface to help me fabricate one in fibreglass:
Once I had the right profile, I made a cardboard template of the upper surface to help me fabricate one in fibreglass:
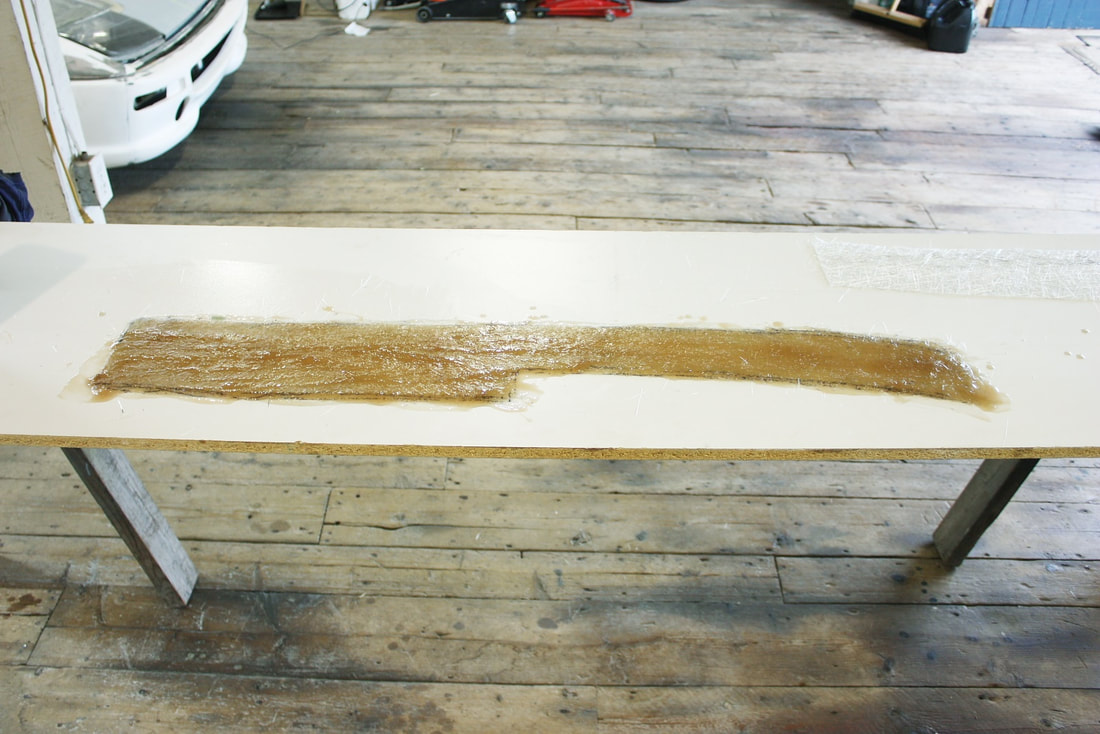
Then I used the template to cut some fibreglass mat, adding an inch or so more around the edges to allow trimming sloppy edges. Again, I laid up the mat on a piece of melamine chipboard since the resin doesn’t stick to it, and it leaves a nice smooth surface:
Then I used the template to cut some fibreglass mat, adding an inch or so more around the edges to allow trimming sloppy edges. Again, I laid up the mat on a piece of melamine chipboard since the resin doesn’t stick to it, and it leaves a nice smooth surface:
After a day or so of curing, I trimmed the piece to shape, notched the top of the fender to recess both ends, and bonded the new upper surface to the quarter panel with just the right crown for a continuous swoop to the front fender:
After a day or so of curing, I trimmed the piece to shape, notched the top of the fender to recess both ends, and bonded the new upper surface to the quarter panel with just the right crown for a continuous swoop to the front fender:
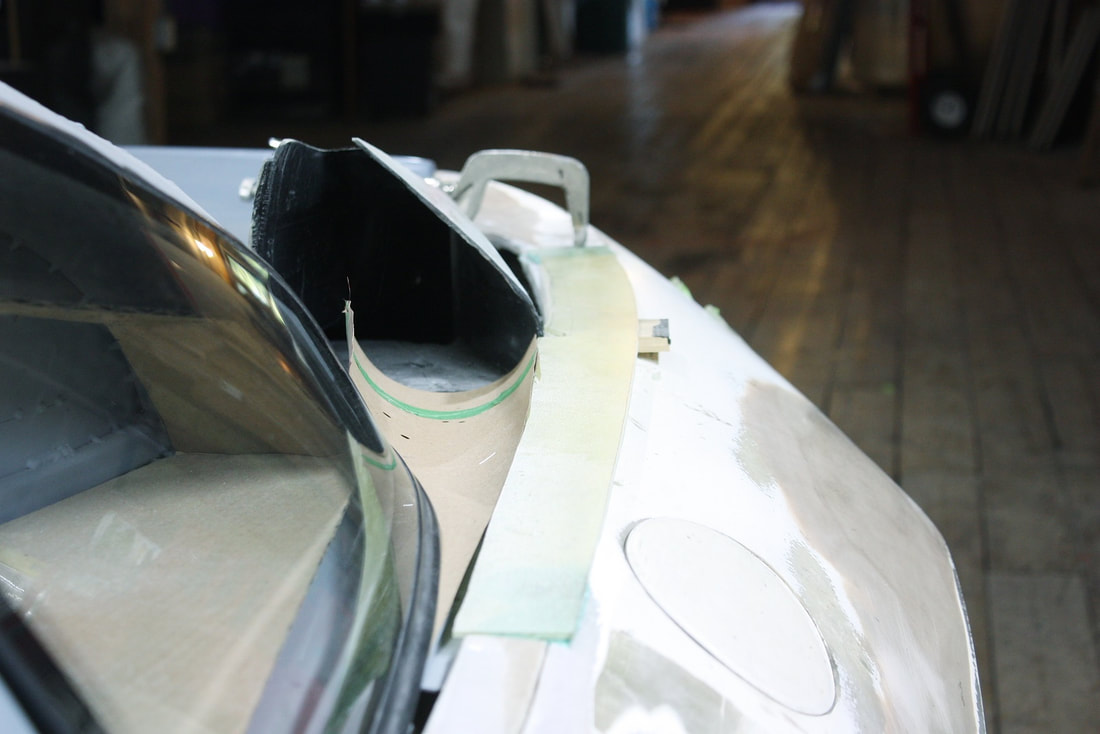
At this point, I needed to fill the gap between the new upper surface and the rest of the quarter panel. There were two sides that needed to be addressed… the inboard side closest to the quarter window, and the outboard side. I decided to work on the window side first.
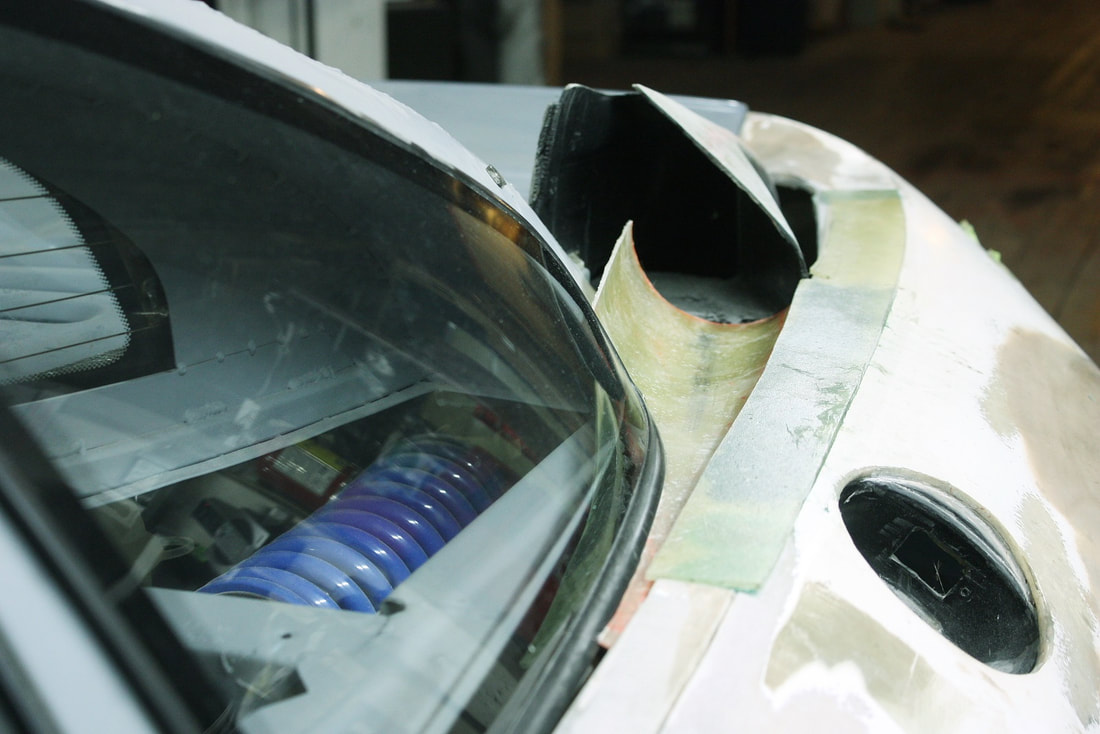
On the authentic F355, the space between the upper horizontal surface of the quarter panel and the quarter window is filled with a concave scoop leading into the engine air intake. The filler panel starts off flush with the upper surface at the door jamb, but gets increasingly scalloped out as it extends toward the back (black piece in photo):
At this point, I needed to fill the gap between the new upper surface and the rest of the quarter panel. There were two sides that needed to be addressed… the inboard side closest to the quarter window, and the outboard side. I decided to work on the window side first.
On the authentic F355, the space between the upper horizontal surface of the quarter panel and the quarter window is filled with a concave scoop leading into the engine air intake. The filler panel starts off flush with the upper surface at the door jamb, but gets increasingly scalloped out as it extends toward the back (black piece in photo):

After playing with several chopped up cardboard tubes, I came up with a template for the trim panel, albeit somewhat more pronounced than the authentic window scoop. In this area, a little exaggeration isn’t a bad thing:
After playing with several chopped up cardboard tubes, I came up with a template for the trim panel, albeit somewhat more pronounced than the authentic window scoop. In this area, a little exaggeration isn’t a bad thing:
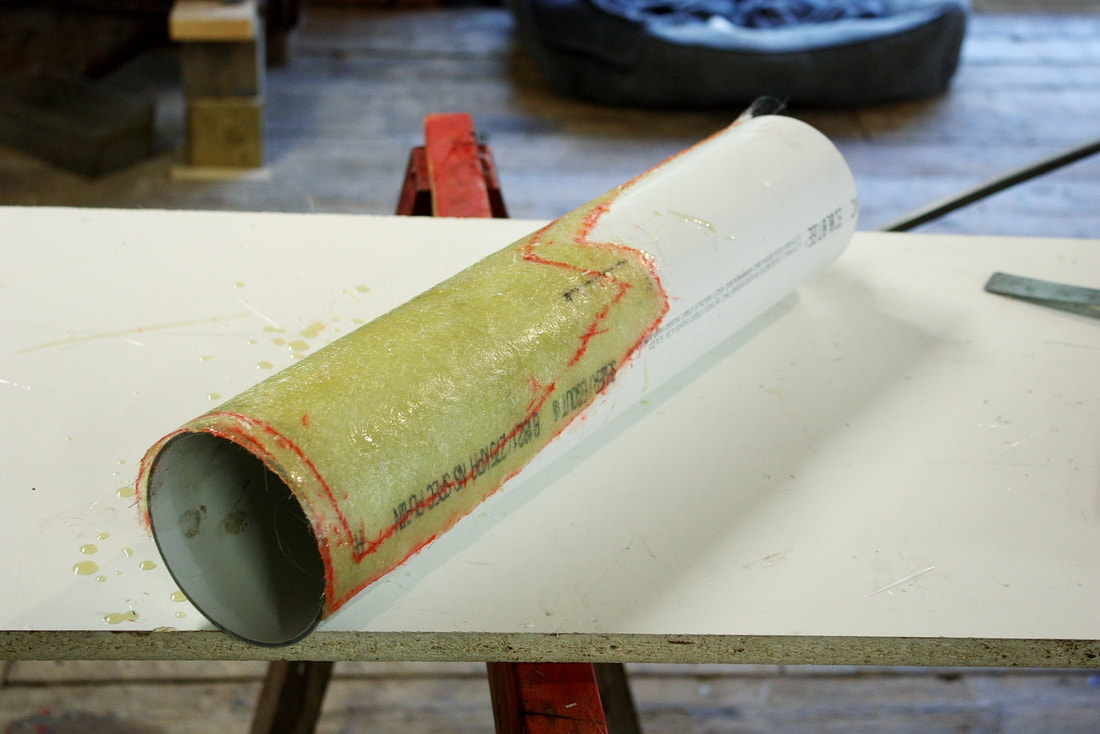
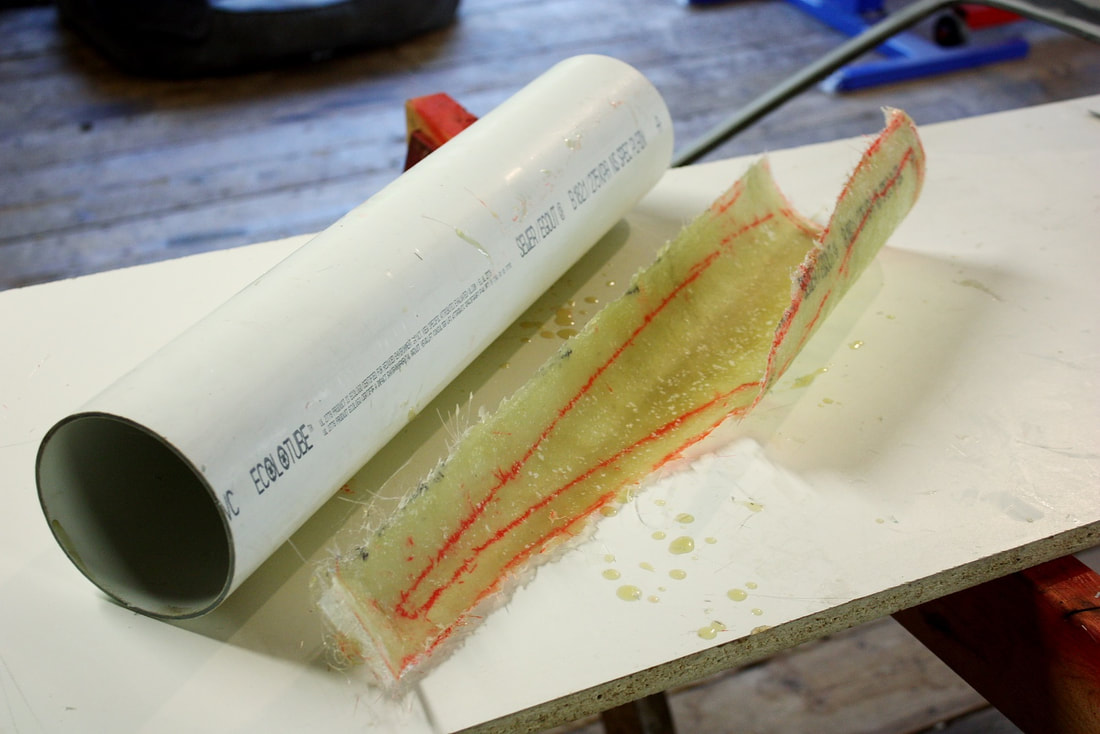
I used the cardboard template to cut two layers of fibreglass mat, then laid up the mat on a 4” diameter PVC drain tube. I’ve learned from experience that you need to wax the tube first:
I used the cardboard template to cut two layers of fibreglass mat, then laid up the mat on a 4” diameter PVC drain tube. I’ve learned from experience that you need to wax the tube first:
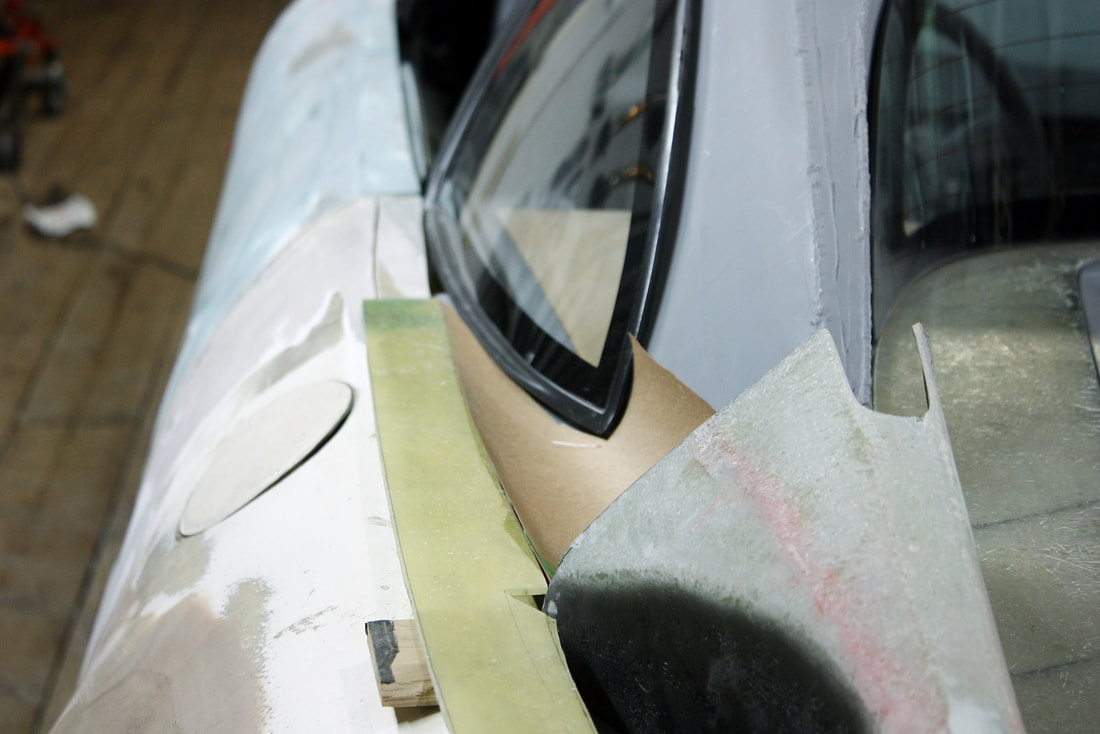
Once it was trimmed up I mocked it up on the chassis and was happy with the result. It’ll need some tweaking as it nears the intake funnel, but having made it from 2 layers of mat, it was still semi-flexible:
Once it was trimmed up I mocked it up on the chassis and was happy with the result. It’ll need some tweaking as it nears the intake funnel, but having made it from 2 layers of mat, it was still semi-flexible:
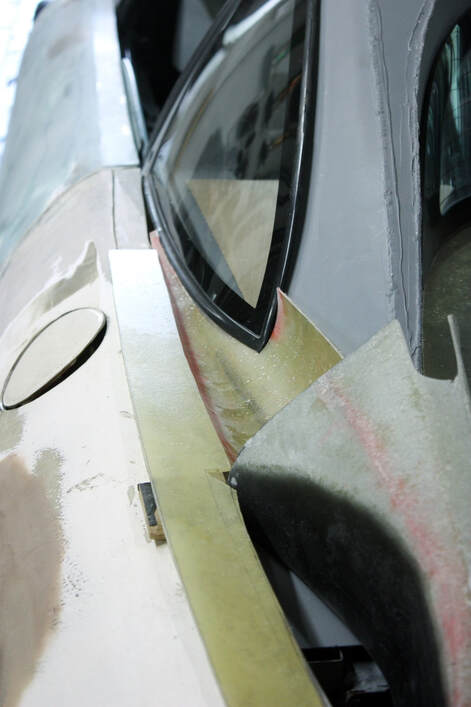
I bonded the window scoop to the upper surface of the quarter panel, but it’ll need to be fibreglassed in place from the backside a bit later.
Next up, I needed to attach the outboard side of the new crown to the fender. At the peak, there was about a ½” gap between the two panels…. far too much to backfill with putty. That meant I’d have to build the fender up with fibreglass mat to achieve the new profile, and that meant having to remove Don’s old fillers:
I bonded the window scoop to the upper surface of the quarter panel, but it’ll need to be fibreglassed in place from the backside a bit later.
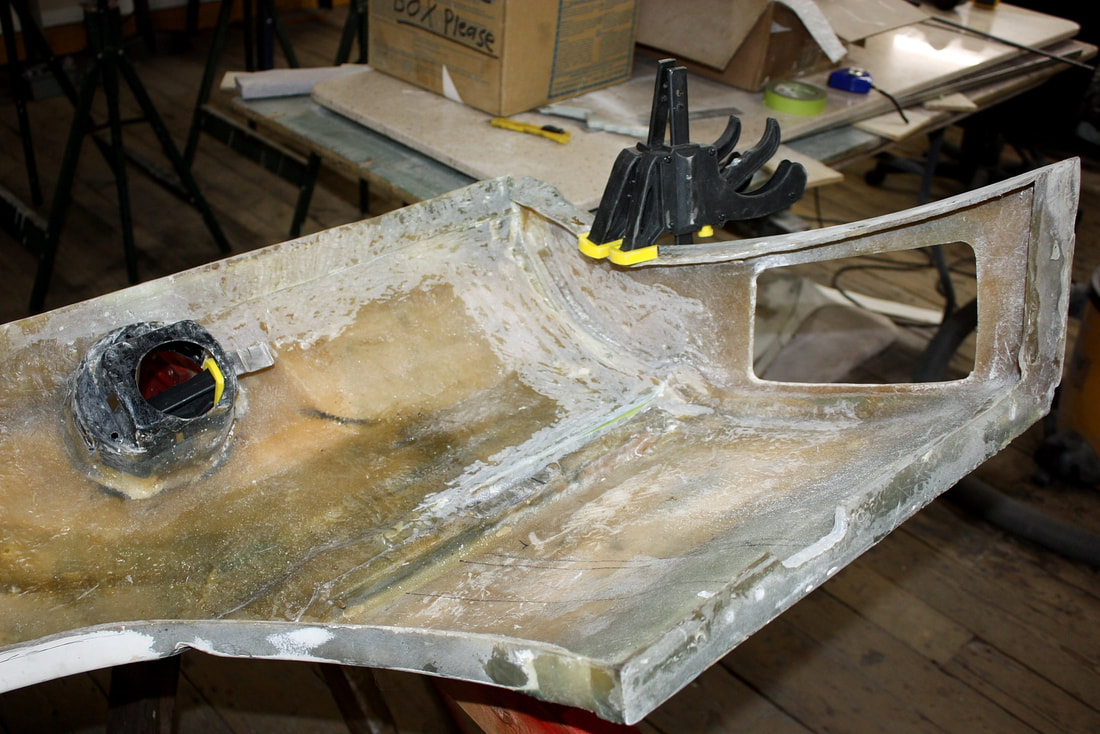
Next up, I needed to attach the outboard side of the new crown to the fender. At the peak, there was about a ½” gap between the two panels…. far too much to backfill with putty. That meant I’d have to build the fender up with fibreglass mat to achieve the new profile, and that meant having to remove Don’s old fillers:
When the last of the old filler was ground out, the surgery Don did on the rear quarter panel was obvious. He cut, lowered and tilted the fender flare outward, and readjusted the belt line as well.
When the last of the old filler was ground out, the surgery Don did on the rear quarter panel was obvious. He cut, lowered and tilted the fender flare outward, and readjusted the belt line as well.
I needed something a bit more compatible with the polyester resin and mat I was about to lay up on top of the old seams, so I filled them with “kitty hair” long-strand structural filler. The composition of this stuff is identical to fibreglass:
I needed something a bit more compatible with the polyester resin and mat I was about to lay up on top of the old seams, so I filled them with “kitty hair” long-strand structural filler. The composition of this stuff is identical to fibreglass:

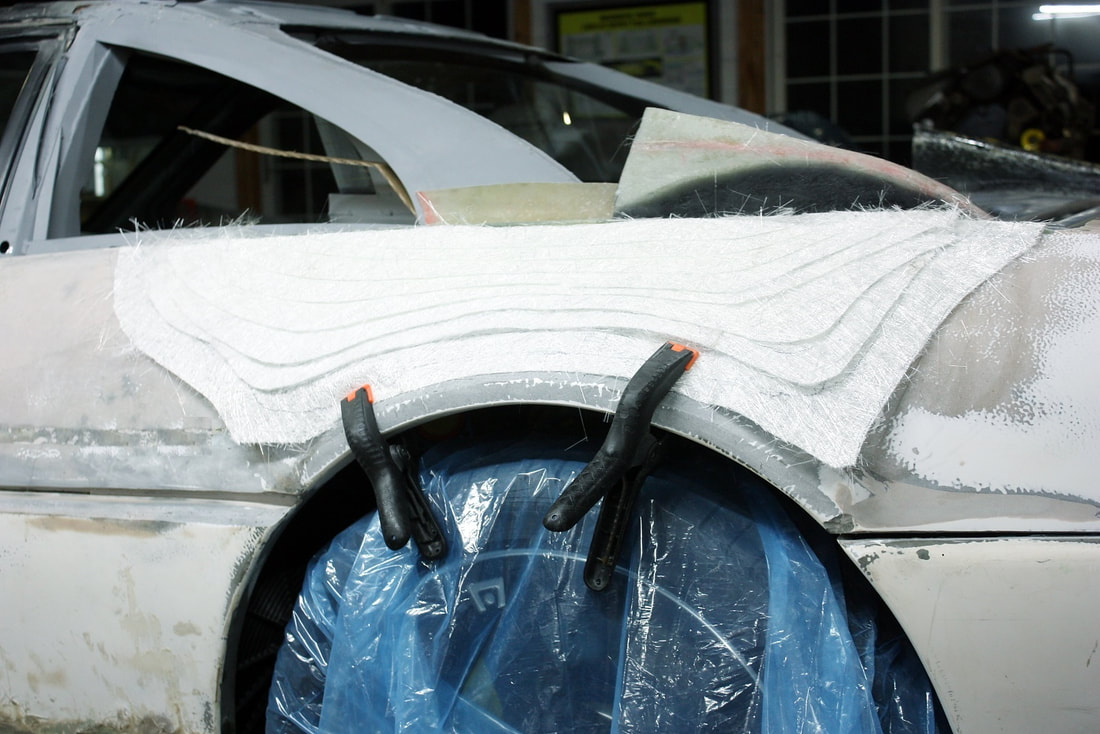
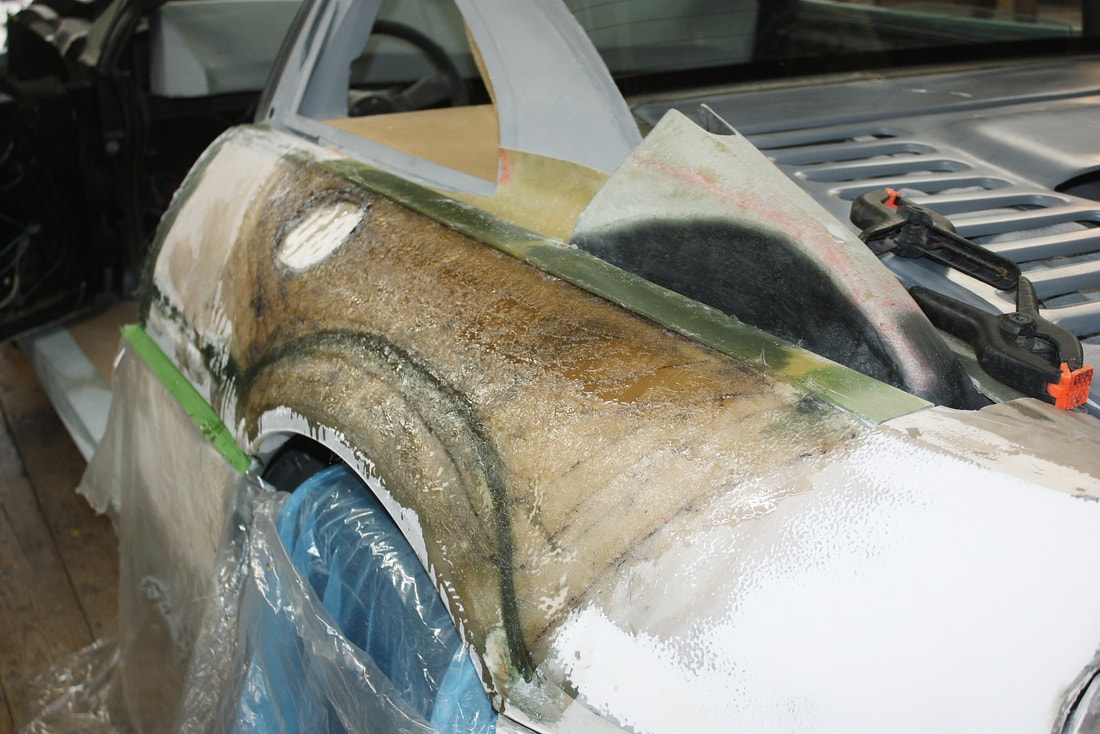
To bolster the profile of the fender to match the new crown along the top surface, I cut 12 layers of 1.5 oz mat in successively smaller sizes building up a sort of topographical map:
To bolster the profile of the fender to match the new crown along the top surface, I cut 12 layers of 1.5 oz mat in successively smaller sizes building up a sort of topographical map:
Here’s the result about halfway through the lay-up. The process would of course result in a “stepped” finish, but that was nothing that a little grinding and a couple thin coats of filler couldn’t handle:
Here’s the result about halfway through the lay-up. The process would of course result in a “stepped” finish, but that was nothing that a little grinding and a couple thin coats of filler couldn’t handle:
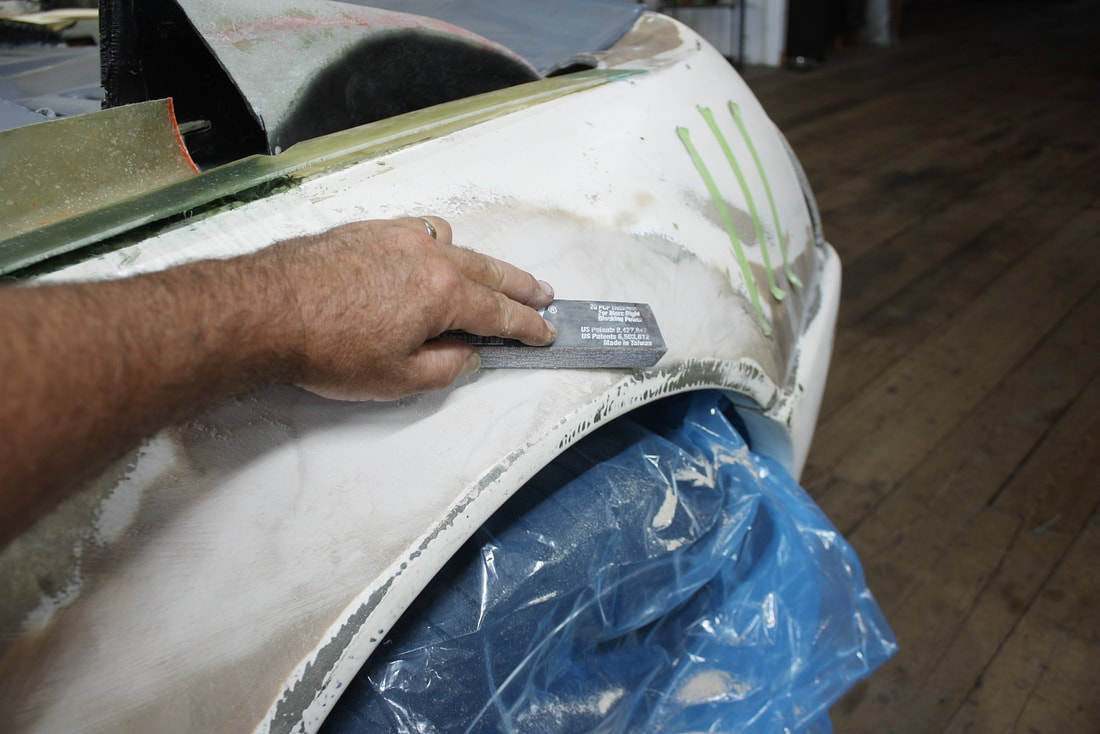
I used a short strand filler to fill in the roughness of the new fibreglass, and to tweak the profile of the hips and the flow of curves from the door. In this photo I had mostly worked the flow around the door, and was starting on the fender flare:
I used a short strand filler to fill in the roughness of the new fibreglass, and to tweak the profile of the hips and the flow of curves from the door. In this photo I had mostly worked the flow around the door, and was starting on the fender flare:
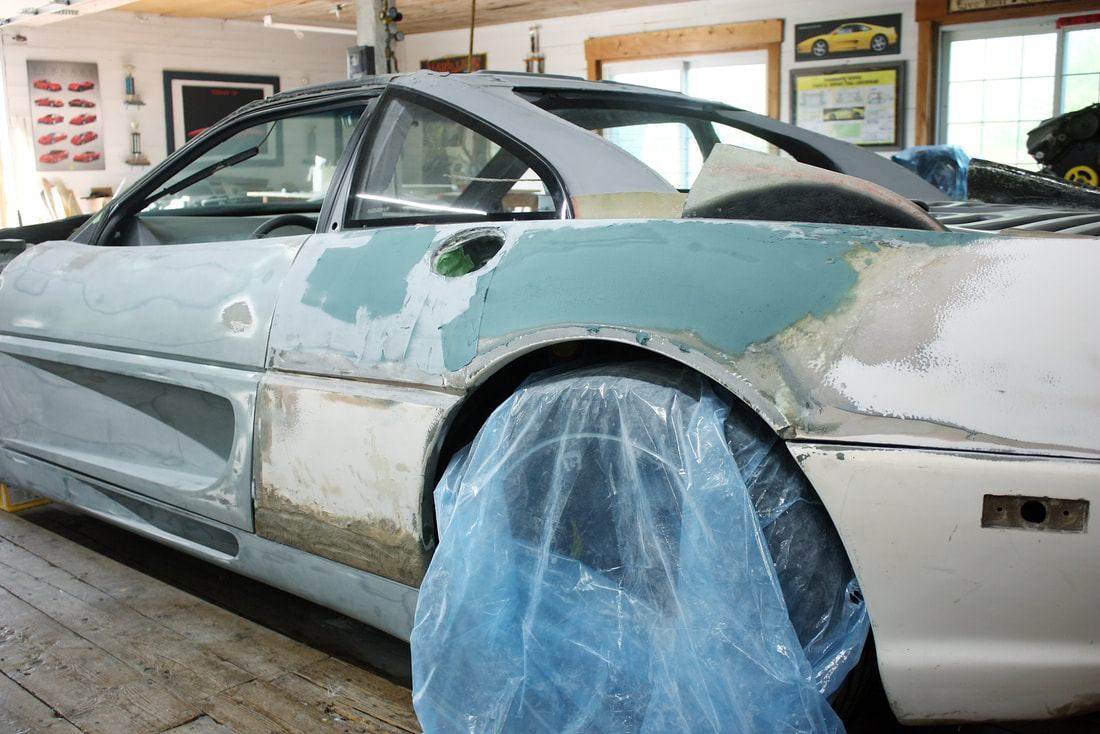
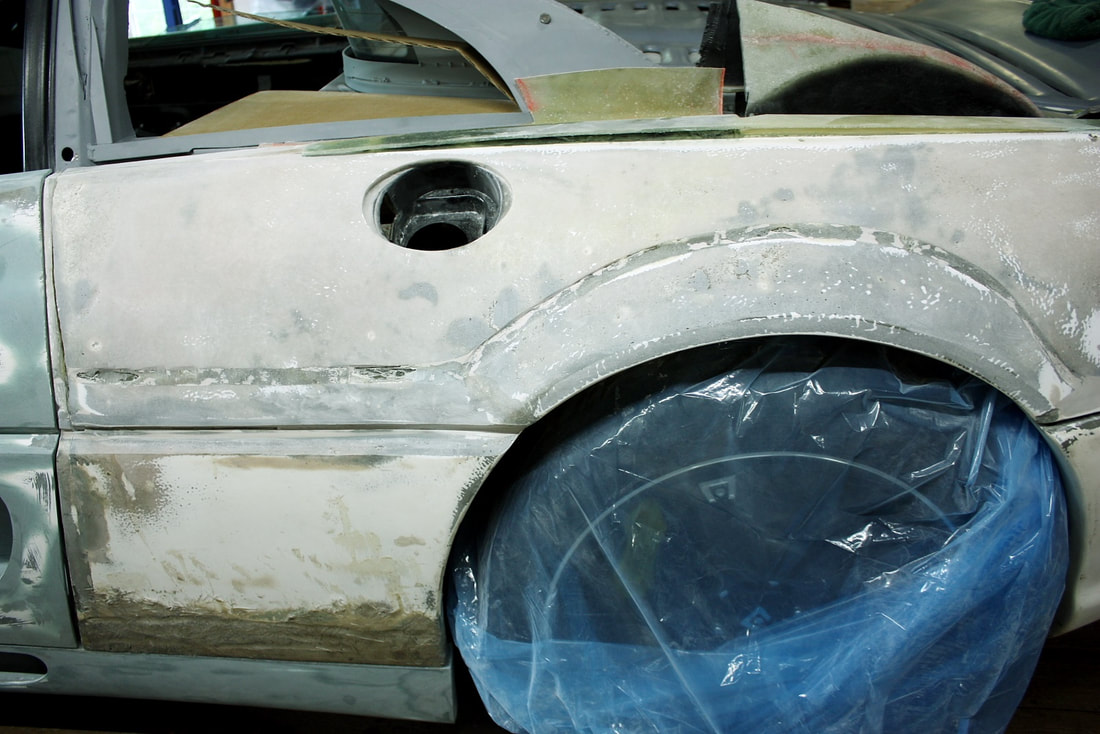
And finally this low angle shot shows the much improved upper line:
And finally this low angle shot shows the much improved upper line:
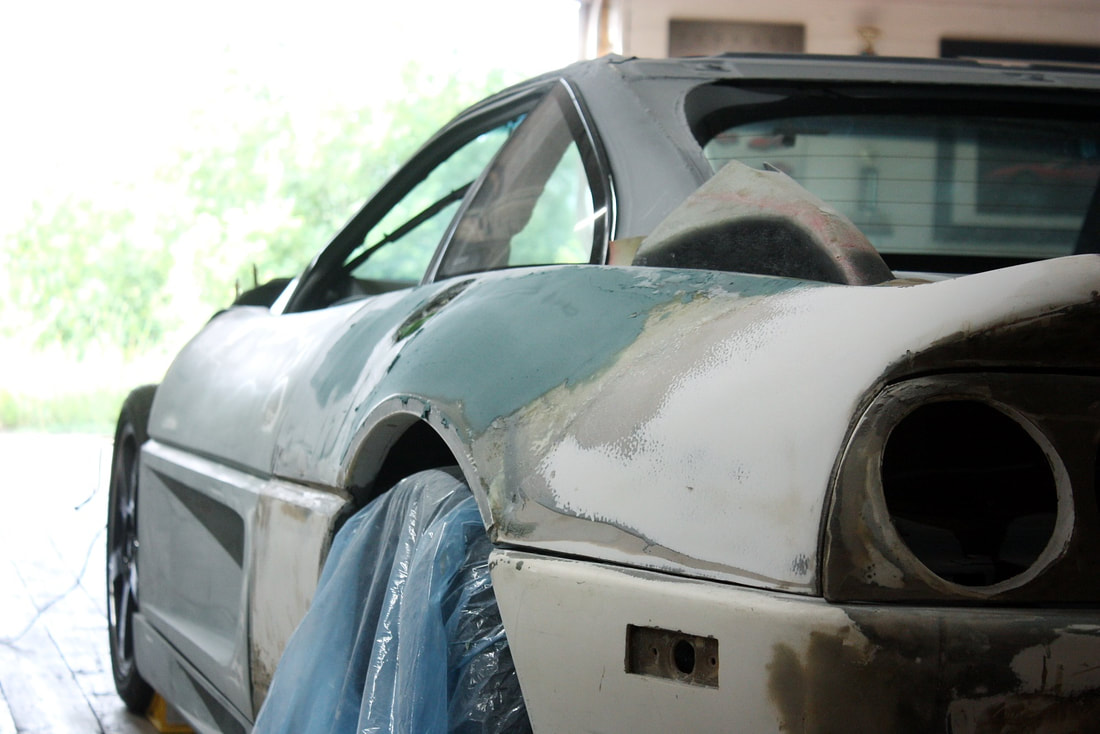
It also shows what’s next: realigning the belt line on the quarter panel.
It also shows what’s next: realigning the belt line on the quarter panel.

 RSS Feed
