In my last post I promised to delve into the passenger side rear quarter panel, but I jumped the gun. There was one last detail I overlooked on (or should I say in?) the driver’s side quarter panel.
This next photo should narrow things down considerably for those of you guessing where this is leading, and who haven’t peeked ahead:
This next photo should narrow things down considerably for those of you guessing where this is leading, and who haven’t peeked ahead:
Still haven’t figured it out? Here’s one last clue:
Still haven’t figured it out? Here’s one last clue:
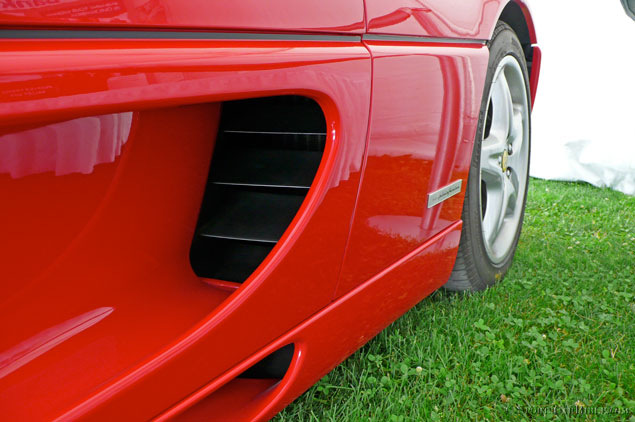
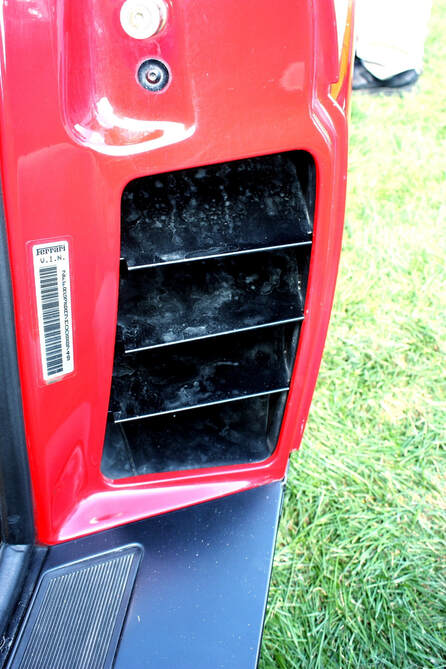
When looking into the door scoops (and trust me, everyone looks and sticks their hands into the scoops), there isn’t a clear unobstructed view of the radiators on the authentic Ferrari. Instead, it appears as though the side-strake design of the earlier F348 was moved out of view, to the inside of the radiator shrouds.
Few know the strakes on the Testarossa and F348 were there to satisfy an export market requirement that openings to the radiators not be beyond a certain size. The strakes circumvented that requirement by dividing the large openings into a series of smaller ones.
On the F355, the strakes (now vanes) are only really obvious when the door is open, but they're there:
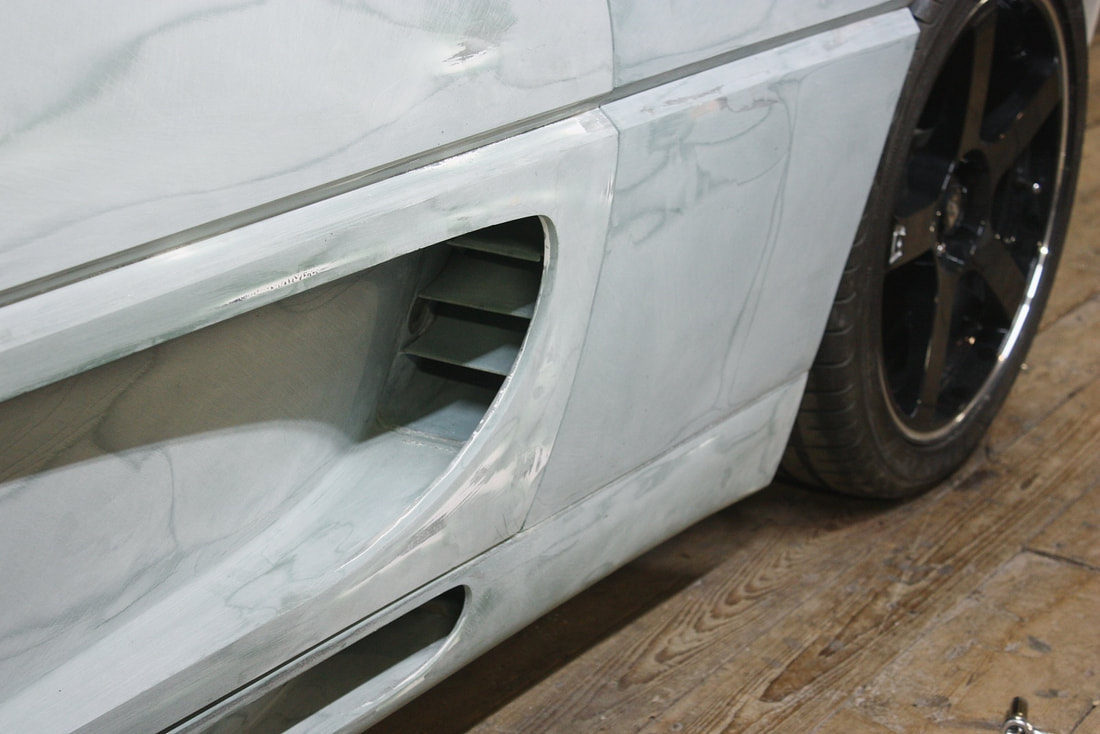
The vanes on the F355’s do more than simply divide the openings though. The inlet scoops on the door and rockers are offset quite a bit lower than the actual radiators, so the shrouds were designed to funnel the airflow upward. For the rocker panel inlet, the floor has a sweeping upward curve to redirect the air. I couldn’t find any good photos of the authentic F355 in this area, so here’s a pic showing how my rocker inlets are designed:
The vanes on the F355’s do more than simply divide the openings though. The inlet scoops on the door and rockers are offset quite a bit lower than the actual radiators, so the shrouds were designed to funnel the airflow upward. For the rocker panel inlet, the floor has a sweeping upward curve to redirect the air. I couldn’t find any good photos of the authentic F355 in this area, so here’s a pic showing how my rocker inlets are designed:
The shadow along the wall of the rocker scoop clearly shows how the floor is ramped upwards. That takes care of feeding air to the lower third of the radiator.
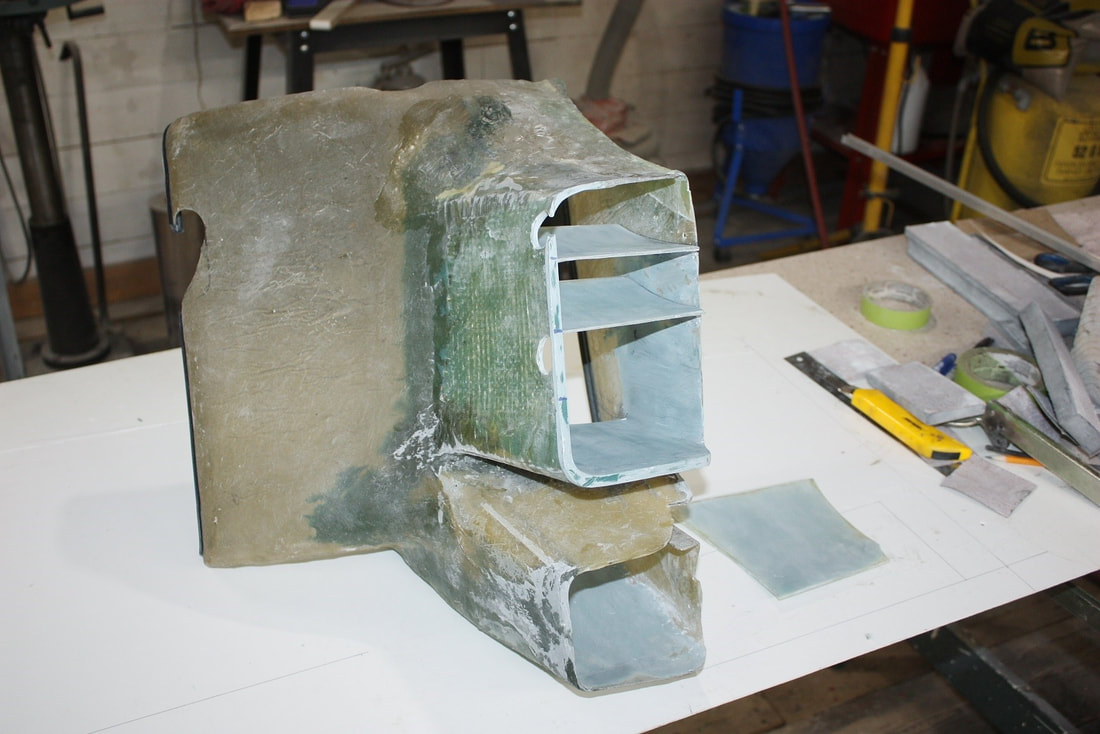
For the upper two thirds, the door scoop needed its own channeling. The first step was to smooth out the inside of the shroud… at least as far as the eye would ever see on the completed car. This next photo shows my effort in that department, as well as the offset nature of the shroud in relation to the radiator:
The shadow along the wall of the rocker scoop clearly shows how the floor is ramped upwards. That takes care of feeding air to the lower third of the radiator.
For the upper two thirds, the door scoop needed its own channeling. The first step was to smooth out the inside of the shroud… at least as far as the eye would ever see on the completed car. This next photo shows my effort in that department, as well as the offset nature of the shroud in relation to the radiator:
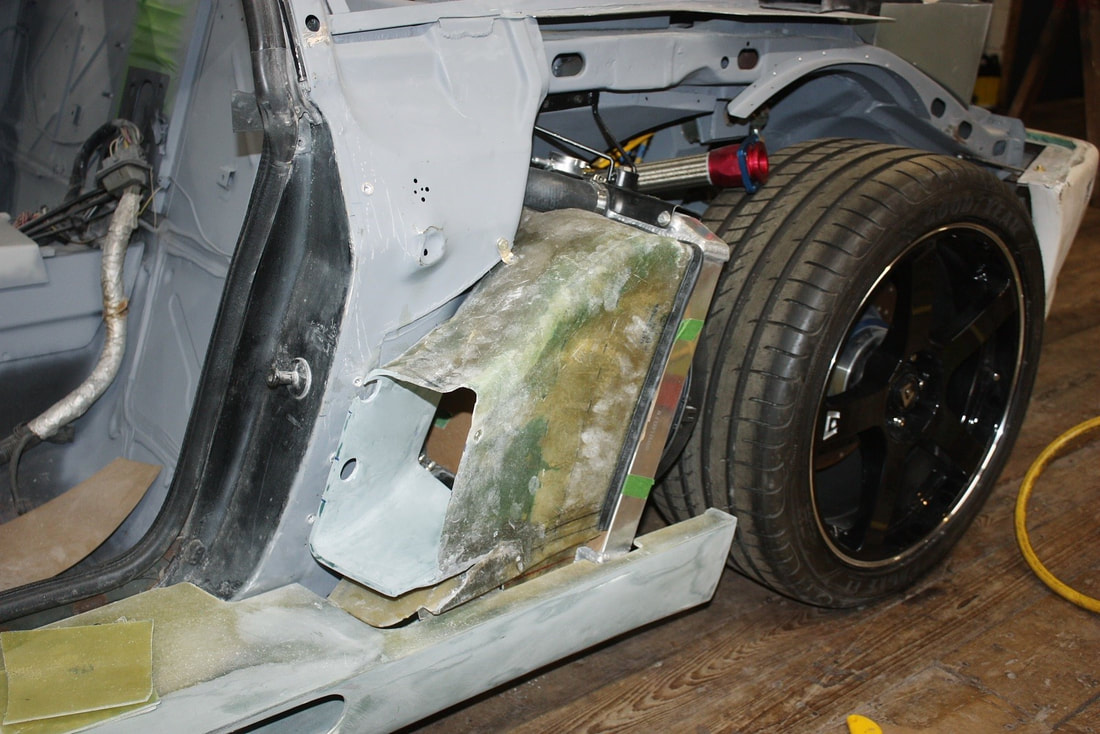
Placing upward curved vanes in the door inlet would redirect most of the air from the door scoop to the upper half of the radiator.
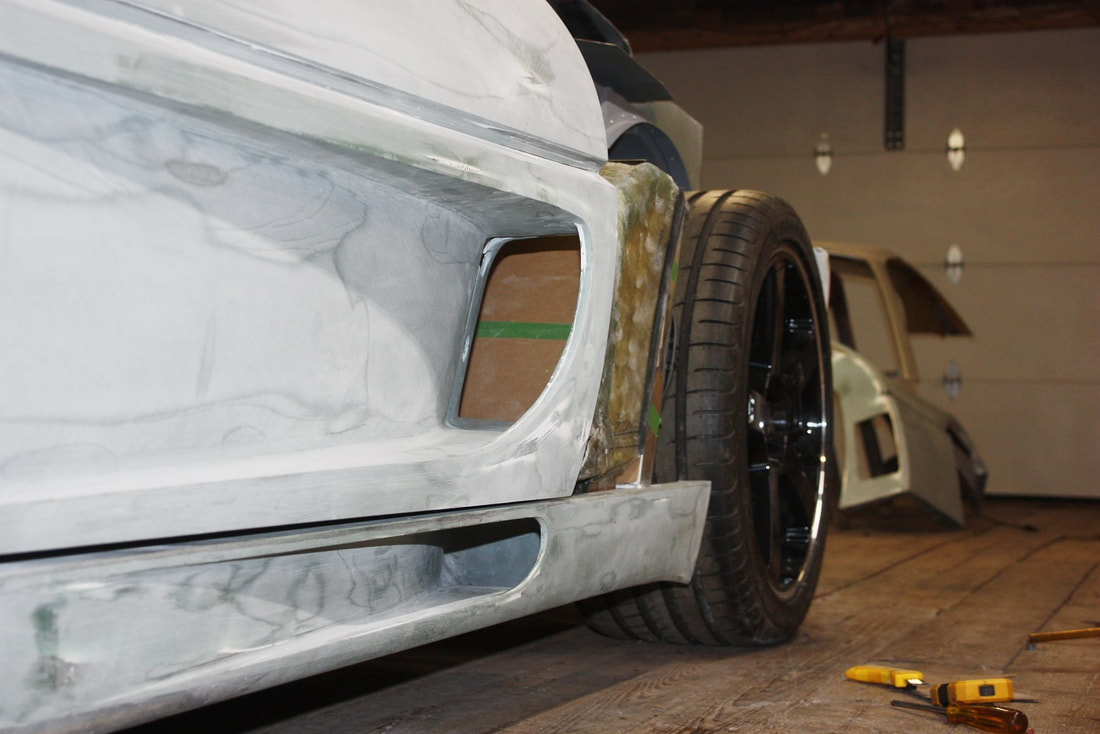
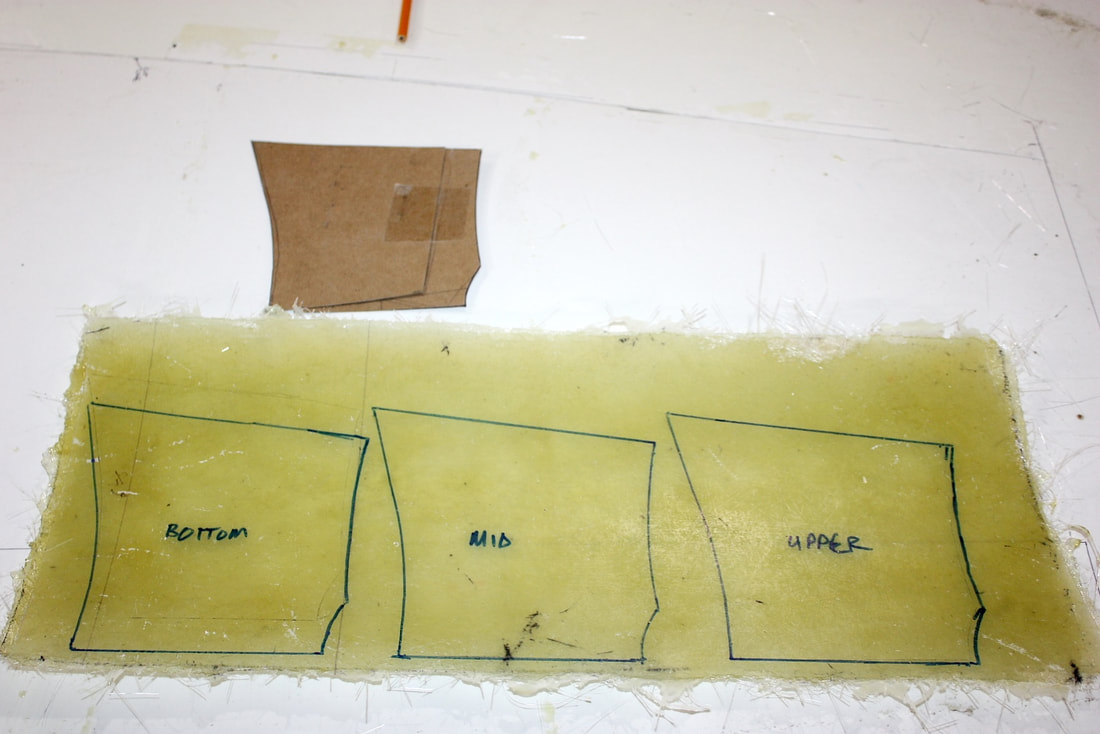
The vanes would need to be robust since the airflow at 120 km/h (75 MPH) would exert a fair amount of force on them. Replacing a radiator on the side of the road isn’t my idea of fun, so I made a plan to make them out of fibreglass. Here, I was test fitting a cardboard template:
Placing upward curved vanes in the door inlet would redirect most of the air from the door scoop to the upper half of the radiator.
The vanes would need to be robust since the airflow at 120 km/h (75 MPH) would exert a fair amount of force on them. Replacing a radiator on the side of the road isn’t my idea of fun, so I made a plan to make them out of fibreglass. Here, I was test fitting a cardboard template:

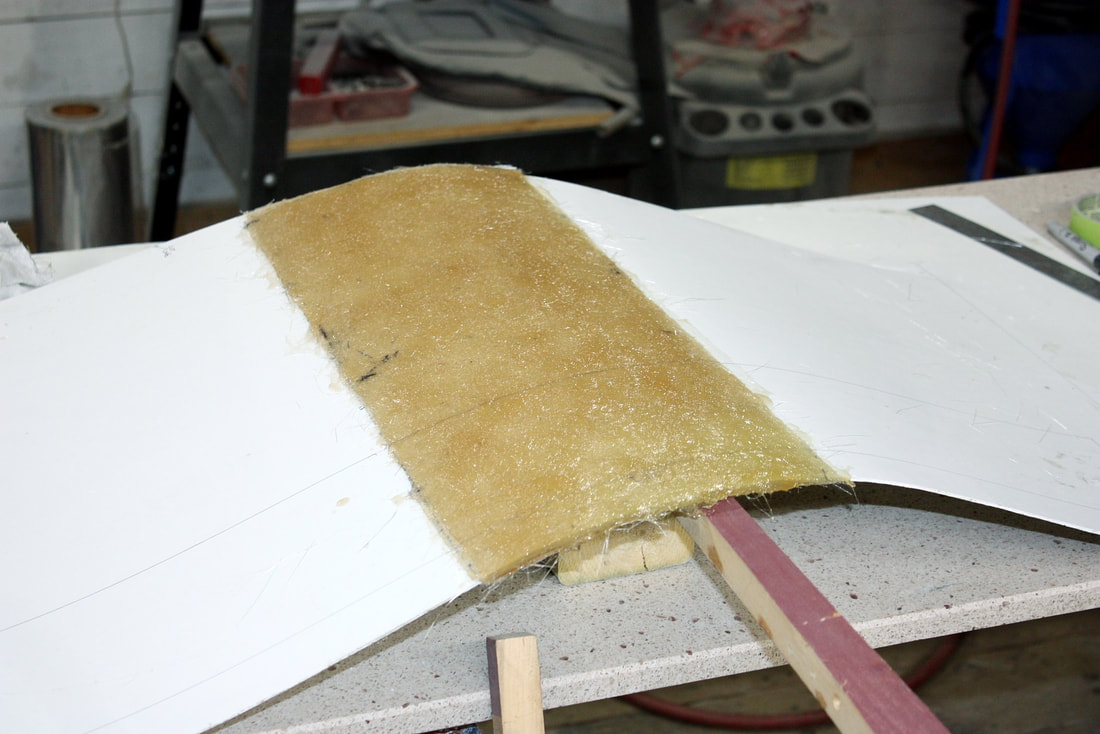
To achieve the curved airfoil shape, I clamped a sheet of fibreglass reinforced plastic (FRP) in a gentle arch to my workbench, buttered it up with mold release wax, and laid up three layers of mat large enough for all three vanes:
To achieve the curved airfoil shape, I clamped a sheet of fibreglass reinforced plastic (FRP) in a gentle arch to my workbench, buttered it up with mold release wax, and laid up three layers of mat large enough for all three vanes:
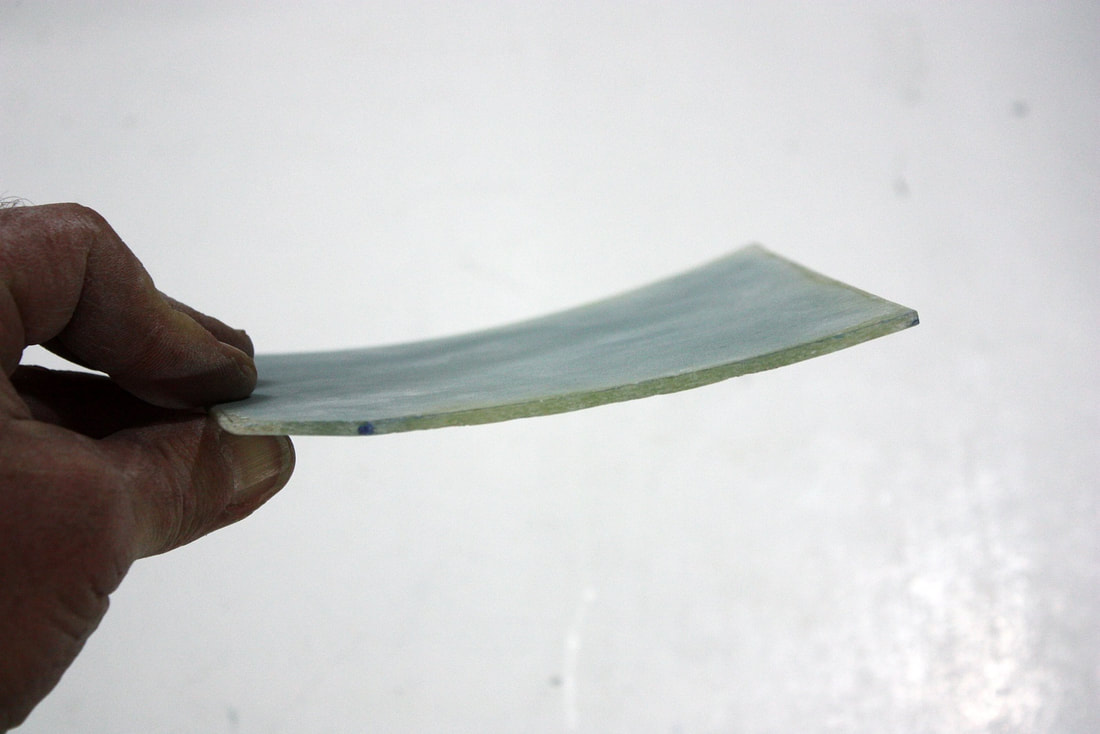
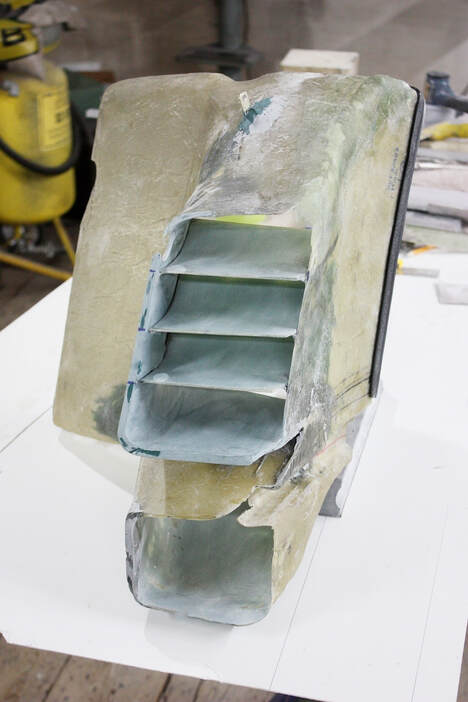
Once cut and trimmed to shape, I filled the visible side with a skim coat of filler, and sanded them smooth. Here you can see the gentle curvature:
Once cut and trimmed to shape, I filled the visible side with a skim coat of filler, and sanded them smooth. Here you can see the gentle curvature:
I mocked them up and fiddled with the exact shape of each one for a while. I could get any two to stay put just with friction, but like a reverse game of Jenga, every time I tried to install the third vane the other two would fall out:
I mocked them up and fiddled with the exact shape of each one for a while. I could get any two to stay put just with friction, but like a reverse game of Jenga, every time I tried to install the third vane the other two would fall out:
To bond them to the shroud, I mixed up a couple small batches of long strand fibreglass filler, and built up radius fillets along the underside of both ends of each vane, one vane at a time. Placing the bead on the bottom of each vane meant that the tops would stay clean, and the messier bonds would remain out of view (unless you're a worm):
To bond them to the shroud, I mixed up a couple small batches of long strand fibreglass filler, and built up radius fillets along the underside of both ends of each vane, one vane at a time. Placing the bead on the bottom of each vane meant that the tops would stay clean, and the messier bonds would remain out of view (unless you're a worm):
Once securely glued in place, I reinstalled the shroud to the radiator... it was starting to look like something out of Mad Max:
Once securely glued in place, I reinstalled the shroud to the radiator... it was starting to look like something out of Mad Max:
Next I reinstalled the rocker panel… (they say civility is only skin deep):
Next I reinstalled the rocker panel… (they say civility is only skin deep):
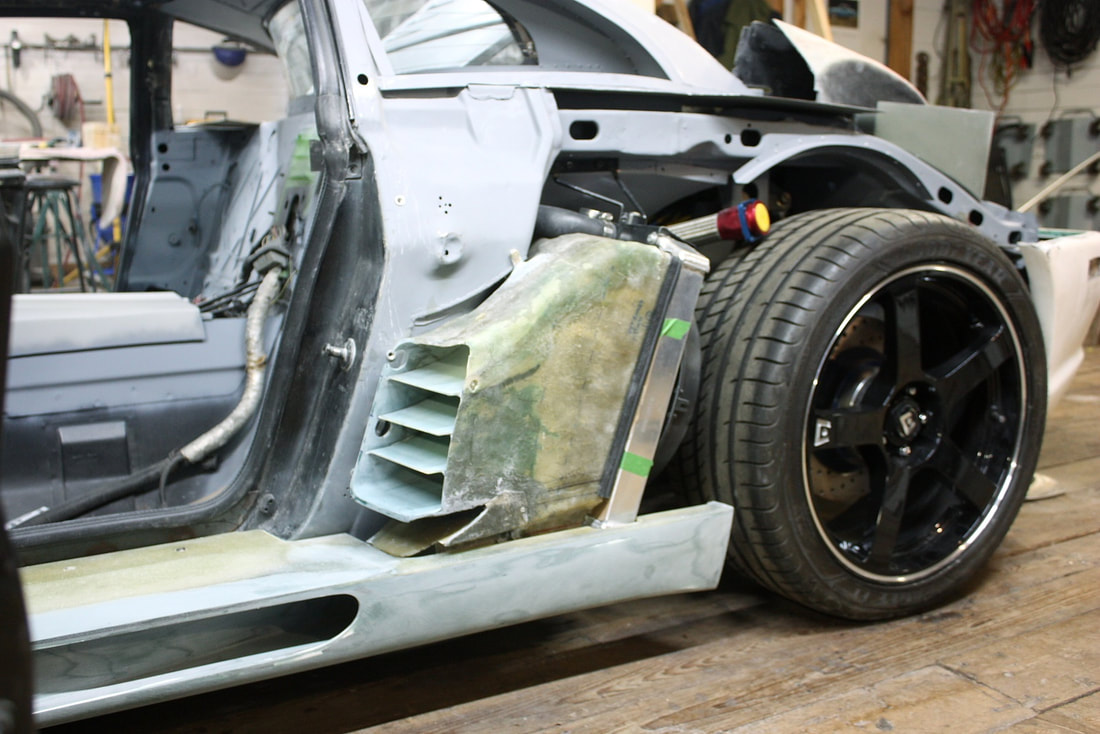
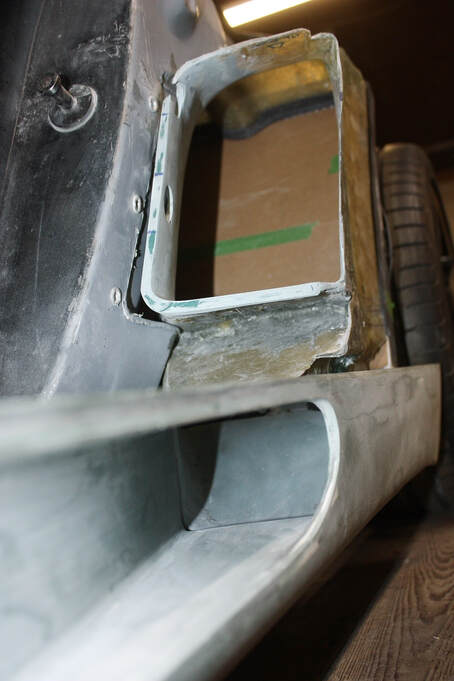
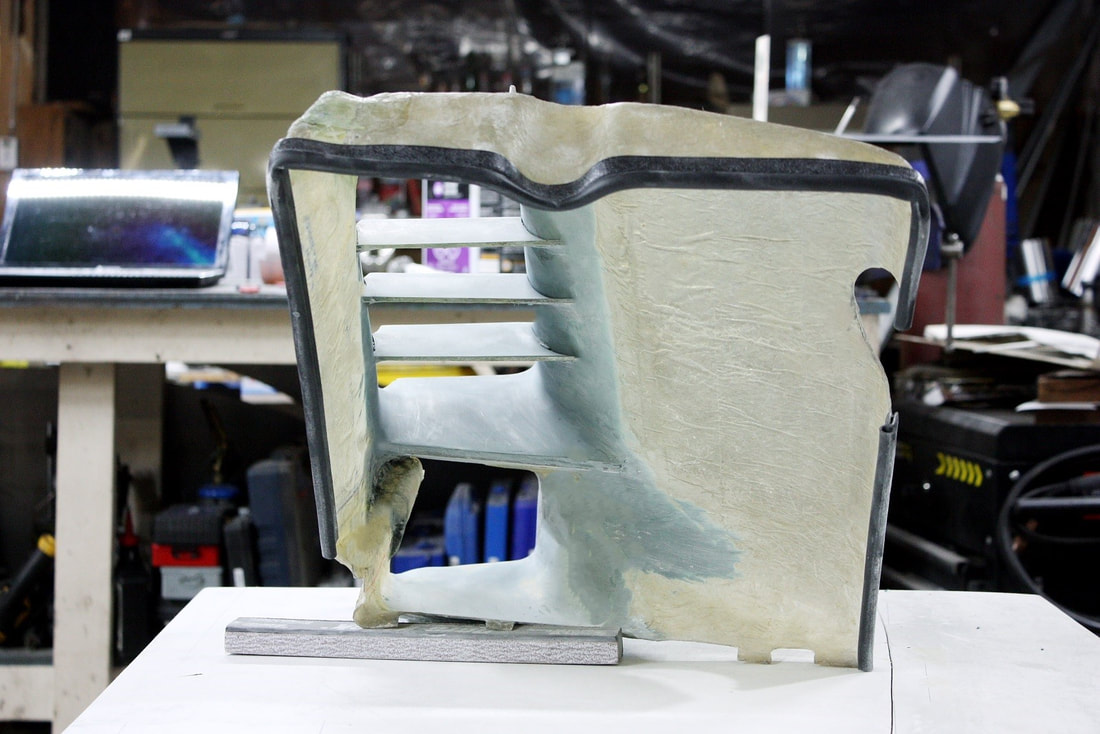
And finally the quarter panel (again). Here’s a close up of how I fasten the lower part of the quarter panel to the chassis. I made two medium sized holes in the side of the shroud to have access to the two ¼” bolts that mount the quarter panel:
And finally the quarter panel (again). Here’s a close up of how I fasten the lower part of the quarter panel to the chassis. I made two medium sized holes in the side of the shroud to have access to the two ¼” bolts that mount the quarter panel:
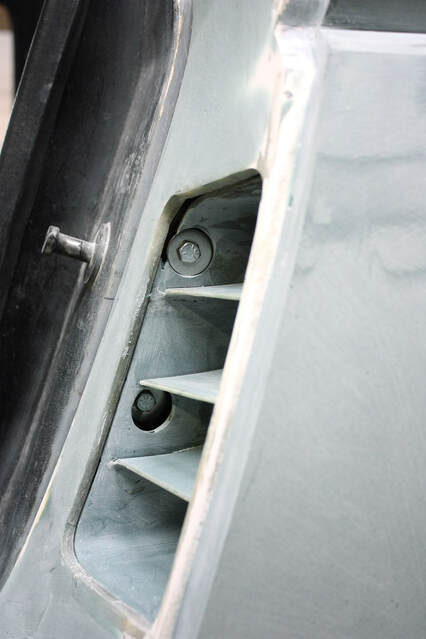
Then I cap the access holes in the shroud with low profile rubber friction plugs for a smoother finish (I obviously need to spend a bit more time in the upper corner of the shroud):
Then I cap the access holes in the shroud with low profile rubber friction plugs for a smoother finish (I obviously need to spend a bit more time in the upper corner of the shroud):
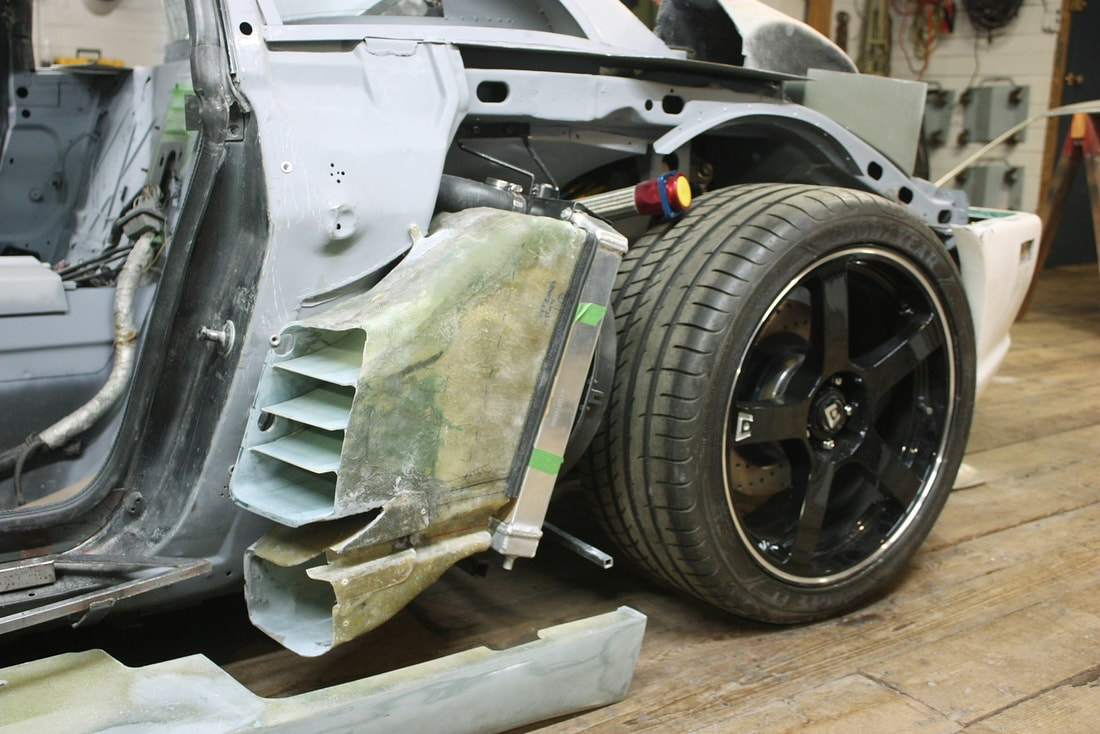
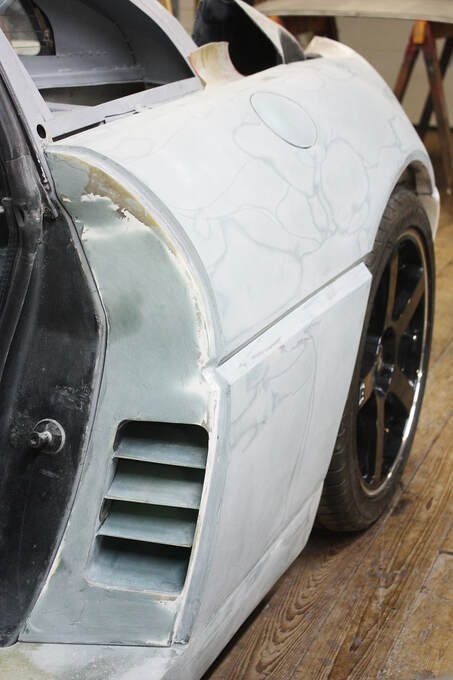
Stepping back, things were looking a lot more civilized:
Stepping back, things were looking a lot more civilized:
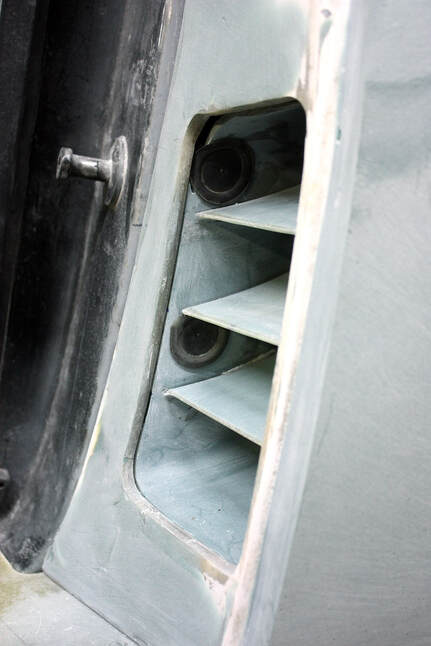
And with the door closed, the vanes just peek out enough to see there's something interesting going on behind the flank of the quarter panel. The vanes should also keep pesky little hands out of the very fragile radiator fins inside:
And with the door closed, the vanes just peek out enough to see there's something interesting going on behind the flank of the quarter panel. The vanes should also keep pesky little hands out of the very fragile radiator fins inside:
Next up is the passenger rear quarter… for real this time!
Next up is the passenger rear quarter… for real this time!

 RSS Feed
