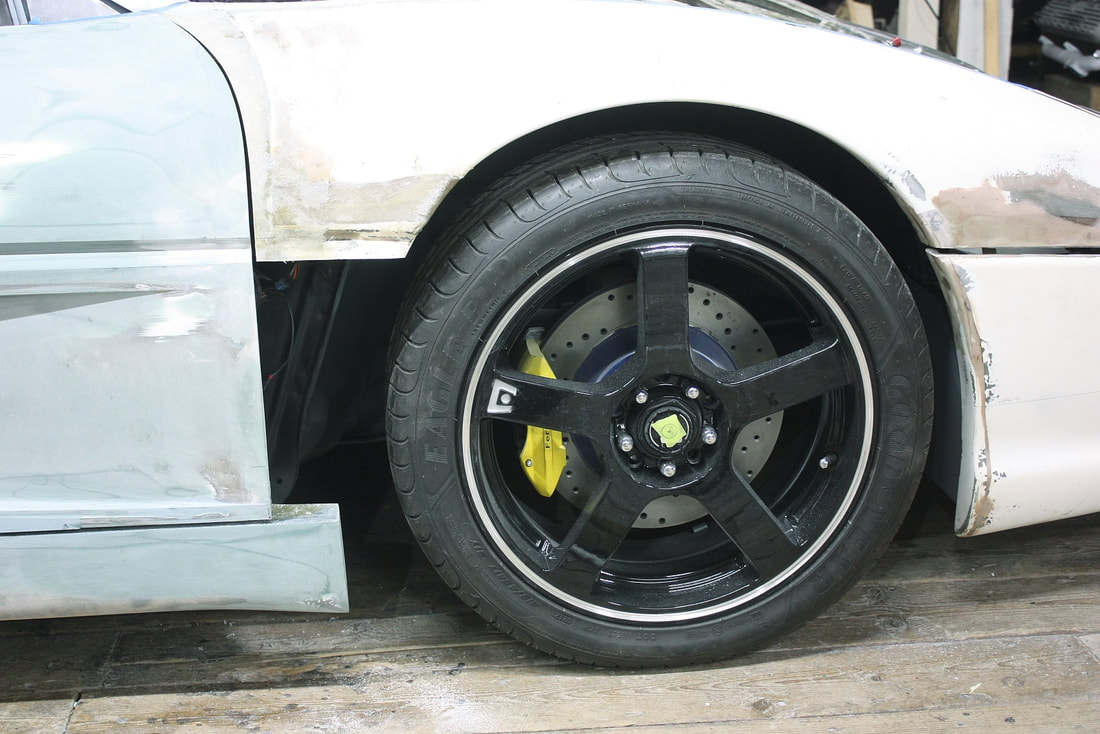
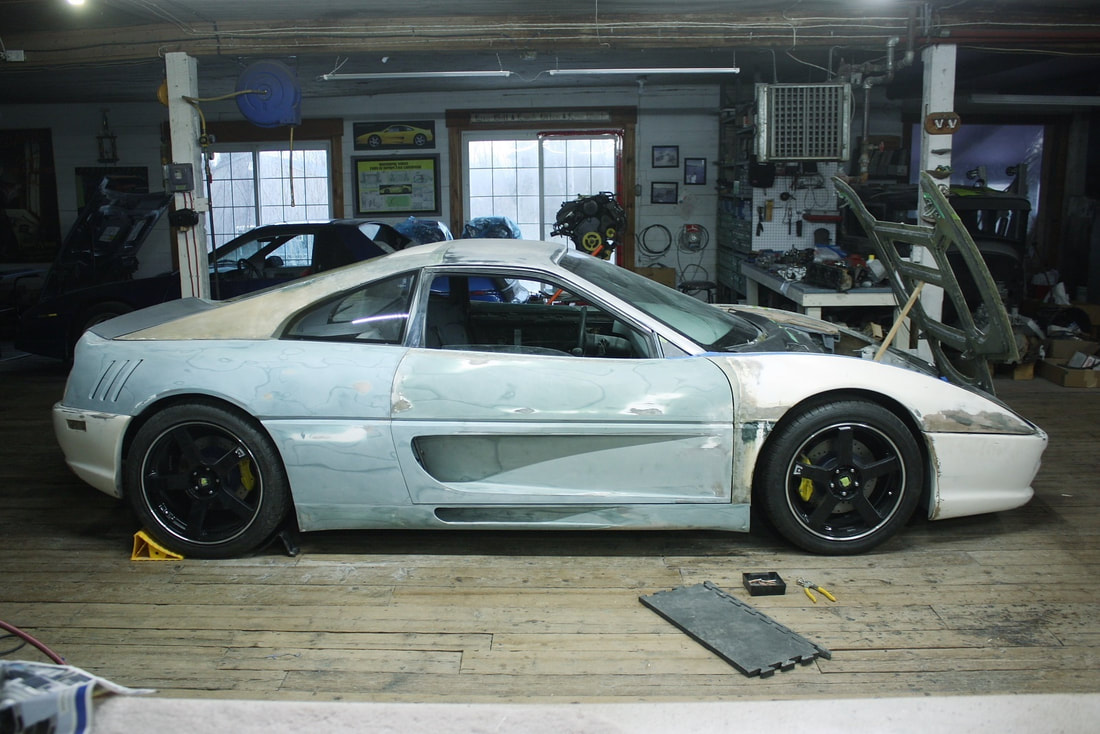
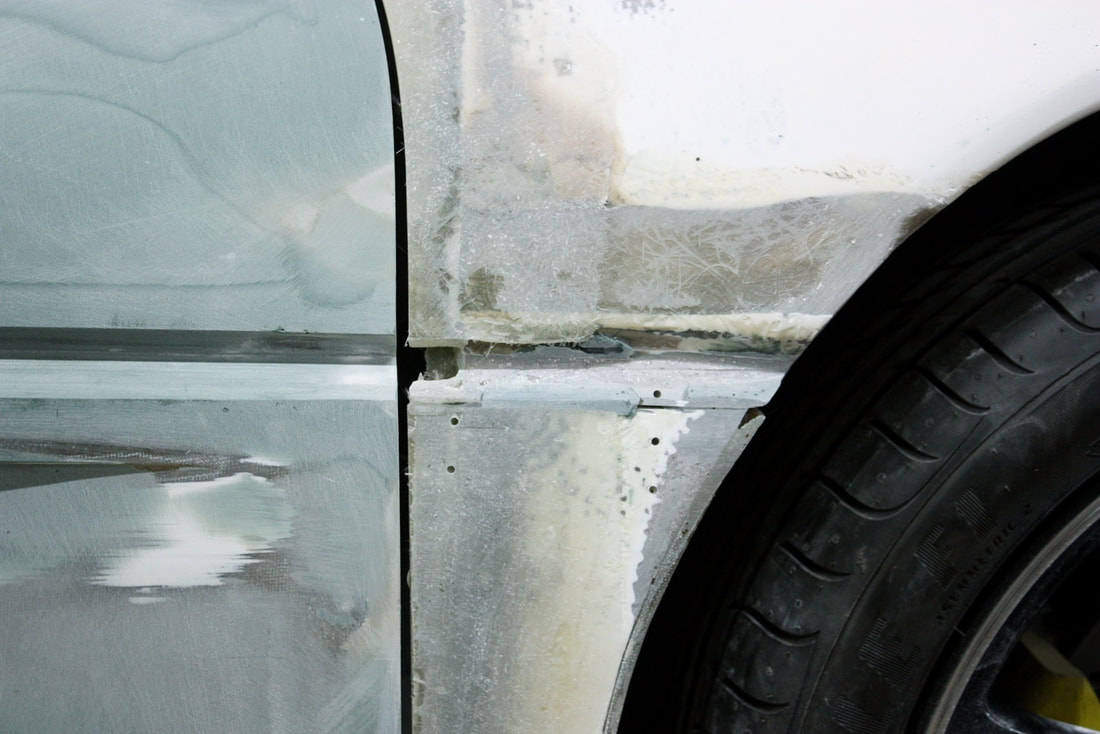
As with other body panels, there was a specific order that needed to be followed for some of the modifications to the passenger side front fender. One of the things that stood out was that the fender was under stress from being pinched between the upper mounting bolts and the rocker panel. The result was that the fender skin was bulging outward in the area next to the door:
As with other body panels, there was a specific order that needed to be followed for some of the modifications to the passenger side front fender. One of the things that stood out was that the fender was under stress from being pinched between the upper mounting bolts and the rocker panel. The result was that the fender skin was bulging outward in the area next to the door:
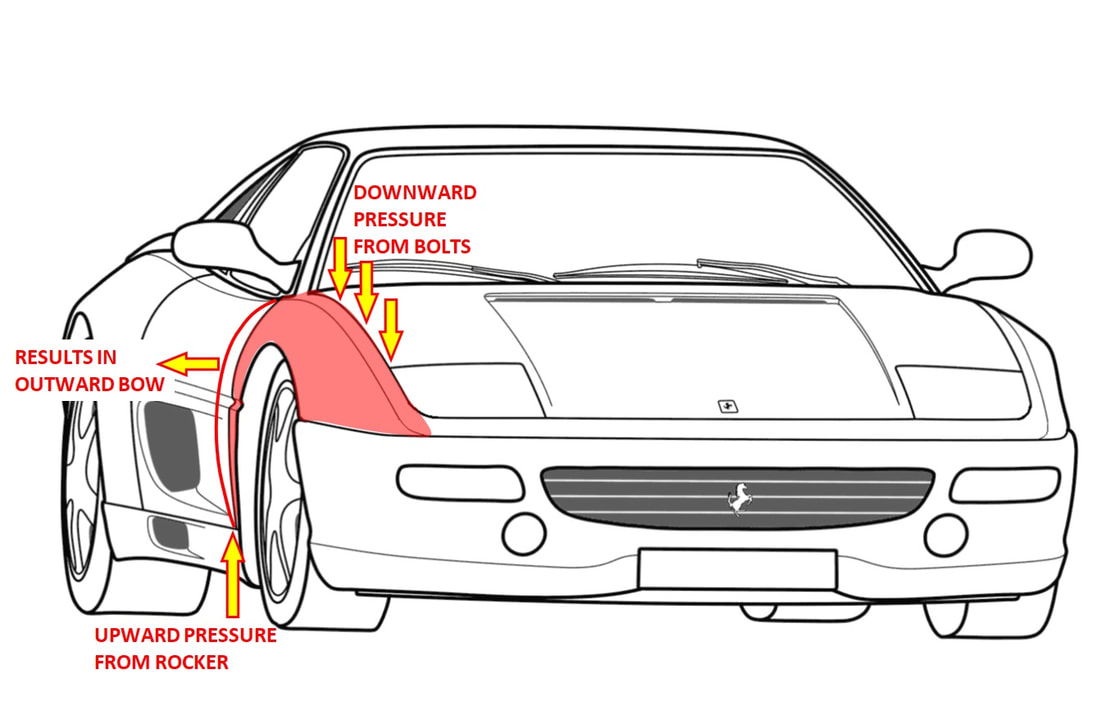

I decided this was the first thing that needed attention for several reasons. First, since correcting the problem meant I’d have to shorten the fender height-wise, any modifications done prior to that would be drawn out of alignment with adjacent panels. Second, the stress on the panel had to be relieved to reduce the likelihood of cracks later in the car’s life.
The easiest way to bring the fender skin into alignment with the door was to remove a thin slice from just below the belt line, and let the two halves fall to a natural position:

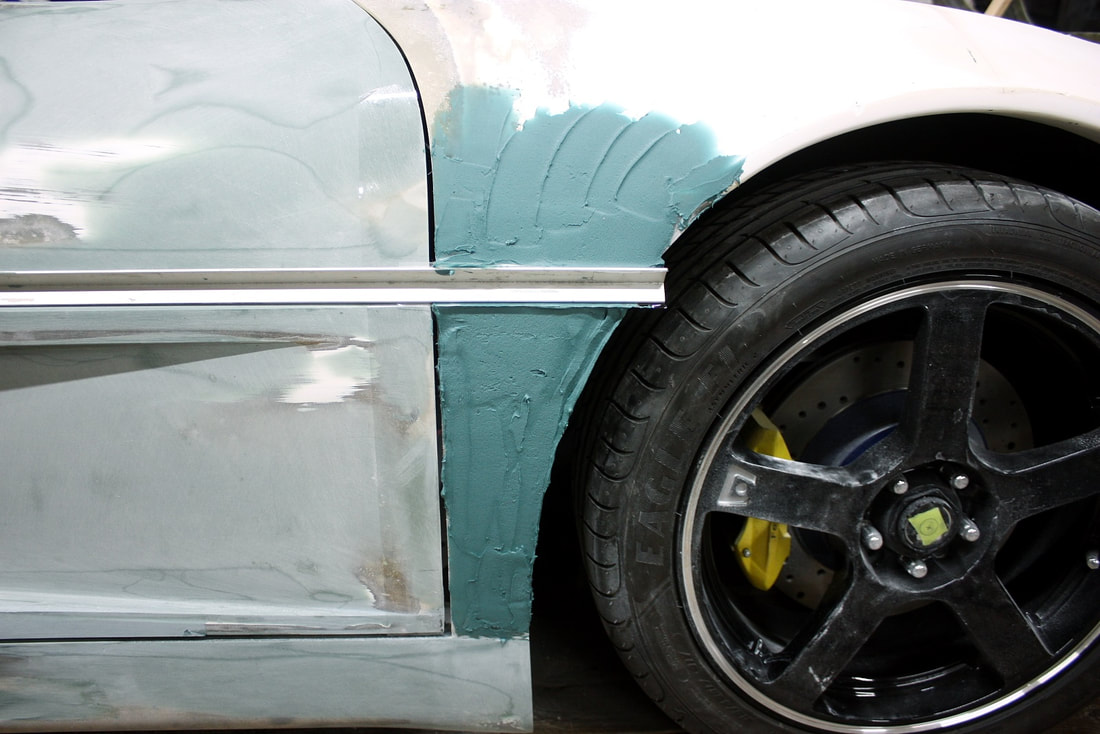
This removed the stress, brought the fender skin to the same level as the door, moved the belt line a bit lower (it needed it), and limited the repair to the same area where other work had to be done anyway. Here’s how the skins aligned after the cut:
This removed the stress, brought the fender skin to the same level as the door, moved the belt line a bit lower (it needed it), and limited the repair to the same area where other work had to be done anyway. Here’s how the skins aligned after the cut:

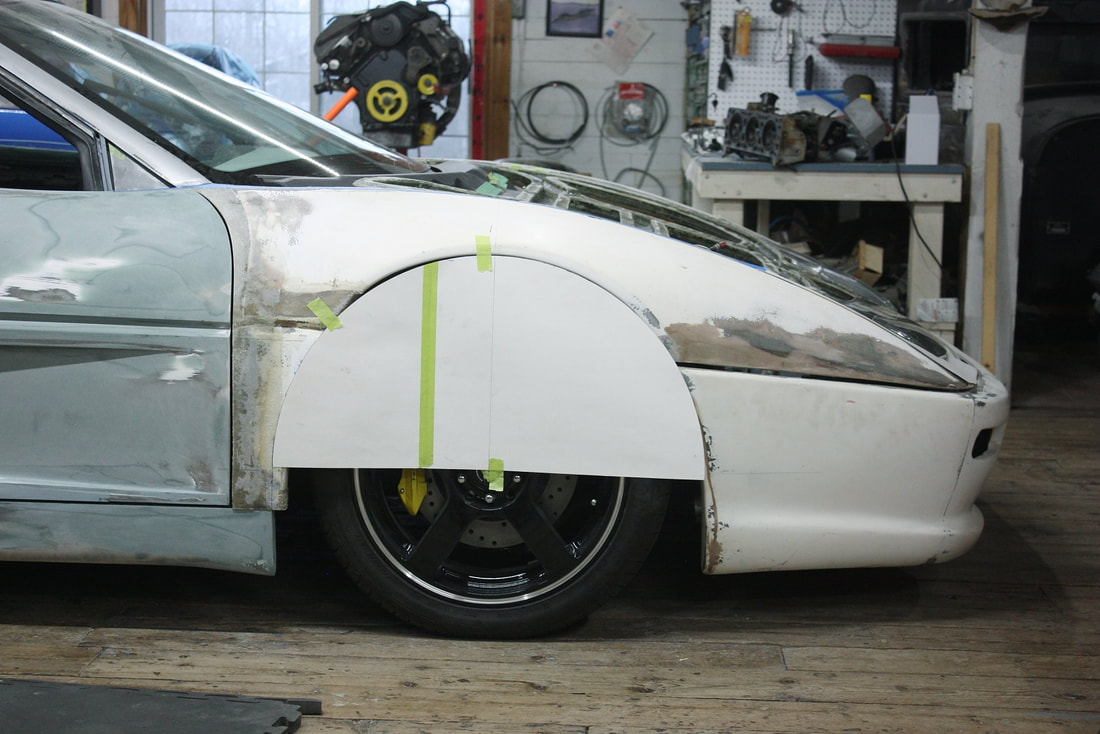
Before bonding the fender back together, I decided to work on other needed mods in the area and bond them all together in one go. I started with the wheel arch by centering a 29” diameter cardboard template on the wheel hub and marking the problem areas:
Before bonding the fender back together, I decided to work on other needed mods in the area and bond them all together in one go. I started with the wheel arch by centering a 29” diameter cardboard template on the wheel hub and marking the problem areas:
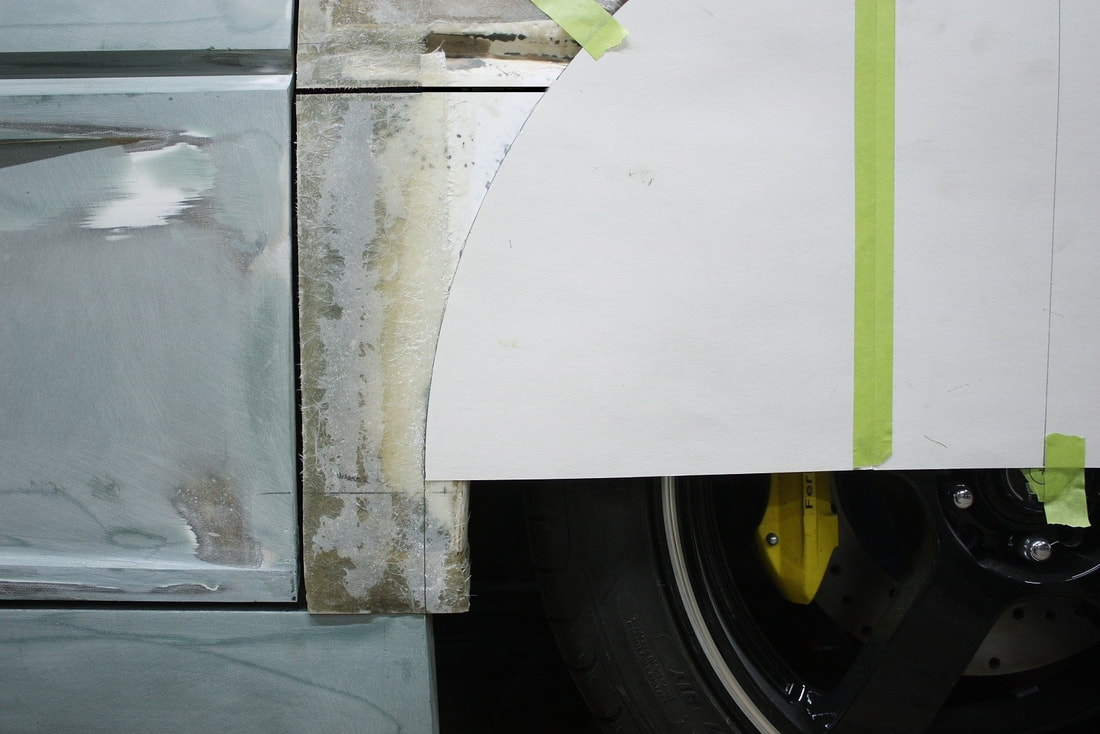
The fender was missing material in some places:
The fender was missing material in some places:
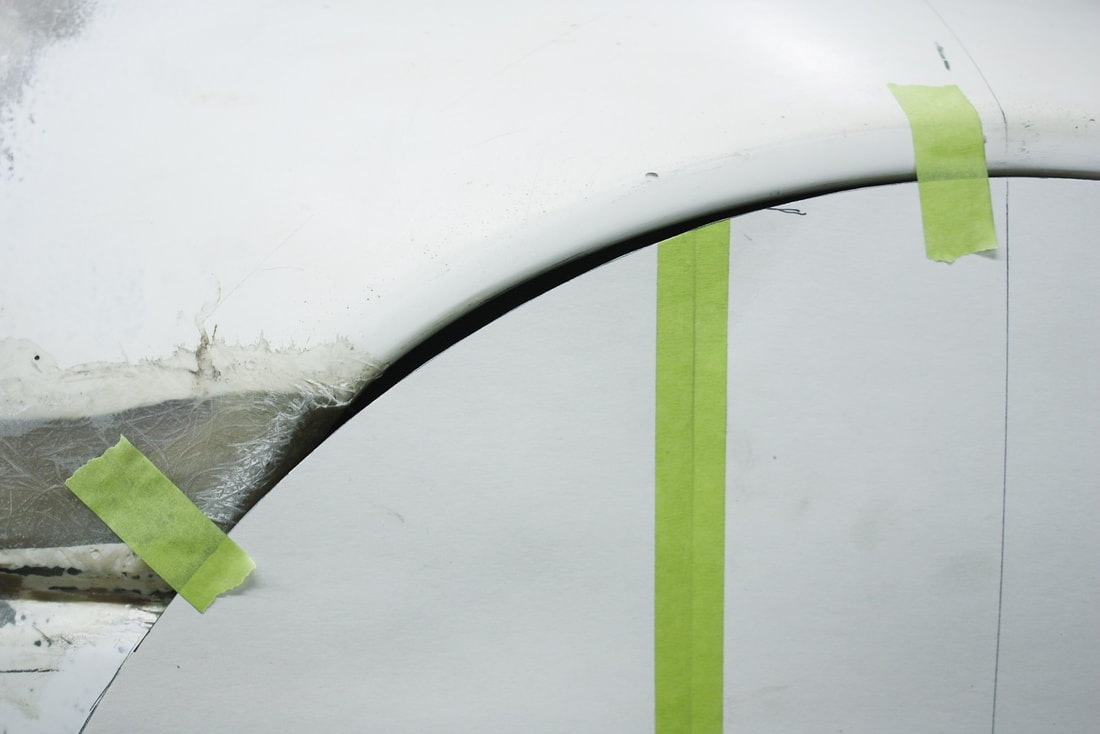
And had too much in others:
And had too much in others:
After scribing the new wheel arch contour I removed the lower piece to modify it:
After scribing the new wheel arch contour I removed the lower piece to modify it:
I re-profiled the lower portion using my band saw to do the dirty work:
I re-profiled the lower portion using my band saw to do the dirty work:

Then I re-installed the piece back onto the car, but clearly more material needed to be removed from the upper half of the fender to get the right profile:
Then I re-installed the piece back onto the car, but clearly more material needed to be removed from the upper half of the fender to get the right profile:

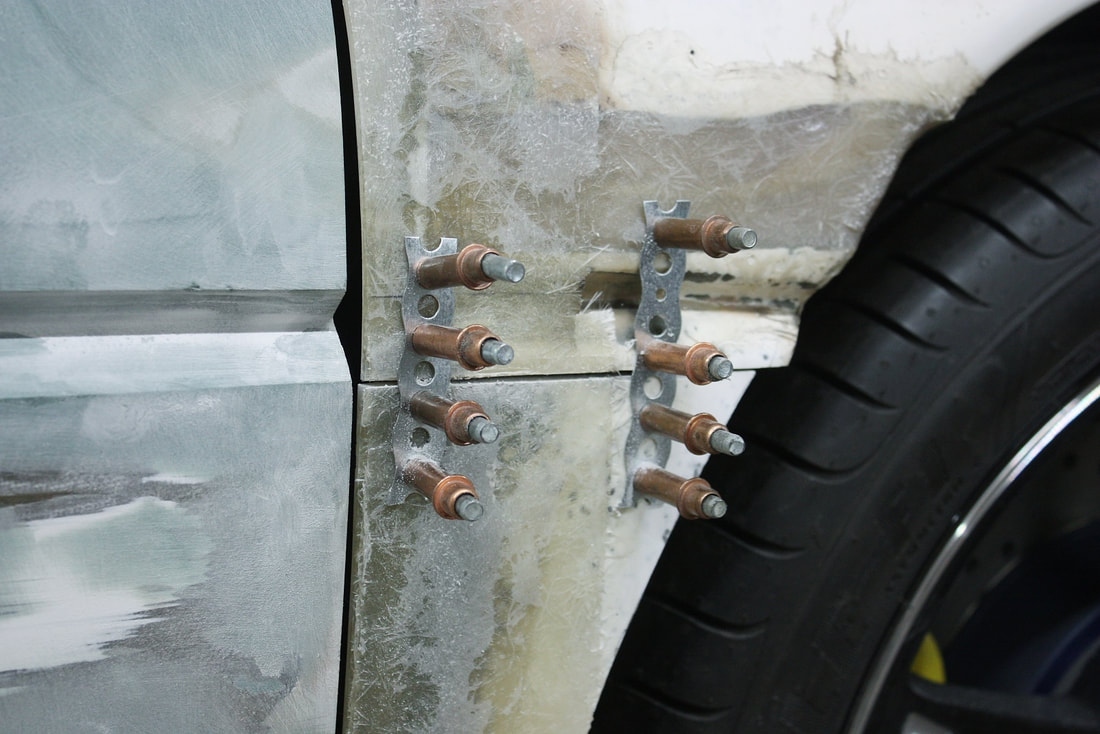
I needed to finish up the circular cut, form a new return flange, and bond the pieces together, so I needed a way to temporarily hold the parts together. Initially I tried using metal strapping and Cleco fasteners to hold the lower portion in place, but it flopped around when taken off the car:
I needed to finish up the circular cut, form a new return flange, and bond the pieces together, so I needed a way to temporarily hold the parts together. Initially I tried using metal strapping and Cleco fasteners to hold the lower portion in place, but it flopped around when taken off the car:
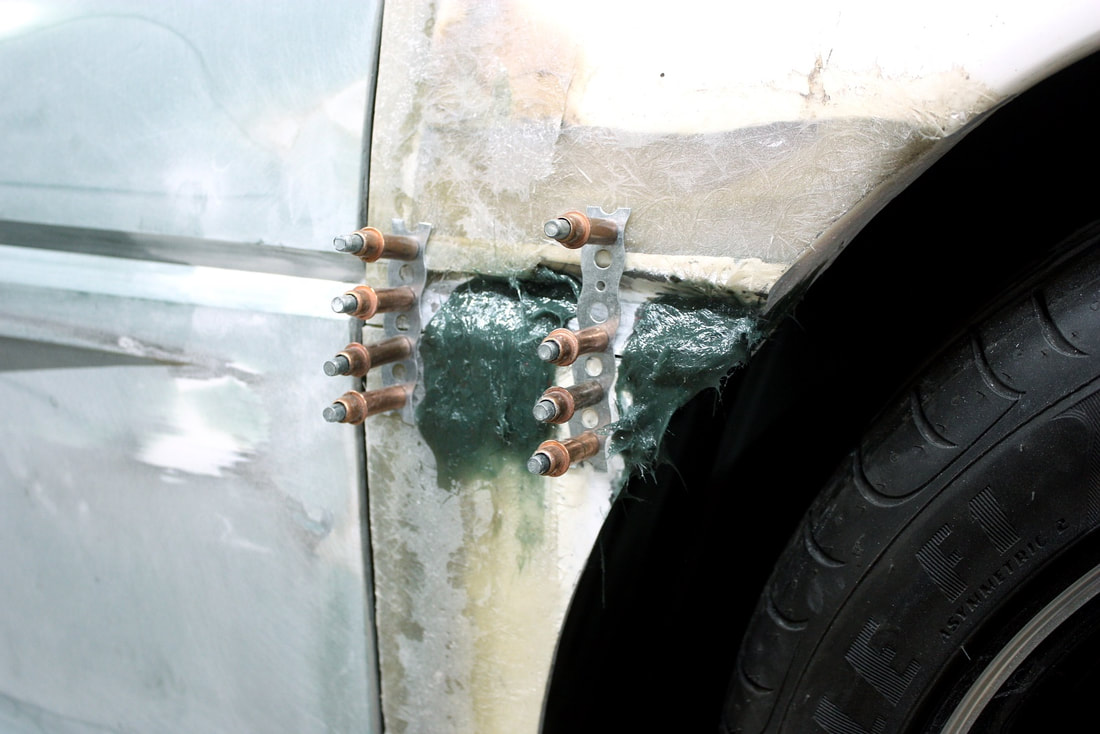
The solution was to add a temporary blob of long-strand filler to stiffen the joint enough to keep the pieces aligned for off-car work:
The solution was to add a temporary blob of long-strand filler to stiffen the joint enough to keep the pieces aligned for off-car work:
With the panel now removable, I shaved the rest of the wheel arch into shape, then molded a new return flange to graft onto the fender. To make the flange, I used the 29” diameter template I made earlier to mark a circle on a piece of 2” thick Styrofoam, then used the band saw to cut out a buck for the flange:
With the panel now removable, I shaved the rest of the wheel arch into shape, then molded a new return flange to graft onto the fender. To make the flange, I used the 29” diameter template I made earlier to mark a circle on a piece of 2” thick Styrofoam, then used the band saw to cut out a buck for the flange:
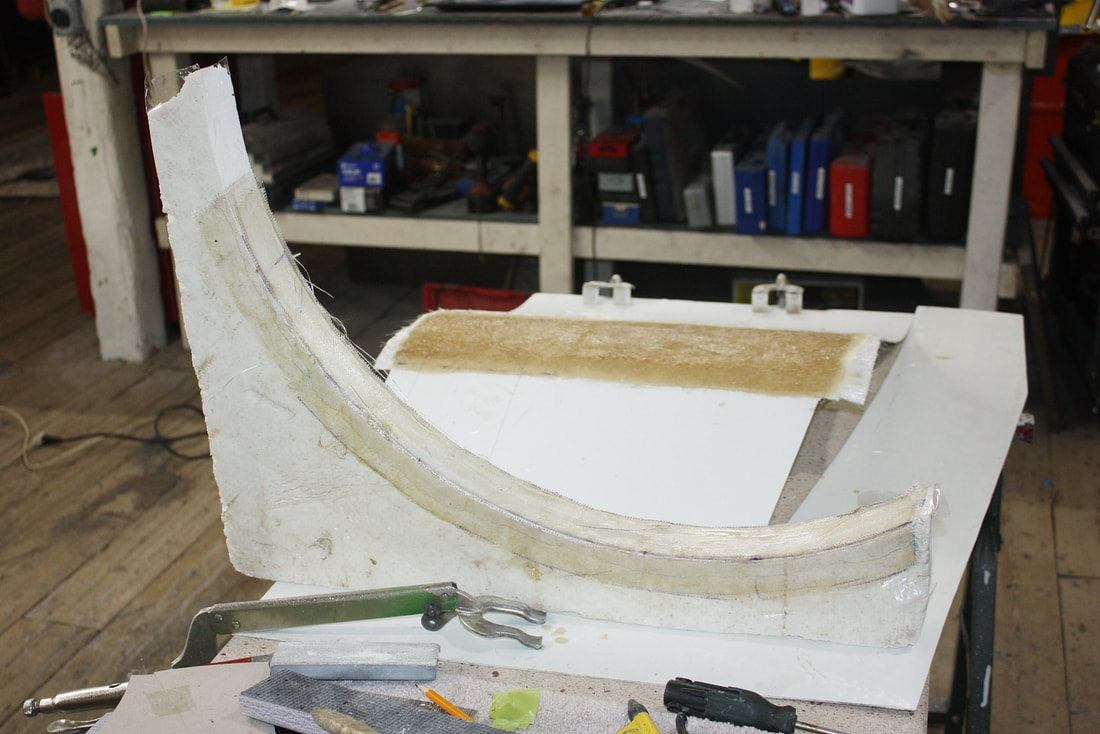
Being made of polystyrene, the mold had to be covered in packing tape to avoid being melted by the polyester resin. I laid up one layer of fibreglass cloth, followed by three more of mat, then let it set up overnight before separating it from the foam buck:
Being made of polystyrene, the mold had to be covered in packing tape to avoid being melted by the polyester resin. I laid up one layer of fibreglass cloth, followed by three more of mat, then let it set up overnight before separating it from the foam buck:

I cut it down, shaped it for its new role, roughed up the inside surfaces, then clamped all the pieces of the fender together in preparation for bonding:
I cut it down, shaped it for its new role, roughed up the inside surfaces, then clamped all the pieces of the fender together in preparation for bonding:
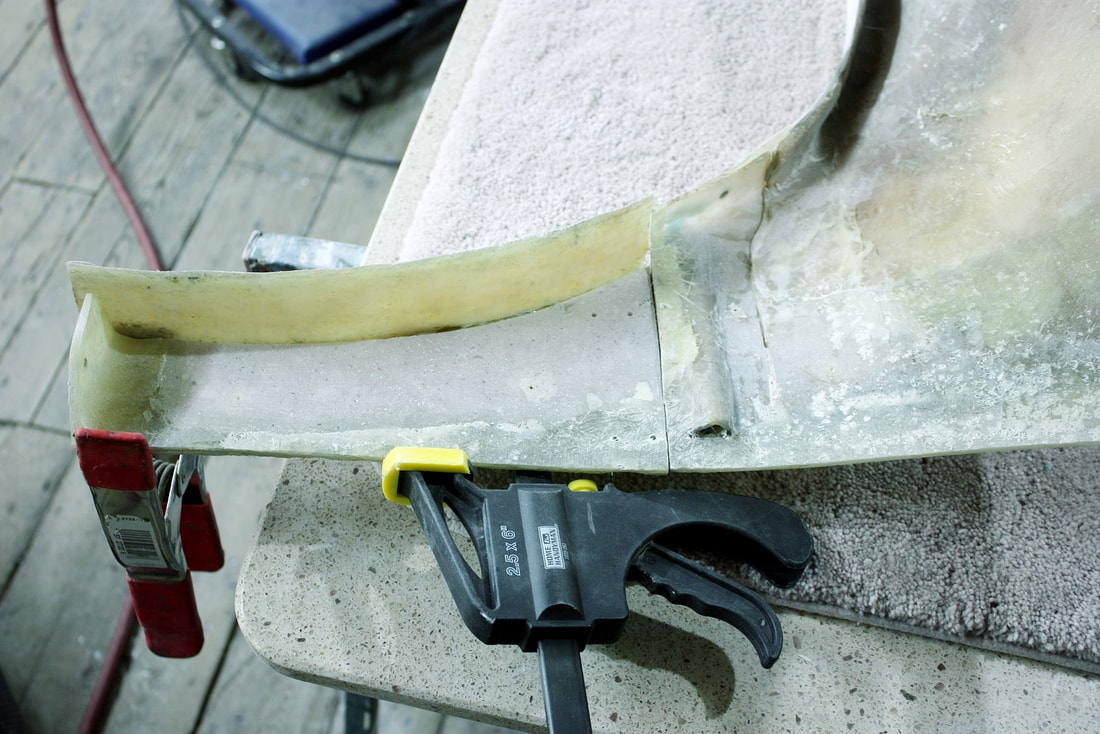
I mixed up about a cup of polyester resin and hardener and back-bonded everything with three layers of mat:
I mixed up about a cup of polyester resin and hardener and back-bonded everything with three layers of mat:
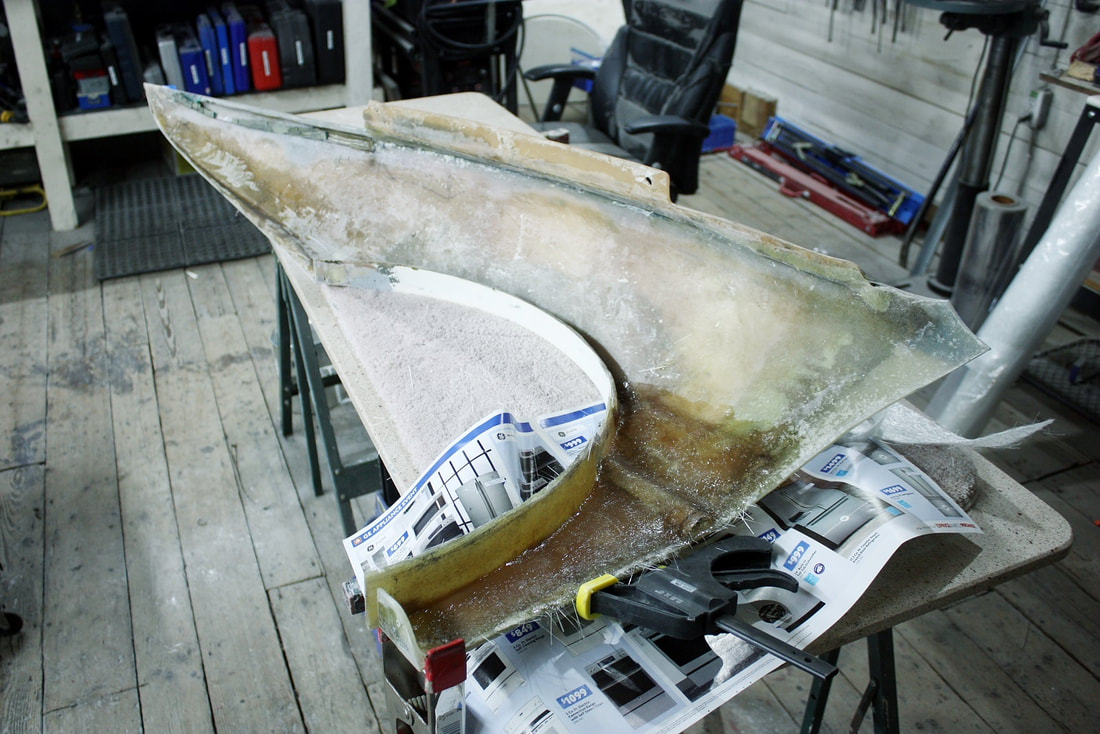
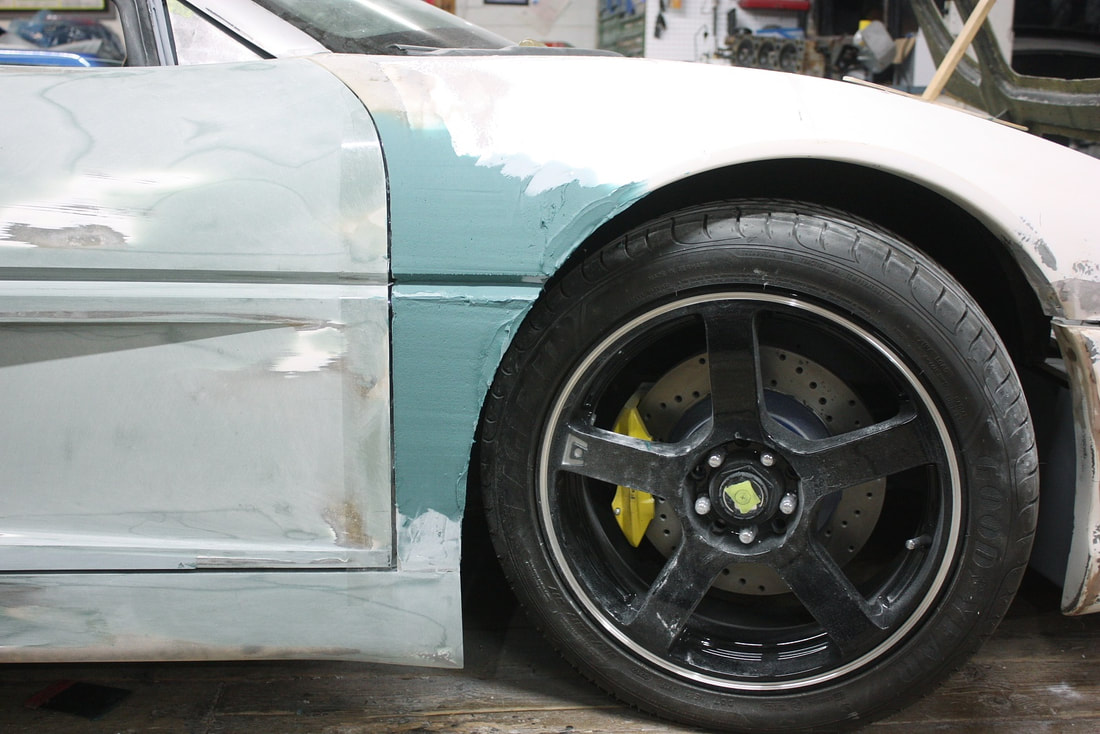
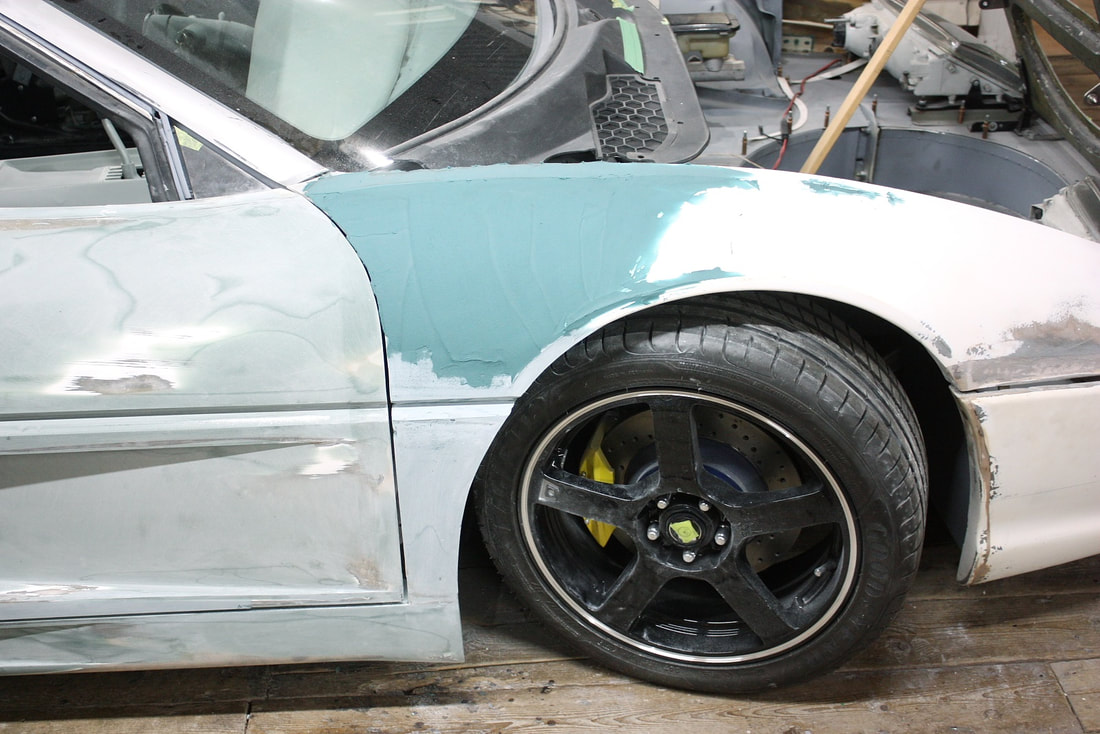
When the resin had cured, I mocked up the fender onto the car and took stock of how the wheel arch was progressing:
When the resin had cured, I mocked up the fender onto the car and took stock of how the wheel arch was progressing:
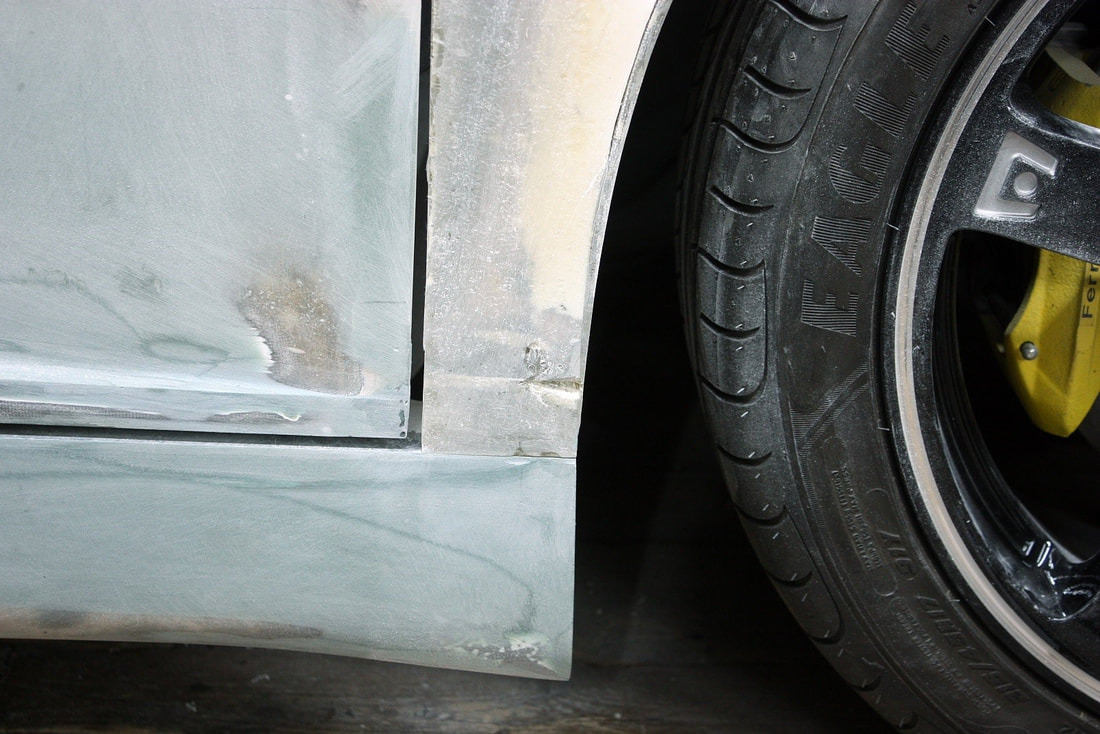
Good from far… but far from good. With the panel solidly joined together, I focused on smoothing out the “wrinkles” on the visible side. The area near the rocker needed some finessing:
Good from far… but far from good. With the panel solidly joined together, I focused on smoothing out the “wrinkles” on the visible side. The area near the rocker needed some finessing:
And the belt line, though lowered a bit, still needed to be straightened and reformed. Here I had sanded down the reinforcing blob from earlier, and prepped the belt line for filling with some short strand filler:
And the belt line, though lowered a bit, still needed to be straightened and reformed. Here I had sanded down the reinforcing blob from earlier, and prepped the belt line for filling with some short strand filler:
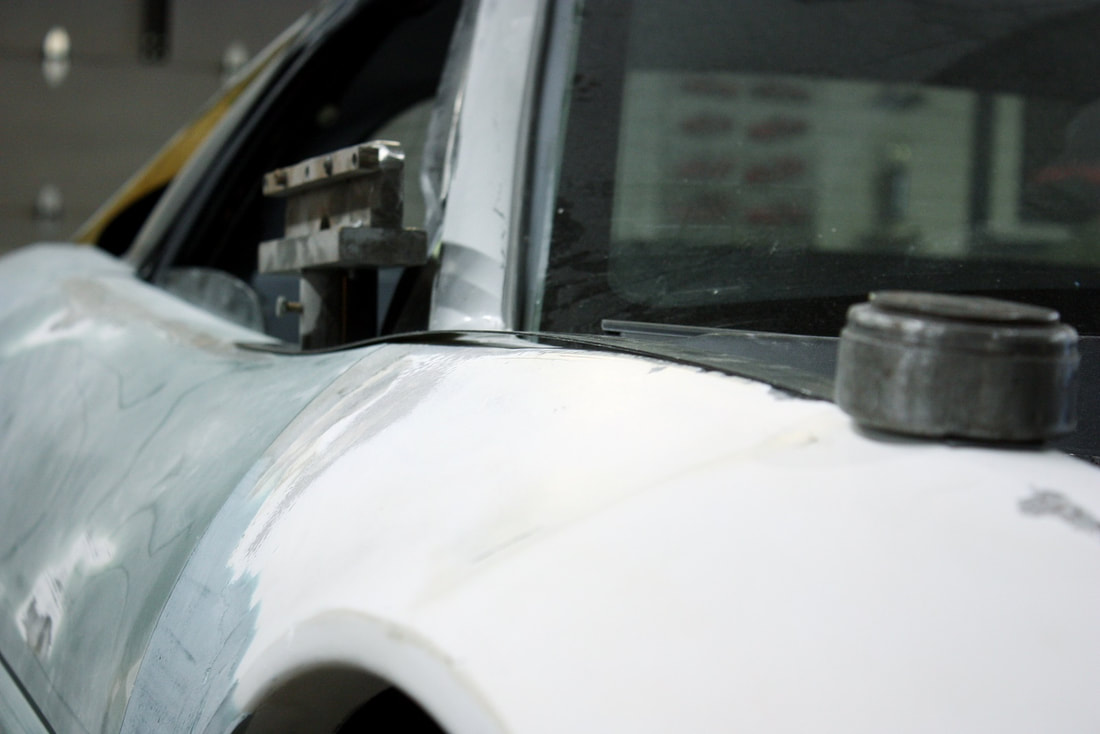
Then I over-filled the V-groove and surrounding area and pressed an aluminum angle into the putty before it had a chance to set. I had lined the angle with packing tape to make removing it a piece of cake, even after the filler had hardened:
Then I over-filled the V-groove and surrounding area and pressed an aluminum angle into the putty before it had a chance to set. I had lined the angle with packing tape to make removing it a piece of cake, even after the filler had hardened:
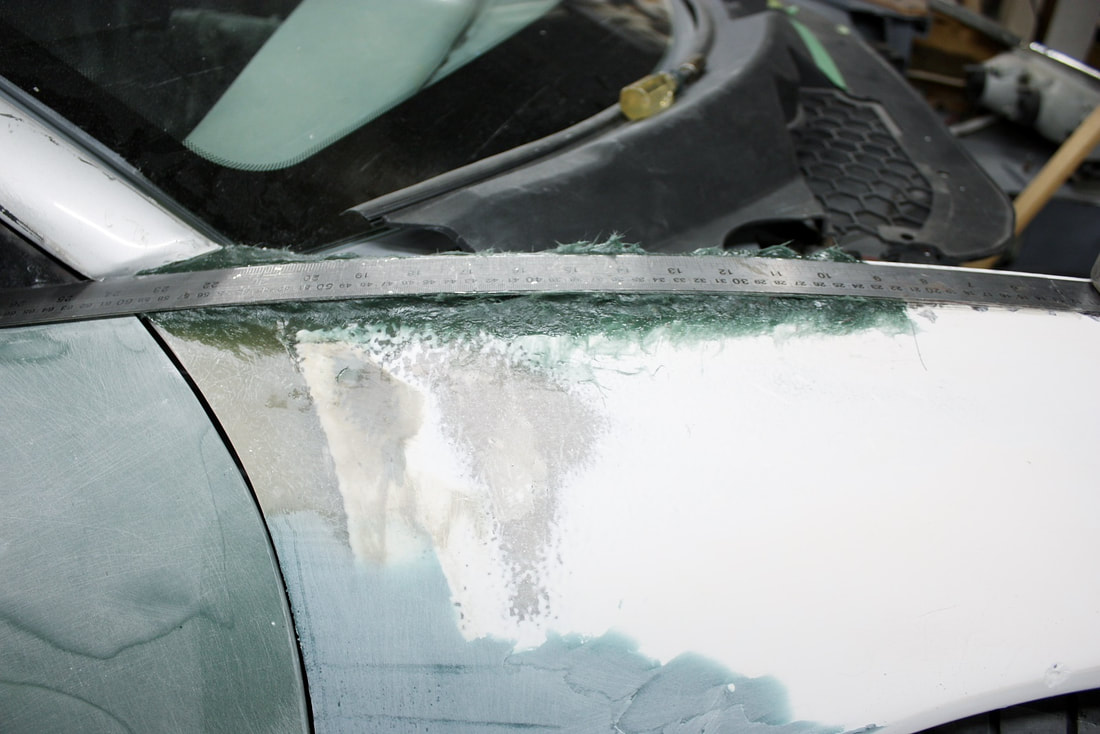
Before blending the belt line mods into the surrounding skin, I needed to make another change to the panel. The flat spot along the top of the fender had to be re-arched and would need to be blended down to the belt line. In this next photo I had laid a long stainless steel ruler along the top of the fender and held both ends down with weights, allowing the ruler to flow smoothly from the door to the centerline of the wheel arch:
Before blending the belt line mods into the surrounding skin, I needed to make another change to the panel. The flat spot along the top of the fender had to be re-arched and would need to be blended down to the belt line. In this next photo I had laid a long stainless steel ruler along the top of the fender and held both ends down with weights, allowing the ruler to flow smoothly from the door to the centerline of the wheel arch:
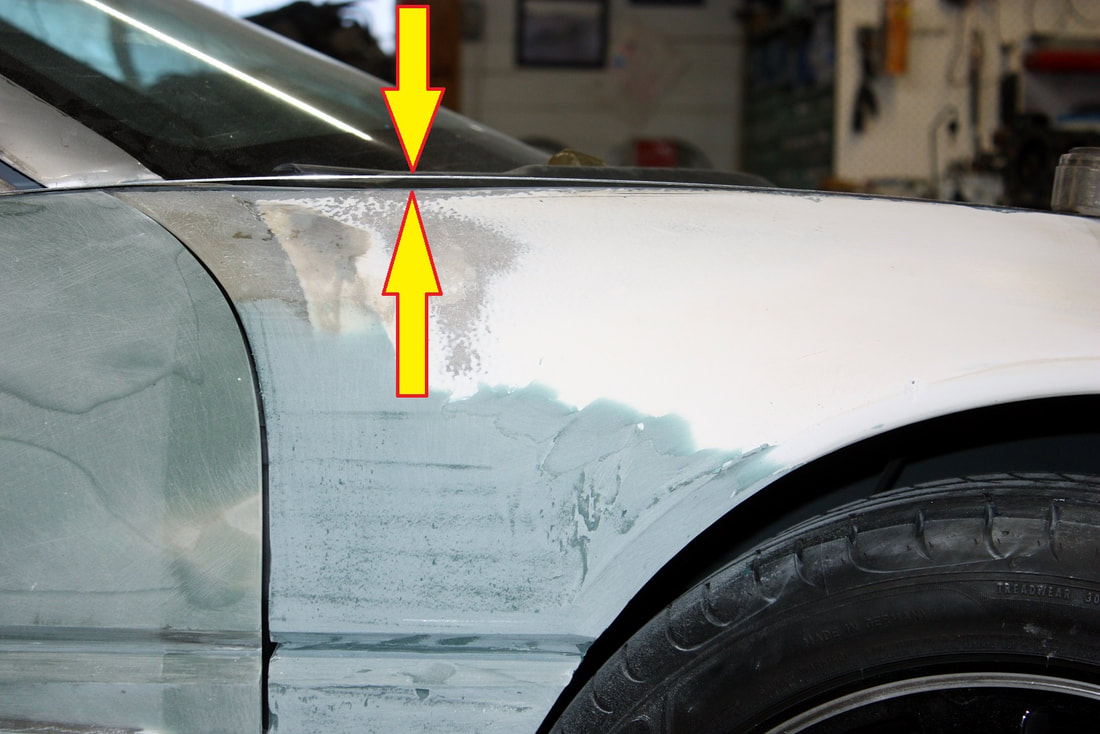
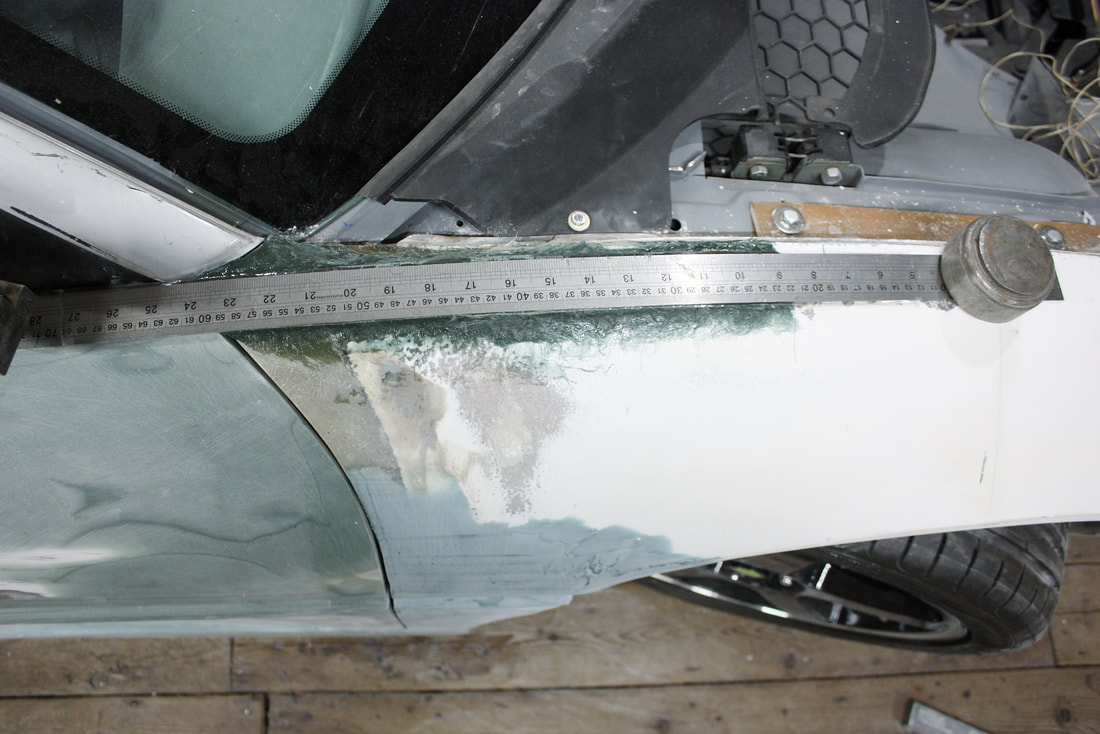
That showed the location and magnitude of the flat spot along the fender top. The best way to achieve the same continuous profile was to slather the low spot with some long strand filler, reinstall the ruler, let the filler take up the void perfectly and allow the excess to squish out:
That showed the location and magnitude of the flat spot along the fender top. The best way to achieve the same continuous profile was to slather the low spot with some long strand filler, reinstall the ruler, let the filler take up the void perfectly and allow the excess to squish out:
Having taped the underside of the ruler, separating it from the panel was a cinch once the filler had hardened. Here’s the result after just a little sanding to remove some of the excess:
Having taped the underside of the ruler, separating it from the panel was a cinch once the filler had hardened. Here’s the result after just a little sanding to remove some of the excess:
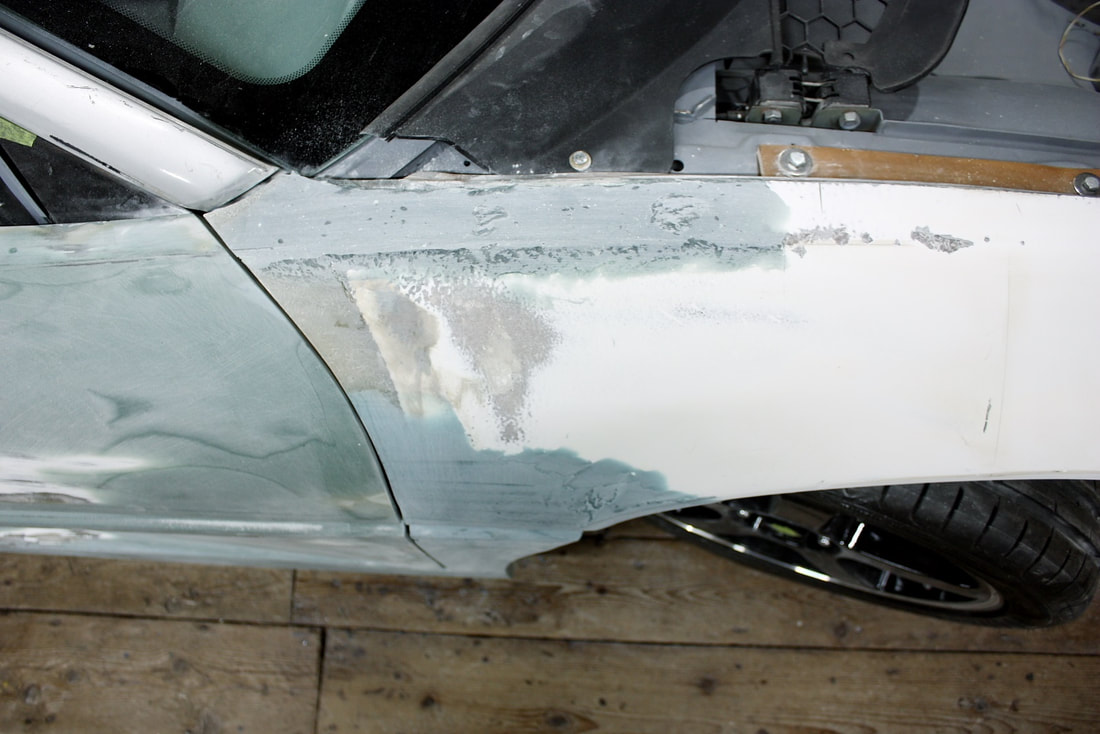
And here's the fender with a skim coat of short strand filler destined to be blended down the belt line modification:
And here's the fender with a skim coat of short strand filler destined to be blended down the belt line modification:
Next up I’ll deal with widening the hood opening, forming the headlight surround, and embossing the fender for the “Scuderia Ferrari” shield.
Next up I’ll deal with widening the hood opening, forming the headlight surround, and embossing the fender for the “Scuderia Ferrari” shield.

 RSS Feed
