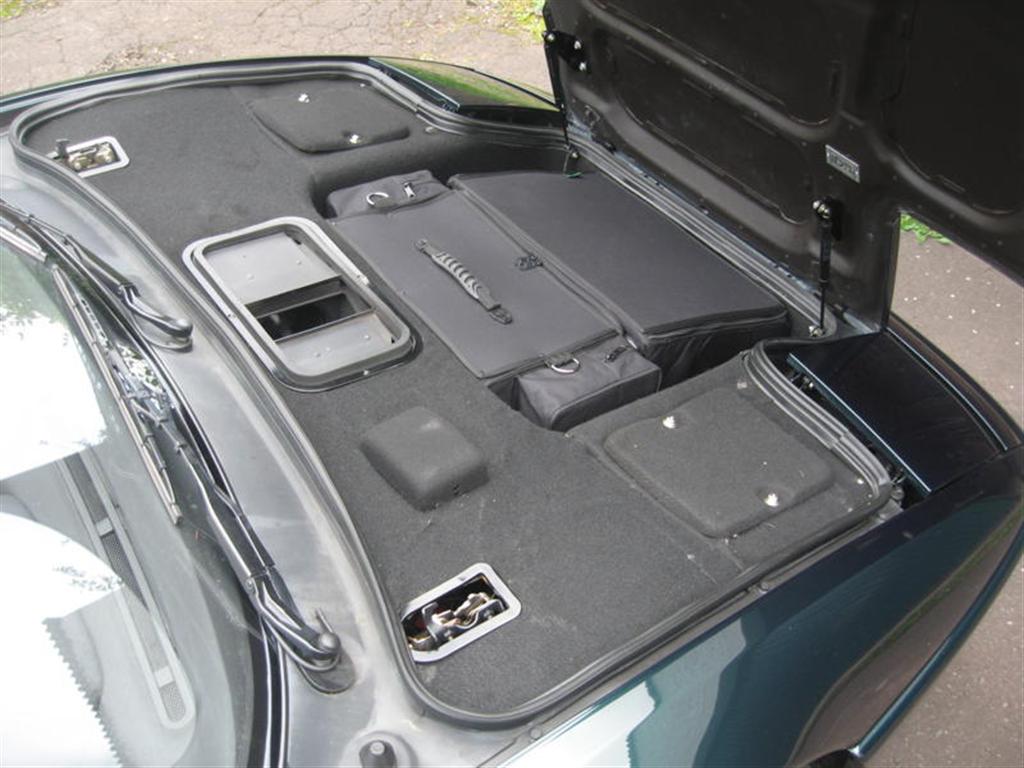
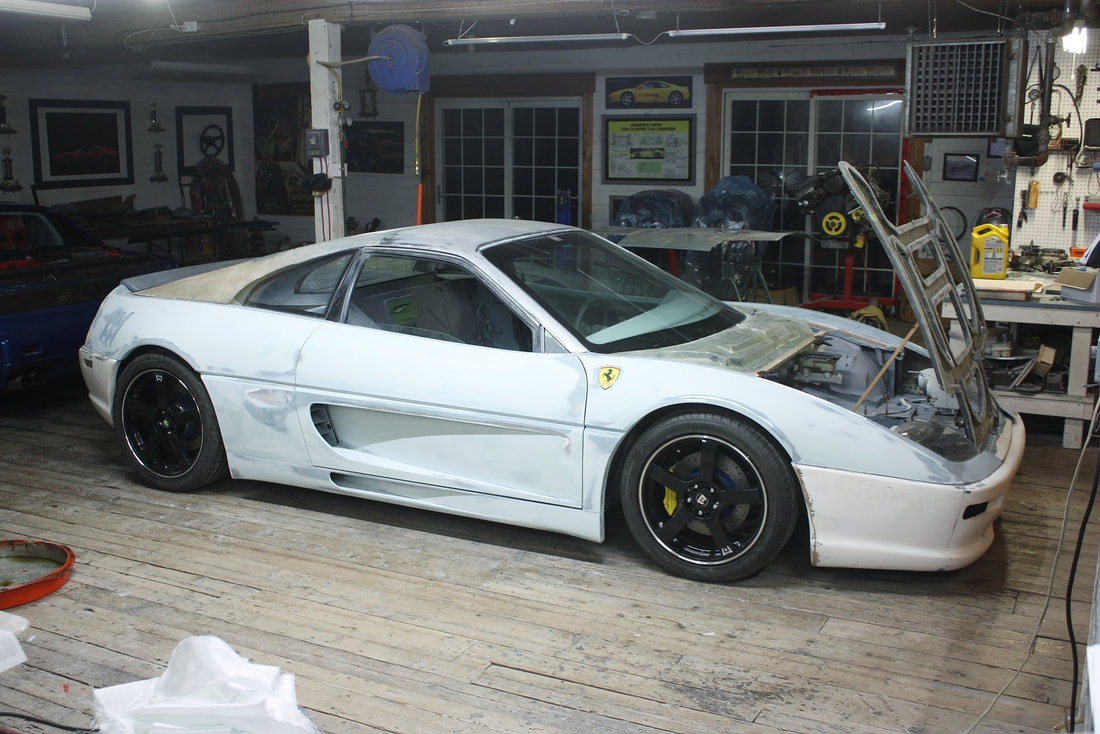
The next major exterior panel was the hood. It made sense since the freshly completed fenders provided a guide for the curvature needed to bond the hood skin to the skeleton. But as I began fitting the skin, the Solstice/Sky cowl panel I had planned to use started giving me a headache. Here’s the cowl I initially wrote about in Post #101:
The next major exterior panel was the hood. It made sense since the freshly completed fenders provided a guide for the curvature needed to bond the hood skin to the skeleton. But as I began fitting the skin, the Solstice/Sky cowl panel I had planned to use started giving me a headache. Here’s the cowl I initially wrote about in Post #101:

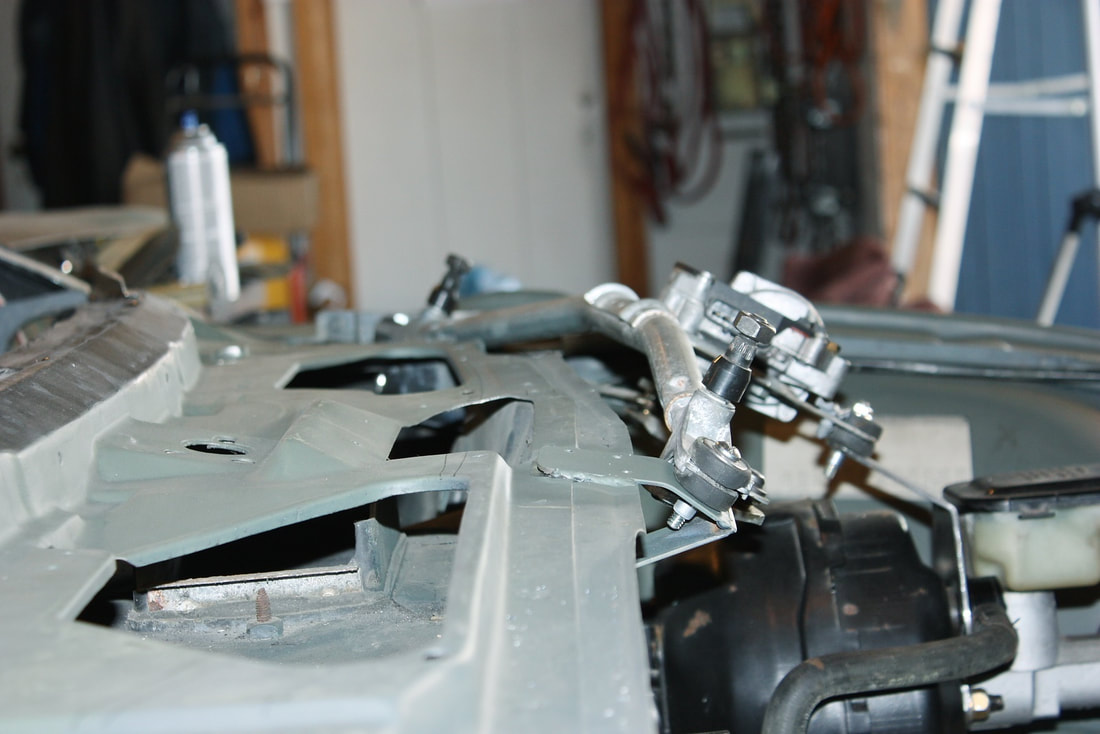
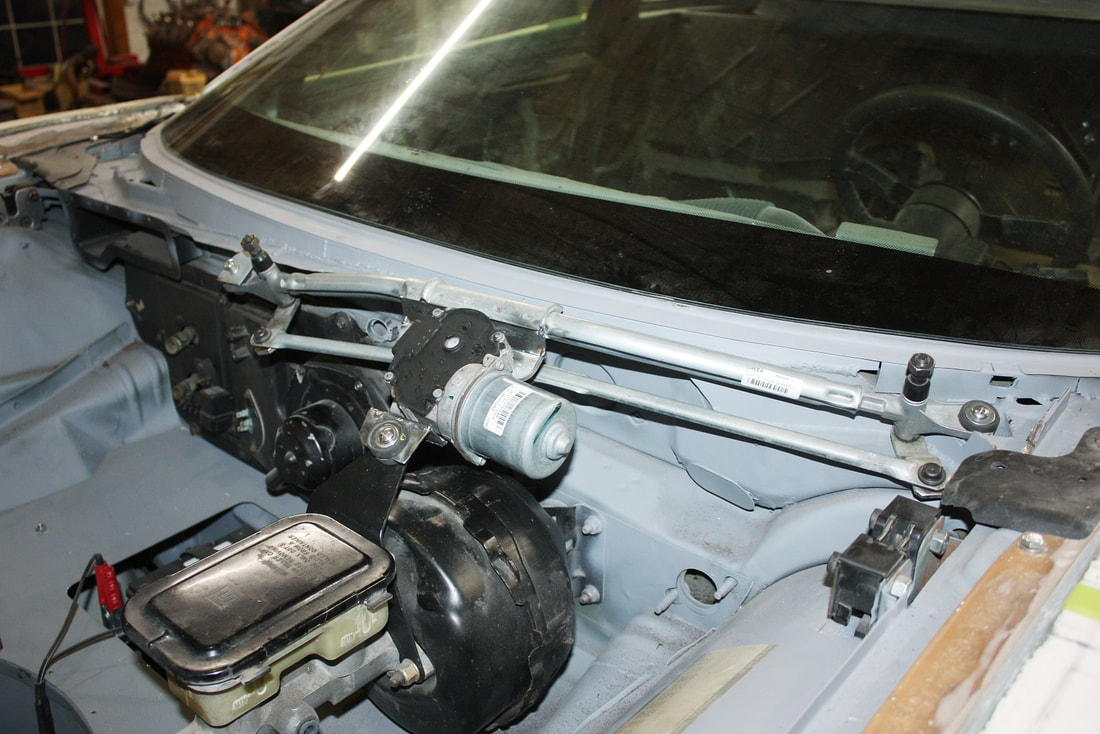
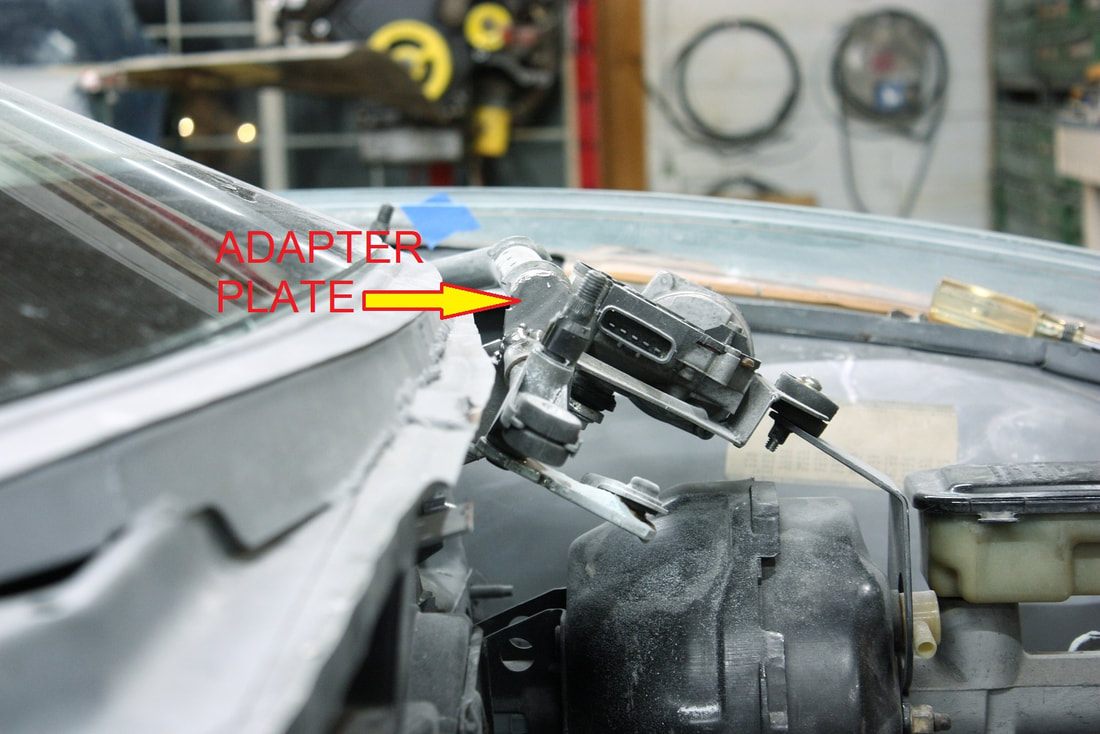
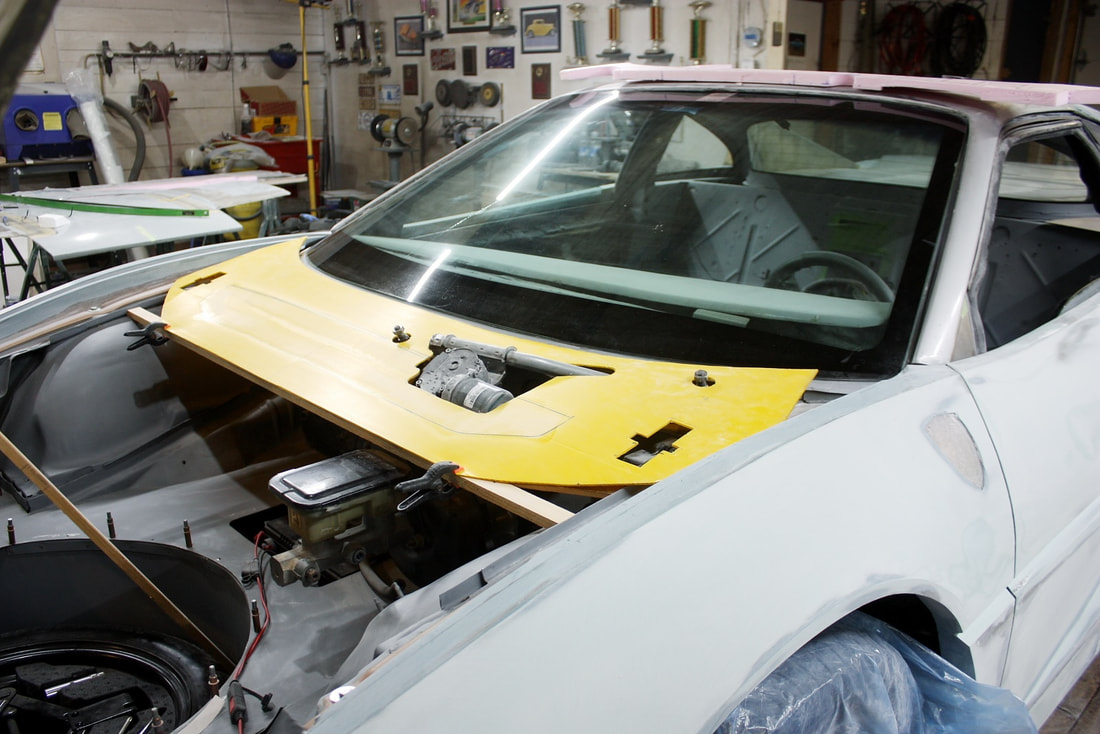
It fit just “okay”… it had roughly the same curvature for the base of the windshield, and it was molded to suit the Solstice wiper system I was using. But it also stuck up a little too high around the wiper motor and interfered with the underside of the hood. Here’s a low angle pic (albeit an old one) showing the height of the wiper motor:
It fit just “okay”… it had roughly the same curvature for the base of the windshield, and it was molded to suit the Solstice wiper system I was using. But it also stuck up a little too high around the wiper motor and interfered with the underside of the hood. Here’s a low angle pic (albeit an old one) showing the height of the wiper motor:
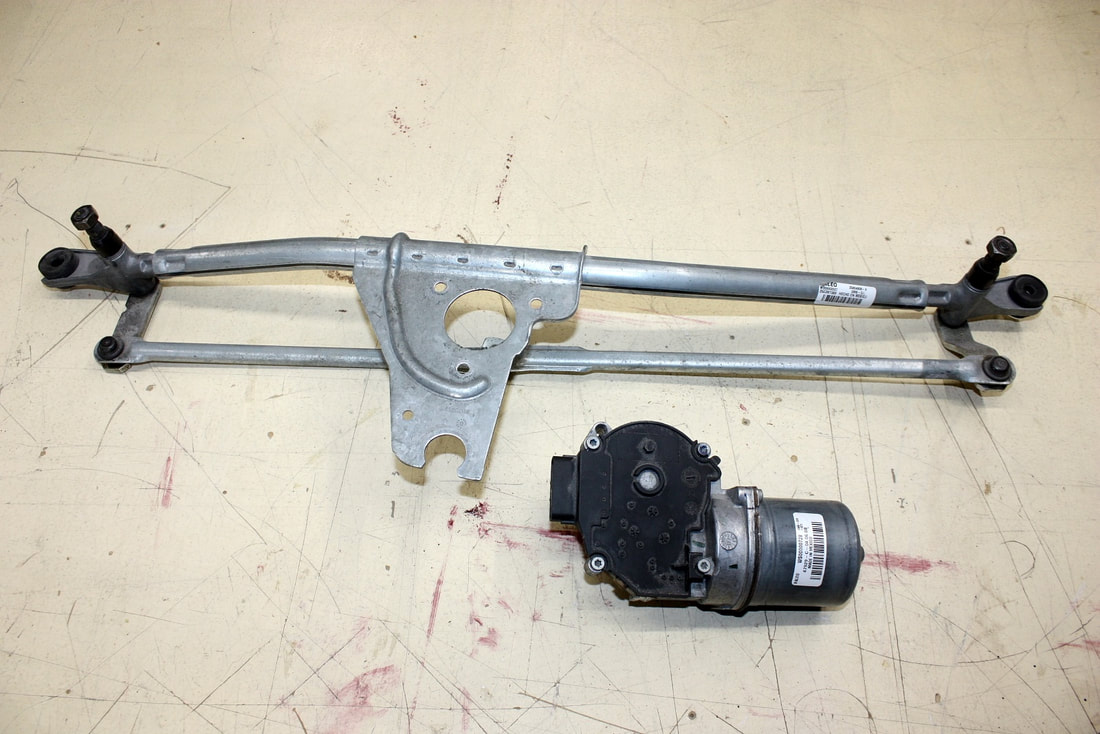
Hoping to make the Solstice cowl fit better, I decided to modify the wiper mechanism lowering its profile. It was a simple matter of removing the motor from its mounting bracket…:
Hoping to make the Solstice cowl fit better, I decided to modify the wiper mechanism lowering its profile. It was a simple matter of removing the motor from its mounting bracket…:
… then notching the bracket downward by about 25 mm, and welding it back together:
… then notching the bracket downward by about 25 mm, and welding it back together:
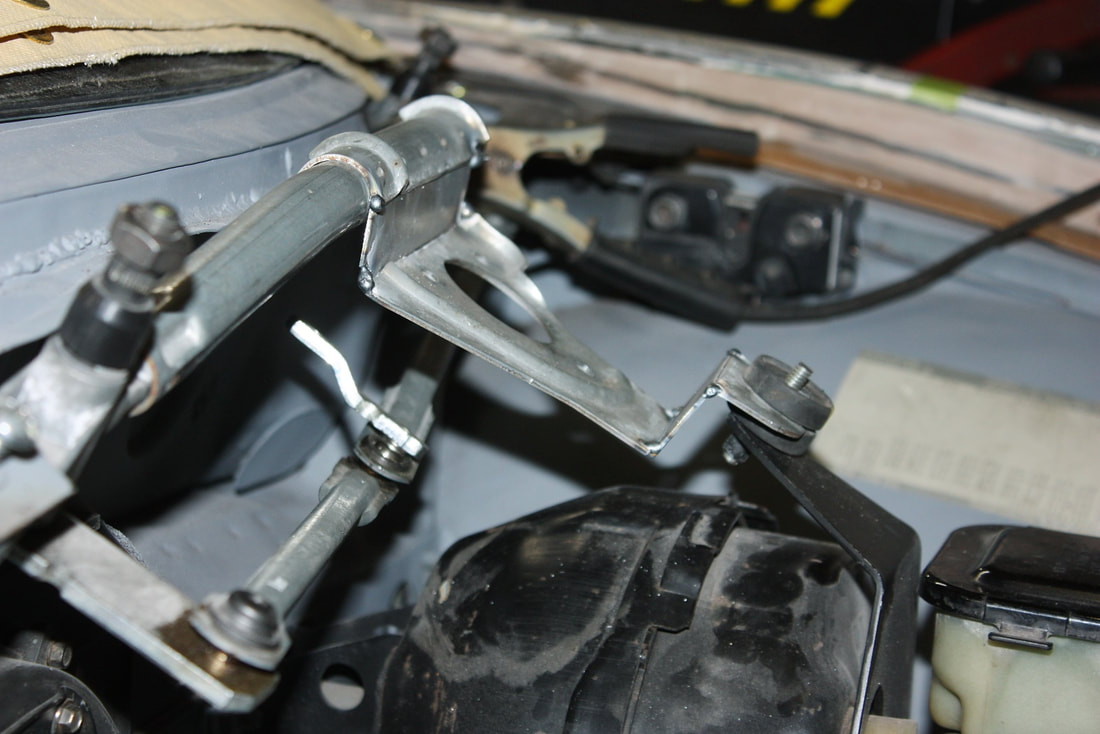
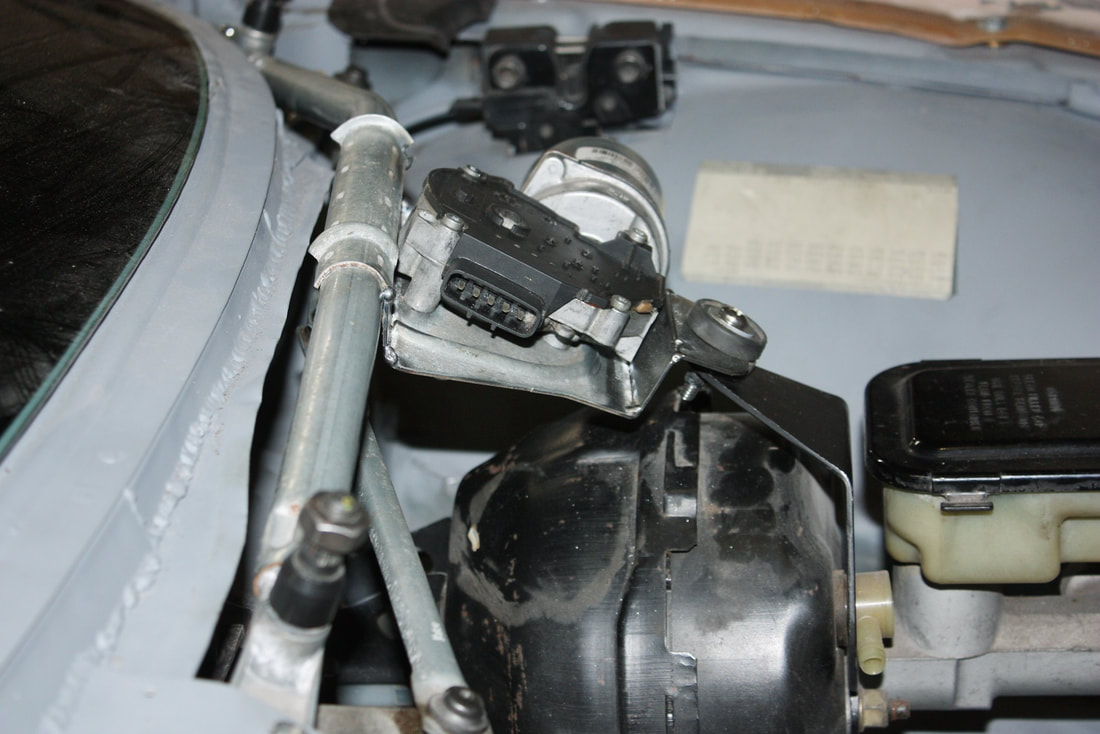
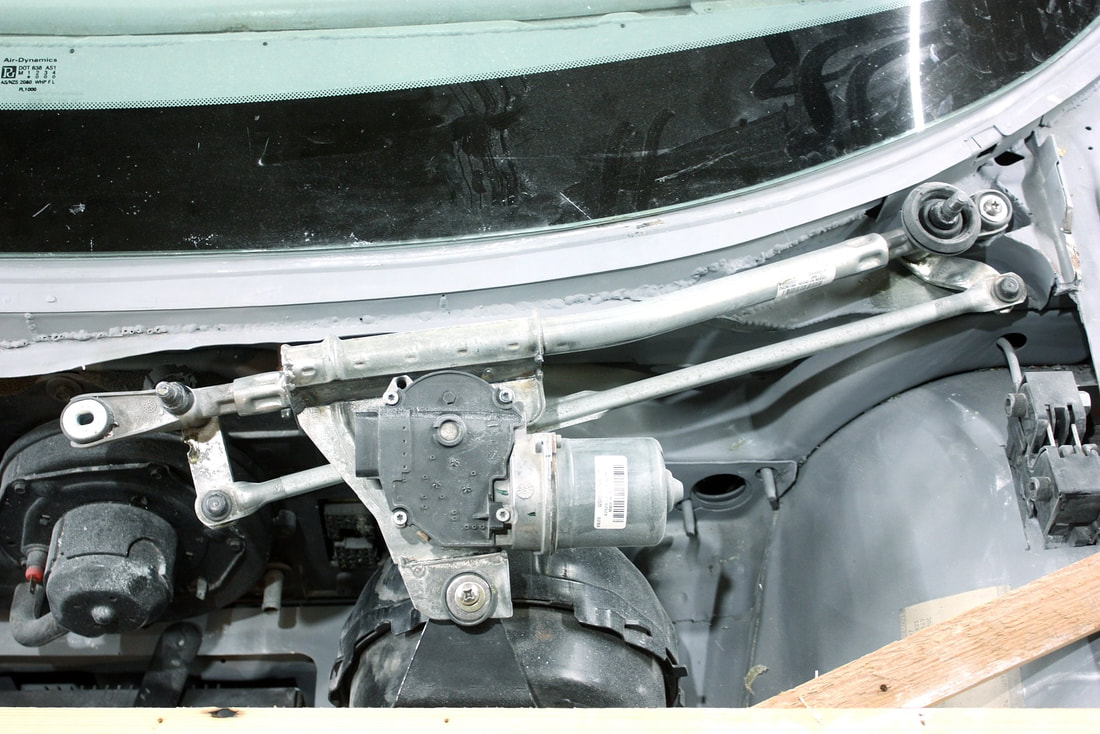
That resulted in just the right amount of clearance between the motor and the underside of the hood. Here are a couple of “after” photos showing the lowered motor assembly:
That resulted in just the right amount of clearance between the motor and the underside of the hood. Here are a couple of “after” photos showing the lowered motor assembly:
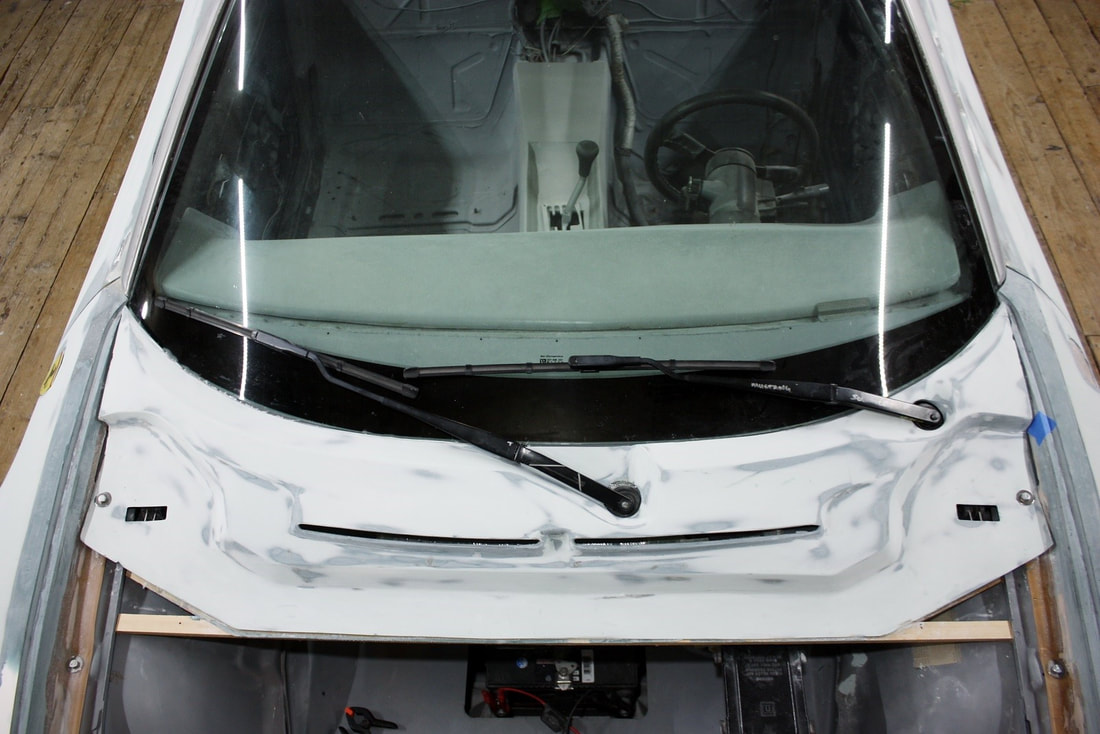
The cowl panel also fit better, but it still interfered with the underside of the hood. It also wasn’t ideal for routing cold air into the HVAC inlet, and when I mocked up some wiper arms they didn’t come close to an ideal sweep across the windshield.
Here’s the problem with the passenger wiper on the stock Solstice mechanism… note how the wiper post is just about centered on the chassis:
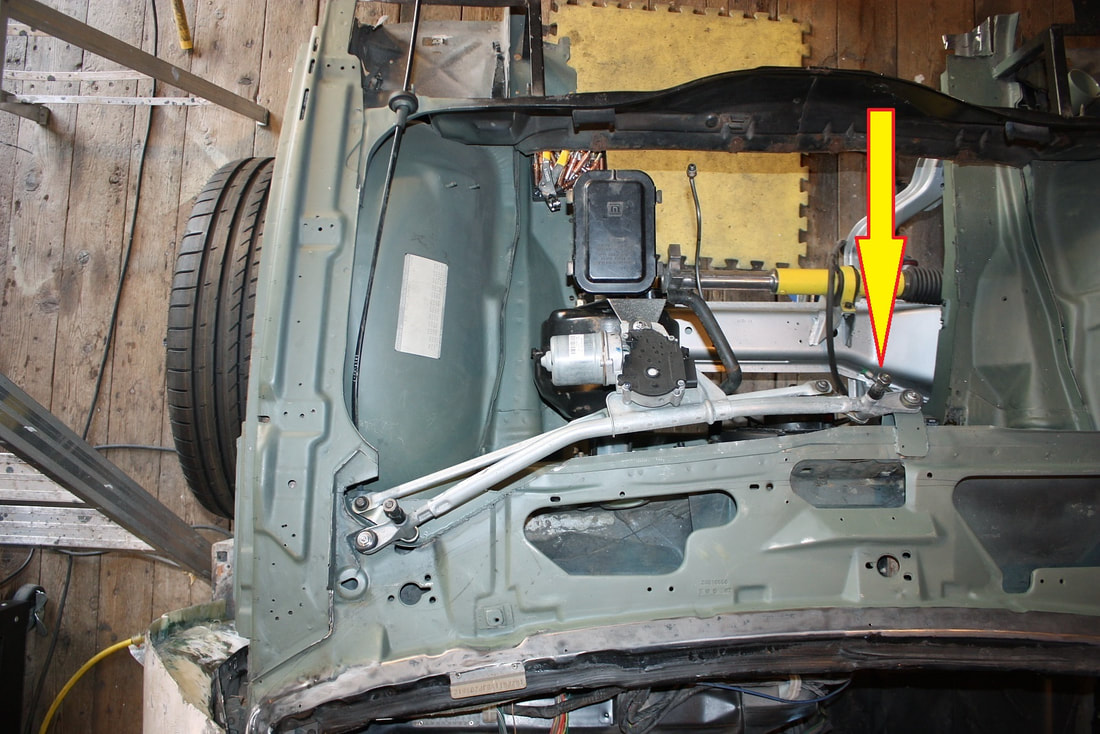
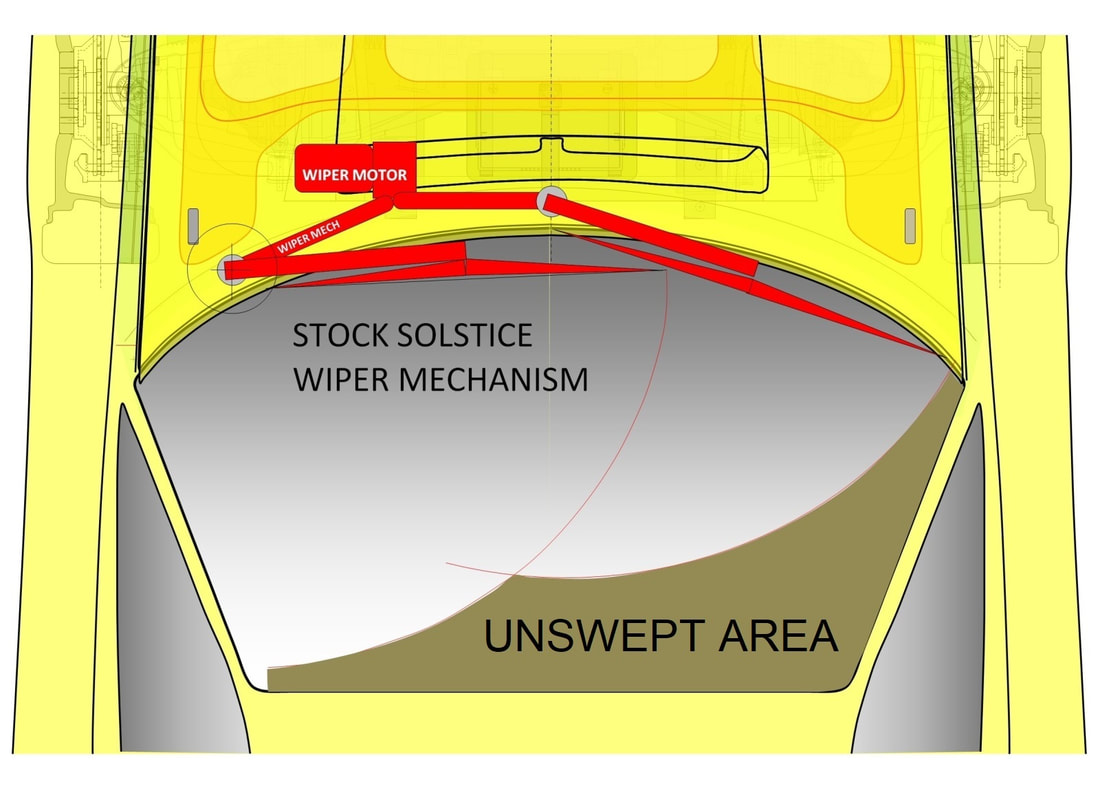
With the post located there, the distance from it to the passenger side A-pillar was 6 inches shorter than the distance from it to the top of the windshield. So with the wiper in the parked position, the tip of the blade was close to touching the A-pillar, but once it swept up to the vertical position, the tip was 6” below the top of the windshield! That left a large unswept area at the top of the passenger side windshield:
With the post located there, the distance from it to the passenger side A-pillar was 6 inches shorter than the distance from it to the top of the windshield. So with the wiper in the parked position, the tip of the blade was close to touching the A-pillar, but once it swept up to the vertical position, the tip was 6” below the top of the windshield! That left a large unswept area at the top of the passenger side windshield:
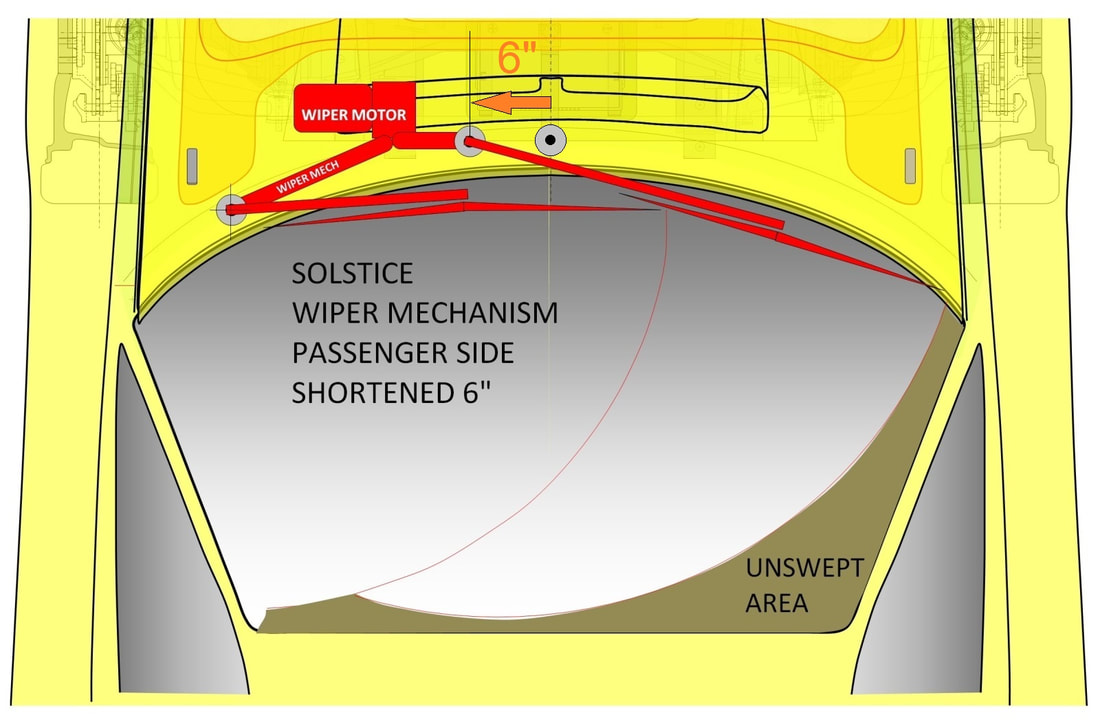
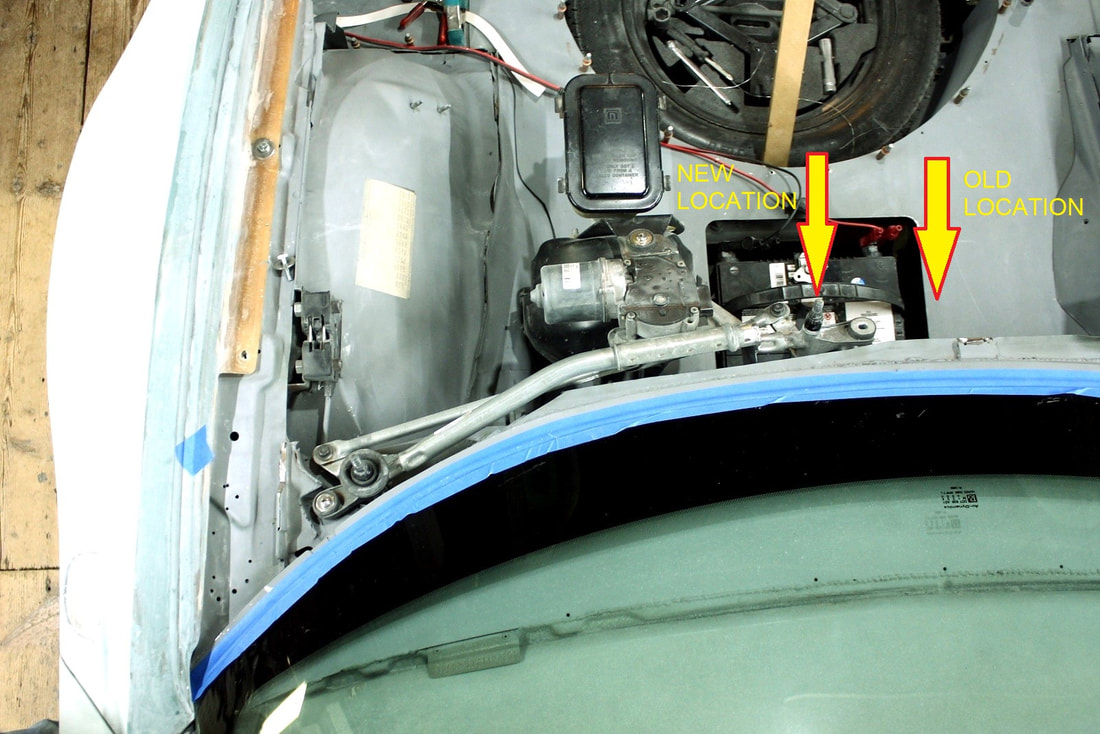
To solve the problem, I needed to relocate the passenger wiper post to be the same distance from the A-pillar as it was from the windshield header. In my case, that meant moving the post 6 inches toward the driver’s side, like so:
To solve the problem, I needed to relocate the passenger wiper post to be the same distance from the A-pillar as it was from the windshield header. In my case, that meant moving the post 6 inches toward the driver’s side, like so:
Shortening the structural tube and the pushrod of the mechanism was a cinch, but to realign the wiper post at the correct height I needed to joggle it down before re-welding it back on:
Shortening the structural tube and the pushrod of the mechanism was a cinch, but to realign the wiper post at the correct height I needed to joggle it down before re-welding it back on:
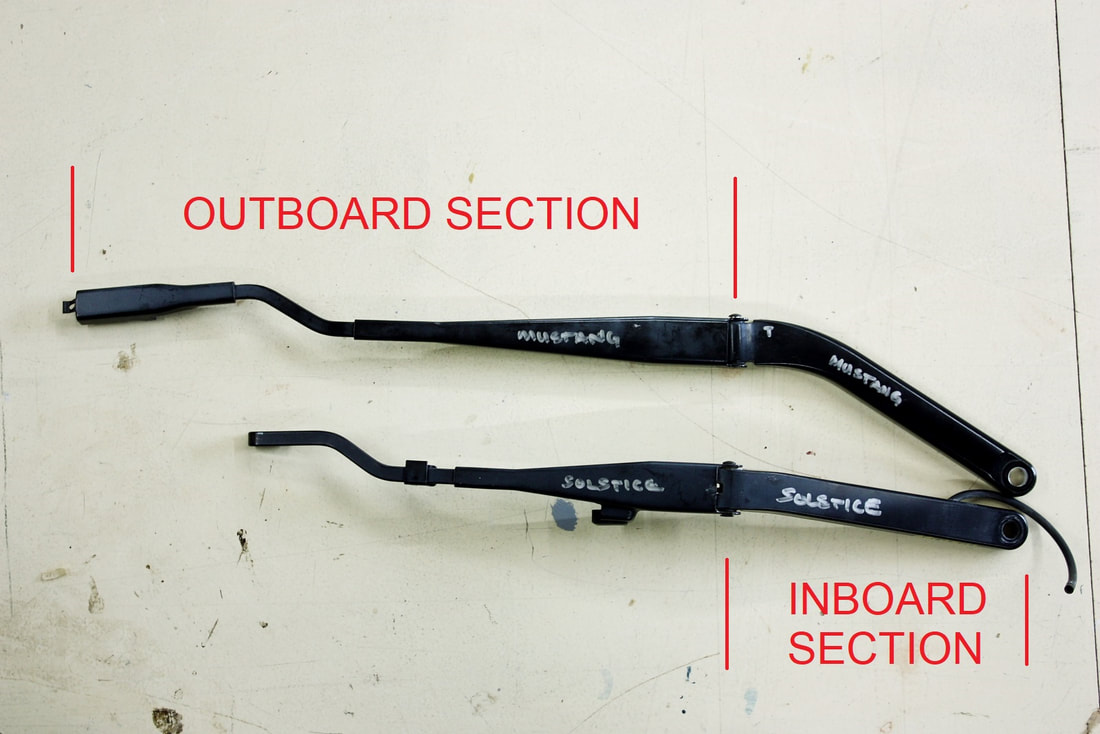
With that bit of inconvenience out of the way, I needed to make a longer passenger wiper arm. I retained the inboard section of the Solstice arm since it had the correct taper and spline count for the wiper post, and grafted it to the longer outboard section of a Mustang wiper arm at the pivot pin. As simple as this seemed, reconnecting the tension spring under both halves was a nightmare:
With that bit of inconvenience out of the way, I needed to make a longer passenger wiper arm. I retained the inboard section of the Solstice arm since it had the correct taper and spline count for the wiper post, and grafted it to the longer outboard section of a Mustang wiper arm at the pivot pin. As simple as this seemed, reconnecting the tension spring under both halves was a nightmare:
With the wiper system finally sorted out, the Solstice cowl panel really, really wouldn’t fit without major cosmetic surgery that would be very hard to hide. So that cemented my plan to make my own custom cowl.
Since the world was my oyster at this point, I checked out the authentic F355 cowl panel to see if I could replicate it:
It’s a really clean design (I think this image is flipped, unless it’s a RHD car). The weather strip runs to the outside perimeter of the entire compartment, with an “island” in the dry section for the HVAC inlet.
The trouble with duplicating the authentic cowl setup wasn’t so much about making it, as it was about the esthetics of the monstrous HVAC inlet adapter attached to the underside of the hood:
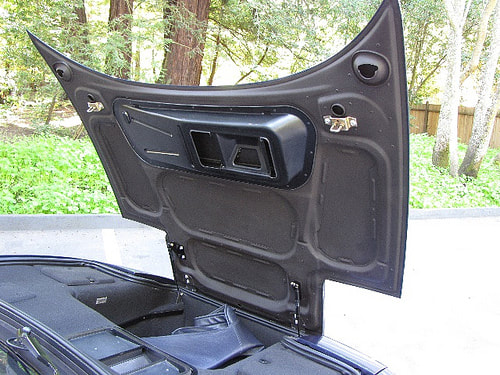
The authentic HVAC adapter is ugly, like someone glued a Hoover vacuum cleaner to the hood. I could’ve replicated something like this but I simply chose not to on account of its appearance.
So off to the drawing board I went. The basic considerations were to have the new cowl follow the exact shape of the windshield base, mate with the integral sealing surface I’d molded into the hood skeleton, hide the wiper mechanisms, hood latches, and clutch and brake master cylinders. I also wanted the cowl to have an upward ramp along the base of the windshield to redirect water running down the windshield to either corner of the cowl where I would install drains at the lowest points. Here’s the basic plan from the top view:
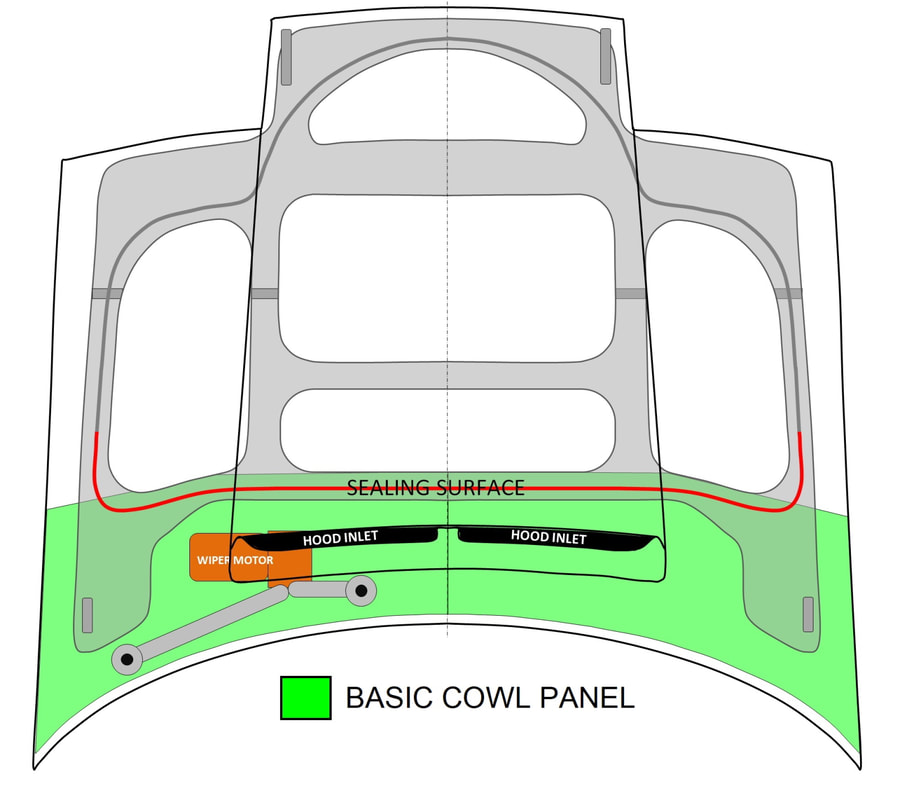
In addition to the basics, I wanted to integrate into the cowl panel the duct connecting the hood slits to the HVAC unit inlet. The idea was to eliminate the large underhood ‘cling-on’ of the authentic Ferrari. The dark green area below represents the integral ducting I was planning:
In addition to the basics, I wanted to integrate into the cowl panel the duct connecting the hood slits to the HVAC unit inlet. The idea was to eliminate the large underhood ‘cling-on’ of the authentic Ferrari. The dark green area below represents the integral ducting I was planning:

The ramp at the base of the windshield, the hood seal, and the airflow from the hood slits to the HVAC unit are all clear in this cross section of the new cowl design:
The ramp at the base of the windshield, the hood seal, and the airflow from the hood slits to the HVAC unit are all clear in this cross section of the new cowl design:

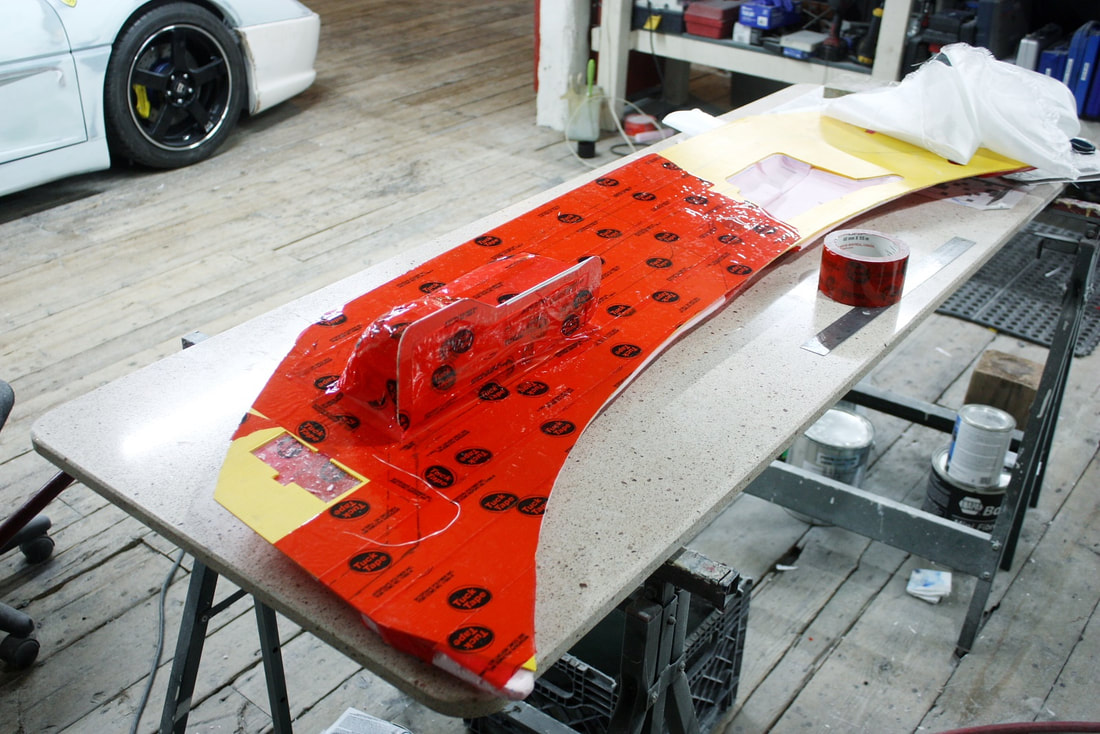
Enough design work. On with fabrication. I fashioned a temporary wooden support for the front edge of the new cowl and pinned it in place:
Enough design work. On with fabrication. I fashioned a temporary wooden support for the front edge of the new cowl and pinned it in place:

Then I used some corrugated plastic sheeting to form what would be the dividing plane between an upper and a lower cowl panel mold. I trimmed the plastic to clear the wiper mechanism, posts, and the two hood latches:
Then I used some corrugated plastic sheeting to form what would be the dividing plane between an upper and a lower cowl panel mold. I trimmed the plastic to clear the wiper mechanism, posts, and the two hood latches:

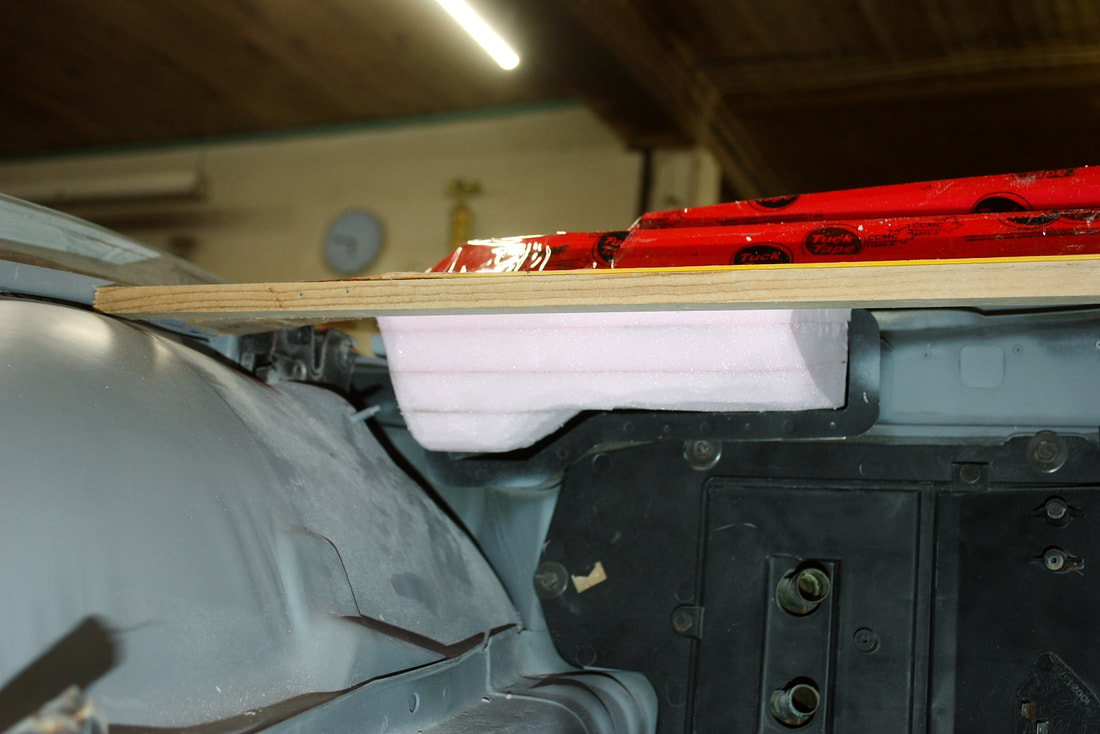
I then glued high density foam blocks to the underside of the Coroplast to form the mold for the lower half of the cowl plenum leading into the main HVAC unit:
I then glued high density foam blocks to the underside of the Coroplast to form the mold for the lower half of the cowl plenum leading into the main HVAC unit:
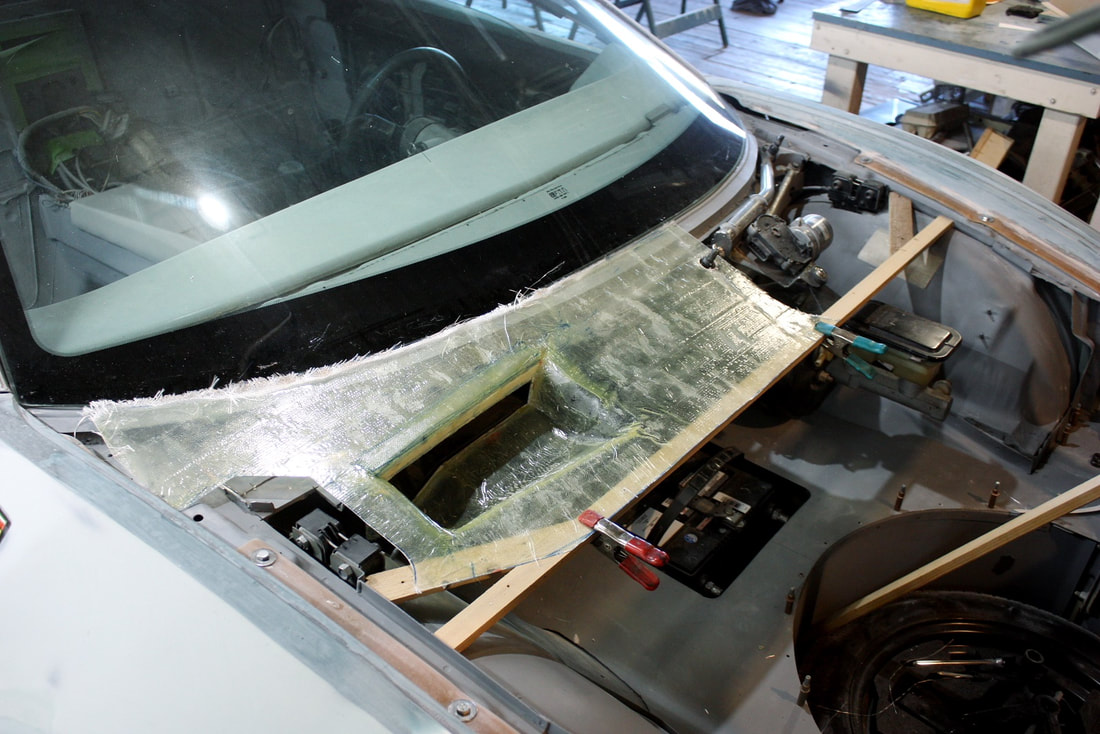
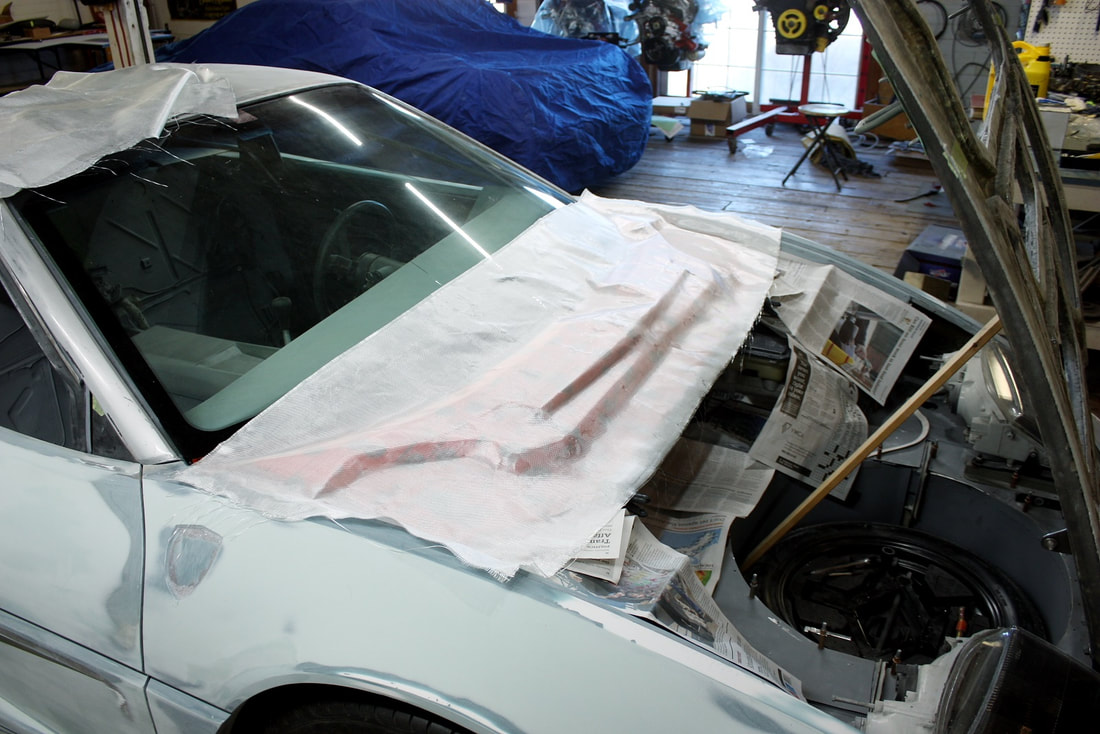
Once the foam was carved, I taped it up to keep the polyester resin from dissolving it, and laid up two layers of light-weight fibreglass cloth to make the lower half of the cowl panel:
Once the foam was carved, I taped it up to keep the polyester resin from dissolving it, and laid up two layers of light-weight fibreglass cloth to make the lower half of the cowl panel:
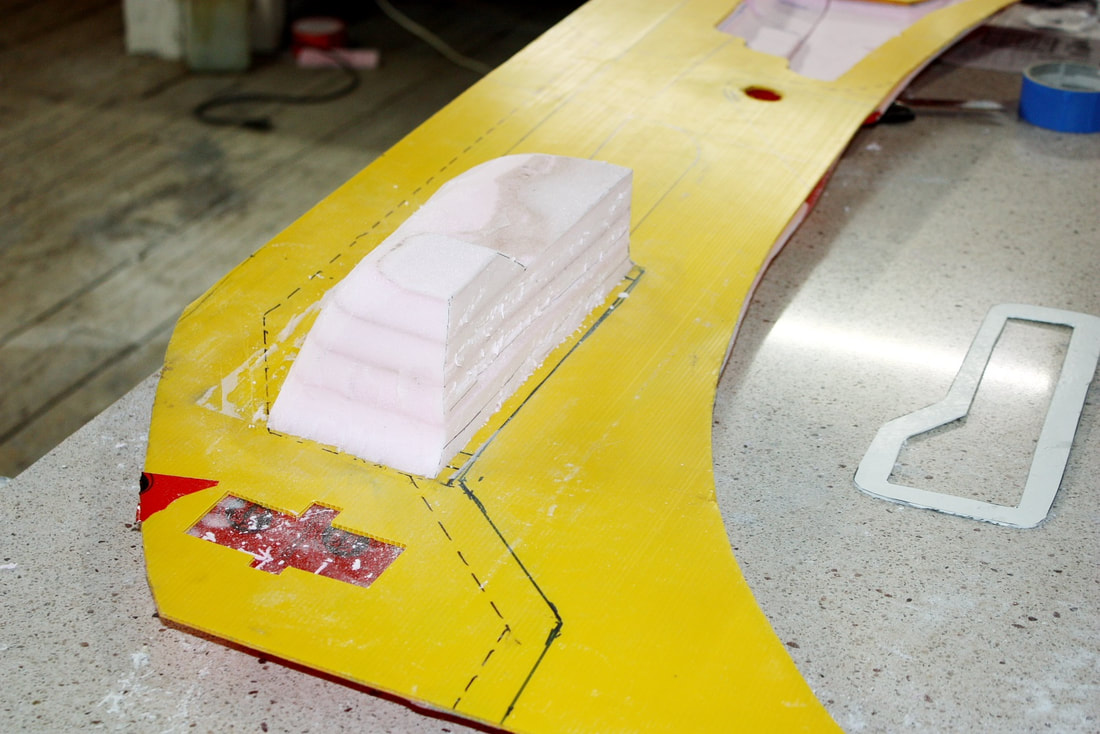
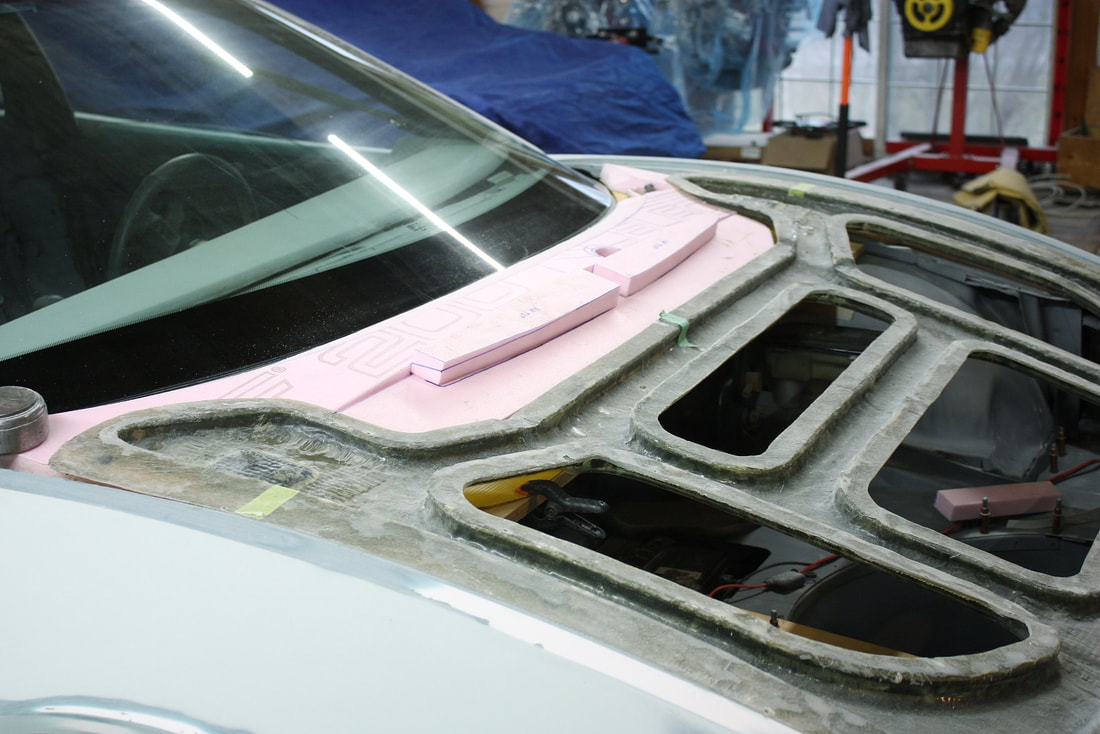
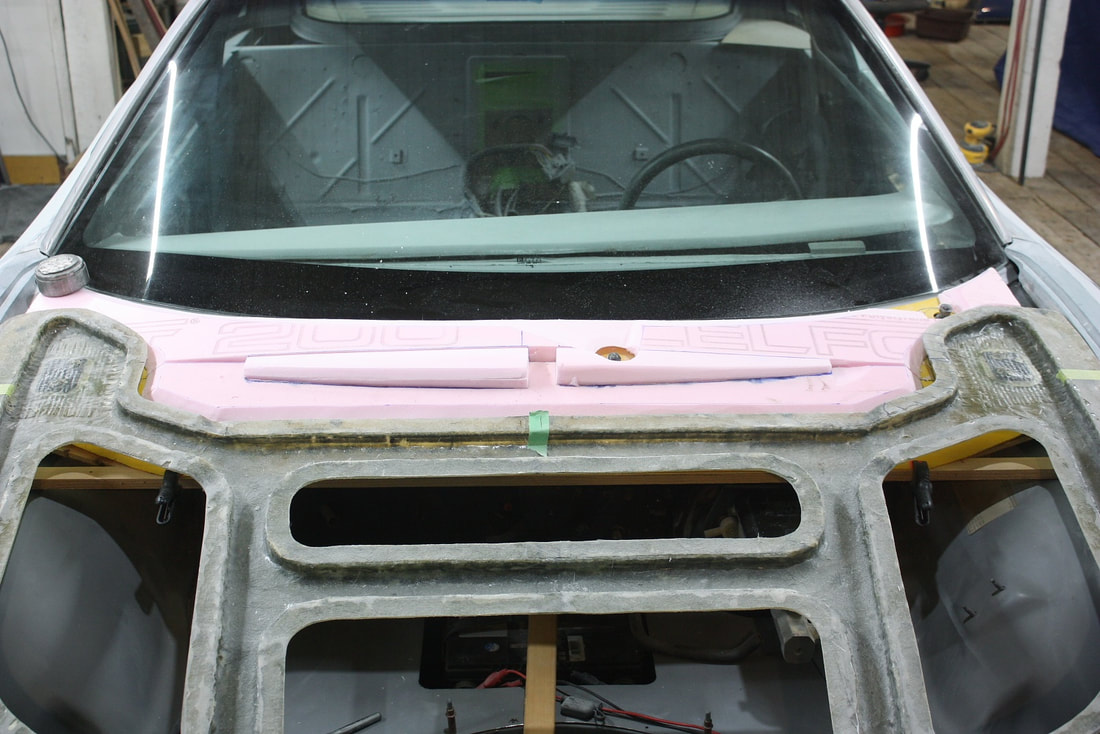
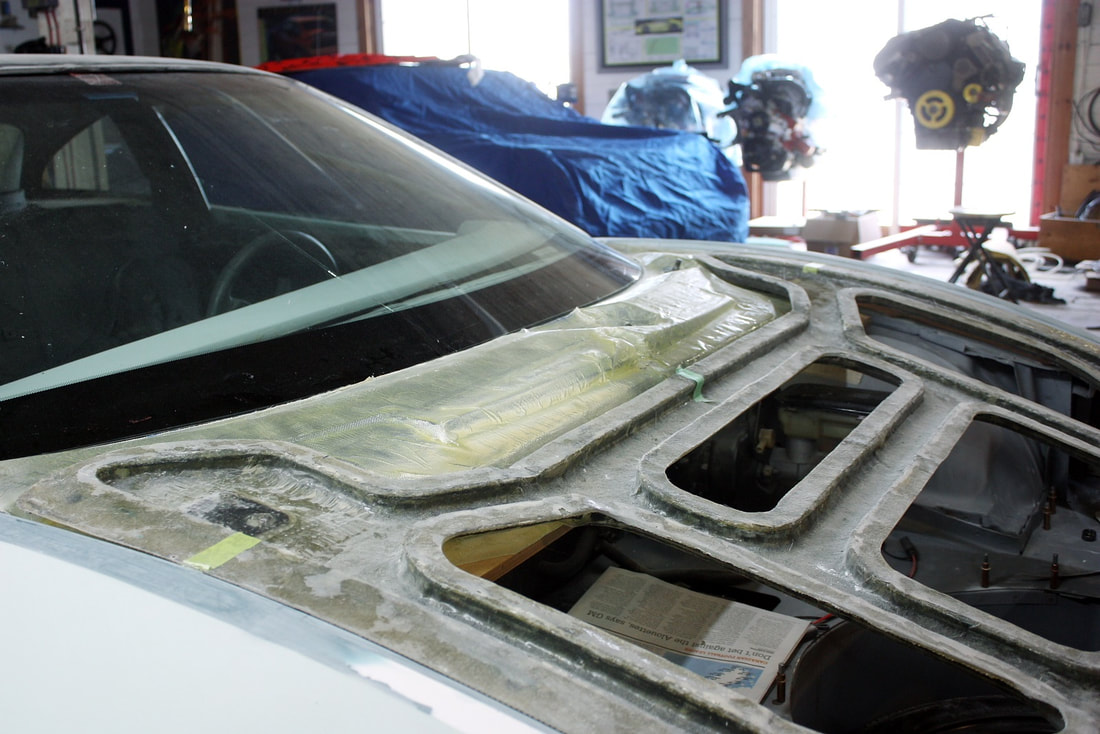
Next, I built up the top half of the Coroplast with Styrofoam blocks and fitted the hood six million times to carve out the upper cowl mold, aligning the hood scoops, wiper posts, hood latch holes, and windshield base just right:
Next, I built up the top half of the Coroplast with Styrofoam blocks and fitted the hood six million times to carve out the upper cowl mold, aligning the hood scoops, wiper posts, hood latch holes, and windshield base just right:
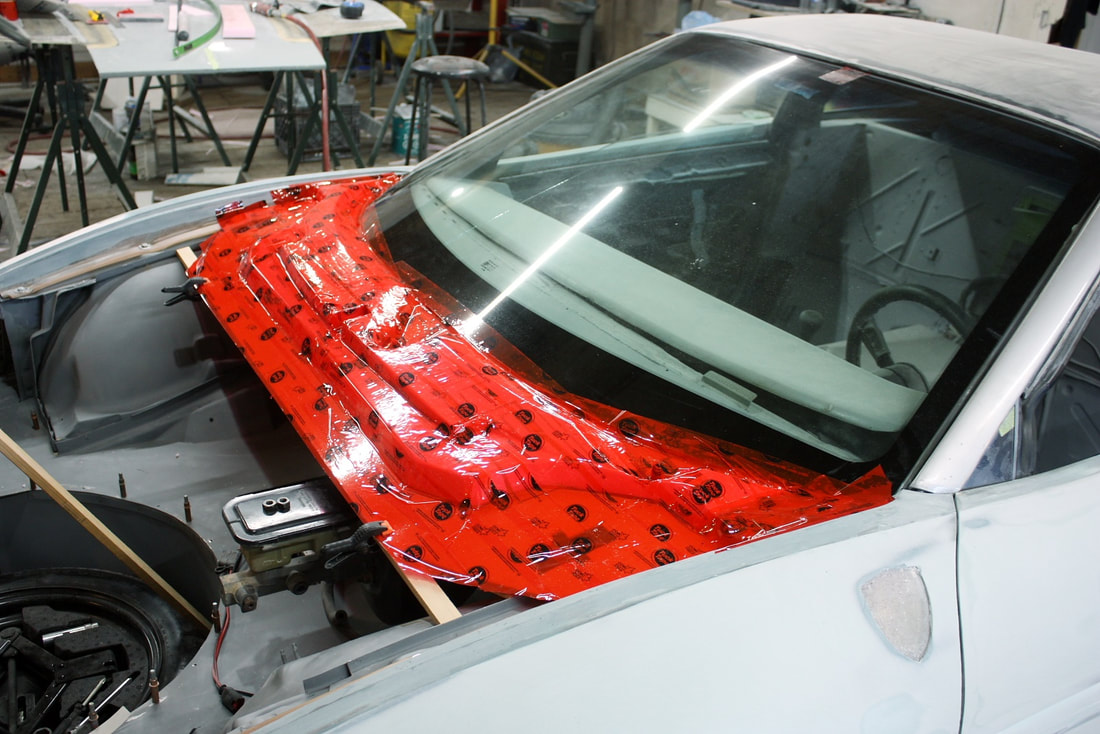
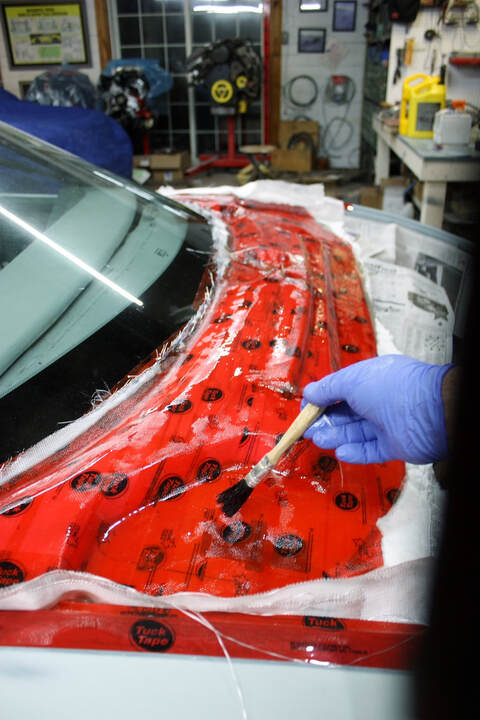
Using the same approach as with the lower half, I taped up the foam and laid up several layers of fibreglass cloth:
Using the same approach as with the lower half, I taped up the foam and laid up several layers of fibreglass cloth:
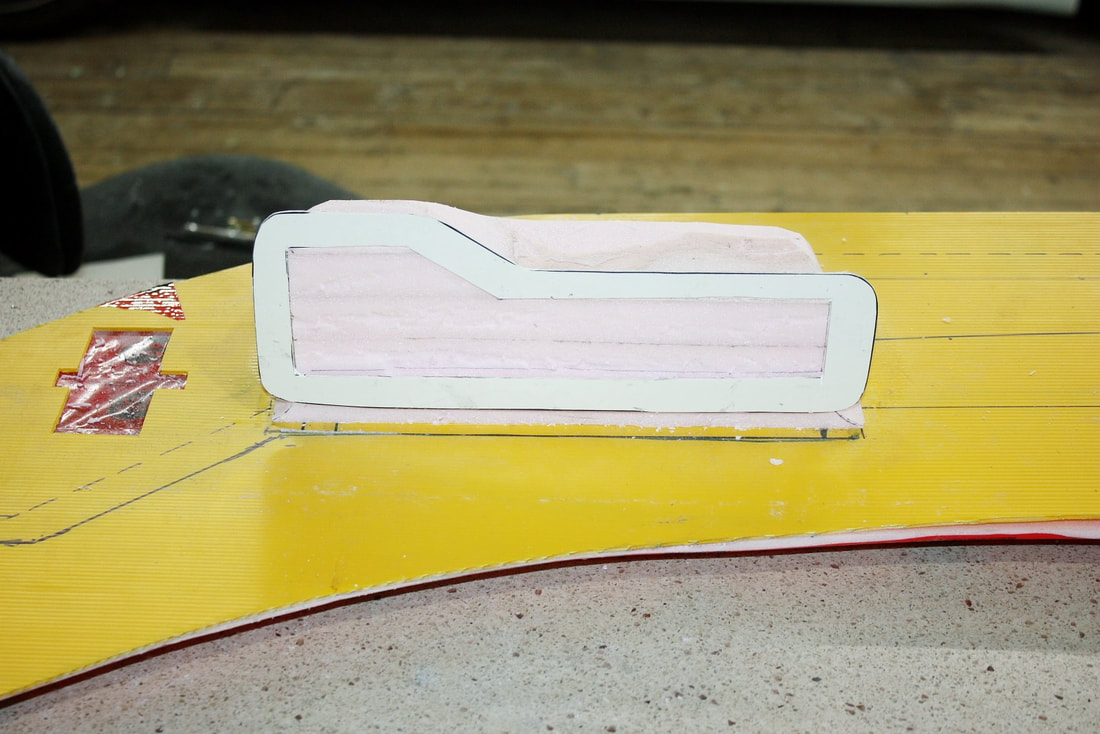
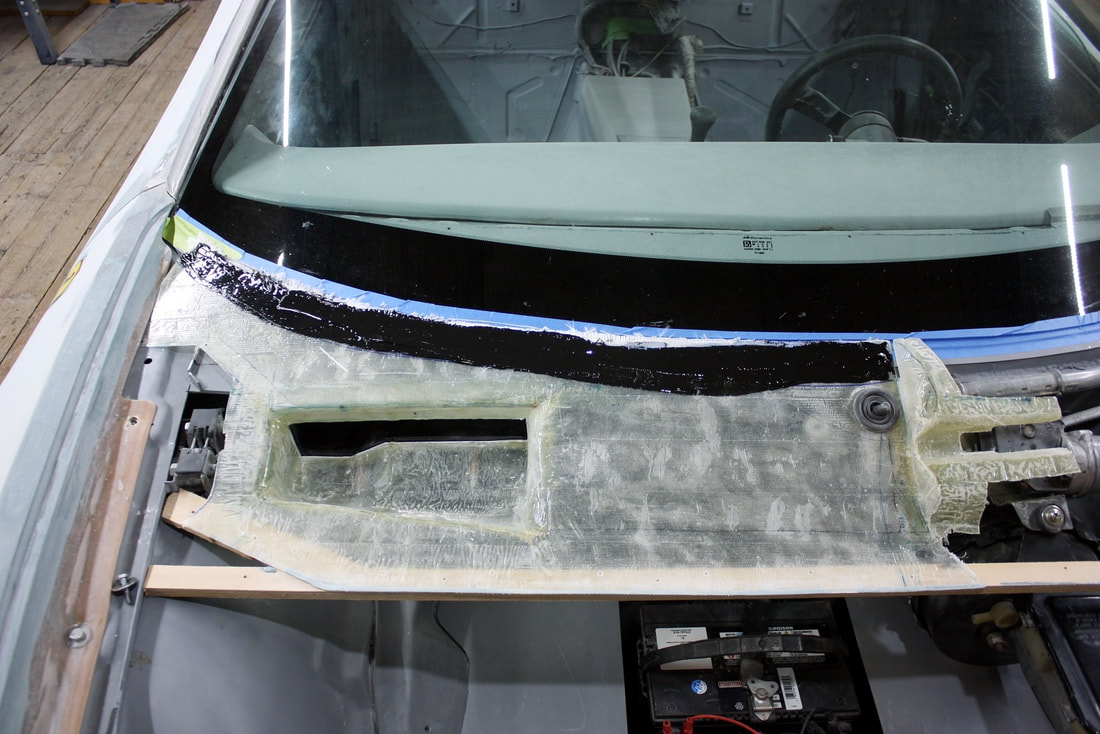
Once the resin had cured I popped the upper cowl panel off the mold and test fitted it to the chassis:
Once the resin had cured I popped the upper cowl panel off the mold and test fitted it to the chassis:
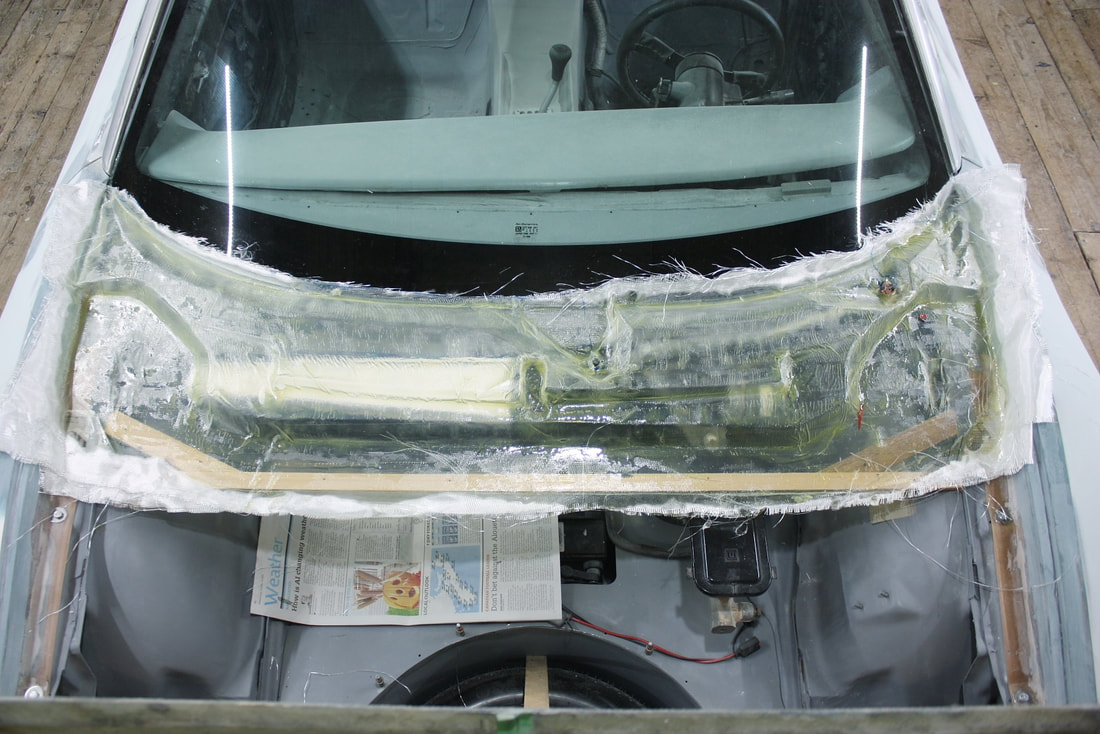
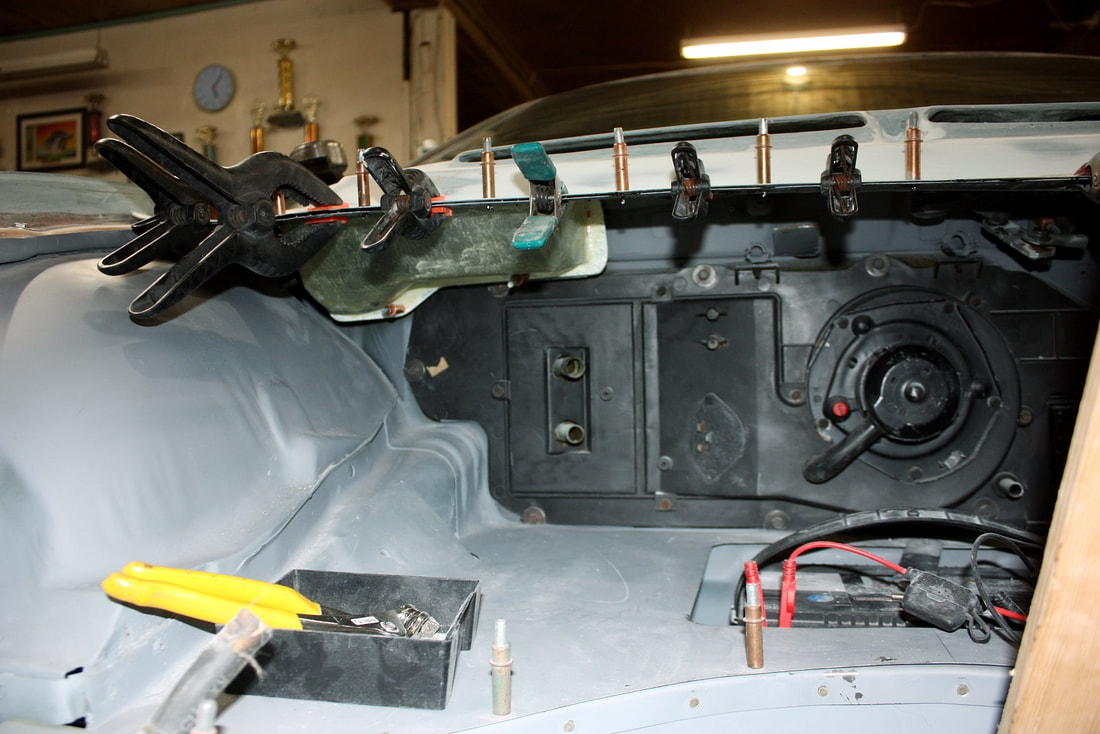
I trimmed the excess flashing off, reinstalled it, aligned it with the lower half, closed the hood skeleton, checked clearances, and stood back to admire the raw piece:
I trimmed the excess flashing off, reinstalled it, aligned it with the lower half, closed the hood skeleton, checked clearances, and stood back to admire the raw piece:
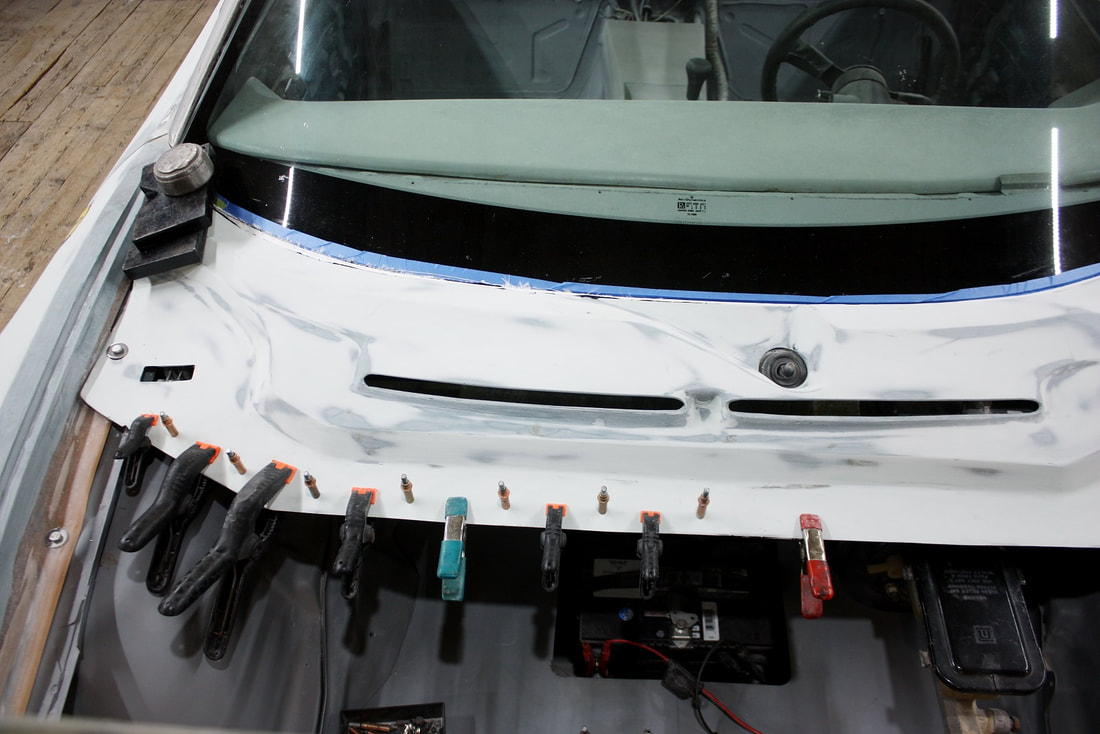
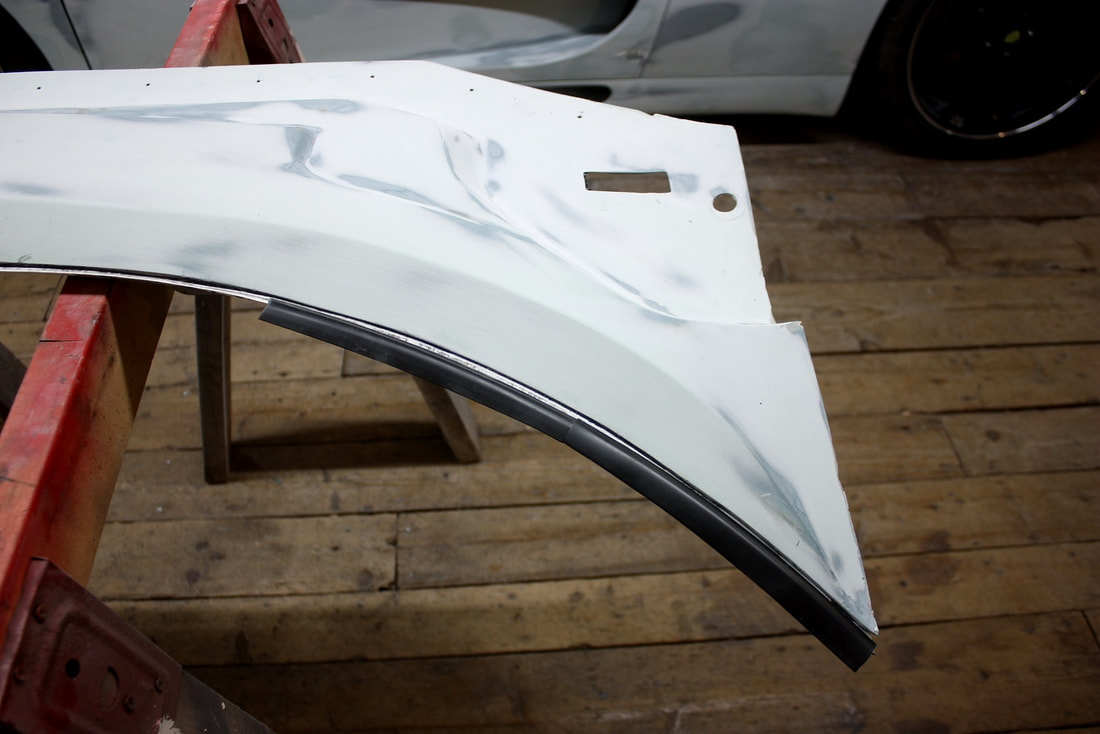
The trouble with a male mold is that it takes a lot of finessing to get a nice exterior finish on the piece, so I spent many hours smoothing the upper cowl panel to match the rest of the body work:
The trouble with a male mold is that it takes a lot of finessing to get a nice exterior finish on the piece, so I spent many hours smoothing the upper cowl panel to match the rest of the body work:
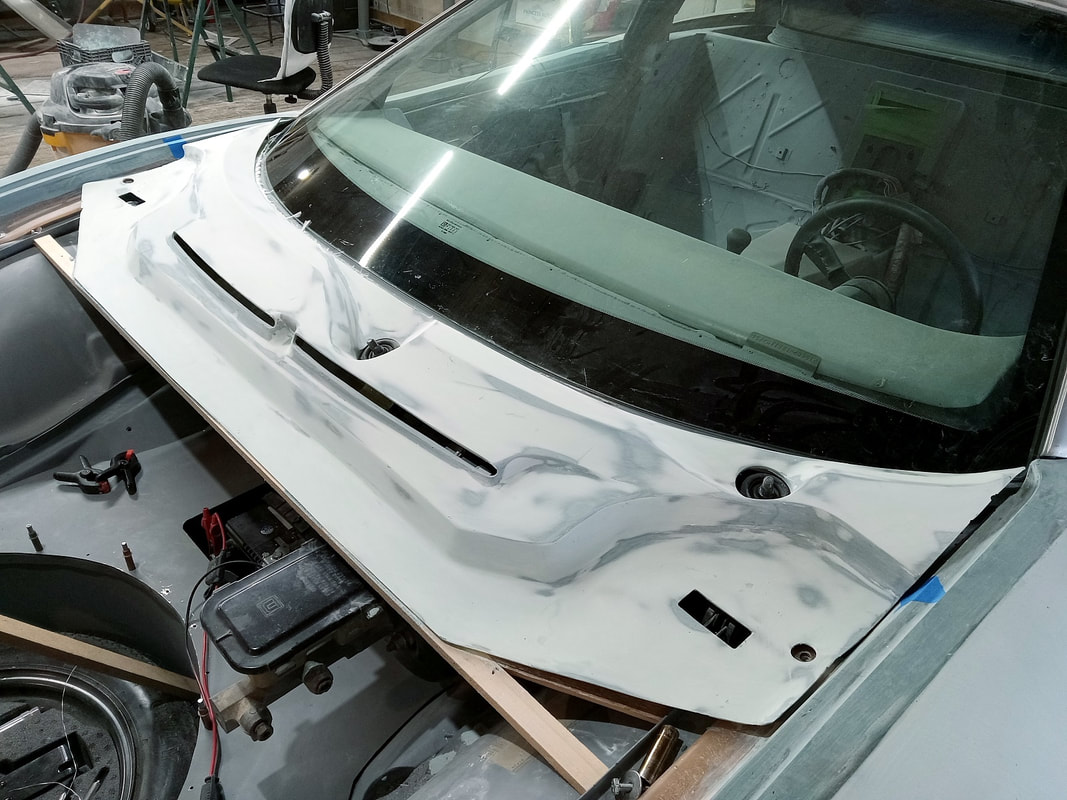
I test fitted the Solstice wiper post seals to make sure they fit tightly, then mocked up the hybrid wiper arms:
I test fitted the Solstice wiper post seals to make sure they fit tightly, then mocked up the hybrid wiper arms:
The last thing to do was bond the upper and lower halves of the cowl together forming the intake plenum for the HVAC system. I used 90 minute epoxy for the task:
The last thing to do was bond the upper and lower halves of the cowl together forming the intake plenum for the HVAC system. I used 90 minute epoxy for the task:
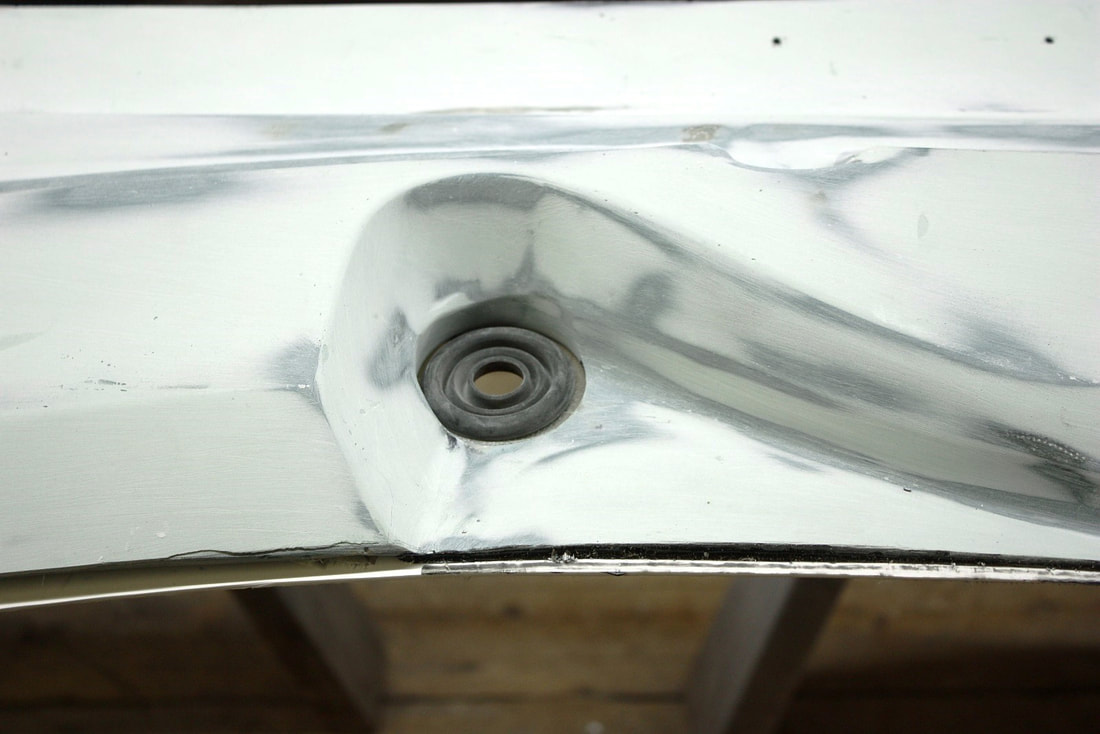
To make a straight, flat mounting flange for a seal between the cowl and the base of the windshield, I sandwiched a thin piece of fibreglass reinforced plastic between the upper and lower halves before gluing them together. Here, I’ve mocked up a short section of the rubber seal on that new flange:
To make a straight, flat mounting flange for a seal between the cowl and the base of the windshield, I sandwiched a thin piece of fibreglass reinforced plastic between the upper and lower halves before gluing them together. Here, I’ve mocked up a short section of the rubber seal on that new flange:
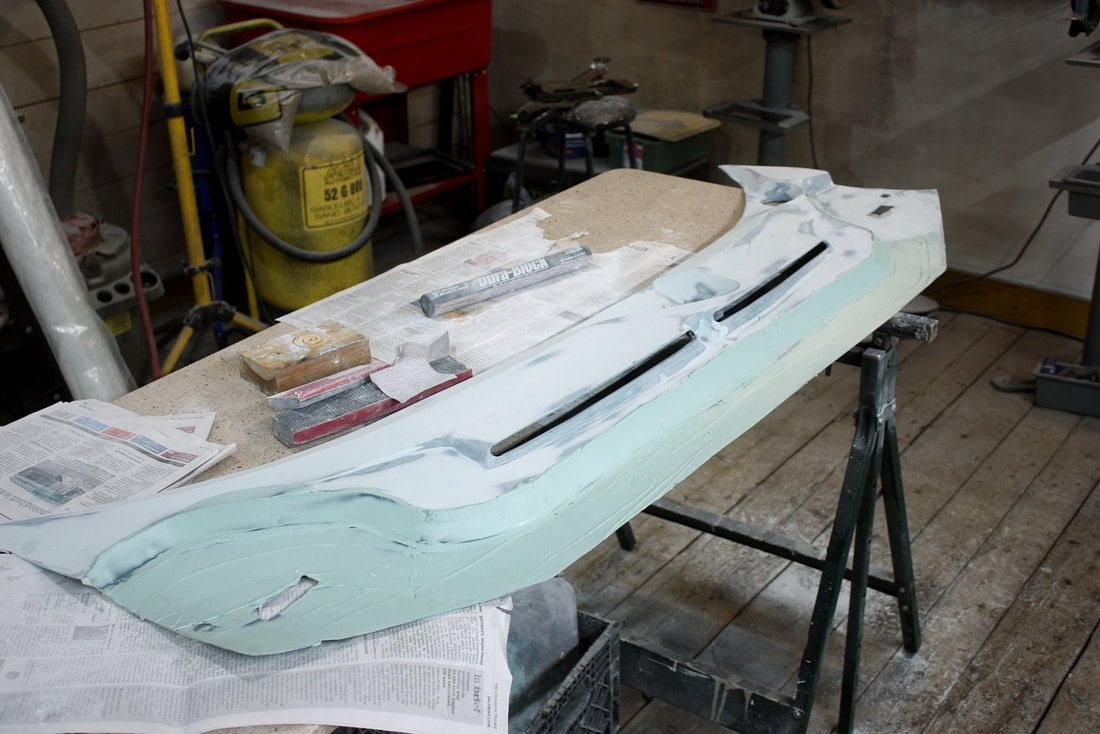
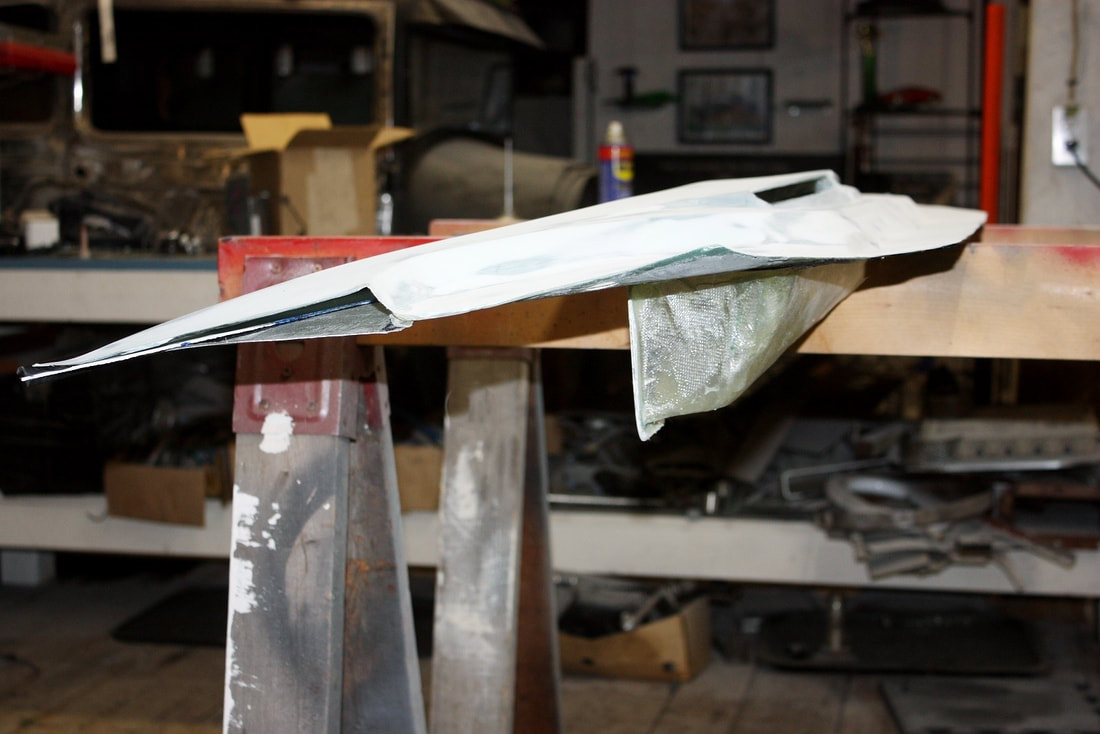
And lastly, here’s a side view of the new cowl (looking for all intents and purposes like some sort of hybrid stingray / stealth bomber). It clearly shows how the upper and lower halves, when joined together, create a low profile integral duct between the hood slits and the HVAC unit inlet:
And lastly, here’s a side view of the new cowl (looking for all intents and purposes like some sort of hybrid stingray / stealth bomber). It clearly shows how the upper and lower halves, when joined together, create a low profile integral duct between the hood slits and the HVAC unit inlet:
I still needed to tidy up a few loose ends, such as replacing the wooden cowl support with something more befitting of a Ferrari, closing off the ends of the cowl to seal the plenum, and filling some minor defects, but otherwise I was ready to attack the hood.
I still needed to tidy up a few loose ends, such as replacing the wooden cowl support with something more befitting of a Ferrari, closing off the ends of the cowl to seal the plenum, and filling some minor defects, but otherwise I was ready to attack the hood.

 RSS Feed
