Welcome to the section of my blog where I show the work needed to shape the body panels into flowing, sexy lines, beyond simply mounting the body to the chassis.
Anyone who’s ever built a kit car knows that nothing ever fits the way it should, that fiberglass panels are only as good as the effort made by the manufacturer, and that no fault is irreversible, even on an IFG kit!
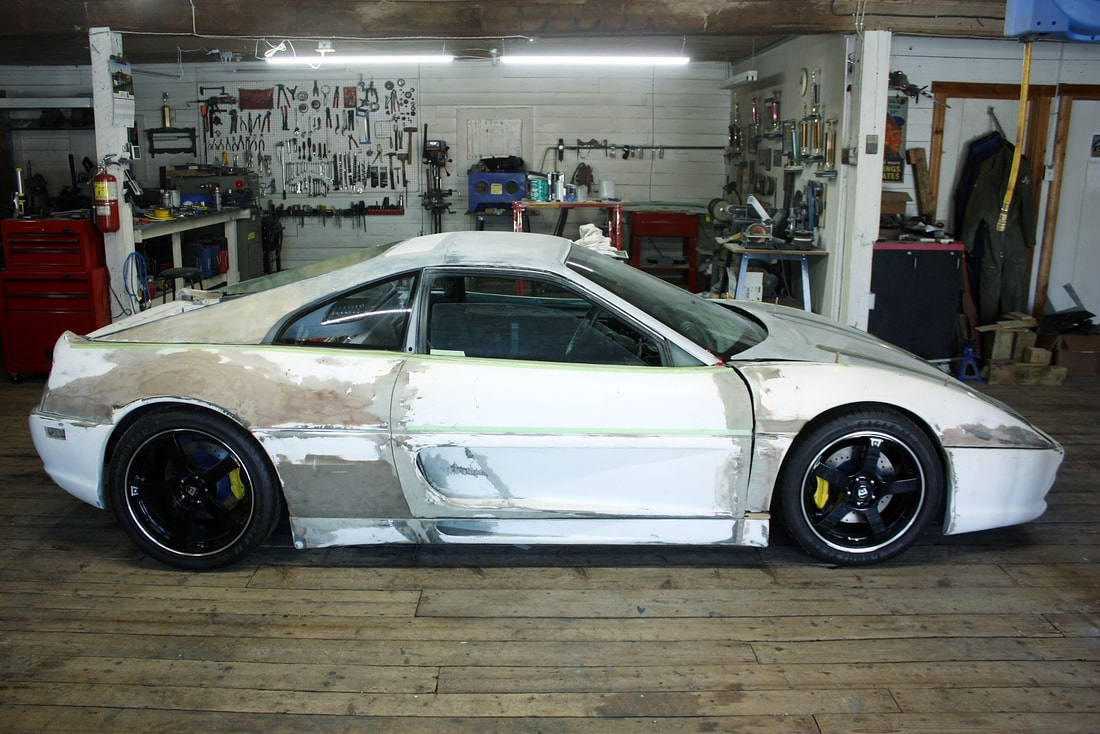
The decision “where to start” finessing is an important one. I began with the doors for one main reason: they’re at the center of the car, so small adjustments in body lines have less far to propagate in either direction than if I had started at the front or rear fascia and worked my way to the other end.
Recall that in the body mounting section, the only thing that could be done at that time was minimize the major discrepancies from one panel to the next, since no two panels met up with each other properly. So here’s what I had to work with starting at the doors:
Welcome to the section of my blog where I show the work needed to shape the body panels into flowing, sexy lines, beyond simply mounting the body to the chassis.
Anyone who’s ever built a kit car knows that nothing ever fits the way it should, that fiberglass panels are only as good as the effort made by the manufacturer, and that no fault is irreversible, even on an IFG kit!
The decision “where to start” finessing is an important one. I began with the doors for one main reason: they’re at the center of the car, so small adjustments in body lines have less far to propagate in either direction than if I had started at the front or rear fascia and worked my way to the other end.
Recall that in the body mounting section, the only thing that could be done at that time was minimize the major discrepancies from one panel to the next, since no two panels met up with each other properly. So here’s what I had to work with starting at the doors:
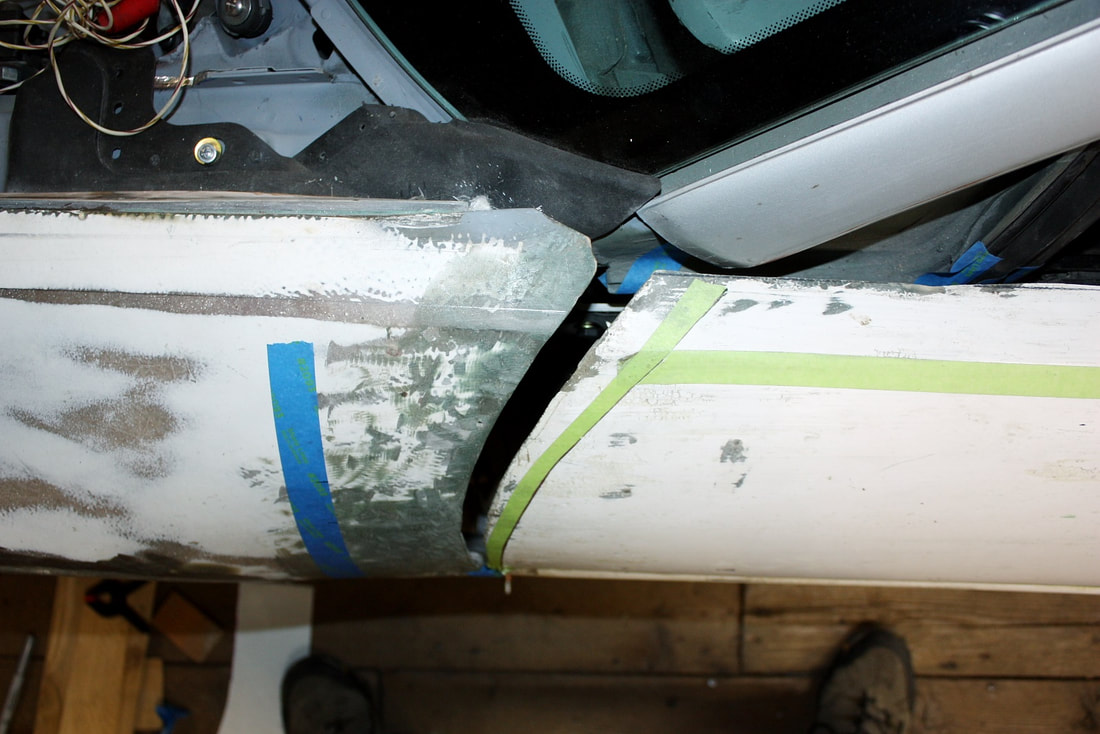
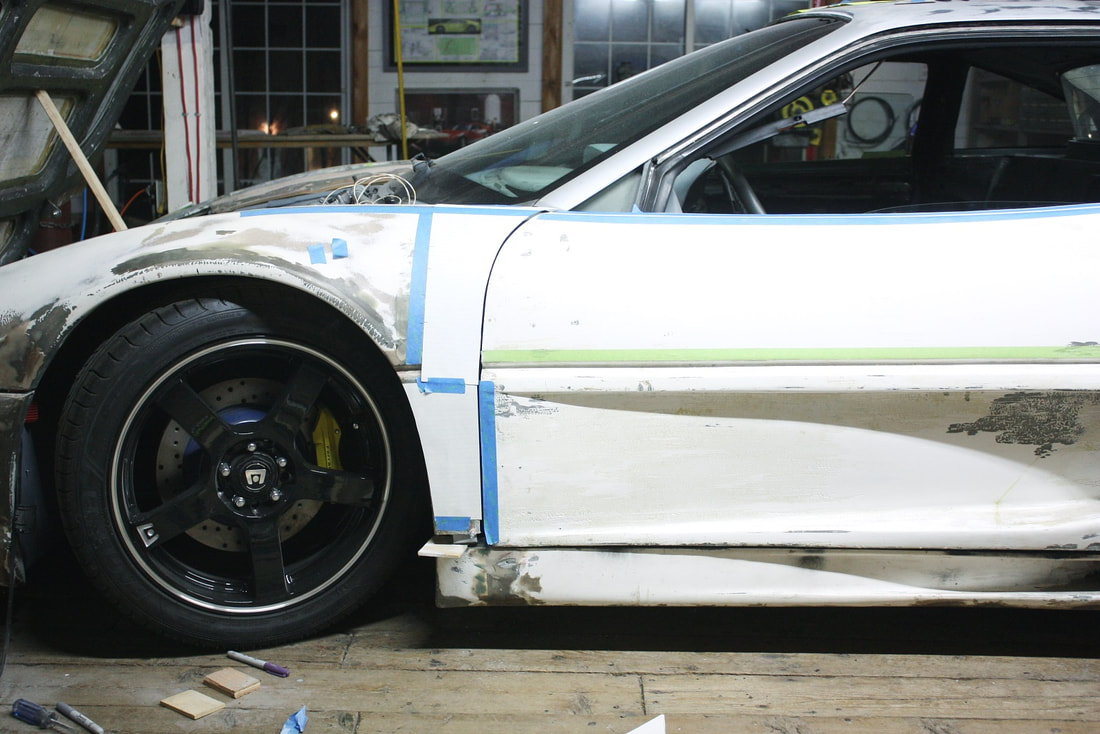
The most noticeable problem is front door gap on both doors. It came about because I purposely tilted the front fenders to lower the nose, lessen the wheel gap, and raise the area at the base of the windshield:
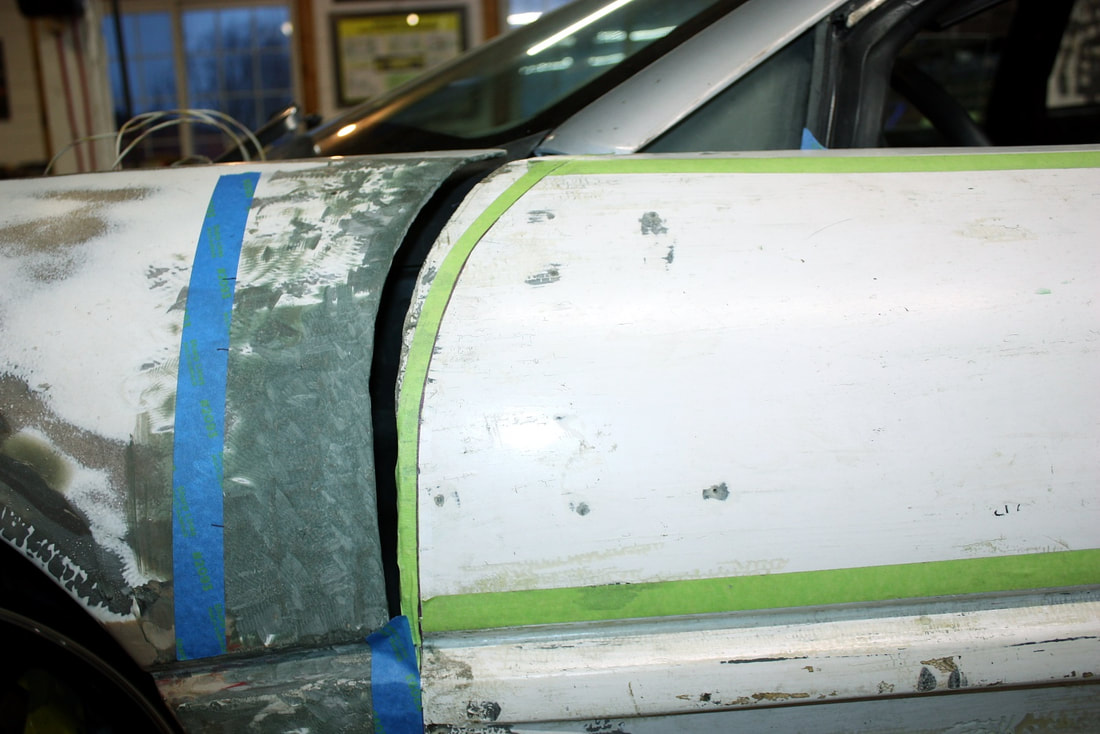
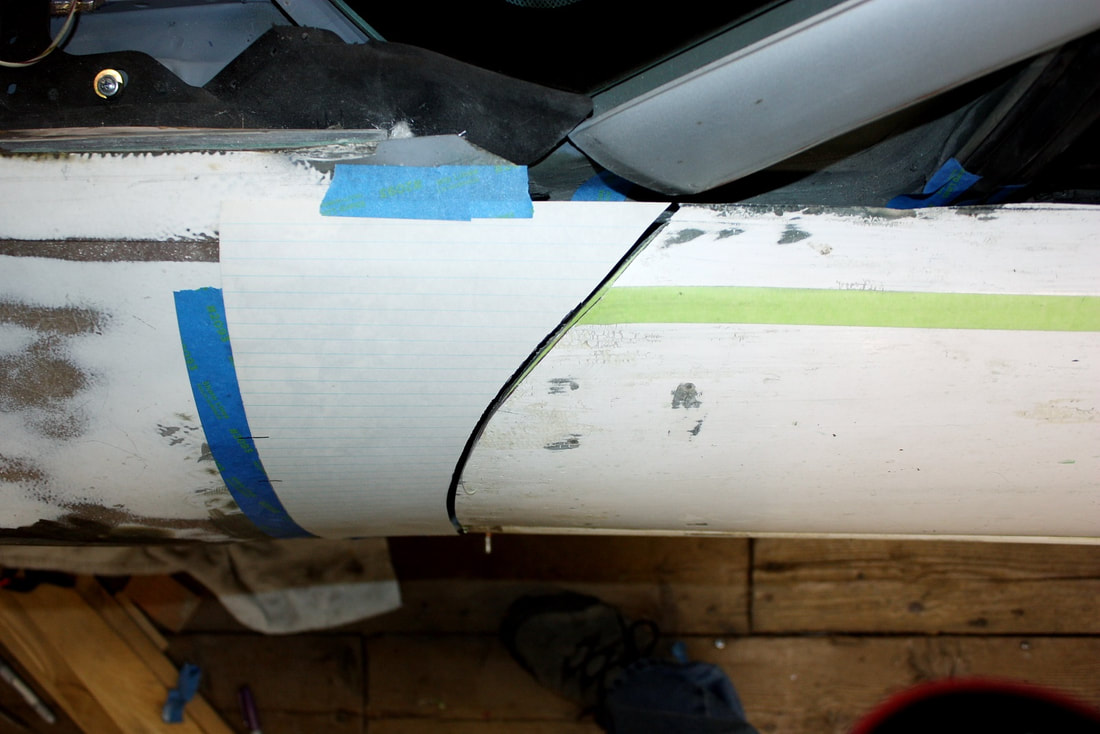
But other fitment problems existed with the door skins as well. The bottoms dragged on the new door sills; both doors had noticeably different curvatures along their top edges; the aft bulkhead of both door skins interfered with the door frames; and as designed, the front of the door skins were far too long. The back edge of the masking tape shows the correct length of the doors:
But other fitment problems existed with the door skins as well. The bottoms dragged on the new door sills; both doors had noticeably different curvatures along their top edges; the aft bulkhead of both door skins interfered with the door frames; and as designed, the front of the door skins were far too long. The back edge of the masking tape shows the correct length of the doors:
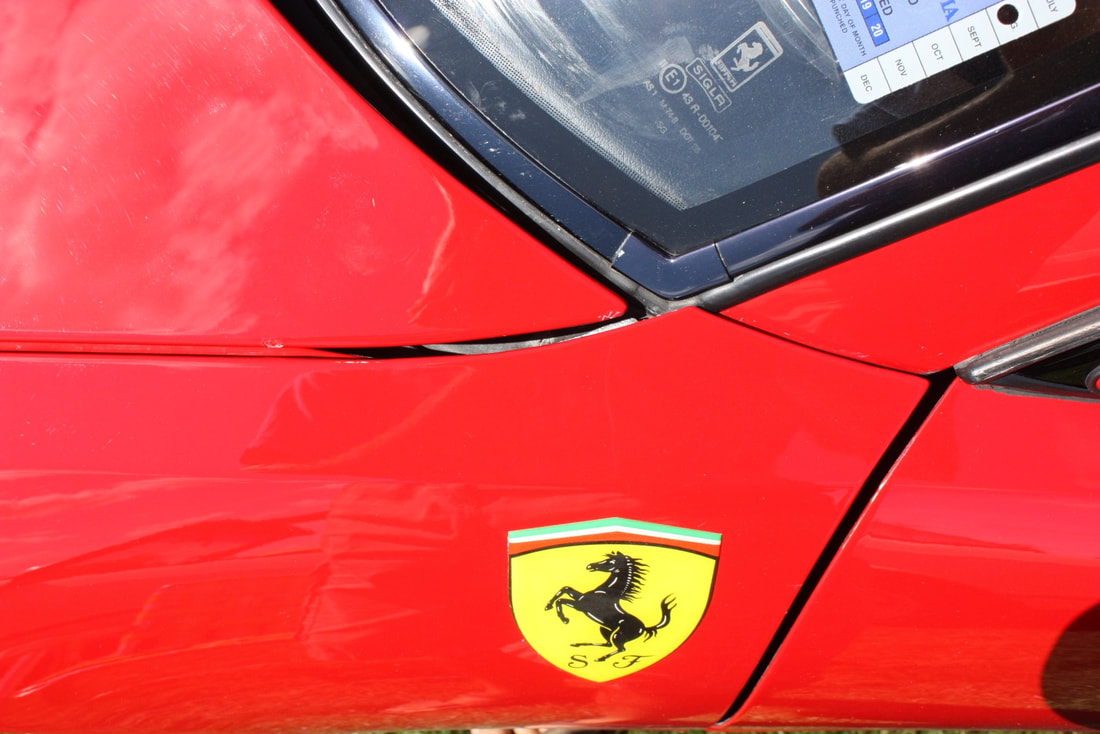
Too long? They look too short! But comparing to an authentic F355, you’ll see how the door line is supposed to match up with the back edge of the A-pillar, like so:
Too long? They look too short! But comparing to an authentic F355, you’ll see how the door line is supposed to match up with the back edge of the A-pillar, like so:
To find the correct line for the front edge of the doors, I used a hot-rodder’s trick: shine a vertical laser level at the door at a 45 degree angle, and it pops out. I aligned the top of the beam with the back edge of the A-Pillar, and the parting line magically appeared (squint, and you'll see it.):
To find the correct line for the front edge of the doors, I used a hot-rodder’s trick: shine a vertical laser level at the door at a 45 degree angle, and it pops out. I aligned the top of the beam with the back edge of the A-Pillar, and the parting line magically appeared (squint, and you'll see it.):
Chopping the front edge of the door was the simple part. It hurt. But it was simple:
Chopping the front edge of the door was the simple part. It hurt. But it was simple:

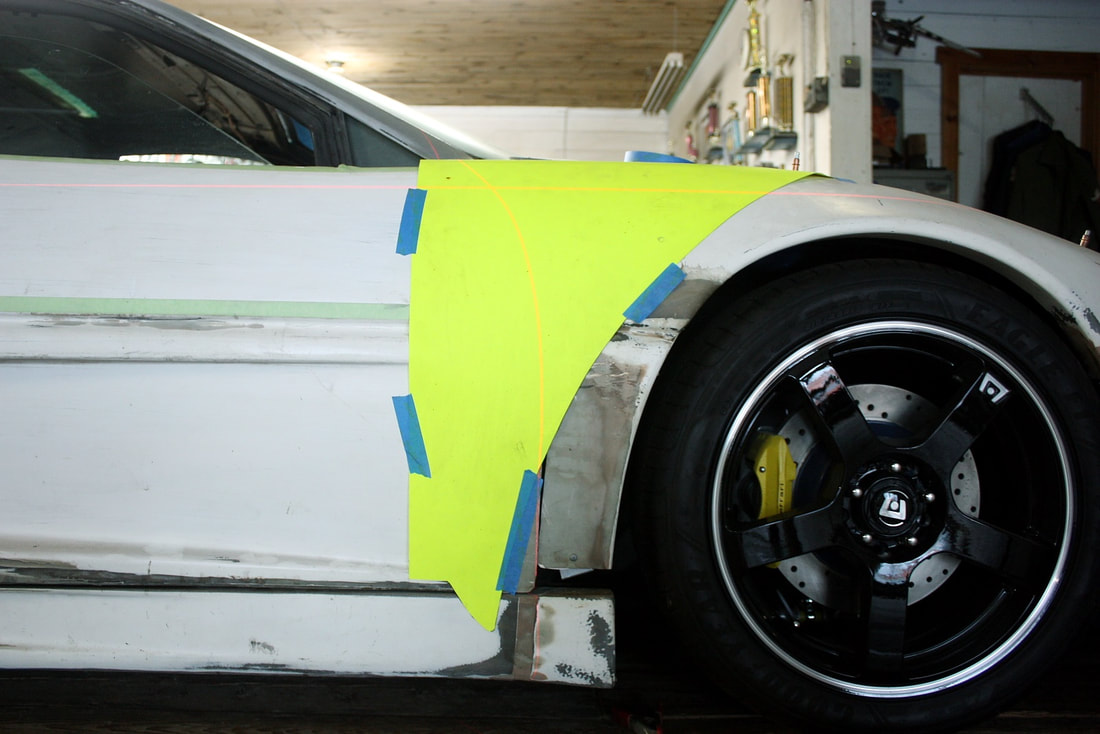
With that bit done, I mocked up a clean sheet of paper on the fender to get an idea how things would look once modified. It was already showing promise!
With that bit done, I mocked up a clean sheet of paper on the fender to get an idea how things would look once modified. It was already showing promise!
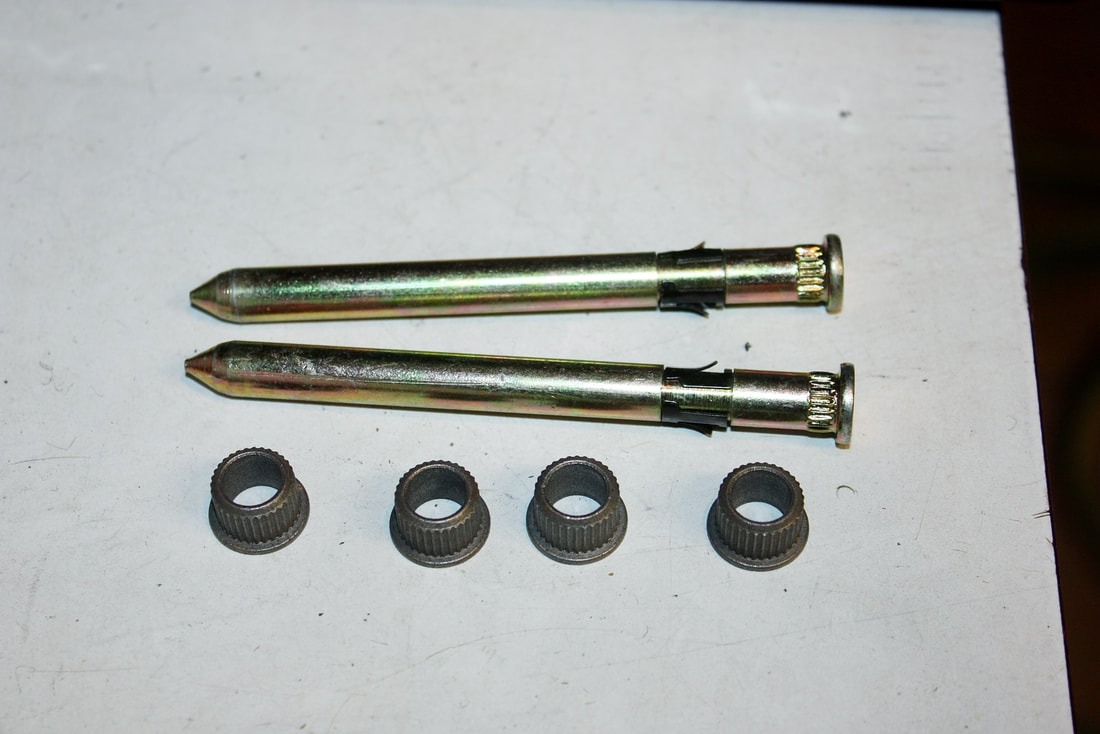
Of course no job gets completed without at least one side-track. In this case it was something I’d known would raise its ugly head before I could start reworking the door skins. Inevitably a 35 year old car is going to have worn out door hinges. I could lift the back edge of either door about ¼” taking up the slack in the worn hinge pins and bushings. There was no way to begin making tight tolerance gaps around the doors with this much play, so I ordered two pairs of Rodney Dickman’s hinge pins:
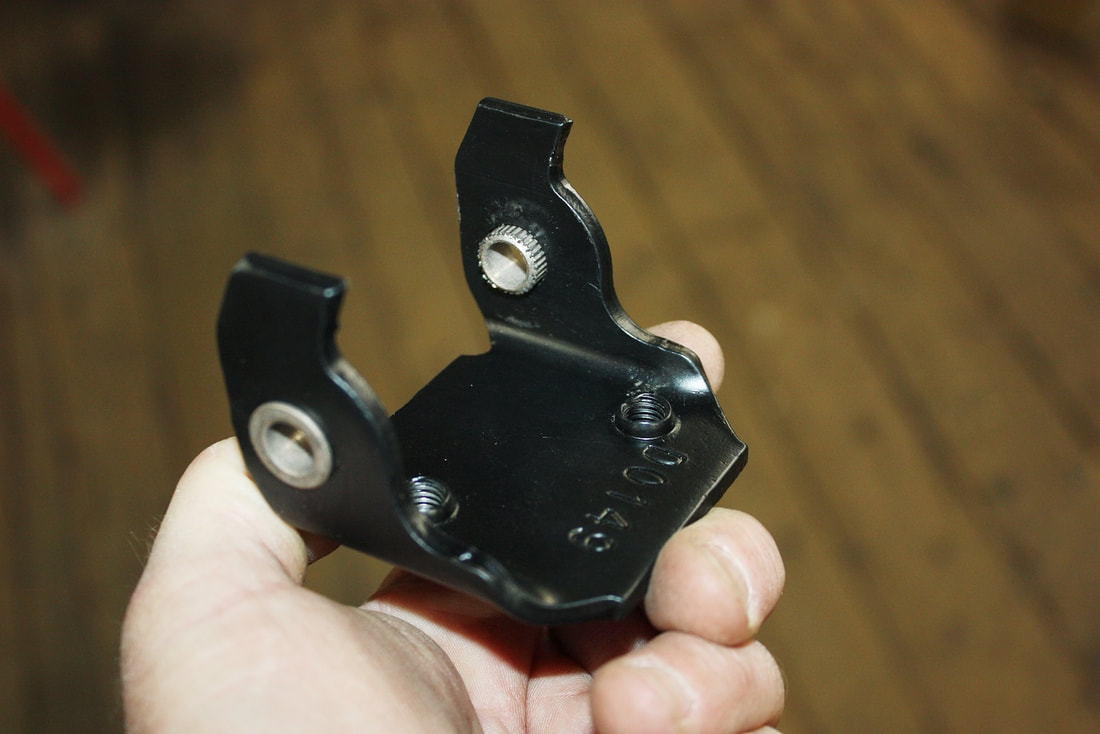
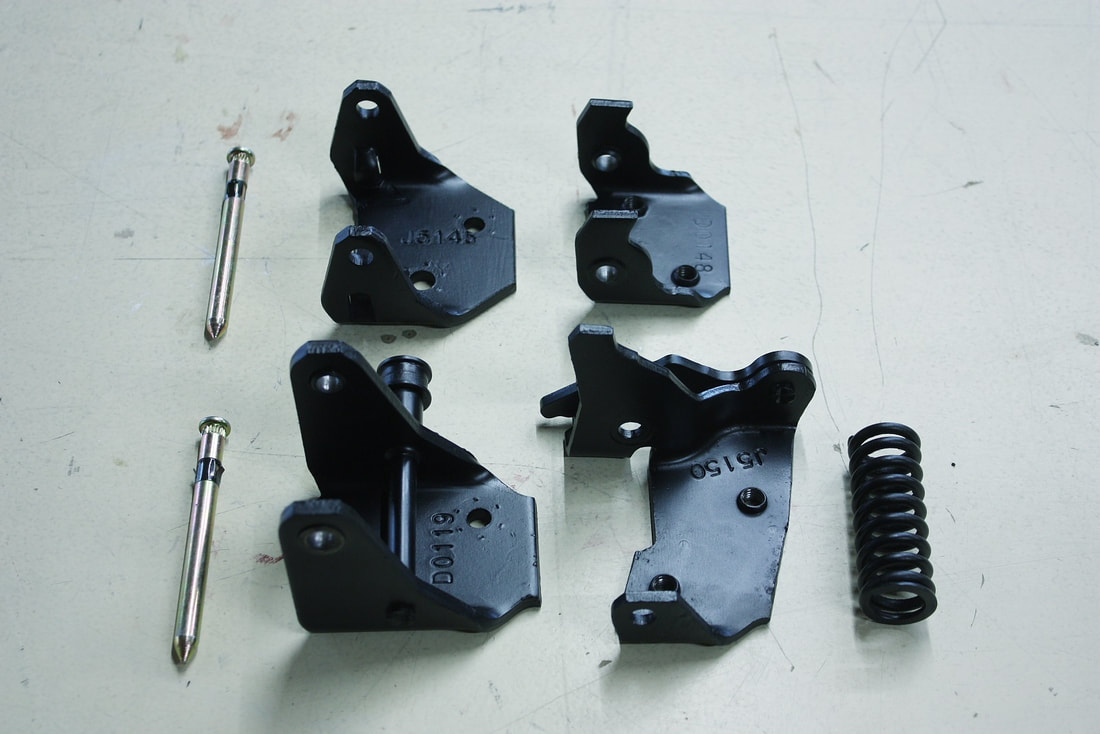
Of course no job gets completed without at least one side-track. In this case it was something I’d known would raise its ugly head before I could start reworking the door skins. Inevitably a 35 year old car is going to have worn out door hinges. I could lift the back edge of either door about ¼” taking up the slack in the worn hinge pins and bushings. There was no way to begin making tight tolerance gaps around the doors with this much play, so I ordered two pairs of Rodney Dickman’s hinge pins:
One half of each hinge has bushings, while in the other half the pin rides directly in steel holes drilled through the hinge metal. Of course some of these non-bushed holes were worn out as well, so I removed the hinges altogether, drilled out the worn metal holes…
One half of each hinge has bushings, while in the other half the pin rides directly in steel holes drilled through the hinge metal. Of course some of these non-bushed holes were worn out as well, so I removed the hinges altogether, drilled out the worn metal holes…

… added extra bushings where needed…
… added extra bushings where needed…
… then completely refurbishing the hinges:
… then completely refurbishing the hinges:
At last I was ready to make more progress on the door skins. Or not!
I had always had no trouble opening and closing either door until I made the paper template narrowing the gap between the front fender and the door. Up to that point, the huge gap had hidden the problem. On a door like the F355’s, which is much thicker than the Fiero’s, and has a 1.5” horizontal flat edge running along the top of the fenders and doors, the pivot point of the hinge needs to be located further outboard than the Fiero’s. Here’s why:
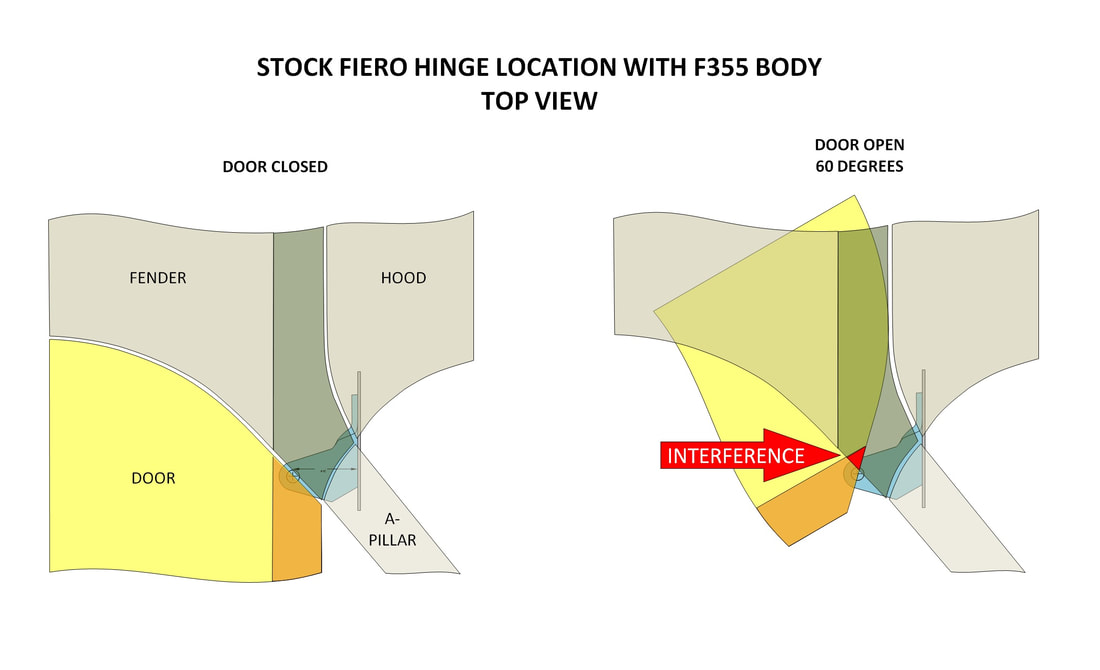
In the above drawing of the door, fender, and A-pillar junction, the critical area is the darker shaded portions of the fender and door tops. This is the horizontal track that runs along the top of the body line. Obviously for them to make a continuous body line from front to rear, these darker shaded areas have to be level with each other at the gap when the door is closed. But with hinges in the wrong location, the body panels will try to occupy the same space when the door is opened as shown by the red area in the diagram to the right.
No amount of relocating the door gap can solve this, except by having huge door gaps, and no one wants that. The solution lies in modifying the hinge to make the interfering part of the door panel pull away from the car, rather than pivot into the fender.
At first I started entertaining ideas of redesigning the hinges, but then stumbled across a simple solution in a build thread on MadMechanics Custom and Kit Car forum by a member who goes by MacGyver. He simply moved his hinges outboard by installing spacer blocks between the hinges and the chassis, much like this:
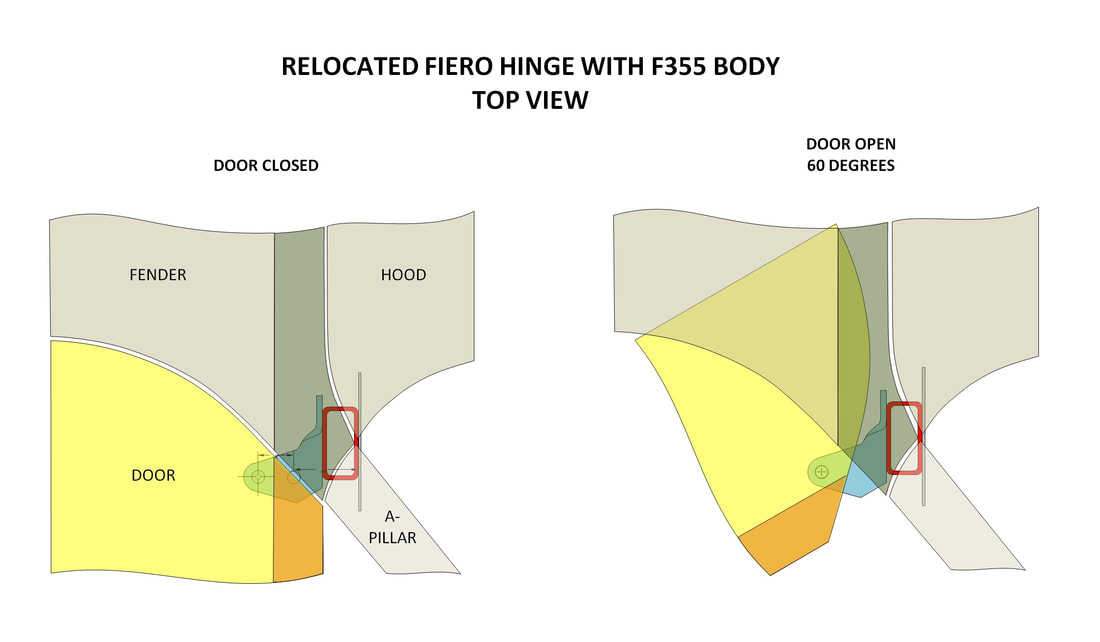
The red rectangle represents the spacer, which moves the entire hinge further outboard, and changes the relationship of the door to the fender when in the open position as shown by the diagram to the right. Notice how the dark flat area at the top of the door pivots away from its mating surface on the fender top. MacGyver used whopping 3” thick spacers, but in my case, I figured I’d be able to get away with the 1” spacers shown in my diagram, so I fabricated one pair from some 1” x 2” x 3/16” tubing to test the theory:
The red rectangle represents the spacer, which moves the entire hinge further outboard, and changes the relationship of the door to the fender when in the open position as shown by the diagram to the right. Notice how the dark flat area at the top of the door pivots away from its mating surface on the fender top. MacGyver used whopping 3” thick spacers, but in my case, I figured I’d be able to get away with the 1” spacers shown in my diagram, so I fabricated one pair from some 1” x 2” x 3/16” tubing to test the theory:
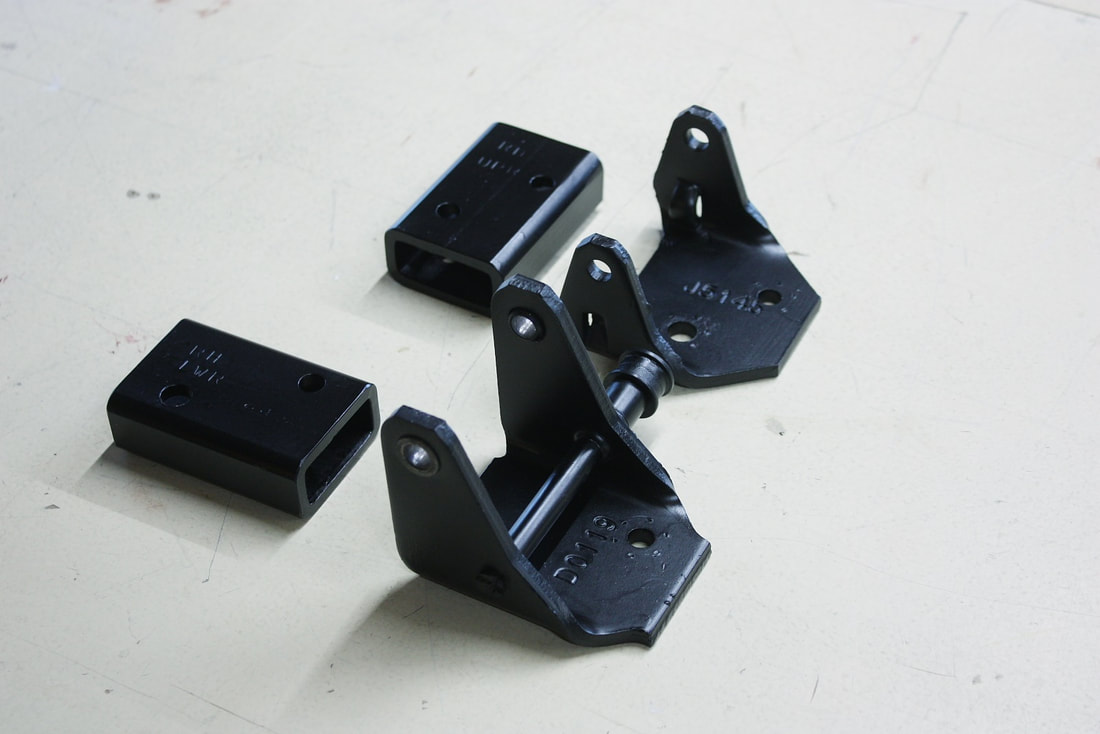
Here’s a close up of the lower hinge on the driver’s side showing the spacer in place, and a long steel rod up running up through the upper hinge to ensure both hinges were aligned:
Here’s a close up of the lower hinge on the driver’s side showing the spacer in place, and a long steel rod up running up through the upper hinge to ensure both hinges were aligned:


Next, I added the other half of the hinges to attach the door:
Next, I added the other half of the hinges to attach the door:

By having the complete hinges attached to the chassis, I had the ability to return the metal door structure in the door frame hole where it belonged, aligning it with reference marks I'd made earlier. Once the door structure was returned to it's normal place, marked the new locations of the hinge mounting holes on the door and prepped it for re-drilling.
Next up: remounting the doors.

 RSS Feed
