| In Post #126, I finished fabricating the combination upper-frame-rail-extension / metal-stiffener to support the upper fascia. It was now time to glue the fancy stiffener to the underside of the fibreglass. The instructions on the 3M adhesive said that it worked best on metal primed with an epoxy primer, so off I went to the local NAPA store and bought a can, along with some self-etching primer as a base. The epoxy spray can comes divided into two internal chambers which are punctured with a special button from the bottom, and shaken well to activate. It’s also pretty toxic so a respirator is a must: |  |
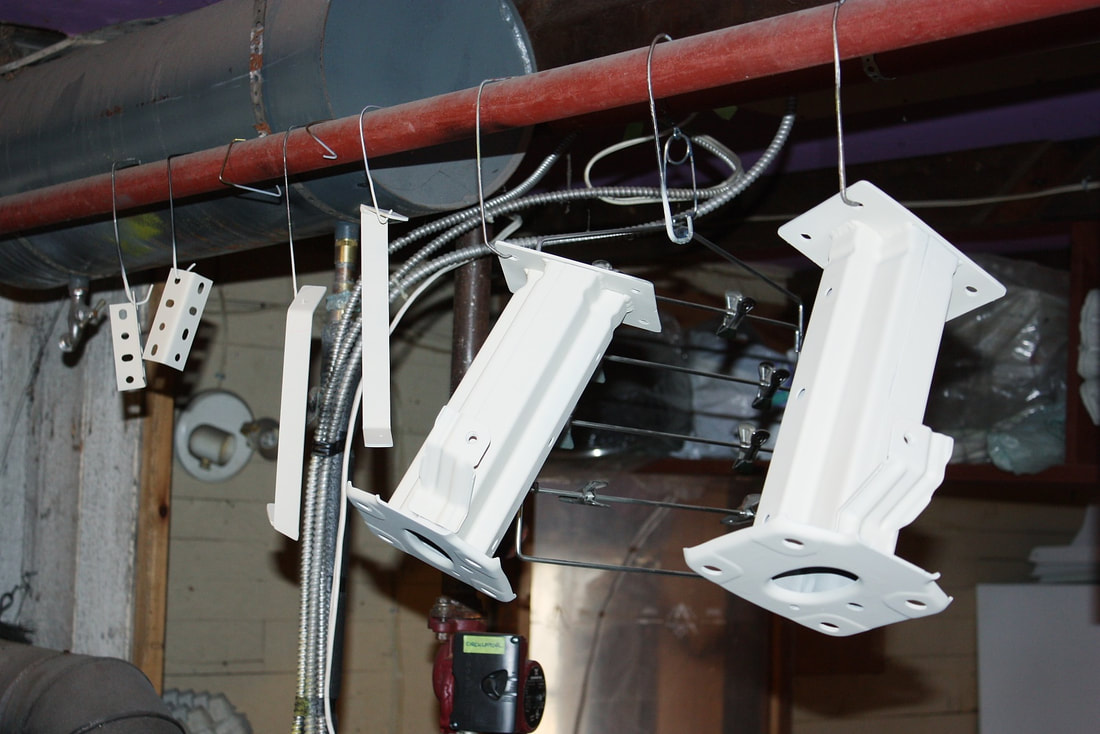
The epoxy is $30 a can and once activated, has a pot life of about 48 hours, so it’s best to save up a bunch of parts that need a good primer before activating it. So I removed all the front end metalwork, etched them, then epoxy primed as many pieces as I could before running out. I started with the upper and lower frame rail ends:
Then did the same for all the metal supports and the bumper bar. I could’ve painted the parts on the car, but I wanted full coverage. Here, the overhead hot water tubes for my shop furnace serve as a great drying rack:
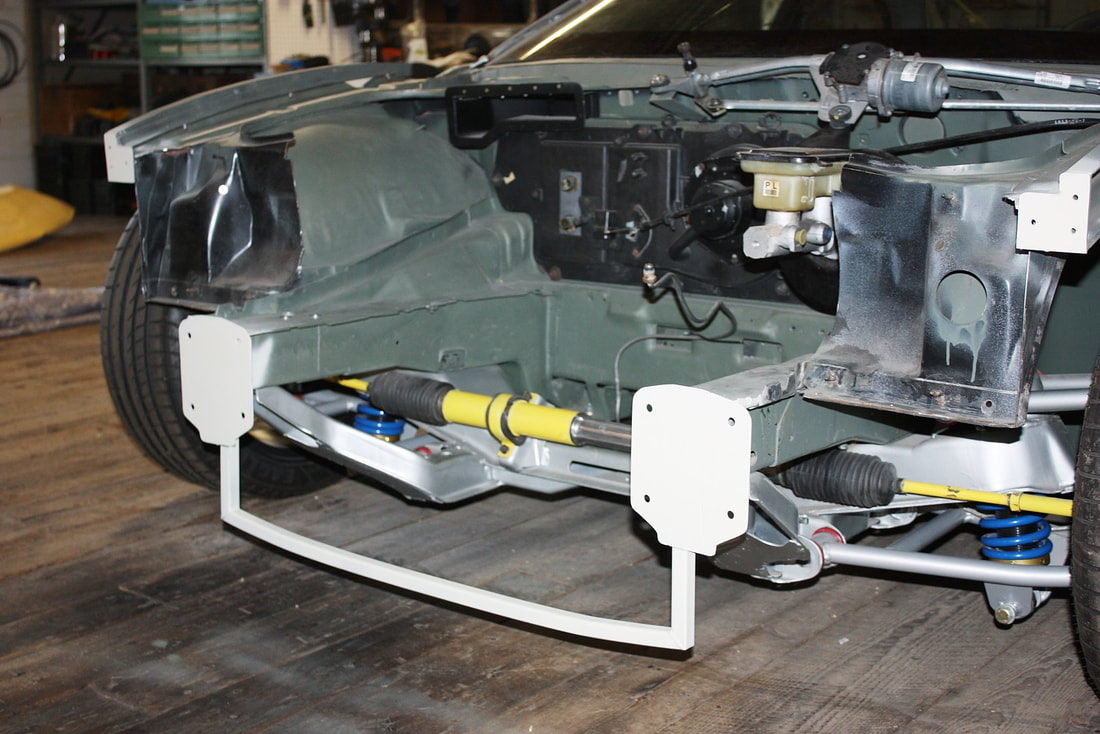
When the epoxy primer had set, I started rebuilding the front frame. This time I bought the proper grade 8 fasteners for the lower frame rail extensions:

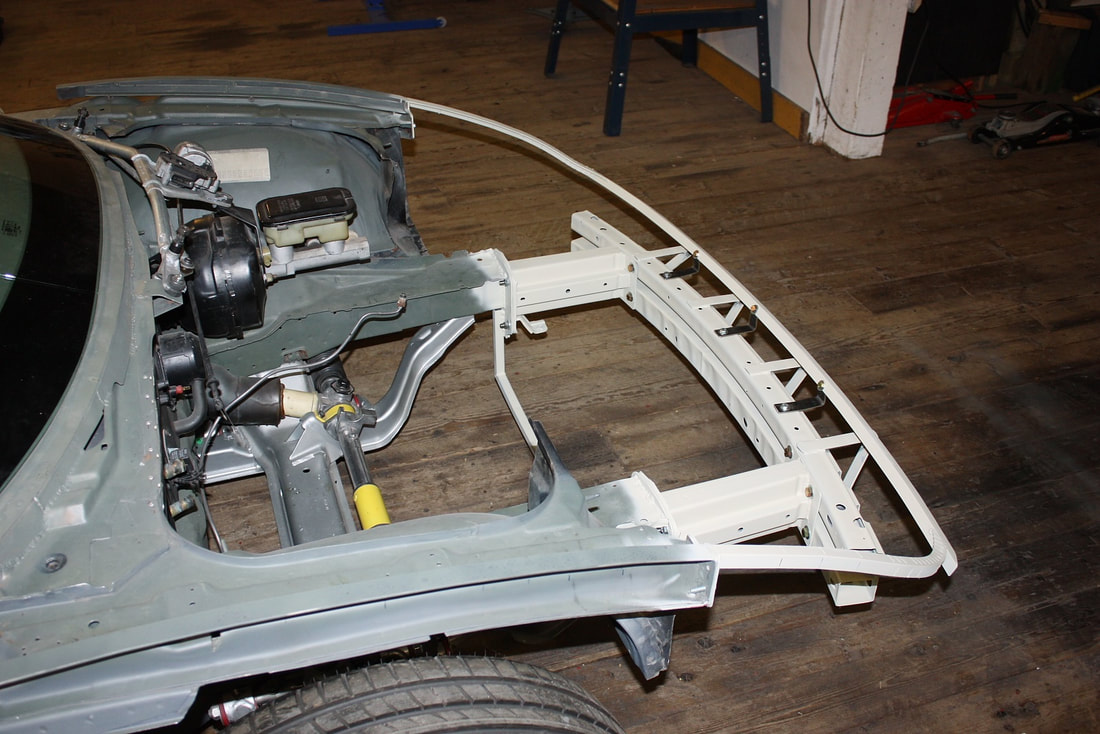
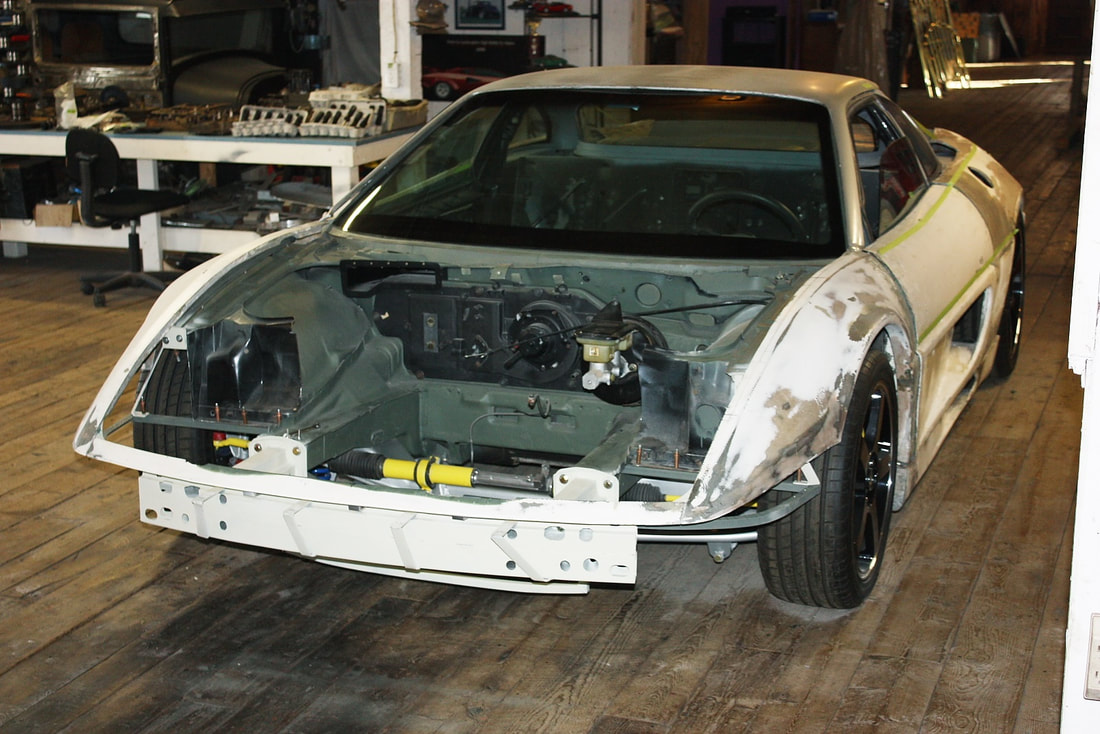
At this point I could’ve glued the upper rail extensions to the front clip while both were separated from the chassis, but I decided the only way to ensure proper alignment would be to install the metalwork to the chassis, align the clip with the rest of the body panels, and then glue them together while in place. So I bolted the upper rail extensions/upper fascia stiffener to the chassis:
| Here’s the 3M adhesive I used to glue the stiffener to the underside of the fibreglass… at $100 for a pair of tubes, it’s not cheap. It does work really well between metal, fibreglass, and sheet molded compound. I borrowed the special double barrelled caulking gun from my local body shop: |  |
I then spread a generous amount of the adhesive to the top surface of the upper rail extensions/upper fascia stiffener:
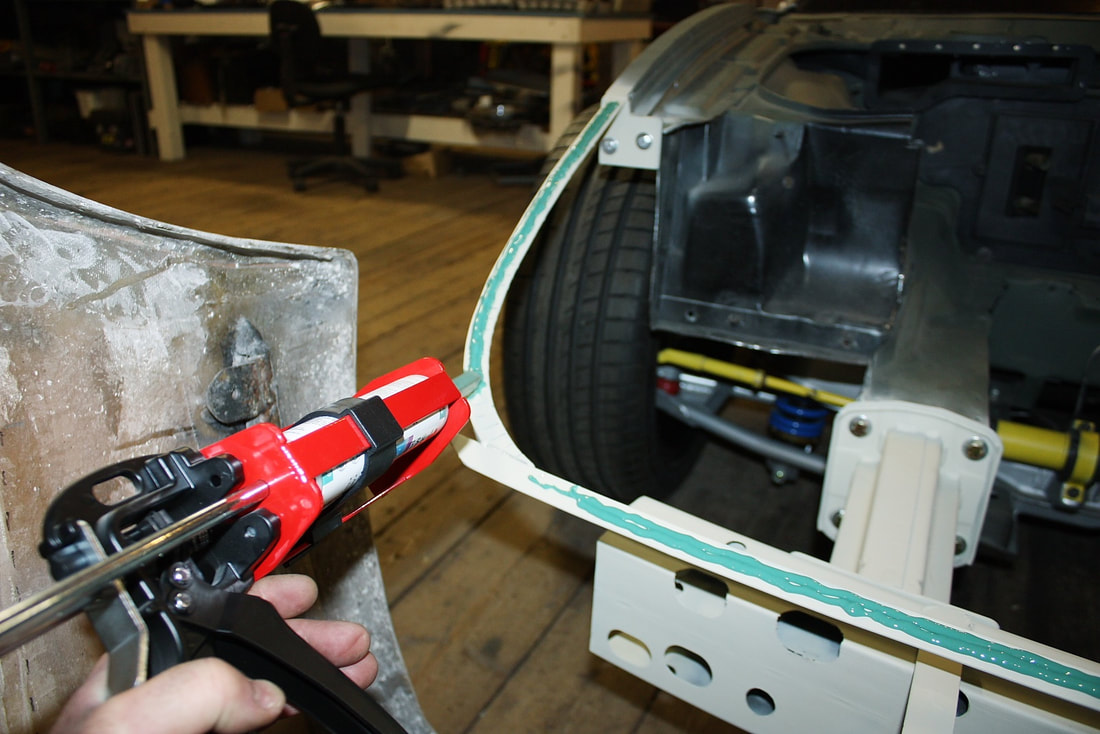
Then I reinstalled the front clip and lightly clamped it in place while the adhesive cured:
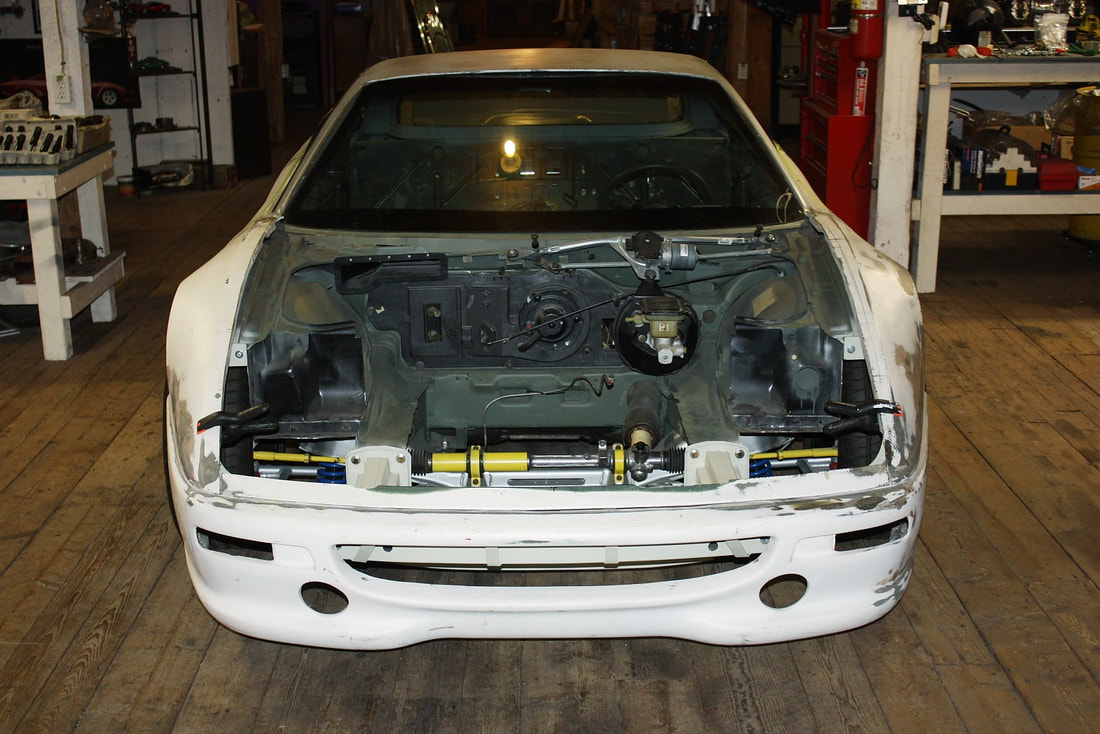
The next day I was able to unbolt the stiffener from the upper rails, and remove the front clip to see how well the stiffener had bonded to the underside:
 |  |
The fit and alignment was spot on, and the stiffener was very well attached to the fibreglass.
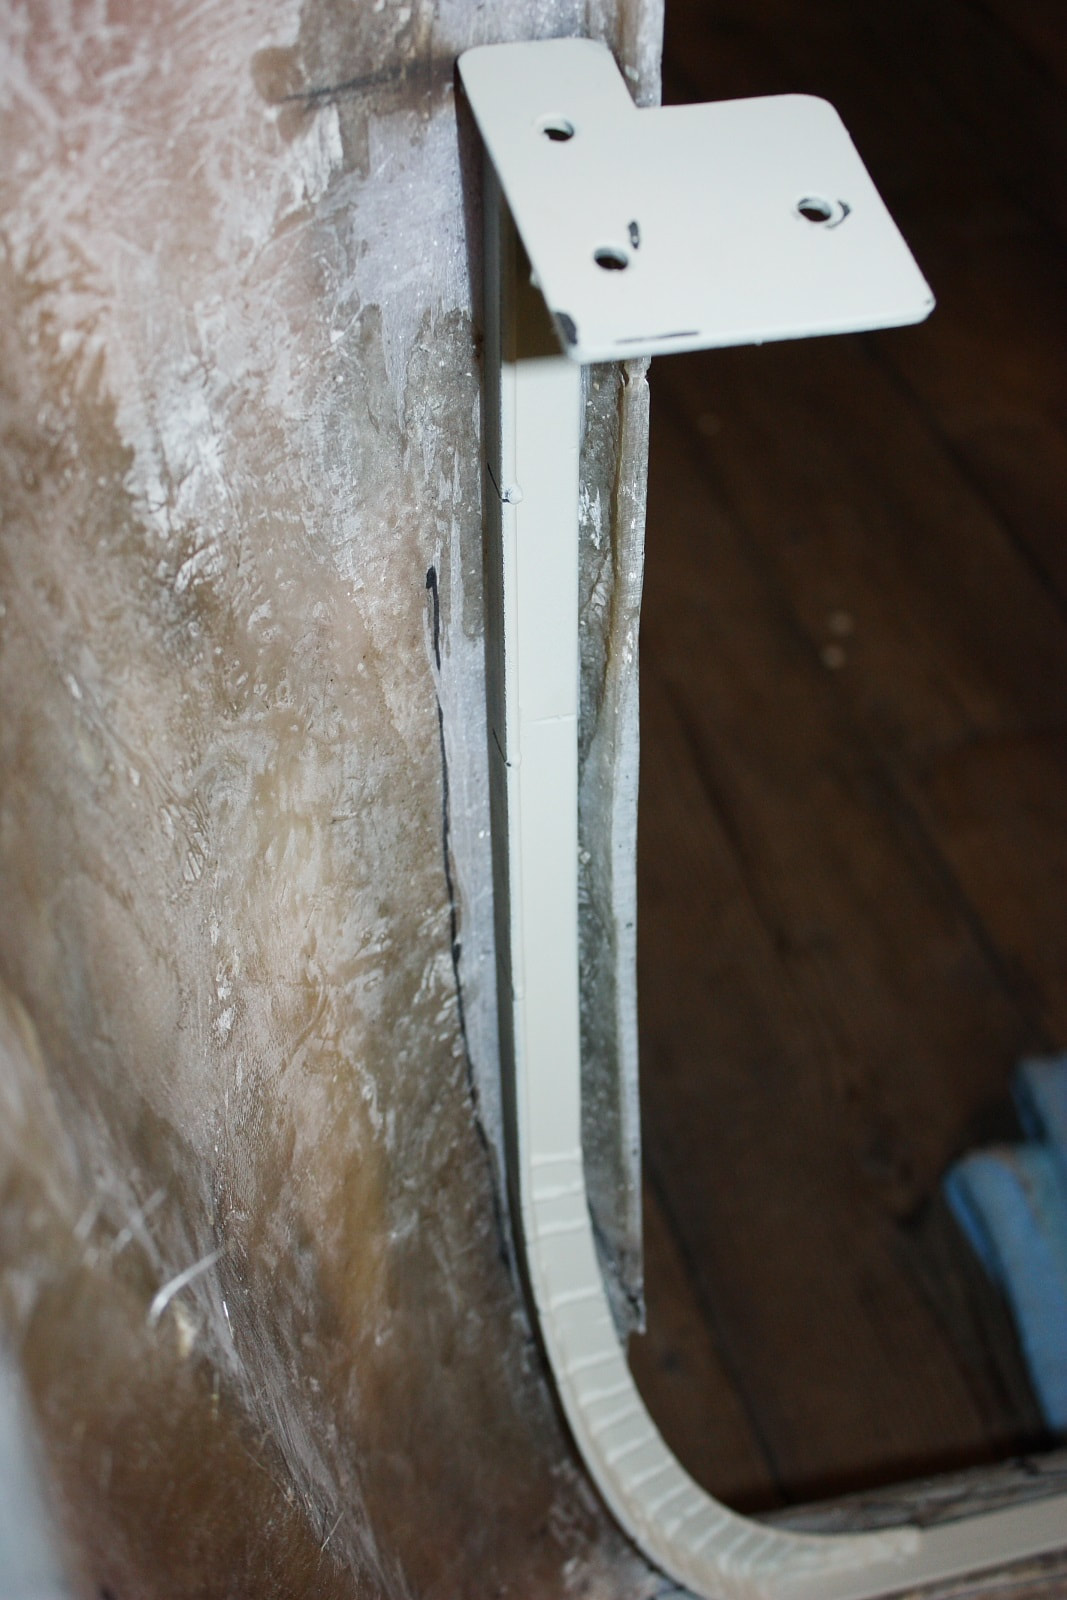
That pretty well took care of securing the fenders together, stiffening the thin bridge between them, and the upper mounts, at least enough to cut the front clip in two. For the lower half of the clip, I still needed to finalize the attachment to the chassis near the wheel openings. All I needed to do was glue a pair of brackets (yellow arrow) to the inside of the lower fascia. The brackets would rest on the triangulated supports I installed in Post #126:
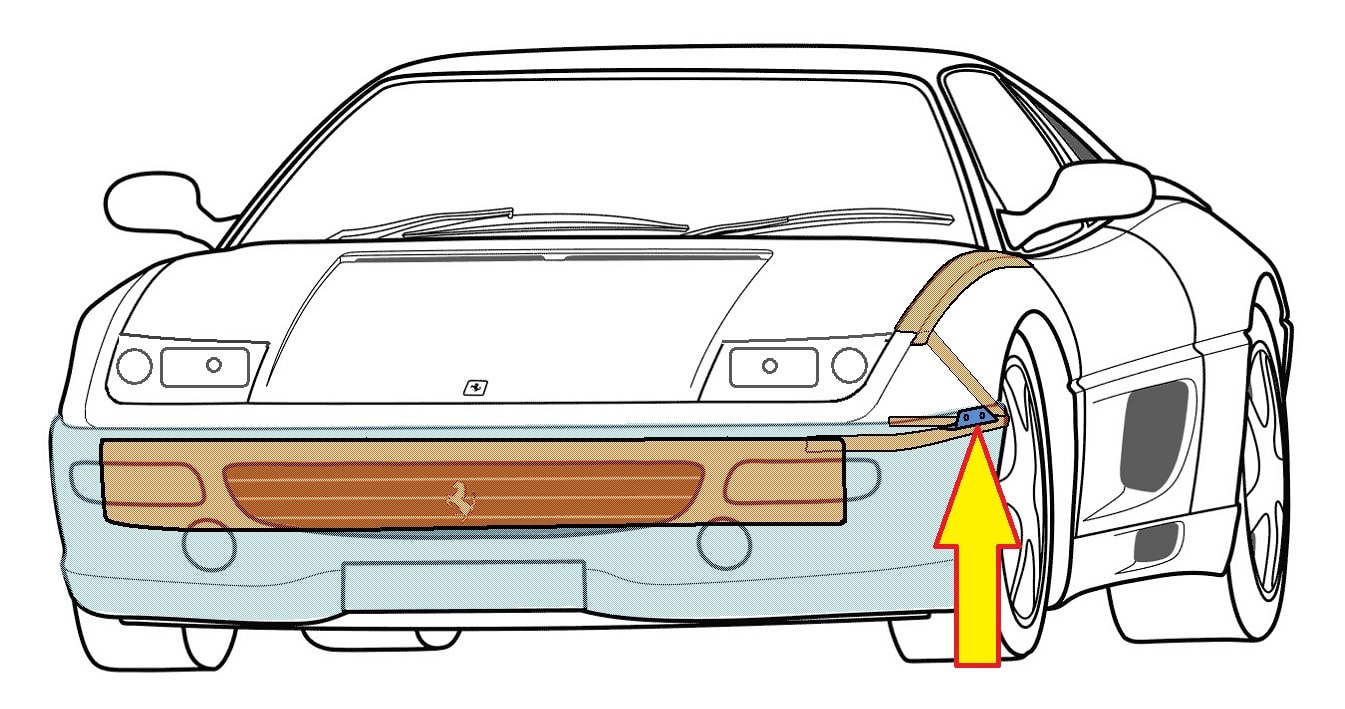
Here’s the area in question:
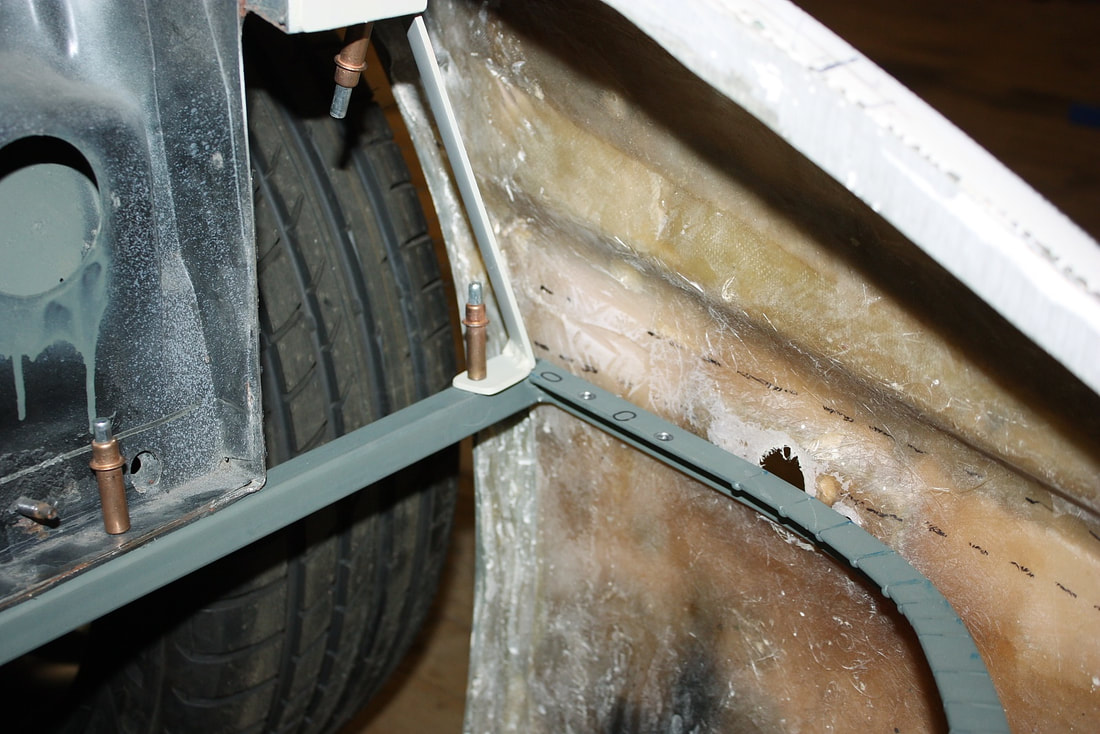
And here’s the glued-in bracket that’ll steady the lower fascia to the chassis near the wheel wells:
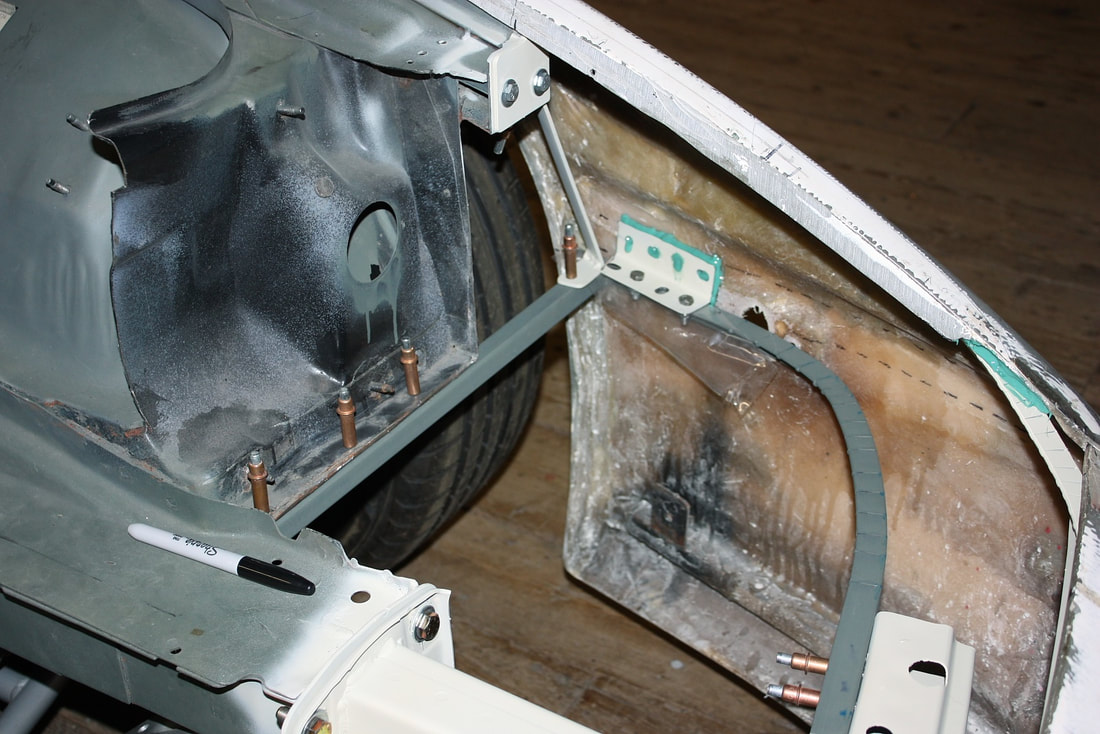
With that last step, both the upper and lower halves of the front clip had all of the mounts needed to secure the two panels independently to the chassis. So, getting out my angle grinder with the thin cut-off wheel was next:

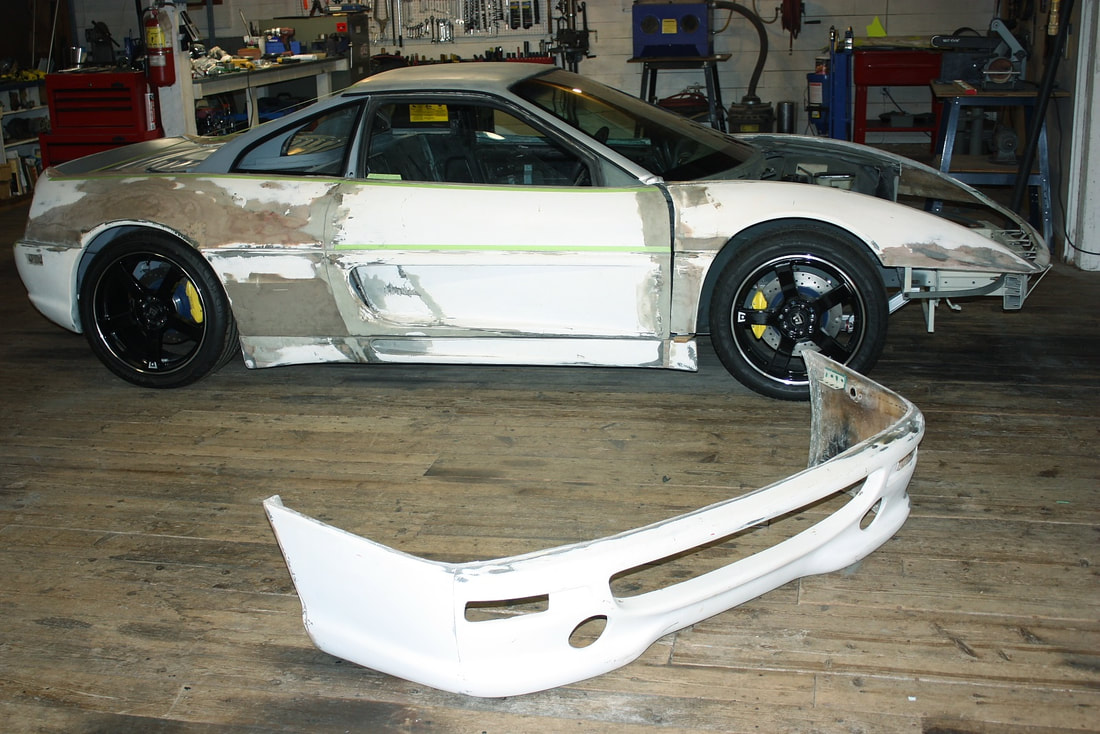
The angle grinder makes a lot of dust, but it is fast and makes a nice cut. Once I had finished running the cutter along the beltline, the two separated pieces stayed perfectly in place… just as I had hoped (and planned!). After removing a few bolts, I removed the lower fascia for some photos:
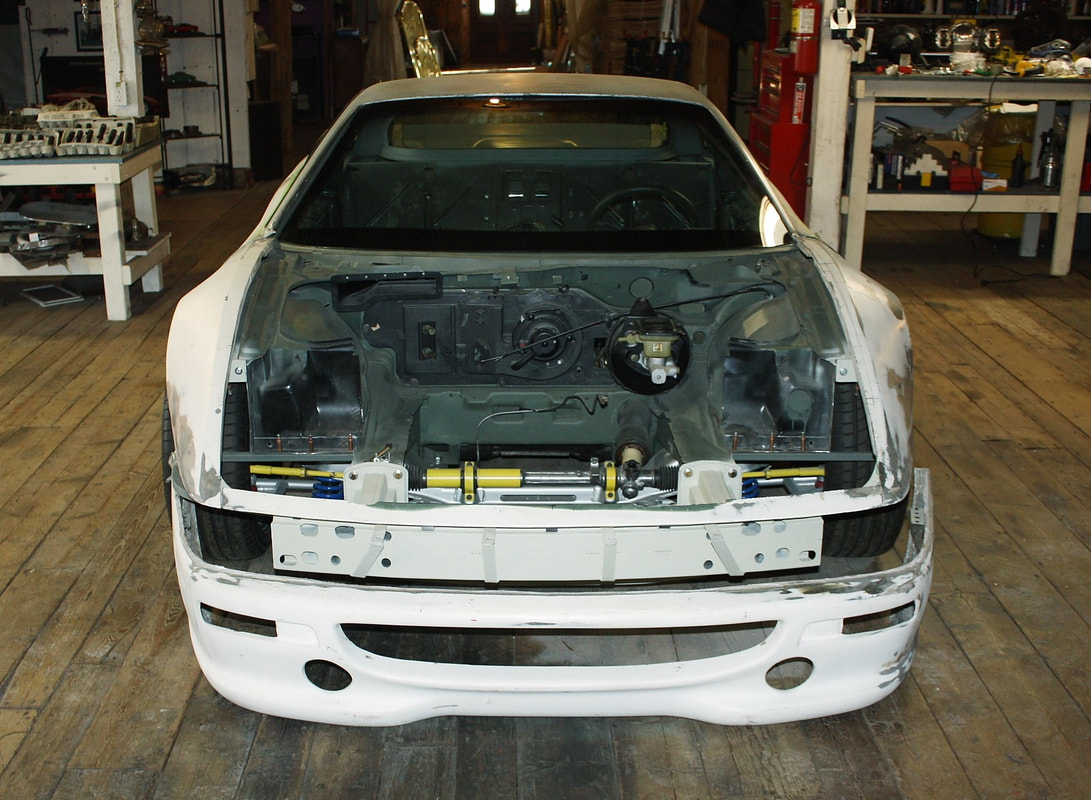
Here’s the car without the lower fascia:
Here’s the Lower fascia by itself:
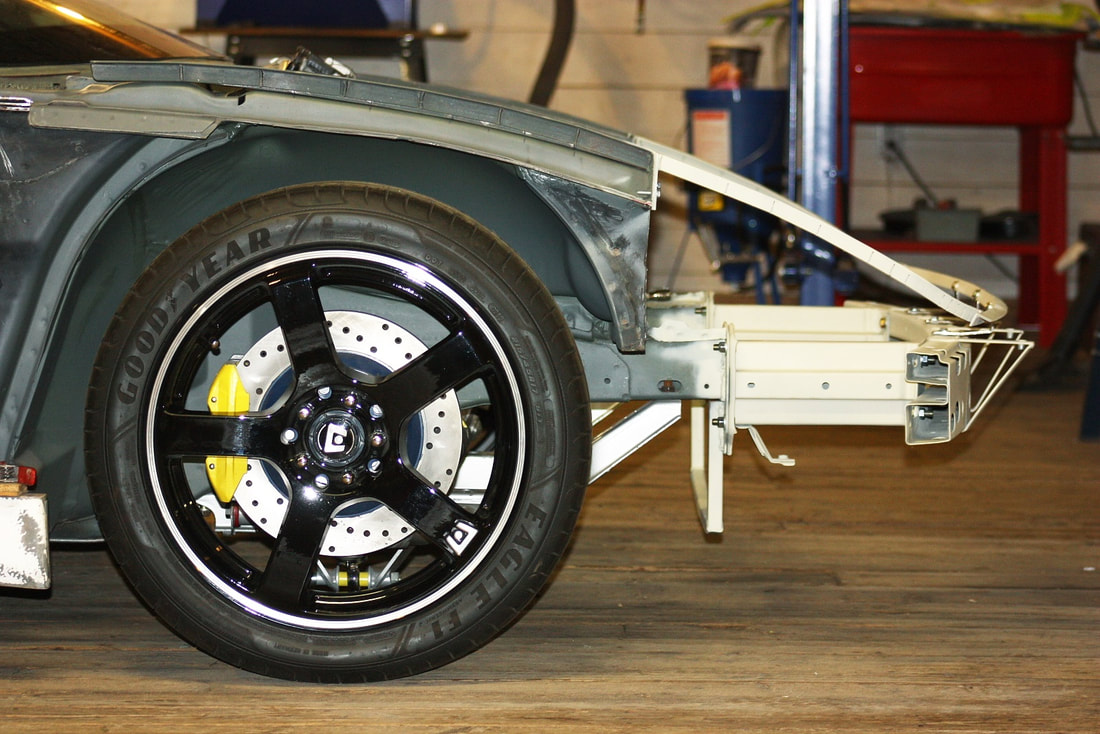
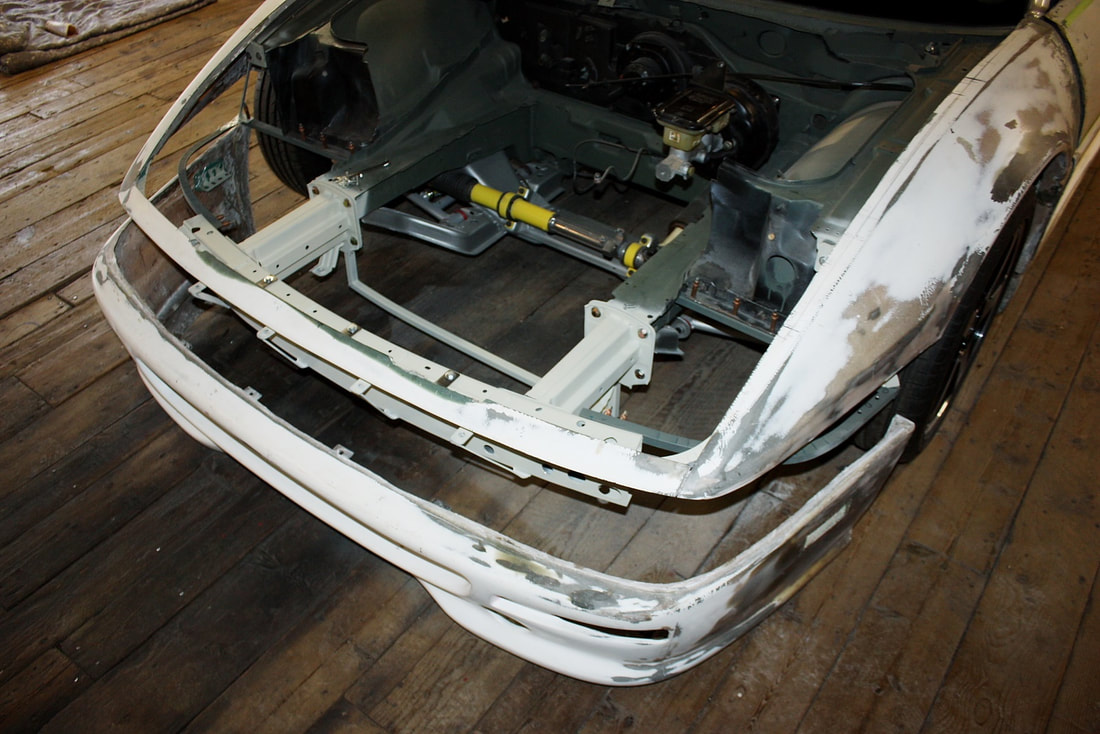
And finally, here’s the one-piece front fender section removed from the chassis:
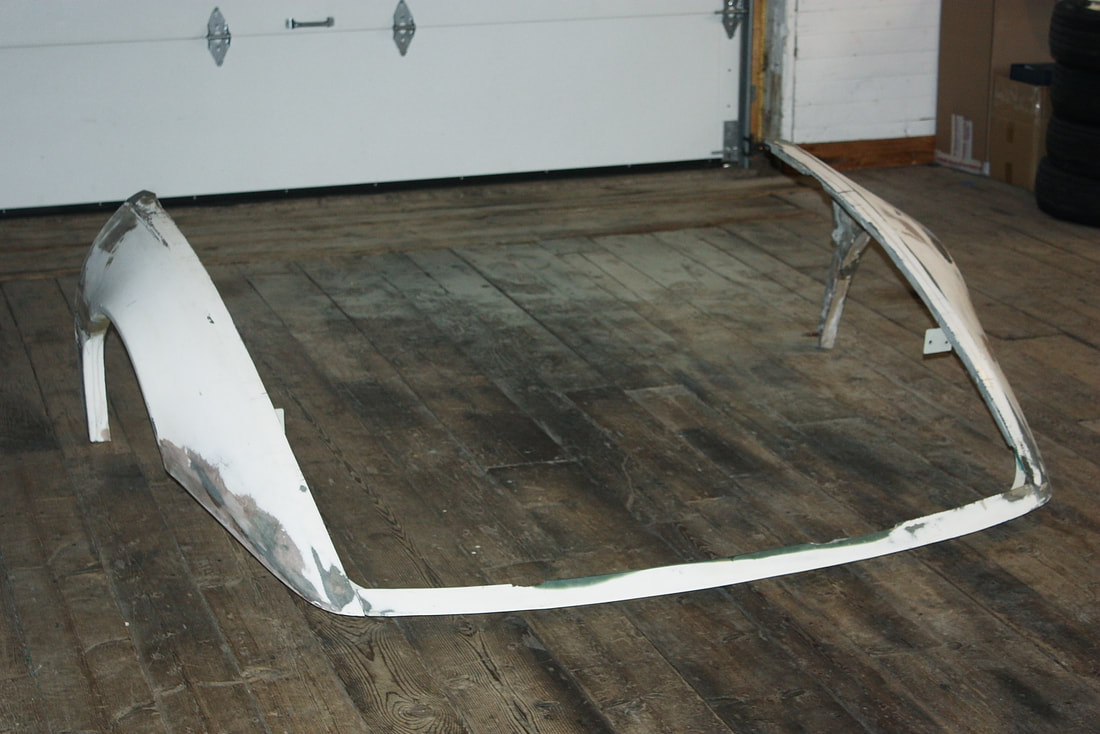
There’s still more work left to mount the fenders properly: I’ve got to form new fibreglass flanges to bolt the fenders to the chassis up both sides of the hood opening, and I’ve got to figure out a way to attach the lower part of the fenders to the rockers. I’ll cover those details later since proper alignment of the fenders with the hood is critical, and I’d rather wait to see how the two parts mate before finalizing the fender mounts.

 RSS Feed
