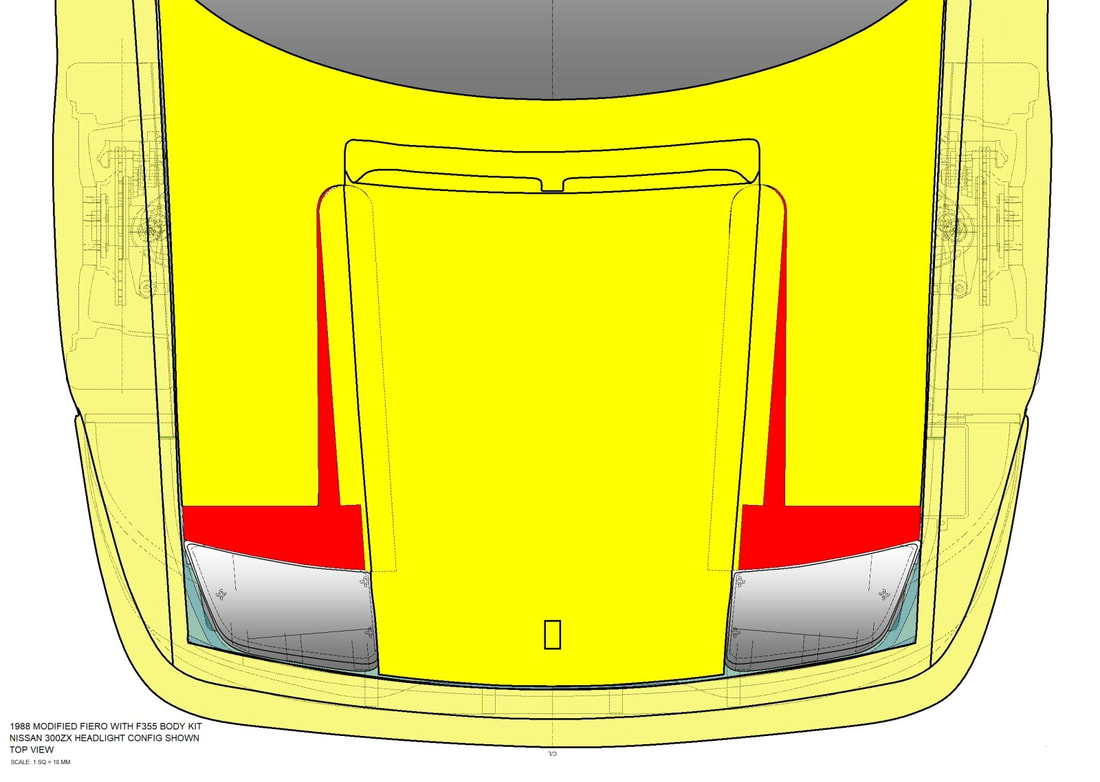
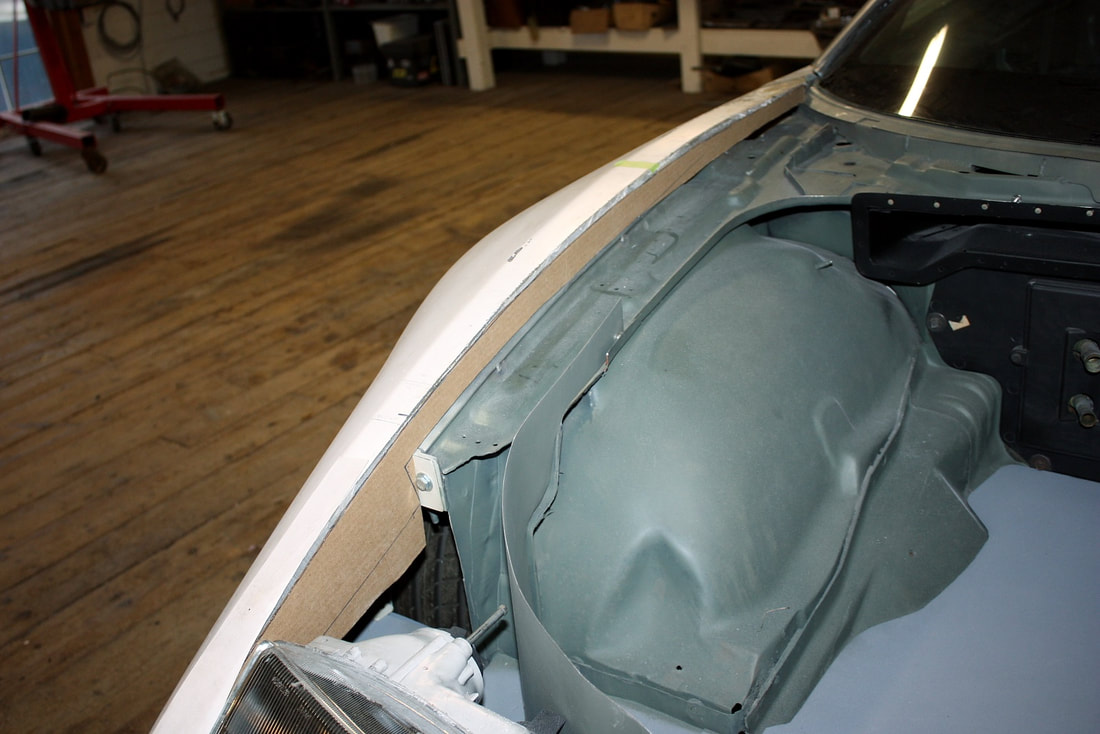
With the hood creases finally lined up with Nissan 300ZX headlights, it was time to address the long triangular cracks I’d made up each side of the hood. (I decided to attack the problem area behind the headlights in a later post):
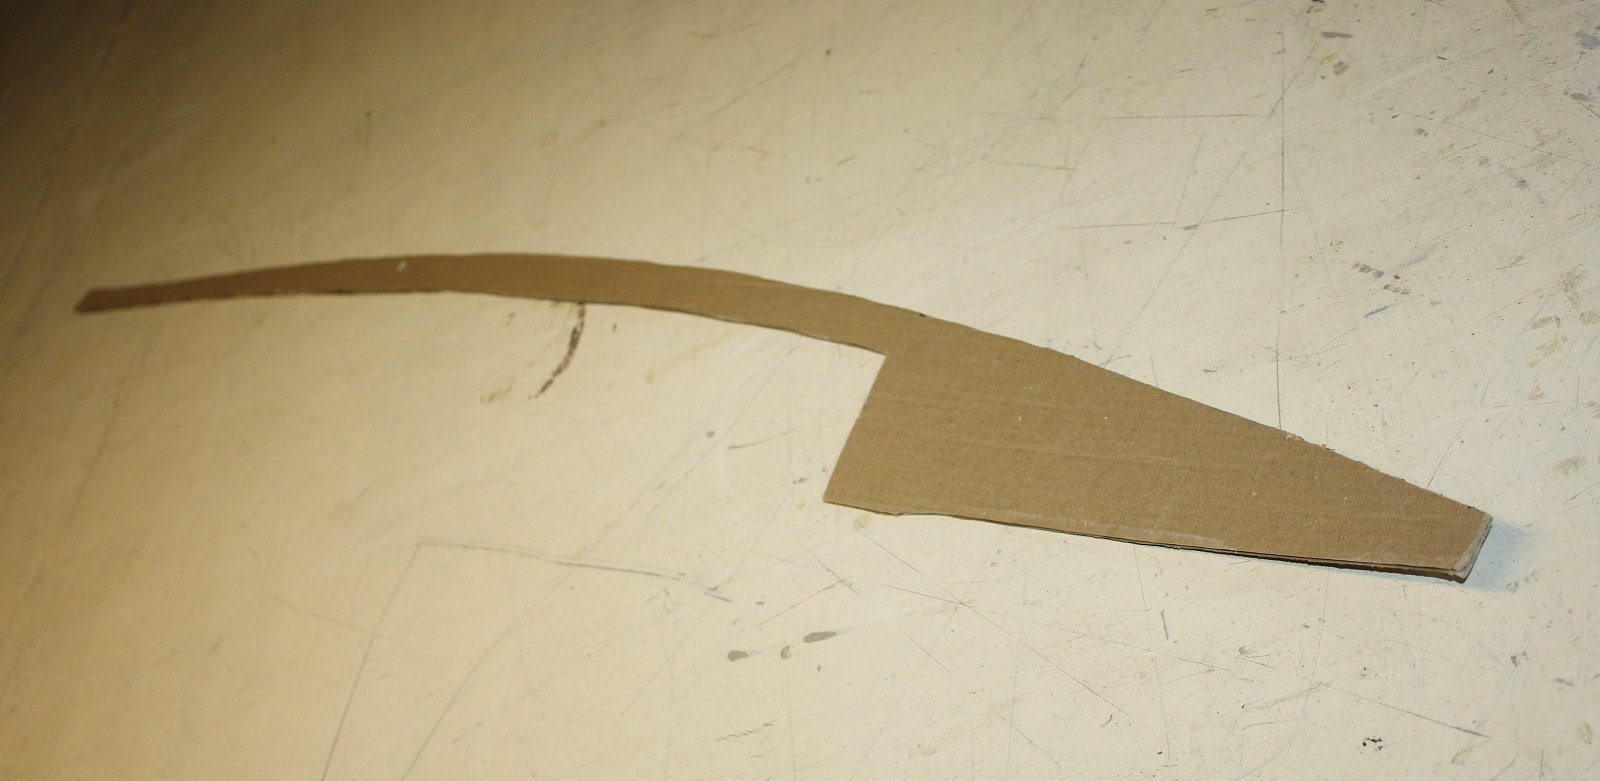
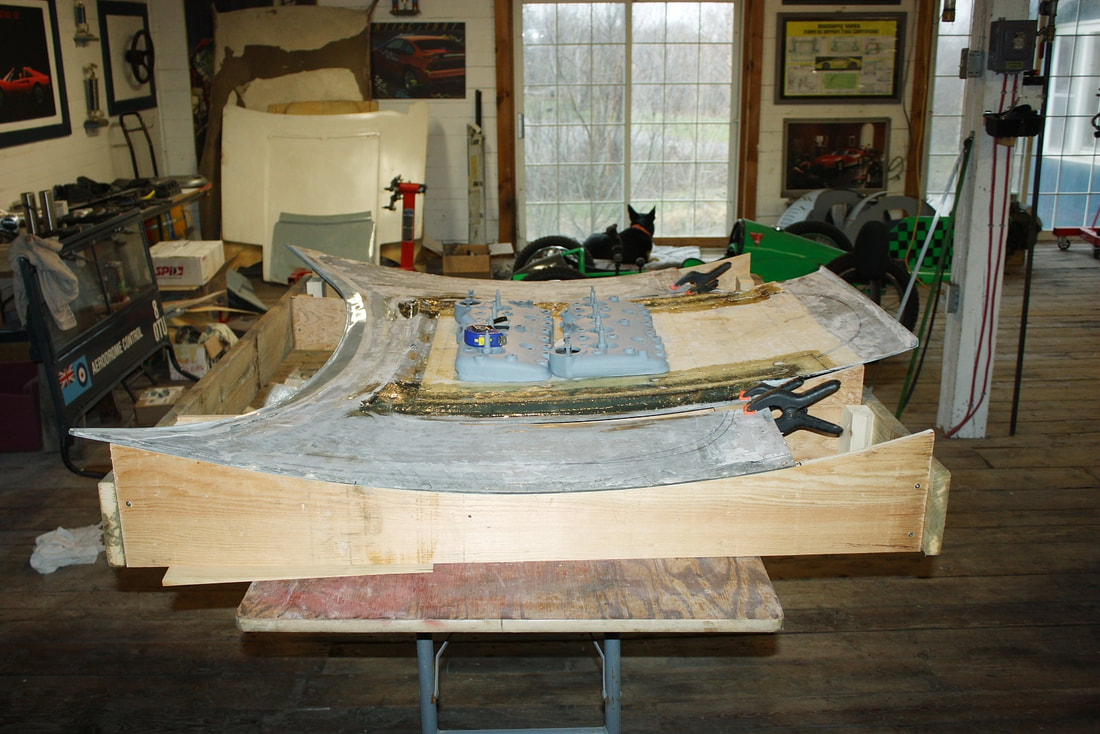
Since the hood was really quite flimsy at this point, I decided it was a good time to start building in the proper camber to follow the fenders. The under-hood webbing would be the main way to hold the hood’s shape, but even at this point I thought it wise to re-bond the two outer sections to the middle section while holding the entire hood in a form. I started by making a cardboard template of the fender curvature:
Since the hood was really quite flimsy at this point, I decided it was a good time to start building in the proper camber to follow the fenders. The under-hood webbing would be the main way to hold the hood’s shape, but even at this point I thought it wise to re-bond the two outer sections to the middle section while holding the entire hood in a form. I started by making a cardboard template of the fender curvature:
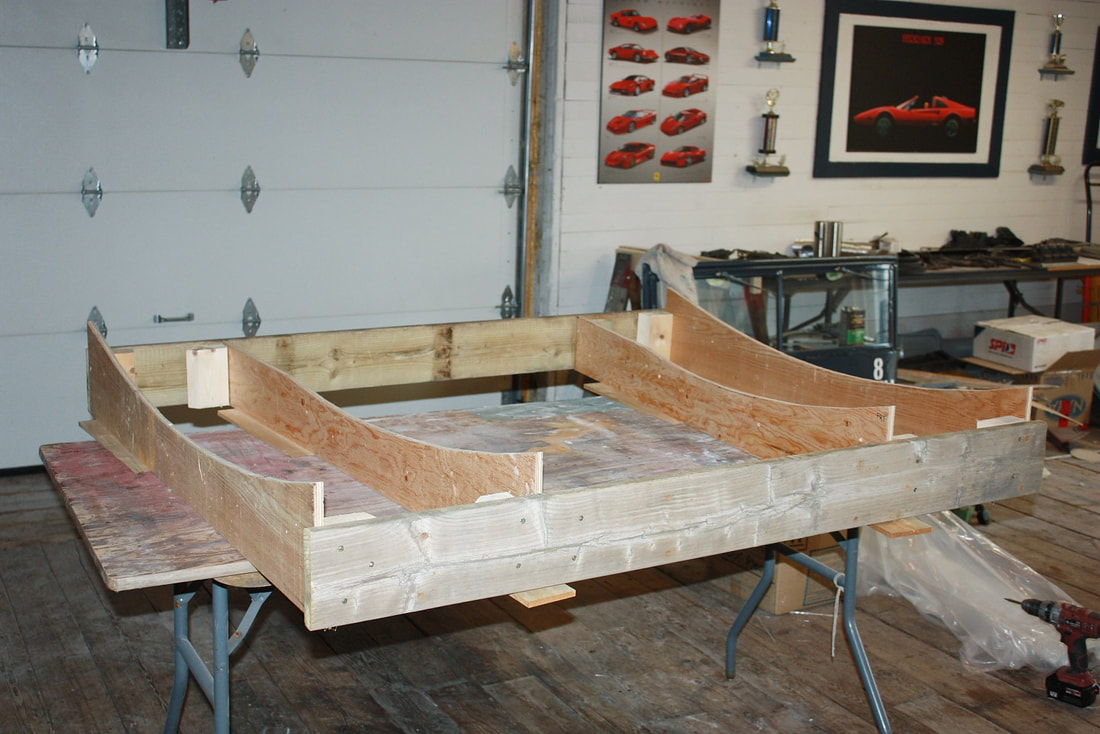
Then, using the template, I cut four inverse ribs out of some plywood and sandwiched them in specific places between a pair of 2” x 6” lumber planks like so:
Next, I laid the hood upside-down onto the wooden buck. The center section of the hood was still rigid enough that I needed to place some heavy weights (a pair of Ford Flathead cylinder heads) in the middle to help bow it downward against the wooden ribs:
Next, I laid the hood upside-down onto the wooden buck. The center section of the hood was still rigid enough that I needed to place some heavy weights (a pair of Ford Flathead cylinder heads) in the middle to help bow it downward against the wooden ribs:
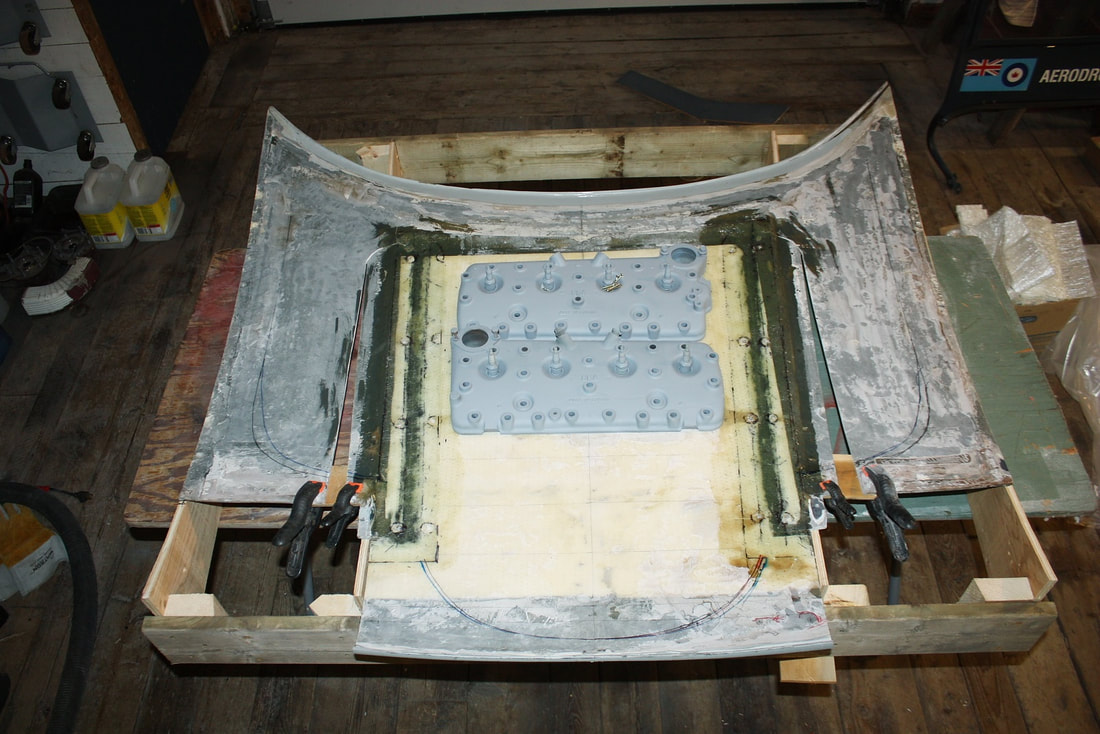
The creased sections I bonded to the center part of the hood were making my life difficult. The creases acted as stiffeners and prevented the center section from following the wooden form below. There wasn’t much I could do at this point so I decided to leave it the way it was and make additional corrections later if it didn’t look right. I screwed the outer sides of the hood to the plywood ribs, pulling them easily into the correct shape:
The creased sections I bonded to the center part of the hood were making my life difficult. The creases acted as stiffeners and prevented the center section from following the wooden form below. There wasn’t much I could do at this point so I decided to leave it the way it was and make additional corrections later if it didn’t look right. I screwed the outer sides of the hood to the plywood ribs, pulling them easily into the correct shape:
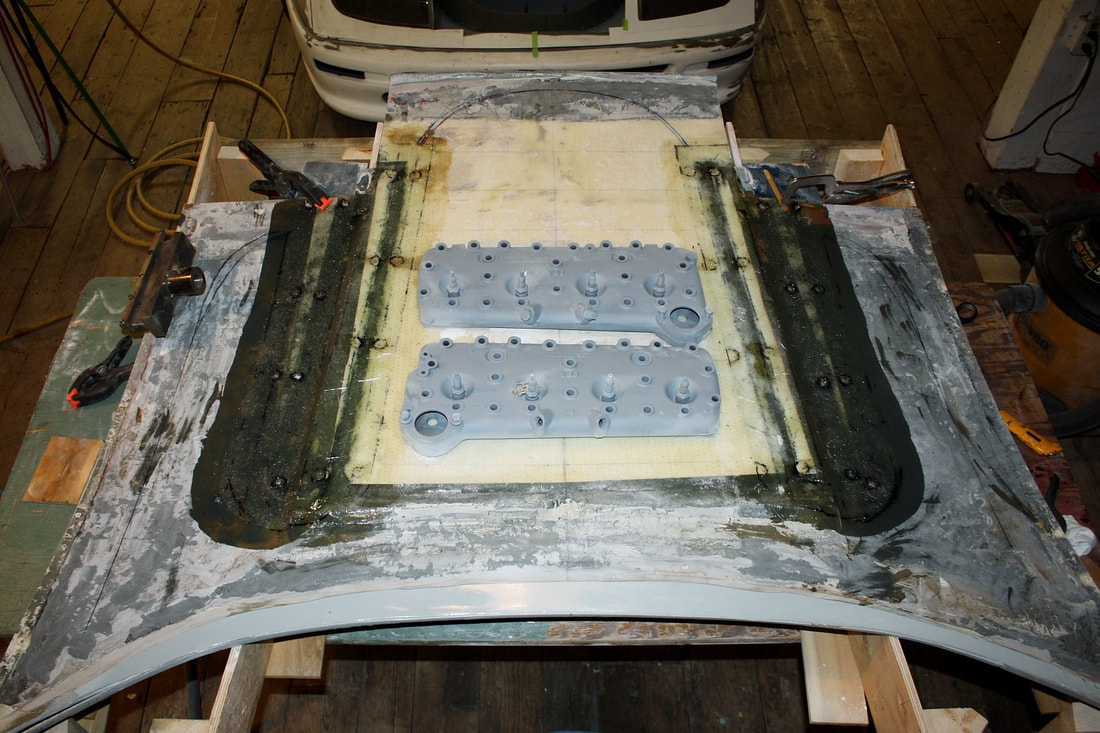
I then used the same technique as in Post #133 to bring both sides of each triangular crack into the same plane with a strip of ¼” plywood and Cleco fasteners. Then I ground a chamfer about 2” wide up either side of the cracks to build up the surface area of the bond. To keep the new, underside layer of fibreglass I was about to lay up from filling any more than half the panel thickness, I filled the triangular holes with the very same triangular slices I had cut out of the hood earlier on. I first had to grind them down to match their new surroundings:
I then used the same technique as in Post #133 to bring both sides of each triangular crack into the same plane with a strip of ¼” plywood and Cleco fasteners. Then I ground a chamfer about 2” wide up either side of the cracks to build up the surface area of the bond. To keep the new, underside layer of fibreglass I was about to lay up from filling any more than half the panel thickness, I filled the triangular holes with the very same triangular slices I had cut out of the hood earlier on. I first had to grind them down to match their new surroundings:

Here’s the passenger side splice filling the hole. It’s only a temporary bridge though… when I flip the hood around to chamfer the other side, I’ll grind all of this old triangular piece out leaving only the new, underlying fibreglass:
Here’s the passenger side splice filling the hole. It’s only a temporary bridge though… when I flip the hood around to chamfer the other side, I’ll grind all of this old triangular piece out leaving only the new, underlying fibreglass:

Again, using the same technique as in my last post, I cut three strips of fibreglass matt of varying width per side, mixed 16 oz of resin with about an 1/8 oz of catalyst, and fully saturated the matt in place:

After they had cured, I unscrewed the hood from the buck and mocked it up on the chassis to see how it was going so far:
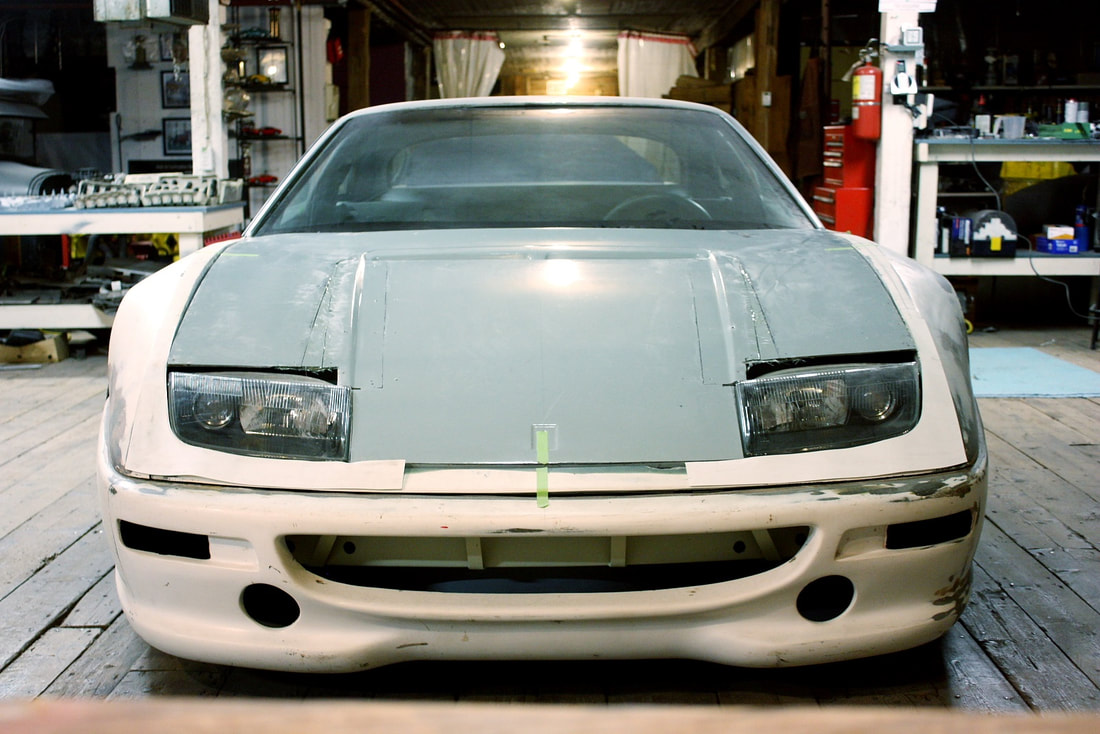
The hood already followed the fender curvature much better, the hood creases lined up with the lights, and my work was paying off.
There’s still lots to do to this hood though. The holes behind the headlights are next, followed by the under hood webbing, and finally fibreglassing the outer side of all these seams.

 RSS Feed
