I’ve mentioned that the hood at this point is only a flexible outer skin panel and that it needs to be arched and reinforced for it to maintain the correct curvature. That’s normally done with an inner hood skin, but I removed the original inner skin back in Post #130 for several reasons. The primary one was that it had been bonded to the outer skin with the wrong curvature. This post is about what I considered while designing a new inner skin.
As best as I could predict, there were five hardware considerations that needed to be incorporated into the new inner skin. It would need to accommodate a front compartment sealing surface; hard points for hood hinges and hood latches; an anti-windshield-intrusion axis to fold along in case of a front end collision; and receptacles for anti-intrusion pins.
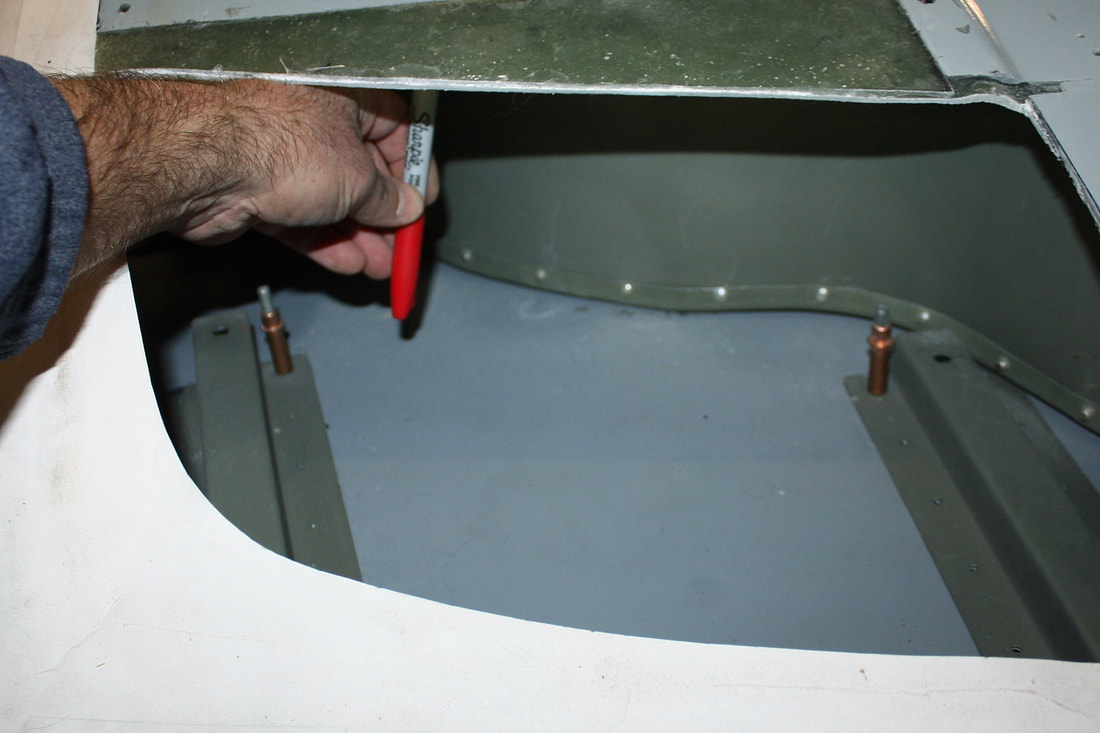
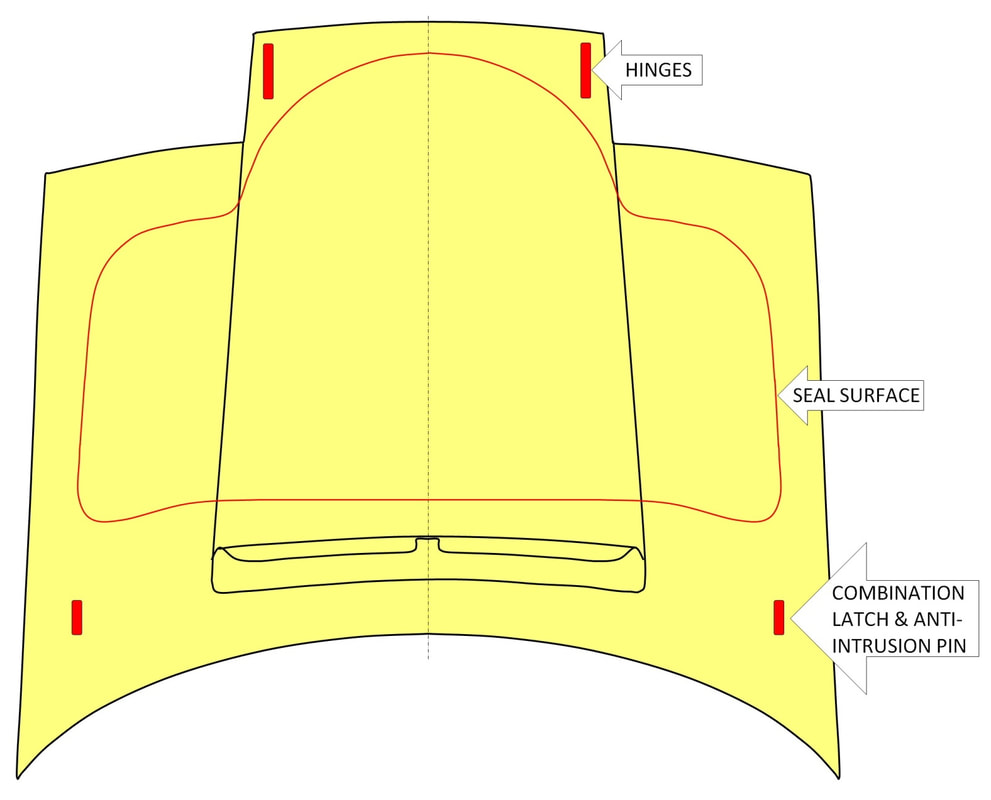
There’s an old axiom that says that the way to eat an elephant, is to take one bite at a time. My first bite was to define the shape of the sealing surface under the hood… something like this:

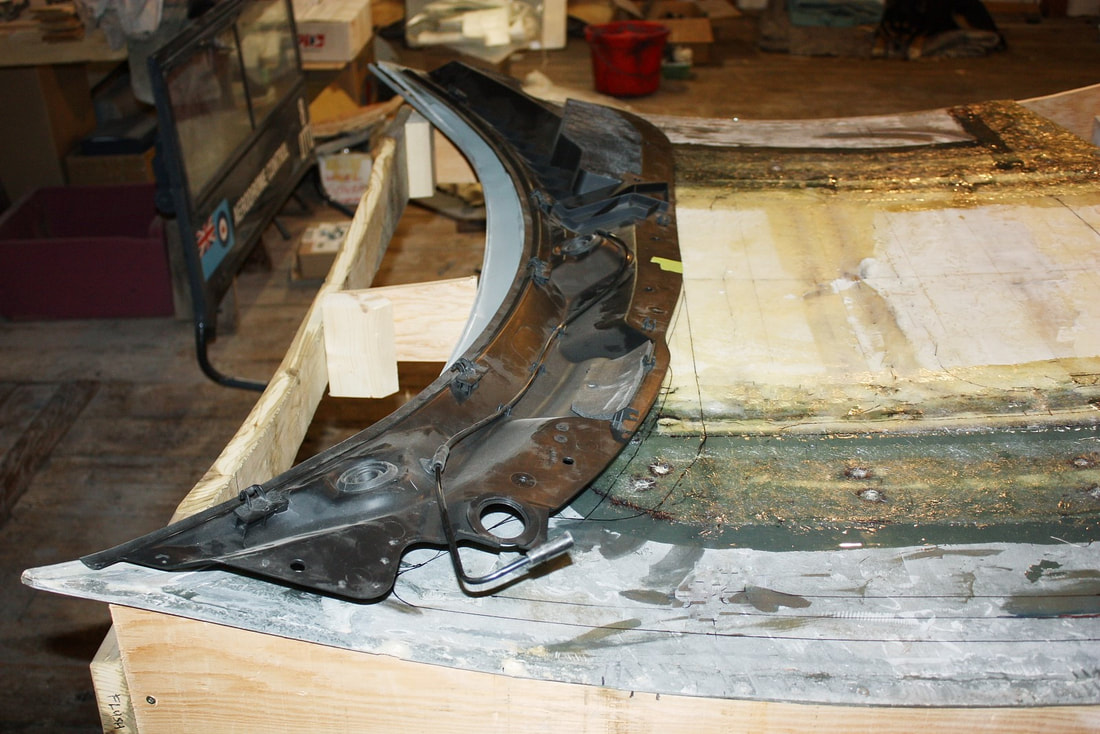
I had already constructed the forward half of the front compartment a few posts back, so all I needed to do was trace that wall onto the underside of the hood. I removed the headlights, replaced the hood, then reached up into the headlight holes with a marker and traced the outline:
I had already constructed the forward half of the front compartment a few posts back, so all I needed to do was trace that wall onto the underside of the hood. I removed the headlights, replaced the hood, then reached up into the headlight holes with a marker and traced the outline:
Then I took the hood off and created a paper template of the curve for use later on:
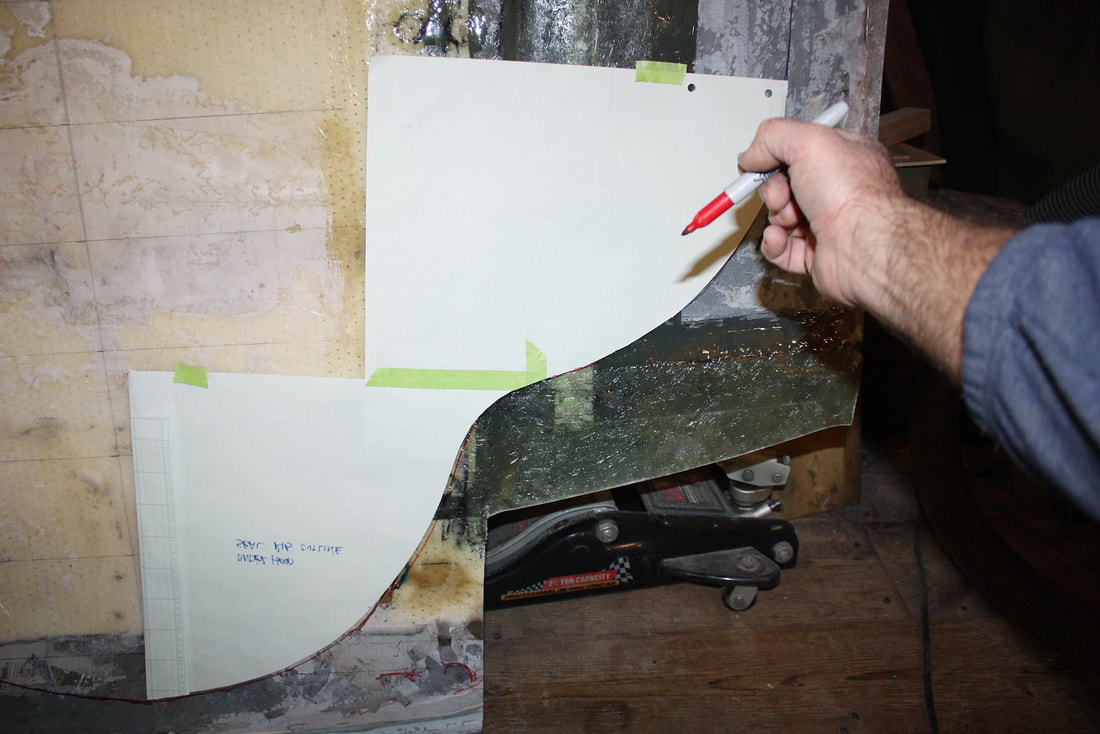
That only worked for the front half of the sealing surface, firstly because my arms weren’t long enough to reach very far back through the headlight holes, and secondly because I hadn’t yet completed the metal wall surrounding the front compartment.
I had purposely waited until now to address the rear compartment wall since the wall shape would depend on what cowl I would use at the base of the windshield. After lots of research (that’s shop-talk for "scouring auto salvage yards"), I found an OEM cowl that came very close to the shape of my custom windshield. It was damaged, so I got it for free. Once I mocked it up and was satisfied with the fit, I ordered a brand new cowl for a Pontiac Solstice:
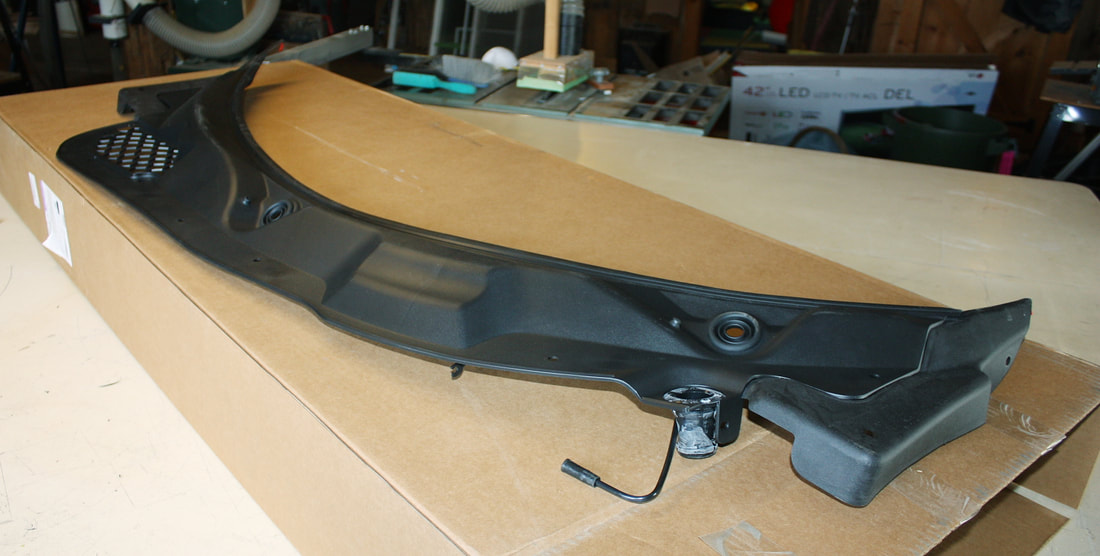
It’s not perfect: I’ll need a small filler panel near the middle of the windshield base, and I’ll need to massage both ends, but it does match the Solstice wiper system I’m using, and the intake for the HVAC system aligns with my relocated intake:
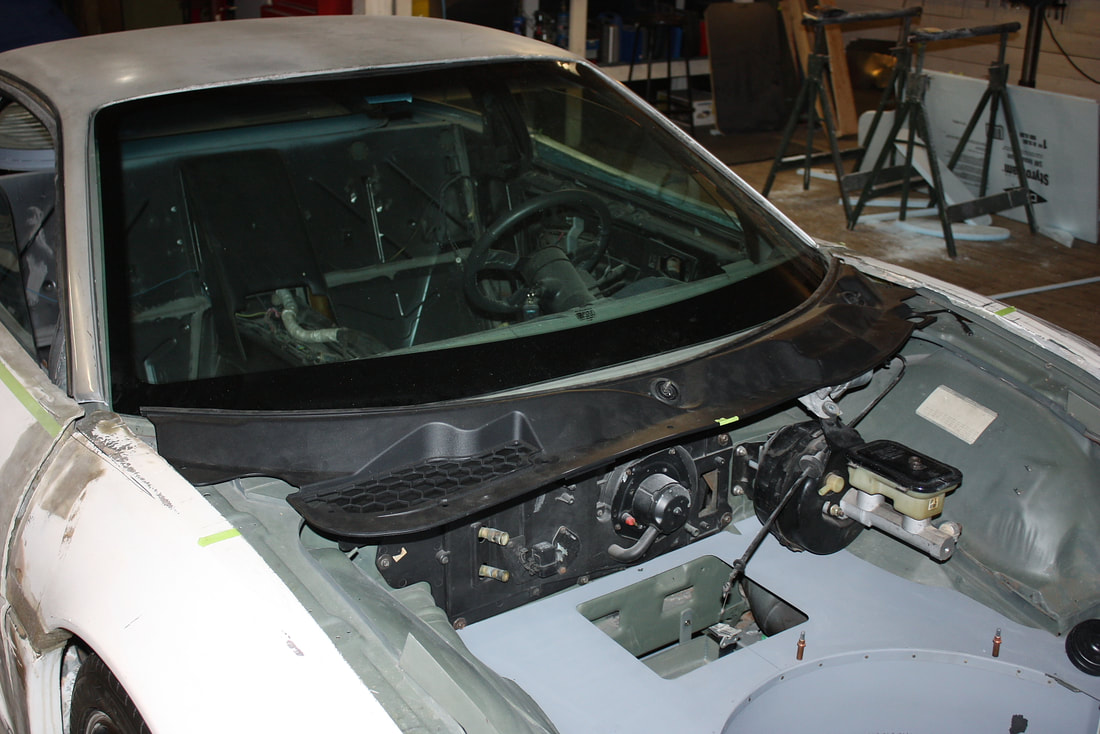
With this decision behind me, I’ll be able to complete the metal sealing flange around the back half of the compartment later on. For now though, I made a few measurements to know precisely where the cowl panel would mate with the underside of the hood, then traced the outline of it to know where the centerline of my seal would contact the underside of the hood:
With this decision behind me, I’ll be able to complete the metal sealing flange around the back half of the compartment later on. For now though, I made a few measurements to know precisely where the cowl panel would mate with the underside of the hood, then traced the outline of it to know where the centerline of my seal would contact the underside of the hood:
Having done that, I could complete the sketch of the entire perimeter the seal would contact under the hood, similar to the first drawing in this post.
Step 2 to planning the ribs of my inner hood skin was to survey the chassis for where the hinges, latches, and anti-intrusion pins could be hard-mounted. Once suitable locations were found, their coordinates could be transferred to the underside of the hood to ensure reinforcements could be molded into the under hood skin.
The red lines on this next drawing show where these components will go, with the hinges at the top, the latches near the windshield. I hope to be able to find latches with a built-in windshield anti-intrusion design:
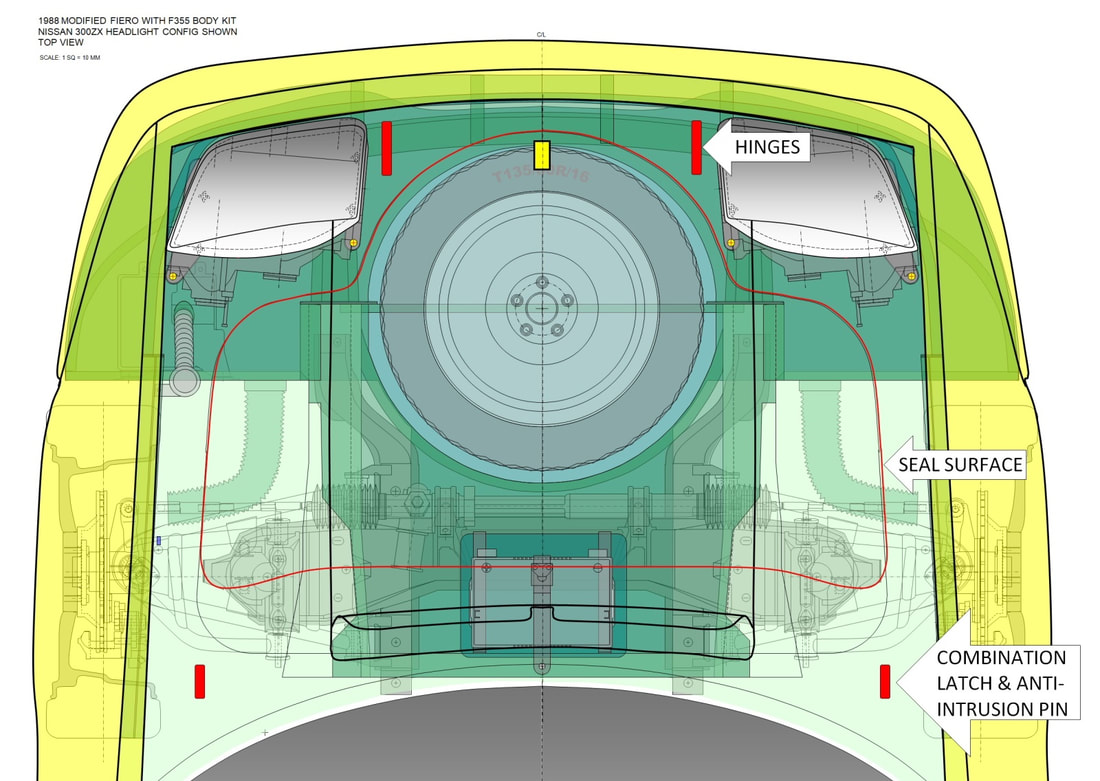
Here’s what the hood drawing looked like after I transferred the locations of those bits of hardware to it:
All that remained was to design a new under hood skin to tie all these points together structurally. I quickly ruled out the need for a full-piece inner skin and decided a series of ribs bonded directly to the underside of the top skin would be easier to make and would be lighter.
I started with four main ribs running lengthwise along most of the length of the hood: two in-line with the hinge points to spread the mounting loads, and two outer webs to maintain the hood curvature in the longitudinal direction.
Then I added a couple wide, cross-hood webs at the front: one tying the hinge points together, and one behind the headlight openings to reinforce the area of high stress concentration at those hood notches.
Finally, the two rear-most cross-hood webs serve as a means to maintain the hood curvature in the transverse direction, while the rear-most web also serves as a sealing surface for the front compartment:
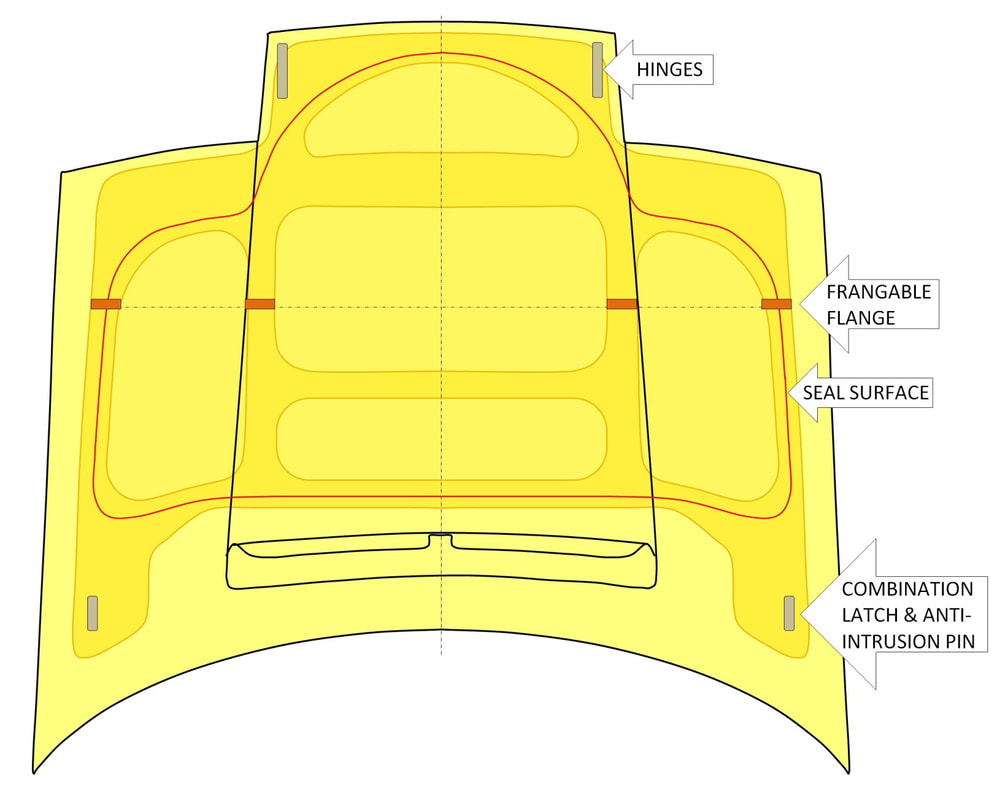
The last important bit about the drawing above is the addition of a frangible flange. That’s a design feature all modern cars have that places a series of aligned notches in the longitudinal ribs to deliberately weaken it in that plane. It’s part of the windshield anti-intrusion system that causes the hood to fold up accordion-style in the event of a front-end collision.
The last important bit about the drawing above is the addition of a frangible flange. That’s a design feature all modern cars have that places a series of aligned notches in the longitudinal ribs to deliberately weaken it in that plane. It’s part of the windshield anti-intrusion system that causes the hood to fold up accordion-style in the event of a front-end collision.

 RSS Feed
