The next step in creating the hood was to find a suitable way to hinge it, and latch it, and modify the under hood webbing to mount these critical pieces.
Luckily, the hood on the F355 pivots at the front with a simple, unarticulated hinge just like the Fiero. No-so-luckily, I couldn’t use the Fiero hinges as-is because of the new front frame horns I grafted onto the front of my car. With a little ingenuity though, I could foresee how I could use them.
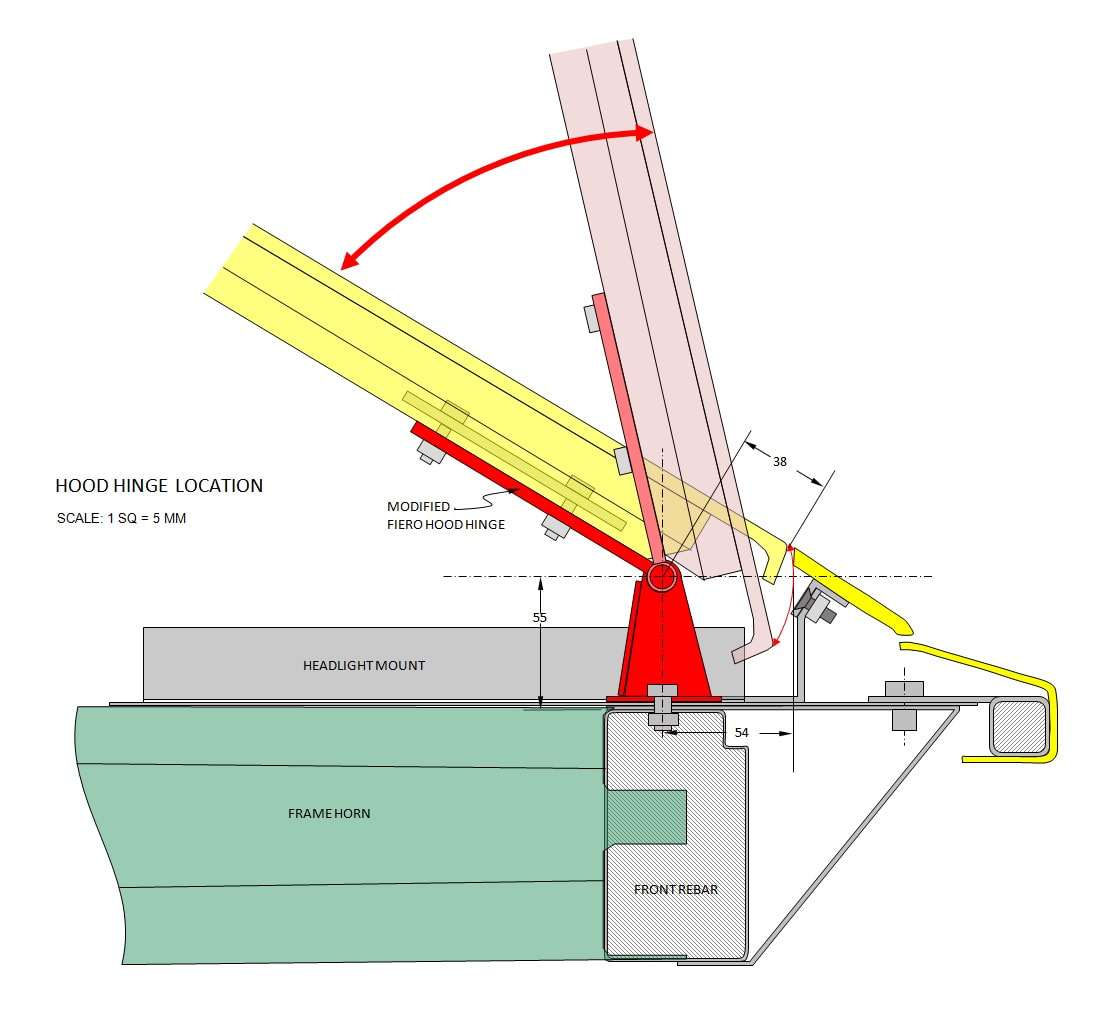
From my earlier chassis work, I pulled up the drawings of the front end, and saw that the best way to have a nice solid hinge was to mount it to the front metal bumper bar (rebar). I figured if I could make that location work without having the hood swing and interfere with anything else, then I’d only have to find the right height and distance the pivot had be from the edge of the hood. I animated the hood rotation around various heights and offsets until I found the sweet spot. Knowing the coordinates of the pivot in 3 dimensions was all I needed to figure out the lower half of the hinge:
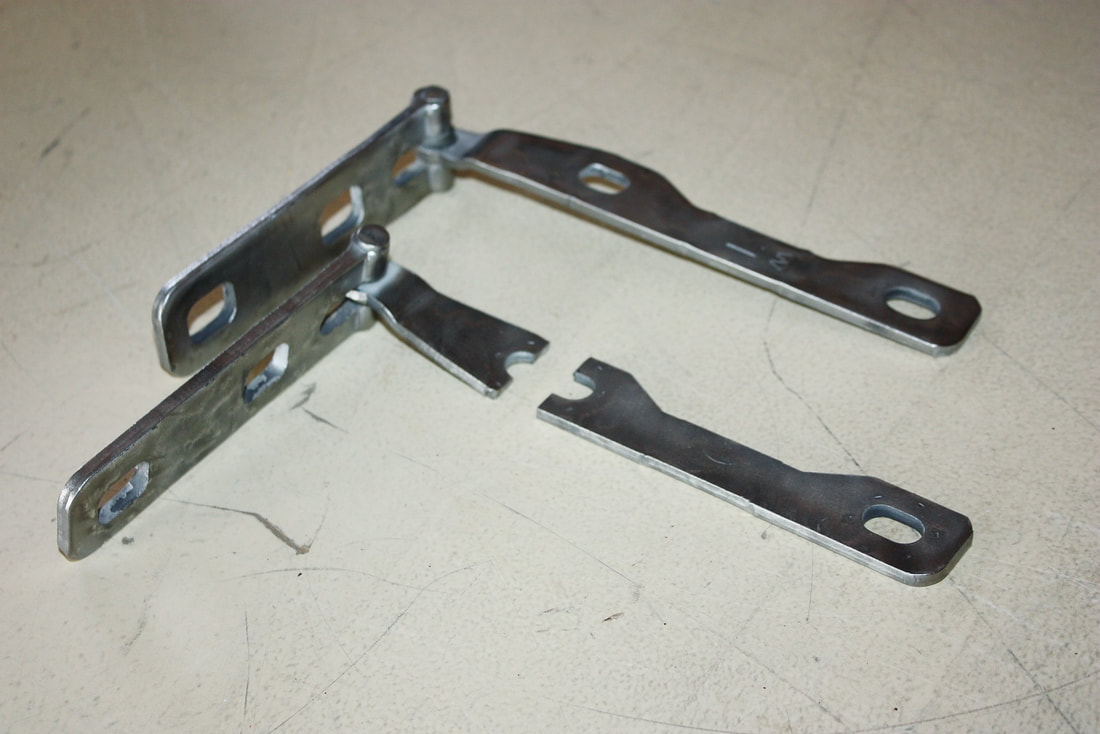
I decided to flip the Fiero hinges around so the half that used to be attached to the Fiero frame, would now attach to the F355 hood, and vice versa. That way, I only needed to modify the lower half of the hinge by cutting it down like so:
I decided to flip the Fiero hinges around so the half that used to be attached to the Fiero frame, would now attach to the F355 hood, and vice versa. That way, I only needed to modify the lower half of the hinge by cutting it down like so:
Next, I made a new base mounting plate and welded it to the shortened hinge arm, along with a gusset, like this:
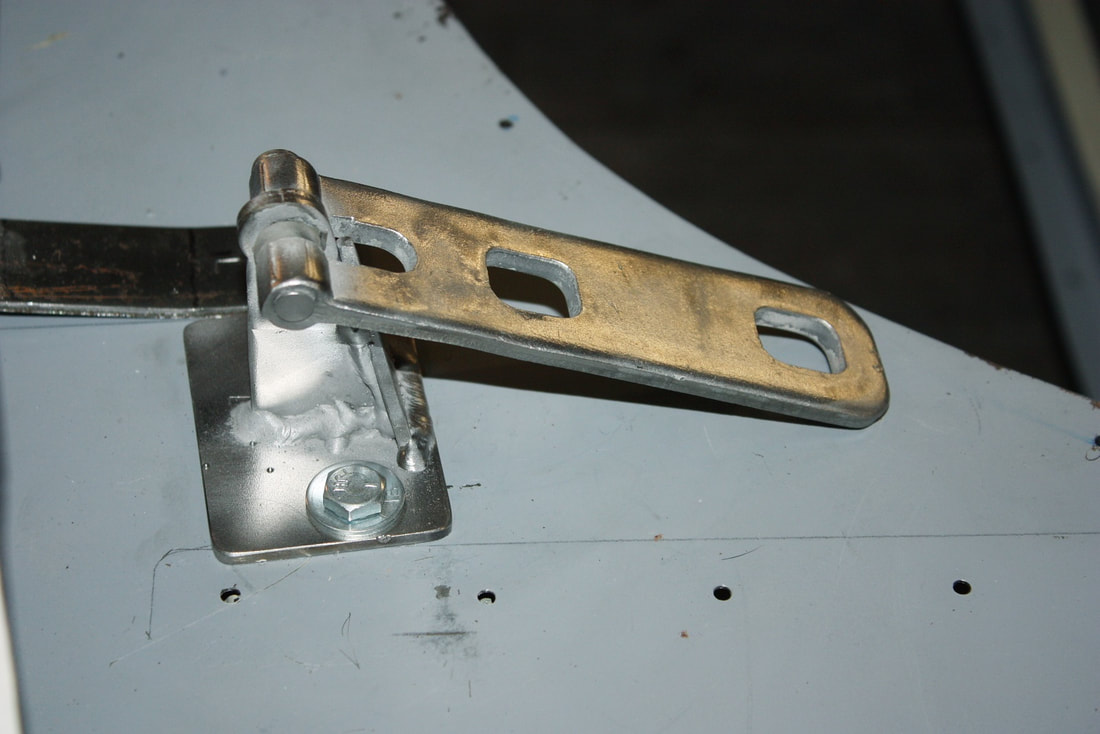
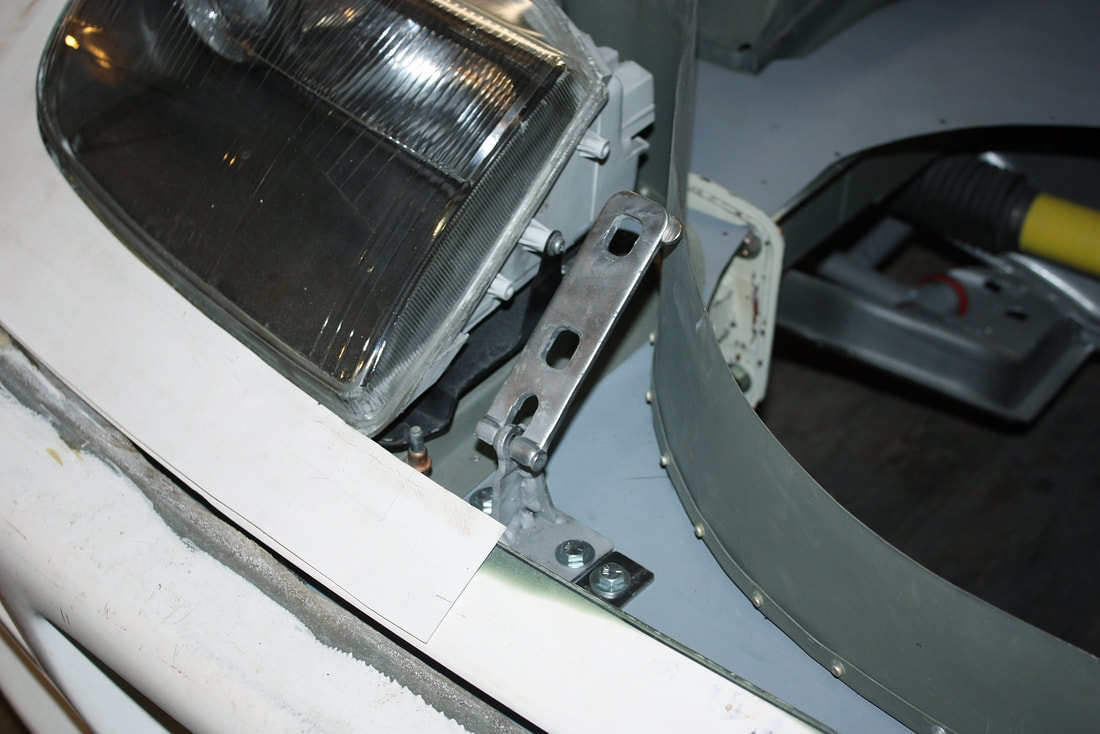
The modified hinge is a nice tight package that fits in the relatively small area I had between the lights and the front compartment wall:
With the locations of the two hinges finalized on the chassis, I could then transfer the mounting measurements to the under hood webbing. After triple-checking, I routered out a recess in the Styrofoam webbing in order to countersink steel mounting plates:
With the locations of the two hinges finalized on the chassis, I could then transfer the mounting measurements to the under hood webbing. After triple-checking, I routered out a recess in the Styrofoam webbing in order to countersink steel mounting plates:
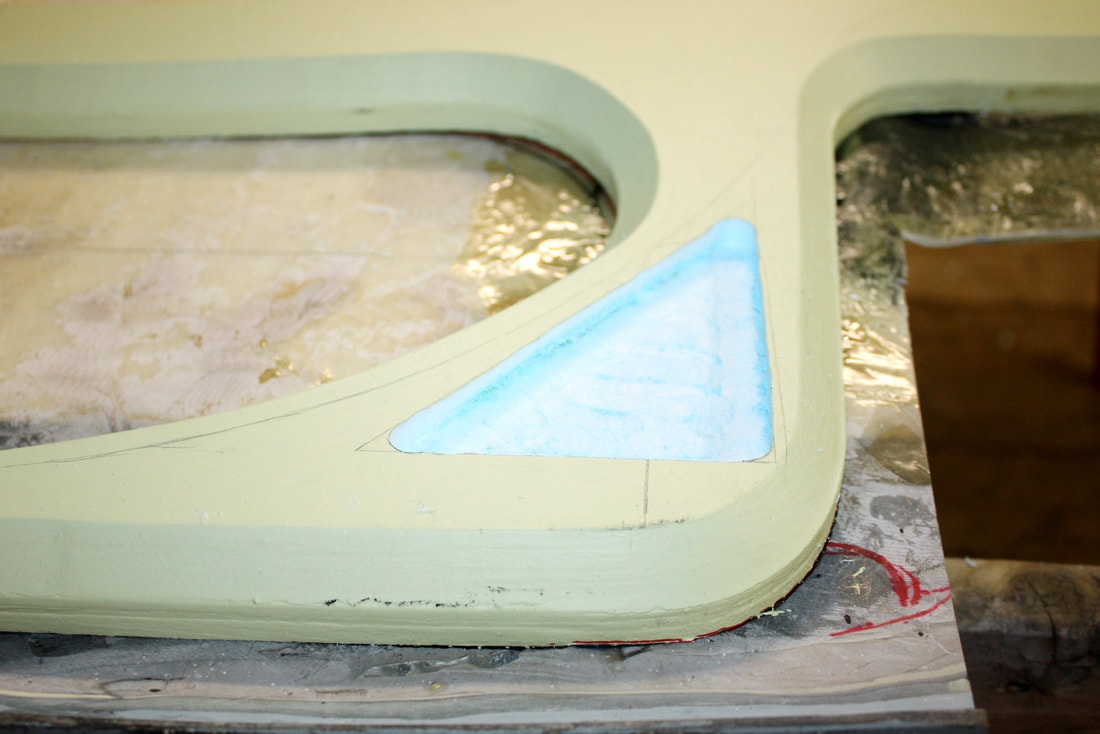
Then I cut a pair of triangular mounting plates from 3/16” thick steel, leaving ¼” play within the countersunk well to allow for the thickness of the walls of a fibreglass pocket:

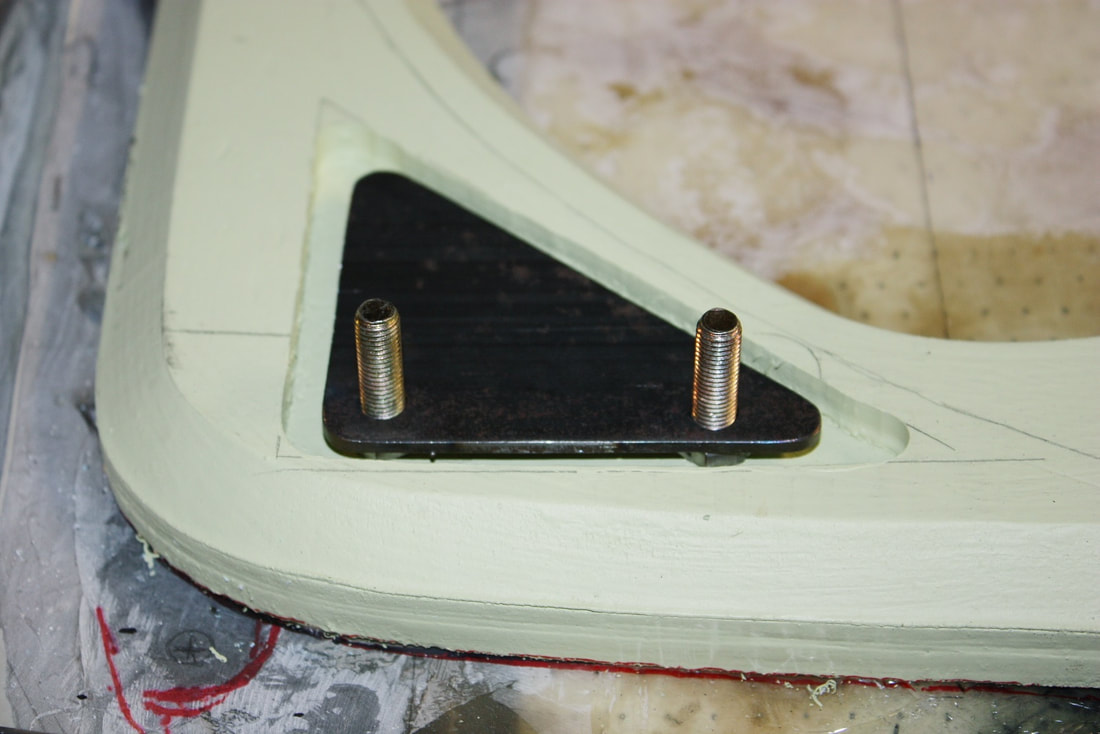
And finally, I welded a pair of bolts to the plates to attach the hinges to later on:
Next up were the latches. I couldn’t re-use the old central location for the Fiero hood latch because that was now buried under the base of my 7” extended windshield. I also couldn’t simply move the latch forward because the Solstice wiper mechanism was in the way. Deciding to put dual left and right latches at the outside hood corners was the easy part… finding latches that would fit was another story.
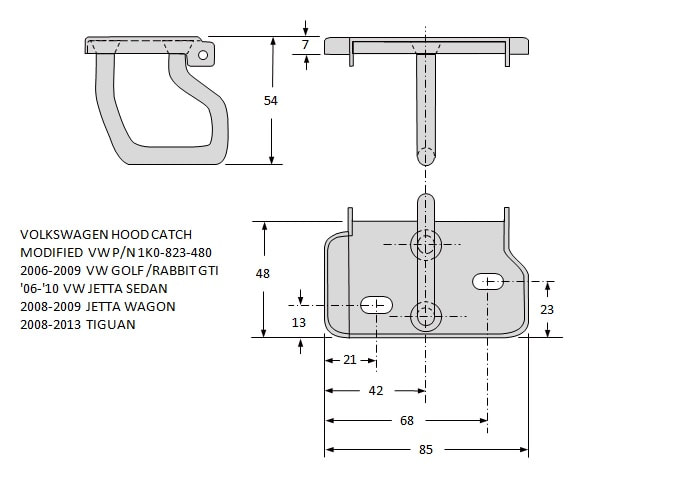
After spending countless wintery-cold hours in the local scrap yard looking at every frozen door, hatch, and hood latch, I finally stumbled across a compact, low profile latch on a ’08 VW Golf hood. It even had built-in springs to pop the hood ajar when released. It’s amazing how every other hood latch I saw looked like it had been designed in the 1950’s. Here’s a quick drawing of the VW latch showing some key dimensions:
Next up were the latches. I couldn’t re-use the old central location for the Fiero hood latch because that was now buried under the base of my 7” extended windshield. I also couldn’t simply move the latch forward because the Solstice wiper mechanism was in the way. Deciding to put dual left and right latches at the outside hood corners was the easy part… finding latches that would fit was another story.
After spending countless wintery-cold hours in the local scrap yard looking at every frozen door, hatch, and hood latch, I finally stumbled across a compact, low profile latch on a ’08 VW Golf hood. It even had built-in springs to pop the hood ajar when released. It’s amazing how every other hood latch I saw looked like it had been designed in the 1950’s. Here’s a quick drawing of the VW latch showing some key dimensions:
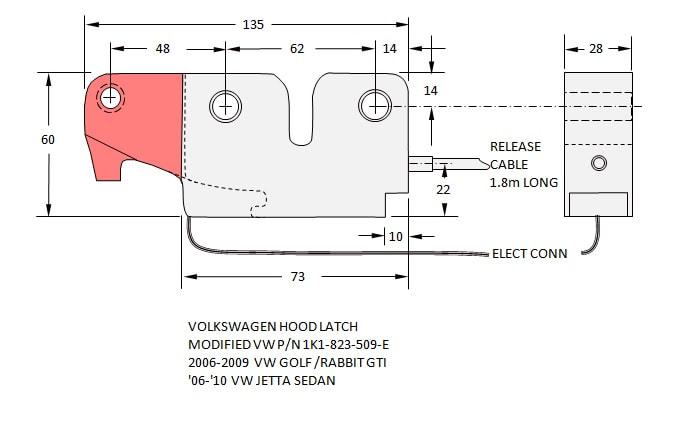
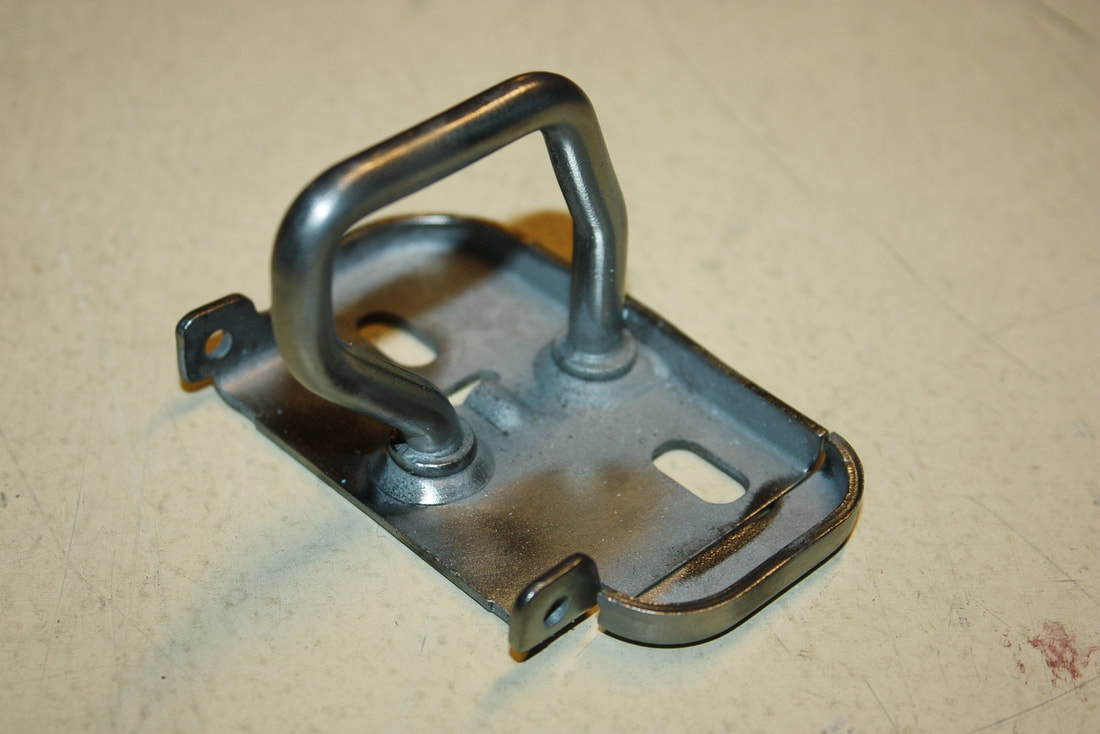
The red-shaded part is an extension of the sheet metal body with a pin for the safety catch. The safety catch mechanism isn’t needed in a reverse opening hood, so I lopped the extra bit off to make the latch even more compact:
The red-shaded part is an extension of the sheet metal body with a pin for the safety catch. The safety catch mechanism isn’t needed in a reverse opening hood, so I lopped the extra bit off to make the latch even more compact:
I wanted to install the latches next to the upper frame rails to take advantage of the extra strength in that area. To sink them to the right depth though, they’d have to protrude a little into the wheel house, but I wasn’t too concerned about the tires contacting them. The extra 6” track width up front (3” per side), meant that the bottom of the latches would be far enough inboard of the tire that they’d never touch even in a full lock, high G turn (which wouldn't happen unless I'd lost control, and then I'd have bigger problems!):
I wanted to install the latches next to the upper frame rails to take advantage of the extra strength in that area. To sink them to the right depth though, they’d have to protrude a little into the wheel house, but I wasn’t too concerned about the tires contacting them. The extra 6” track width up front (3” per side), meant that the bottom of the latches would be far enough inboard of the tire that they’d never touch even in a full lock, high G turn (which wouldn't happen unless I'd lost control, and then I'd have bigger problems!):
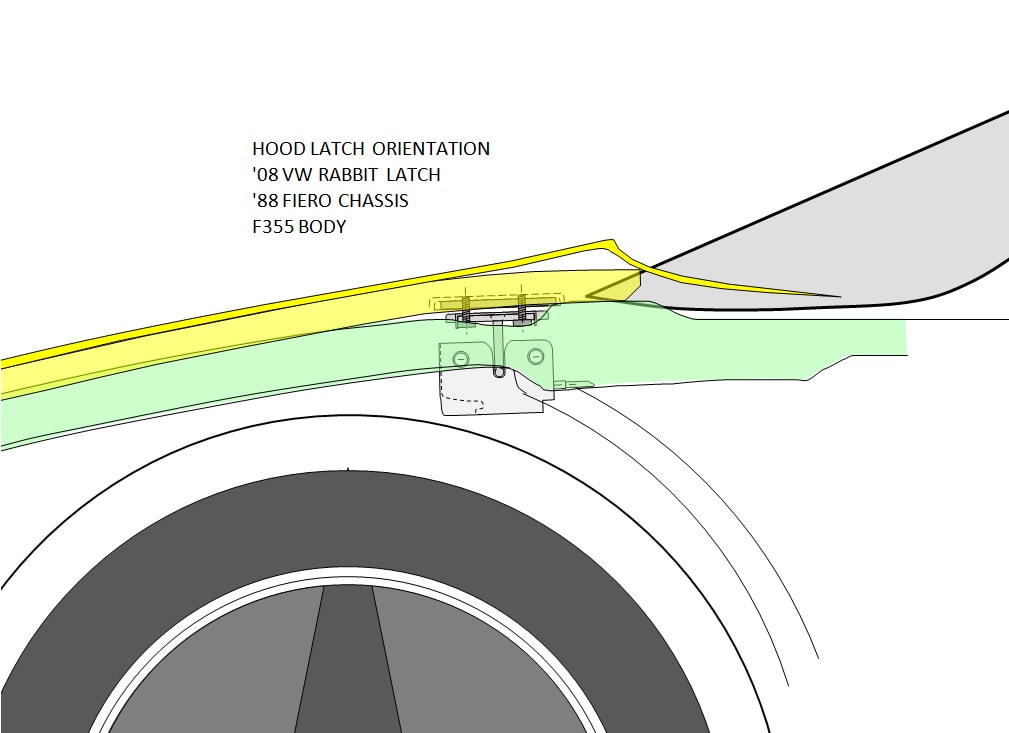
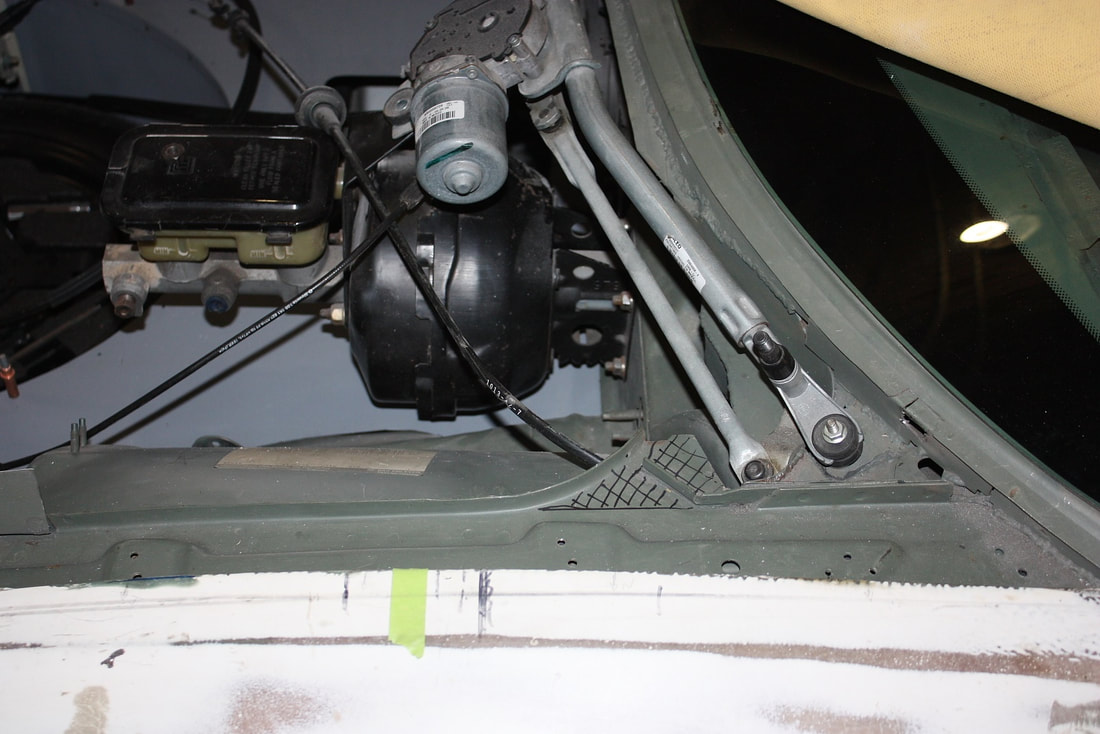
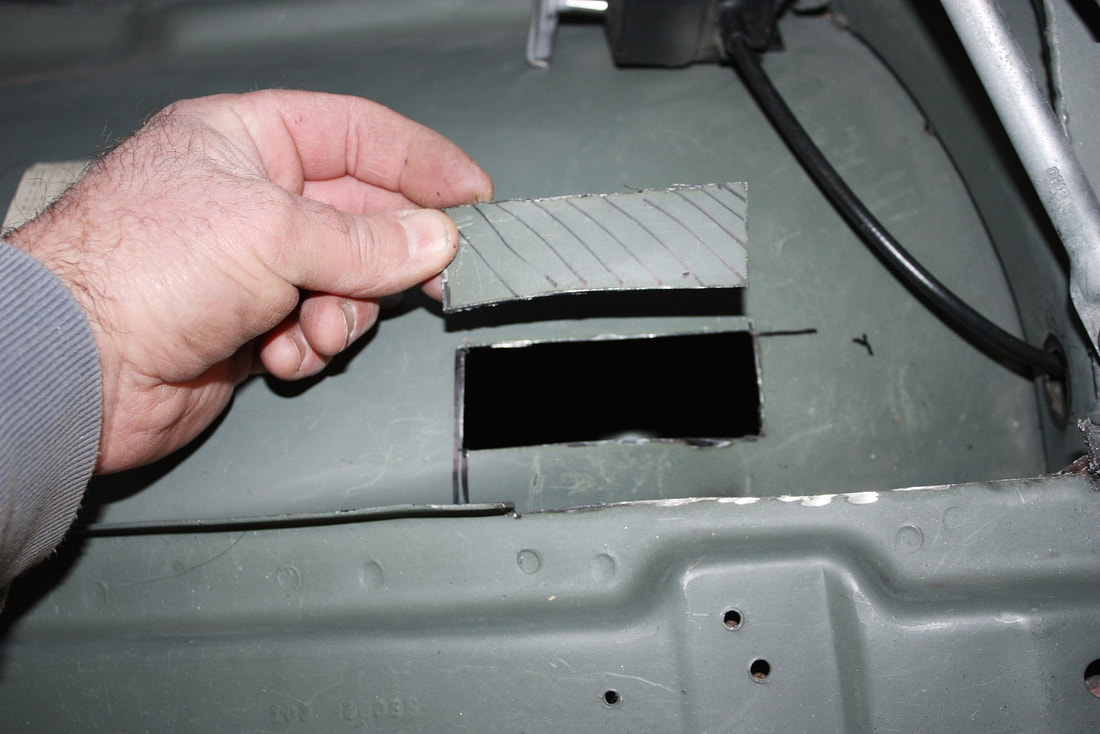
On a hood as wide as the F355’s, the closer the latches are to the rear corners of the hood, the better. They’ll provide stability, and act as anti-windshield-intrusion devices. There was a limit to how far back I could mount the latches on the cowl though, with the primary obstruction being the wiper mechanism on the driver’s side. The cross-hatched area in this next photo shows where I needed to remove some metal in the cowl to bury the VW latches:
On a hood as wide as the F355’s, the closer the latches are to the rear corners of the hood, the better. They’ll provide stability, and act as anti-windshield-intrusion devices. There was a limit to how far back I could mount the latches on the cowl though, with the primary obstruction being the wiper mechanism on the driver’s side. The cross-hatched area in this next photo shows where I needed to remove some metal in the cowl to bury the VW latches:
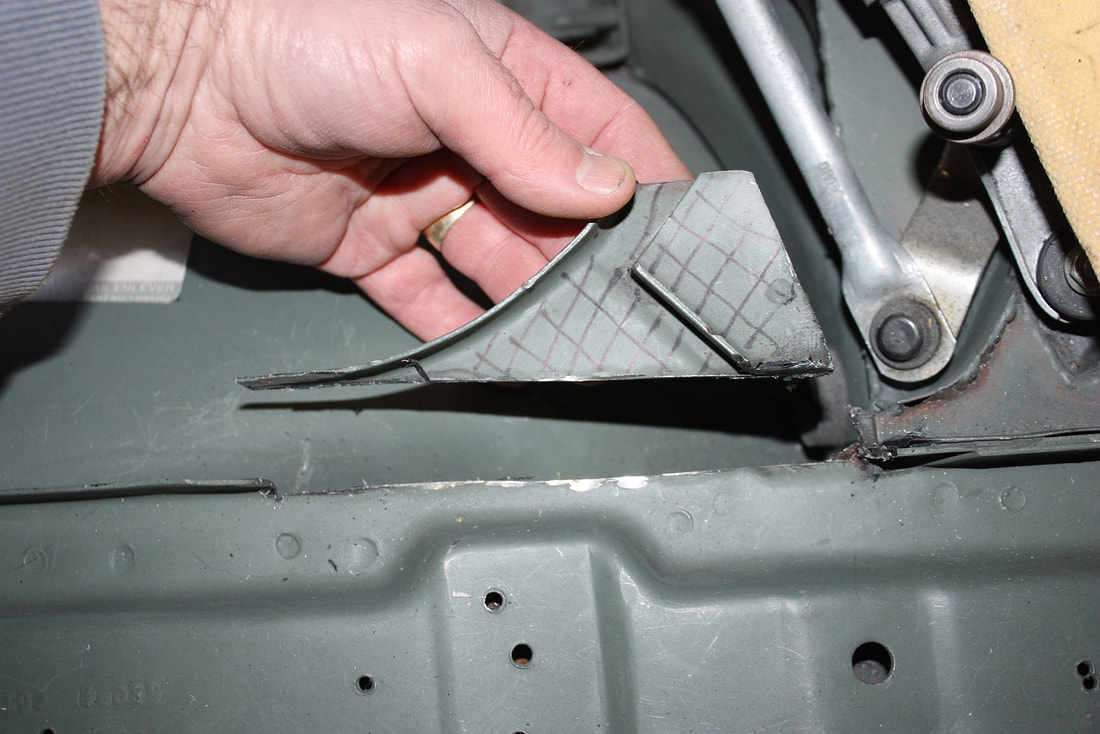
Removing this piece allowed access to the deeper area underneath it where the wheel house starts arching downward around the backside of the wheel:
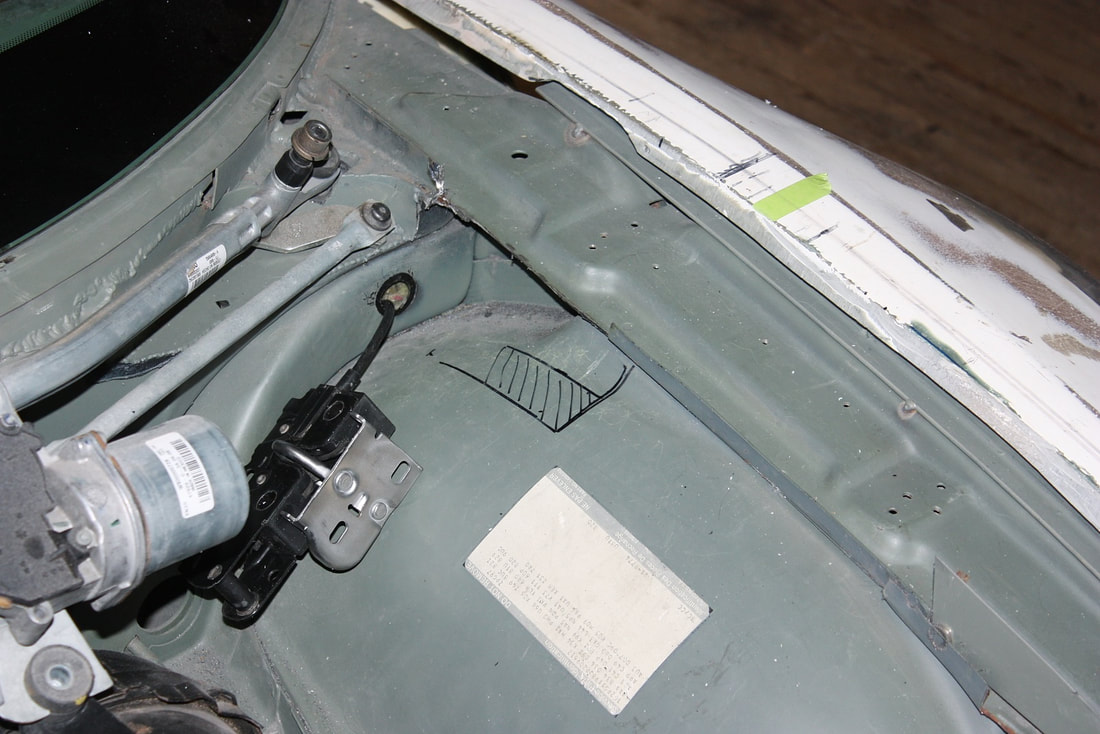
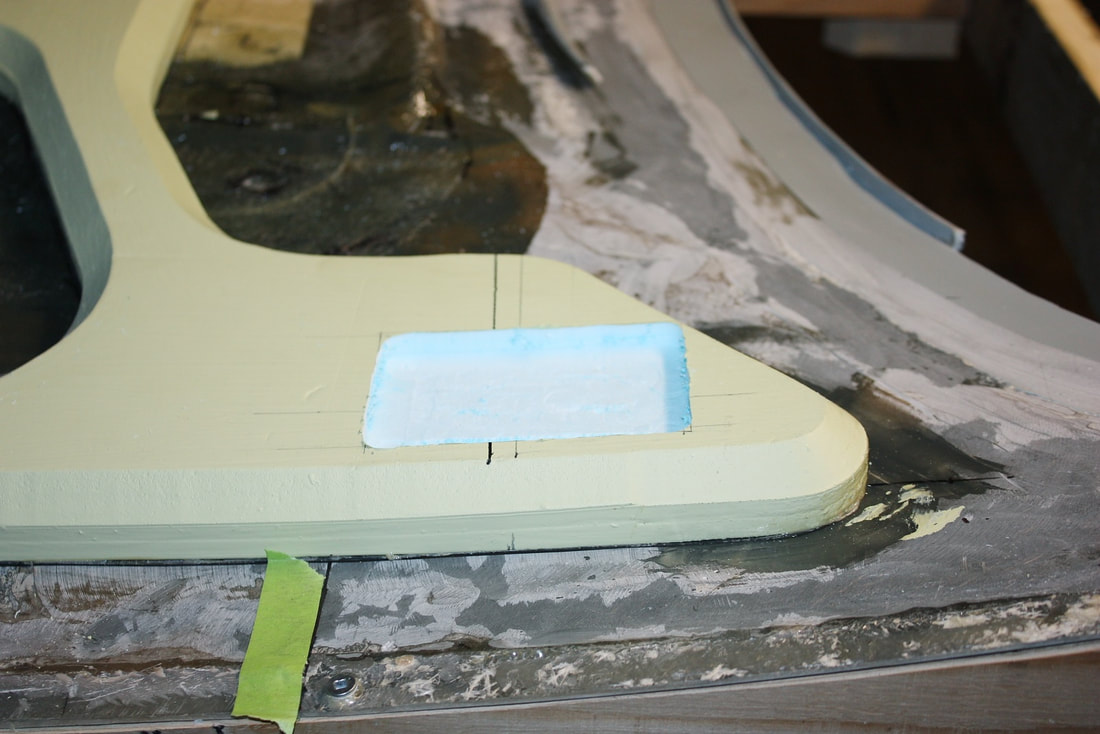
I needed to countersink the latch even further, so that the bottom of the groove for the catch-ring would be 85 mm below the level of the fender tops. To achieve this, I cut into the wheel house shown in this next cross-hatched area:
I needed to countersink the latch even further, so that the bottom of the groove for the catch-ring would be 85 mm below the level of the fender tops. To achieve this, I cut into the wheel house shown in this next cross-hatched area:
Here’s the section I ended up removing:
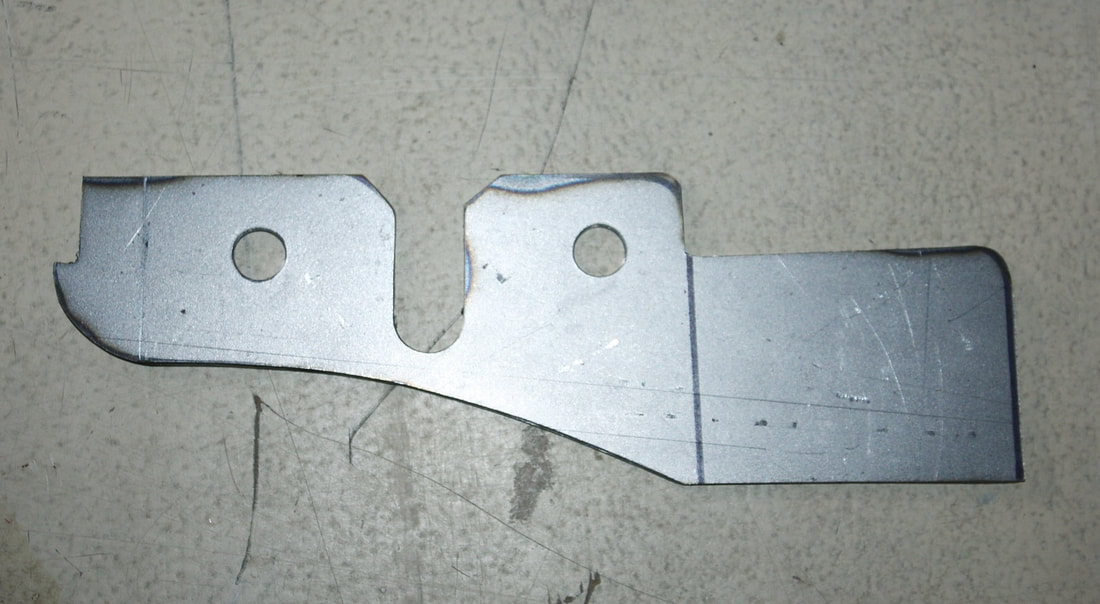
With that dirty deed done, the next step was designing mounting plates for the new latches that would secure them to the upper frame rails. I played around with a cardboard template until I had the dimensions just right, then cut a couple pieces of 3/32” steel plate to shape:
With that dirty deed done, the next step was designing mounting plates for the new latches that would secure them to the upper frame rails. I played around with a cardboard template until I had the dimensions just right, then cut a couple pieces of 3/32” steel plate to shape:
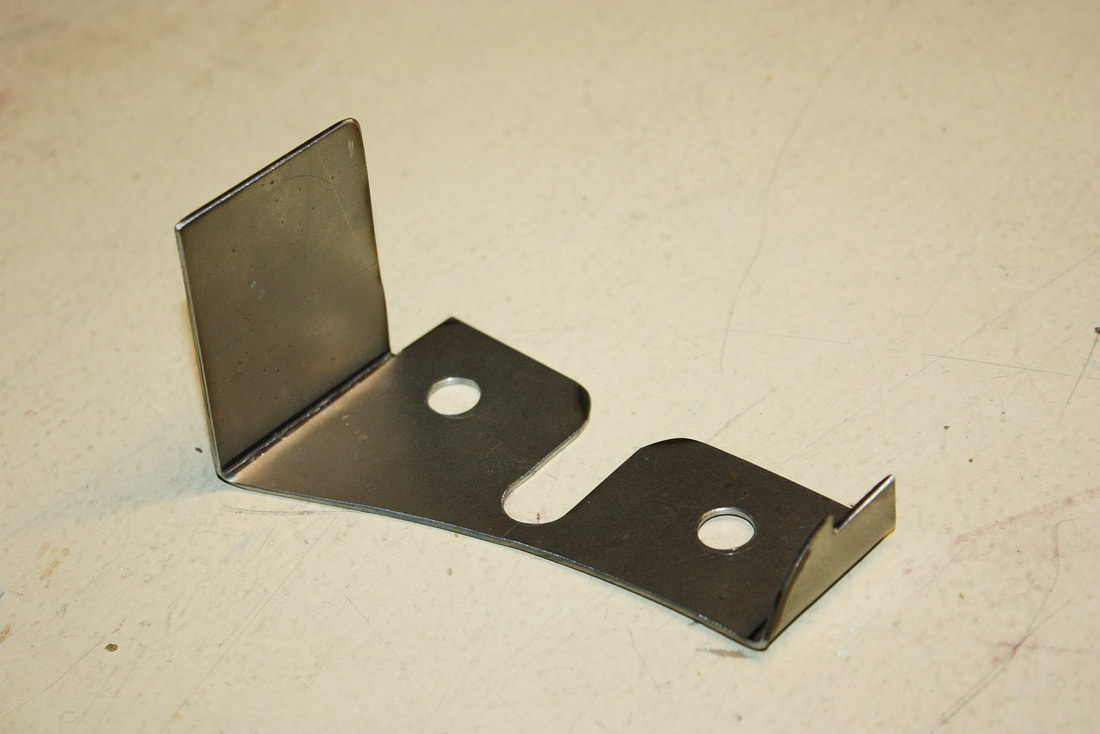
Then I bent a couple ears (or legs) into them with my little vise-bender, and did the final trimming to fit perfectly into place:
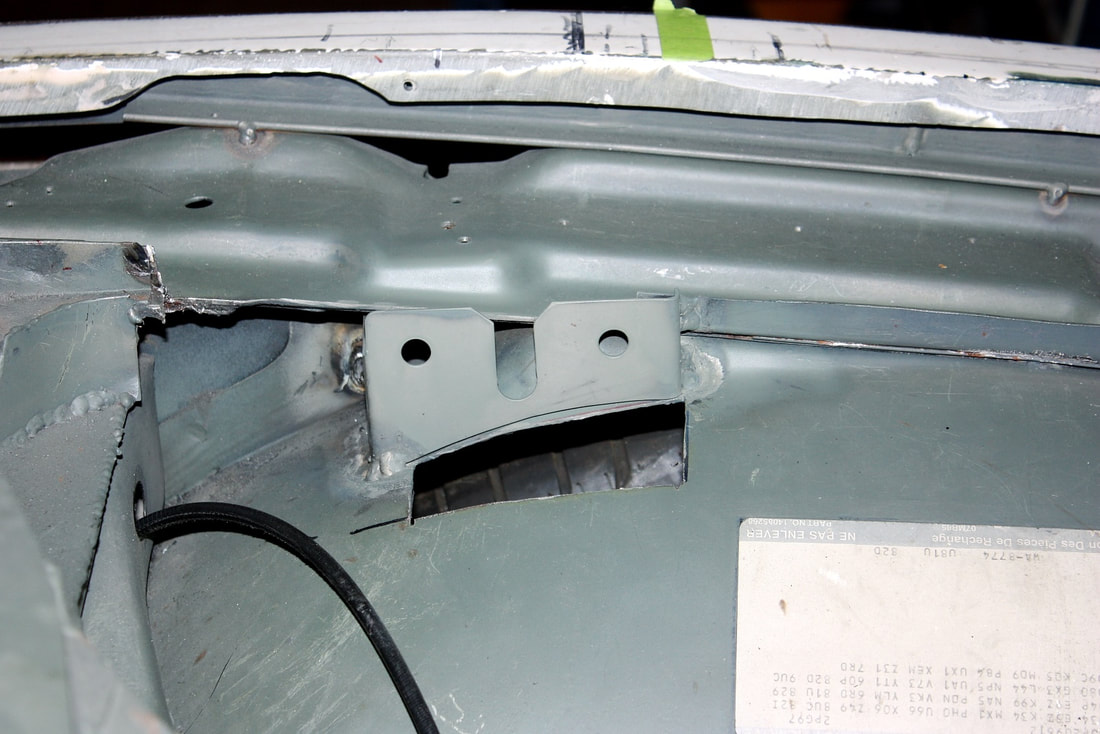
After a few measurement and alignment checks, I welded the two legs solidly to the upper frame rails and to the wheel house sheet metal:
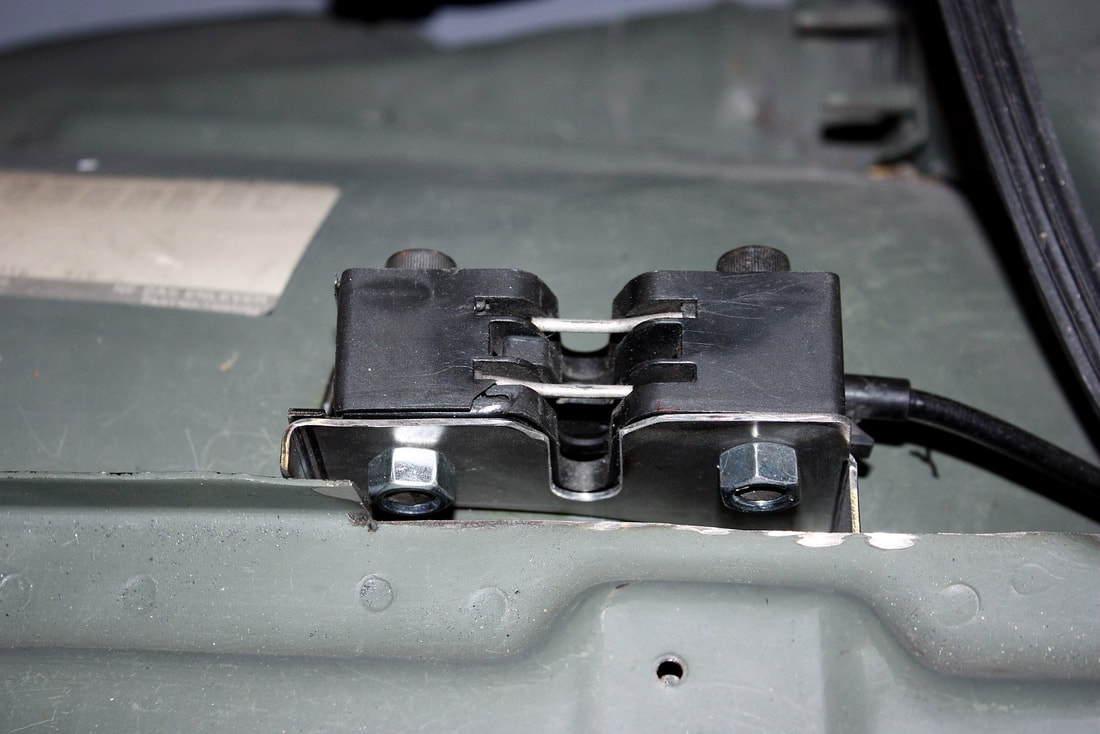
The last step was to bolt the latches to the mounts. In this next photo, you can see the integral “pop-up” springs… they’re the two metal bars that bridge the groove for the striker:
The last step was to bolt the latches to the mounts. In this next photo, you can see the integral “pop-up” springs… they’re the two metal bars that bridge the groove for the striker:
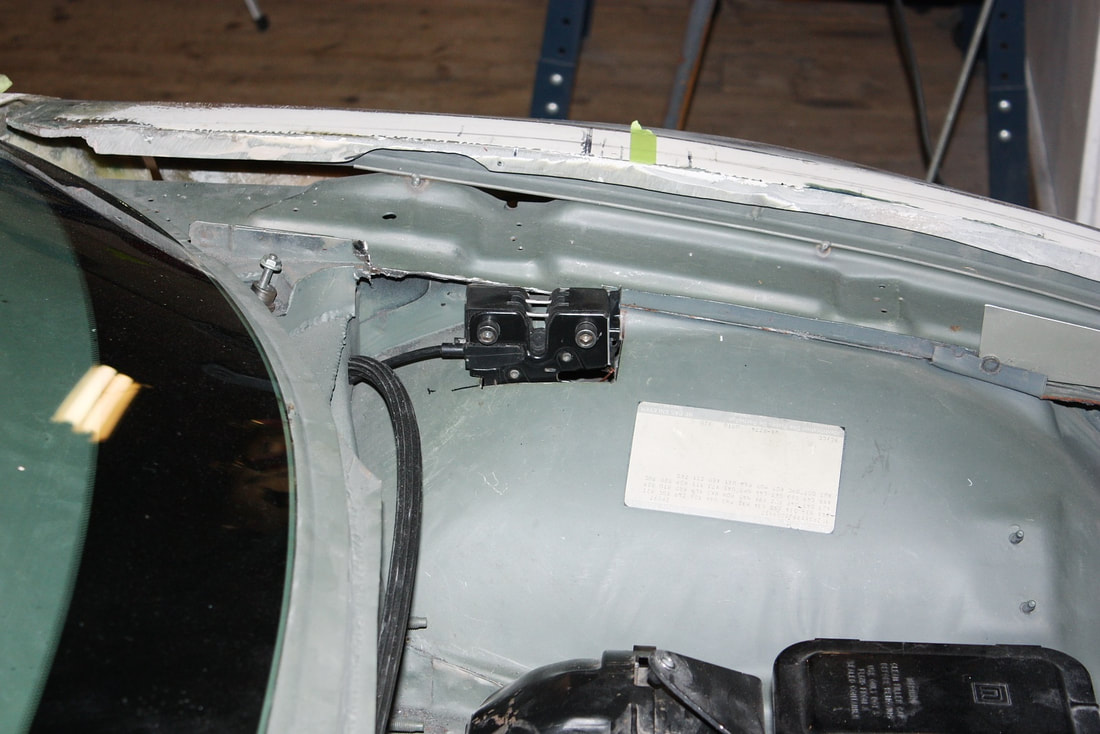
At first, I threaded the 1.8 meter long release cables through the single release cable hole in the Fiero firewall (photo below). But then I decided to route the passenger side cable through a new hole in the cowl on the passenger side to tidy things up. For now, my plan is to route the release cables into their respective side’s rocker panels, where I’ll mount a pair electric solenoids to pull the cables. In the event of a battery failure, I have a plan for a manual release:
At first, I threaded the 1.8 meter long release cables through the single release cable hole in the Fiero firewall (photo below). But then I decided to route the passenger side cable through a new hole in the cowl on the passenger side to tidy things up. For now, my plan is to route the release cables into their respective side’s rocker panels, where I’ll mount a pair electric solenoids to pull the cables. In the event of a battery failure, I have a plan for a manual release:
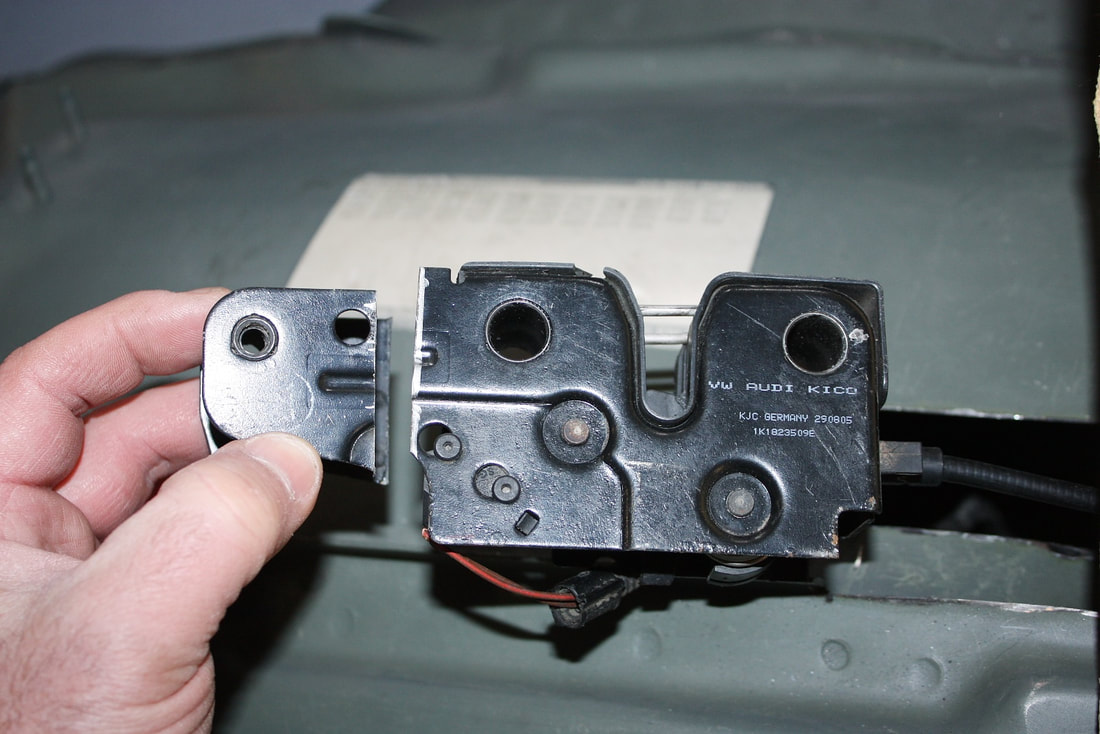
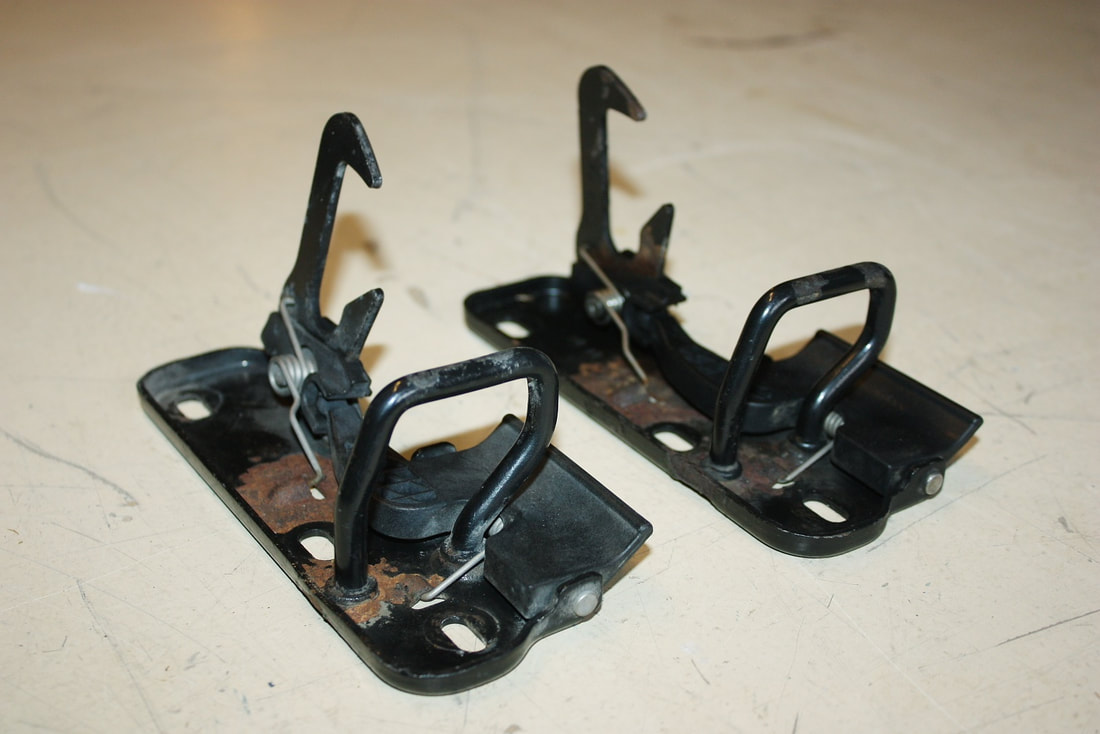
Next on the agenda was modifying the other half of the VW latches: the safety catches/strikers. Here they are fresh from the junkyard:
Next on the agenda was modifying the other half of the VW latches: the safety catches/strikers. Here they are fresh from the junkyard:
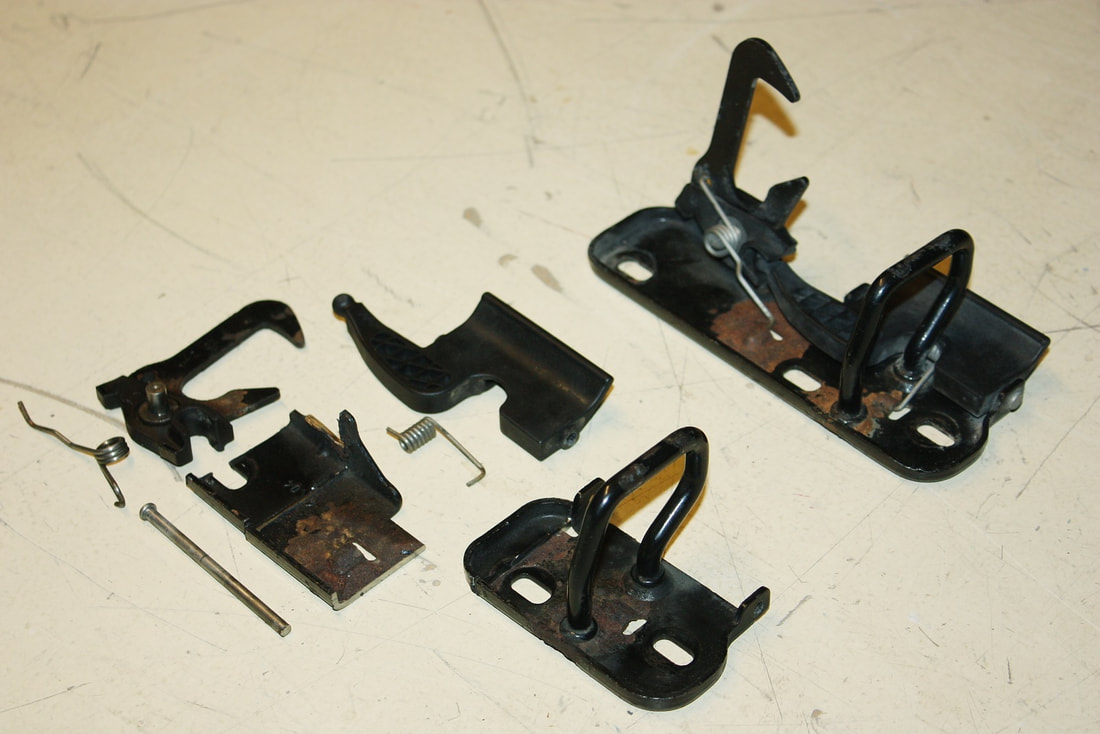
These strikers included a safety mechanism to prevent the hood from flying open on the Jetta/Rabbit if someone accidentally pulled the hood release while driving. As mentioned before, they’re not needed on a reverse opening hood, so I hacked away at them until I had only the parts I needed:
These strikers included a safety mechanism to prevent the hood from flying open on the Jetta/Rabbit if someone accidentally pulled the hood release while driving. As mentioned before, they’re not needed on a reverse opening hood, so I hacked away at them until I had only the parts I needed:
Then, I made a drawing of them for posterity’s sake:
 |  |
As with the hood hinges, I needed to embed mounting plates and studs into the under hood webbing for the strikers, so by carefully measuring the location of the chassis-mounted latches, I could place the strikers accurately onto the webbing:
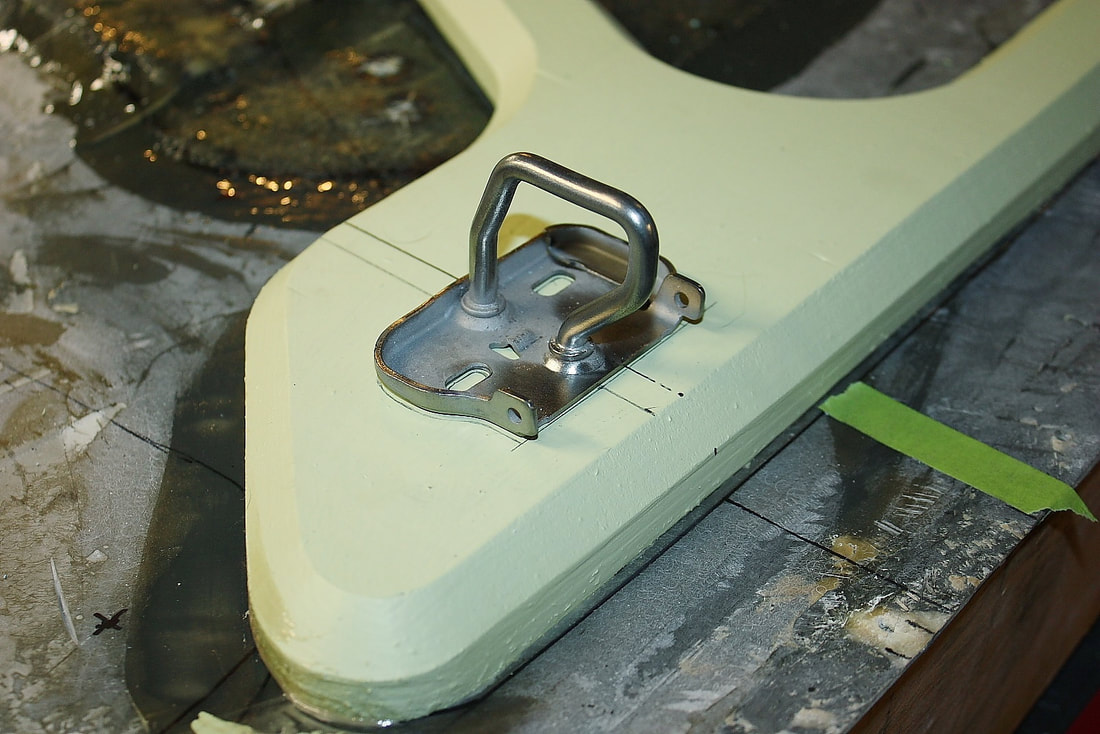
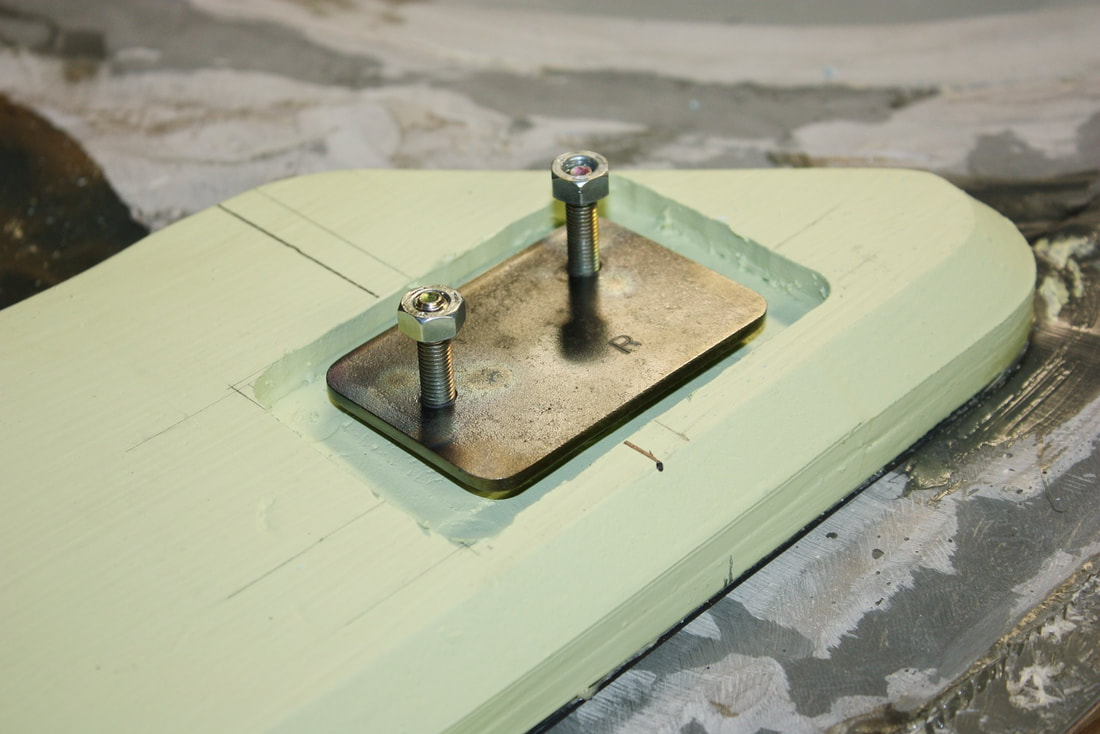
Again, as I did with the hinge mounts, I routered pockets into the Styrofoam to embed studded mounting plates into the fibreglass:
The last step was to fabricate the mounting plates and weld the studs to them like so:
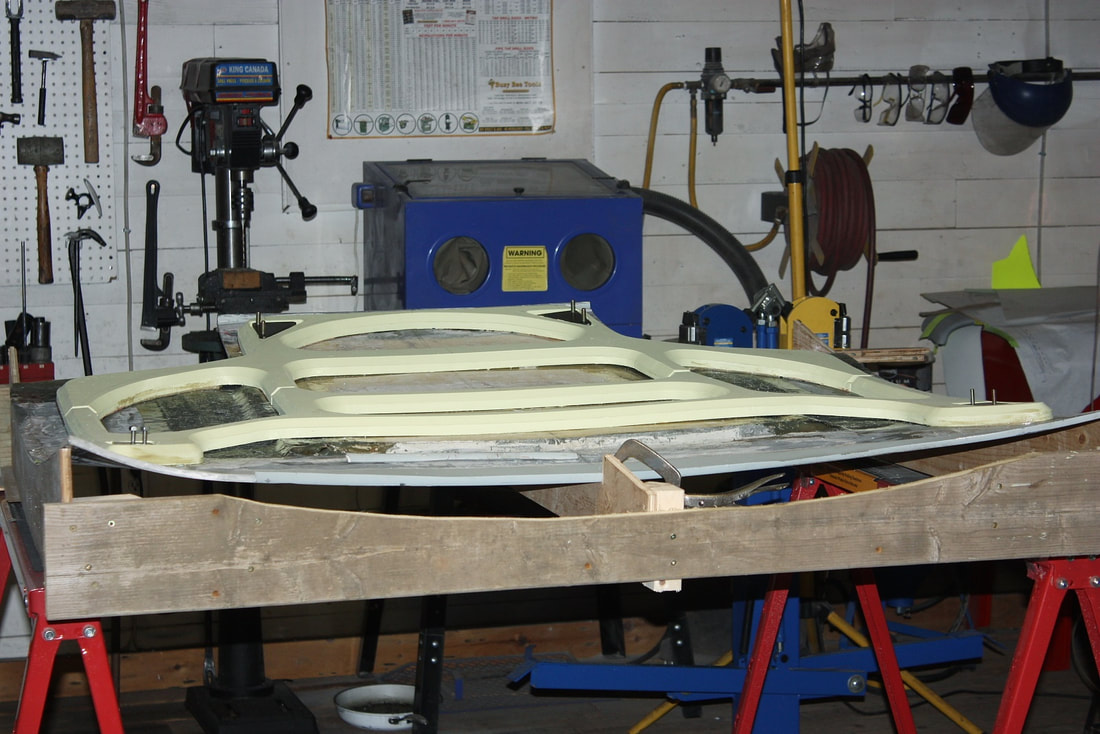
With that, I was finally ready to start fibreglassing the under hood webbing. Here’s the upside-down hood, clamped to the contour buck, with the Styrofoam webbing glued in place, and the hard points ready to be ‘glassed in:
With that, I was finally ready to start fibreglassing the under hood webbing. Here’s the upside-down hood, clamped to the contour buck, with the Styrofoam webbing glued in place, and the hard points ready to be ‘glassed in:

 RSS Feed
