In my last post, I laid up the resin-saturated fibreglass for the under hood webbing in an EVA foam and melamine mold. After letting it cure for a couple days, I slid a putty knife between the melamine and the fibreglass and heard a very satisfying sound as the melamine released its grip. Here’s the result with the EVA foam still surrounding the piece:
In my last post, I laid up the resin-saturated fibreglass for the under hood webbing in an EVA foam and melamine mold. After letting it cure for a couple days, I slid a putty knife between the melamine and the fibreglass and heard a very satisfying sound as the melamine released its grip. Here’s the result with the EVA foam still surrounding the piece:
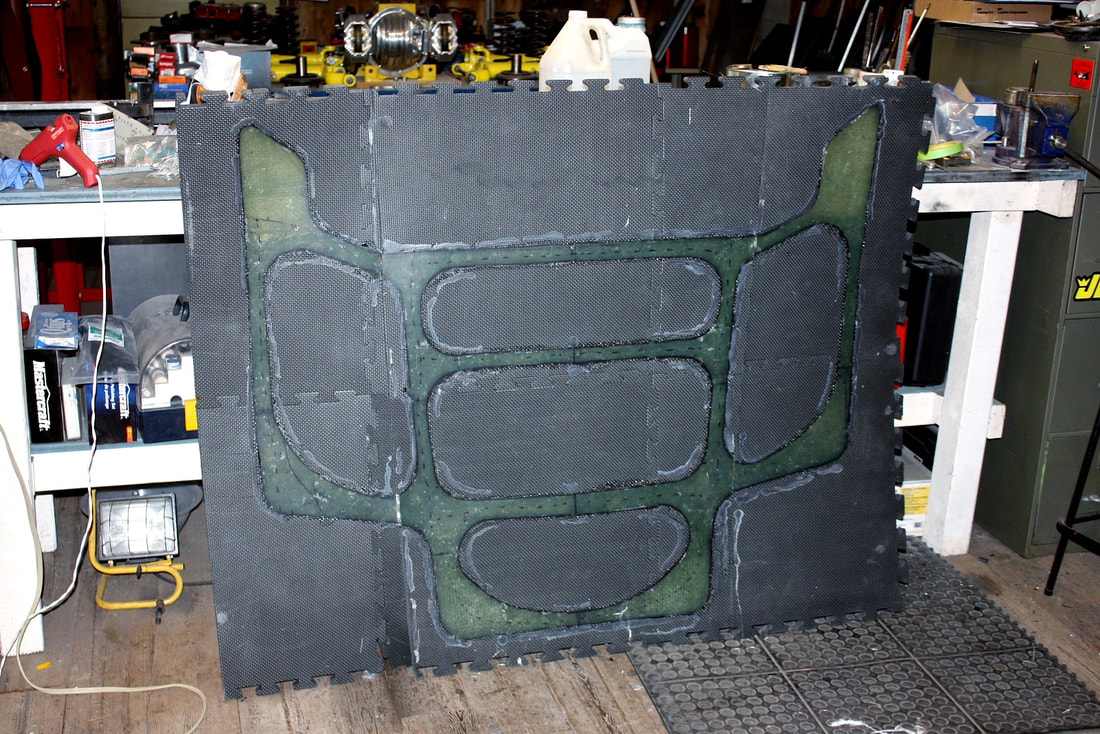
Next, I set about removing the foam mold from the fibreglass, which turned out to be a bit more challenging than expected. I had experimented with resin on a different brand of foam than what I actually used for my mold, and for whatever reason, the resin stuck to the new foam much more firmly than in my earlier tests. I had hoped to save the foam mold but that wasn’t in the cards. Here’s the under hood web “extracted” from the EVA foam:
Next, I set about removing the foam mold from the fibreglass, which turned out to be a bit more challenging than expected. I had experimented with resin on a different brand of foam than what I actually used for my mold, and for whatever reason, the resin stuck to the new foam much more firmly than in my earlier tests. I had hoped to save the foam mold but that wasn’t in the cards. Here’s the under hood web “extracted” from the EVA foam:
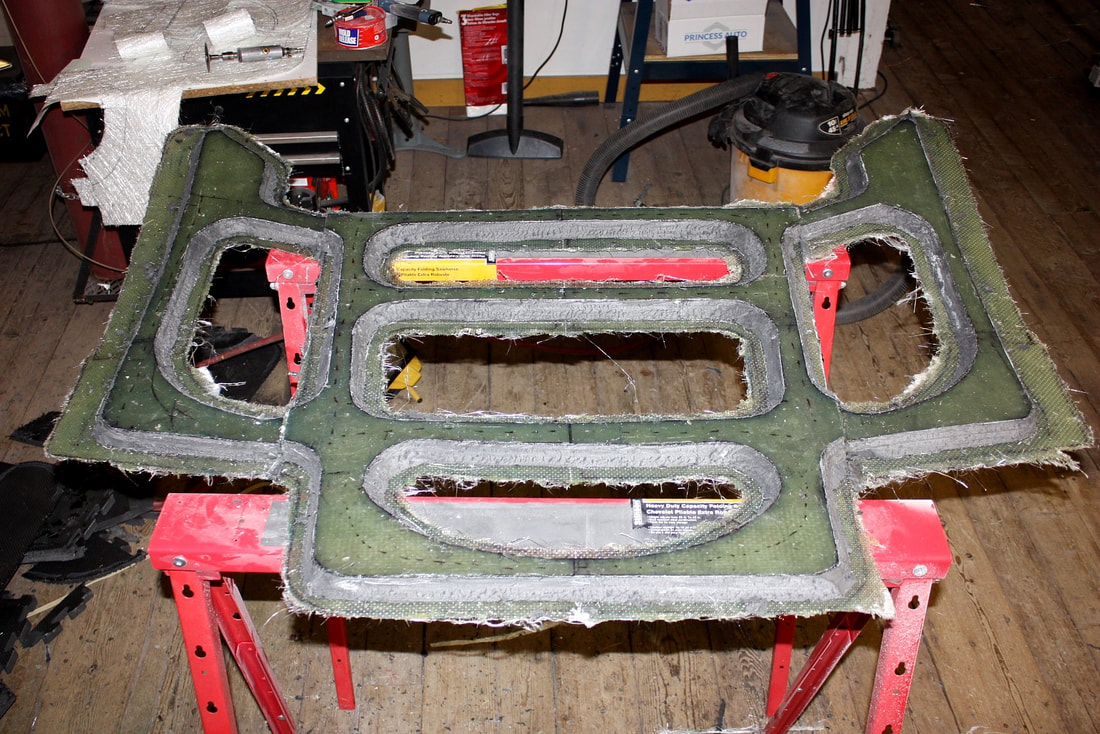
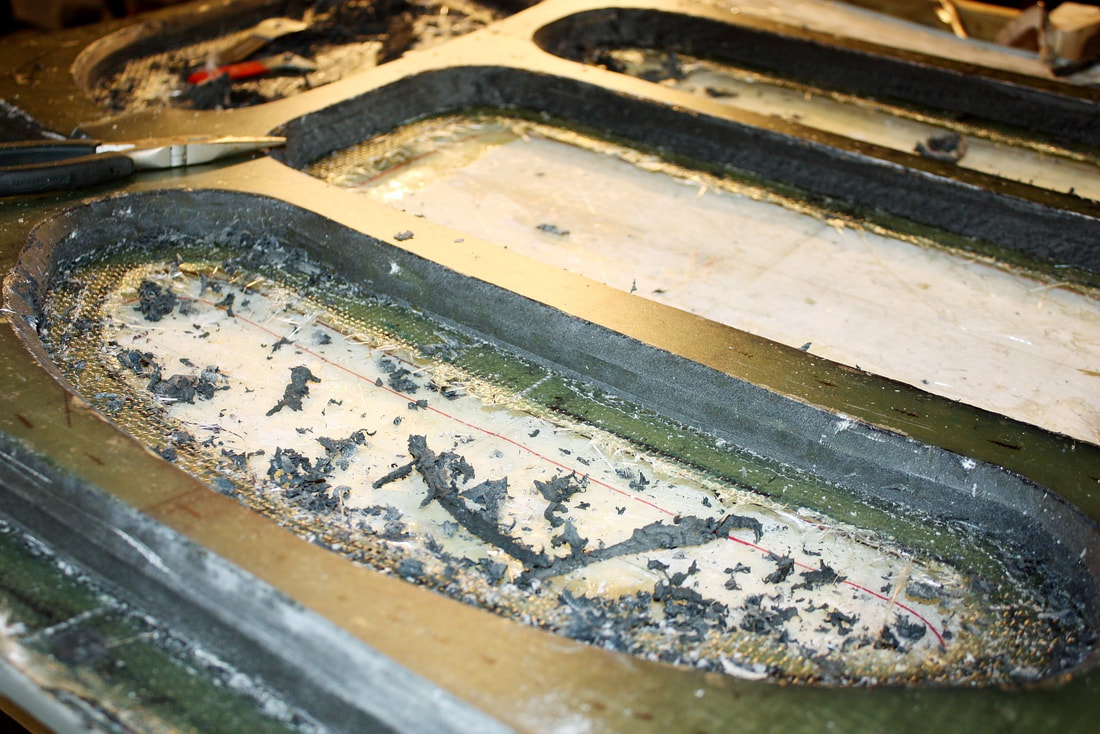
A close-up look at the web shows how smooth the surface against the melamine turned out, and also how much work lay ahead to scrape the remnants of the foam off the webbing walls:
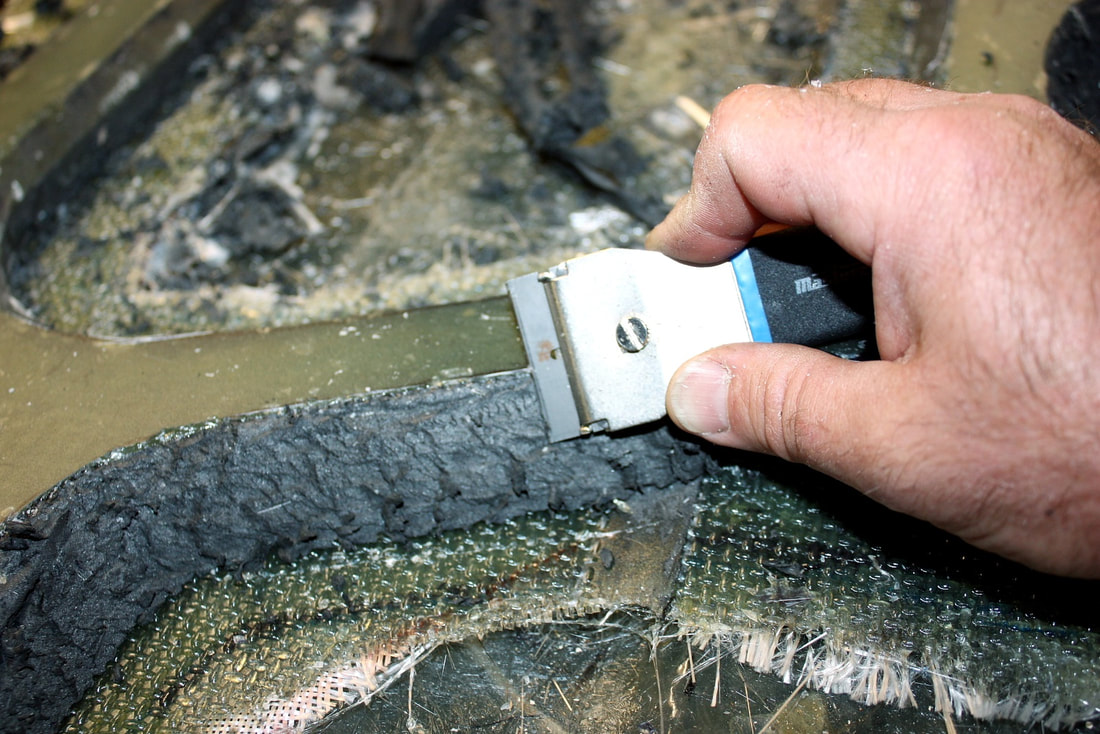
It wasn’t hard work to clean off the extra foam, though it was tedious, and I ran through several razor blades to clean the entire web:
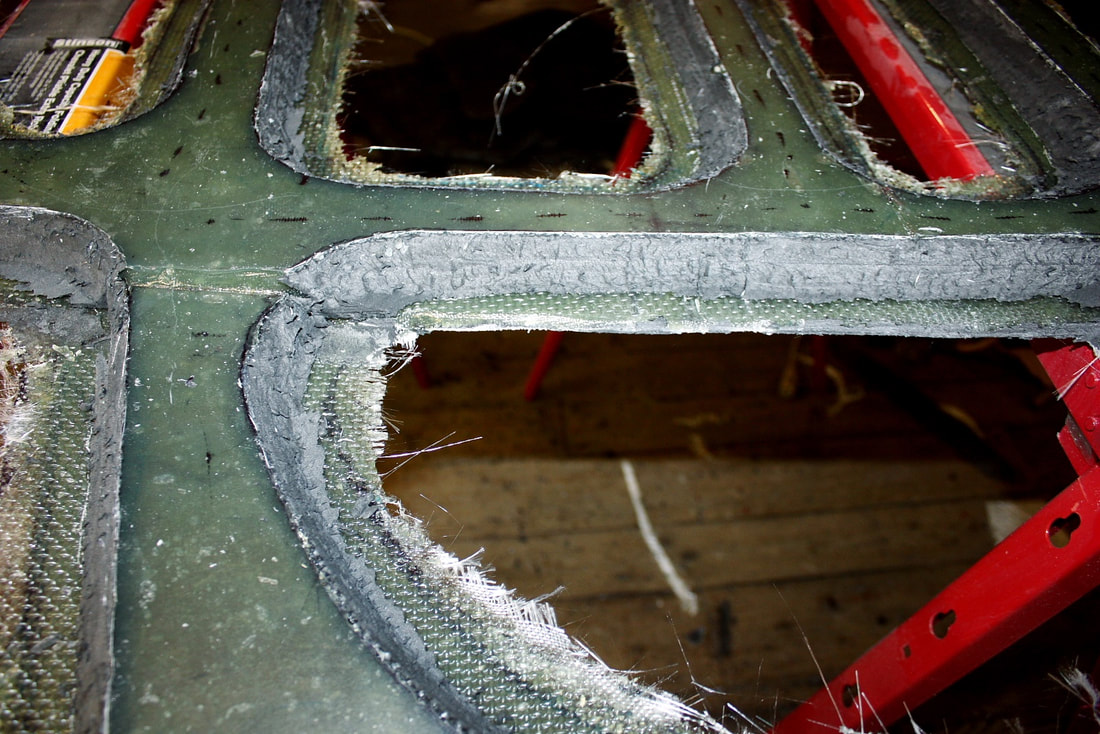
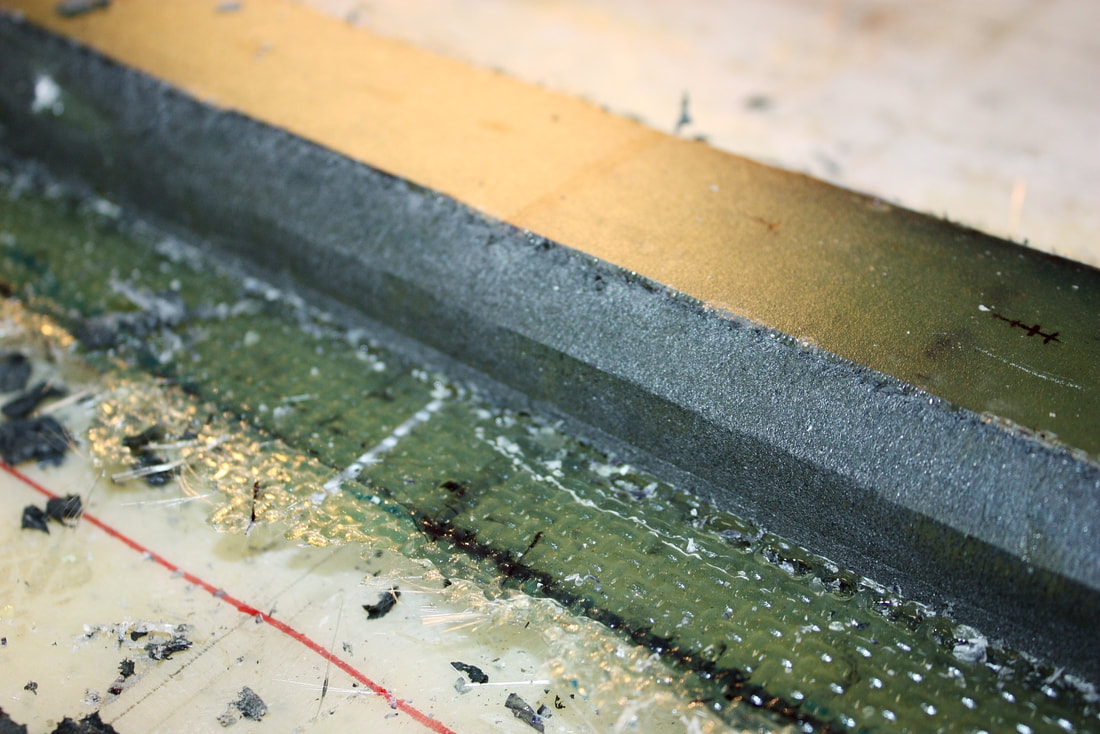
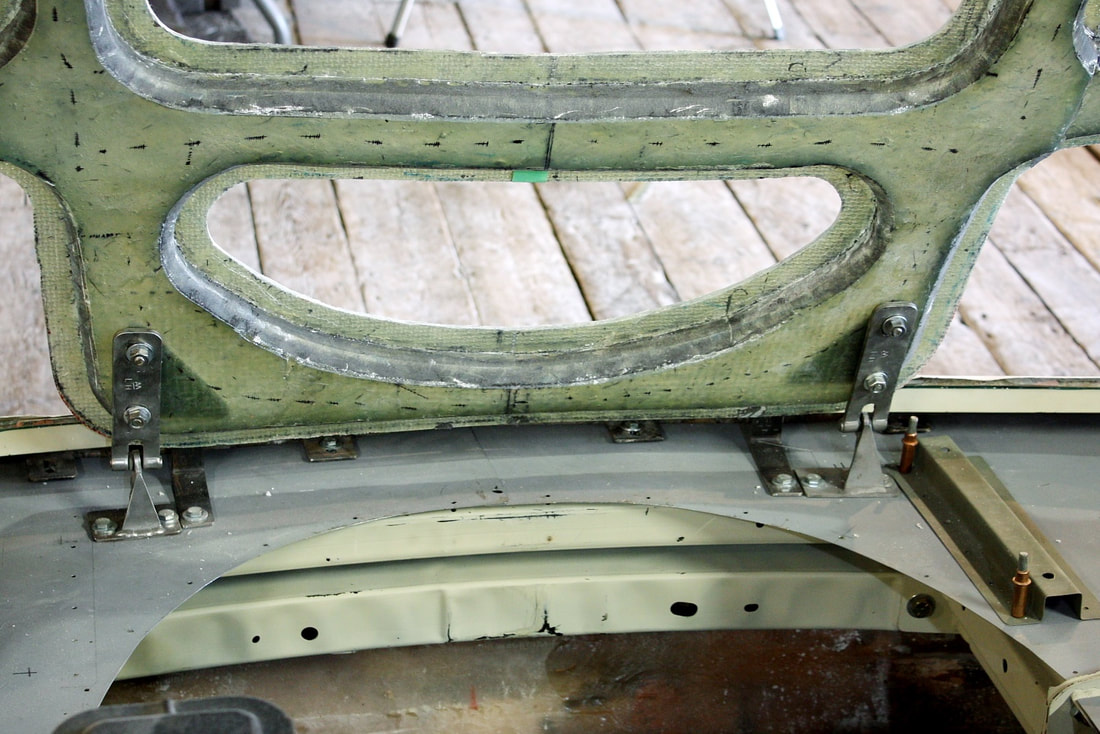
Having used a router to make the edges of the mold smooth really paid off in the end. This is a close-up of the cleaned up fibreglass:
Having used a router to make the edges of the mold smooth really paid off in the end. This is a close-up of the cleaned up fibreglass:
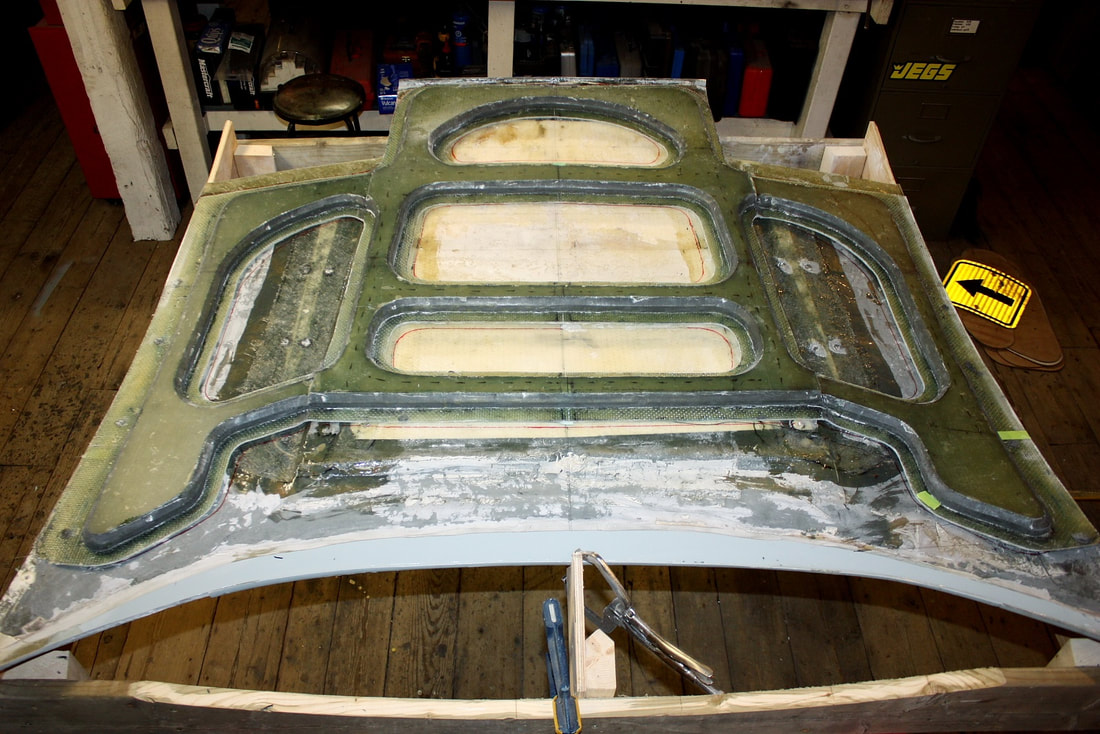
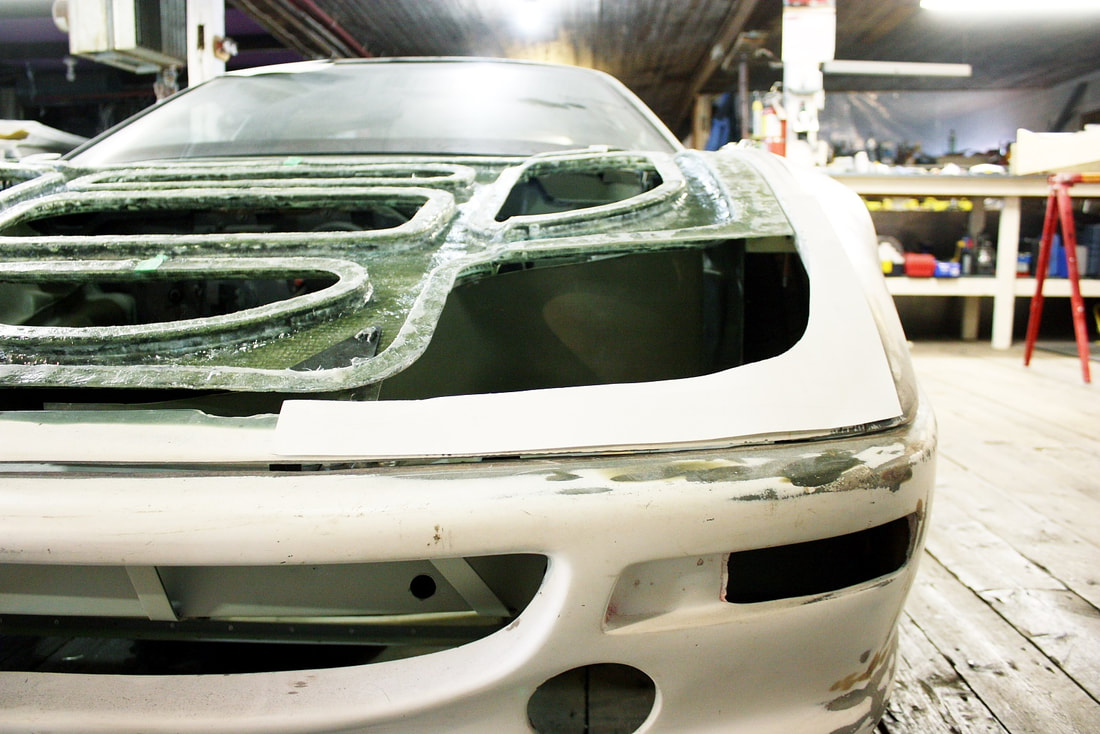
Once the flashing had been trimmed off, I mocked up the webbing on the underside of the hood. It was as near a perfect fit as I could’ve hoped for. Not perfect, but damned close, and certainly within the margin of error that I could work with:
Once the flashing had been trimmed off, I mocked up the webbing on the underside of the hood. It was as near a perfect fit as I could’ve hoped for. Not perfect, but damned close, and certainly within the margin of error that I could work with:
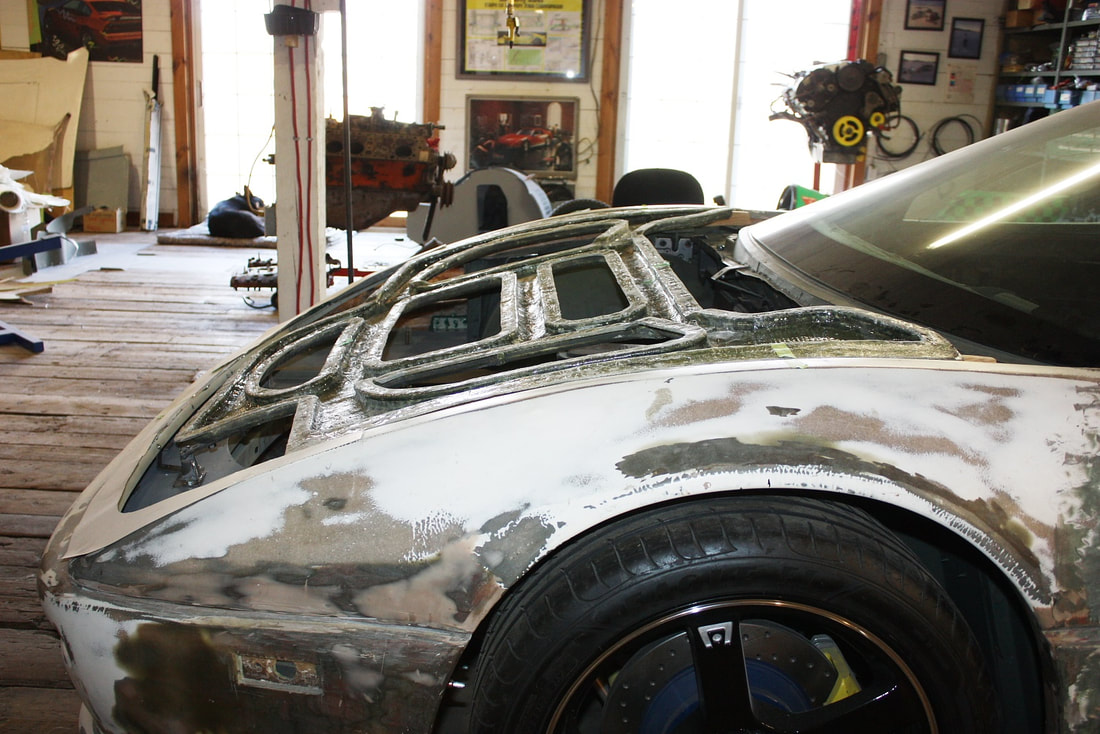
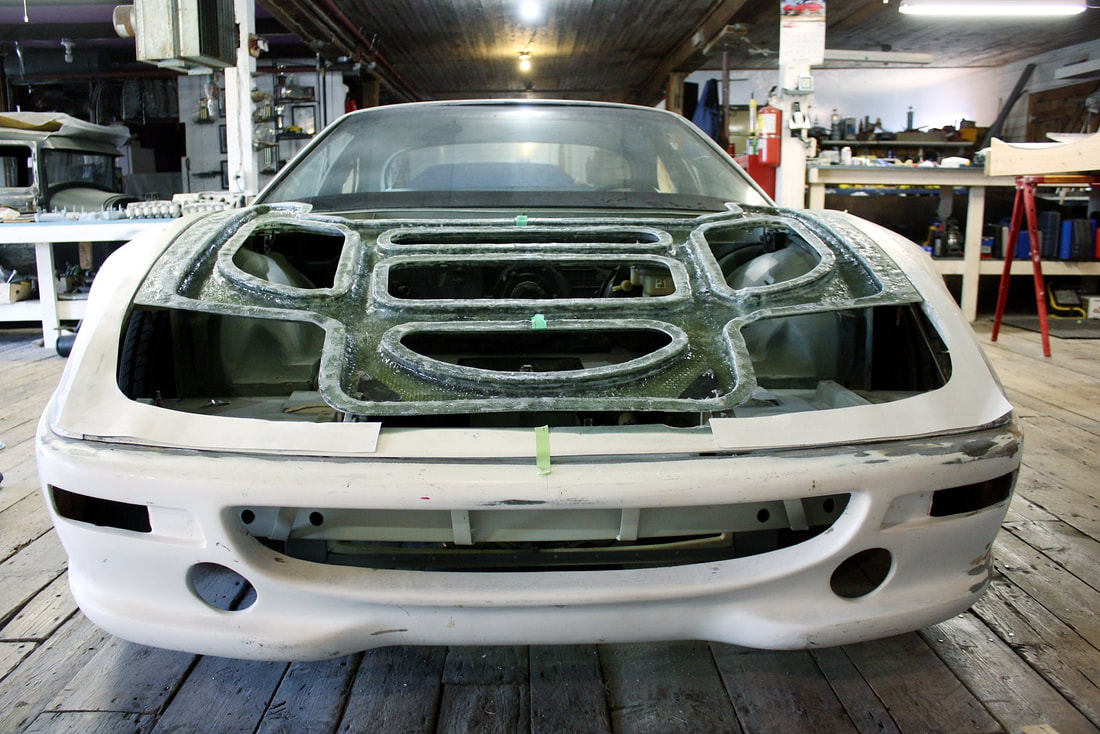
Next, I test fitted the webbing to the chassis to see how well it conformed to the fender arches and front fascia. Again, it was spot on:
Next, I test fitted the webbing to the chassis to see how well it conformed to the fender arches and front fascia. Again, it was spot on:
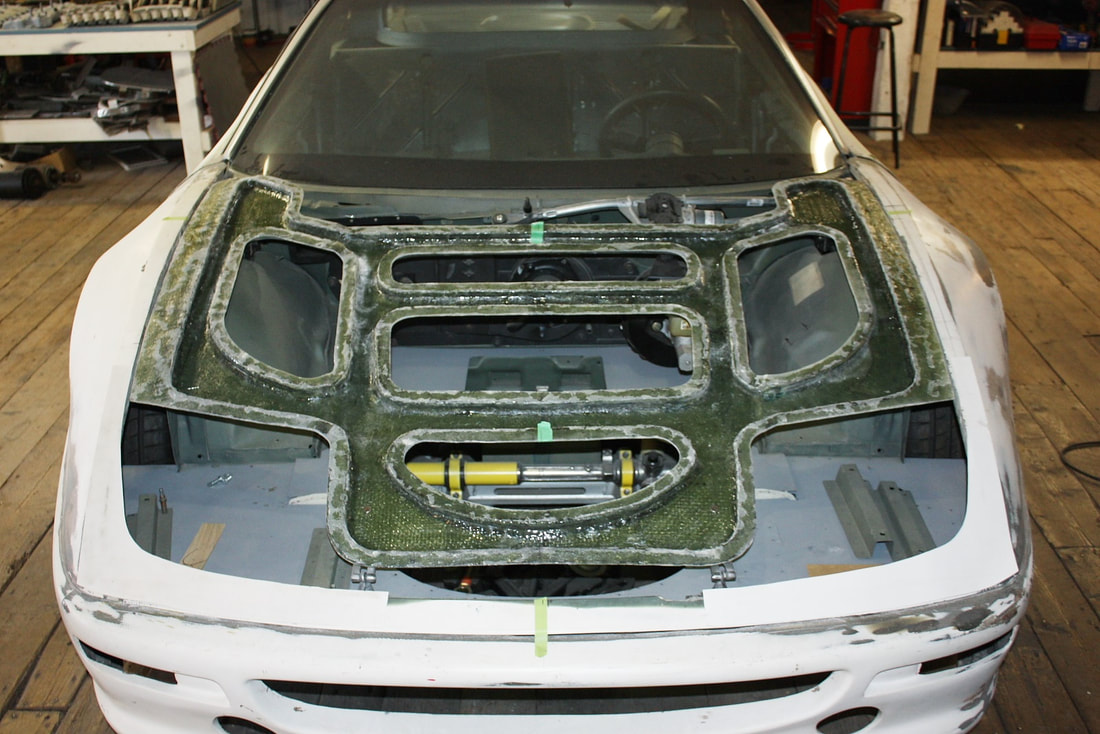
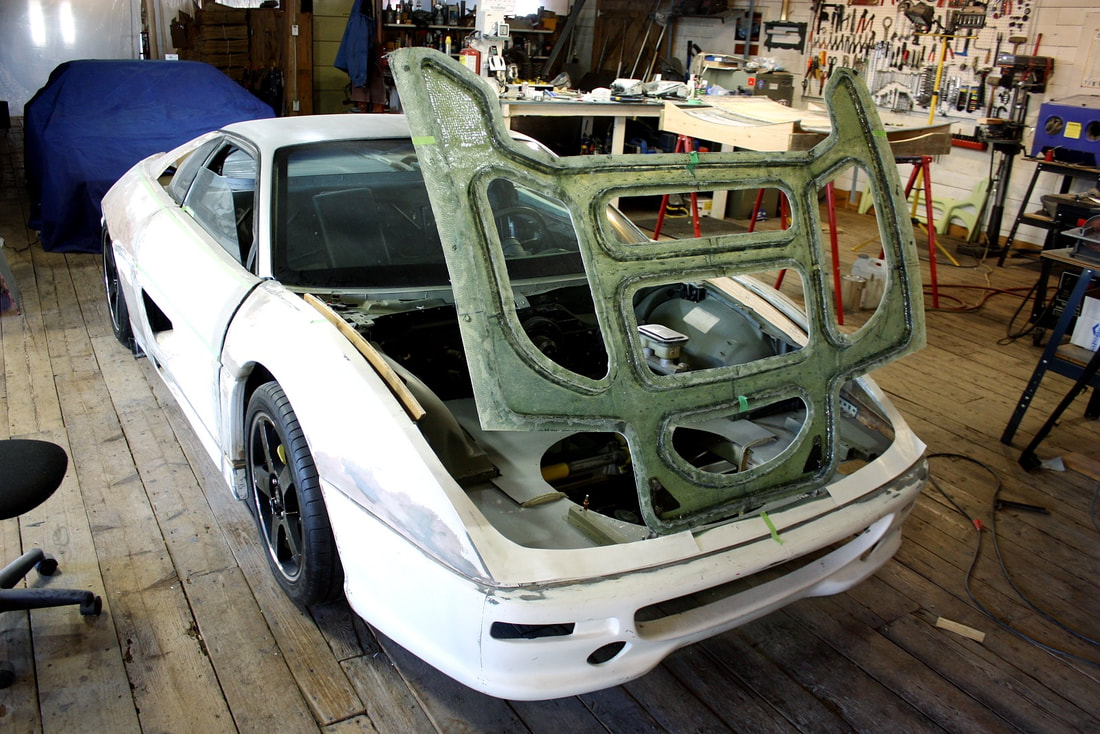
Here’s a front view showing the benefit of having made a separate mold rather than molding the web directly to the underside of the hood as I had originally planned. The holes in the webbing would provide access to complete the hinge mounts, latch mounts, front compartment wall, and HVAC inlet, and I could very easily see how much clearance I had to things like the brake fluid reservoir. All of this would’ve been much more difficult if the webbing and hood skin had been one piece:
Here’s a front view showing the benefit of having made a separate mold rather than molding the web directly to the underside of the hood as I had originally planned. The holes in the webbing would provide access to complete the hinge mounts, latch mounts, front compartment wall, and HVAC inlet, and I could very easily see how much clearance I had to things like the brake fluid reservoir. All of this would’ve been much more difficult if the webbing and hood skin had been one piece:
So, the next step was locating and mounting the web to the hood hinges. No accurate measurements were needed to be taken or transferred, no guessing and hoping for the best. All I needed was to place the web on the chassis, align it between the fenders, and backlight the hinge to see exactly where the mounting holes needed to be. Voila!
So, the next step was locating and mounting the web to the hood hinges. No accurate measurements were needed to be taken or transferred, no guessing and hoping for the best. All I needed was to place the web on the chassis, align it between the fenders, and backlight the hinge to see exactly where the mounting holes needed to be. Voila!

The Fiero hinges have large square mounting holes to ensure a huge range of adjustability, so it was just a matter of centering two pairs of ¼” holes in the fibreglass to match the holes in the hinges.
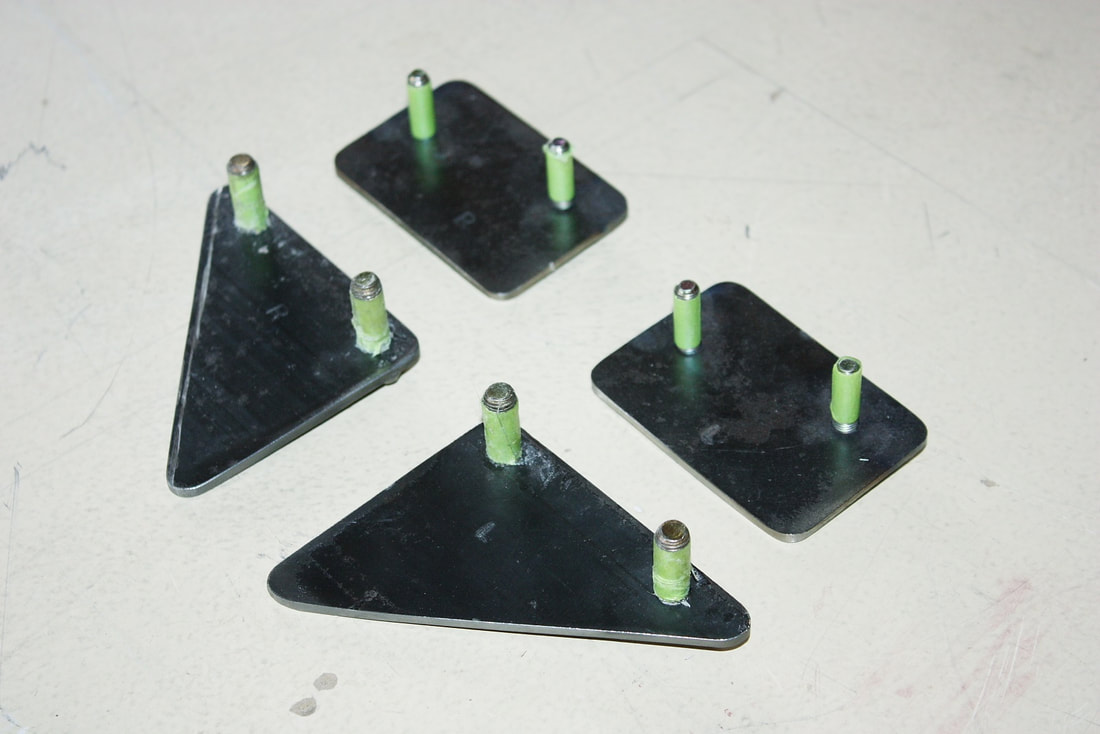
Next, I dug up my reinforcement/mounting plates I had made earlier for the hinges and strikers:
The Fiero hinges have large square mounting holes to ensure a huge range of adjustability, so it was just a matter of centering two pairs of ¼” holes in the fibreglass to match the holes in the hinges.
Next, I dug up my reinforcement/mounting plates I had made earlier for the hinges and strikers:
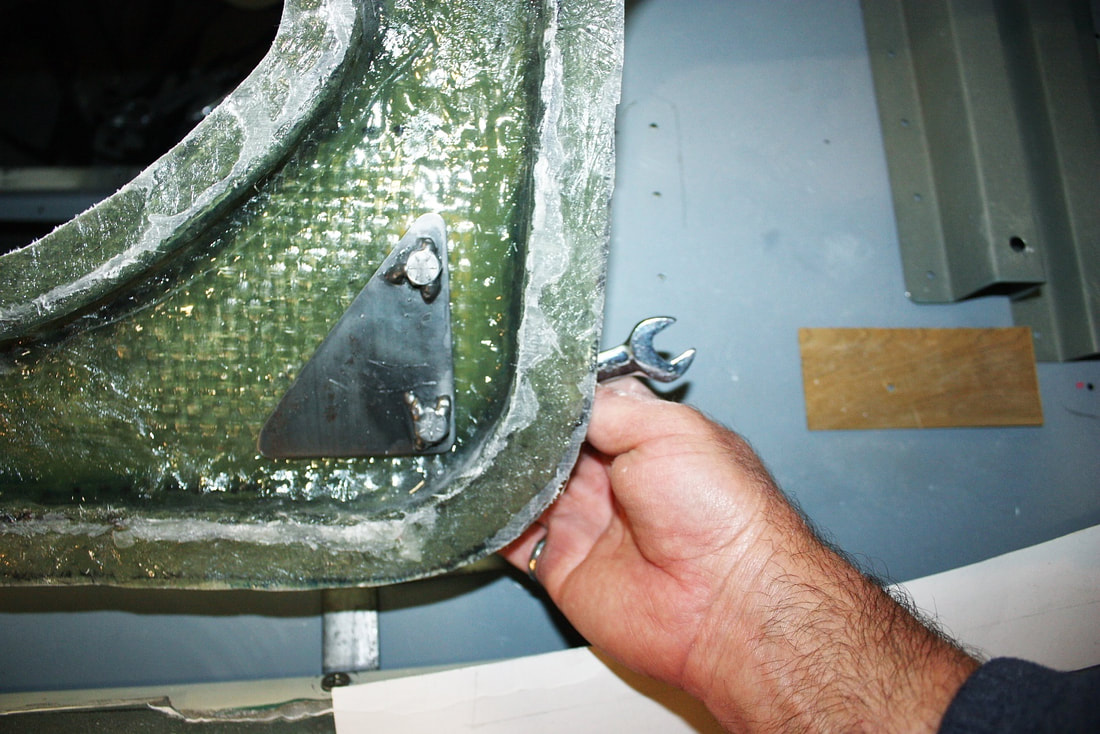
I then bolted the reinforcement/upper mounting plates to the hinges sandwiching the fibreglass web between them:
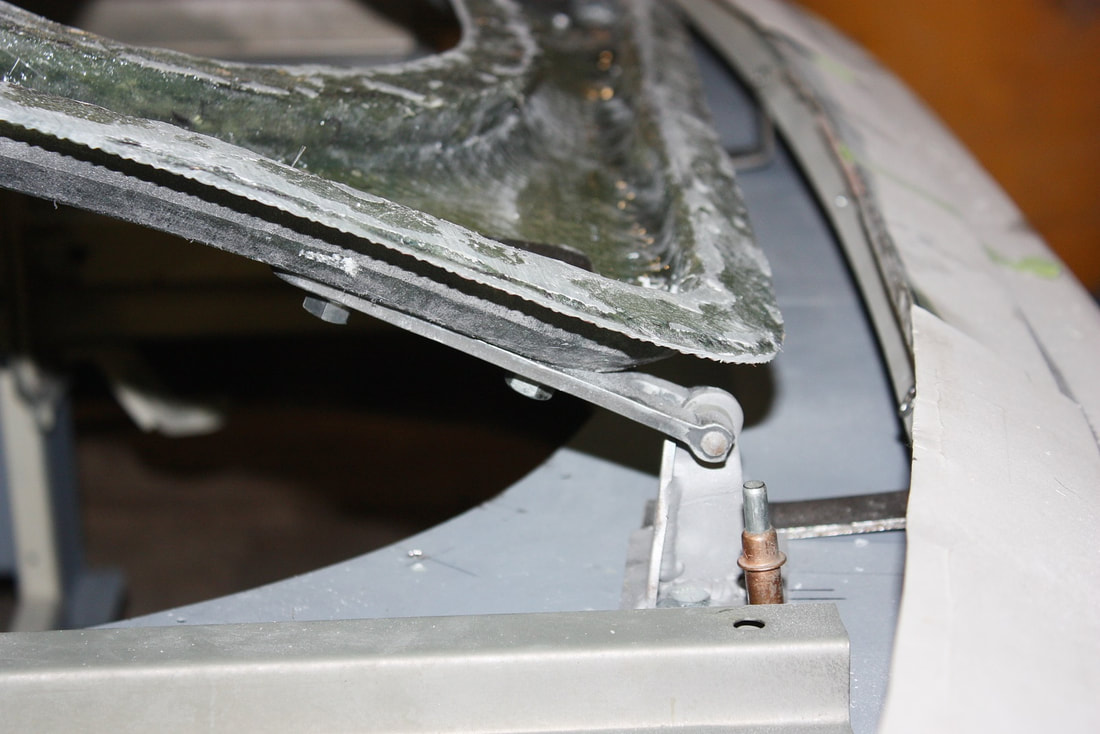
Here’s a close-up of the completed RH hinge in the closed position:
Stepping back…
And another close-up of the hinges with the web in the open position:
And another little step back:
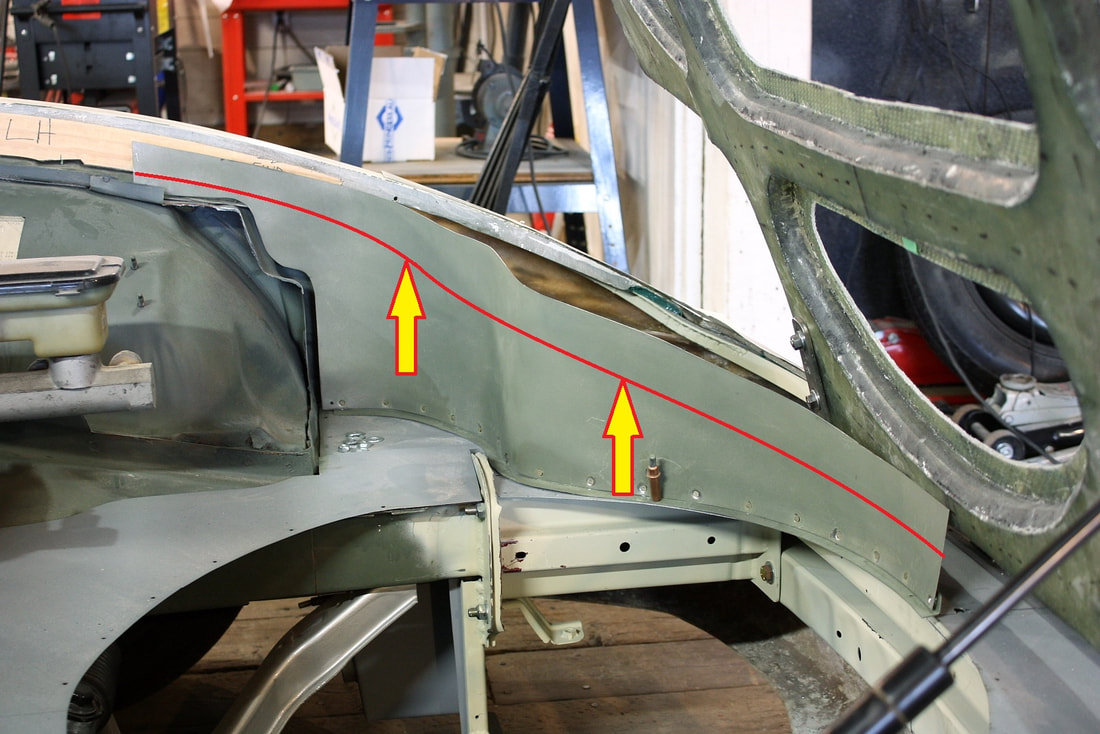
If you’re one of those people who look closely at each image, you’ll have noticed that the front compartment wall I made earlier is missing from all the previous photos. The reason of course is because I originally made the wall to fit up tight against the hood skin. Now, with the webbing hanging a full inch lower, the wall needed to be trimmed. So that was my next step.
Here’s the original height of the wall with a red line showing how much I needed to cut it down:
Some quick work with cut-off wheel was all it took to shave enough off to close the hood structure. It’ll need even more trimming when I finally decide what size rubber seal to install.
Some quick work with cut-off wheel was all it took to shave enough off to close the hood structure. It’ll need even more trimming when I finally decide what size rubber seal to install.

With the hinges and compartment wall out of the way, the next things to tackle were the strikers. When I installed the latches to the chassis earlier on, I had no good way of measuring precisely where the strikers would have to placed under the hood, let alone making sure they were perfectly aligned in three dimensions to the latches. The new webbing made this job a cinch.
I installed my wooden hood profiles on top of the frame rails to set the correct height of the web, then I pushed the strikers into the latches like so:
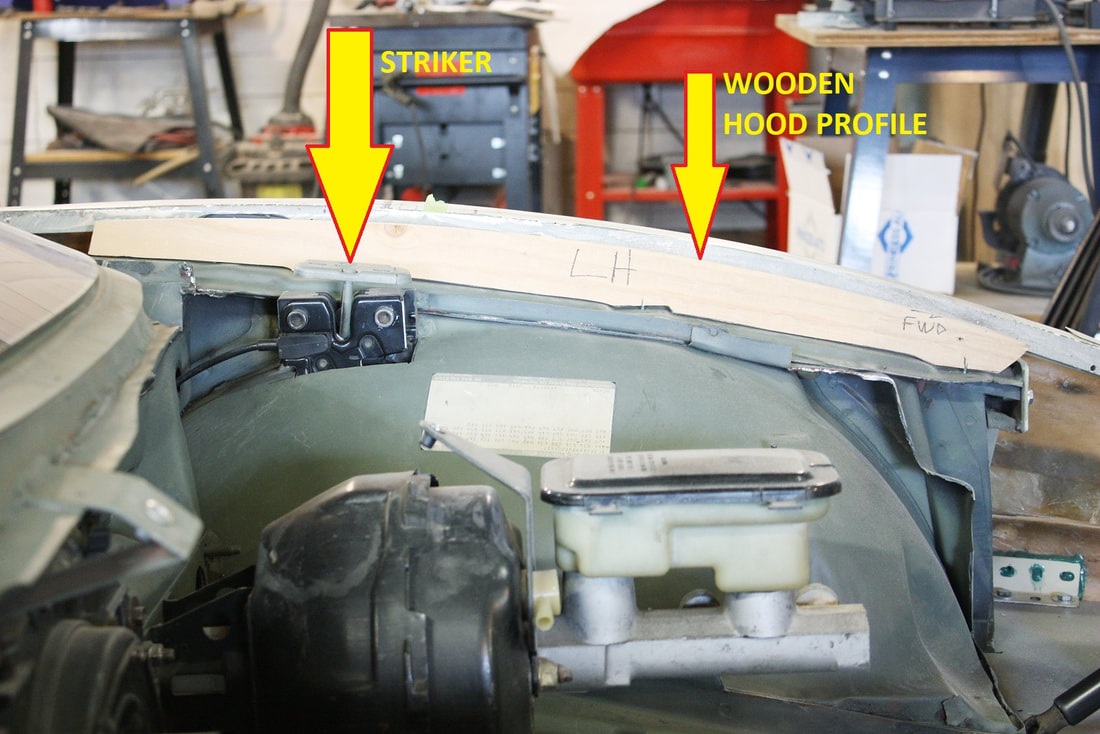
Then I simply lowered the web onto the wooden profiles, and adjusted the latches up or down until the striker mounting plates just touched the underside of the fibreglass;
Once again, I used a flashlight to backlight the striker and find exactly where to drill the mounting holes in the fibreglass:

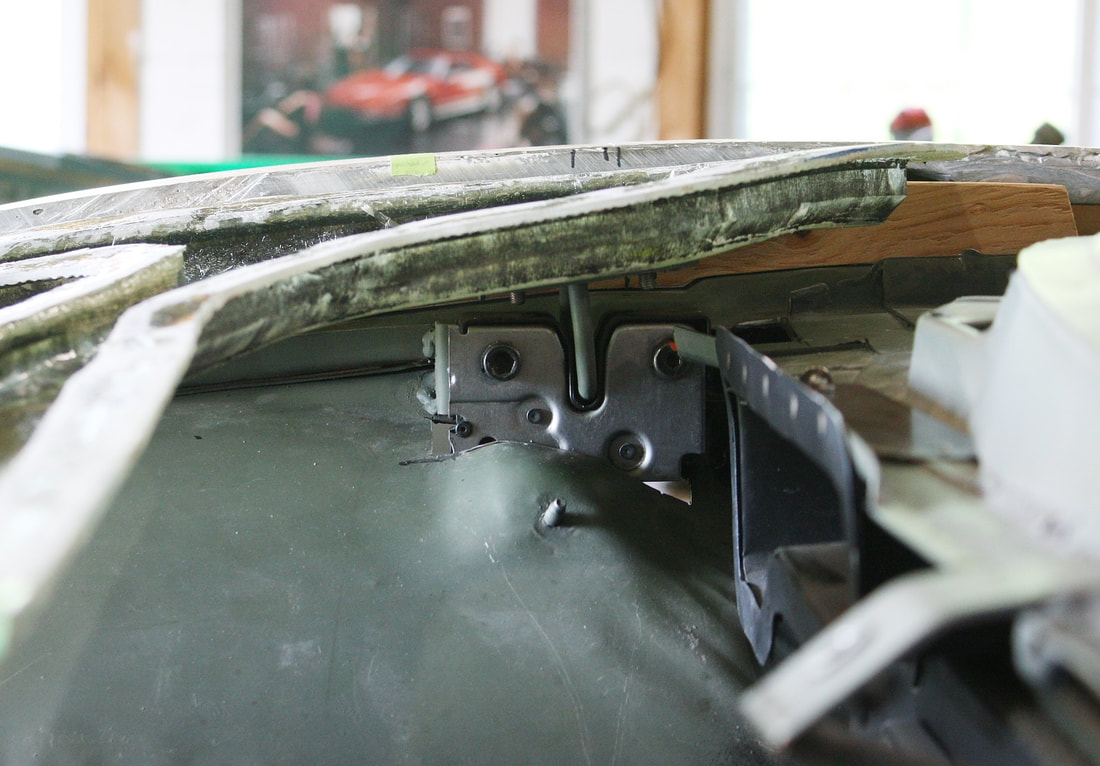
As with the hinges, I backed up the striker mounting plates with steel reinforcements that will be hidden once the hood skin is installed. Here, you can also clearly see the extra layer of coarse woven fibreglass in the mounting area:
As with the hinges, I backed up the striker mounting plates with steel reinforcements that will be hidden once the hood skin is installed. Here, you can also clearly see the extra layer of coarse woven fibreglass in the mounting area:

I tested the VW latches by engaging the strikers into their respective receptacles and liked the quality “click” as the clasps closed. I still have to design a release handle to pull both cables simultaneously, so I had to make do with pliers to open the “hood” again. The springs built-in to the latches also worked well to pop the hood and keep it from re-engaging the latch mechanisms. I was really quite satisfied with how this all turned out for the better.
I tested the VW latches by engaging the strikers into their respective receptacles and liked the quality “click” as the clasps closed. I still have to design a release handle to pull both cables simultaneously, so I had to make do with pliers to open the “hood” again. The springs built-in to the latches also worked well to pop the hood and keep it from re-engaging the latch mechanisms. I was really quite satisfied with how this all turned out for the better.

 RSS Feed
