As I mentioned in my last post, the International Fibreglass (IFG) roof had been designed to fit (and I use the term “fit” loosely) over a stock Fiero chassis. It no longer came close to fitting my heavily modified rear roofline, so I needed an alternative.
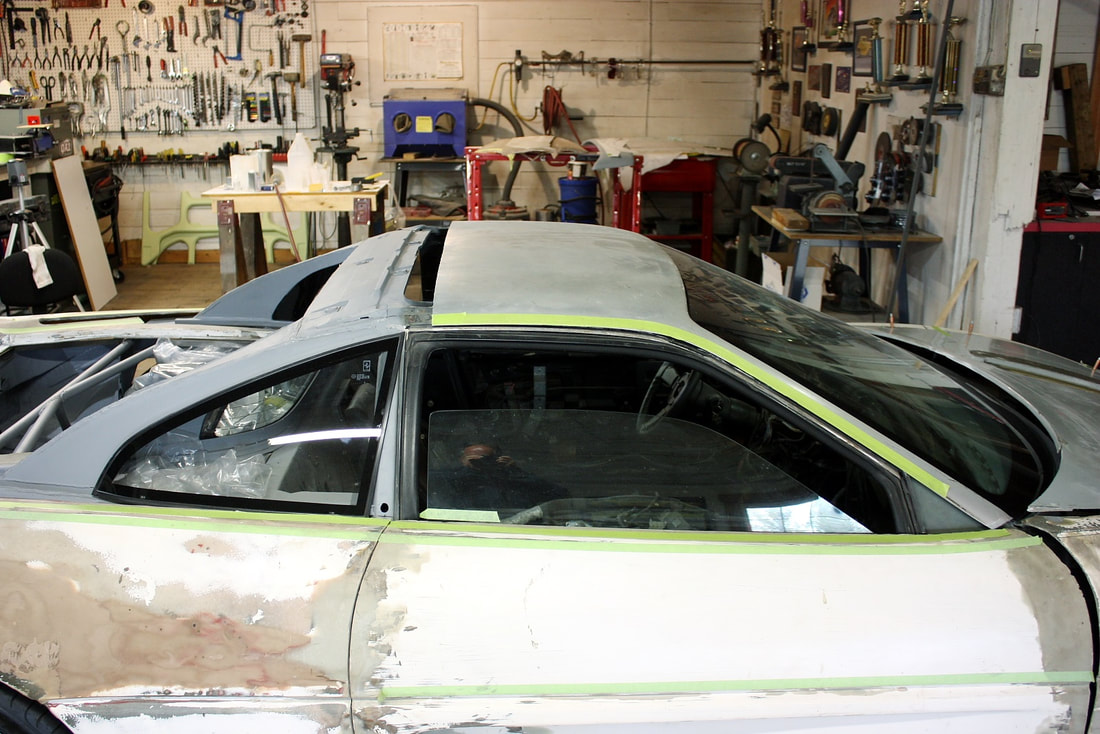
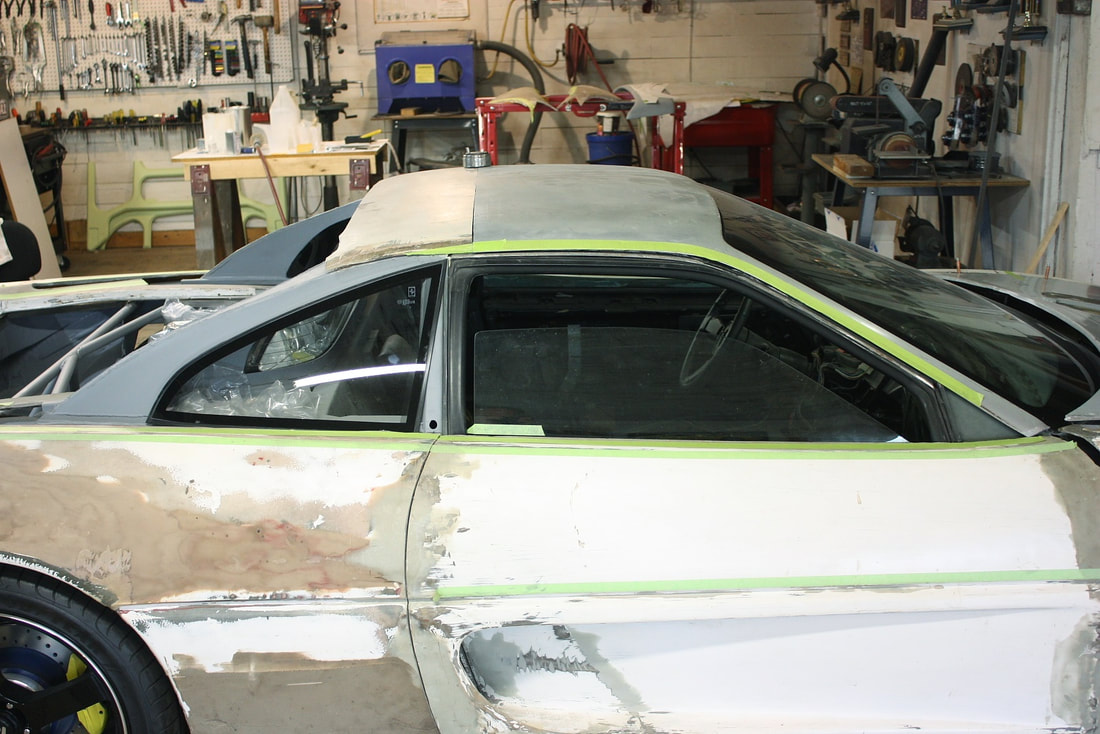
Roofs are actually quite difficult to create from scratch because of the very gentle compound curves involved. And, because of the low angle sightlines of a car roof, imperfections show up easily in the reflections on the broad, horizontal surface. So I decided to make as much use of a stock, sunroof-free Fiero roof panel as possible. I’ve used green masking tape to highlight the important contours:
As I mentioned in my last post, the International Fibreglass (IFG) roof had been designed to fit (and I use the term “fit” loosely) over a stock Fiero chassis. It no longer came close to fitting my heavily modified rear roofline, so I needed an alternative.
Roofs are actually quite difficult to create from scratch because of the very gentle compound curves involved. And, because of the low angle sightlines of a car roof, imperfections show up easily in the reflections on the broad, horizontal surface. So I decided to make as much use of a stock, sunroof-free Fiero roof panel as possible. I’ve used green masking tape to highlight the important contours:
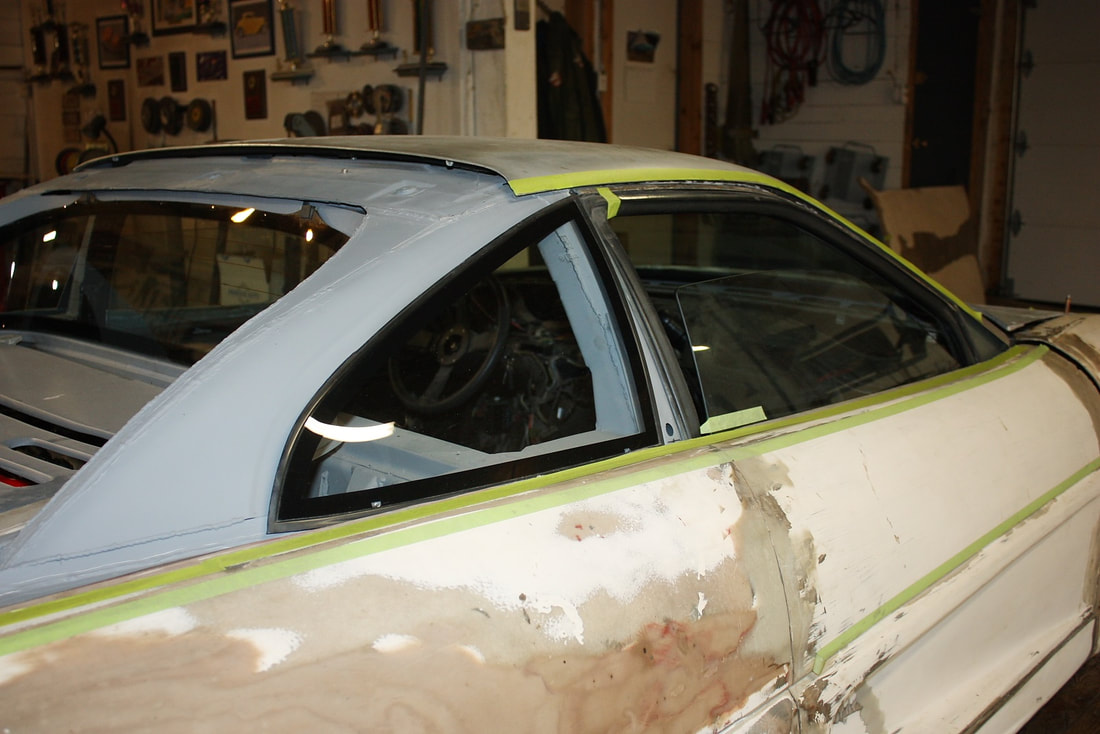
From the photo above, the most obvious reason I couldn’t just slap it on and graft the sail panels to it is because it was too short.
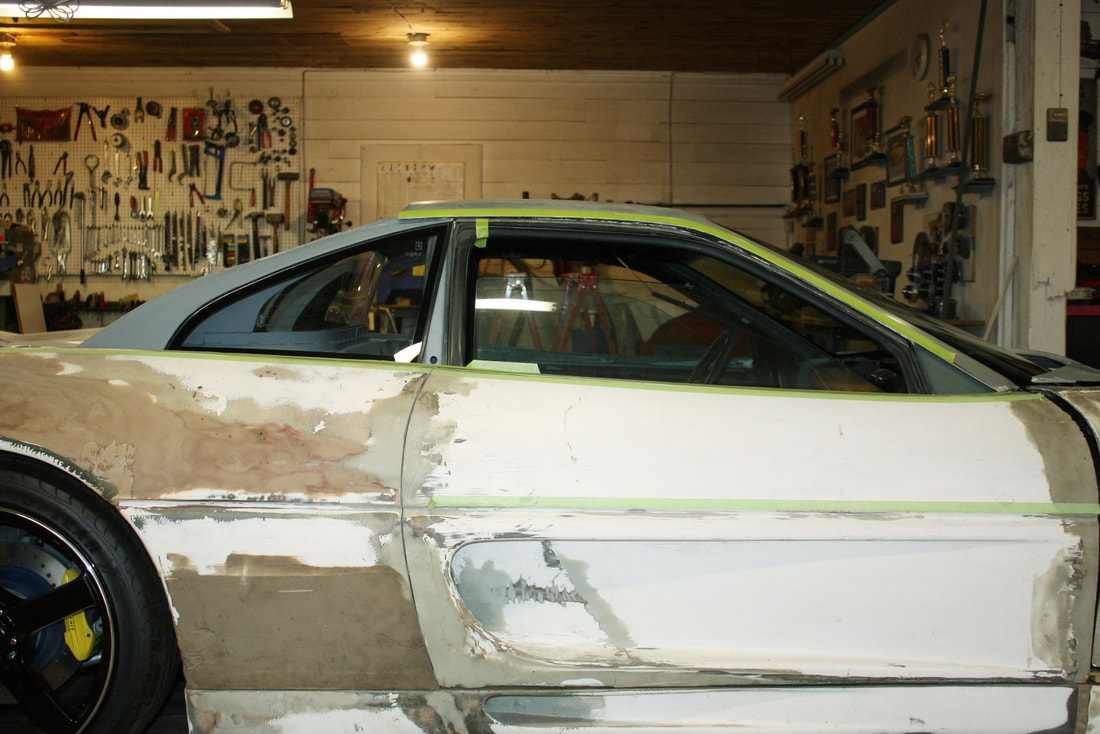
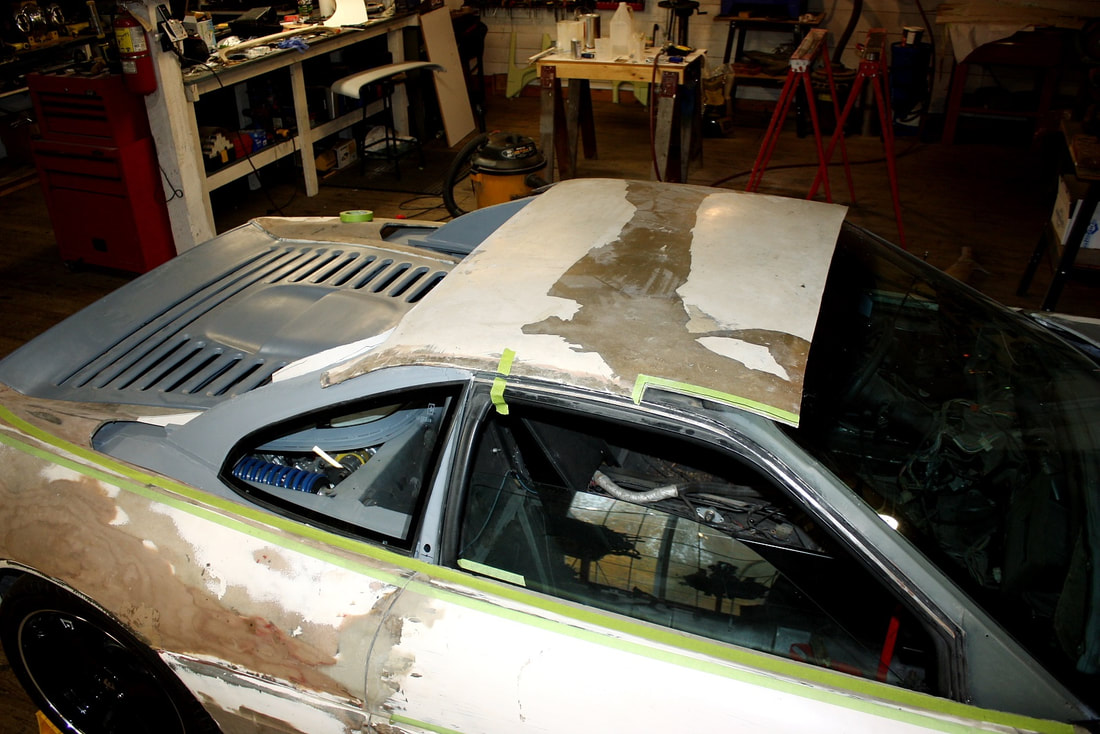
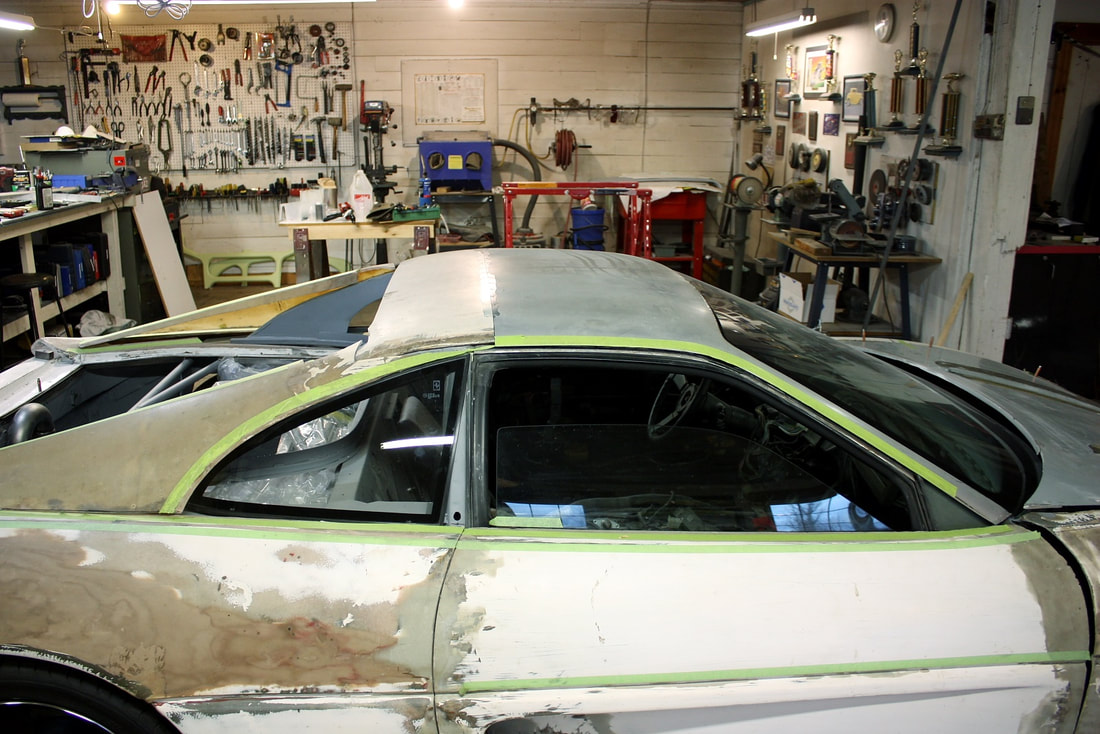
From the photo below, it’s also clear the profile of the Fiero roof panel continues straight back while my modified roofline starts to slope downward after the B-pillar:
From the photo above, the most obvious reason I couldn’t just slap it on and graft the sail panels to it is because it was too short.
From the photo below, it’s also clear the profile of the Fiero roof panel continues straight back while my modified roofline starts to slope downward after the B-pillar:
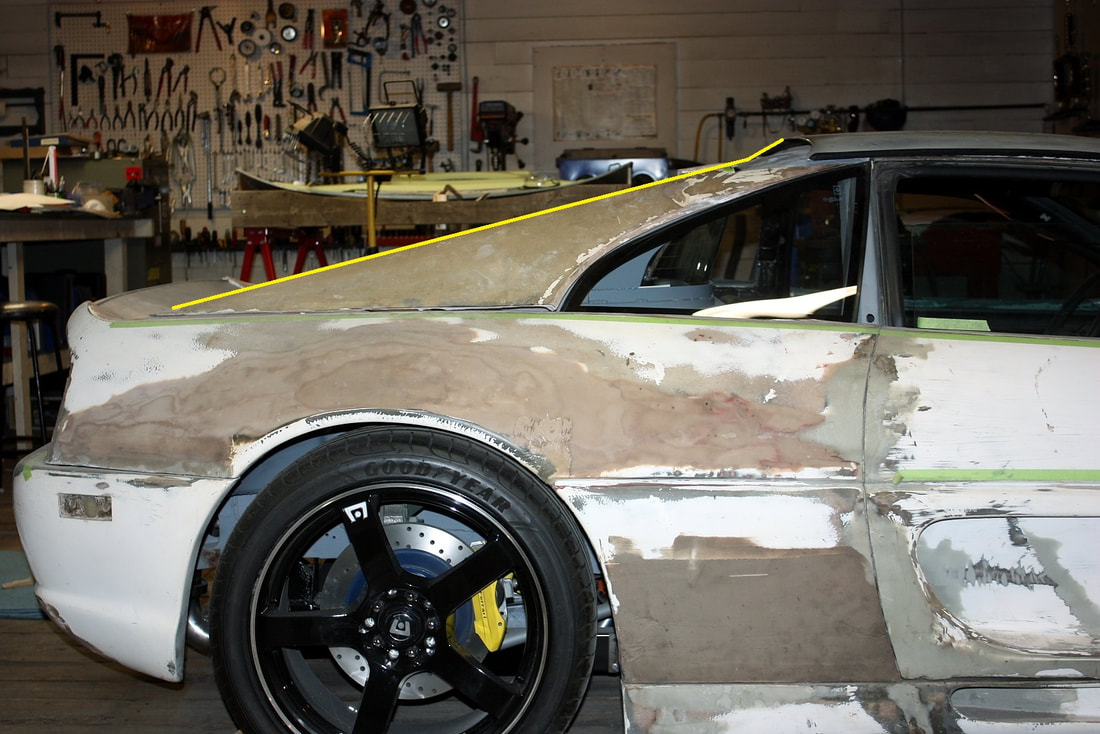
The other problem is clear in this next image where the back edge of the stock Fiero panel ends up too high to intersect properly with the tops of sail panels. Any roof extension would need an obvious kink downward:
The other problem is clear in this next image where the back edge of the stock Fiero panel ends up too high to intersect properly with the tops of sail panels. Any roof extension would need an obvious kink downward:
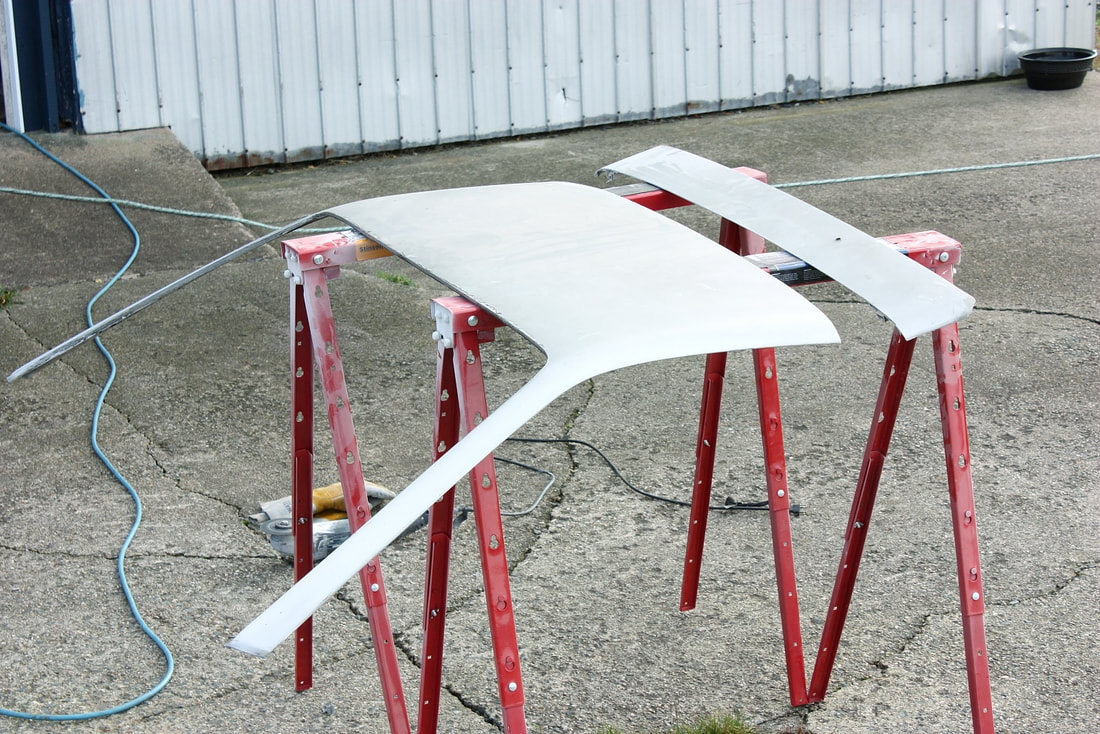
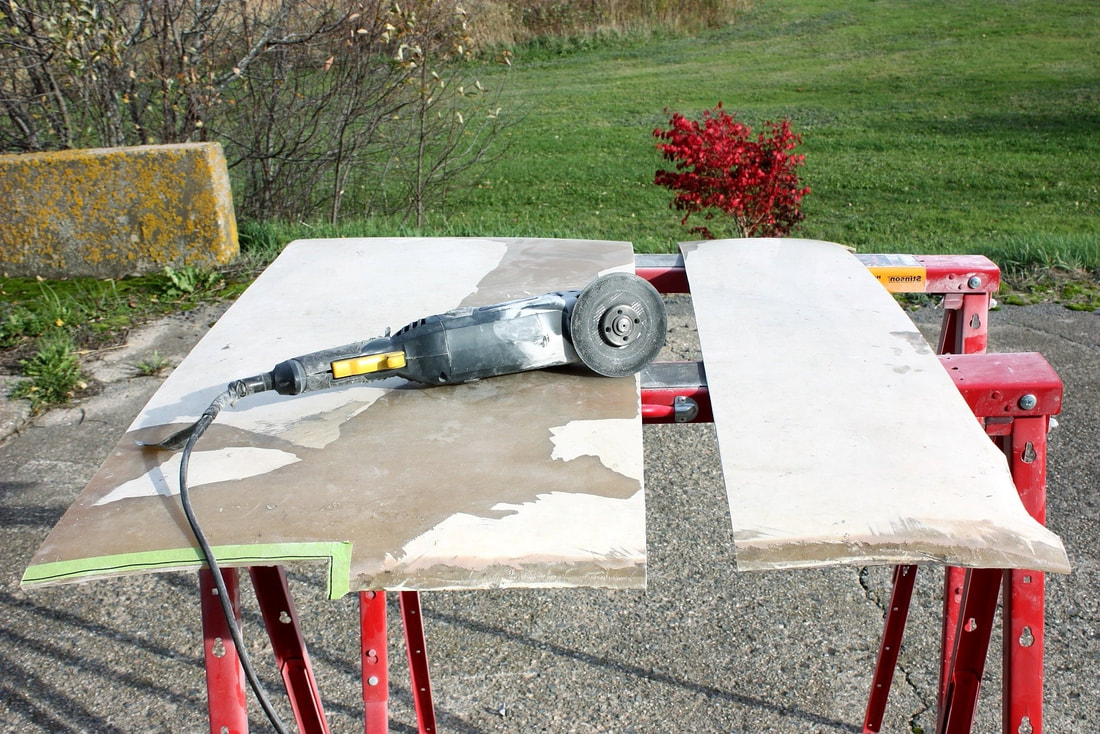
It didn’t take a rocket scientist to figure out I needed to cut off the rear section of the Fiero roof panel in-line with the B-pillar. So I marked it, took it outside, and sliced it in two:
It didn’t take a rocket scientist to figure out I needed to cut off the rear section of the Fiero roof panel in-line with the B-pillar. So I marked it, took it outside, and sliced it in two:
When I mocked it back up on the chassis, I could imagine a nice continuous, curved greenhouse line from A-pillar to C-pillar:
When I mocked it back up on the chassis, I could imagine a nice continuous, curved greenhouse line from A-pillar to C-pillar:
Next, I needed to find a way to extend the roof rearward with the proper slope and curvature. Seeing how my now discarded IFG roof panel had a fairly faithful curvature on the front half, I spun it around and mocked it up backwards on the chassis:
Next, I needed to find a way to extend the roof rearward with the proper slope and curvature. Seeing how my now discarded IFG roof panel had a fairly faithful curvature on the front half, I spun it around and mocked it up backwards on the chassis:
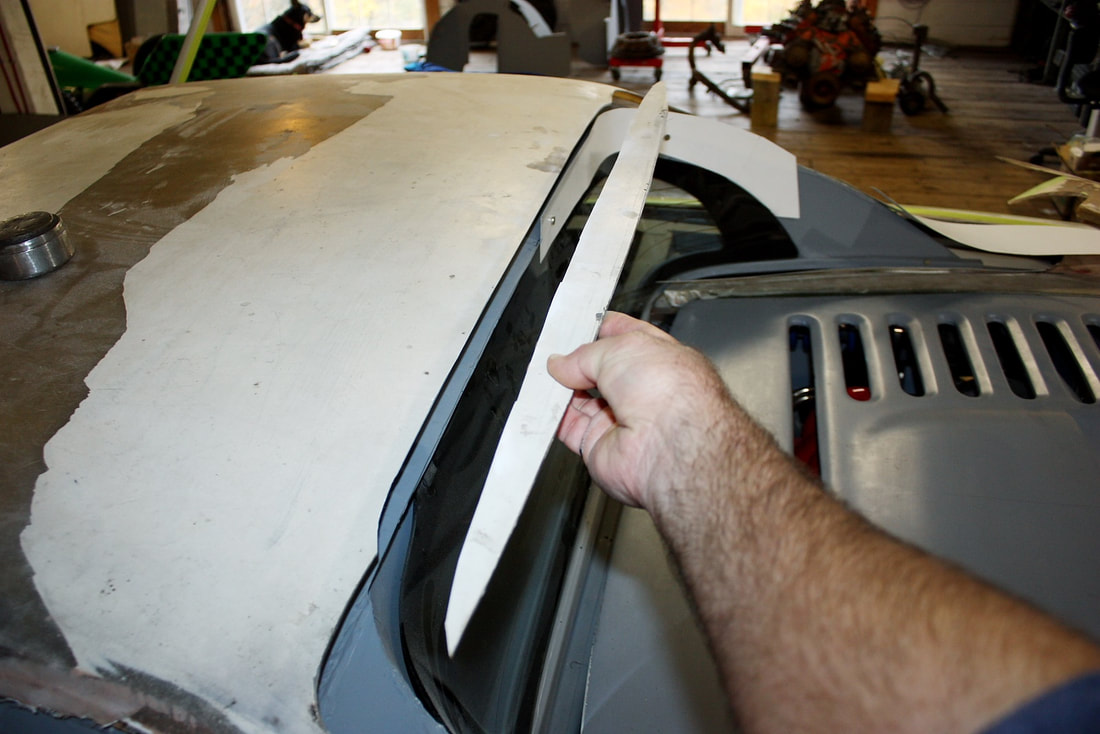
I trimmed off the old convex edge of the windshield header to follow the rear edge of my metal roof:
I trimmed off the old convex edge of the windshield header to follow the rear edge of my metal roof:
Then I carefully marked where I’d need to cut the roof to mate with the front half of the Fiero panel. Once again I did the dirty deed outside to keep the post modification clean-up to a minimum inside the shop:
Then I carefully marked where I’d need to cut the roof to mate with the front half of the Fiero panel. Once again I did the dirty deed outside to keep the post modification clean-up to a minimum inside the shop:
The two panels were remarkably similar in contour at the seam when I mocked them up on the car together. The profiles weren’t a perfect match where they met at the window openings, but that entire area will need to be reworked to graft the sail panels on anyway:
The two panels were remarkably similar in contour at the seam when I mocked them up on the car together. The profiles weren’t a perfect match where they met at the window openings, but that entire area will need to be reworked to graft the sail panels on anyway:
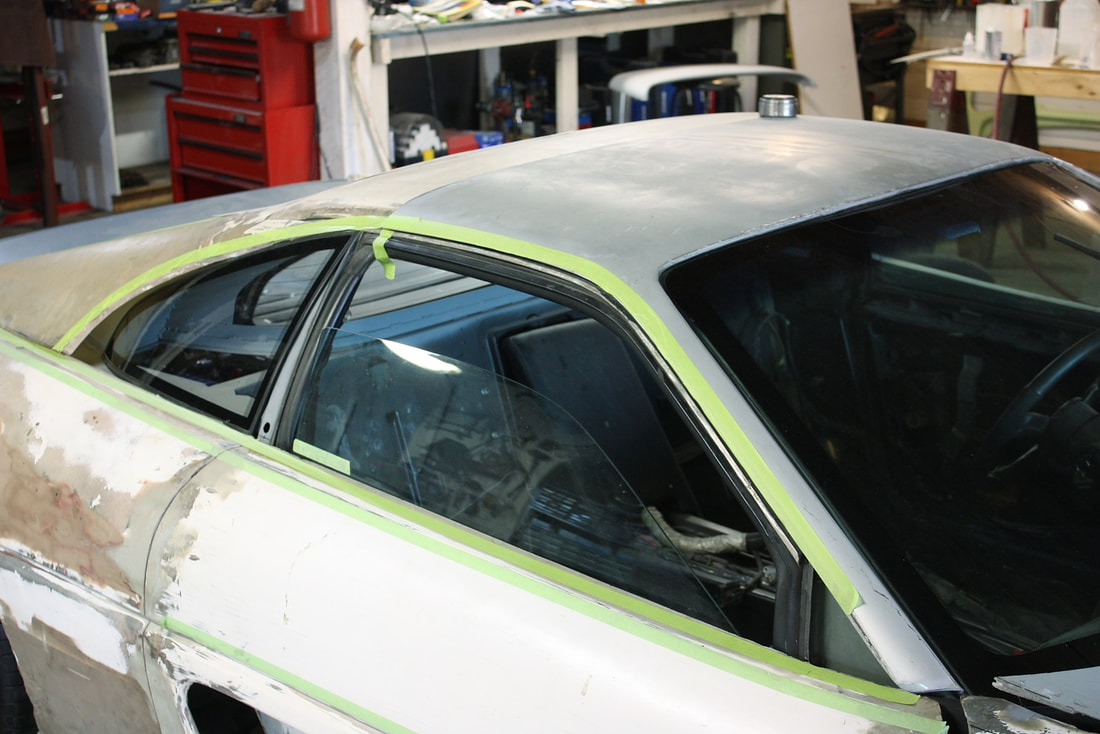
It really started to come together after a bit of fiddling, and when I mocked up the sail panels. Again, the masking tape helped me visualize what will be achievable when the pieces are grafted together and reshaped. There are still big gaps where the sail panels join up to the roof:
It really started to come together after a bit of fiddling, and when I mocked up the sail panels. Again, the masking tape helped me visualize what will be achievable when the pieces are grafted together and reshaped. There are still big gaps where the sail panels join up to the roof:
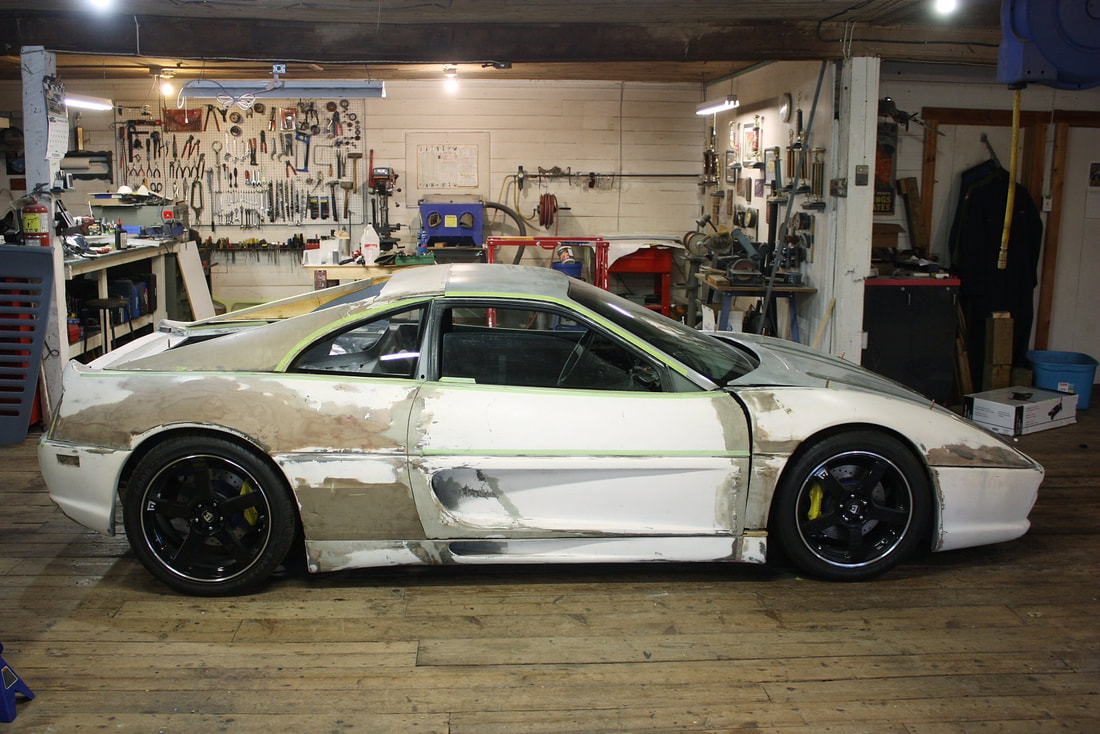
Stepping back to check out the whole car made me smile. The cabin area kept looking less and less like a Fiero with the extended windshield, side-glass treatment, and long sail panels all contributing to the new shape:
Stepping back to check out the whole car made me smile. The cabin area kept looking less and less like a Fiero with the extended windshield, side-glass treatment, and long sail panels all contributing to the new shape:
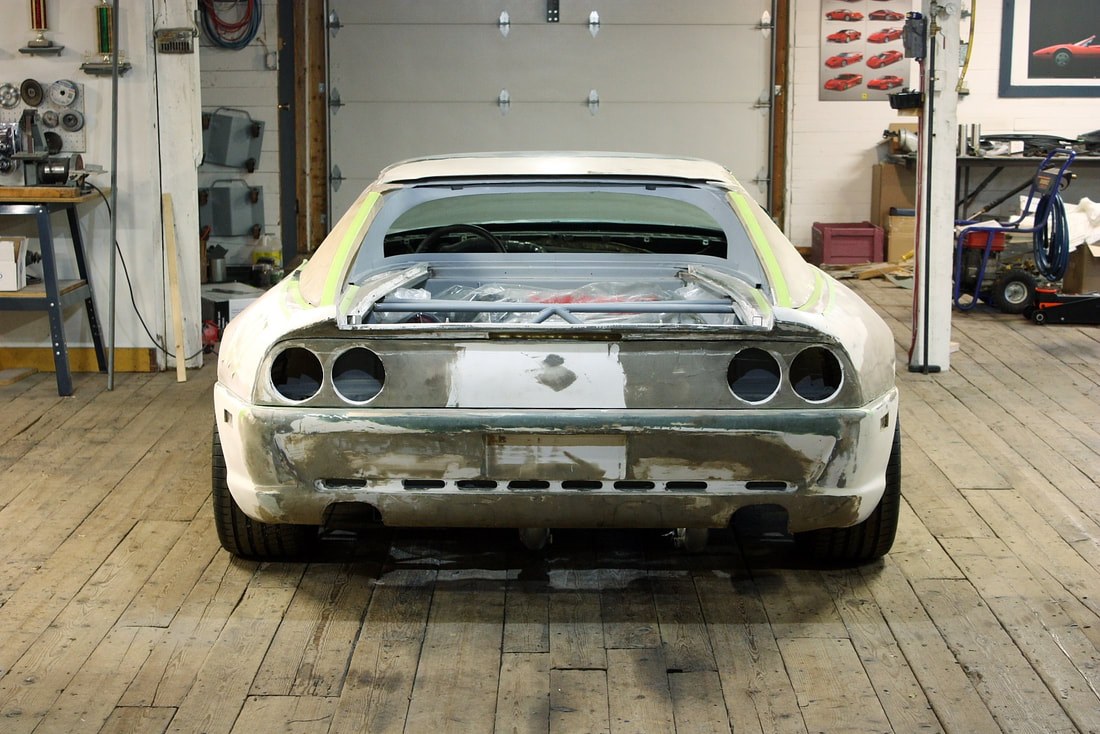
From the back, things were taking shape too. The rear edge of the roof was significantly lower, resulting in an upper rear window frame that would eventually be authentic in thickness, and the sail panels melded the wide hips to the narrow cabin:
From the back, things were taking shape too. The rear edge of the roof was significantly lower, resulting in an upper rear window frame that would eventually be authentic in thickness, and the sail panels melded the wide hips to the narrow cabin:
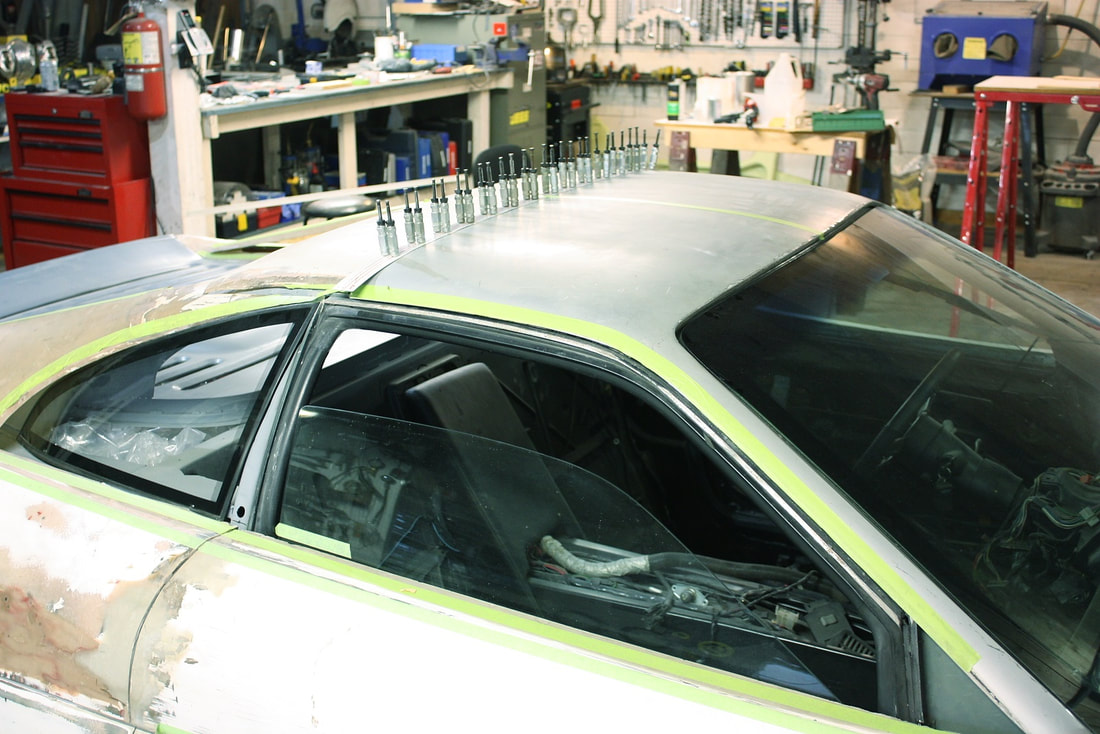
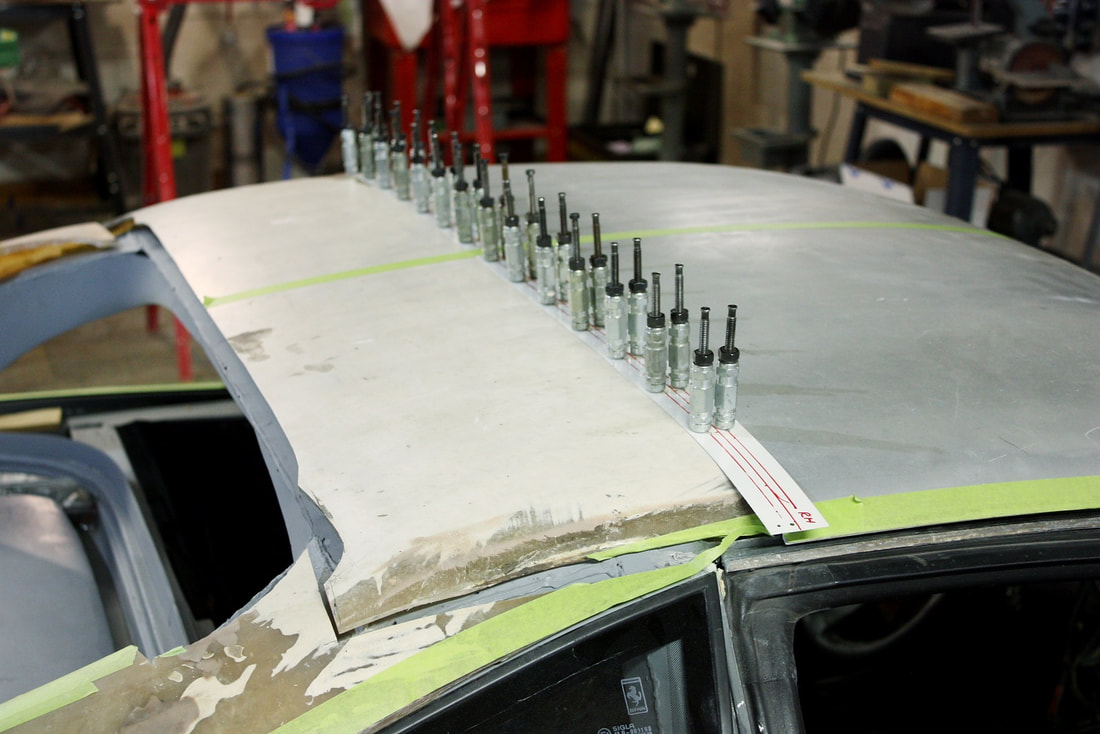
Getting back to work, I needed to find a way to join the two halves of the roof together again. I fabricated a thin metal strip and fastened it to both parts using Cleco fasteners. That pulled the panel halves tight against the bottom side of the metal strip, and held the outer skins at the same relative height:
Getting back to work, I needed to find a way to join the two halves of the roof together again. I fabricated a thin metal strip and fastened it to both parts using Cleco fasteners. That pulled the panel halves tight against the bottom side of the metal strip, and held the outer skins at the same relative height:
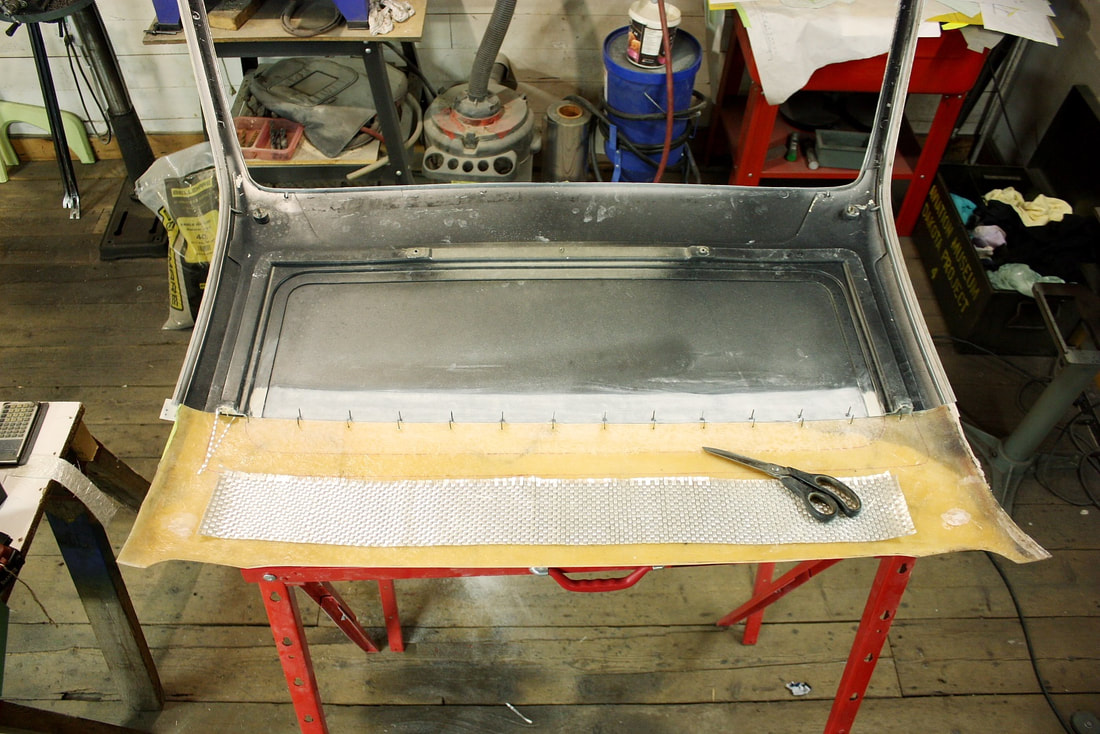
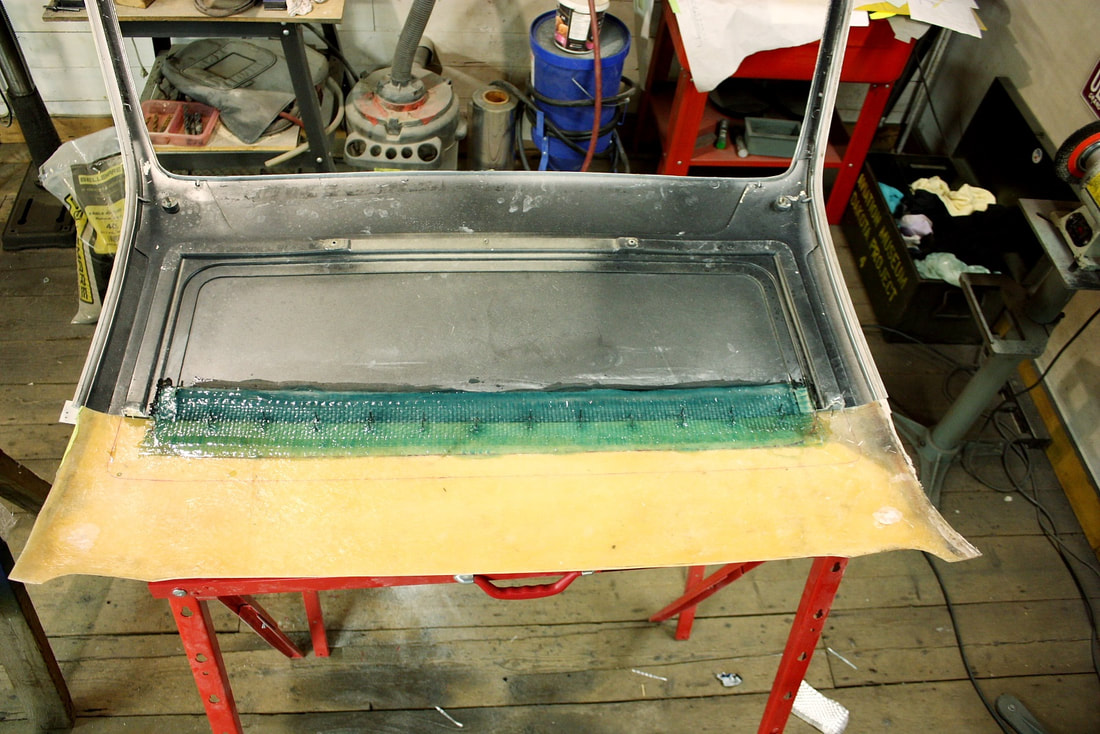
Once they were tightly secured together, I removed the roof panel, flipped it upside down, and prepped the two halves for a fibreglass splice:
Once they were tightly secured together, I removed the roof panel, flipped it upside down, and prepped the two halves for a fibreglass splice:
The Fiero-half of the roof panel is made with Sheet Molded Compound, or SMC, which uses a different resin than normal polyester-based fibreglass. Polyester resin won’t bond very well to SMC, so a special hybrid resin is required to make repairs when bonding the two materials together. This is stuff I used:
The Fiero-half of the roof panel is made with Sheet Molded Compound, or SMC, which uses a different resin than normal polyester-based fibreglass. Polyester resin won’t bond very well to SMC, so a special hybrid resin is required to make repairs when bonding the two materials together. This is stuff I used:

It mixes up pretty much the same way as normal resin except the hardener comes in a cream rather than liquid Methyl Ethyl Keytone Peroxide (MEKP). I laid up two layers of heavy woven cloth without any concern for making a flush patch since the headliner would hide this part of the roof:
It mixes up pretty much the same way as normal resin except the hardener comes in a cream rather than liquid Methyl Ethyl Keytone Peroxide (MEKP). I laid up two layers of heavy woven cloth without any concern for making a flush patch since the headliner would hide this part of the roof:
I didn’t glass the seam outboard of the sunroof webs because those areas were going to need attention from the visible side first.
Once the underside had cured, I flipped the roof right-side-up, removed the Cleco fasteners and metal strip, ground the top-side joint down to the new underlying fibreglass, beveled the joint 1.5” on either side, and laid up three layers of 1.5 oz mat using the SMC resin:

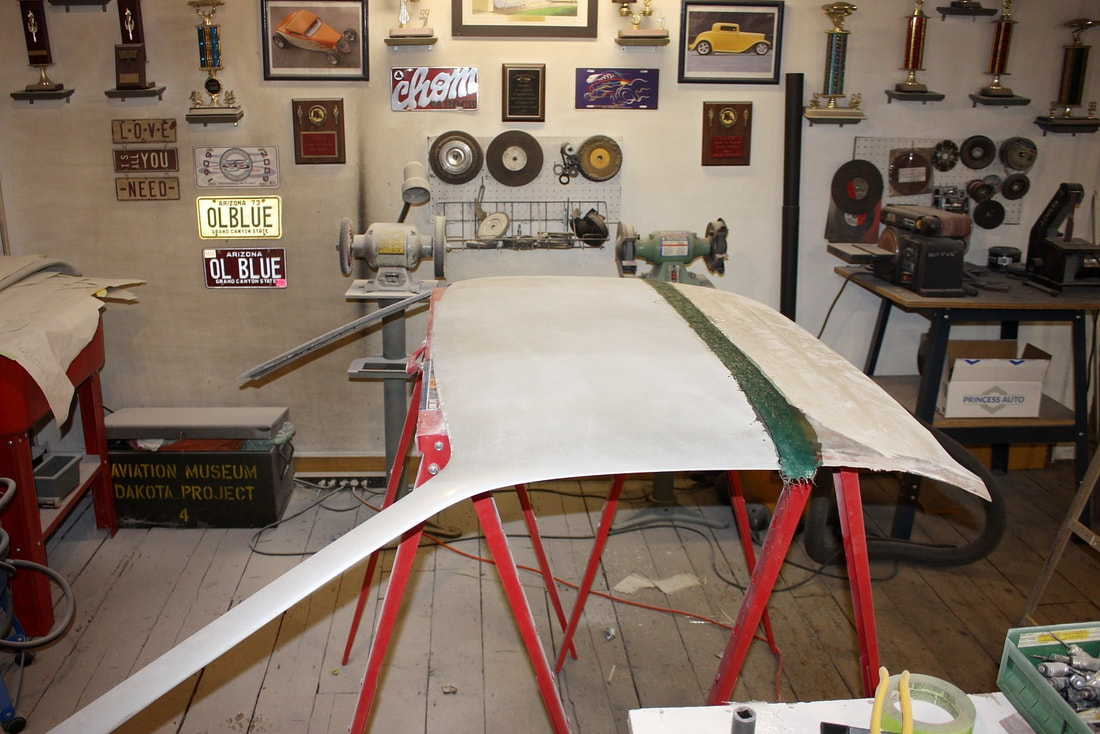
I let it cure overnight and came away happy with the way it turned out. Obviously it’ll need refinishing, but the two pieces are now as one:
I let it cure overnight and came away happy with the way it turned out. Obviously it’ll need refinishing, but the two pieces are now as one:

 RSS Feed
