I left off in my last post waiting for a prototype scissor hinge to be 3D printed in ABS plastic. It took about a week for my friend to find time to squeeze my little project into his workshop’s schedule, but it was worth the wait:
I left off in my last post waiting for a prototype scissor hinge to be 3D printed in ABS plastic. It took about a week for my friend to find time to squeeze my little project into his workshop’s schedule, but it was worth the wait:

He delivered the six links only after being unable to keep himself from sticking them together to see if they’d work. They did:
He delivered the six links only after being unable to keep himself from sticking them together to see if they’d work. They did:

In fact, they rotated throughout the needed range and just kept going! I’m counting on using gas springs as a travel limiter on the upward swing, so to test out the idea I quickly mocked up the hinges and fake gas springs I’d made for the front compartment lid onto a piece of perforated angle. Then I played around with the location of the upper spring mount until I found the sweet spot:
In fact, they rotated throughout the needed range and just kept going! I’m counting on using gas springs as a travel limiter on the upward swing, so to test out the idea I quickly mocked up the hinges and fake gas springs I’d made for the front compartment lid onto a piece of perforated angle. Then I played around with the location of the upper spring mount until I found the sweet spot:
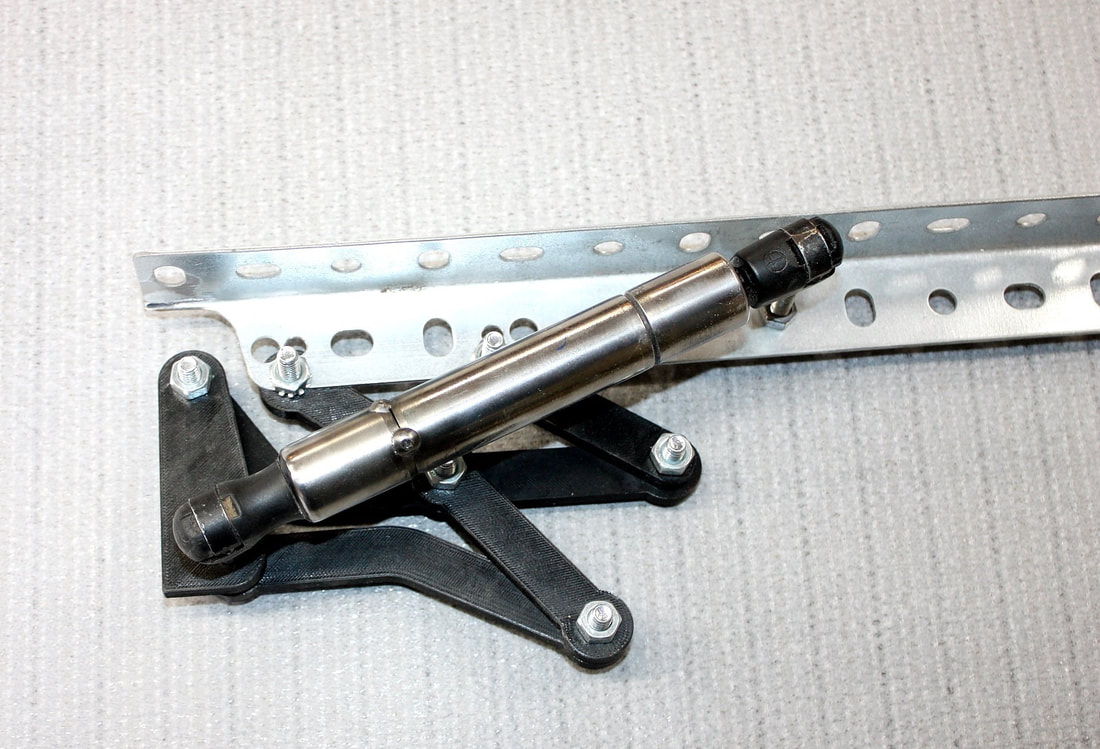
One of the mistakes I made at first was to orient the gas spring with the piston facing upward instead of downward, which created some minor clearance issues. The piston has to face downward to keep it and the seal lubricated.
One of the mistakes I made at first was to orient the gas spring with the piston facing upward instead of downward, which created some minor clearance issues. The piston has to face downward to keep it and the seal lubricated.

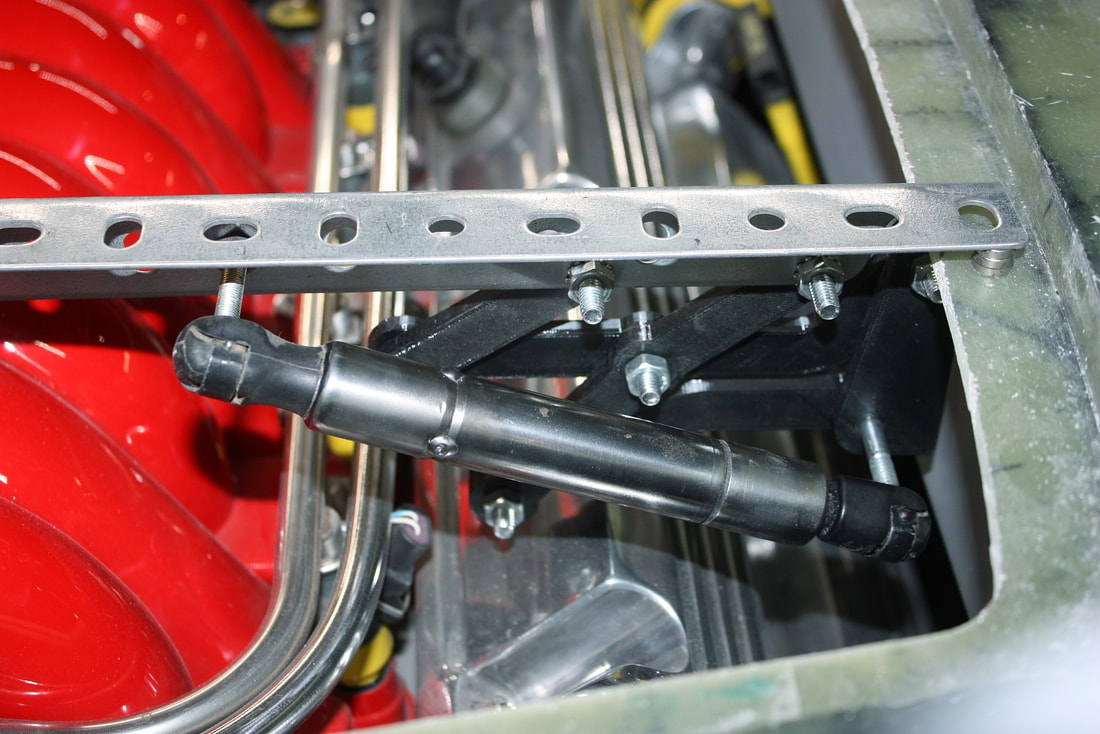
With my assembled prototype, I mocked up the hinge into the chassis to ensure adequate clearances to the engine in both left and right hand locations, to figure out how to mount them to the chassis and the underside of the deck lid, and to calculate exactly how much room above the hinge was left for the square tube perimeter frame I planned on attaching to the underside of the deck lid:
With my assembled prototype, I mocked up the hinge into the chassis to ensure adequate clearances to the engine in both left and right hand locations, to figure out how to mount them to the chassis and the underside of the deck lid, and to calculate exactly how much room above the hinge was left for the square tube perimeter frame I planned on attaching to the underside of the deck lid:
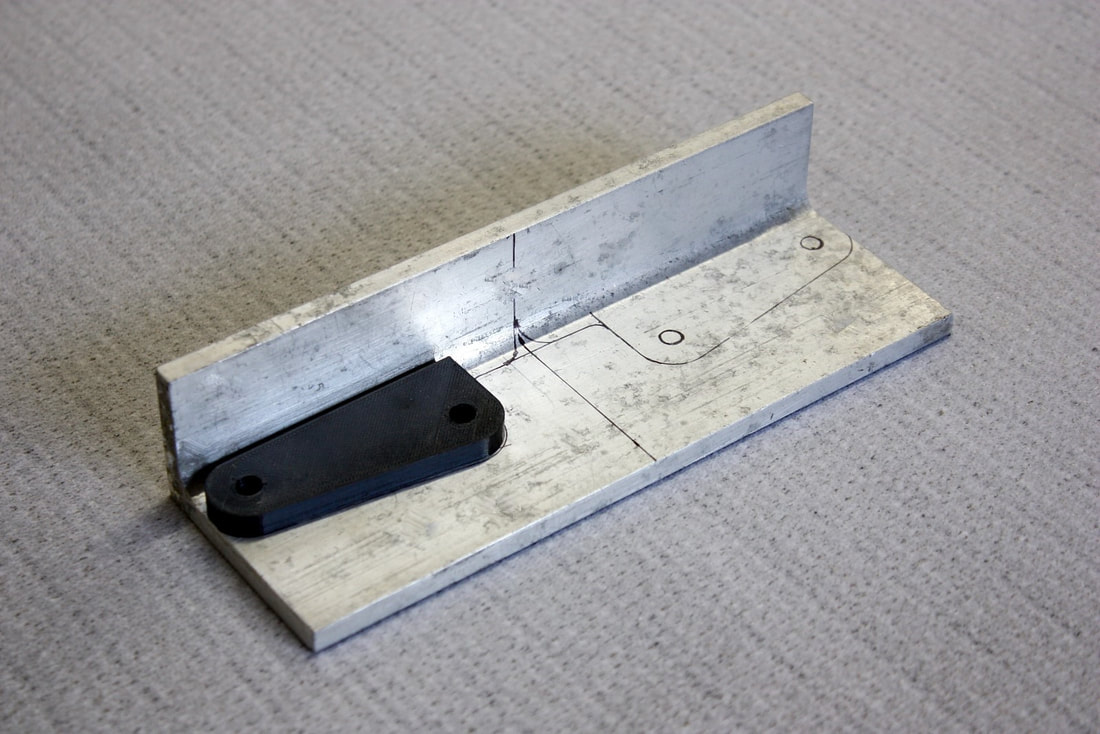
The plastic chassis mount was just a simple flat piece for the prototype, but it needed to be made from a 90 degree angle to be able to mount it. With my new insights in hand, I started making the lower mount out of some 1.5” x 1.5” x ¼” thick 6061-T6 aluminum angle I had lying around:
The plastic chassis mount was just a simple flat piece for the prototype, but it needed to be made from a 90 degree angle to be able to mount it. With my new insights in hand, I started making the lower mount out of some 1.5” x 1.5” x ¼” thick 6061-T6 aluminum angle I had lying around:
I had enough material to make the mirror image of each part, one for the right and one left hinge mount, so I made both then got carried away and polished them!:
I had enough material to make the mirror image of each part, one for the right and one left hinge mount, so I made both then got carried away and polished them!:

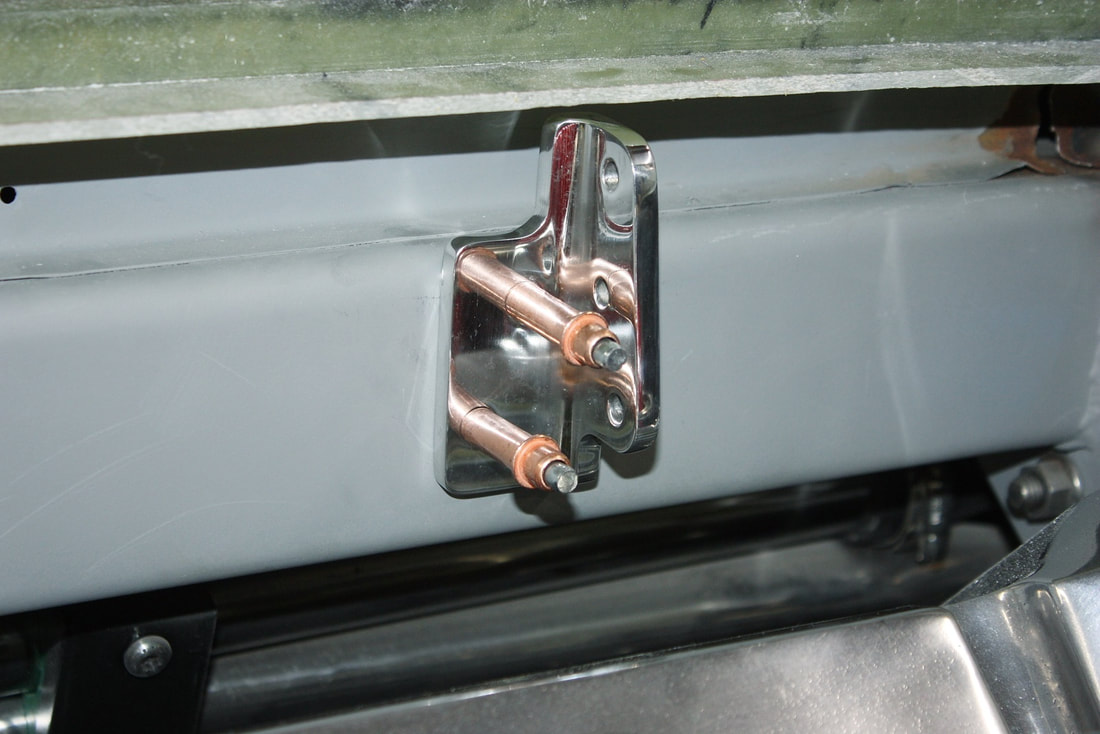
The right side hinge mount was a clean installation… directly onto the 3” x 4” cross car square tube I installed for the shock mounts way back in post #48:
The right side hinge mount was a clean installation… directly onto the 3” x 4” cross car square tube I installed for the shock mounts way back in post #48:
The left hand side was a bit trickier because its ideal location fell neatly between the mounting ears of the torque strut. The most difficult part was getting the holes drilled into the beam with the engine in the way. I got around this by cutting a drill bit down to about 2” long, re-sharpening it with my Drill Dr., and installing it in a right angle die grinder:
The left hand side was a bit trickier because its ideal location fell neatly between the mounting ears of the torque strut. The most difficult part was getting the holes drilled into the beam with the engine in the way. I got around this by cutting a drill bit down to about 2” long, re-sharpening it with my Drill Dr., and installing it in a right angle die grinder:
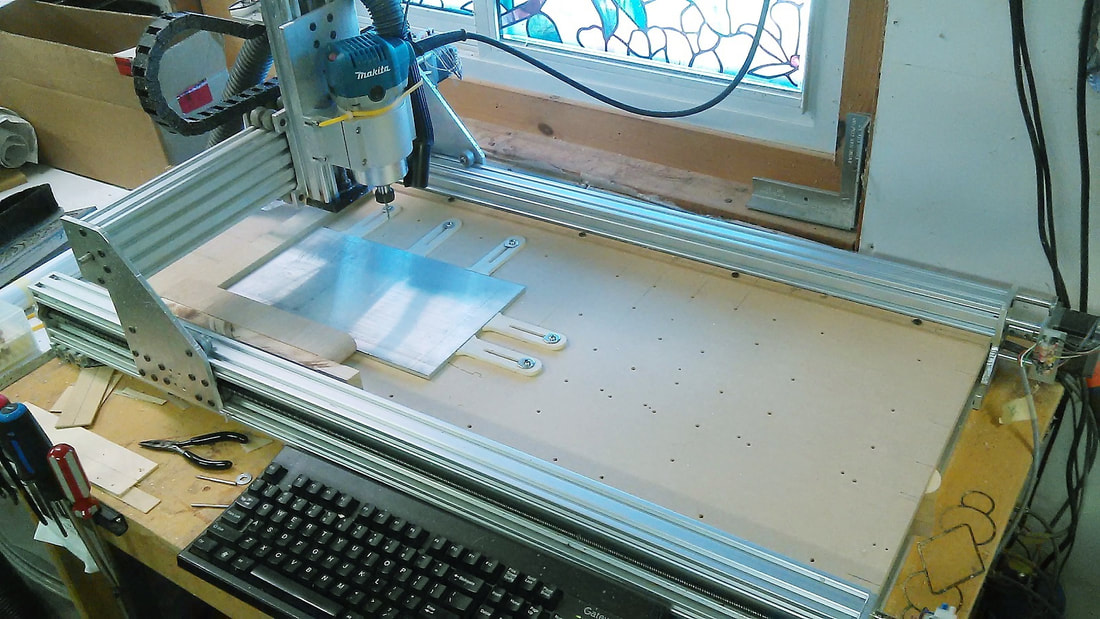
While this was going on, I sent the electronic file for the four middle links off to my brother in Ontario where he agreed to mill them out of ¼” aluminum plate using his homemade CNC mill. From the .STL files I sent of each link, he created a cut file to minimize wastage:
While this was going on, I sent the electronic file for the four middle links off to my brother in Ontario where he agreed to mill them out of ¼” aluminum plate using his homemade CNC mill. From the .STL files I sent of each link, he created a cut file to minimize wastage:

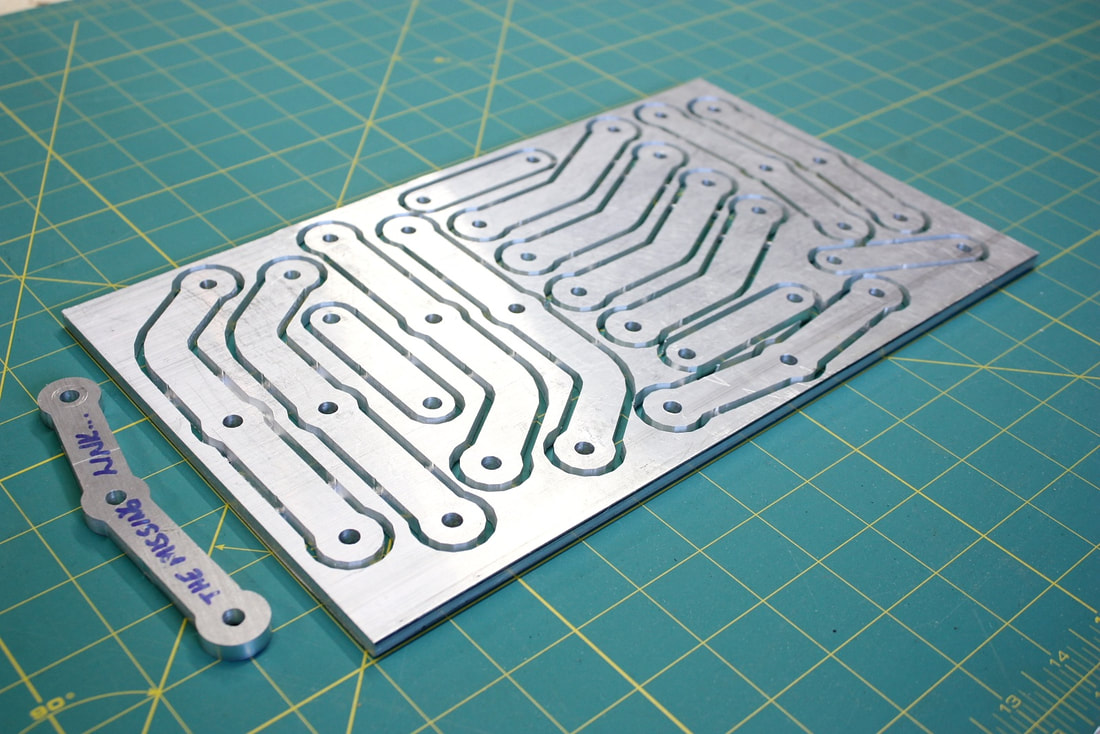
He has a small business re-manufacturing obsolete RC model kits called Summit Model Aeronautics. It was a cinch for him to cut two full sets of hinge parts in case I ever needed replacements:
He has a small business re-manufacturing obsolete RC model kits called Summit Model Aeronautics. It was a cinch for him to cut two full sets of hinge parts in case I ever needed replacements:
He left small un-machined tabs to hold each piece in place. To break out each piece, all I needed was a Dremel tool and a thin cut-off wheel:
He left small un-machined tabs to hold each piece in place. To break out each piece, all I needed was a Dremel tool and a thin cut-off wheel:
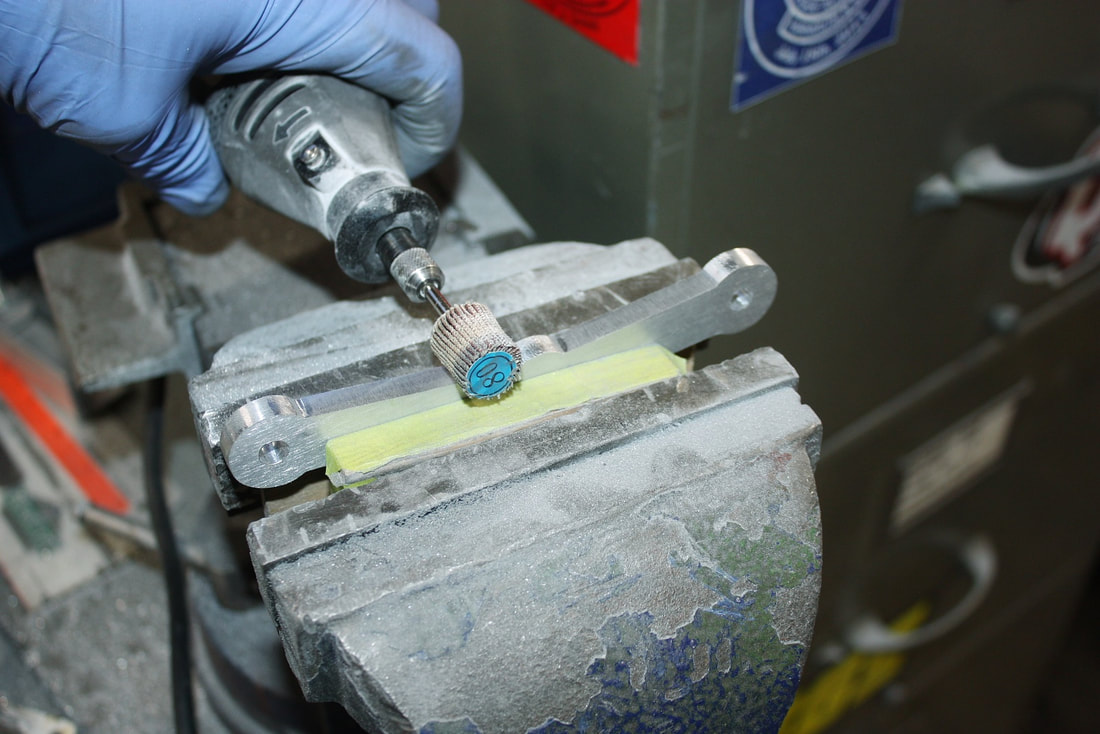
Switching tools on the Dremel, I used an 80 grit flapper wheel to sand down the little leftover bits from the tabs, and to smooth out the fine machining marks:
Switching tools on the Dremel, I used an 80 grit flapper wheel to sand down the little leftover bits from the tabs, and to smooth out the fine machining marks:
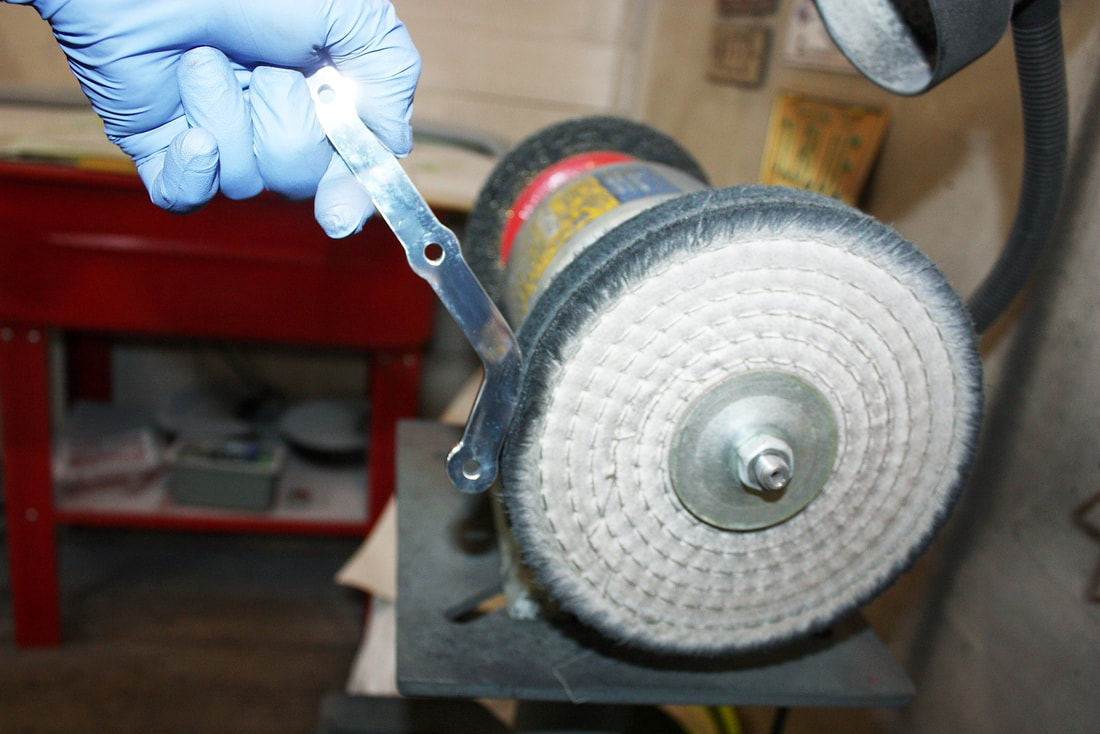
After sanding the pieces with a series of different grit papers on a sanding block, I then polished the links on my 8” buffing wheel with jeweler’s rouge:
After sanding the pieces with a series of different grit papers on a sanding block, I then polished the links on my 8” buffing wheel with jeweler’s rouge:
I then made the upper mounts from 1” x 1” x 1/8” thick aluminum angle, and polished them as well. When all the parts were complete, I assembled both hinges using stainless ¼” button head bolts and lock nuts:
I then made the upper mounts from 1” x 1” x 1/8” thick aluminum angle, and polished them as well. When all the parts were complete, I assembled both hinges using stainless ¼” button head bolts and lock nuts:
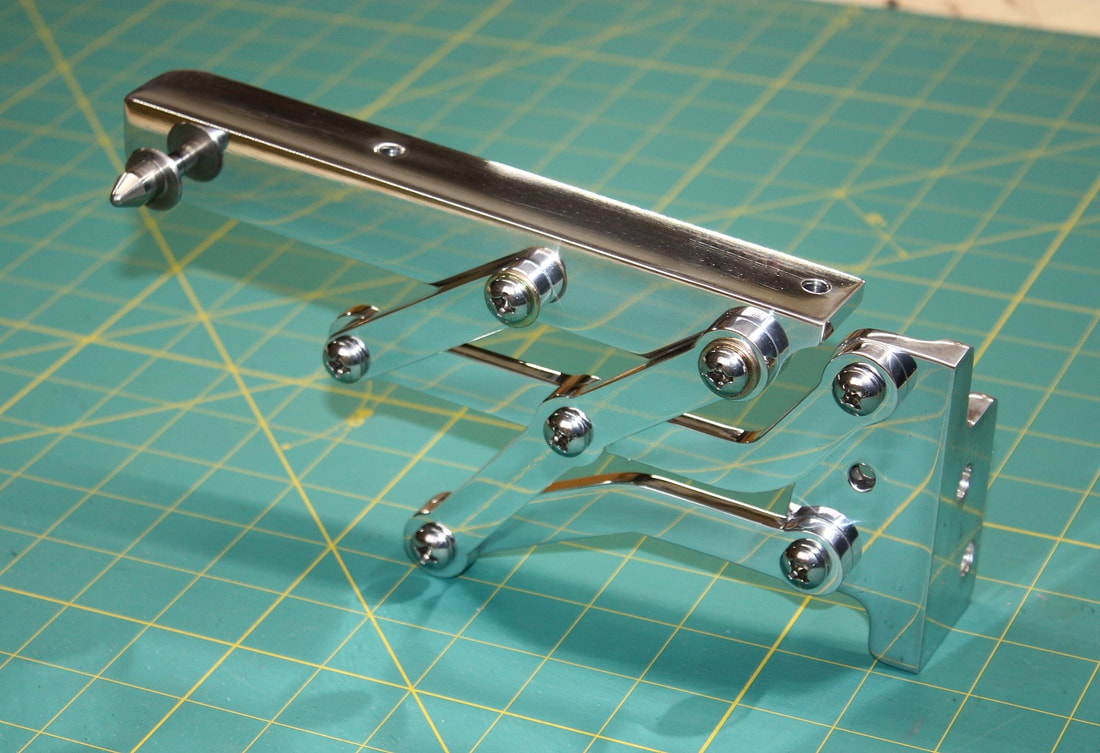
Here’s the LH hinge by itself in the open position:
Here’s the LH hinge by itself in the open position:

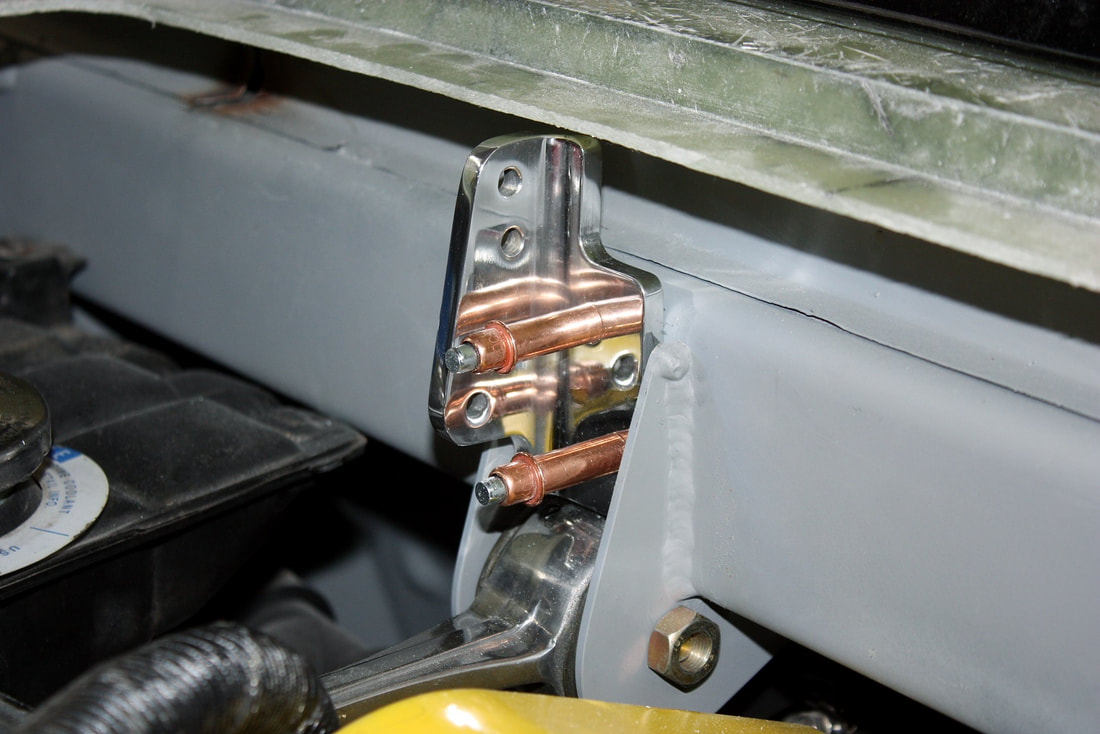
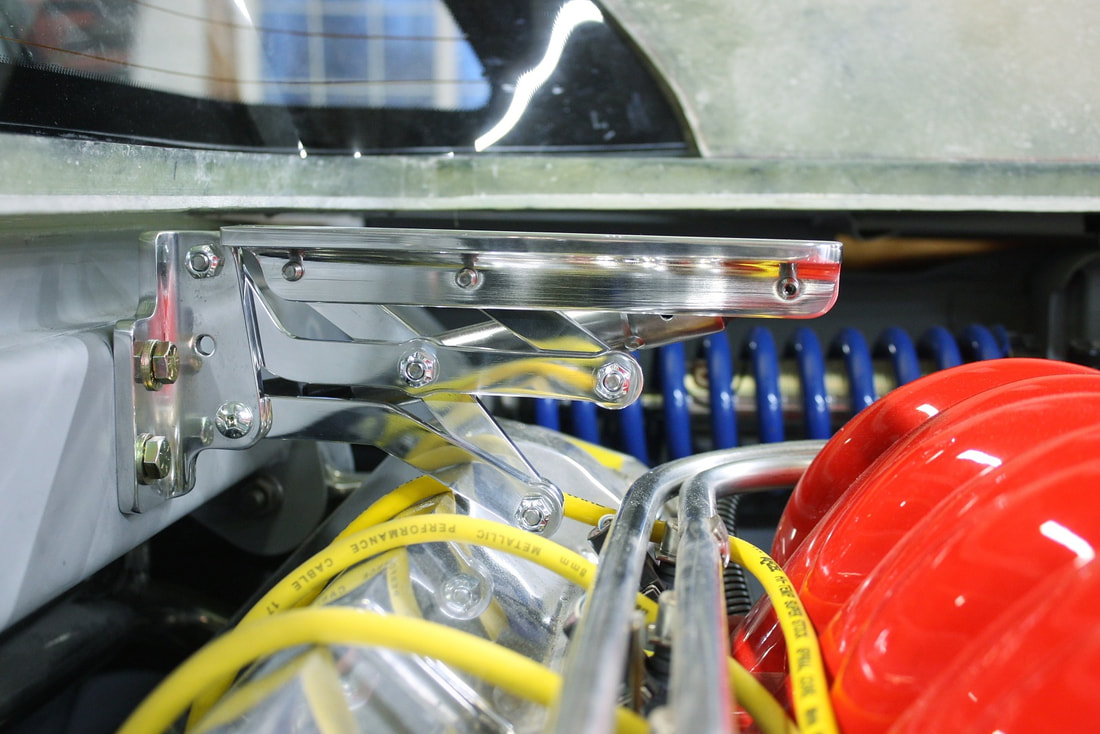
I tapped the mounting holes in the cross car beam for 5/16” bolts, and installed both hinges along with the mock gas springs to take a few photos. Here’s the RH hinge closed… notice the clearance between the lower link and the valve cover… it’s about 3/8”:
I tapped the mounting holes in the cross car beam for 5/16” bolts, and installed both hinges along with the mock gas springs to take a few photos. Here’s the RH hinge closed… notice the clearance between the lower link and the valve cover… it’s about 3/8”:
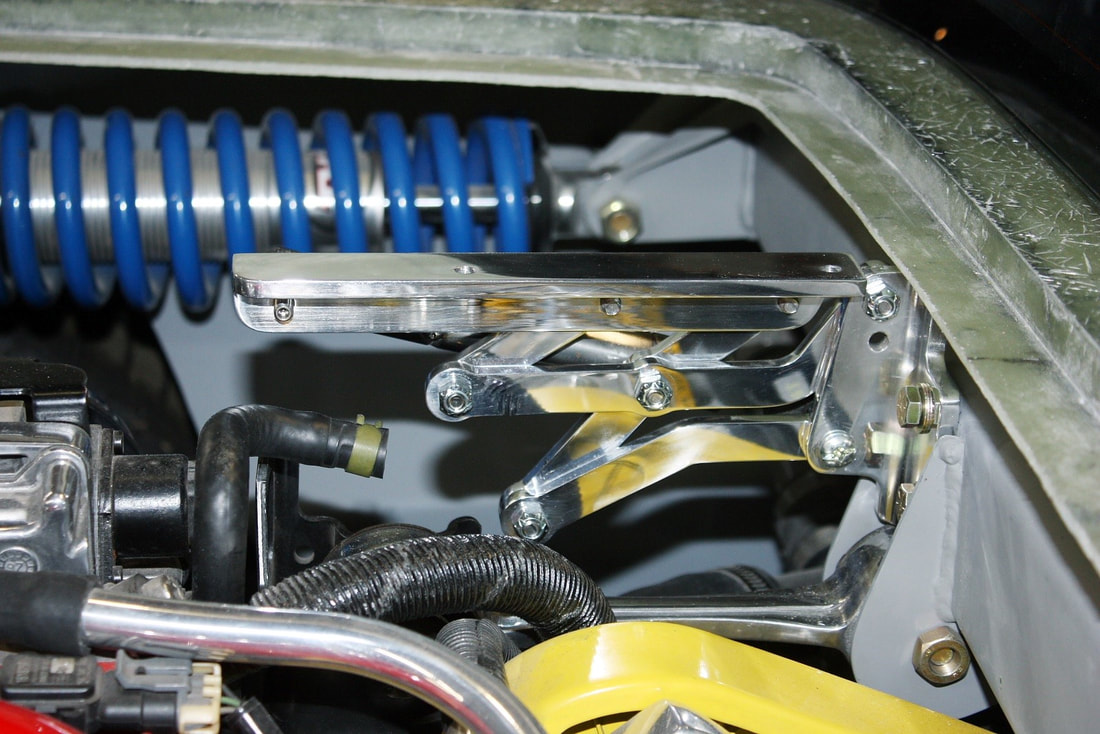
The LH hinge had less critical clearances, though the lower link still gets to within ½” of the torque strut:
The LH hinge had less critical clearances, though the lower link still gets to within ½” of the torque strut:
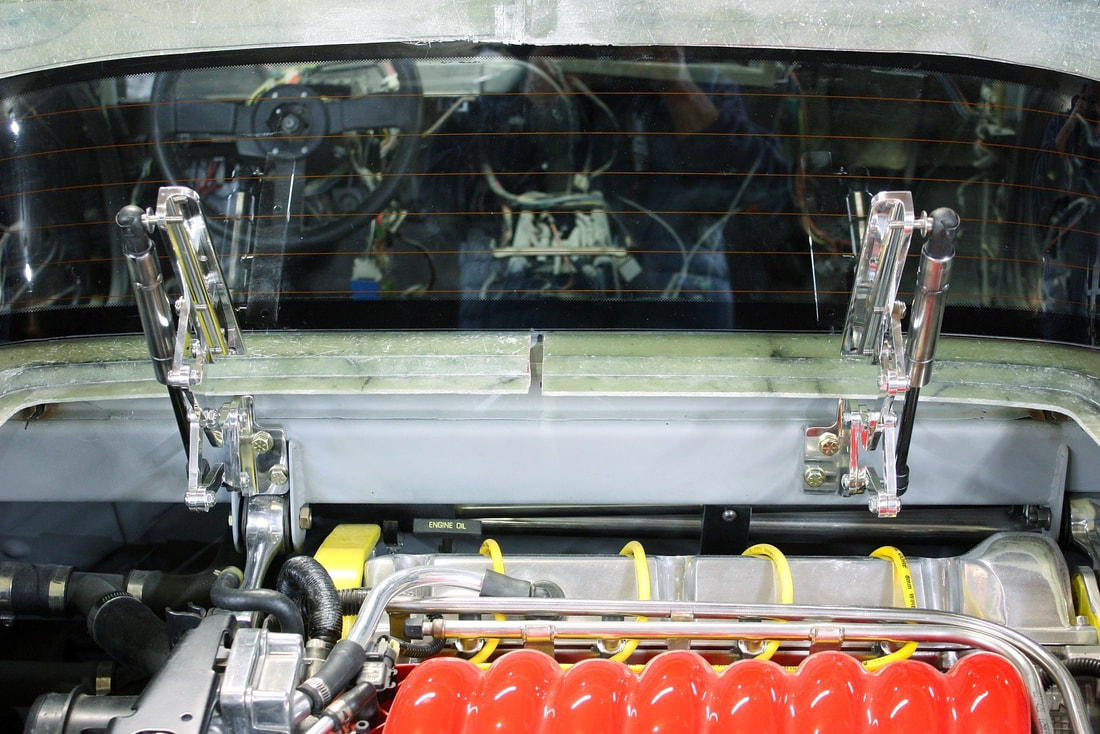
Finally, here’s a photo of both hinges in the open position, lookin’ all purdy!
Finally, here’s a photo of both hinges in the open position, lookin’ all purdy!
I have yet to calculate the spring force required of the gas springs, but I’ll need to build the deck lid frame and measure the final weight of deck lid assembly before being able to do so. That’s my next step.
I have yet to calculate the spring force required of the gas springs, but I’ll need to build the deck lid frame and measure the final weight of deck lid assembly before being able to do so. That’s my next step.

 RSS Feed
