Well, here we are at the final post in the “body mounting phase” of the project! Yay! It’s taken a little less than 3-1/2 years to get here, but if I had to do it all over again I’d still take the time to get it right rather than compromise for the sake of expediency.
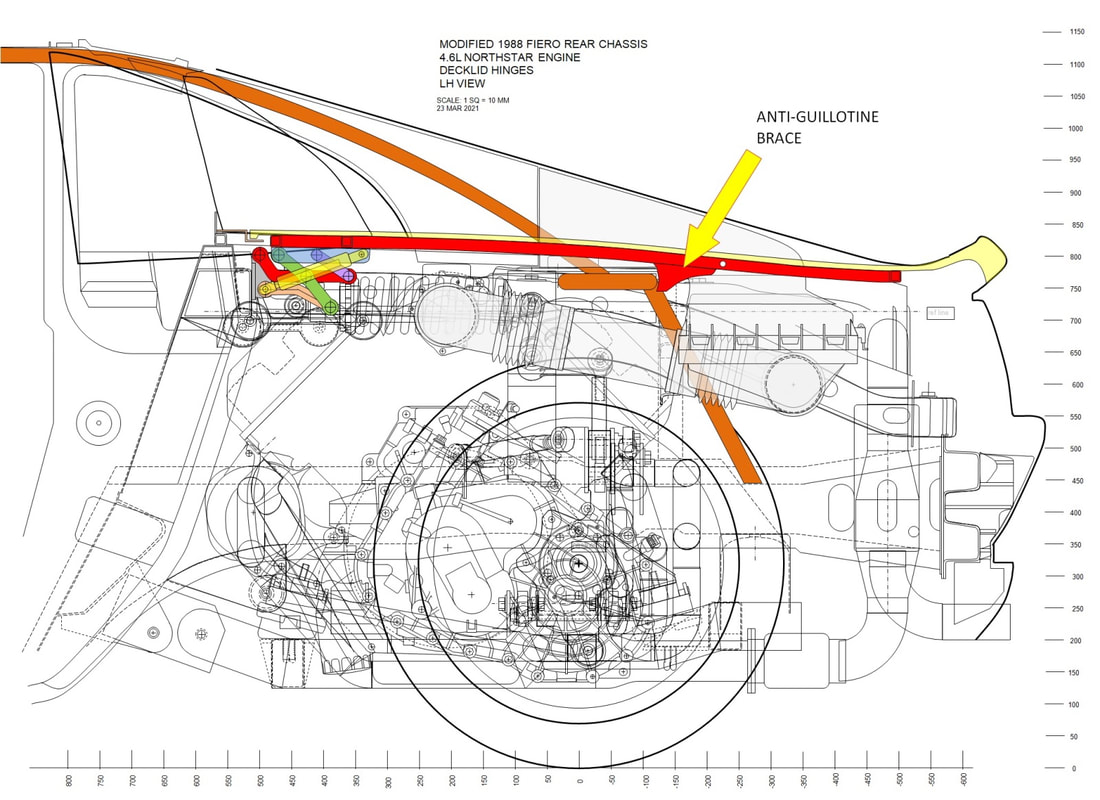
Speaking of doing it right, as I was adding more metal tubes to the deck lid frame, I considered incorporating some sort of anti-guillotine mechanism to prevent the rear deck lid from entering the passenger compartment in the event of a rear-end collision. The stiffness of the metal deck lid frame concerned me so I needed to find a way to force the lid to fold rather than push forward. By weakening the deck lid frame with a pair of strategically placed holes I could force the lid to fold wherever I wanted it to, and by hooking the frame to the chassis just ahead of the weakened frame, I could redirect the crash forces away from the hinges, which would otherwise be the weakest link.
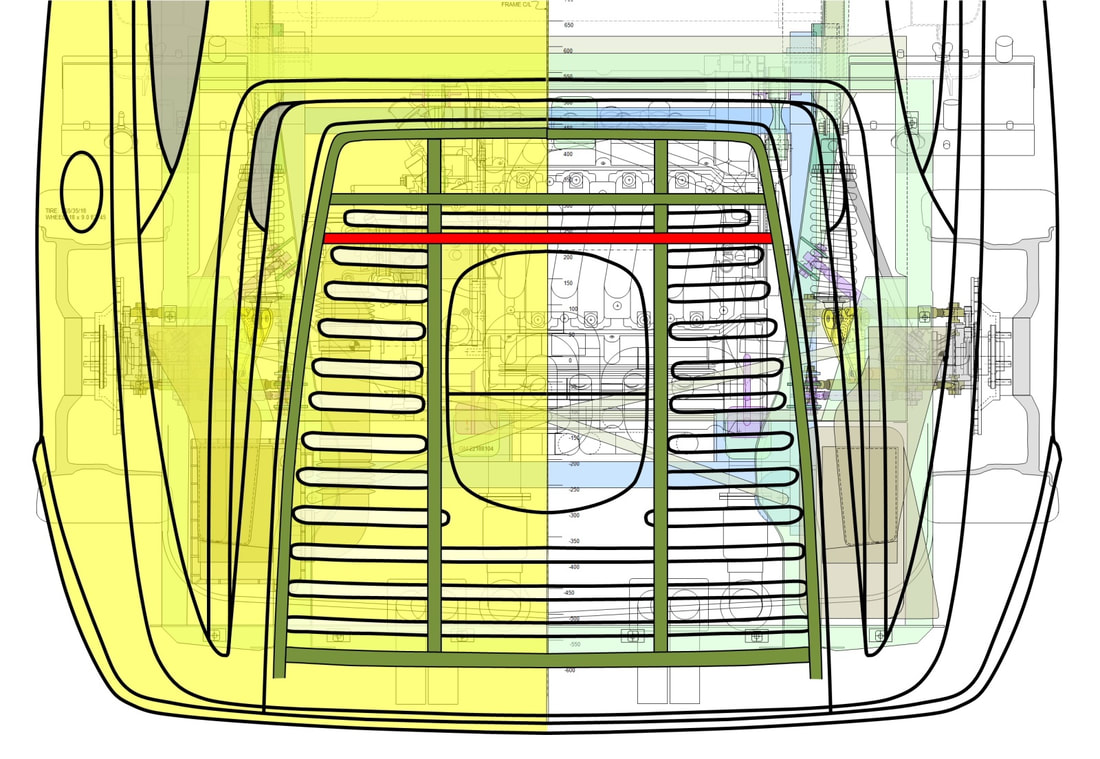
The solution was simple and easy to visualize using my side view drawings. I would drop a pair of tail-hooks down from the deck lid frame (red) to latch onto the solid cross car braces (orange) installed in post #92. Then I’d drill a pair of through-holes (white dots) immediately behind the tail hooks to weaken the deck lid frame where I wanted it to fold:
Well, here we are at the final post in the “body mounting phase” of the project! Yay! It’s taken a little less than 3-1/2 years to get here, but if I had to do it all over again I’d still take the time to get it right rather than compromise for the sake of expediency.
Speaking of doing it right, as I was adding more metal tubes to the deck lid frame, I considered incorporating some sort of anti-guillotine mechanism to prevent the rear deck lid from entering the passenger compartment in the event of a rear-end collision. The stiffness of the metal deck lid frame concerned me so I needed to find a way to force the lid to fold rather than push forward. By weakening the deck lid frame with a pair of strategically placed holes I could force the lid to fold wherever I wanted it to, and by hooking the frame to the chassis just ahead of the weakened frame, I could redirect the crash forces away from the hinges, which would otherwise be the weakest link.
The solution was simple and easy to visualize using my side view drawings. I would drop a pair of tail-hooks down from the deck lid frame (red) to latch onto the solid cross car braces (orange) installed in post #92. Then I’d drill a pair of through-holes (white dots) immediately behind the tail hooks to weaken the deck lid frame where I wanted it to fold:
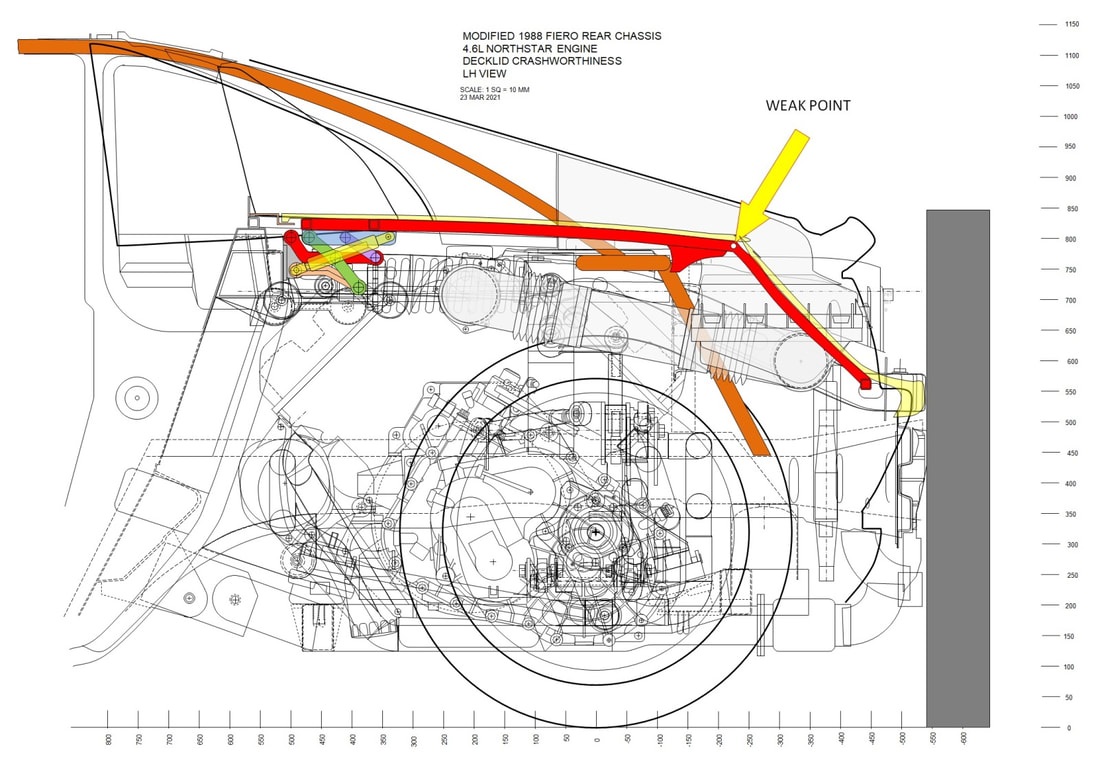
In a rear end collision, the rear half of the deck lid frame should fold just behind the tail hooks. In a severe impact, the frame would theoretically crumple up to the engine preventing any incursion of the forward half into the passenger compartment:
In a rear end collision, the rear half of the deck lid frame should fold just behind the tail hooks. In a severe impact, the frame would theoretically crumple up to the engine preventing any incursion of the forward half into the passenger compartment:
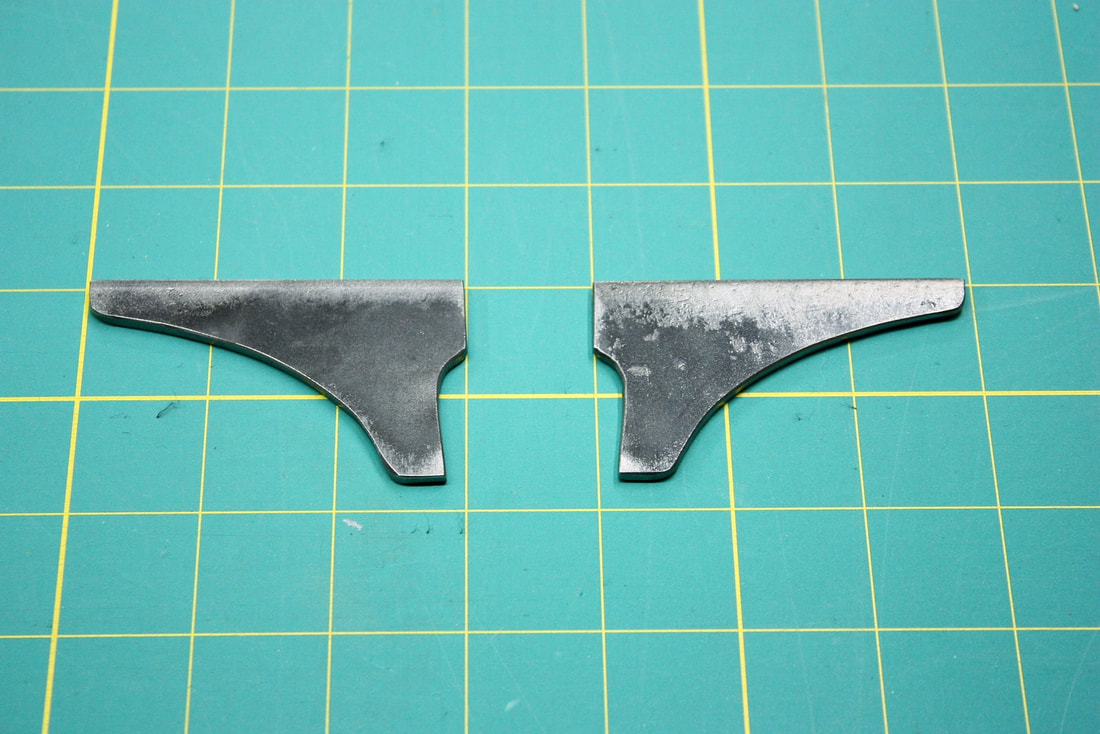
So with this plan in hand, I set about cutting some 1/8” thick tail-hooks with lots of surface area to weld to the deck lid frame:
So with this plan in hand, I set about cutting some 1/8” thick tail-hooks with lots of surface area to weld to the deck lid frame:
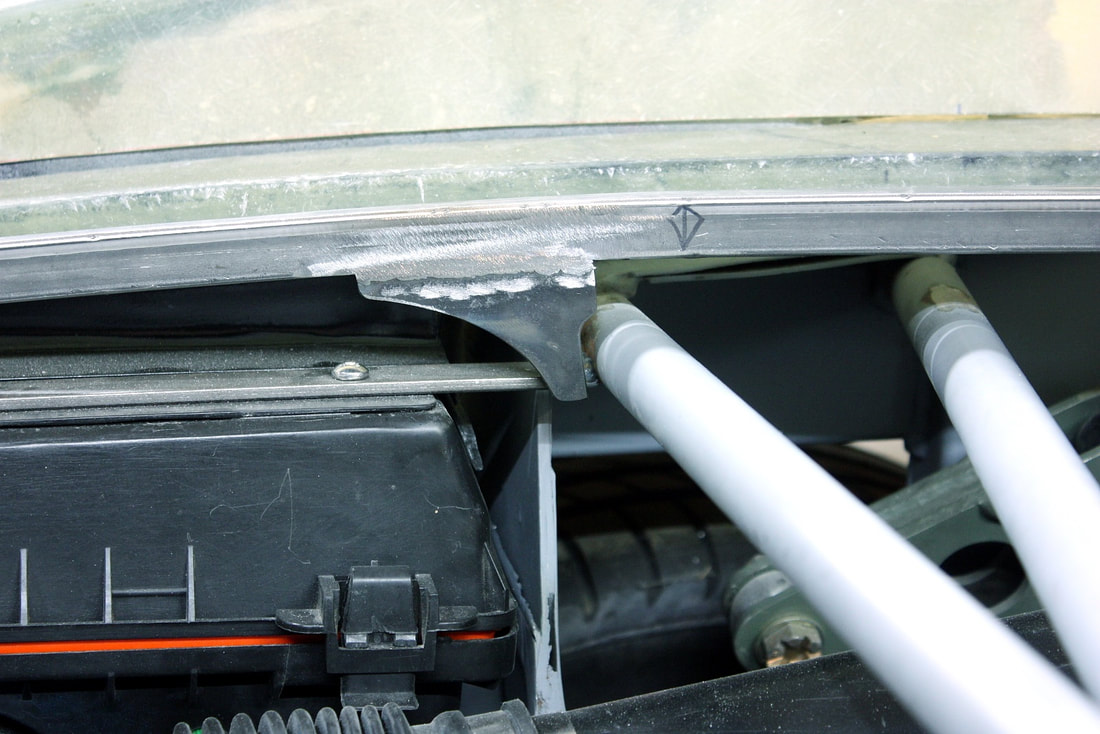
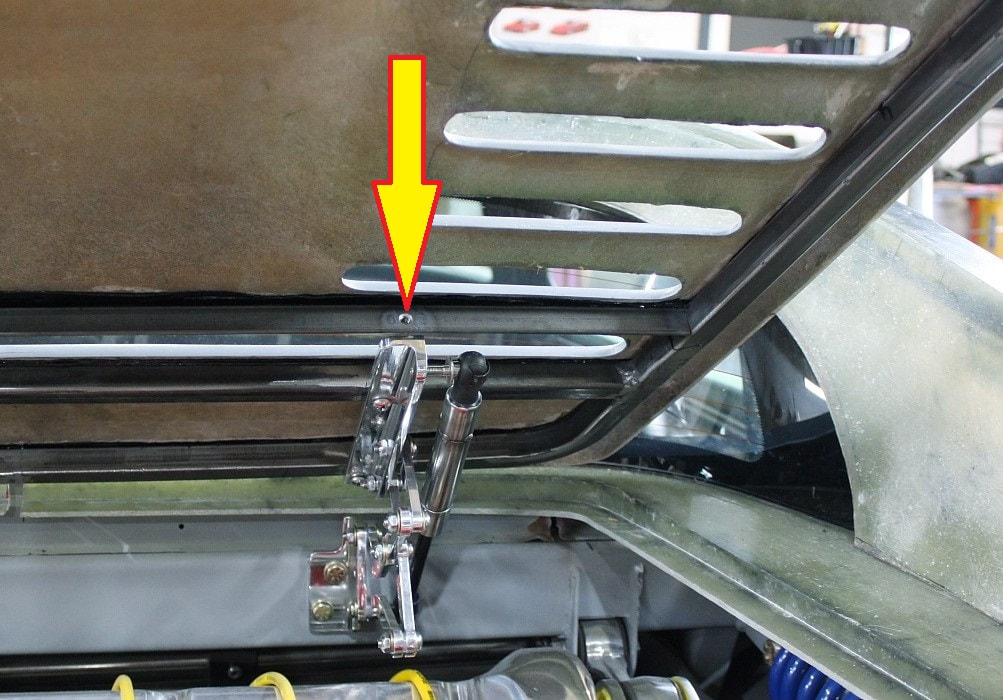
Then I welded them to the deck lid frame just behind the aft cross car tube. On the passenger side, the hook conveniently cleared the PCM cooling box by about a ½”:
Then I welded them to the deck lid frame just behind the aft cross car tube. On the passenger side, the hook conveniently cleared the PCM cooling box by about a ½”:

On the driver’s side, I had a lot more clearance around the air filter box. All that was left was to drill the weakening holes in the side rails of the frame. I decided to do this after the deck lid skin was bonded to it:
On the driver’s side, I had a lot more clearance around the air filter box. All that was left was to drill the weakening holes in the side rails of the frame. I decided to do this after the deck lid skin was bonded to it:
With that detail out of the way, I once again mocked the deck lid skin onto the frame to check if the frame I had built was stout enough to force the downward sag out of the panel:
With that detail out of the way, I once again mocked the deck lid skin onto the frame to check if the frame I had built was stout enough to force the downward sag out of the panel:

The area ahead of the first cooling slot in the skin definitely had enough support to straighten that portion of the panel, but the area just behind it still sagged unacceptably. The cure was to add one more cross lid brace to the framework like so:
The area ahead of the first cooling slot in the skin definitely had enough support to straighten that portion of the panel, but the area just behind it still sagged unacceptably. The cure was to add one more cross lid brace to the framework like so:
Rather than add a full square tube, I opted to weld in an angle to reduce weight and also because the stiffness of a full tube wasn’t needed:
Rather than add a full square tube, I opted to weld in an angle to reduce weight and also because the stiffness of a full tube wasn’t needed:
The last bit of metal work the frame needed was the addition of mounting points for what I call the mesh support bars. These are the two flat bars that run longitudinally from the hinges to the rear of the lid and whose purpose, for lack of a better understanding, is simply to hold the under hood mesh in place. I wanted to make these bars and the mesh removable to allow detailing the underside of the deck lid. Cleaning a panel behind a mesh screen can be tedious if it’s not removable.
The front mounts were easy-peasy… I just drilled a pair of holes and welded nuts behind them onto the newest cross-member:
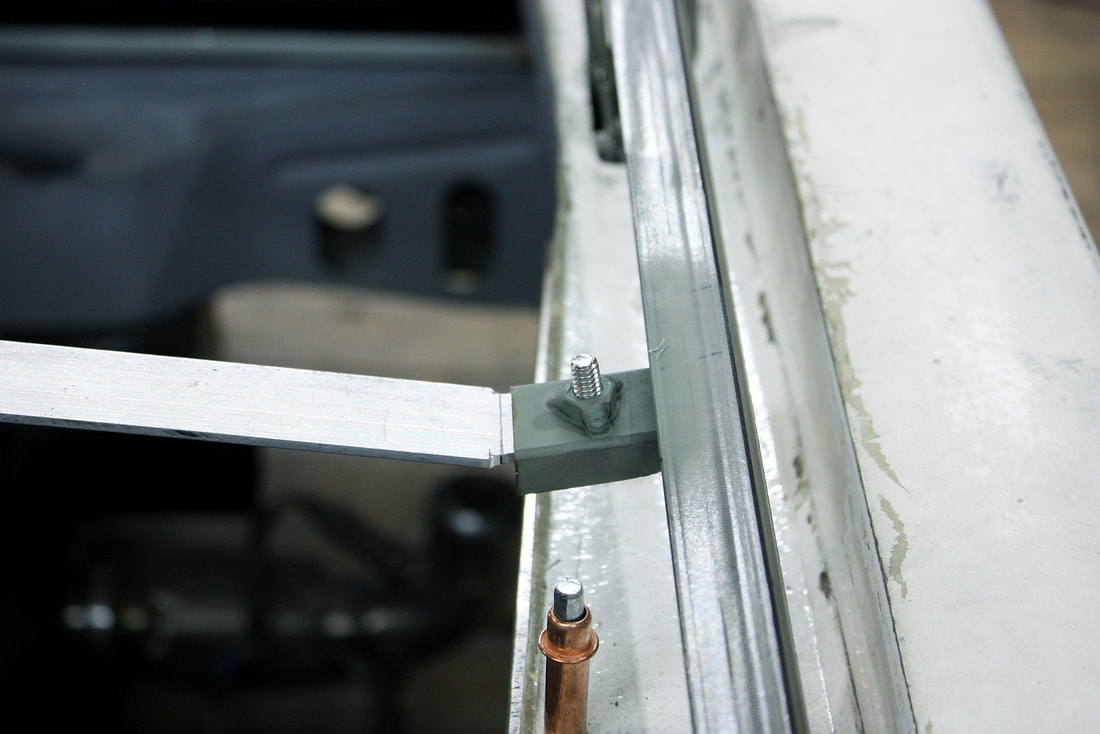
The aft mounts for the mesh support bars involved making small brackets, drilling them, and again welding nuts to the back side of them before welding the brackets to the rear cross-member:
The aft mounts for the mesh support bars involved making small brackets, drilling them, and again welding nuts to the back side of them before welding the brackets to the rear cross-member:

For the bars themselves, I used some 1” x 1/8” thick aluminum bar. They’re light weight, will fold easily in a crash, and were simple to bend to shape. Here’s how they attached to the aft mounts:
For the bars themselves, I used some 1” x 1/8” thick aluminum bar. They’re light weight, will fold easily in a crash, and were simple to bend to shape. Here’s how they attached to the aft mounts:
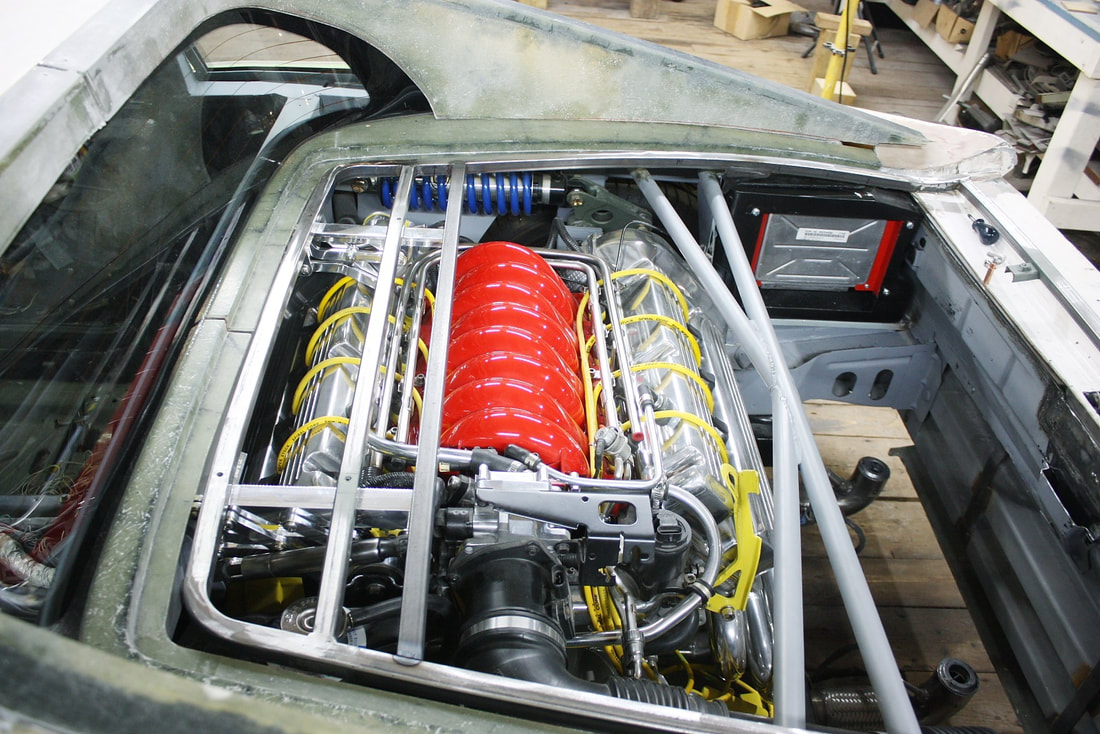
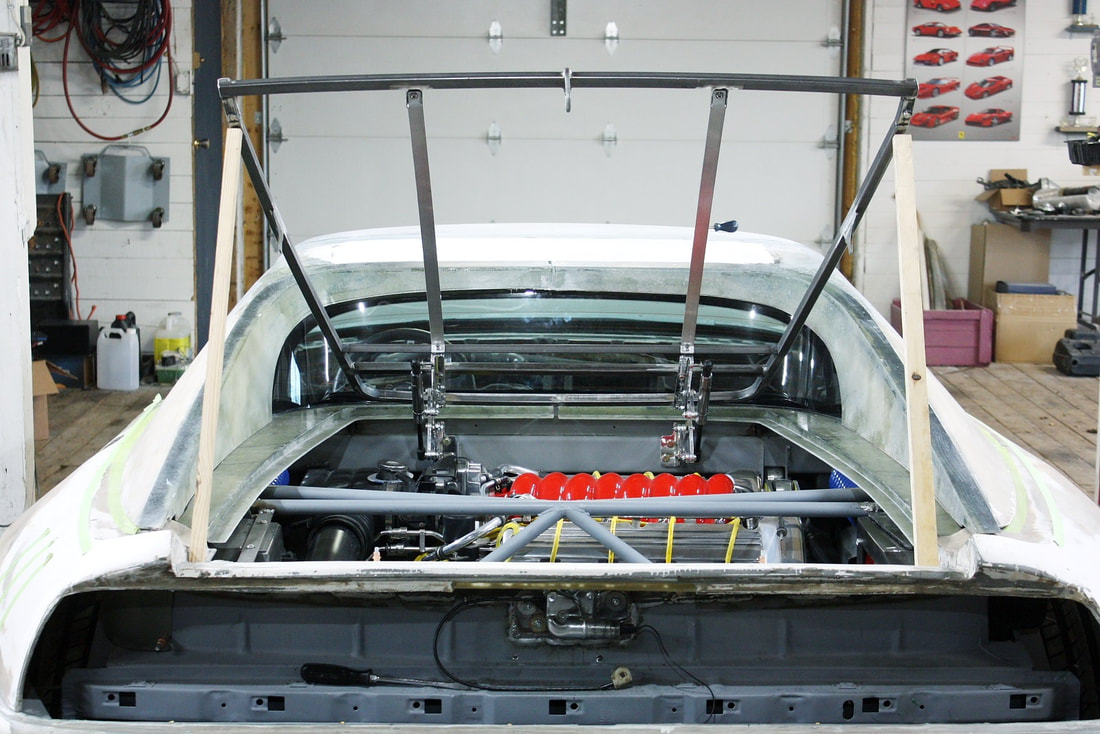
And here’s what the completed deck lid frame looked like, less the mesh, and before the skin graft:
And here’s what the completed deck lid frame looked like, less the mesh, and before the skin graft:
The final step was to bond the skin to the deck lid frame. Using a 40 grit disk, I roughed up the top side of the frame in accordance with the epoxy adhesive instructions, then re-installed the frame onto the chassis.
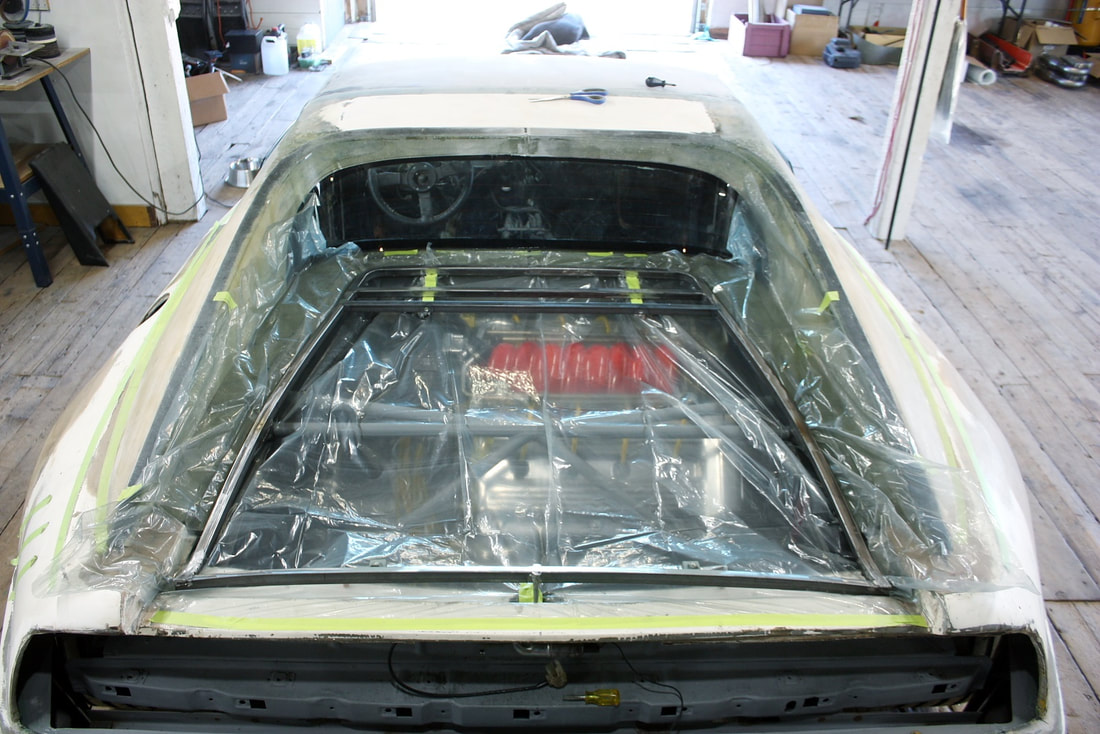
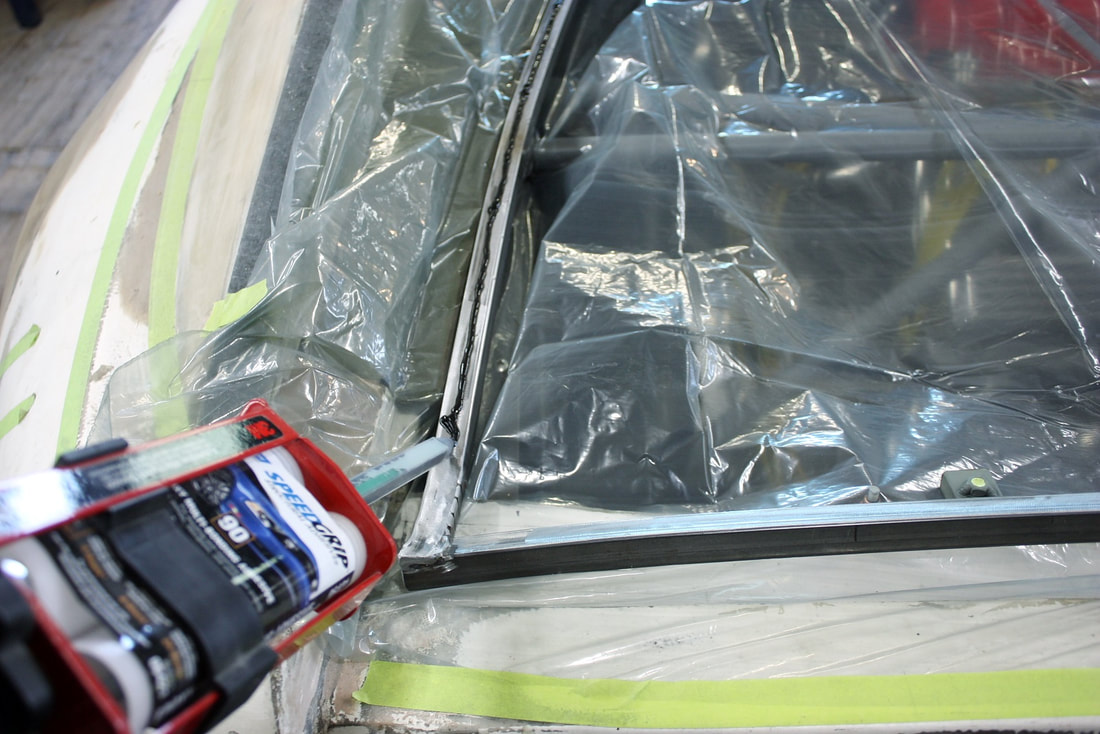
The best way to ensure the skin would be bonded precisely where it needed to be in relation to the frame, was to bond it while the frame was installed in its final position on the chassis. So I double-checked the alignment of the frame on the hinges, secured it at the rear with the latch, and installed a plastic garbage bag to protect the engine bay from accidental adhesive drips:
The final step was to bond the skin to the deck lid frame. Using a 40 grit disk, I roughed up the top side of the frame in accordance with the epoxy adhesive instructions, then re-installed the frame onto the chassis.
The best way to ensure the skin would be bonded precisely where it needed to be in relation to the frame, was to bond it while the frame was installed in its final position on the chassis. So I double-checked the alignment of the frame on the hinges, secured it at the rear with the latch, and installed a plastic garbage bag to protect the engine bay from accidental adhesive drips:
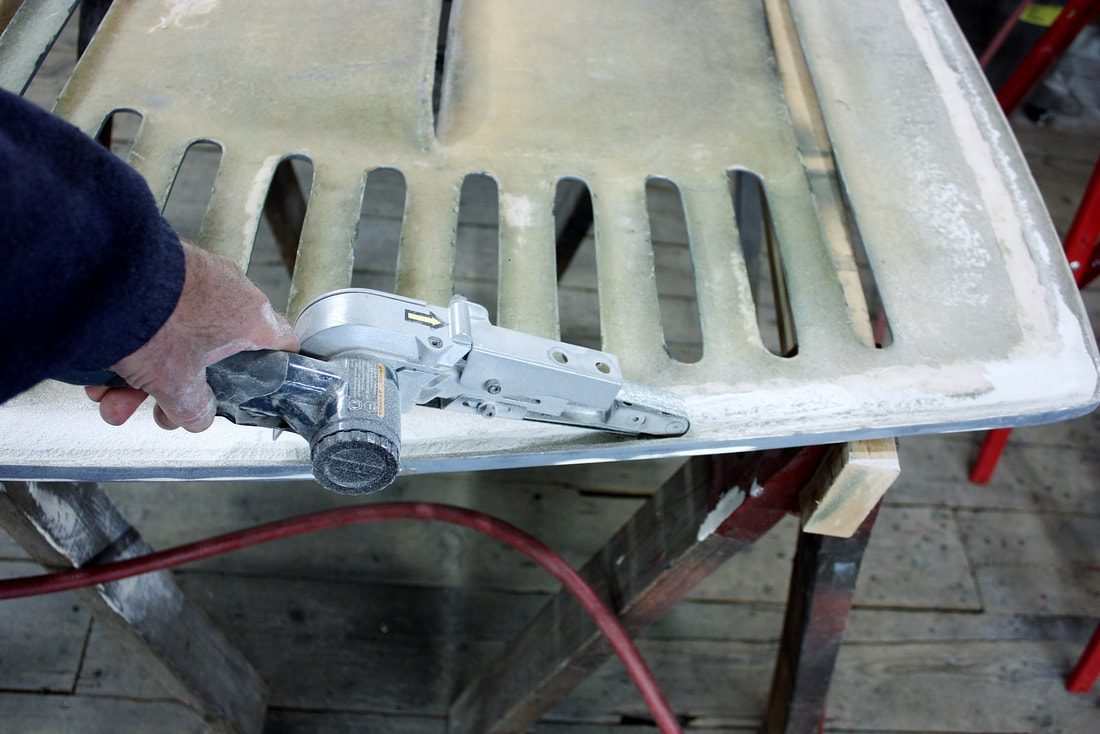
Next, I used my pneumatic belt sander to roughen the circumference of the deck lid's underside for maximum adhesion:
Next, I used my pneumatic belt sander to roughen the circumference of the deck lid's underside for maximum adhesion:
Then I applied a small bead of structural epoxy to both the underside of the lid and to the top side of the frame:
Then I applied a small bead of structural epoxy to both the underside of the lid and to the top side of the frame:
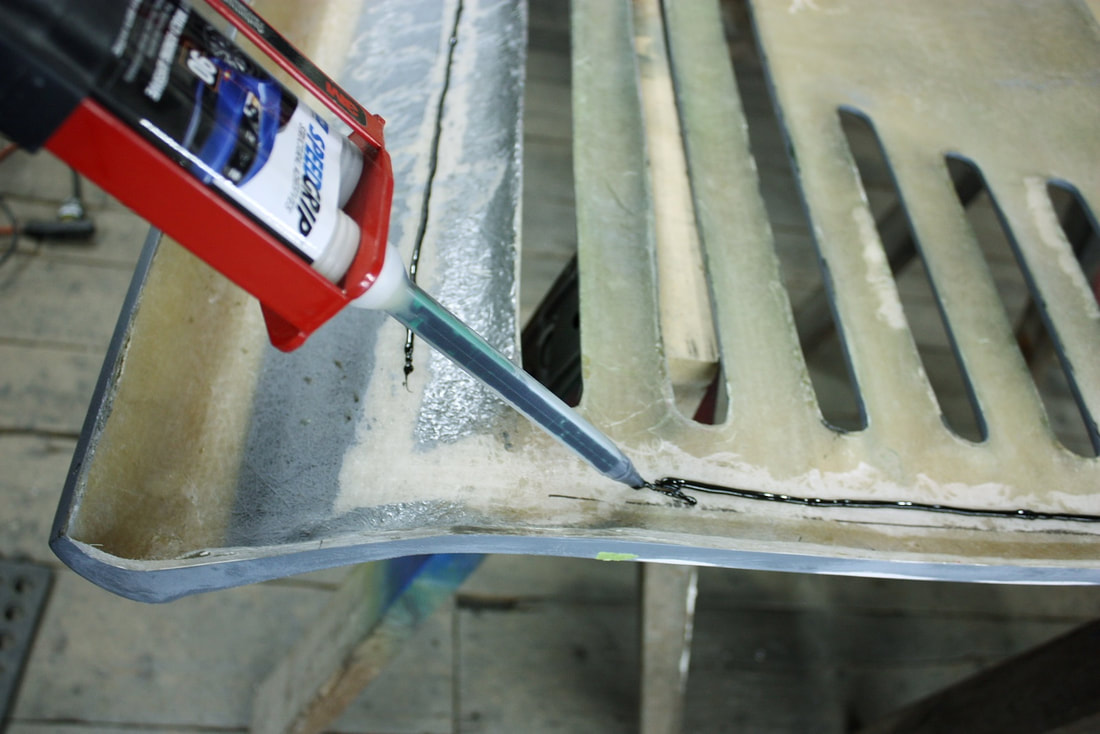
Again, following the instructions, I spread both beads out evenly across the entire bonding surfaces before adding a final larger bead to the top of the frame:
Again, following the instructions, I spread both beads out evenly across the entire bonding surfaces before adding a final larger bead to the top of the frame:
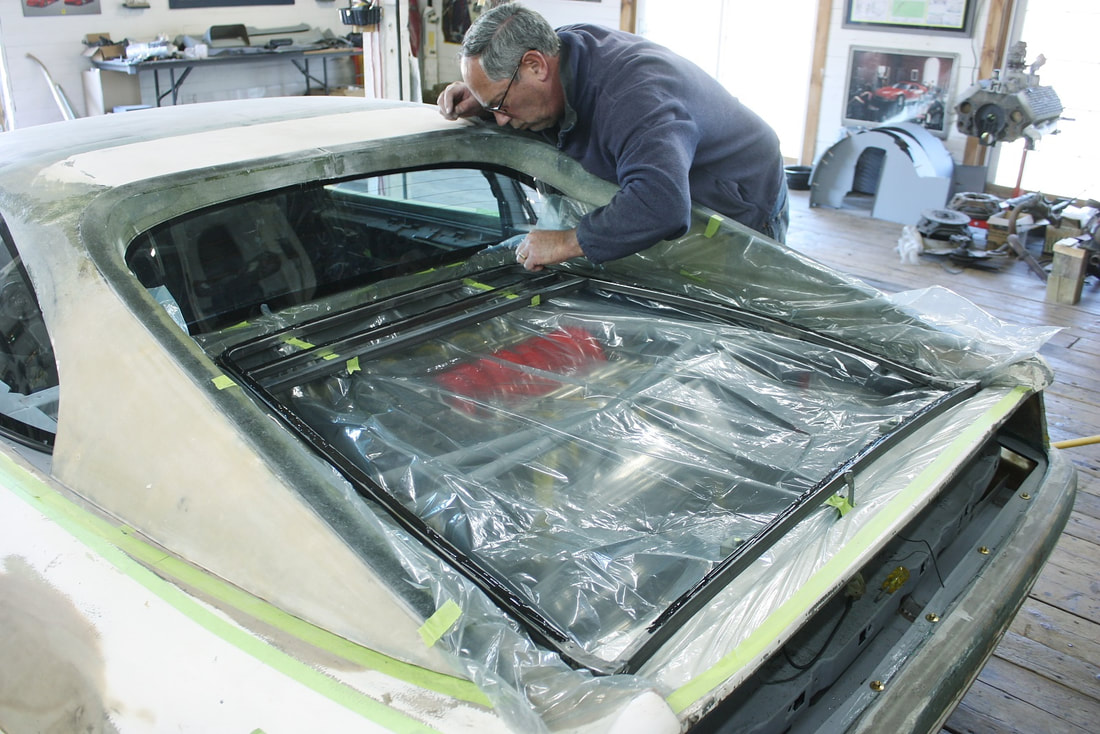
Lastly, I centered the panel in the surrounding bodywork, clamped it onto the frame, and let it cure for 24 hours:
Lastly, I centered the panel in the surrounding bodywork, clamped it onto the frame, and let it cure for 24 hours:
At this point, I didn’t have to worry about maintaining a constant gap between the deck lid surround and the deck lid itself. I purposely hadn’t bonded the deck lid surround to the sail panels earlier on since I knew it would be much easier to adjust the deck lid gap by shifting the two halves of the surround later to match the final position of the lid.
The next day I released the clamps and much to my happiness the epoxy worked flawlessly. I opened the lid making sure the front edge wouldn’t rub on the surround at the base of the rear window – Check! Then scanned each leg of the frame to ensure the skin was tightly bonded to the frame with no gaps – Check! Then I stepped back to survey whether the open lid was square and level with the chassis – Check!
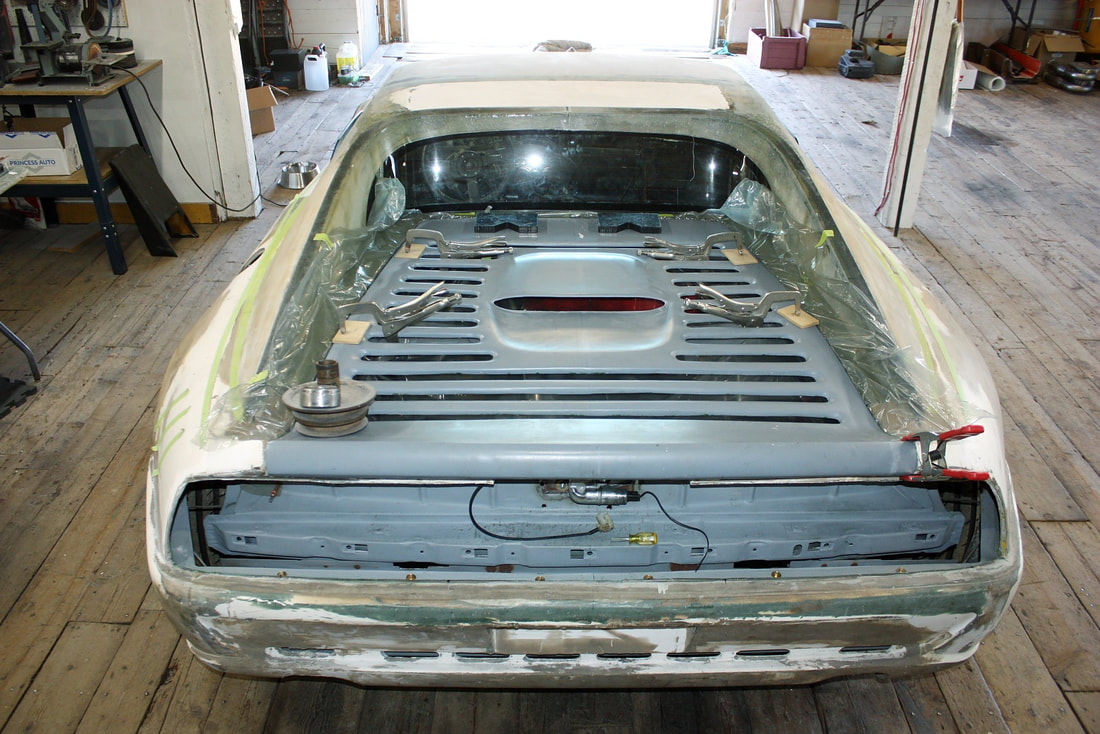
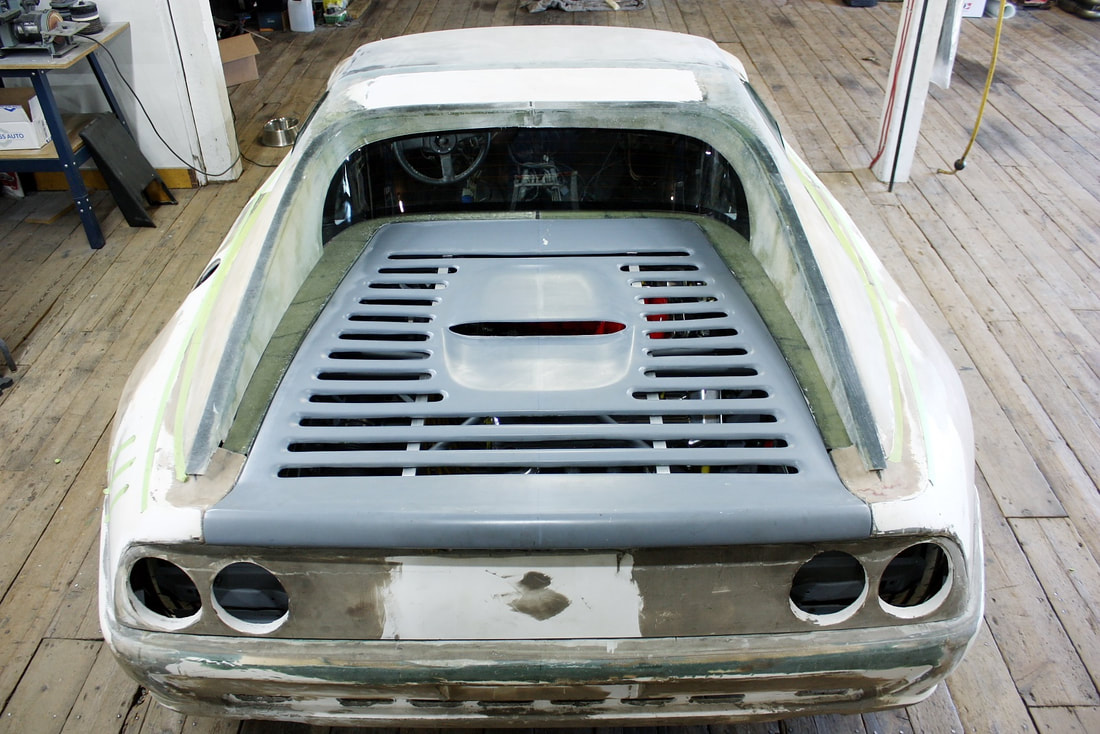
Next I closed the lid and admired the lack of sag in the center as compared to every other IFG kit out there:
Next I closed the lid and admired the lack of sag in the center as compared to every other IFG kit out there:
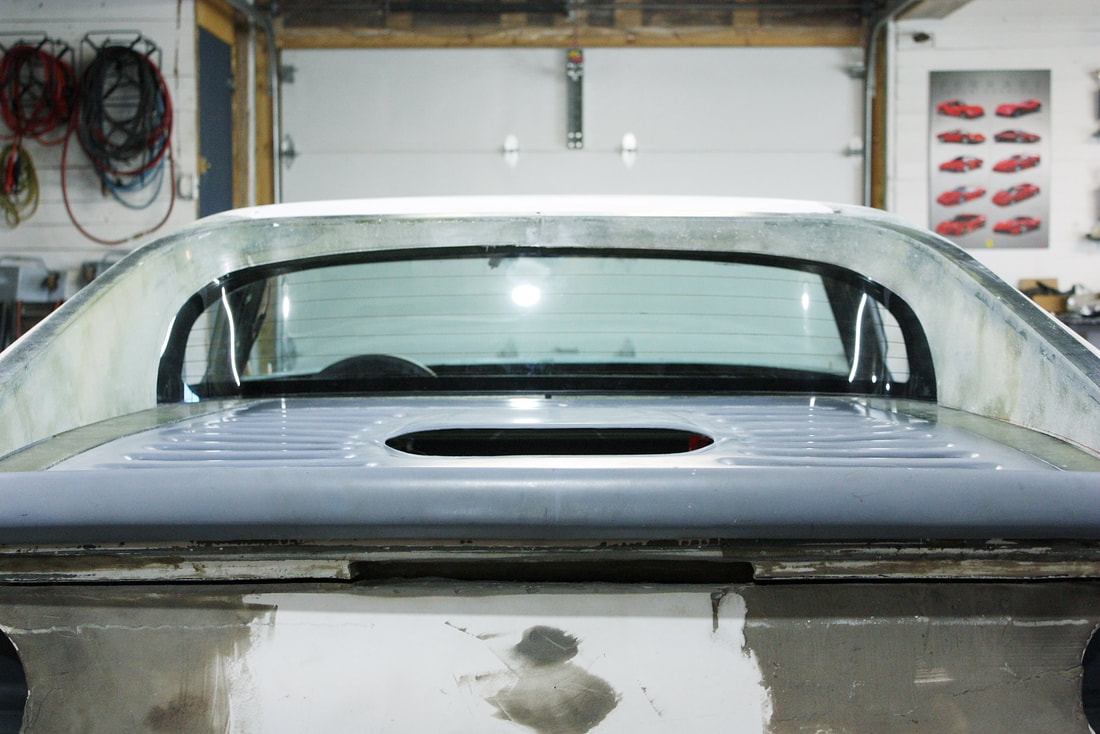
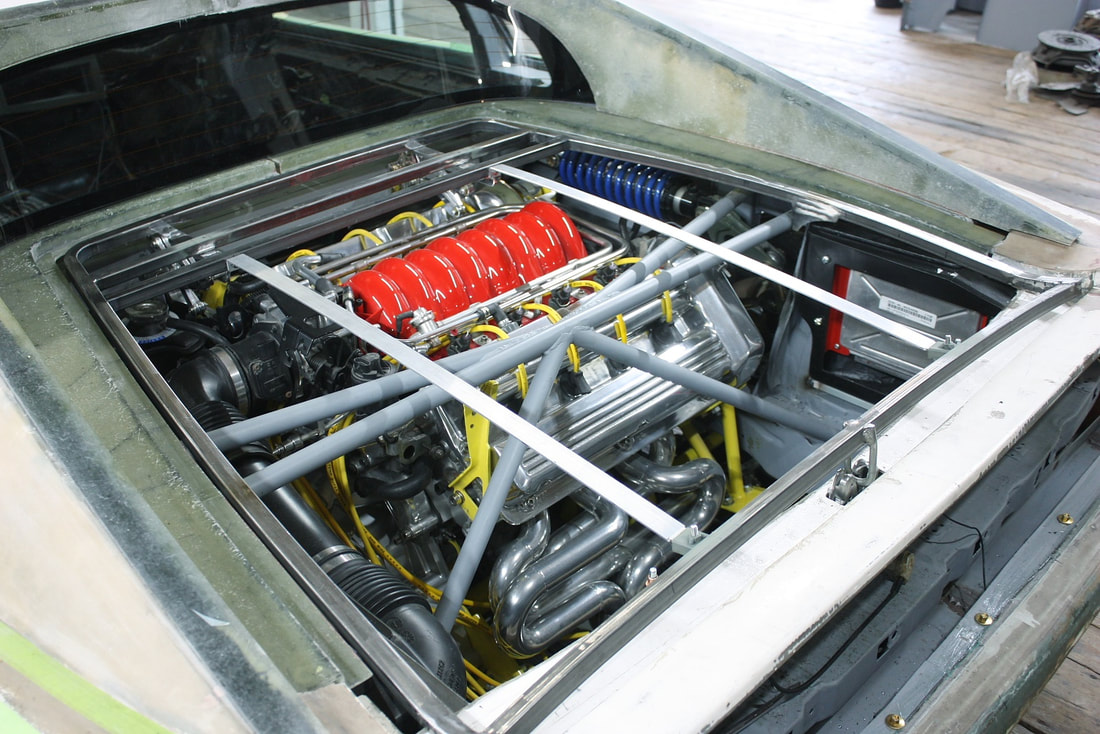
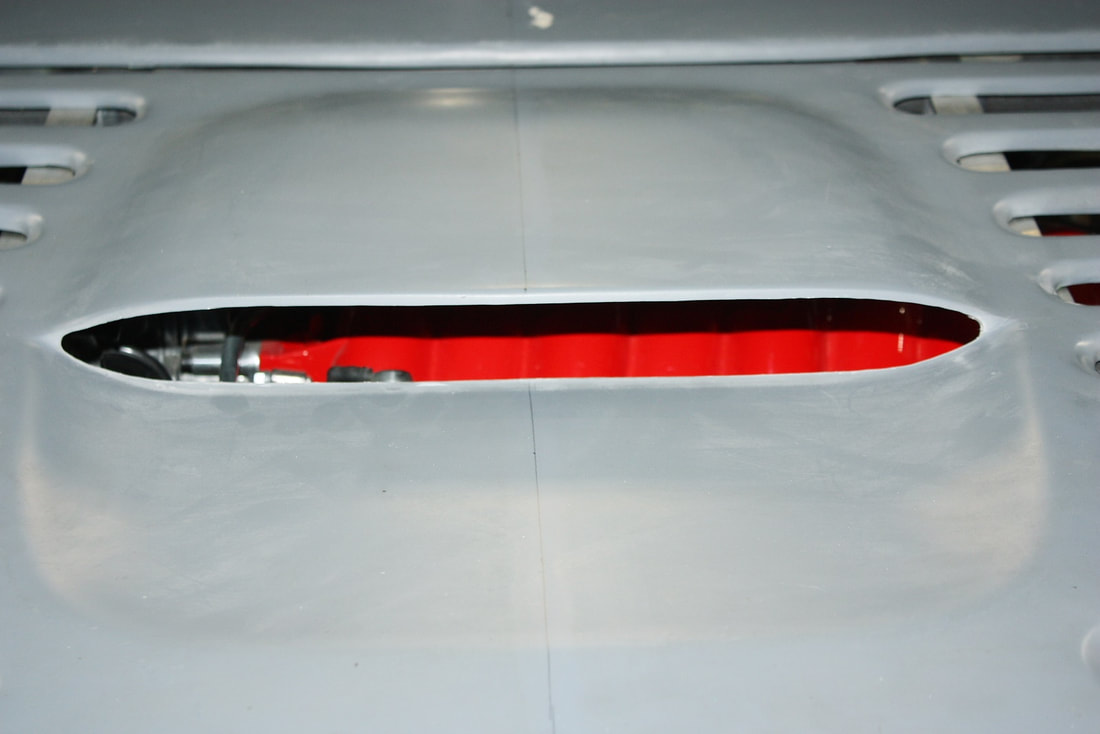
Conveniently the placement of the engine was just right to catch a glimpse of the engine's lipstick through the deck scoop:
Conveniently the placement of the engine was just right to catch a glimpse of the engine's lipstick through the deck scoop:
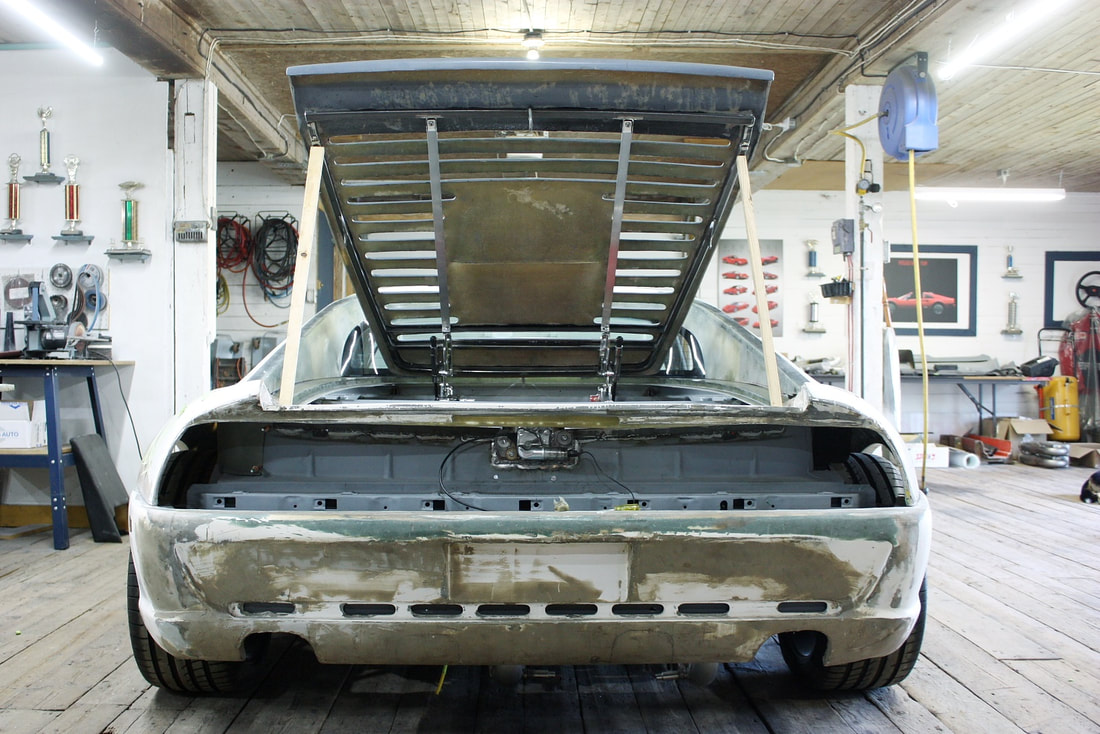
And finally I stepped back to appreciate how far this car body has come since the day it first arrived:
And finally I stepped back to appreciate how far this car body has come since the day it first arrived:
Back in Post #120, I laid out my plan for the body work in five stages: Mock ups, Mounting, Patchwork, Smoothing, and Painting. This post concludes the “Mounting Phase” so I’ll be turning my attention to filling in the gaps soon. But for the next couple posts, I'll be catching up on some unfinished business in a new topic called "Odds & Sods"... see you over there next.
Back in Post #120, I laid out my plan for the body work in five stages: Mock ups, Mounting, Patchwork, Smoothing, and Painting. This post concludes the “Mounting Phase” so I’ll be turning my attention to filling in the gaps soon. But for the next couple posts, I'll be catching up on some unfinished business in a new topic called "Odds & Sods"... see you over there next.

 RSS Feed
