This post is about having a critical look at the quality of the fibreglass skin on the passenger door, devising plans to address the flaws, and getting down and dirty to fix them. The problems were so extensive that I’ll need two blog entries to cover everything.
I’ve resorted to a mix of drawings and photos to illustrate the problem areas and their fixes. The flaws are usually subtle, extend over large areas, and are often only visible by taking in more than one sightline or perspective, which is difficult to capture in a photo.
For starters, I made this map of the main problem areas with the passenger door:
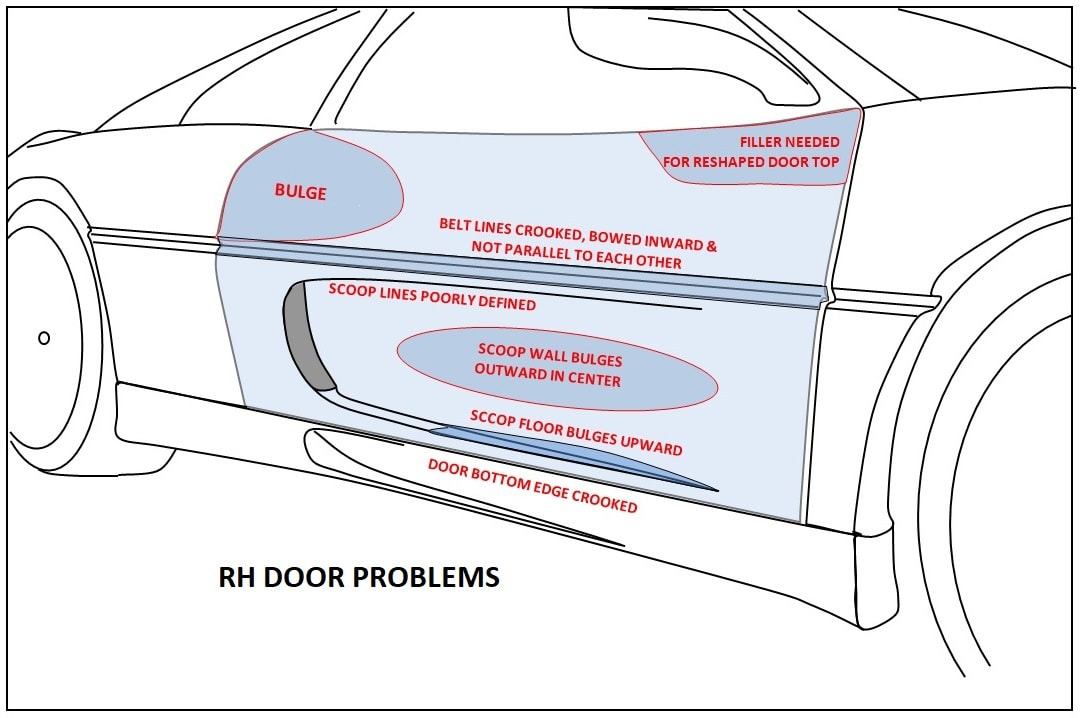
With the magnitude of some of these, I needed different strategies to straighten and smooth out the door. Some needed to be sliced and reset, ground down and reinforced on their backsides, or built up with fibre reinforced fillers. One thing for certain, the door would need a skim-coat over its entire surface once the big issues were dealt with.
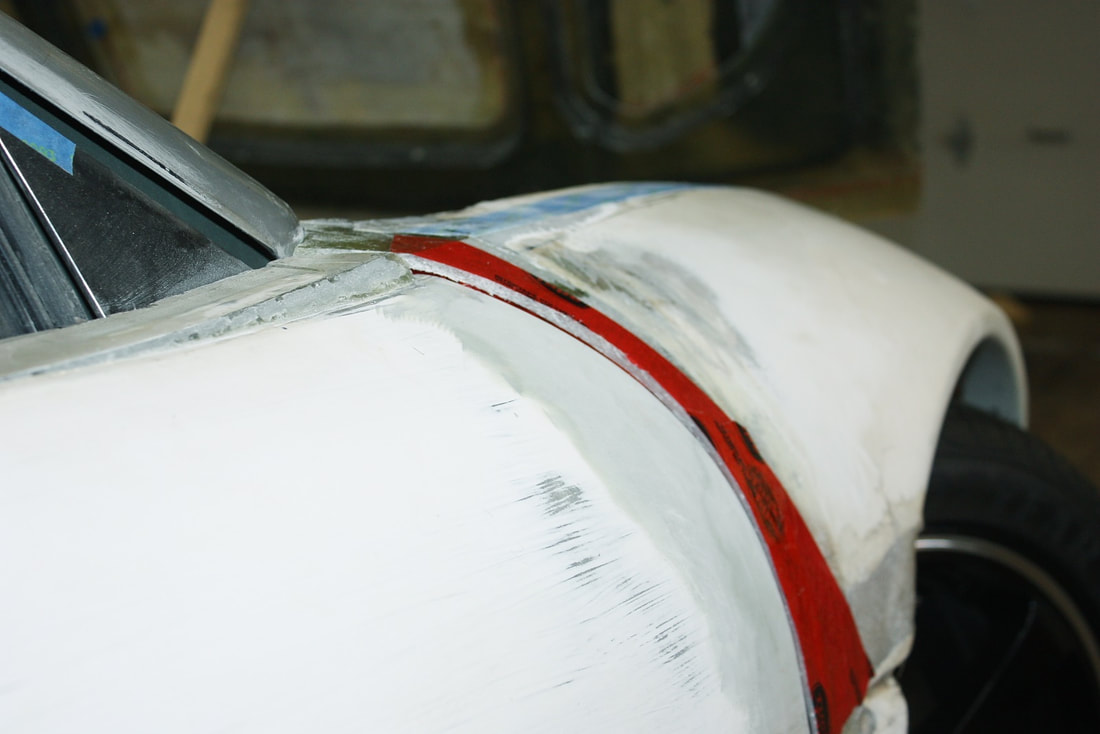
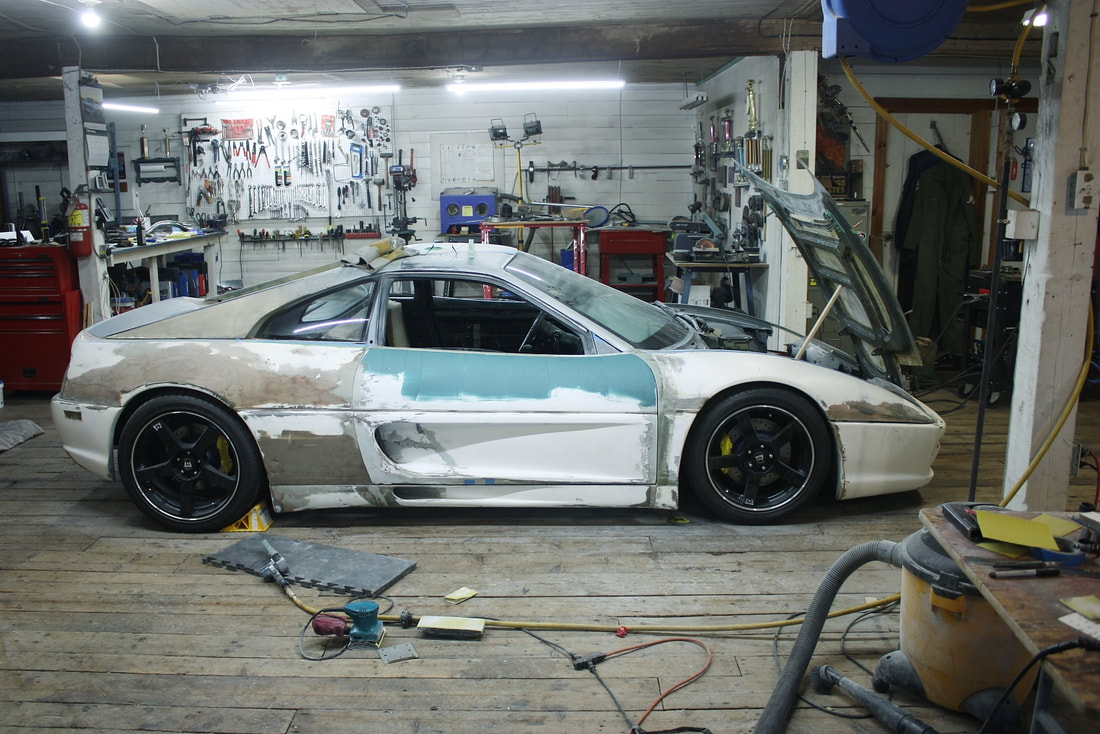
I decided to start at the top and work my way down. There were three major problems on the top half. The first one I created myself by slicing and re-arching the forward portion of the door to match the height of the front fender. The second problem was a bulge that started in the rear quarter panel and flowed into the door skin. You don’t have to look hard to see it in this next photo:
With the magnitude of some of these, I needed different strategies to straighten and smooth out the door. Some needed to be sliced and reset, ground down and reinforced on their backsides, or built up with fibre reinforced fillers. One thing for certain, the door would need a skim-coat over its entire surface once the big issues were dealt with.
I decided to start at the top and work my way down. There were three major problems on the top half. The first one I created myself by slicing and re-arching the forward portion of the door to match the height of the front fender. The second problem was a bulge that started in the rear quarter panel and flowed into the door skin. You don’t have to look hard to see it in this next photo:

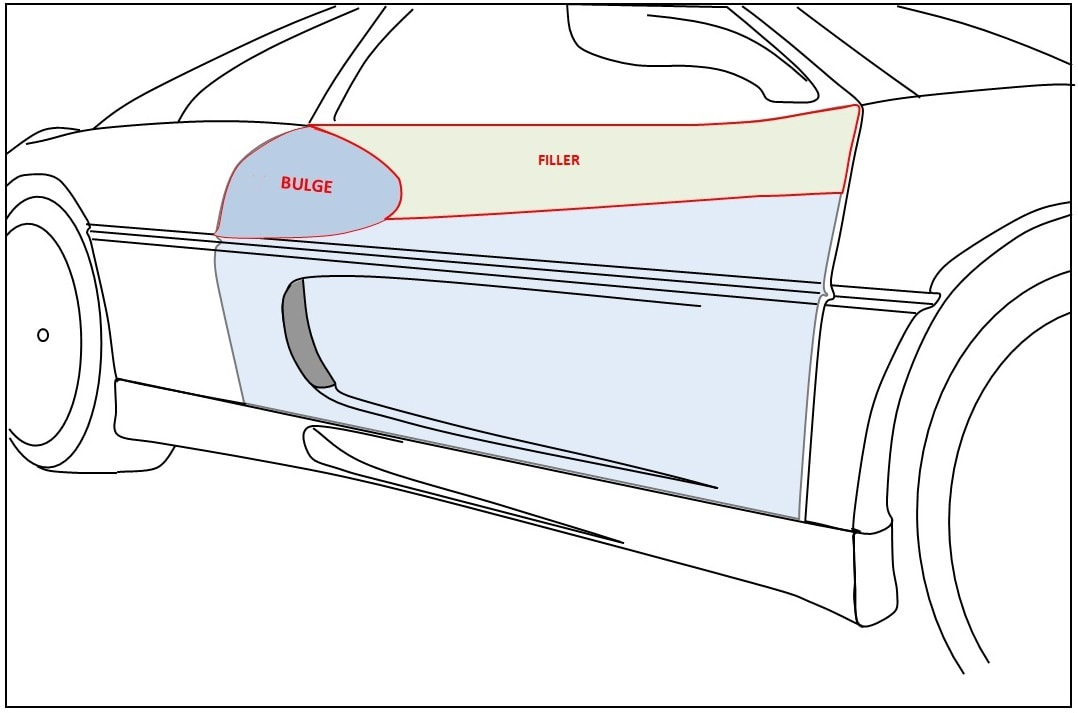
The third problem was that all IFG door panels were molded with a distinctive inward bow, giving the top view of the door a Coke-bottle shape that isn’t anywhere near as pronounced on the authentic car. The previous owner did reshape the doors to a great extent, but not completely.
I decided I could partially grind down the bulge, then bridge whatever was left of it to the front of the door with short strand putty. The bridge would fill the remnants of the inward bow at the same time, sort of like this:
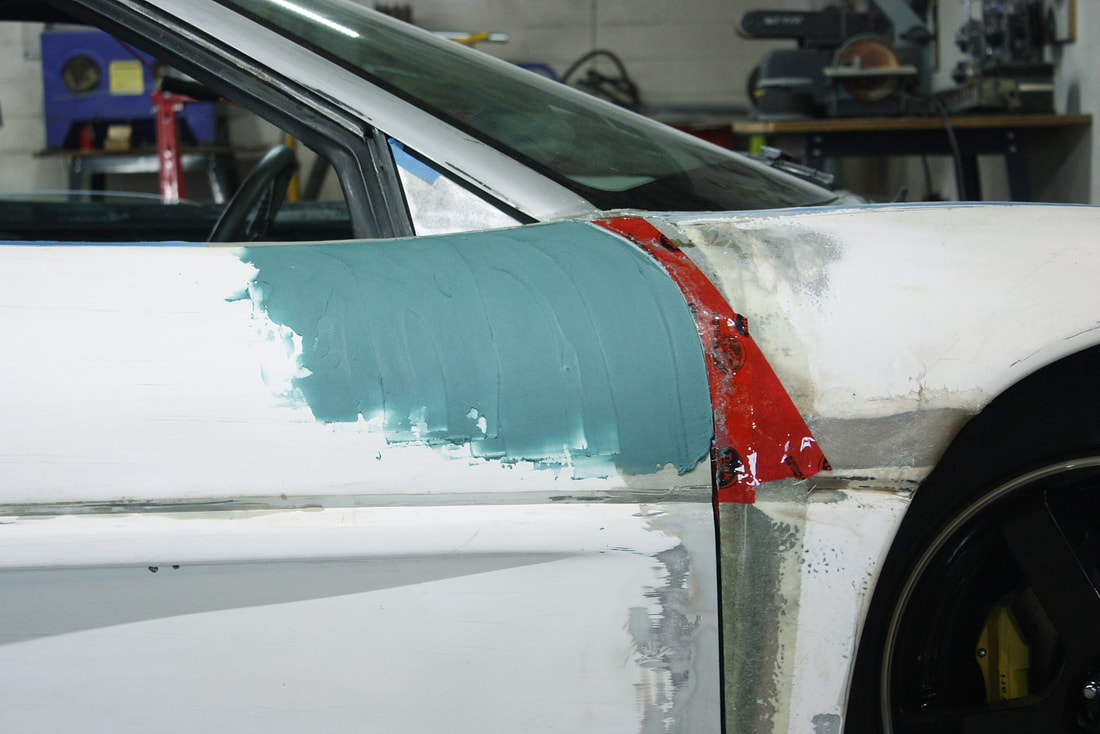
First I needed to raise the area around the step I created when I sliced and raised the top of the door. It would’ve required more than a ¼” of filler so I taped off the front fender to protect it and built the area up with fibreglass mat:
First I needed to raise the area around the step I created when I sliced and raised the top of the door. It would’ve required more than a ¼” of filler so I taped off the front fender to protect it and built the area up with fibreglass mat:
Once the resin had firmly set up, I ground it down to give it a nice gritty surface for the short strand filler to adhere to, which was next. I use Evercoat Everglass because I like the way it sands with minimal airborne dust, it can be sanded in 30 minutes, doesn’t gum up the paper ever, and it feathers really nicely.
Once the resin had firmly set up, I ground it down to give it a nice gritty surface for the short strand filler to adhere to, which was next. I use Evercoat Everglass because I like the way it sands with minimal airborne dust, it can be sanded in 30 minutes, doesn’t gum up the paper ever, and it feathers really nicely.

The instructions for the short strand say not to exceed ¼” thickness to avoid noticeable shrinkage and to keep thermal expansion differences between the putty and the (metal) surface from becoming a problem. I followed that advice, but thermal expansion shouldn’t be an issue on a fibreglass surface since both are polyester composites with similar properties.
The instructions for the short strand say not to exceed ¼” thickness to avoid noticeable shrinkage and to keep thermal expansion differences between the putty and the (metal) surface from becoming a problem. I followed that advice, but thermal expansion shouldn’t be an issue on a fibreglass surface since both are polyester composites with similar properties.
I rough-shaped the first coat of filler, then I gave the entire upper half of the door a skim-coat to begin blending the compound curves:
I rough-shaped the first coat of filler, then I gave the entire upper half of the door a skim-coat to begin blending the compound curves:
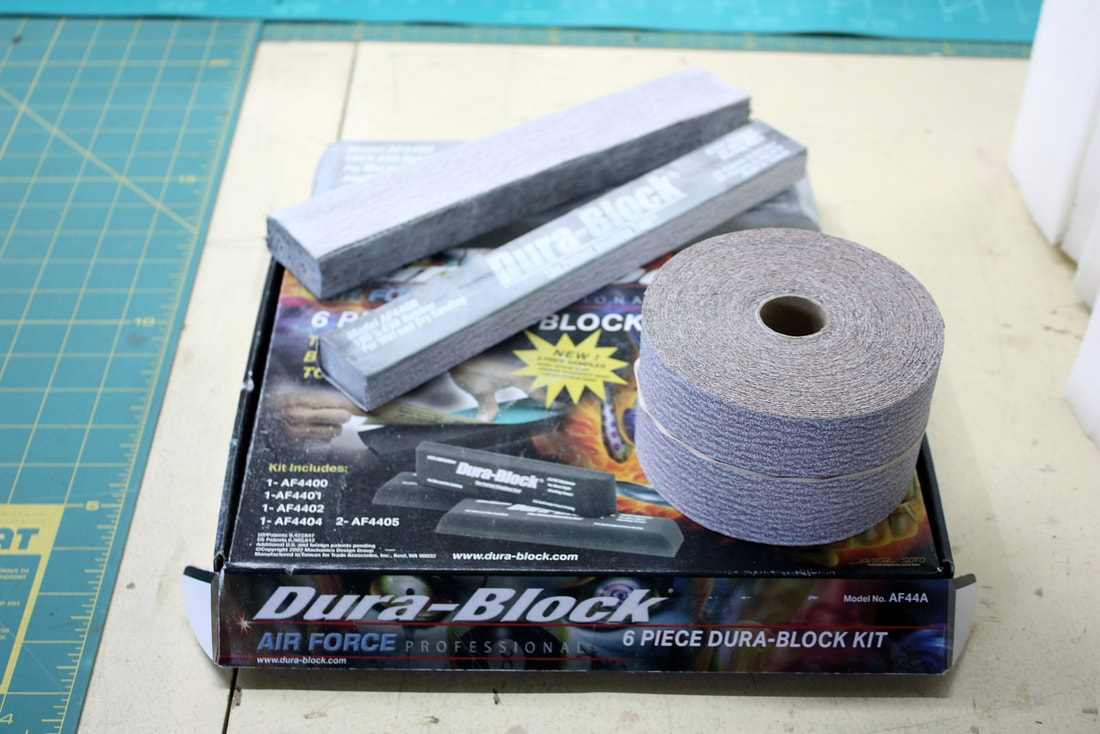
While waiting for the filler to set up, I dug out my collection of sanding blocks and papers. I bought a set of six Dura-Blok sanding blocks which come in a variety of shapes. They’re made of semi-rigid EPDM foam and require adhesive-backed sandpaper. I’ve also made a few different blocks from 1” thick gym mats that are also EPDM but more flexible for soft curves.
The sandpaper I use is by Norton and comes in a roll. I use 80 grit to quickly carve out the unwanted putty:
I found it easiest to reshape the top half of the door while it was still installed on the car. The door has a tricky shape because it starts with a very distinctive saddle shape at the top, but gradually transforms to a straight, flat surface by the time it reaches the belt line in the middle of the door. Here’s a progress shot:
I found it easiest to reshape the top half of the door while it was still installed on the car. The door has a tricky shape because it starts with a very distinctive saddle shape at the top, but gradually transforms to a straight, flat surface by the time it reaches the belt line in the middle of the door. Here’s a progress shot:
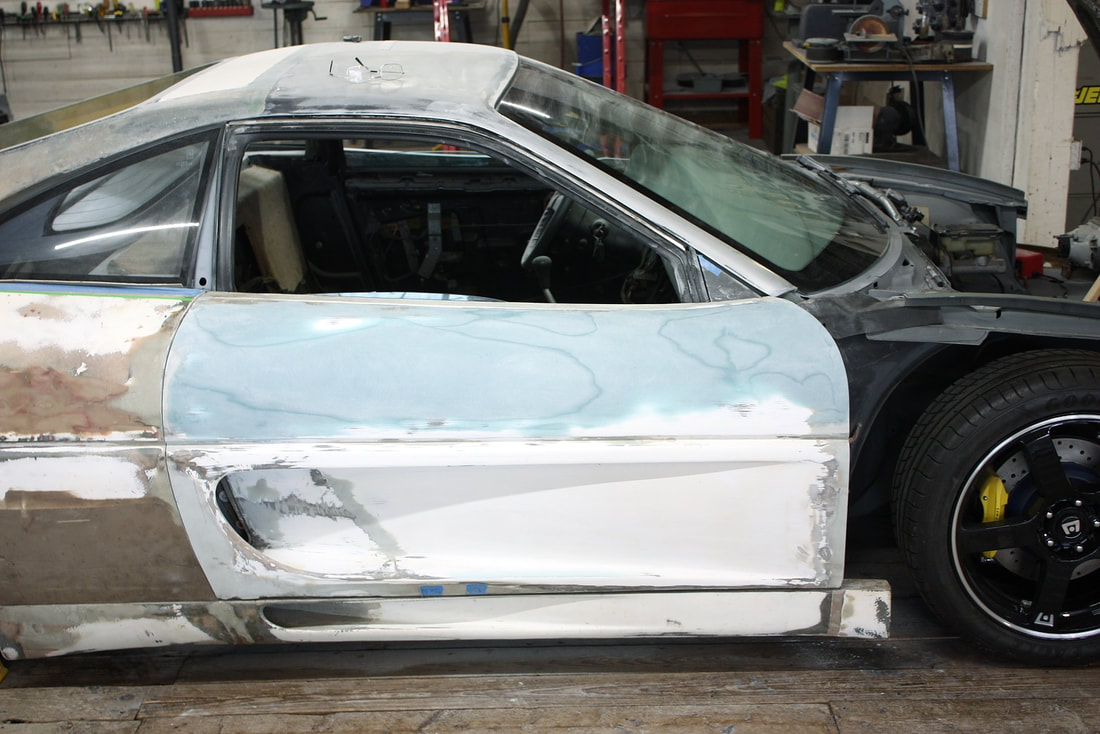
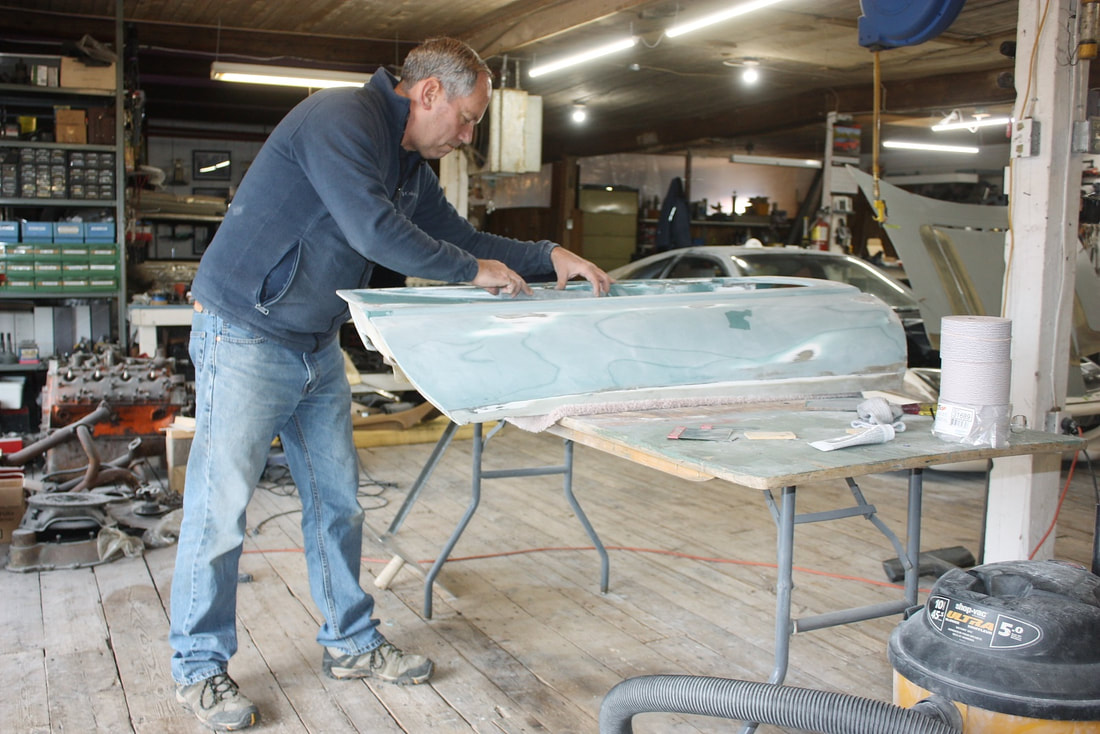
At this point I took the door skin off the car to bring it up to a more comfortable working height. This next photo attempts to show the ill-defined and wavy belt line, which was next in my sights:
At this point I took the door skin off the car to bring it up to a more comfortable working height. This next photo attempts to show the ill-defined and wavy belt line, which was next in my sights:
The belt line was tricky because it’s a series of four parallel lines: three that define a 90 degree beveled groove, one inch wide, running the length of the door, and a fourth line defining the top of the door scoop. The crease edges were grossly over-radiused leading to their poor definition, and each line varied in straightness. So the first step was to redefine the outside corners with sharp, crisp, straight lines.
The belt line was tricky because it’s a series of four parallel lines: three that define a 90 degree beveled groove, one inch wide, running the length of the door, and a fourth line defining the top of the door scoop. The crease edges were grossly over-radiused leading to their poor definition, and each line varied in straightness. So the first step was to redefine the outside corners with sharp, crisp, straight lines.

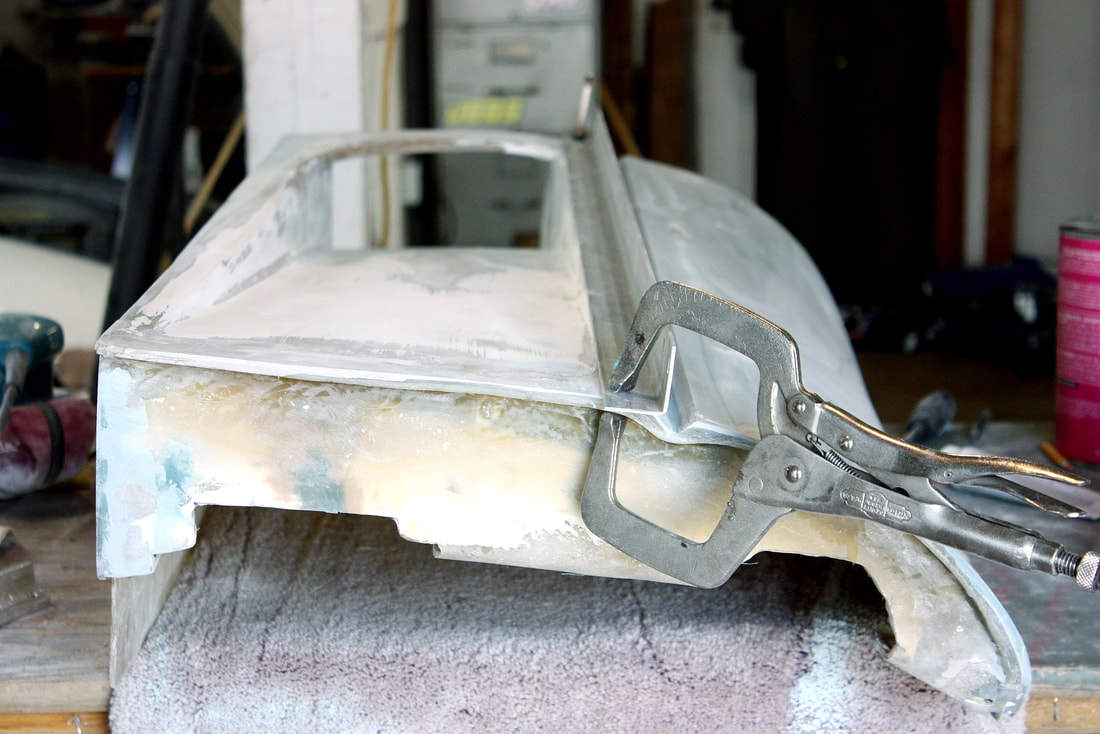
I used a long piece of angled steel clamped to the door to create an edge against which I pushed body filler to make the three outside creases perfectly straight, even in height, and parallel to each other. I removed the angle just as the filler started to set to keep it from adhering to the steel, then touched up the excess filler once it fully cured. Here I’m doing the top of the scoop:
I used a long piece of angled steel clamped to the door to create an edge against which I pushed body filler to make the three outside creases perfectly straight, even in height, and parallel to each other. I removed the angle just as the filler started to set to keep it from adhering to the steel, then touched up the excess filler once it fully cured. Here I’m doing the top of the scoop:
When the two upper corners of the groove were done, it was a simple matter of filling the valley with putty and drawing a V-shaped putty knife between the edges to redefine the beveled walls and the crease in the bottom of the groove. It never works out perfectly with the knife, but a long straight corner block sands both sides of the bevel simultaneously, and carves a new straight crease in the bottom.
When the two upper corners of the groove were done, it was a simple matter of filling the valley with putty and drawing a V-shaped putty knife between the edges to redefine the beveled walls and the crease in the bottom of the groove. It never works out perfectly with the knife, but a long straight corner block sands both sides of the bevel simultaneously, and carves a new straight crease in the bottom.
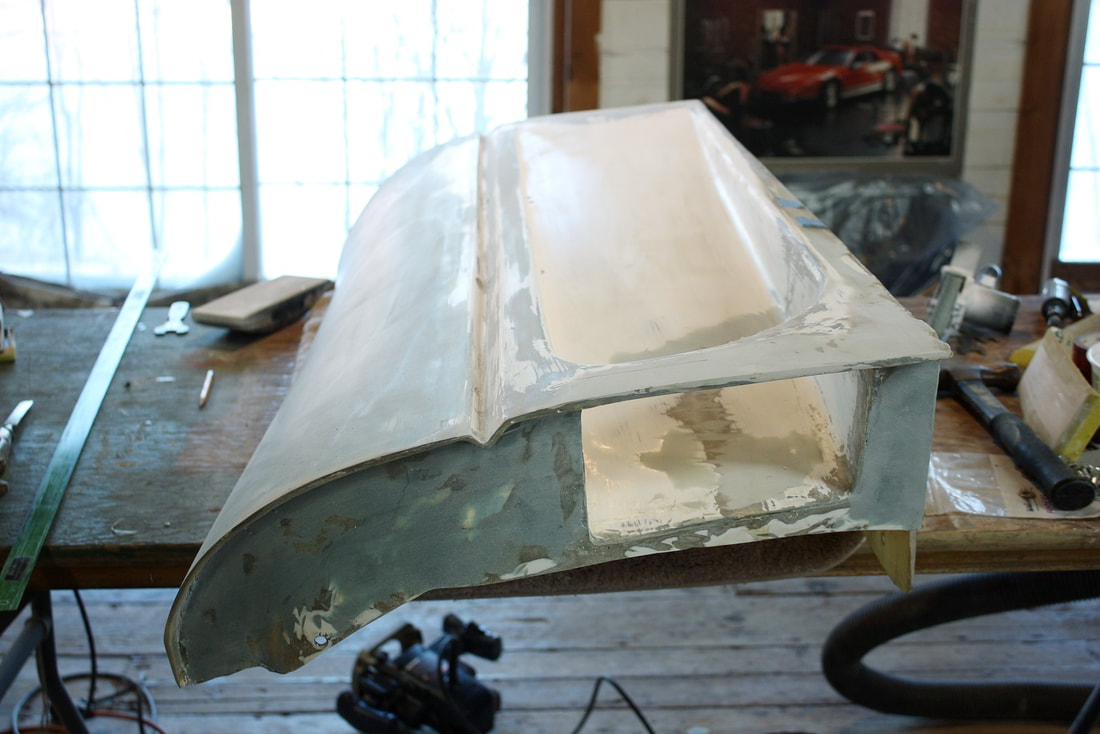
At this point, I left ultra-sharp corners along each crease to help me with sightlines but I’ll radius them with a couple of light sandpaper passes before paint.
Here’s the sightline down the groove and upper scoop edge showing the results of the straight-edge and 80-grit block-sanding:
At this point, I left ultra-sharp corners along each crease to help me with sightlines but I’ll radius them with a couple of light sandpaper passes before paint.
Here’s the sightline down the groove and upper scoop edge showing the results of the straight-edge and 80-grit block-sanding:

The next area was the scoop itself.
The next area was the scoop itself.

 RSS Feed
