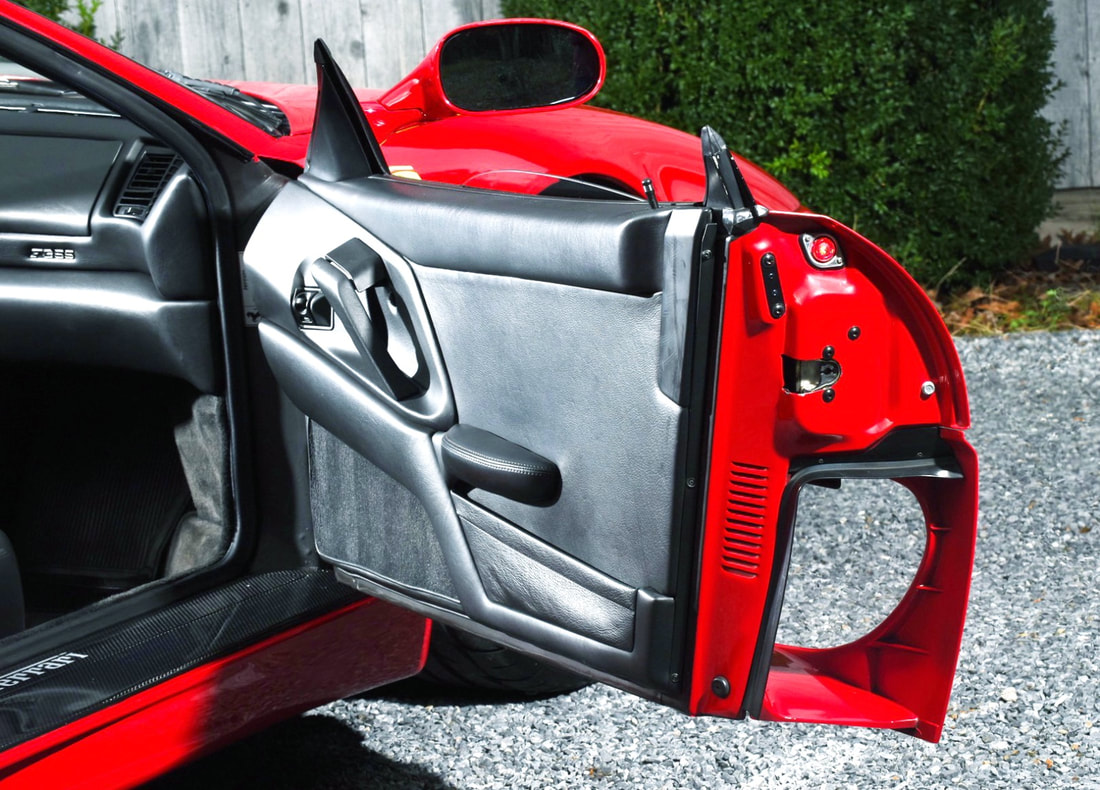
As I delve into reshaping each part of this IFG body kit, I like to have a good look at any close-up photos I can find on the internet to compare what I’ve got to work with versus what the authentic panel looks like. This is frequently followed by having to take an Aspirin and a nap. In the case of the F355’s signature door scoops, there are a few noteworthy differences. For starters, here’s what a real F355 door scoop looks like from the side view:
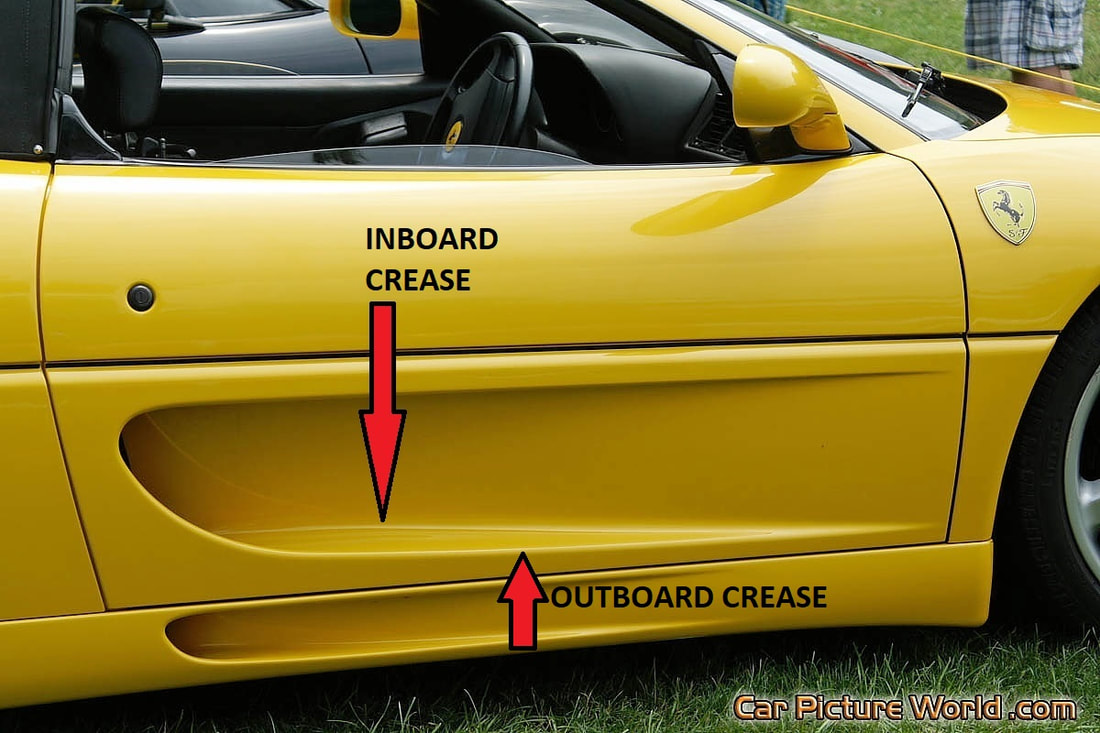
The first thing that caught my eye was the waviness of the authentic scoop’s horizontal “floor”. The outboard crease is sloped gently upward toward the rear, but it is a straight line for most of its length. The inboard crease on the other hand follows an organic path rising in a gentle concave arc, cresting at a point 2/3rds along the length of the door (see arrow), then dropping gently downward to the rear of the door (more on this later). The scoop floor is a rather contorted shape to follow such different lines only inches apart!
On the authentic car, no one would question the strangely warped floor of the scoop, because they’d never question Pininfarina’s artwork. On the other hand, anyone looking at a fibreglass replica with such a “feature” would think it was the result of poor, lazy body work. At least that’s the way I would see it, so I decided the inboard crease on my car would be made to follow the straight lines of the outside corner.
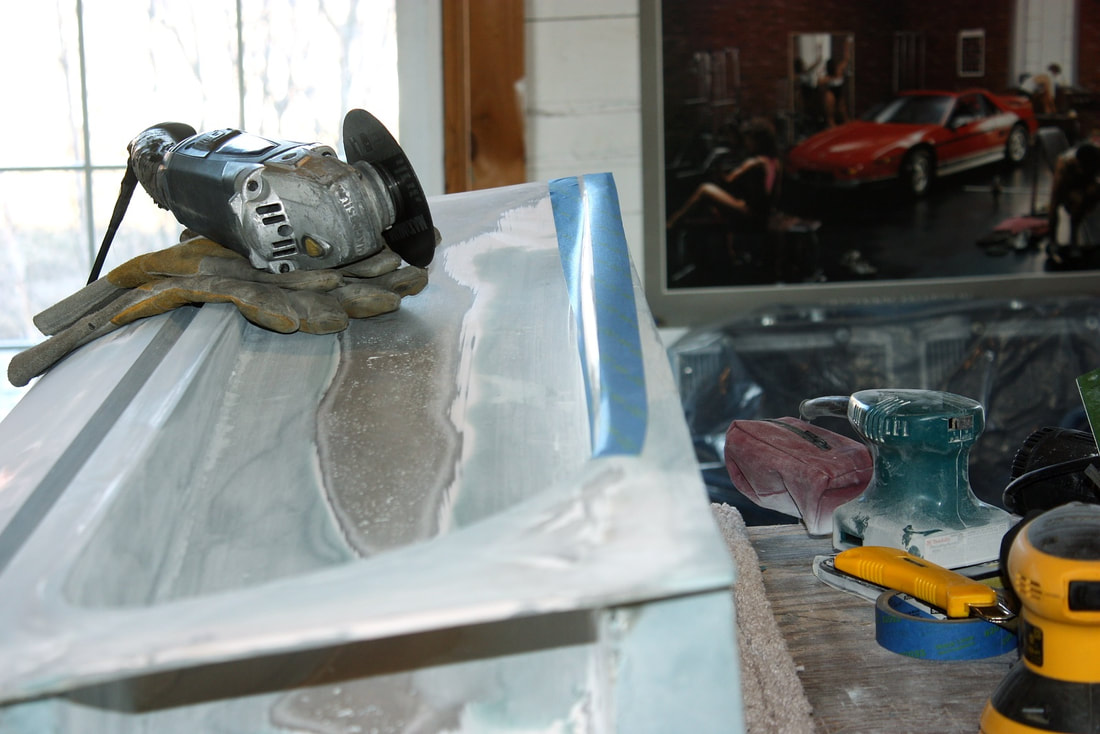
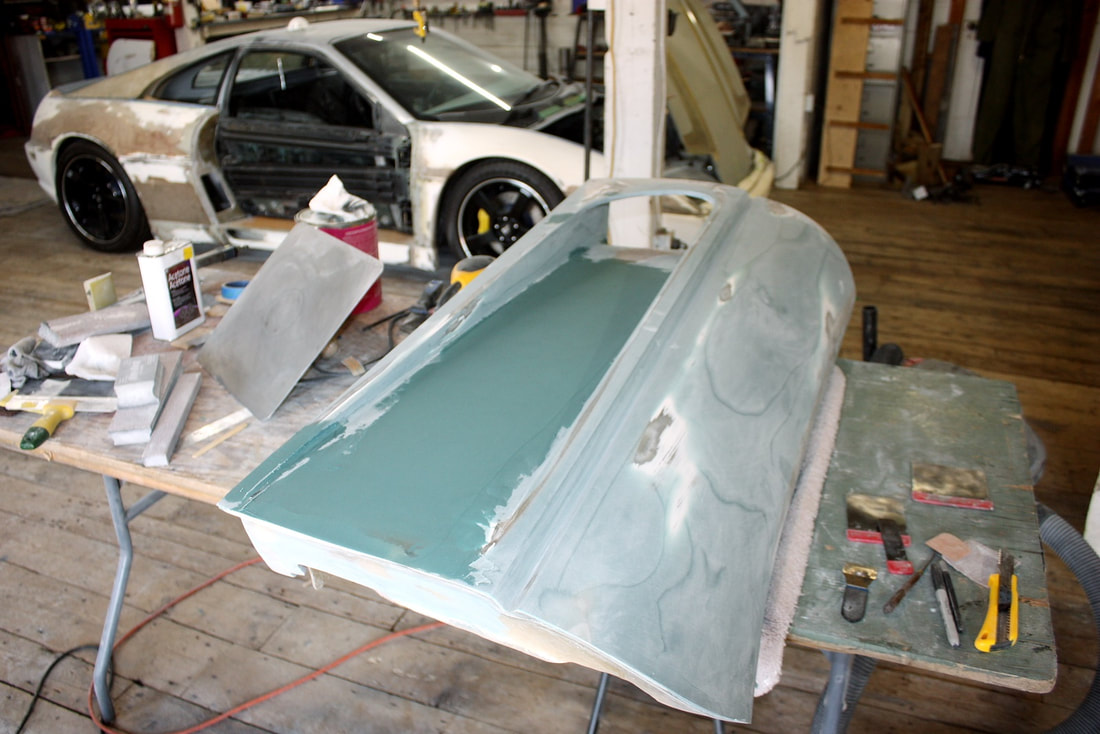
Taking a close look at my IFG passenger door, the scoop floor was neither flat, nor followed the authentic scoop lines. Big surprise. Both the inboard and outboard creases (red line) were bowed upward… sigh:
The first thing that caught my eye was the waviness of the authentic scoop’s horizontal “floor”. The outboard crease is sloped gently upward toward the rear, but it is a straight line for most of its length. The inboard crease on the other hand follows an organic path rising in a gentle concave arc, cresting at a point 2/3rds along the length of the door (see arrow), then dropping gently downward to the rear of the door (more on this later). The scoop floor is a rather contorted shape to follow such different lines only inches apart!
On the authentic car, no one would question the strangely warped floor of the scoop, because they’d never question Pininfarina’s artwork. On the other hand, anyone looking at a fibreglass replica with such a “feature” would think it was the result of poor, lazy body work. At least that’s the way I would see it, so I decided the inboard crease on my car would be made to follow the straight lines of the outside corner.
Taking a close look at my IFG passenger door, the scoop floor was neither flat, nor followed the authentic scoop lines. Big surprise. Both the inboard and outboard creases (red line) were bowed upward… sigh:

It’s also easy to see from the yellow line that the door’s bottom edge wasn’t anywhere near straight either.
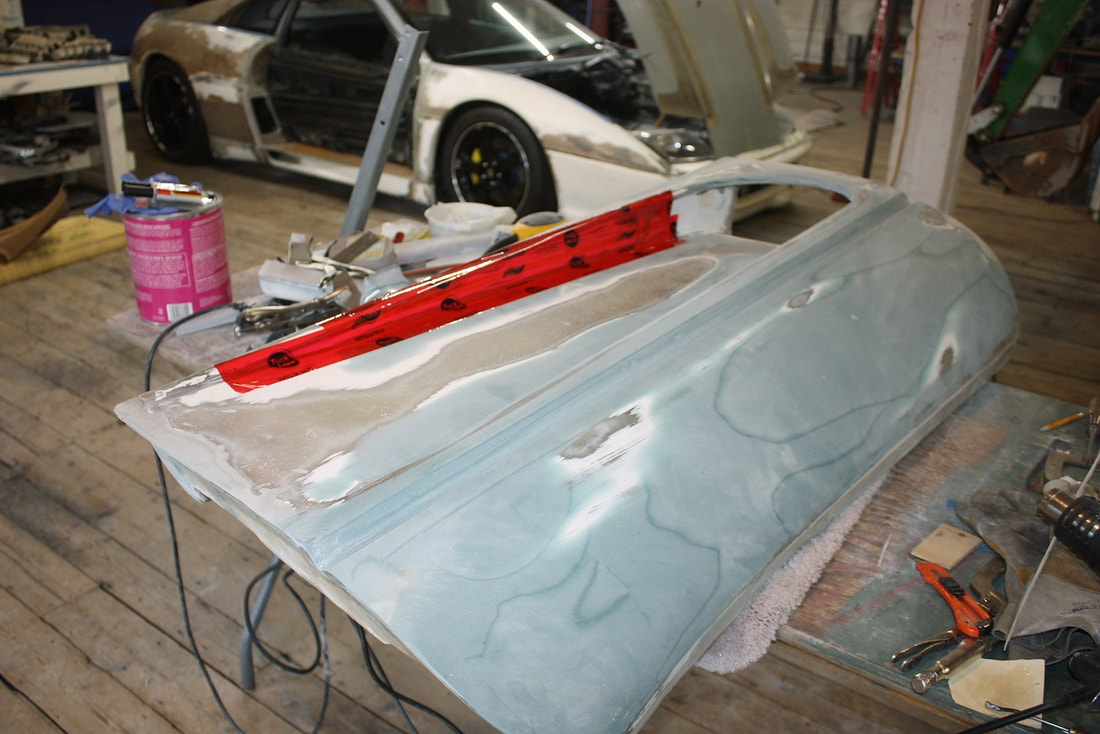
To flatten the scoop floor I had several options. From worst to best they were to: fill the low spots; or grind the high spots; or slice and re-profile the floor. I chose the latter because the other two options meant either way too much filler, or grinding through the skin. So I marked a straight line along the outside corner with masking tape as a guide for my cut-off wheel:
It’s also easy to see from the yellow line that the door’s bottom edge wasn’t anywhere near straight either.
To flatten the scoop floor I had several options. From worst to best they were to: fill the low spots; or grind the high spots; or slice and re-profile the floor. I chose the latter because the other two options meant either way too much filler, or grinding through the skin. So I marked a straight line along the outside corner with masking tape as a guide for my cut-off wheel:
I carefully separated the scoop floor from the rest of the door by slicing both corners along most of their lengths like this:
I carefully separated the scoop floor from the rest of the door by slicing both corners along most of their lengths like this:

Next, I gently flexed the floor piece down make it flat, and clamped it back to the door. You can see the extent of the old curvature by the shape of the crack along the inboard edge:
Next, I gently flexed the floor piece down make it flat, and clamped it back to the door. You can see the extent of the old curvature by the shape of the crack along the inboard edge:


While it was clamped, I used some tape to seal up the front side and keep resin from leaking through the slices while I repaired the backside:
While it was clamped, I used some tape to seal up the front side and keep resin from leaking through the slices while I repaired the backside:
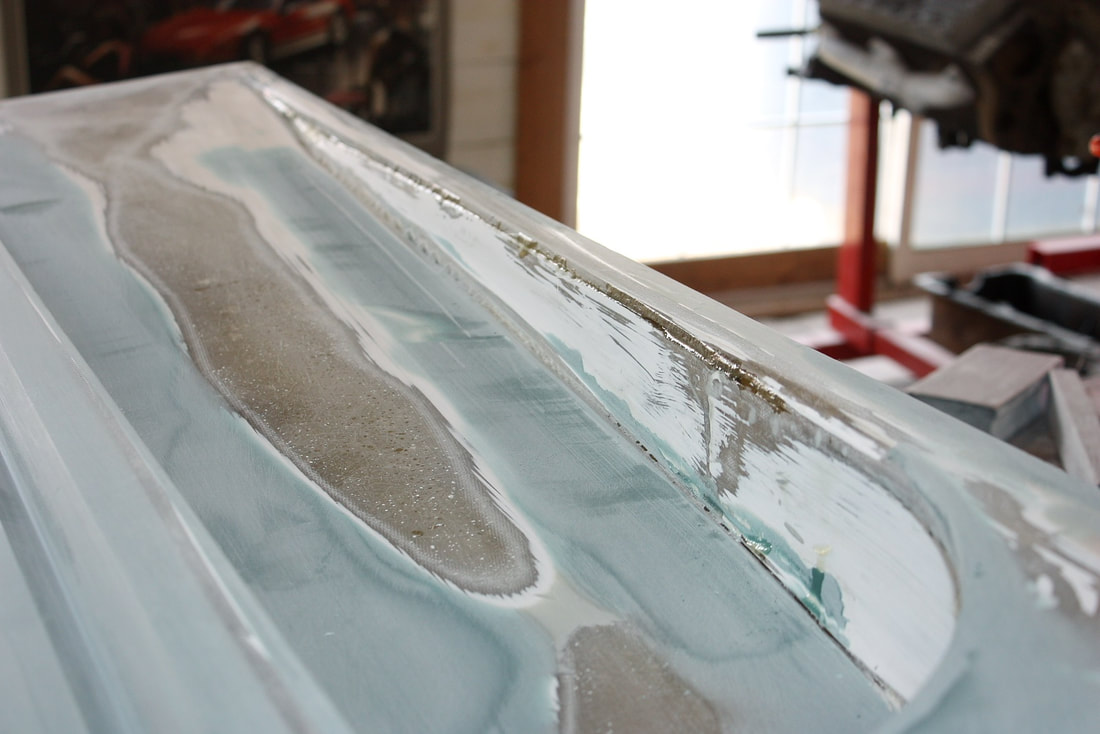
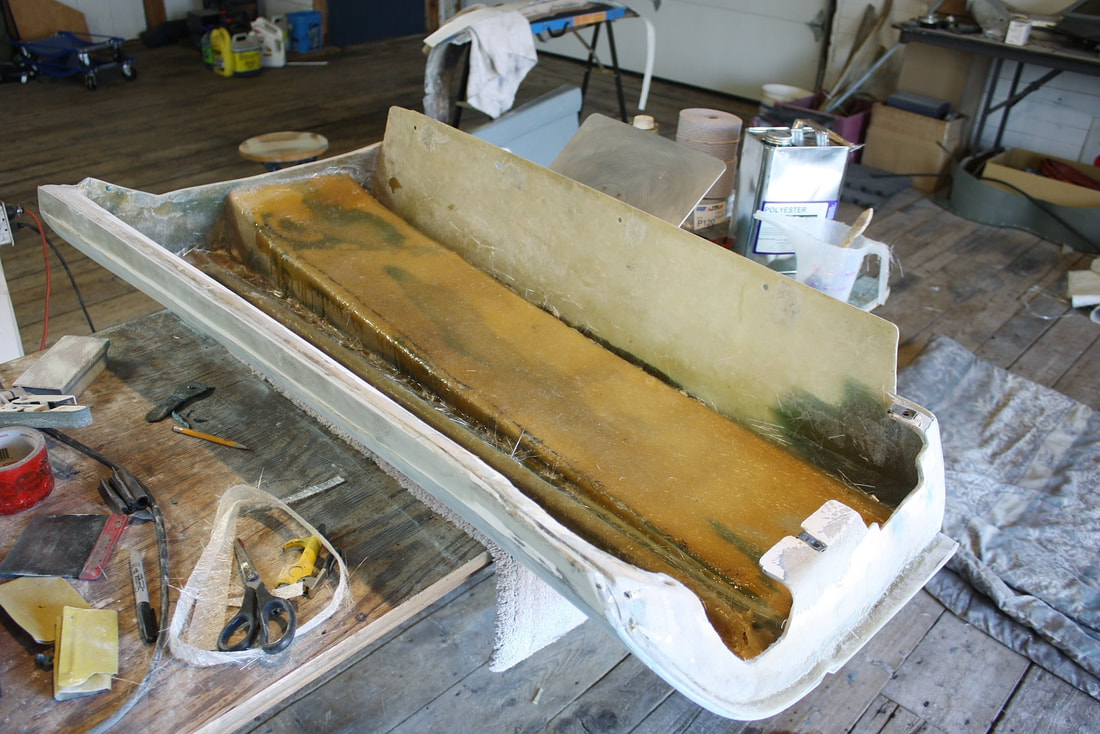
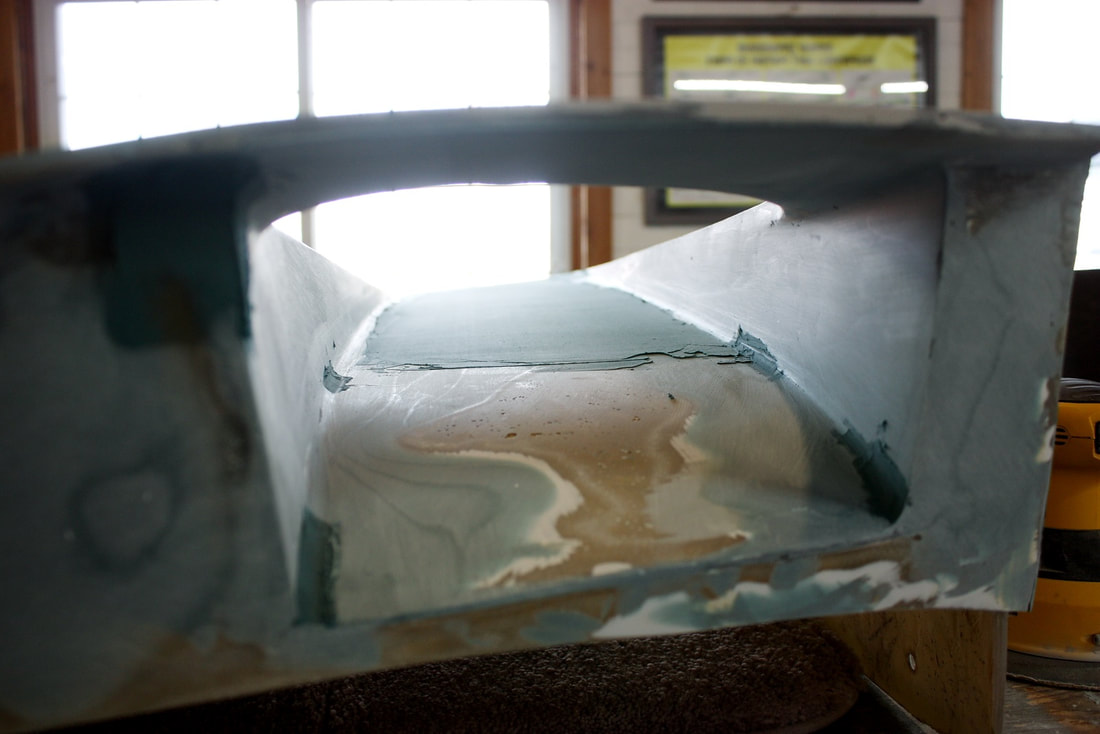
I added several layers of 1.5 oz mat strips along the backside of both slices to rejoin the floor to the rest of the door. Once the repairs had set, I took off the clamps and had a nice flat scoop floor ready for some fine tuning with short strand filler:
I added several layers of 1.5 oz mat strips along the backside of both slices to rejoin the floor to the rest of the door. Once the repairs had set, I took off the clamps and had a nice flat scoop floor ready for some fine tuning with short strand filler:
Before I refined the scoop lines any further, I decided to straighten the door’s bottom edge next. I had a certain flexibility to change the profile of scoop line, but the door bottom is a fixed line that must match the top of the rocker panel in three dimensions.
I temporarily reinstalled the door skin to take some reference measurements to the rocker panel giving a 4mm gap between the two. This way, I knew how to orient my long straight-edge as a guide for my putty knife when I removed the door skin to do the actual work:
After the filler set up and was sanded smooth, I mocked up the door panel back onto the car to check the new clearance with the rocker panel. Things were starting to shape up:
After the filler set up and was sanded smooth, I mocked up the door panel back onto the car to check the new clearance with the rocker panel. Things were starting to shape up:
That pretty much wrapped up the work on the various door creases, so next up was the vertical wall of the scoop. Looking closely at the IFG panel, I noticed there was a rather significant crown in the scoop wall. To my eye, it didn’t flow well with what I expected for the bottom half of the door:
That pretty much wrapped up the work on the various door creases, so next up was the vertical wall of the scoop. Looking closely at the IFG panel, I noticed there was a rather significant crown in the scoop wall. To my eye, it didn’t flow well with what I expected for the bottom half of the door:

Once again I pulled up some images of the authentic car’s scoops to see what sort of crown should be there:
Once again I pulled up some images of the authentic car’s scoops to see what sort of crown should be there:
It’s hard to tell from any one photo, but after looking at several real Ferrari door photos taken at shallow angles, it was clear that the crown on my passenger door skin was far too exaggerated. By running my hand along the scoop wall, I also picked up uneven changes in the crown along its length. More and more I started realizing the IFG kit was really just a blob of polyester resin loosely resembling a car.
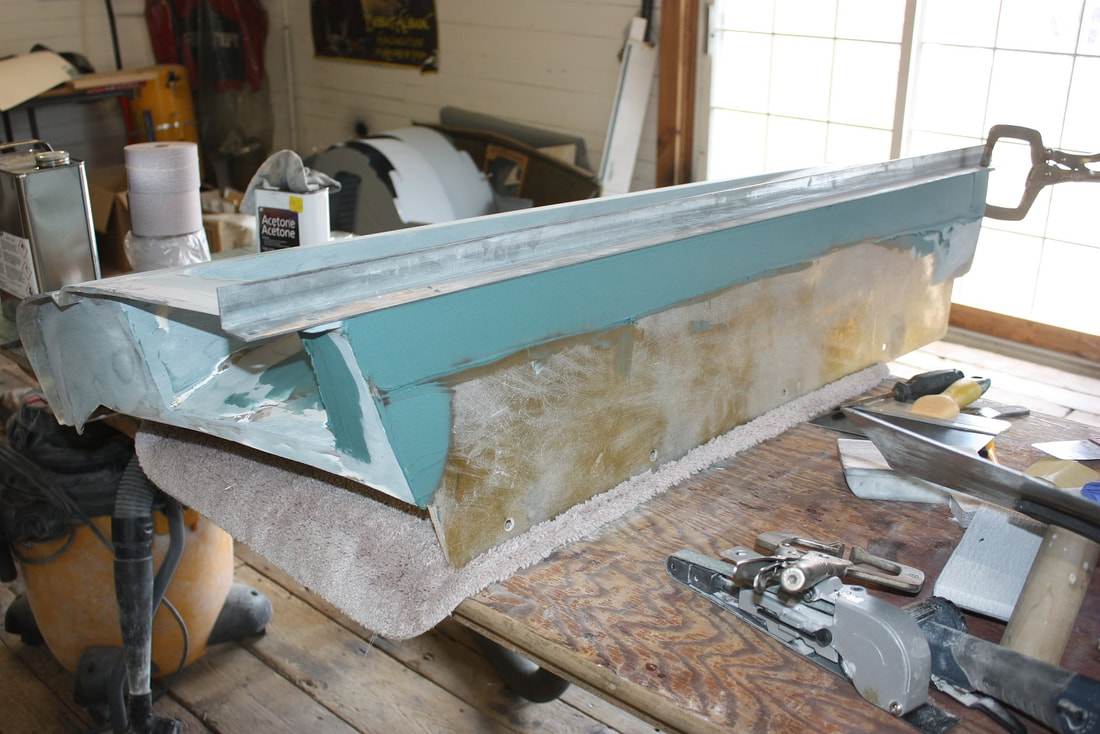
To flatten the wall, fillers were out of the question since 3/8” thickness would have been needed in some areas. There was also no way to slice the wall because the crown is a compound curved surface and would retain its shape unless sliced in many locations. My only option was to grind it flat, but that would mean sanding the high spots completely through the thickness of the skin. To prevent that from happening, I first had to build up an additional 1/4” thickness behind the scoop wall:
It’s hard to tell from any one photo, but after looking at several real Ferrari door photos taken at shallow angles, it was clear that the crown on my passenger door skin was far too exaggerated. By running my hand along the scoop wall, I also picked up uneven changes in the crown along its length. More and more I started realizing the IFG kit was really just a blob of polyester resin loosely resembling a car.
To flatten the wall, fillers were out of the question since 3/8” thickness would have been needed in some areas. There was also no way to slice the wall because the crown is a compound curved surface and would retain its shape unless sliced in many locations. My only option was to grind it flat, but that would mean sanding the high spots completely through the thickness of the skin. To prevent that from happening, I first had to build up an additional 1/4” thickness behind the scoop wall:

Once the resin had cured, the belt sander with 60 grit paper made short work of the crown:
Once the resin had cured, the belt sander with 60 grit paper made short work of the crown:

That left the scoop ready for a skim coat of short strand filler:
That left the scoop ready for a skim coat of short strand filler:
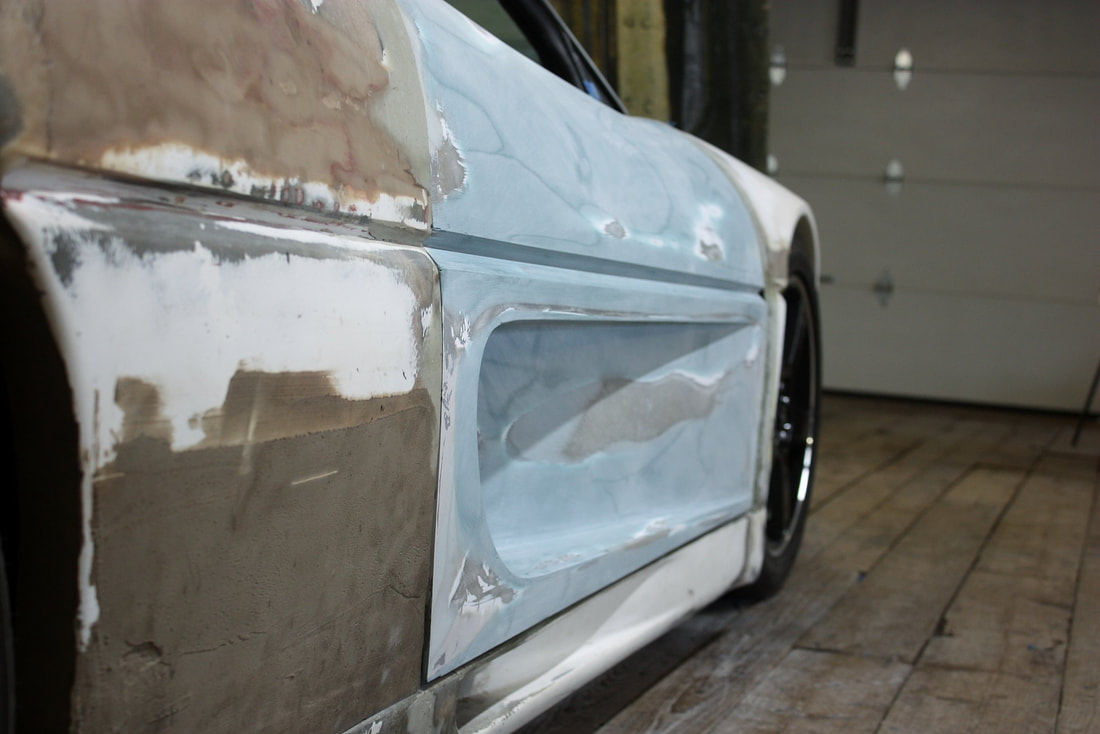
Here’s a view of the reduced crown and a better appreciation of the continuous arc beginning to take shape along the inside corners:
Here’s a view of the reduced crown and a better appreciation of the continuous arc beginning to take shape along the inside corners:
I had to fill the scoop wall in two stages since it was impossible to make a single continuous pass with the putty knife due to the scallop getting in the way.
Once I sanded the forward section of the scoop, I filled the aft section by reaching through the scoop hole and dragging the putty knife backwards in a second pass:
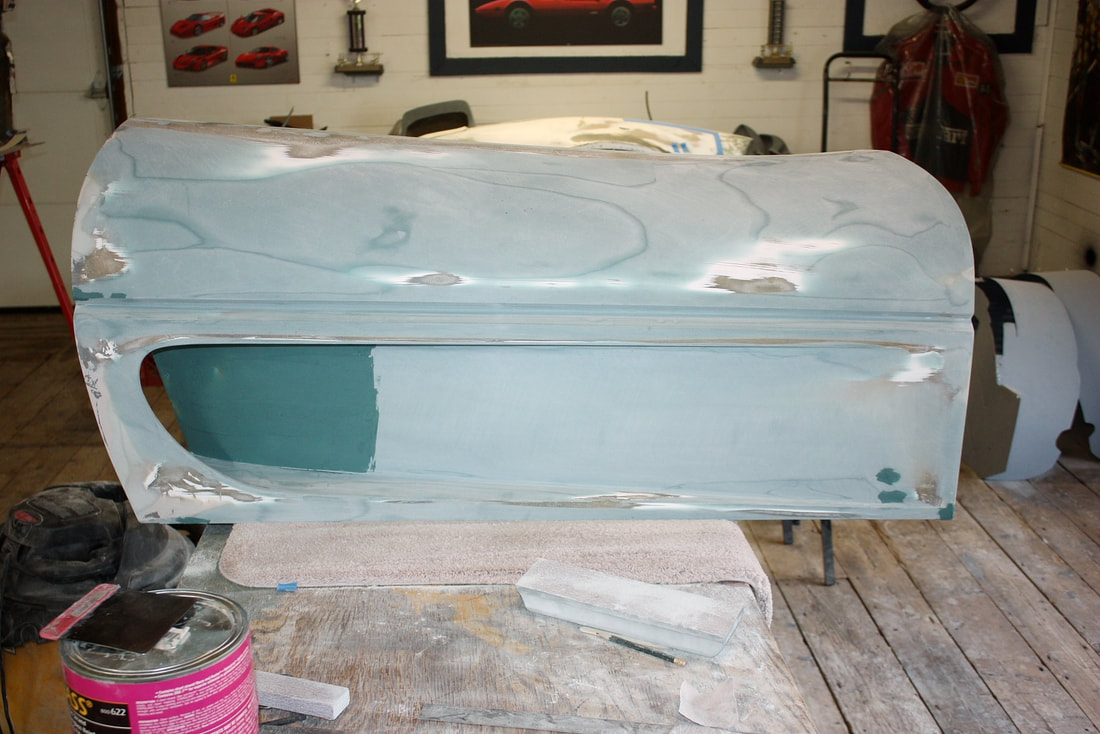
Once sanded smooth, the outside surfaces of the door were finally as far as they could be taken with short-strand fillers. Spot filler putty and Feather Fill polyester primer/filler would come next after I had a few more pieces to spray:
Once sanded smooth, the outside surfaces of the door were finally as far as they could be taken with short-strand fillers. Spot filler putty and Feather Fill polyester primer/filler would come next after I had a few more pieces to spray:
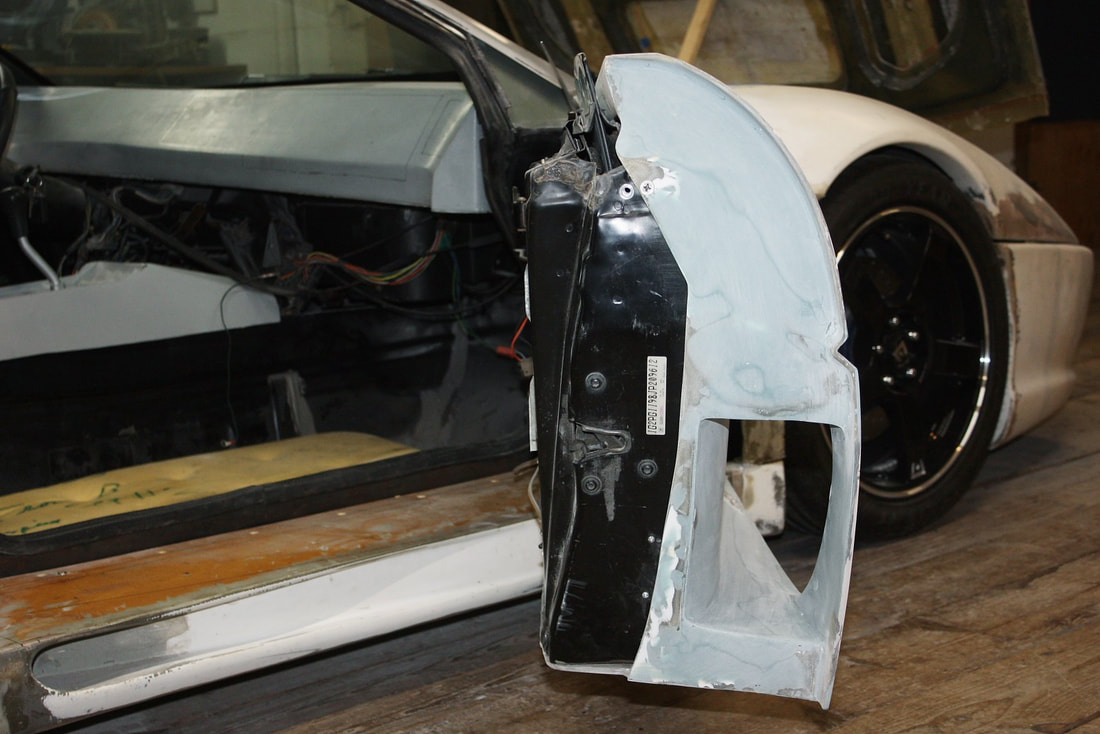
The hidden surfaces still needed a bit of work, like the front and rear bulkheads. Luckily the front only needed a few minor touch ups, especially since it would never be seen anyway.
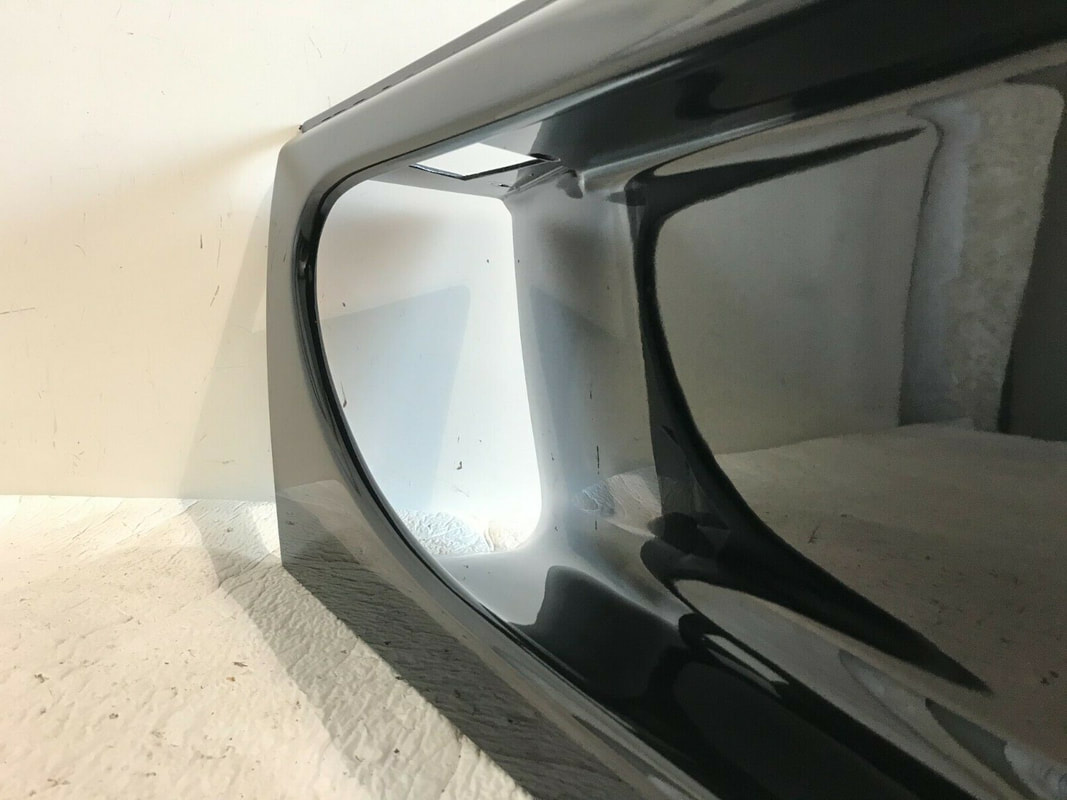
The aft bulkhead left me with a quandary after pulling up some photos of authentic F355’s. Here’s the best photo I could find:
The hidden surfaces still needed a bit of work, like the front and rear bulkheads. Luckily the front only needed a few minor touch ups, especially since it would never be seen anyway.
The aft bulkhead left me with a quandary after pulling up some photos of authentic F355’s. Here’s the best photo I could find:
I wasn’t going to replicate the various bosses at the top of the door, so that wasn’t an issue. The bottom of the scoop however was very different from that on the IFG door:
I wasn’t going to replicate the various bosses at the top of the door, so that wasn’t an issue. The bottom of the scoop however was very different from that on the IFG door:
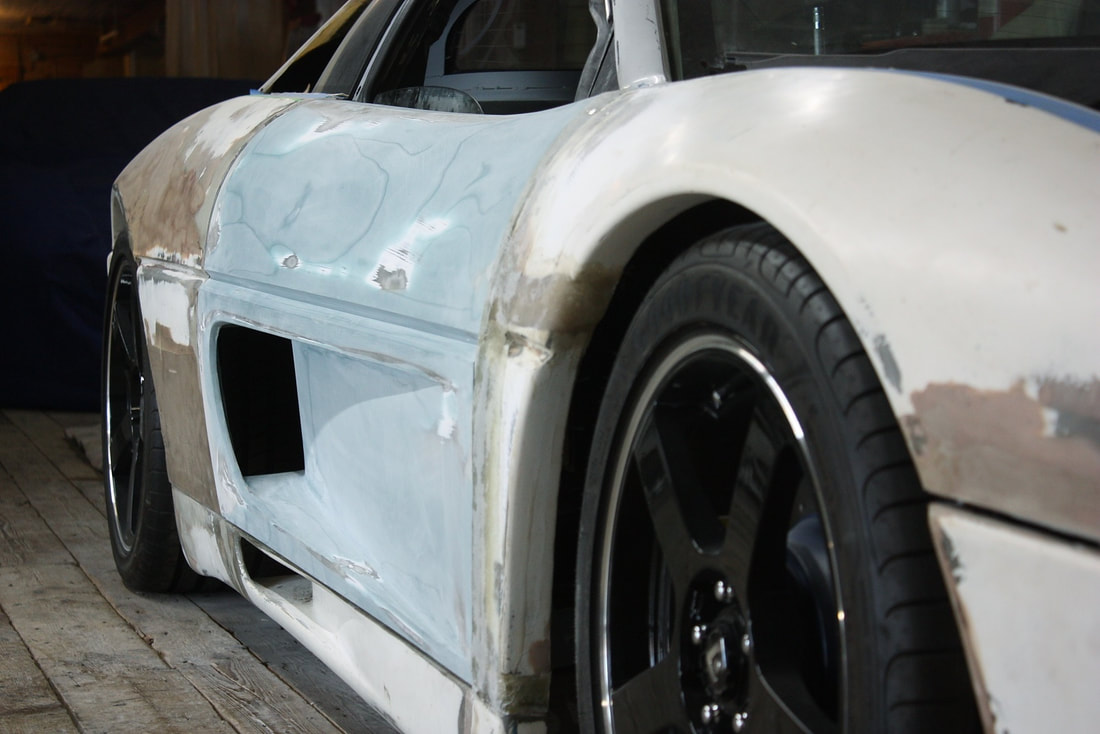
Notice the thickness at the bottom of the door compared to the real F355. At this point it dawned on me that the subtle downward turn of the scoop floor in the side view of the authentic car was needed to make the larger radiator inlet hole at the back of the door. There was nothing I was going to do about this at this point since the scoops, aft door bulkheads, quarter panel forward bulkheads, and radiator shrouds would all need to be reworked to make it more authentic-looking, for minimal gain.
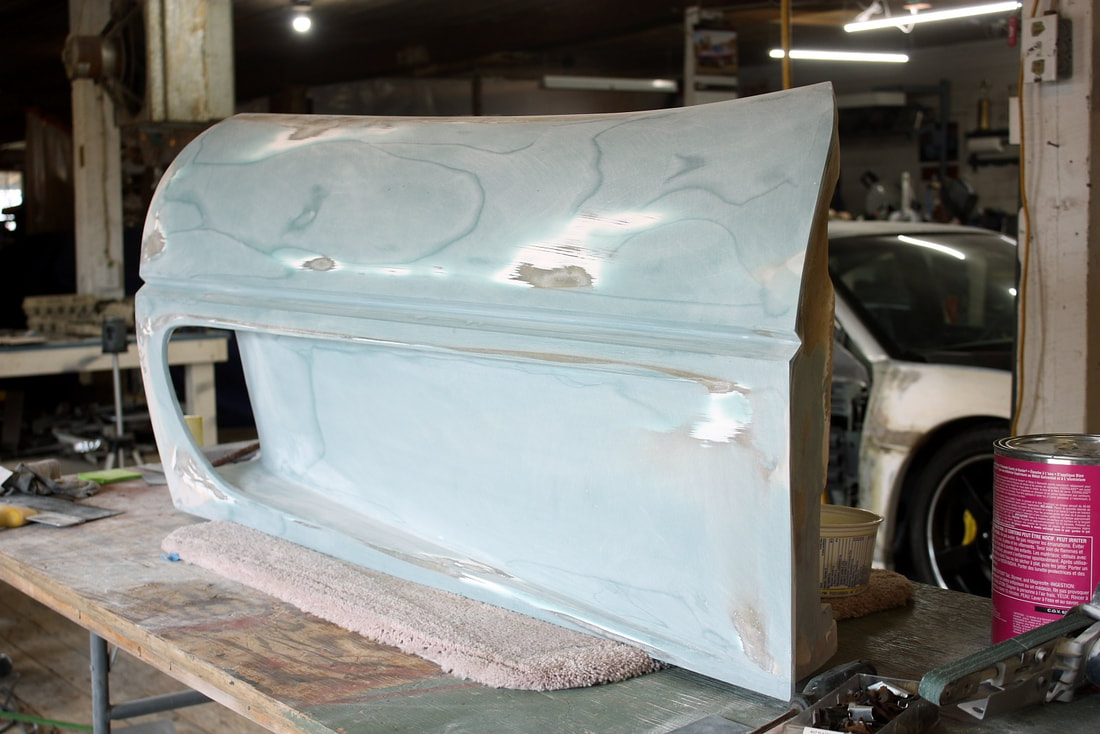
I refitted the door skin to the chassis and admired my handiwork: upper door profile properly arched; beltline with straight crisp creases and even depth; sharp, flowing contours of the scoop; properly crowned scoop wall; and a straight door bottom edge:
Notice the thickness at the bottom of the door compared to the real F355. At this point it dawned on me that the subtle downward turn of the scoop floor in the side view of the authentic car was needed to make the larger radiator inlet hole at the back of the door. There was nothing I was going to do about this at this point since the scoops, aft door bulkheads, quarter panel forward bulkheads, and radiator shrouds would all need to be reworked to make it more authentic-looking, for minimal gain.
I refitted the door skin to the chassis and admired my handiwork: upper door profile properly arched; beltline with straight crisp creases and even depth; sharp, flowing contours of the scoop; properly crowned scoop wall; and a straight door bottom edge:
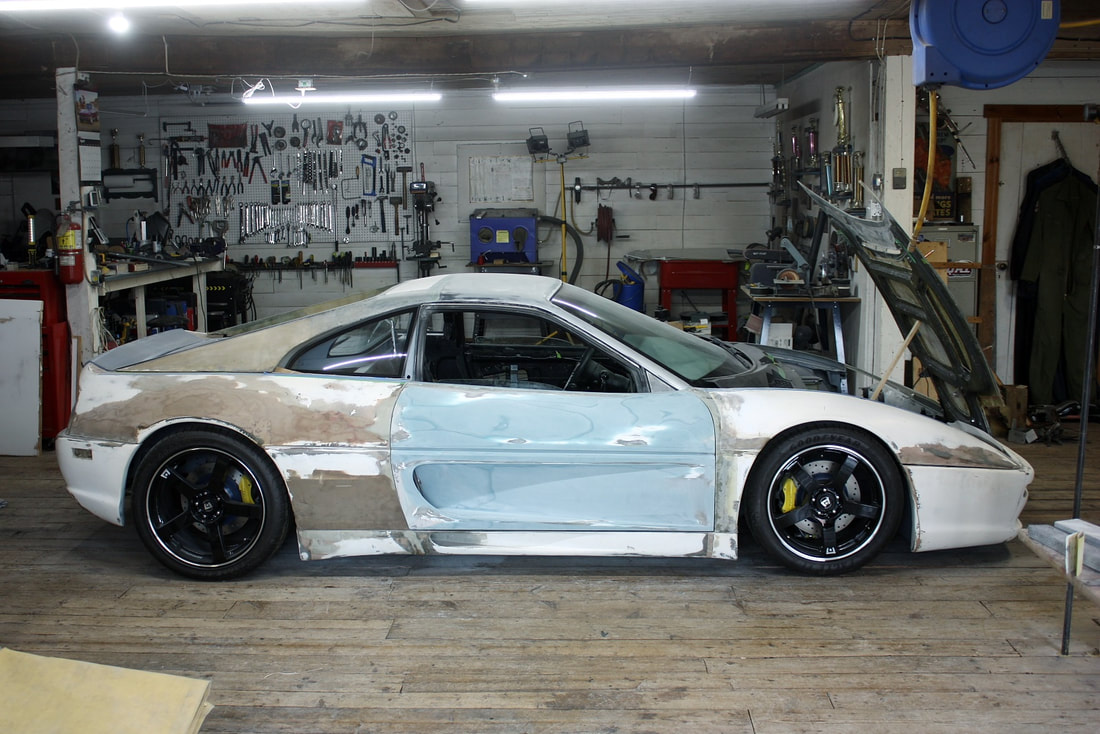
Stepping back, the detail work is lost, and the biggest noticeable difference becomes the narrowed door gaps:
Stepping back, the detail work is lost, and the biggest noticeable difference becomes the narrowed door gaps:
All of door work set me up for continuing the flow of lines forward into the front fender, and rearward into the quarters. But up next is the driver’s door. It may seem like it’s going to be more of the same, but remember: the only consistency in IFG panels is that they’re completely inconsistent.
All of door work set me up for continuing the flow of lines forward into the front fender, and rearward into the quarters. But up next is the driver’s door. It may seem like it’s going to be more of the same, but remember: the only consistency in IFG panels is that they’re completely inconsistent.

 RSS Feed
