OK! So, after a rather long break from the project, part 2 is finally here. (Life has a way of getting in the way sometimes!) I left off having reinforced the bulkheads on the driver’s door panel and reshaped the top profile to match that of the passenger door. This post is about tackling all the rest of the panel’s problems.
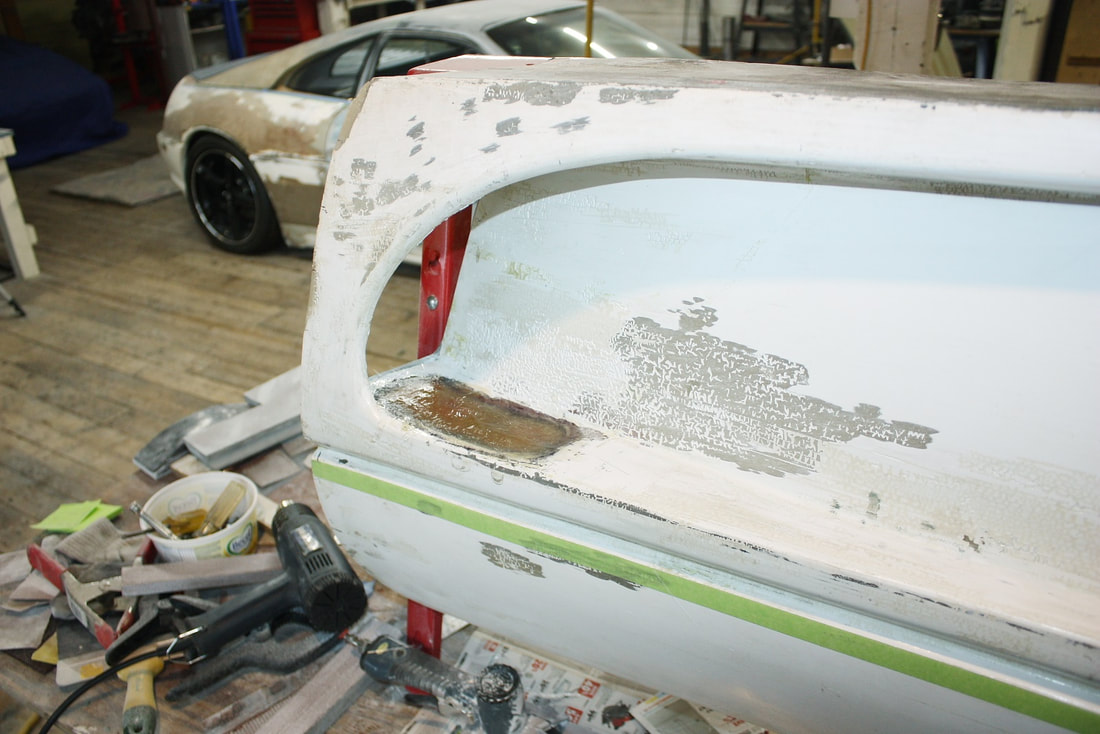
I decided long ago I wouldn’t use the stock F355 mechanical door handle configuration, choosing electrical activation instead. That meant glassing over the hole that someone made in the “ceiling” of the scoop. The previous owner obviously had a similar idea because the misshaped hole already had one thin layer of fibreglass closing it up from the inside:
I decided long ago I wouldn’t use the stock F355 mechanical door handle configuration, choosing electrical activation instead. That meant glassing over the hole that someone made in the “ceiling” of the scoop. The previous owner obviously had a similar idea because the misshaped hole already had one thin layer of fibreglass closing it up from the inside:
It hadn’t bonded very well to the inside surface so I chopped it out, bevelled the sides of the hole, and laid up some packing tape to keep some new resin from seeping through:
It hadn’t bonded very well to the inside surface so I chopped it out, bevelled the sides of the hole, and laid up some packing tape to keep some new resin from seeping through:

I cut four successively larger patches of 1.5 oz mat to refill the hole and make a structural repair:
I cut four successively larger patches of 1.5 oz mat to refill the hole and make a structural repair:
Then I saturated it with polyester resin…
Then I saturated it with polyester resin…
…let it cure over night, roughed up the surface again, and levelled it off with a thin layer of long strand Kitty Hair body filler:
…let it cure over night, roughed up the surface again, and levelled it off with a thin layer of long strand Kitty Hair body filler:
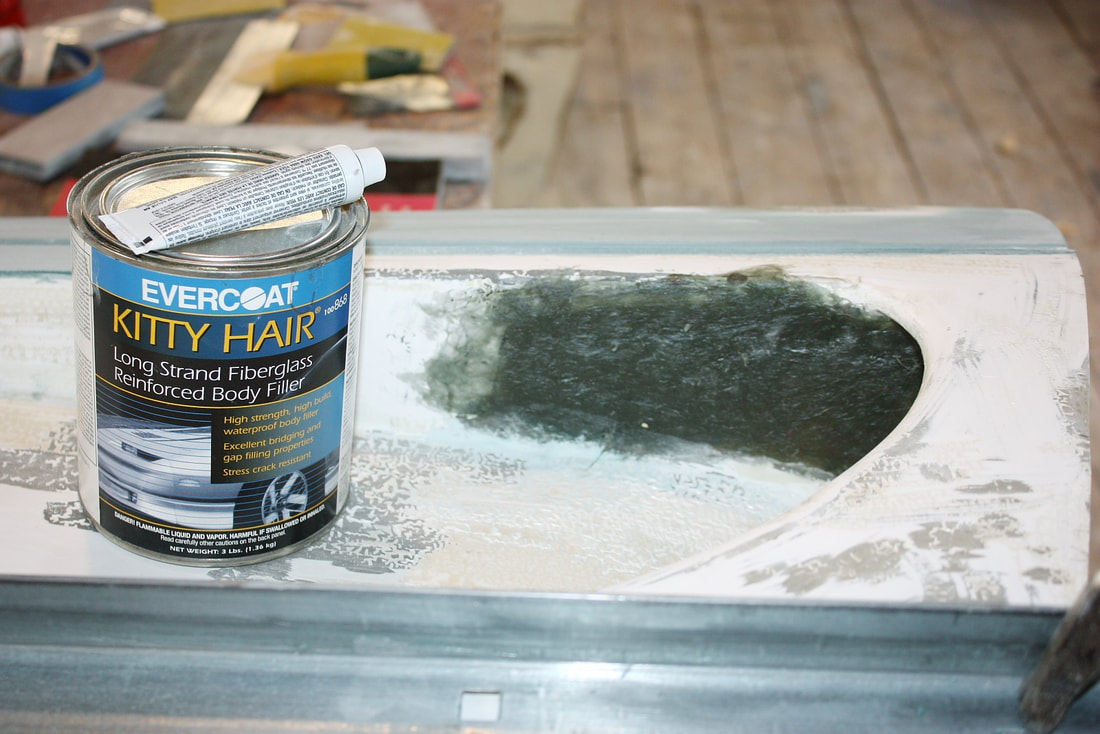
With the left-over kitty hair I filled a couple drilled holes that the previous owner had made right through the door skin, and patched the lower rear corner since it had a chunk taken out of it:
With the left-over kitty hair I filled a couple drilled holes that the previous owner had made right through the door skin, and patched the lower rear corner since it had a chunk taken out of it:
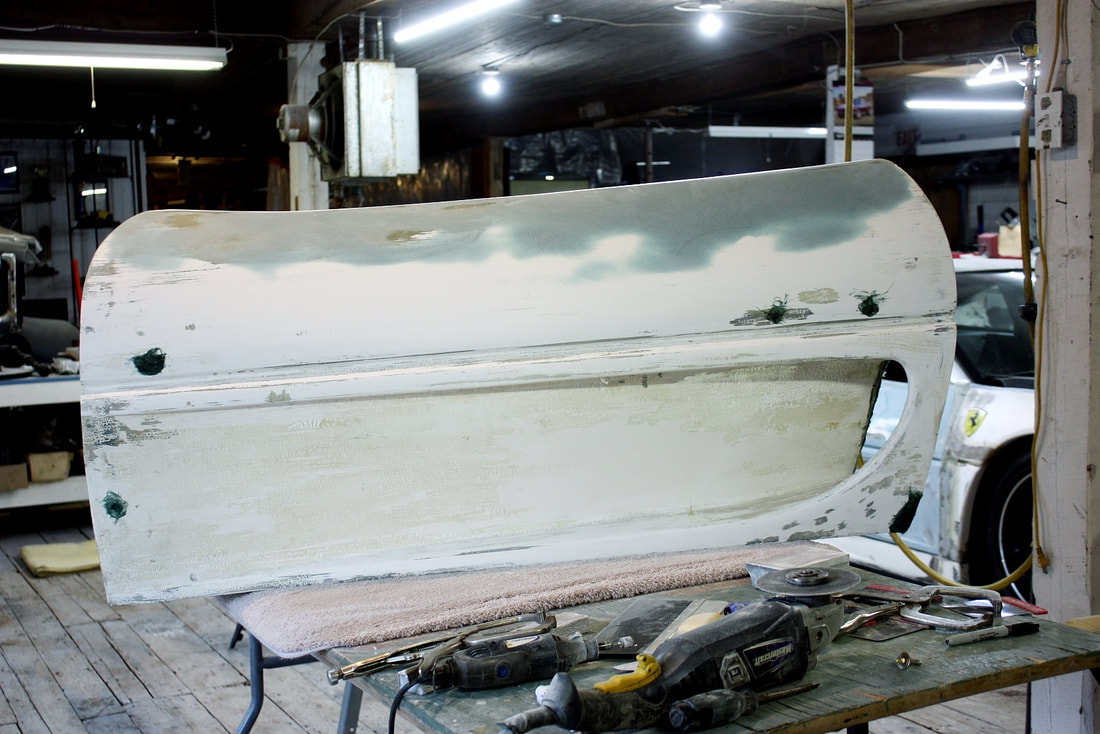
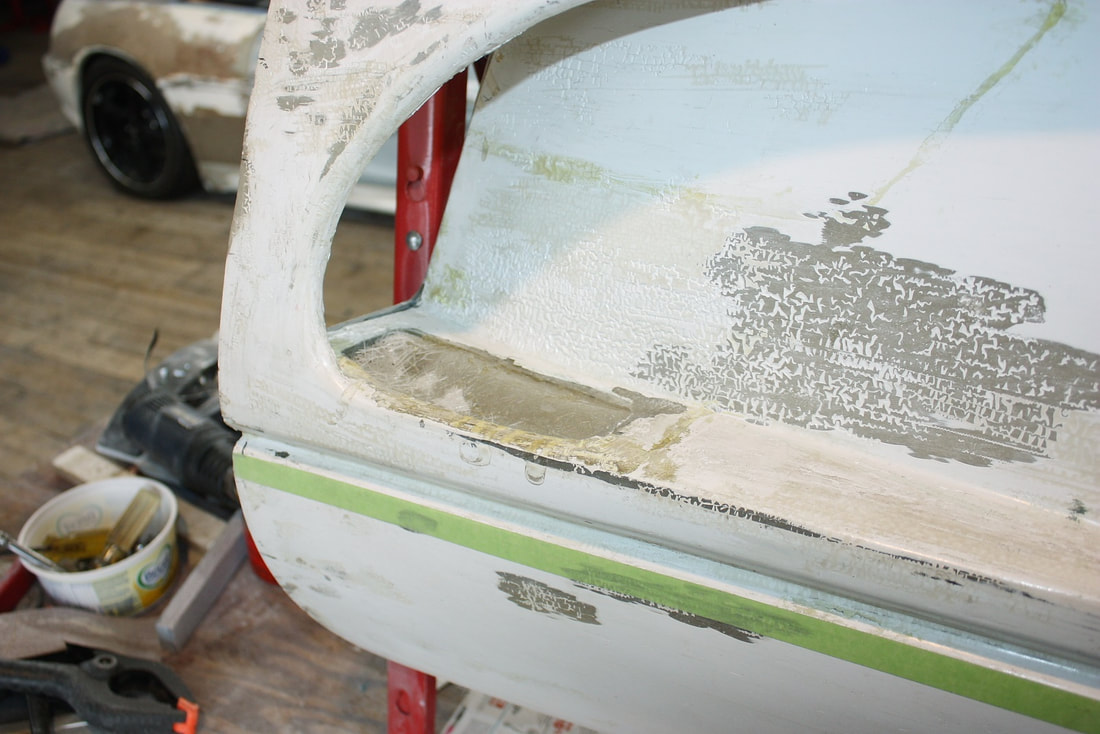
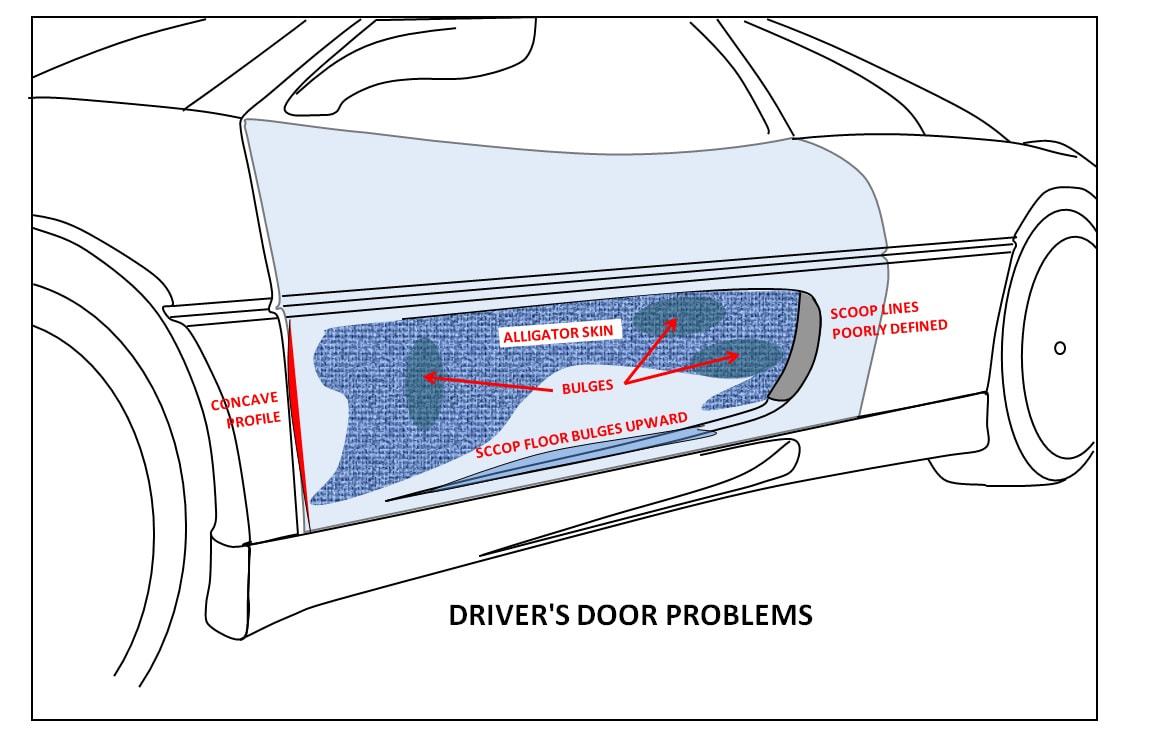
With the door handle hole plugged, I could focus on the cosmetic repairs... there were so many it was hard to decide where to start. Here’s a close look at the door skin at this stage:
With the door handle hole plugged, I could focus on the cosmetic repairs... there were so many it was hard to decide where to start. Here’s a close look at the door skin at this stage:

It doesn’t take a keen eye to see how awful it was: poorly defined creases, crooked lines, concave surfaces where there should have been convex ones, and on and on:
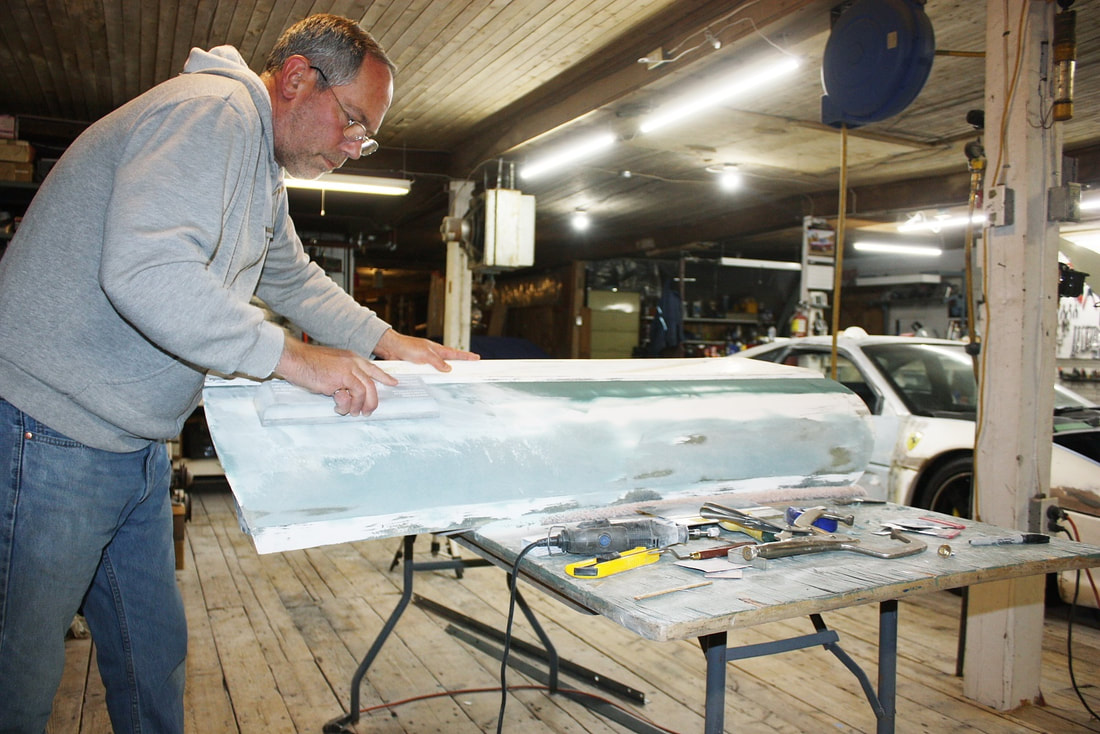
I decided to keep working a top down approach, so the next logical step was to shape the skin on the top half of the panel. My strategy for a large area like this is to get the perimeter properly levelled and shaped, then fill and shape the main surface, transitioning smoothly from the contour of one outer edge to the other.
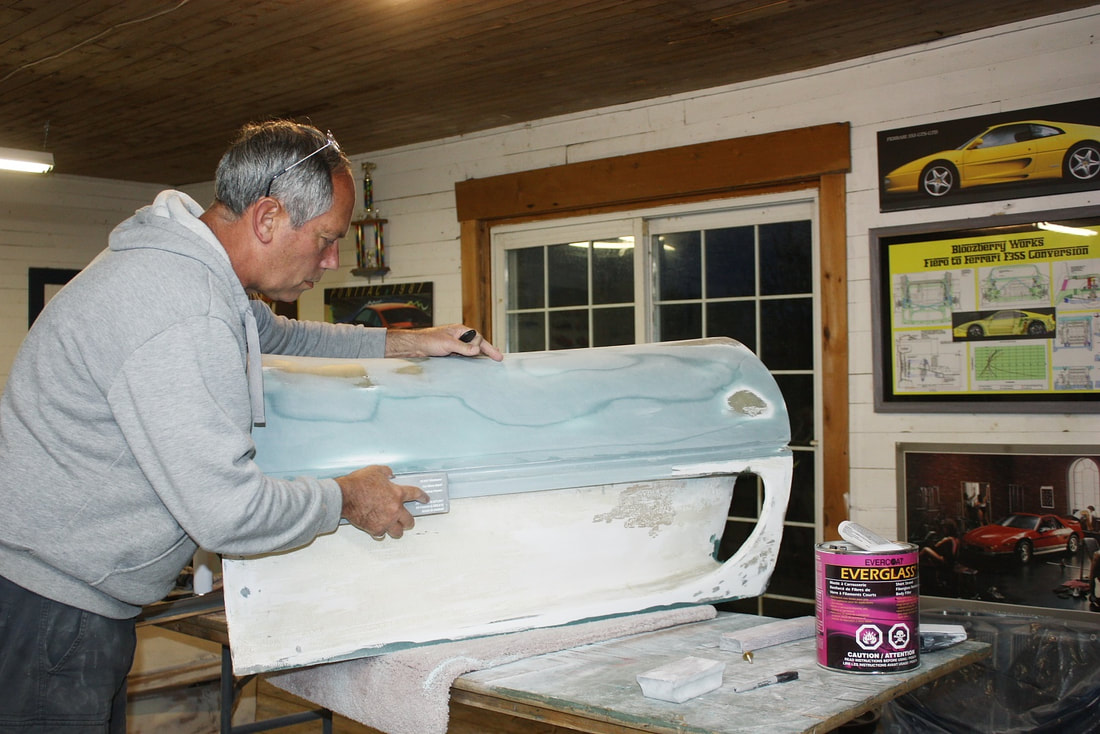
In my case, I had already completed the upper, saddle-shaped edge in my last post, so I needed to work on straightening the lower edge along the middle of the panel. Here, I had used a long straight edge to guide the filler along the top of the belt line, and was sanding it smooth:
It doesn’t take a keen eye to see how awful it was: poorly defined creases, crooked lines, concave surfaces where there should have been convex ones, and on and on:
I decided to keep working a top down approach, so the next logical step was to shape the skin on the top half of the panel. My strategy for a large area like this is to get the perimeter properly levelled and shaped, then fill and shape the main surface, transitioning smoothly from the contour of one outer edge to the other.
In my case, I had already completed the upper, saddle-shaped edge in my last post, so I needed to work on straightening the lower edge along the middle of the panel. Here, I had used a long straight edge to guide the filler along the top of the belt line, and was sanding it smooth:
Once I had straightened the upper crease along the belt line, I applied a thin skim layer of short strand filler to the entire upper surface bridging the upper and lower edges of my previous filler work:
Once I had straightened the upper crease along the belt line, I applied a thin skim layer of short strand filler to the entire upper surface bridging the upper and lower edges of my previous filler work:
While that set up, I clamped my long straight-edge to the lower edge of the V-groove in preparation for filling and straightening the belt line itself:
While that set up, I clamped my long straight-edge to the lower edge of the V-groove in preparation for filling and straightening the belt line itself:
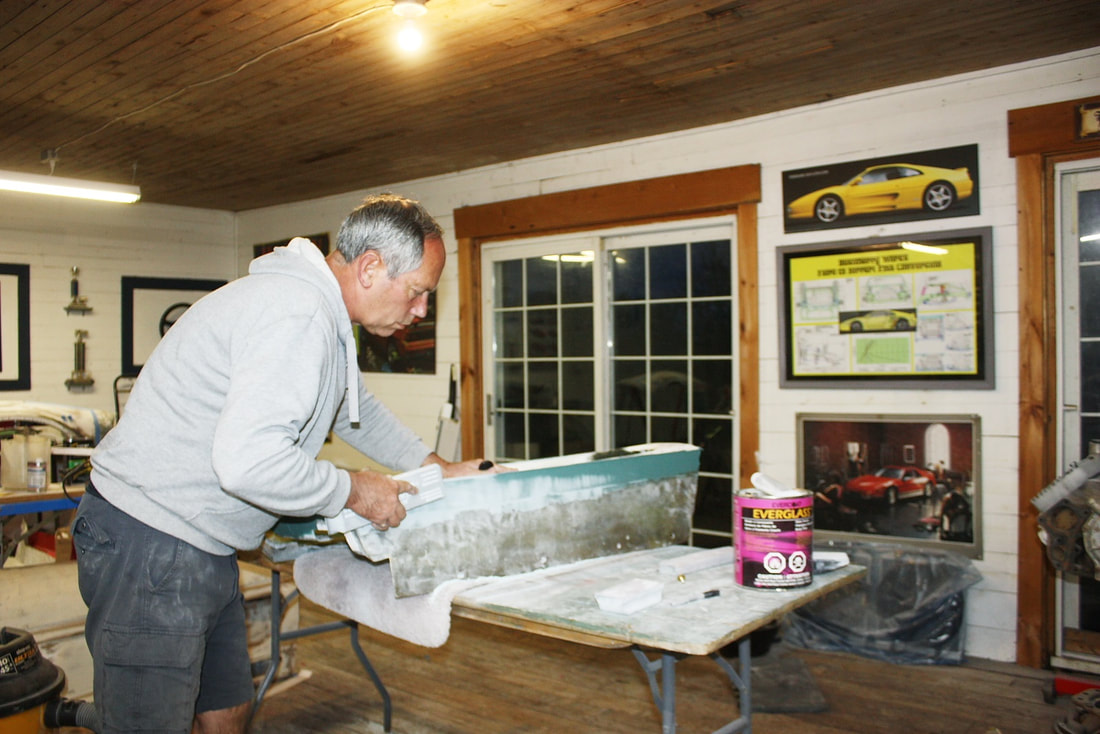
I used the same technique as I used on the passenger door to rework the groove: first I placed a blob of filler at one end of the groove, then dragged a V-shaped trowel through it using the metal guide on one side, and the finished edge on the other to keep the trowel straight:
I used the same technique as I used on the passenger door to rework the groove: first I placed a blob of filler at one end of the groove, then dragged a V-shaped trowel through it using the metal guide on one side, and the finished edge on the other to keep the trowel straight:
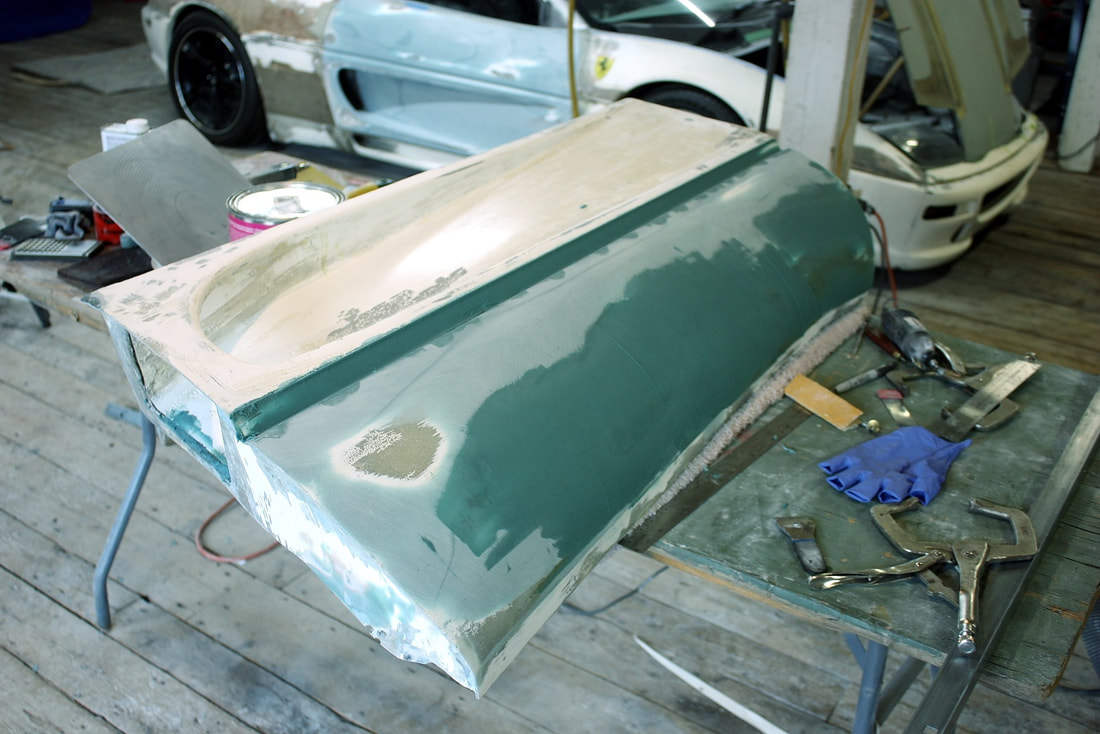
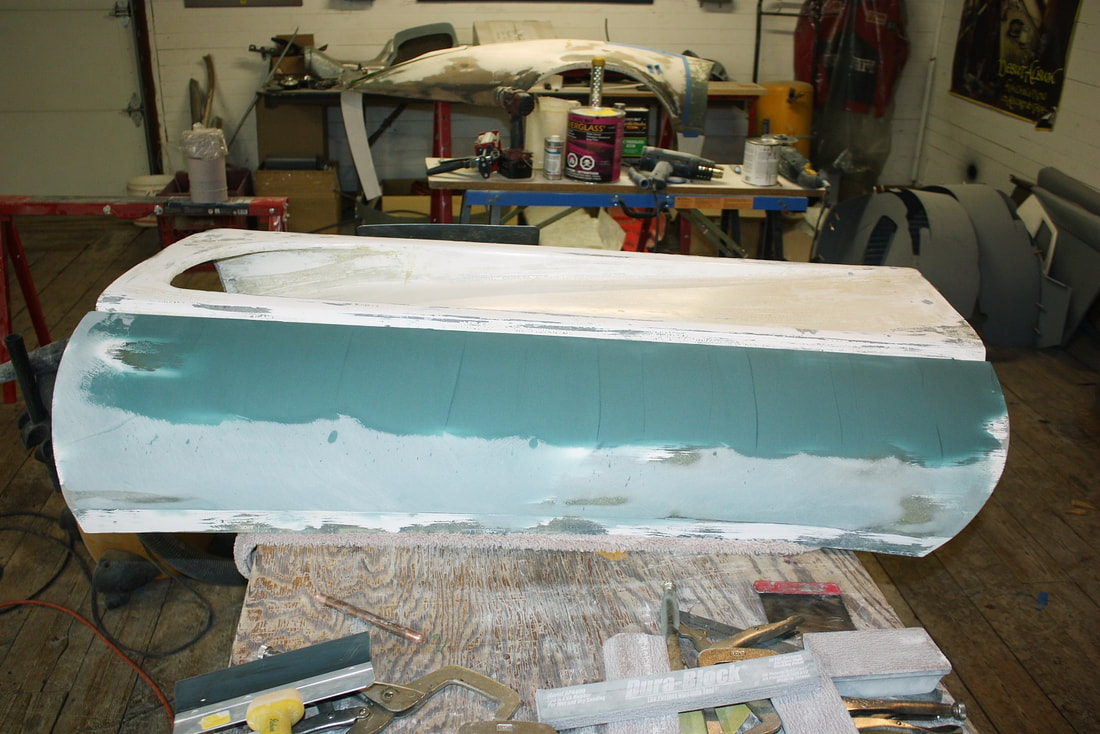
Here’s the result before sanding the putty smooth on both the upper skin and the belt line groove:
Here’s the result before sanding the putty smooth on both the upper skin and the belt line groove:

From the photo above it’s obvious how the lower half of the door skin bows inward, when it should have a nice soft convex crown instead. But I’ll deal with that a bit later on in this post.
When I finished block sanding the upper skin and the V-groove, the next step was to rework the perimeter of the scoop. Once again, I used my long angle iron as a straight edge to guide the application of filler to make crisp edges, then I removed the guide when the filler was semi-set, then sanded the filler to final shape:
I could only go just so far with the straight edge along the top of the scoop since it gradually curves downward starting about ¾ of the way down its length. The curved part would have to be done by hand and eye.
I used the straight edge technique to reset the scoop’s bottom edge and the bottom lip of the door too:
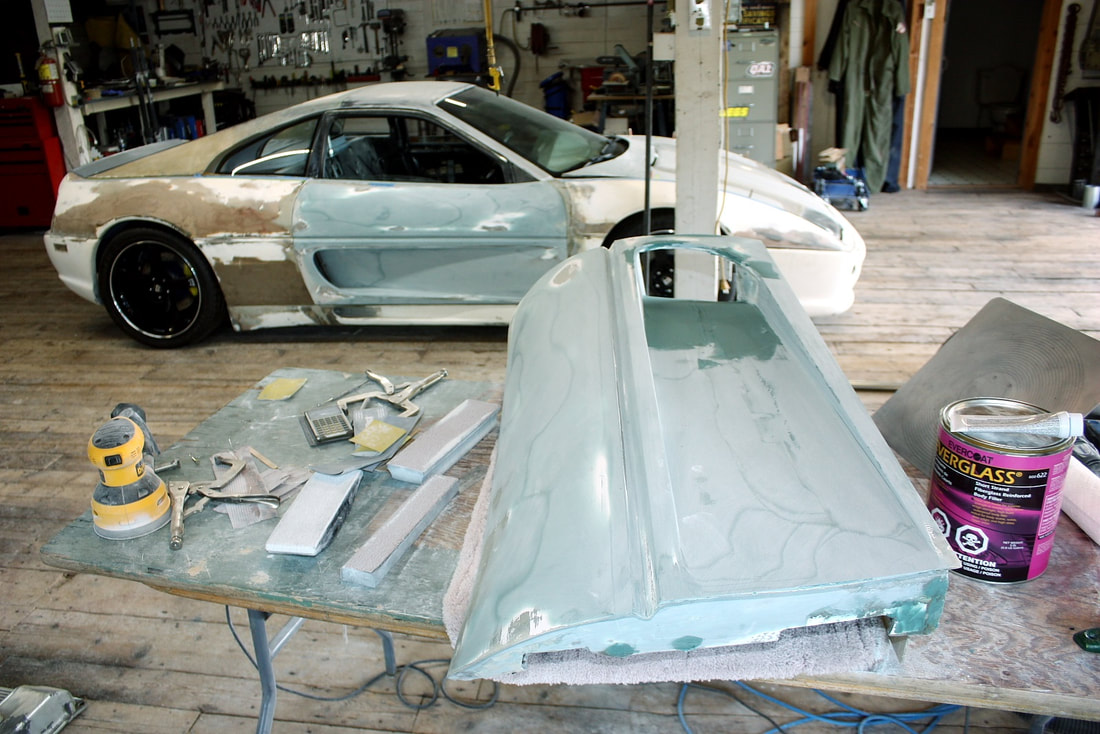
The actual scoop was next. It was a mess of alligator skin, random outward bulges, and the previously mentioned concave bow down most of its length:
The actual scoop was next. It was a mess of alligator skin, random outward bulges, and the previously mentioned concave bow down most of its length:
I addressed the bulge in the scoop’s floor first. Luckily the fibreglass was thick enough to get away with simply grinding the bulge flat using my 1” belt sander. I didn’t have to resort to slicing and re-bonding the area as I did for the passenger door:
I addressed the bulge in the scoop’s floor first. Luckily the fibreglass was thick enough to get away with simply grinding the bulge flat using my 1” belt sander. I didn’t have to resort to slicing and re-bonding the area as I did for the passenger door:

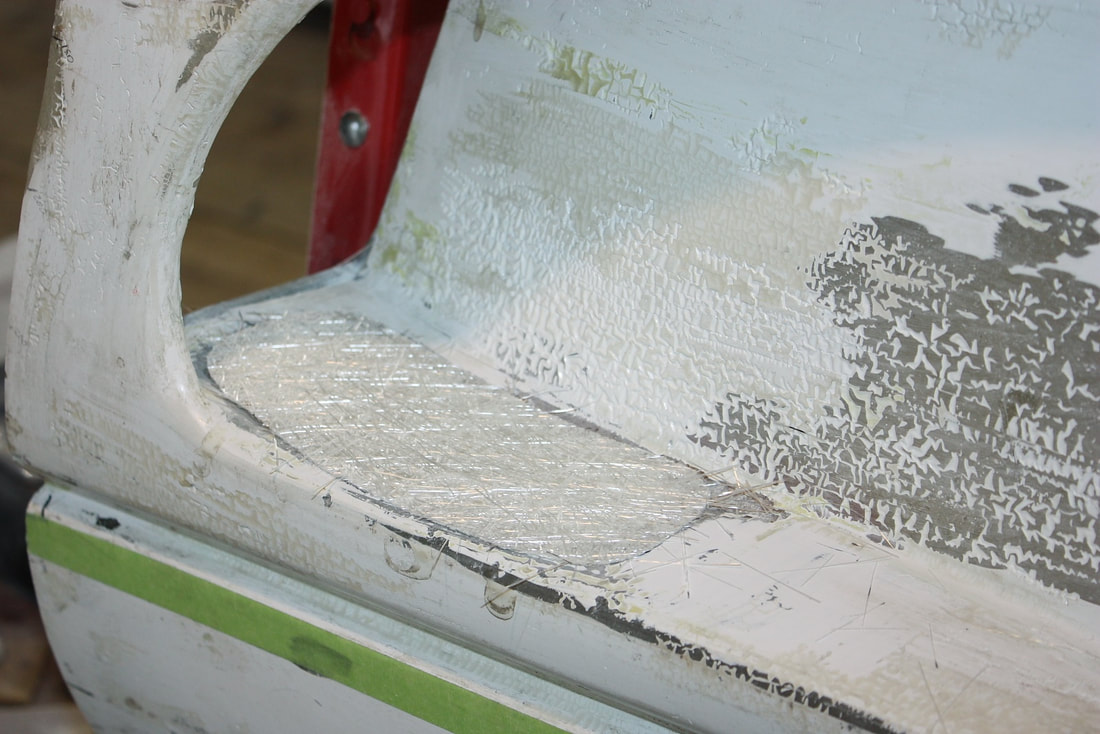
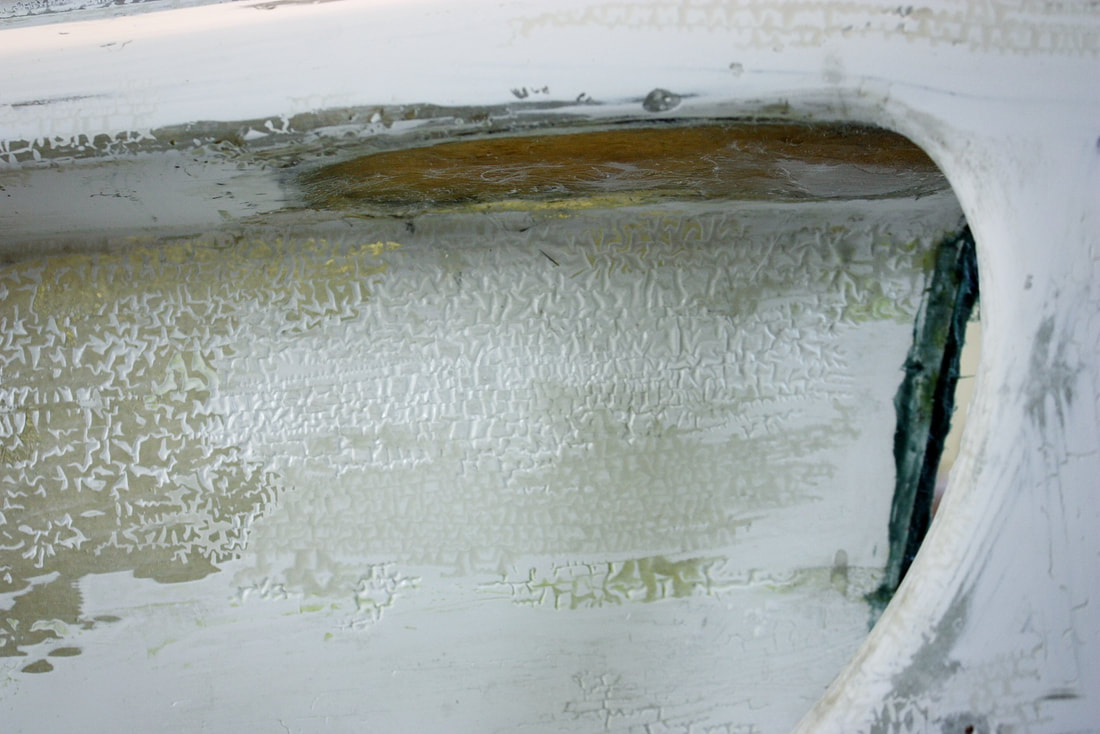
The biggest problem was the large scoop wall. Here’s a close look at the crazed gel coat. Apparently, it’s caused by laying up the fibreglass on gel coat that’s under-cured:
The biggest problem was the large scoop wall. Here’s a close look at the crazed gel coat. Apparently, it’s caused by laying up the fibreglass on gel coat that’s under-cured:
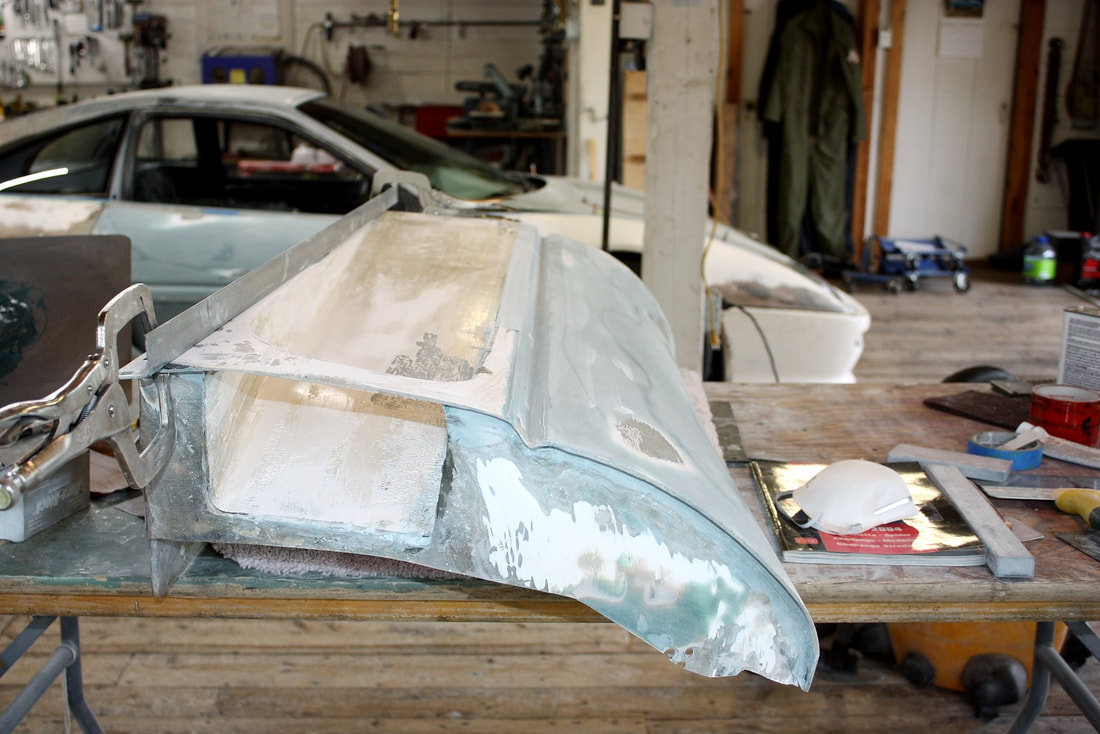
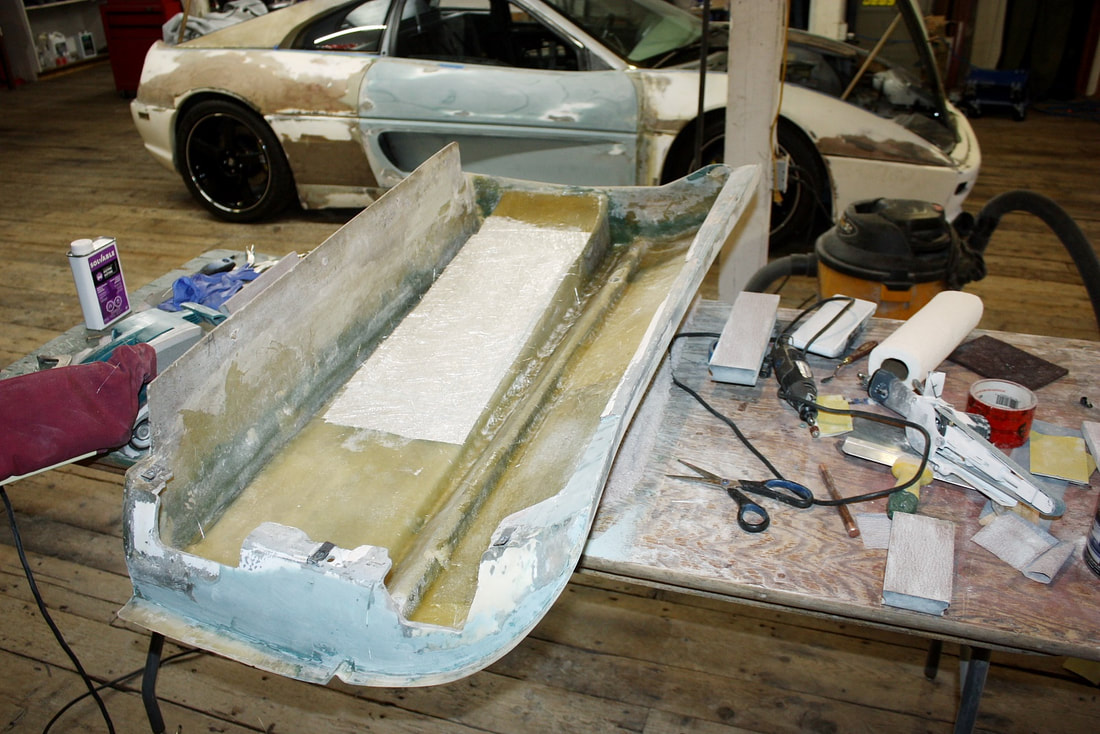
It was so bad, that when coupled with the bulges in the wall, there simply wasn’t enough material thickness to grind away the flaws without burning through the fibreglass. That meant having to thicken the scoop wall from behind as I did with the passenger door. Here, I was roughing up the old fibreglass to make a mechanical bond with the new:
It was so bad, that when coupled with the bulges in the wall, there simply wasn’t enough material thickness to grind away the flaws without burning through the fibreglass. That meant having to thicken the scoop wall from behind as I did with the passenger door. Here, I was roughing up the old fibreglass to make a mechanical bond with the new:

I laminated an additional four layers of 1.5 oz mat on the backside to ensure I’d have enough material to grind away the imperfections on the outboard side:
I laminated an additional four layers of 1.5 oz mat on the backside to ensure I’d have enough material to grind away the imperfections on the outboard side:
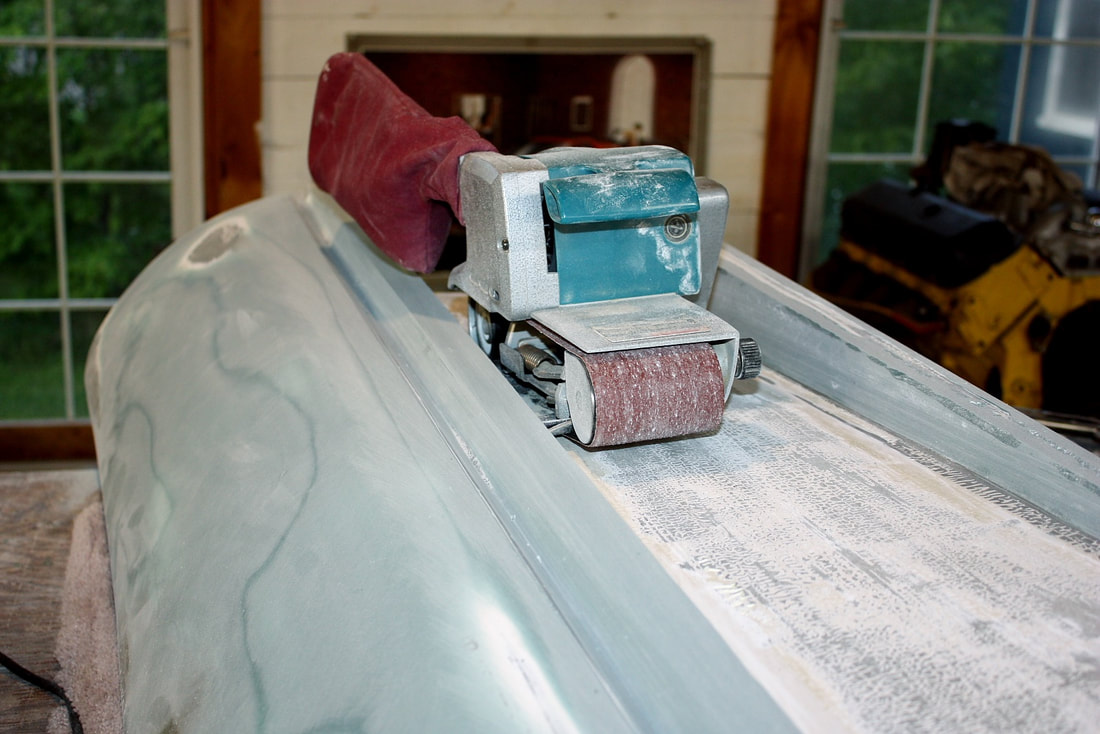
And here I was using 60 grit paper on the 4” belt sander to level out the scoop wall as much as possible with this badass tool:
And here I was using 60 grit paper on the 4” belt sander to level out the scoop wall as much as possible with this badass tool:
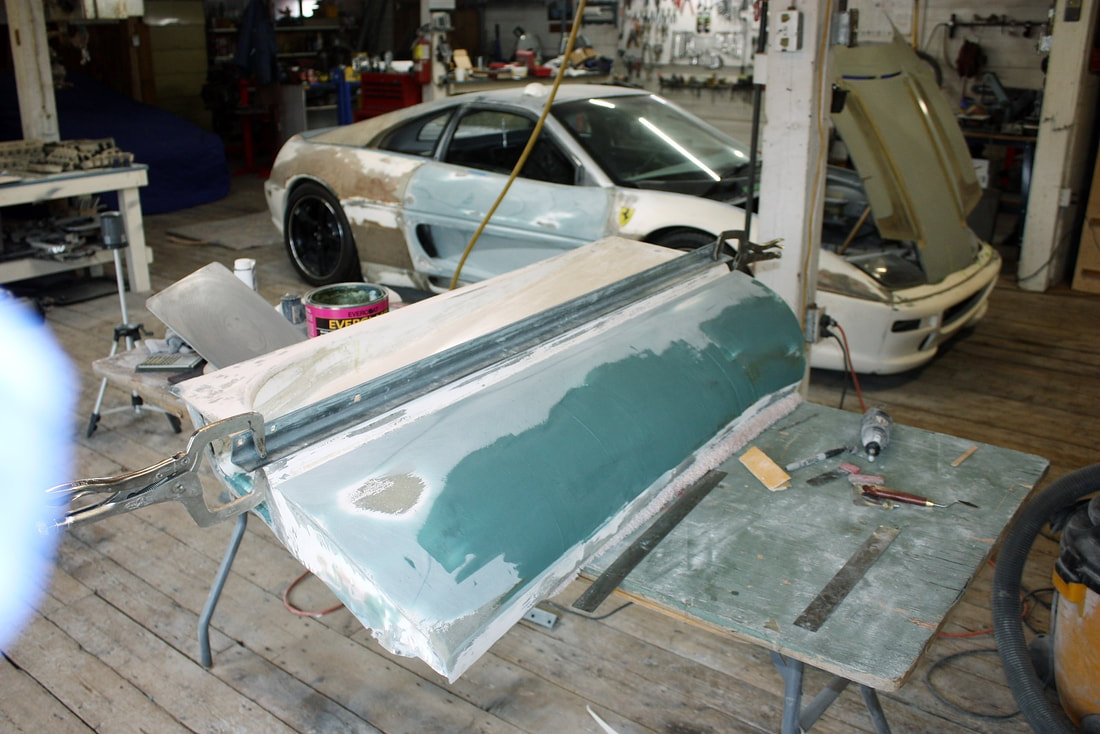
From there it took a series of fill and sand iterations before the scoop wall began to take shape. I struggled with getting the compound curves just right... there's a very slight vertical crown combined with an ever-increasing inward arch toward the rear of the scoop. It seems the passenger door was much easier:
From there it took a series of fill and sand iterations before the scoop wall began to take shape. I struggled with getting the compound curves just right... there's a very slight vertical crown combined with an ever-increasing inward arch toward the rear of the scoop. It seems the passenger door was much easier:
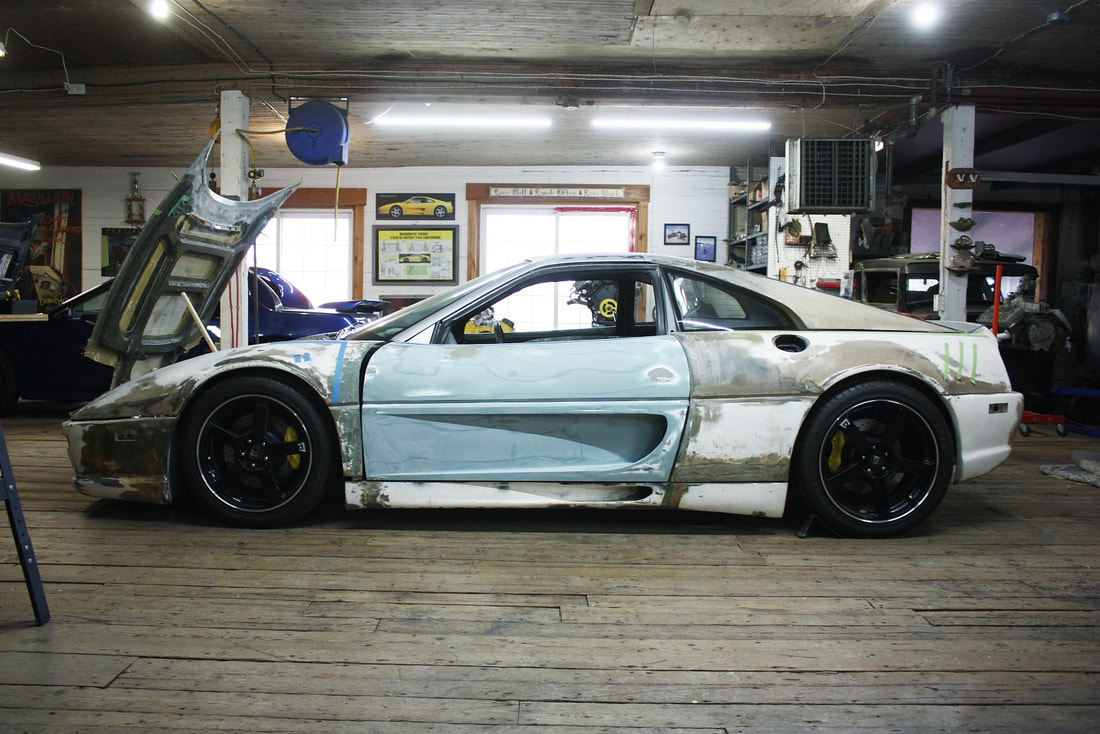
It also took some work before the signature swoopy vertical "C" opening had the exact same shape as the passenger door (no, they weren't the same… surprise, surprise, surprise), but for the most part, the door shaping was done. I reinstalled the panel on the chassis and was happy with the way things were shaping up:

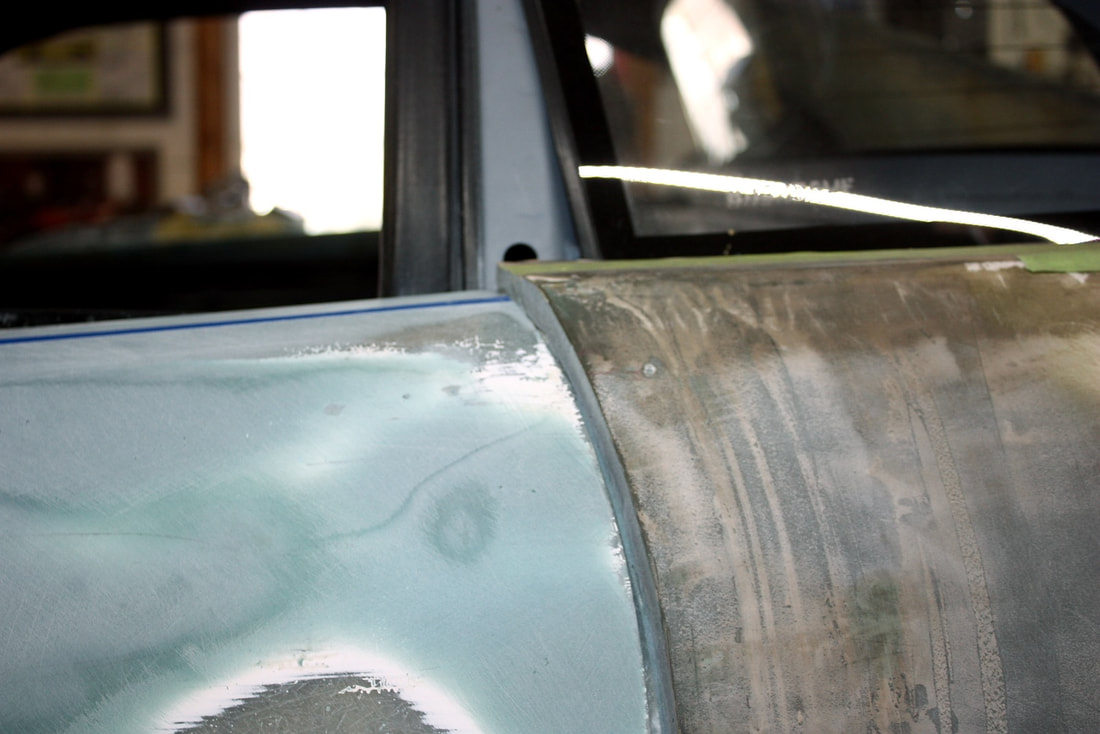
The reshaped door, installed exactly where it should be, only emphasized all the other problems with the remaining panels... the crooked belt line, huge gaps, and misaligned curves from door to fenders. Here's a close up of the mismatched curves between the back edge of the door and the rear quarter panel:
And here's a close up of the front door gap... but bear in mind that I created much of this gap myself when I tilted the fenders slightly to achieve the required under-hood clearance at the cowl, and when I cut the front edge of the door back to align with the back edge rather than the front edge of the A-pillar:

Stepping back to get an overall view of the body gives an appreciation of how much more work there is to do!

 RSS Feed
