This post is about how I hid the scars from the structural changes I made in my last post, and addressed a bunch of flaws created by the original IFG molds. (Yes… even after replacing the sills and the bottoms, more work was needed on the only original part that was left.)
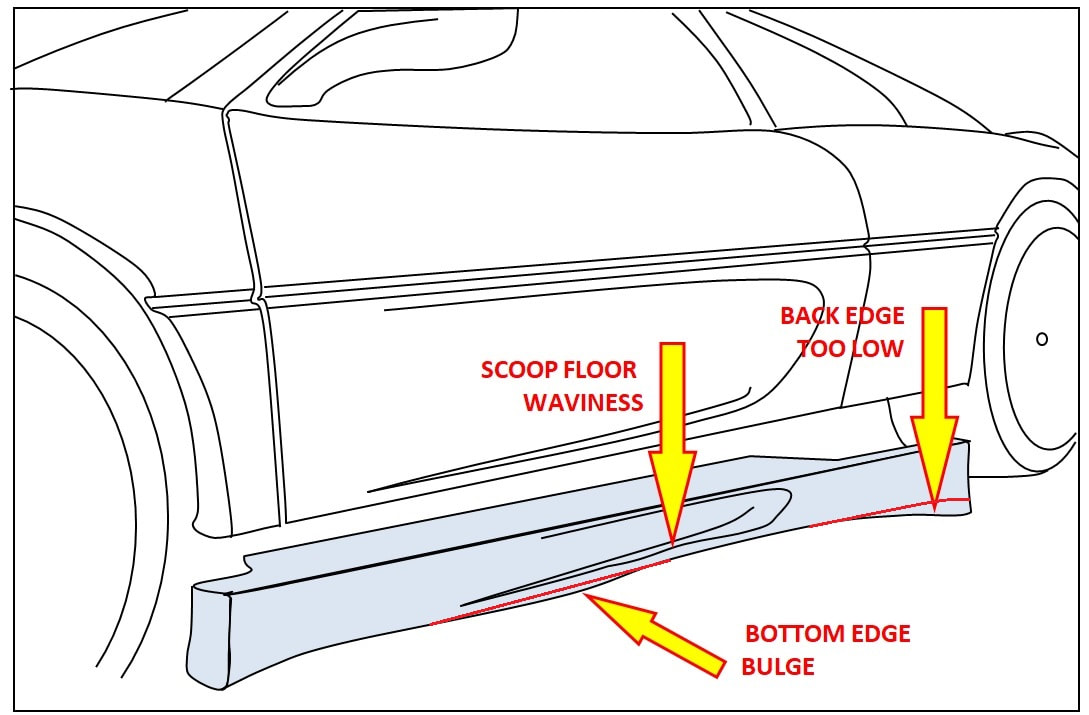
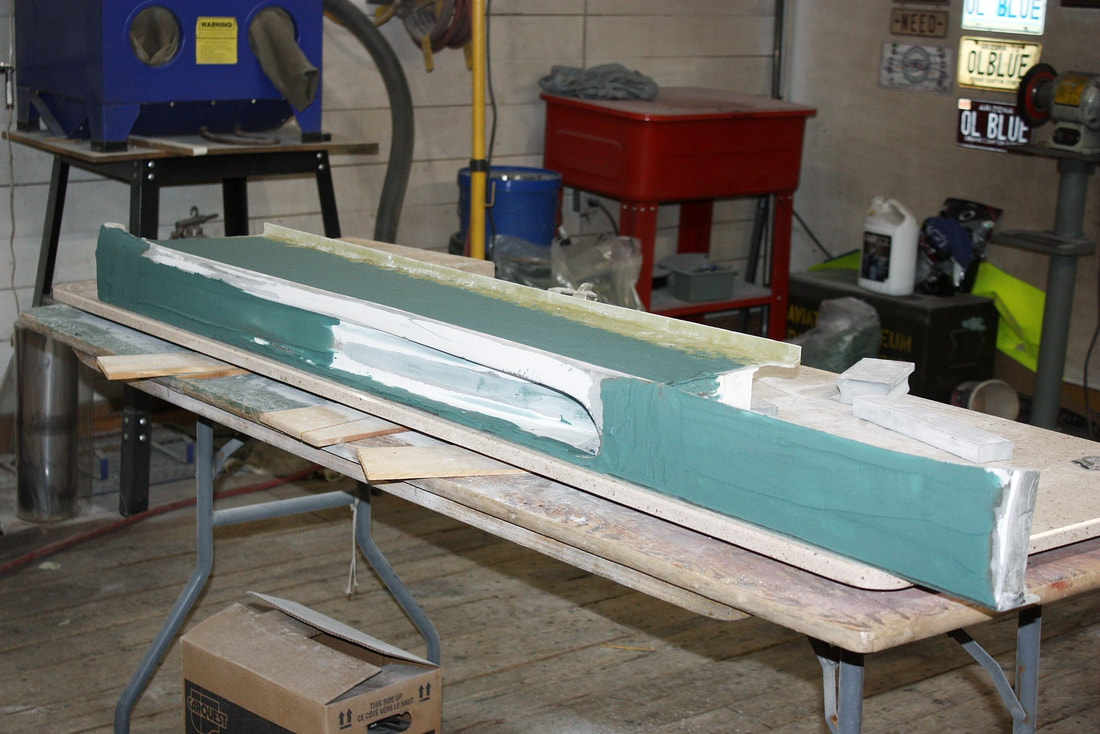
For starters, the IFG rockers had a lot of waviness in the scoop lines, a huge bulge in the driver’s side bottom edge, and both drooped way too far down at rear wheel openings:
This post is about how I hid the scars from the structural changes I made in my last post, and addressed a bunch of flaws created by the original IFG molds. (Yes… even after replacing the sills and the bottoms, more work was needed on the only original part that was left.)
For starters, the IFG rockers had a lot of waviness in the scoop lines, a huge bulge in the driver’s side bottom edge, and both drooped way too far down at rear wheel openings:
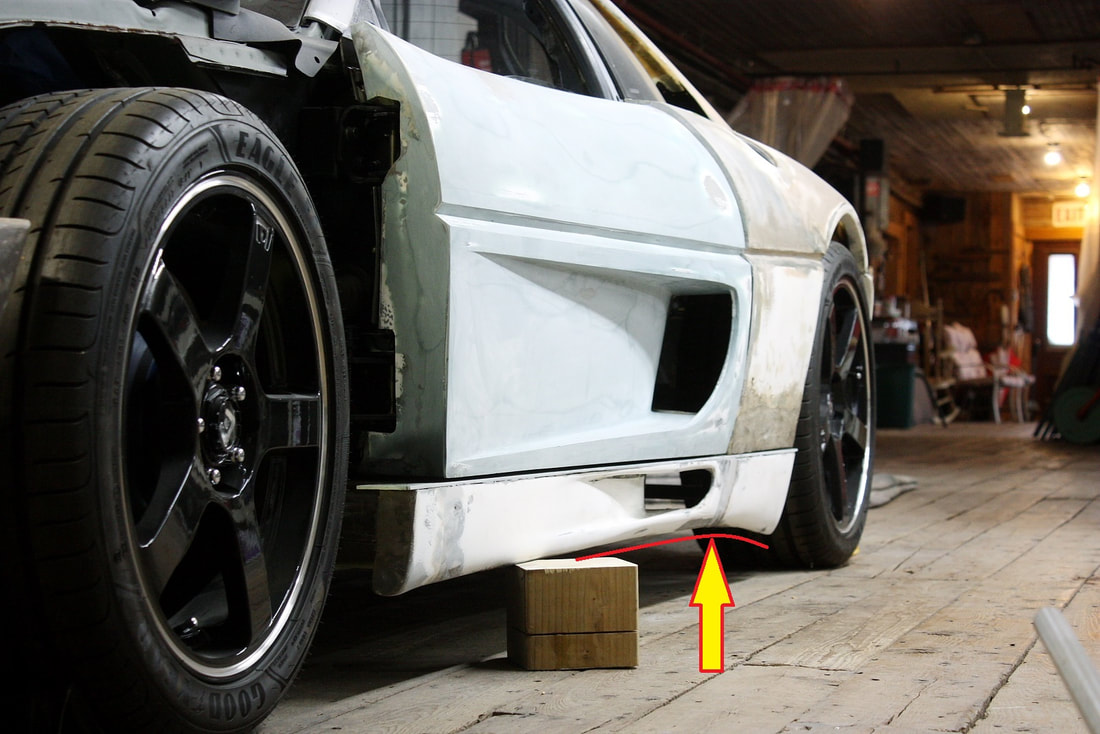
The exaggerated droop at the rear of the rockers wasn’t only unpleasing to the eye, it also unnecessarily reduced ground clearance:
The exaggerated droop at the rear of the rockers wasn’t only unpleasing to the eye, it also unnecessarily reduced ground clearance:
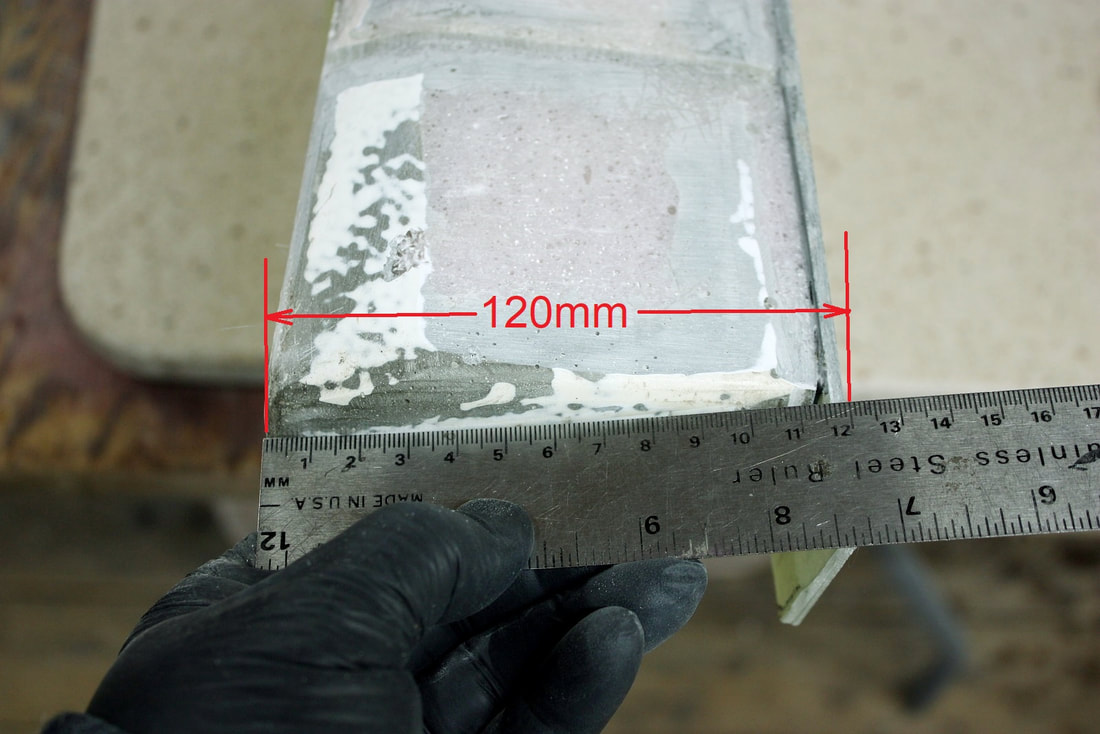
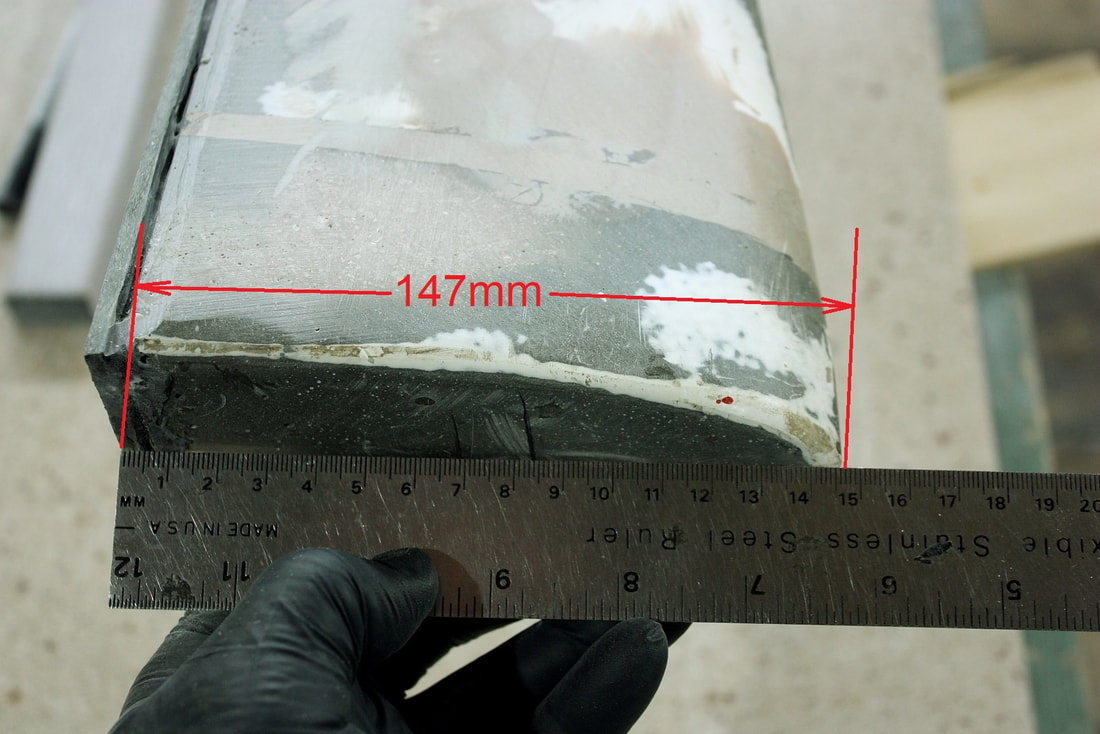
I measured both front and rear ends of each rocker and found nearly 30mm greater height at the rear:
I measured both front and rear ends of each rocker and found nearly 30mm greater height at the rear:
 |  |
So I traced new profiles on the aft ends of both rockers to mimic the less pronounced flair at the fronts:
So I traced new profiles on the aft ends of both rockers to mimic the less pronounced flair at the fronts:
Then, using a cut-off wheel in my angle grinder, I lopped off the excess:
Then, using a cut-off wheel in my angle grinder, I lopped off the excess:

Next up, I focused on the waviness of the scoop lines. In my previous post I had severed the scoop “ceilings” from the warped outer edges, then raised and bonded the ceilings to the underside of the door sills. That left the thin warped outer edges hanging low, so it was easy to grind them flush with the new ceilings. Here, the rocker is upside down, but it should be obvious what I was doing:
Next up, I focused on the waviness of the scoop lines. In my previous post I had severed the scoop “ceilings” from the warped outer edges, then raised and bonded the ceilings to the underside of the door sills. That left the thin warped outer edges hanging low, so it was easy to grind them flush with the new ceilings. Here, the rocker is upside down, but it should be obvious what I was doing:
That solved the warps along the upper edge of the scoops. The bottom edges weren’t anywhere near as bad so I decided to straighten them later with lighter duty sanding and fillers:
That solved the warps along the upper edge of the scoops. The bottom edges weren’t anywhere near as bad so I decided to straighten them later with lighter duty sanding and fillers:
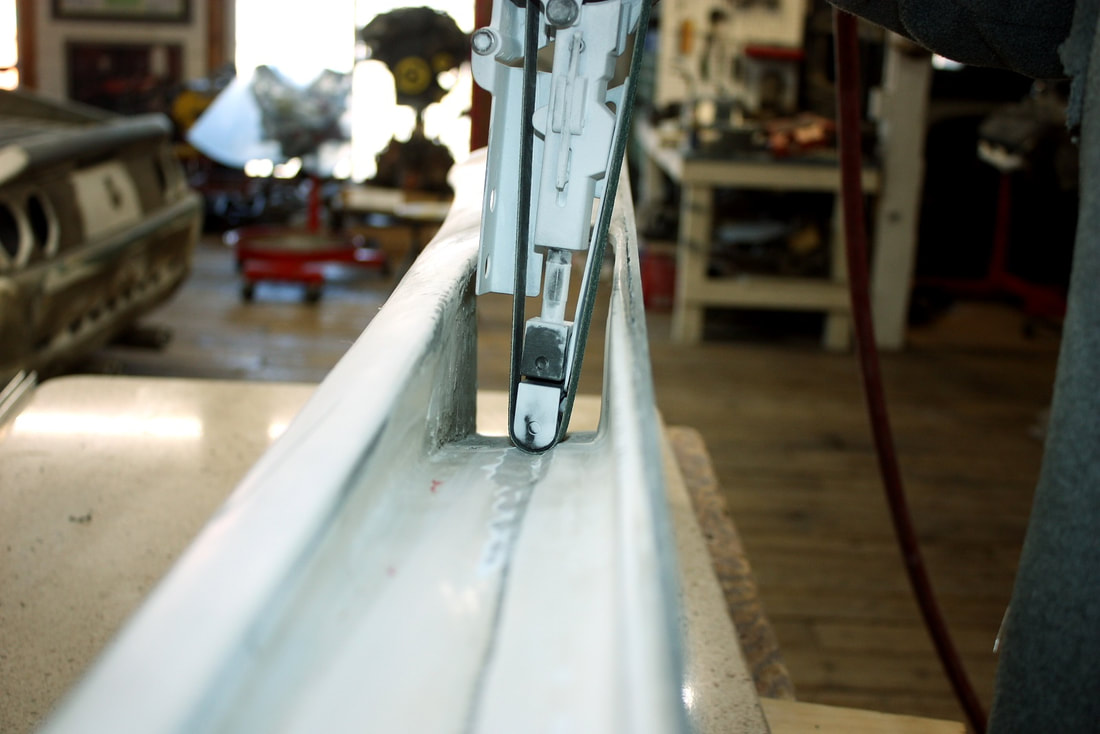
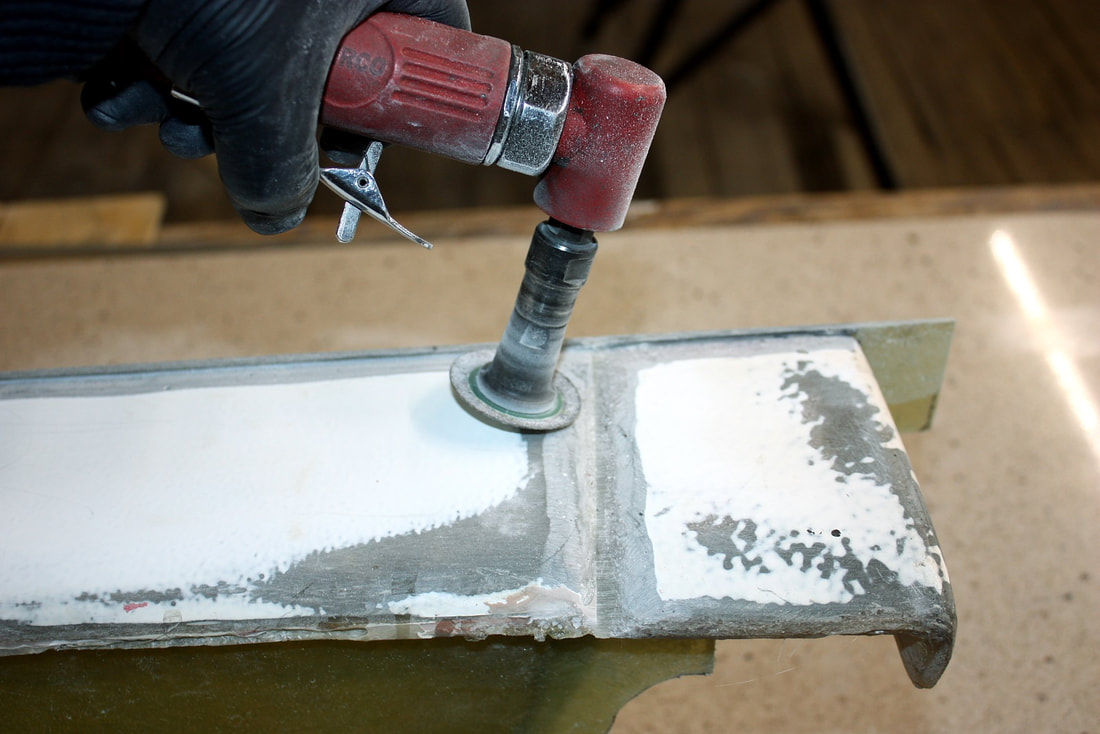
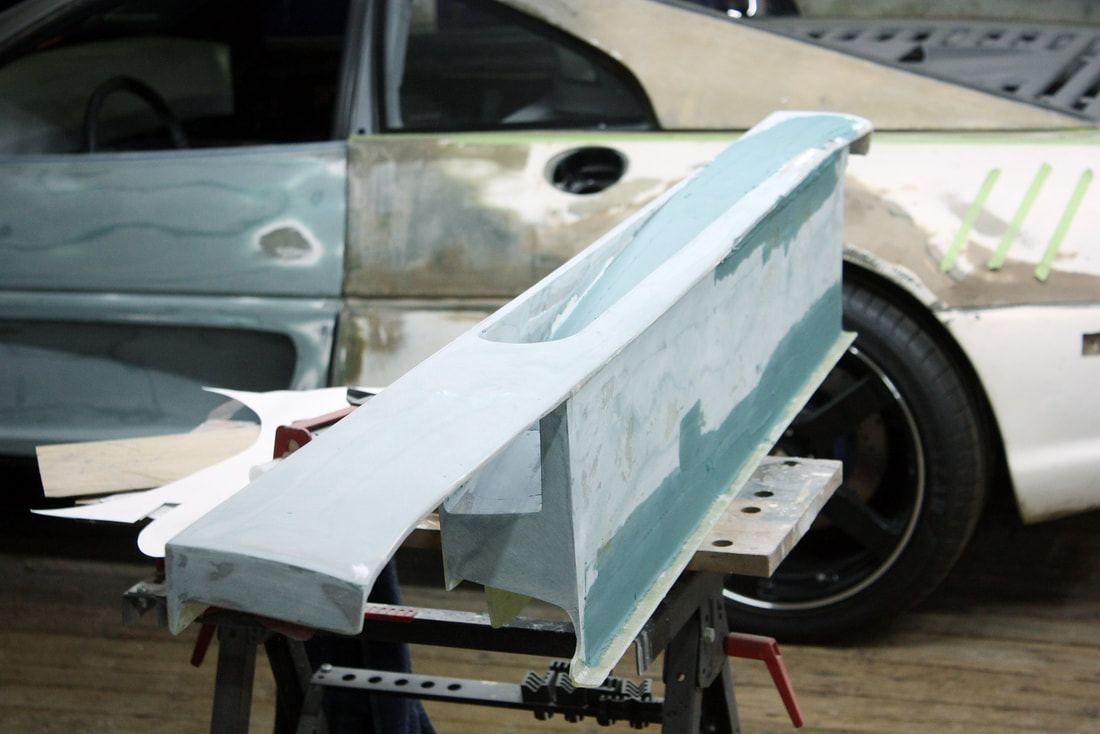
Next I had to address the large splits I’d made down the scoop walls. In my last post I repaired the cuts structurally by fibreglassing the two halves together along the hidden side of the scoops. That still left big ugly seams on the street-side of the rockers though. To fix those, I used the rounded tip of my 1” pneumatic belt sander to bevel out both sides of the seam like so:
Next I had to address the large splits I’d made down the scoop walls. In my last post I repaired the cuts structurally by fibreglassing the two halves together along the hidden side of the scoops. That still left big ugly seams on the street-side of the rockers though. To fix those, I used the rounded tip of my 1” pneumatic belt sander to bevel out both sides of the seam like so:
I also beveled out all the other seams created in my last post, for example, where the three original rocker pieces had been joined together:
I also beveled out all the other seams created in my last post, for example, where the three original rocker pieces had been joined together:
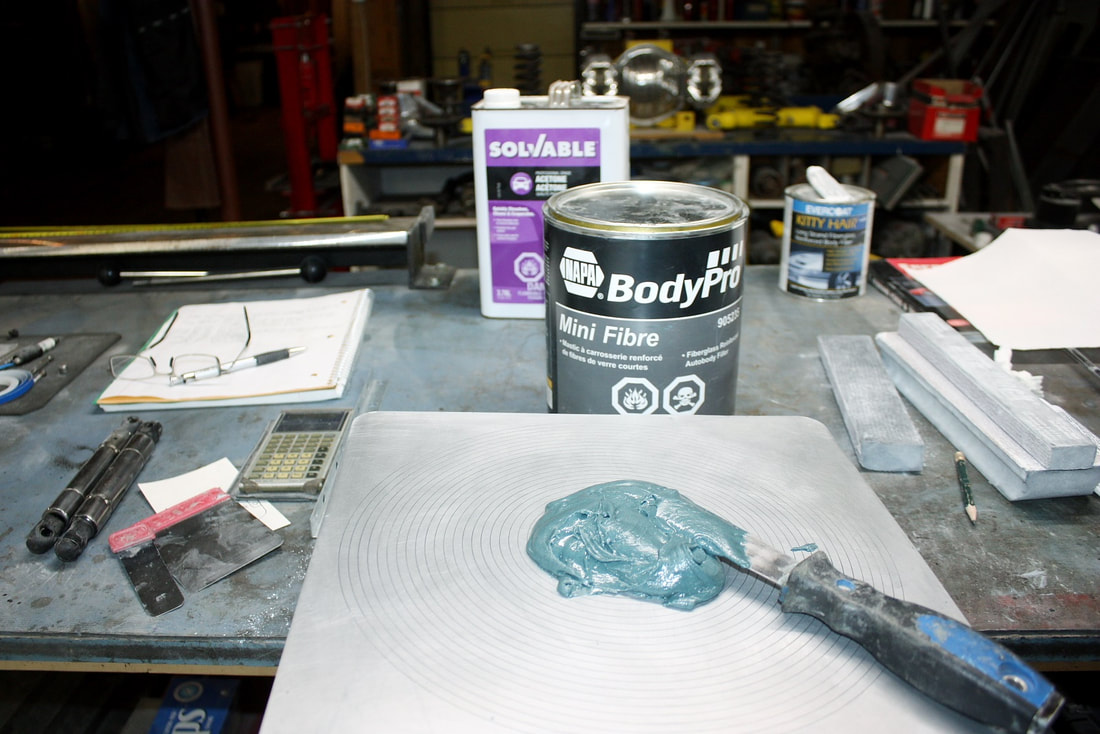
Then I used some short strand body filler to fill the seams. I don’t worry too much about the thickness of filler being used here for two reasons. First, short strand filler is structural; second, it’s chemically identical to the body panel material; and third, it has the same expansion properties as the panel.
I mix up no more than about a 4” blob at a time since the working time is quite short at about 5 minutes. That doesn’t give much time to sculpt any masterpieces with the putty:
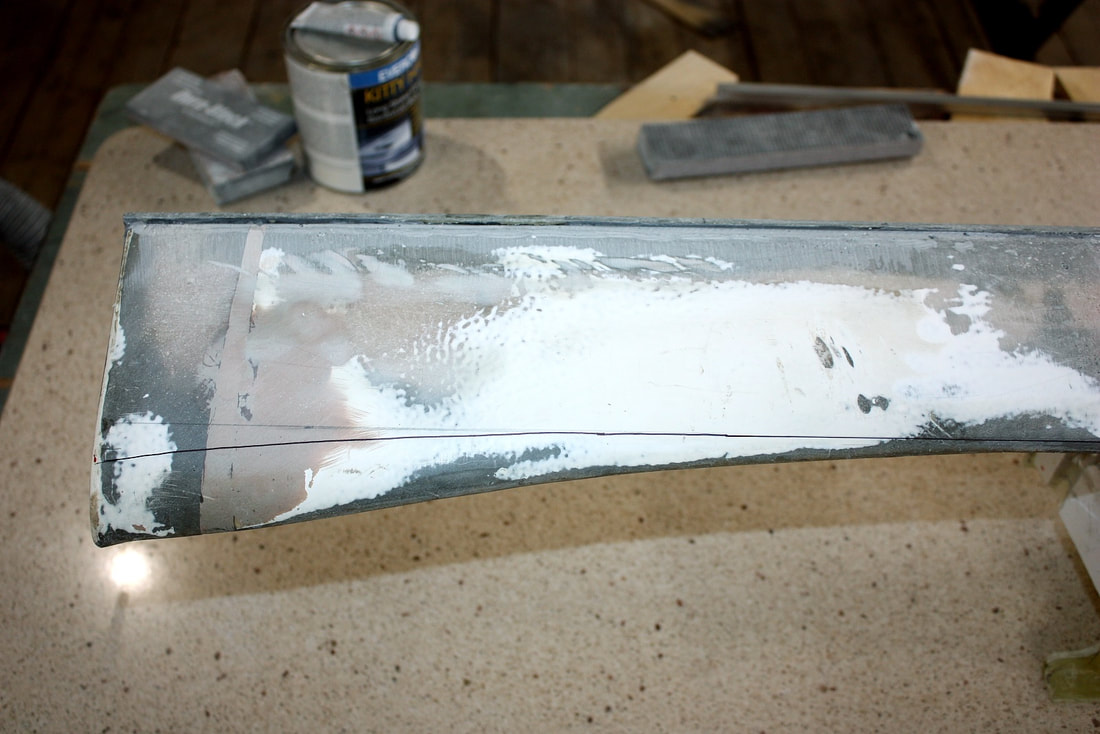
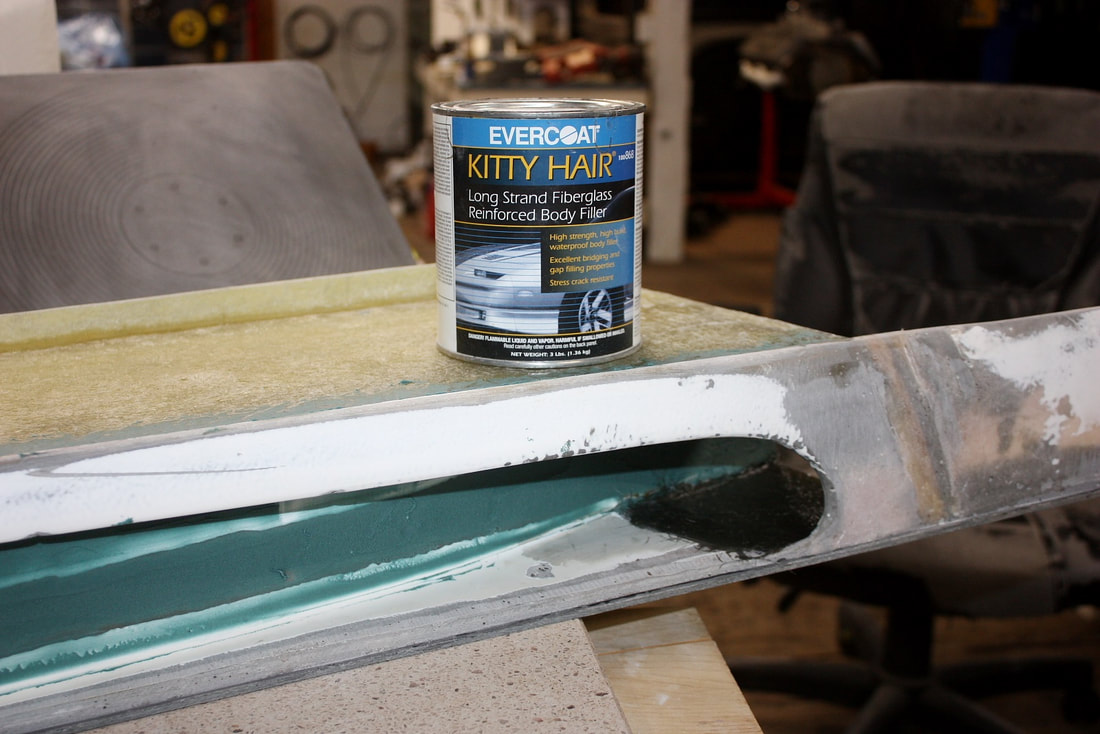
In this next photo, I’ve applied the short strand filler in the beveled groove along the scoop wall, and I’ve built up the ceiling area inside the scoop mouth with long strand filler since I needed greater bulk. Again, the long strand “kitty hair” filler is physically identical to the fibreglass panel. It’s literally fibreglass mat that been pulled apart and pre-saturated in resin in a can:
In this next photo, I’ve applied the short strand filler in the beveled groove along the scoop wall, and I’ve built up the ceiling area inside the scoop mouth with long strand filler since I needed greater bulk. Again, the long strand “kitty hair” filler is physically identical to the fibreglass panel. It’s literally fibreglass mat that been pulled apart and pre-saturated in resin in a can:
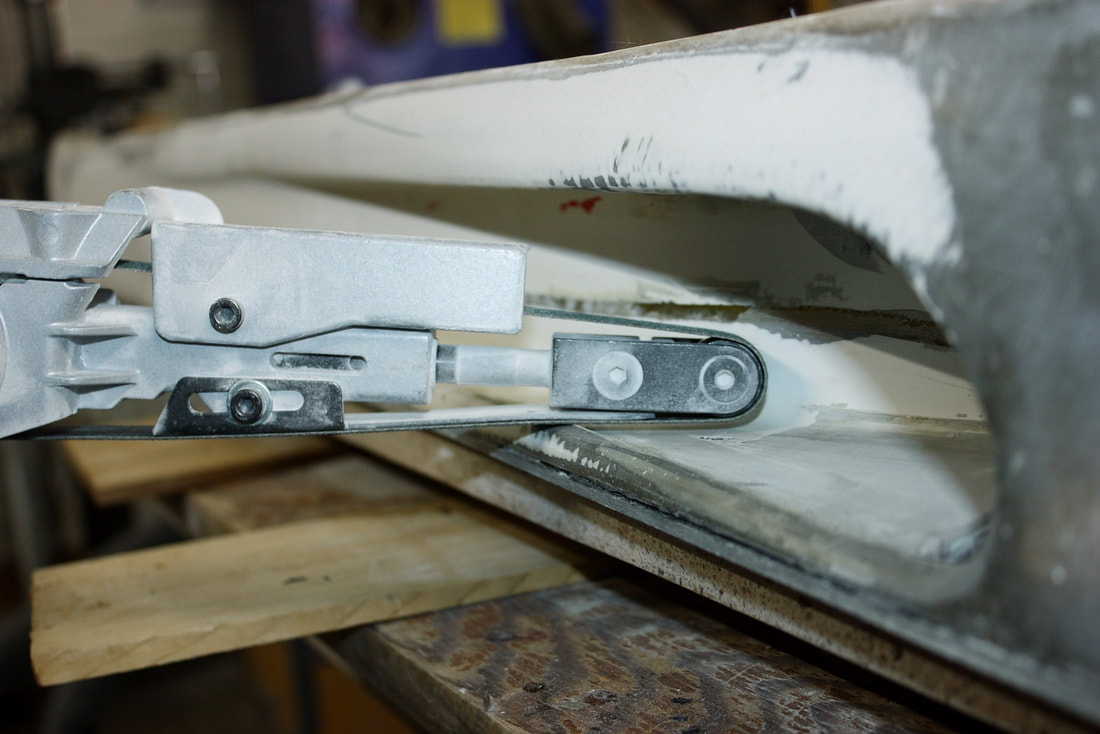
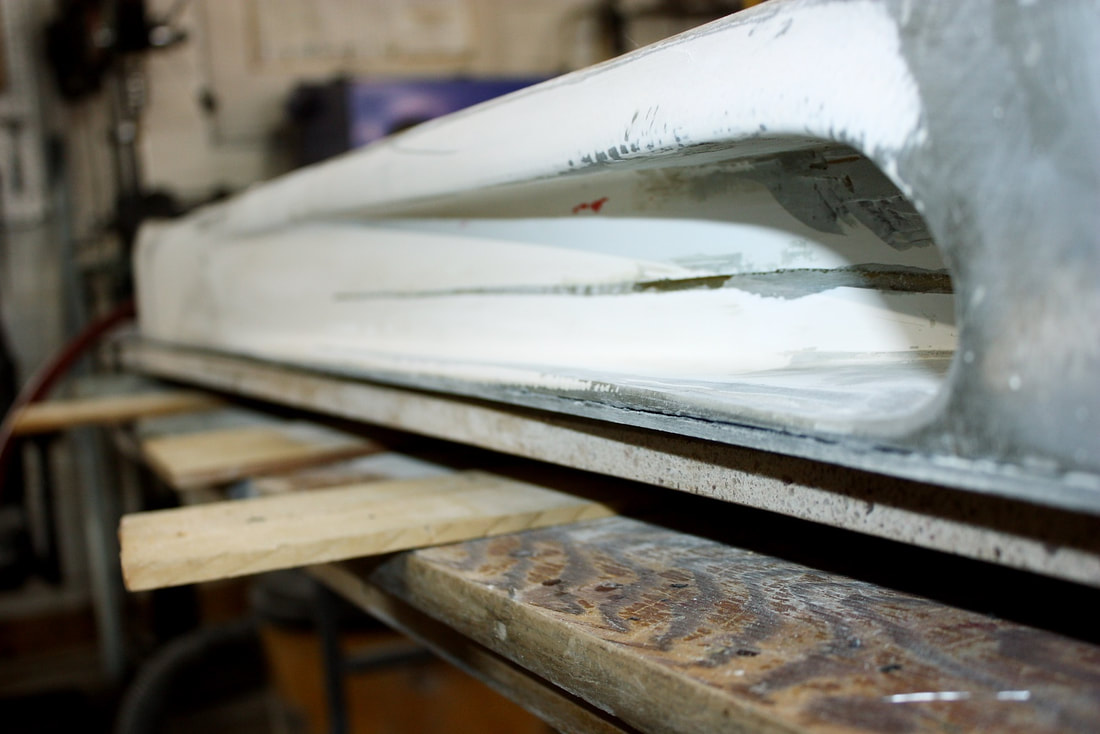
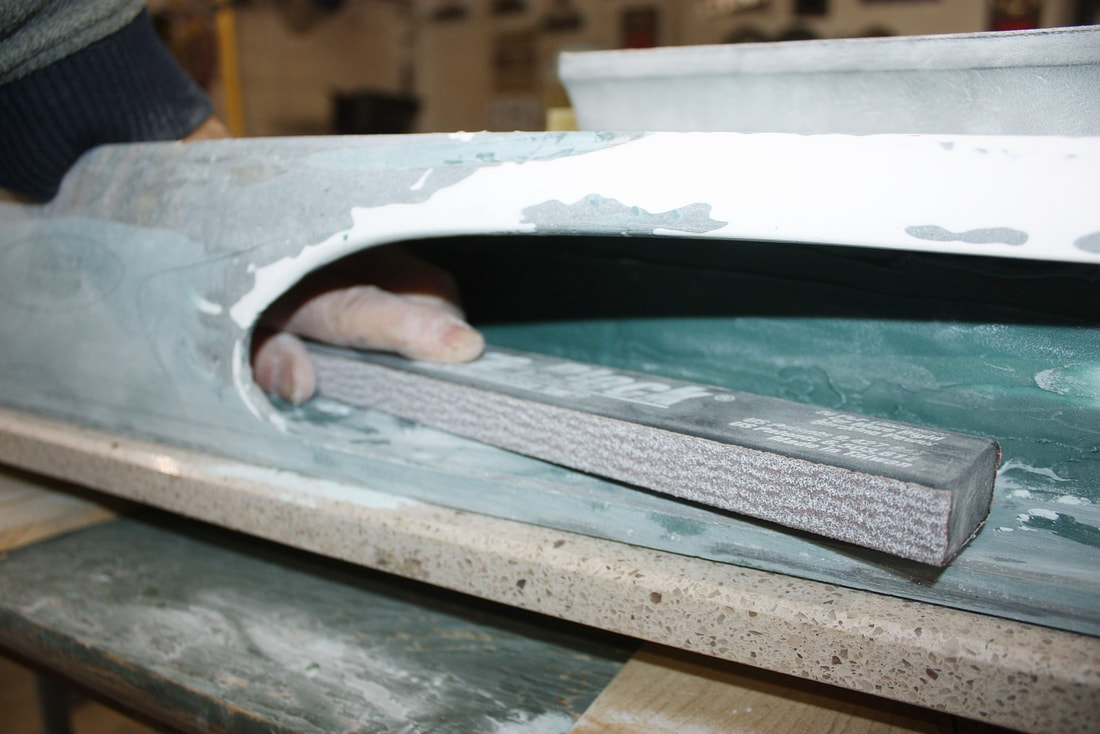
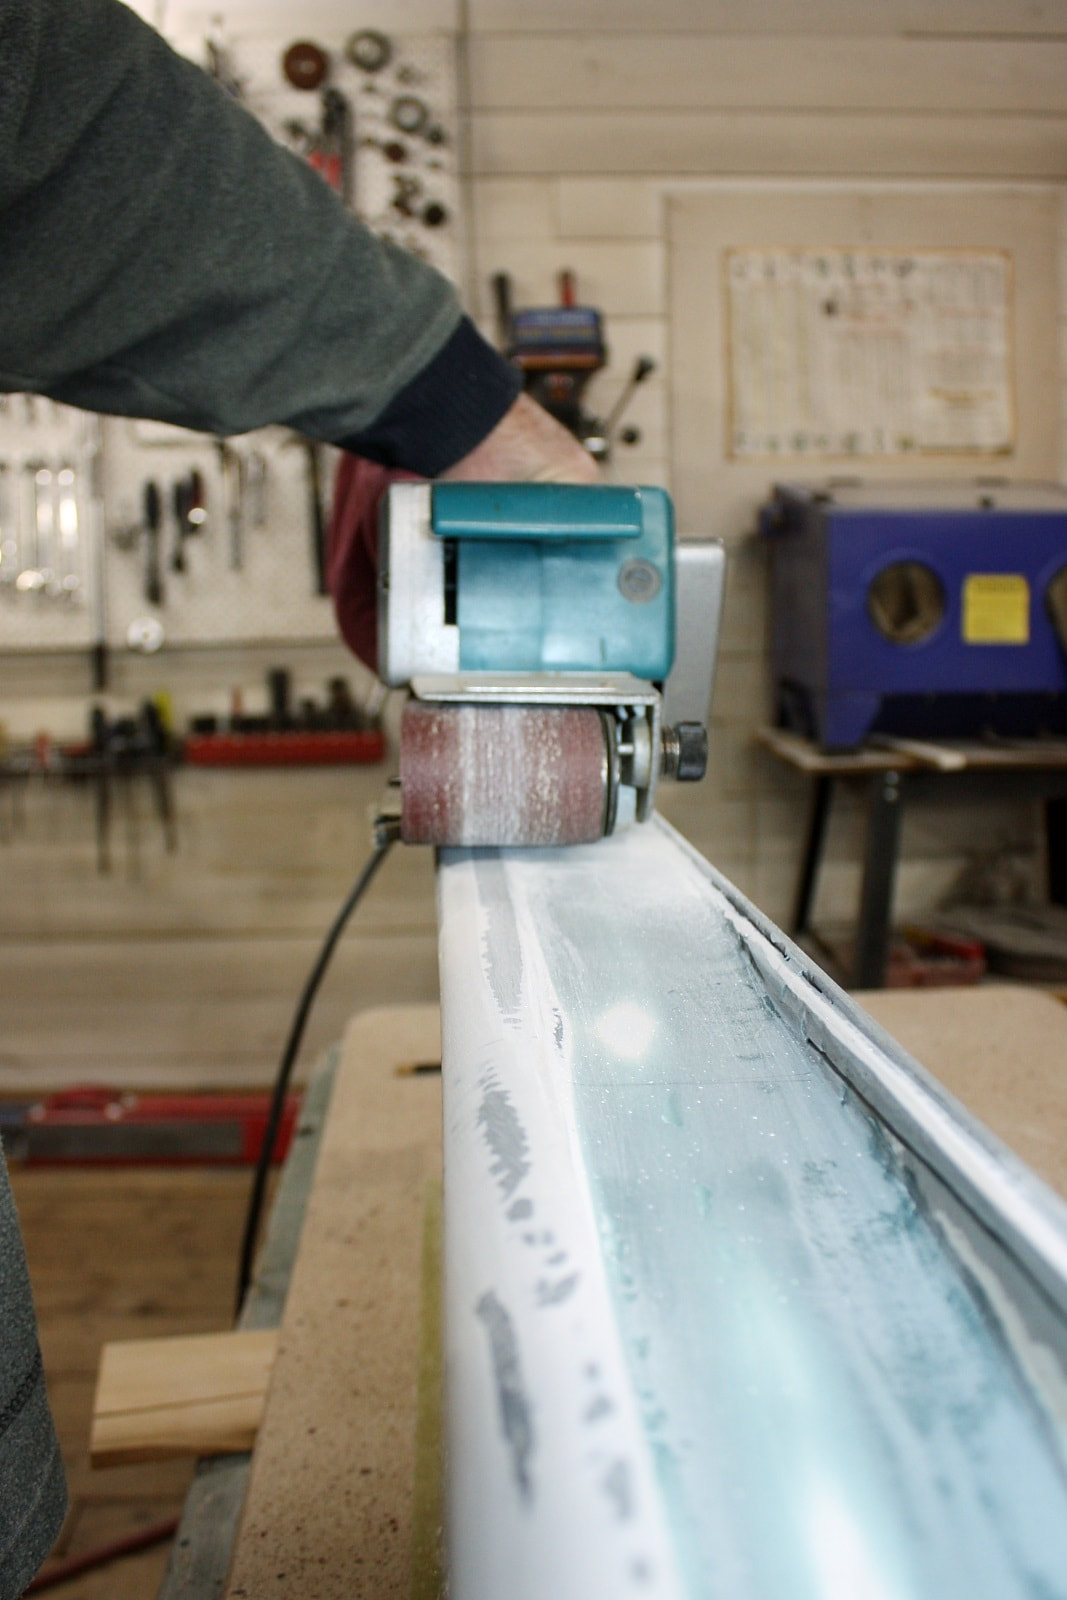
Then the sanding started. These scoops were a real pain in the you-know-what to smooth out. My hands were perhaps 10 percent larger than the scoop mouths so I could reach in only so far from either end. The long, narrow, stiff Dura-Block sanding block was a godsend:
Then the sanding started. These scoops were a real pain in the you-know-what to smooth out. My hands were perhaps 10 percent larger than the scoop mouths so I could reach in only so far from either end. The long, narrow, stiff Dura-Block sanding block was a godsend:
As with the door panels, I spread a skim coat on the entire surface of the rockers to blend out many small imperfections. This is a photo of the passenger side rocker freshly covered, and another showing some progress:
As with the door panels, I spread a skim coat on the entire surface of the rockers to blend out many small imperfections. This is a photo of the passenger side rocker freshly covered, and another showing some progress:
The driver’s side rocker took an extra step or two to bring into shape. In addition to all the other problems, the bottom edge was heavily warped outward along much of its length (the angle iron shows how far from being straight the rocker was):
The driver’s side rocker took an extra step or two to bring into shape. In addition to all the other problems, the bottom edge was heavily warped outward along much of its length (the angle iron shows how far from being straight the rocker was):

I backfilled the warped area with long strand filler creating a straight line…
I backfilled the warped area with long strand filler creating a straight line…
…then “had at it” along the front side with the big guns. I used a 60 grit belt to shave the bulged area down quickly:
…then “had at it” along the front side with the big guns. I used a 60 grit belt to shave the bulged area down quickly:
Then I followed up with several skim coats of short strand filler to even out the imperfections and get the correct contours along this rather complicated piece:
Then I followed up with several skim coats of short strand filler to even out the imperfections and get the correct contours along this rather complicated piece:
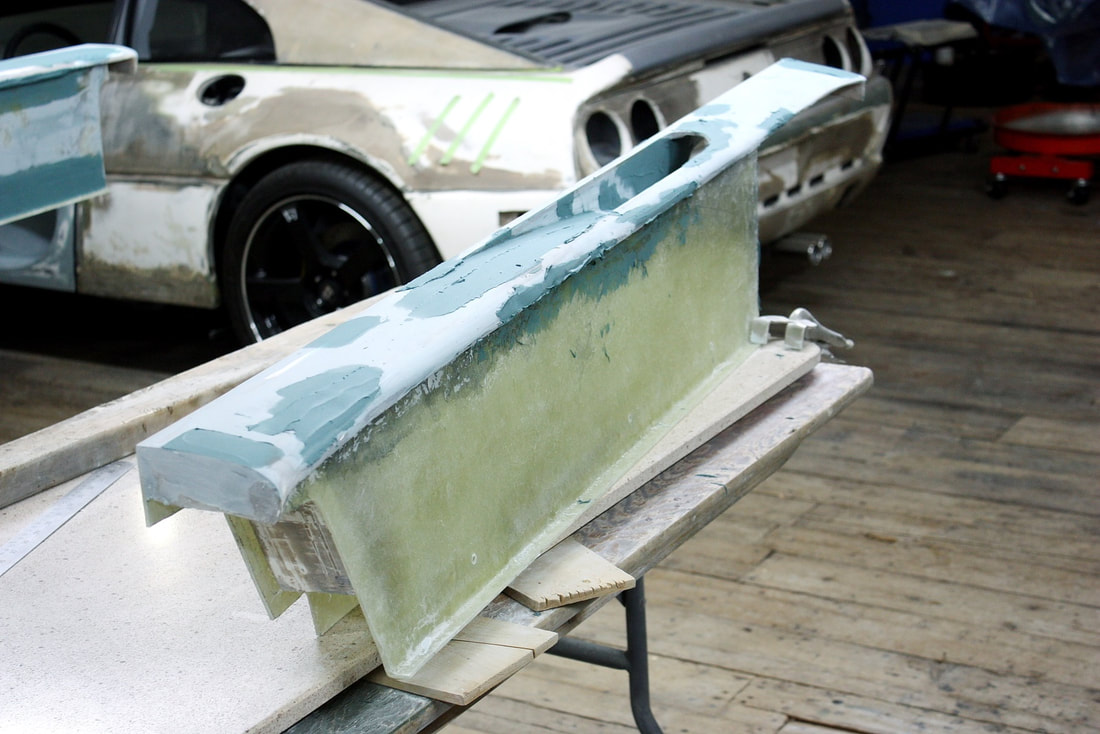
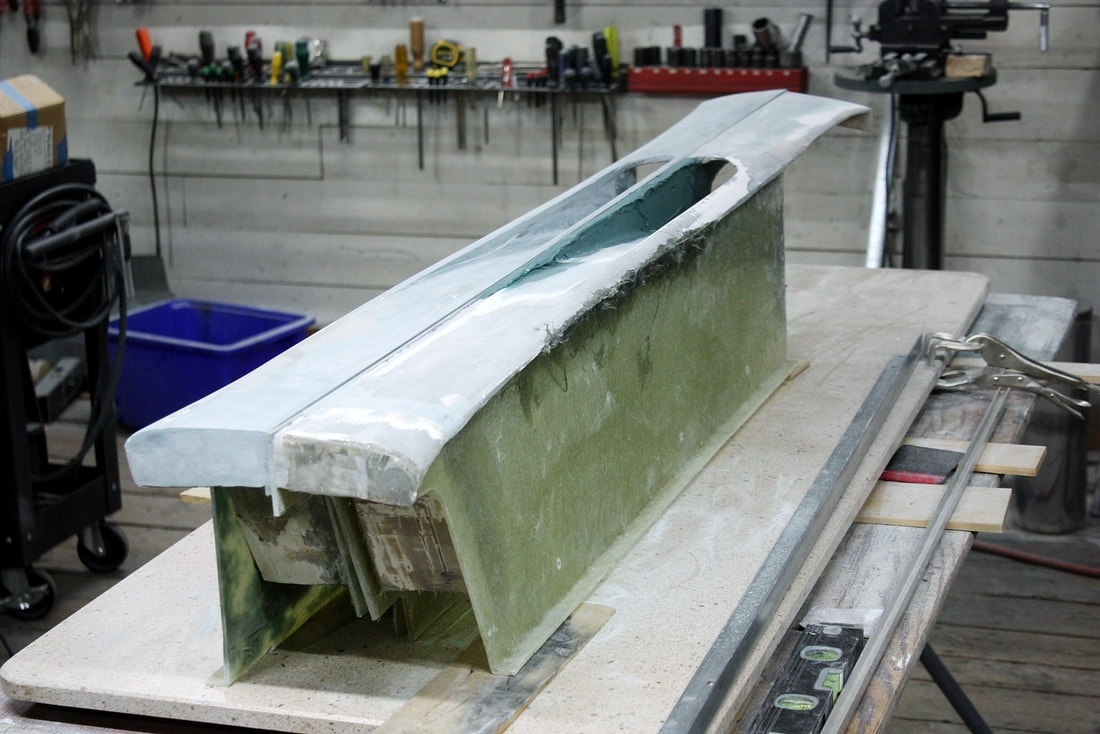
One of the pitfalls of having made the rocker skid plates (or bottom panels) the way I did, was that the smooth side ended up inside the rockers leaving the rough sides facing downward on the outside. I would’ve loved to figure out a way to make the panel the other way around but that’s how the cookie crumbled. That meant the undersides needed filling and smoothing. Granted, they’re the bottoms of the rockers that few will ever see, but at least the technician that’s got to do the bi-annual inspections will know:
One of the pitfalls of having made the rocker skid plates (or bottom panels) the way I did, was that the smooth side ended up inside the rockers leaving the rough sides facing downward on the outside. I would’ve loved to figure out a way to make the panel the other way around but that’s how the cookie crumbled. That meant the undersides needed filling and smoothing. Granted, they’re the bottoms of the rockers that few will ever see, but at least the technician that’s got to do the bi-annual inspections will know:
The final step was to give the inside corners of the scoops the proper radius. As I’ve mentioned elsewhere, I like to make crisp lines on all creases initially because sharp apexes are easier to follow visually than soft radii, making it easier to tell if your lines go exactly where you want them to or not. So once I was happy with the smooth curvature of the scoop walls, I softened the transition from floor-to-wall-to-ceiling by filling the inner corners and contouring the putty with a rounded popsicle stick:
The final step was to give the inside corners of the scoops the proper radius. As I’ve mentioned elsewhere, I like to make crisp lines on all creases initially because sharp apexes are easier to follow visually than soft radii, making it easier to tell if your lines go exactly where you want them to or not. So once I was happy with the smooth curvature of the scoop walls, I softened the transition from floor-to-wall-to-ceiling by filling the inner corners and contouring the putty with a rounded popsicle stick:

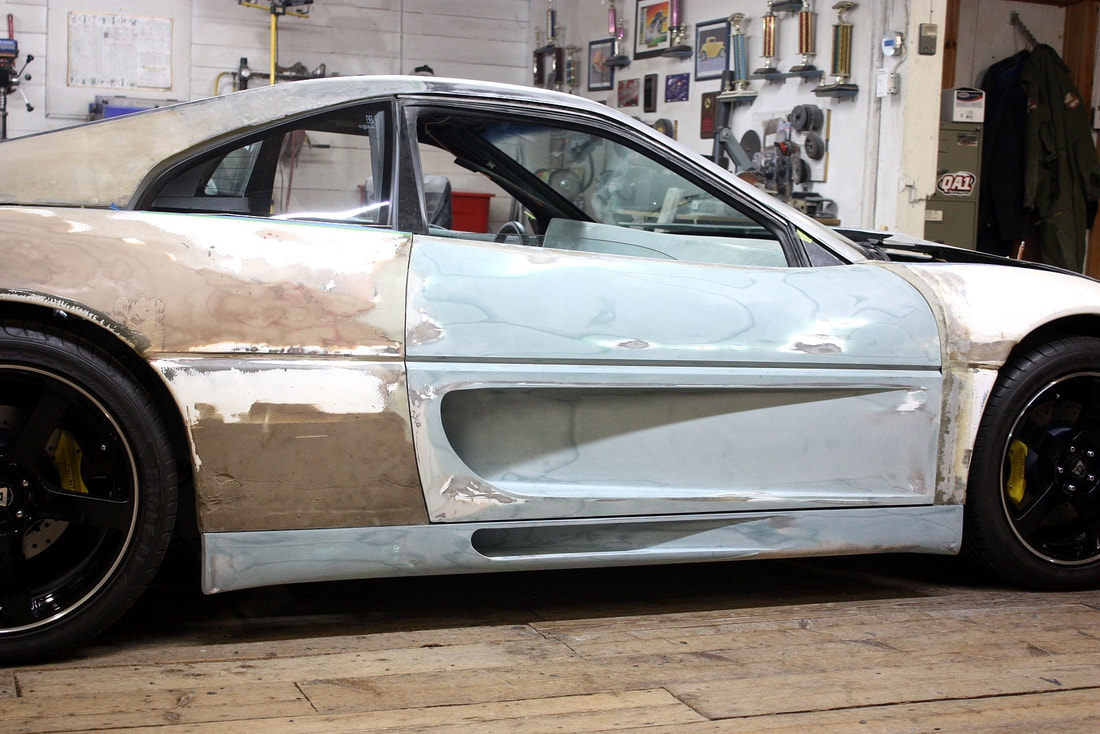
Here’s the end result of both completed rockers. The openings are larger and straight, the outer scoop creases are straight, the inner creases have soft, continuous lines, the sills are flat, and the aft ends of the rockers have a less pronounced downward flare:
Here’s the end result of both completed rockers. The openings are larger and straight, the outer scoop creases are straight, the inner creases have soft, continuous lines, the sills are flat, and the aft ends of the rockers have a less pronounced downward flare:

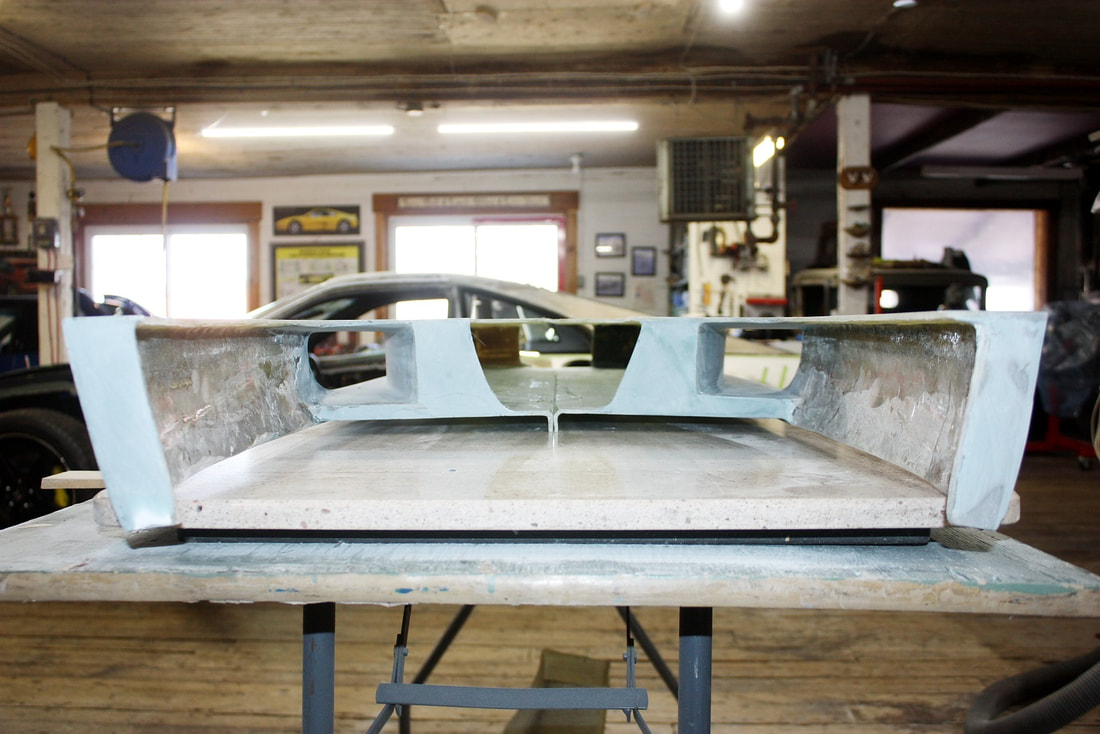
Here’s the rear view with both rockers butted up against each other. They’re both very similar in shape and size now:
Here’s the rear view with both rockers butted up against each other. They’re both very similar in shape and size now:
And here’s both of them stacked on top of each other showing the much improved contours:
And here’s both of them stacked on top of each other showing the much improved contours:
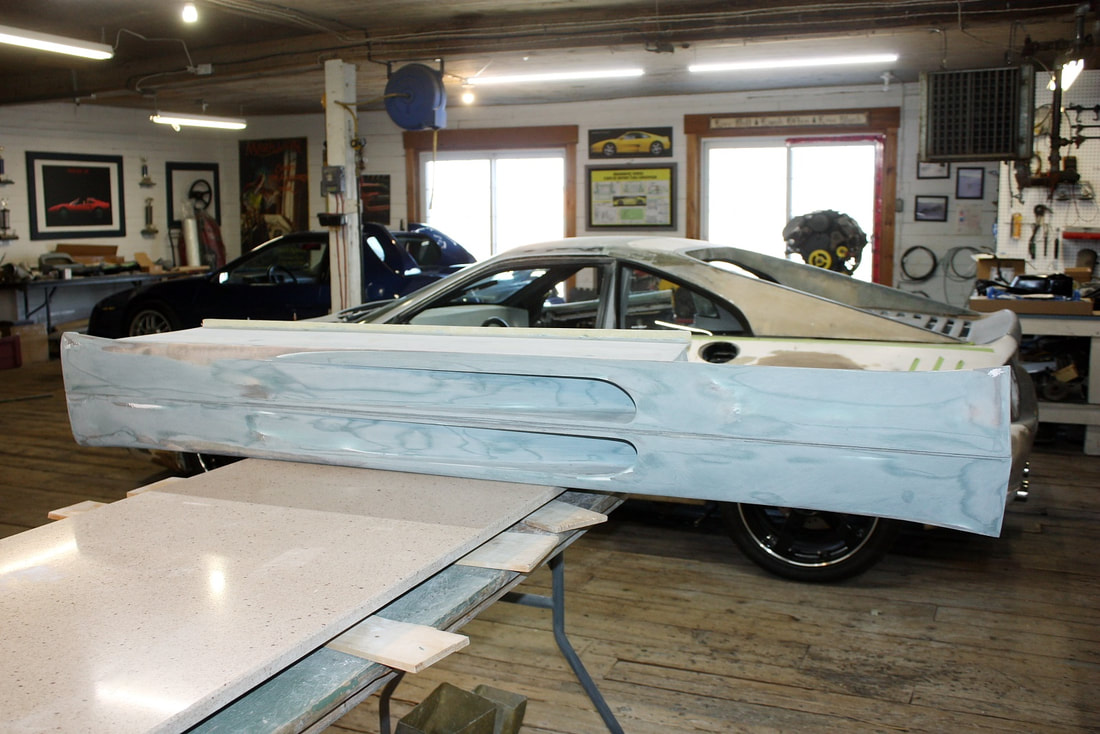
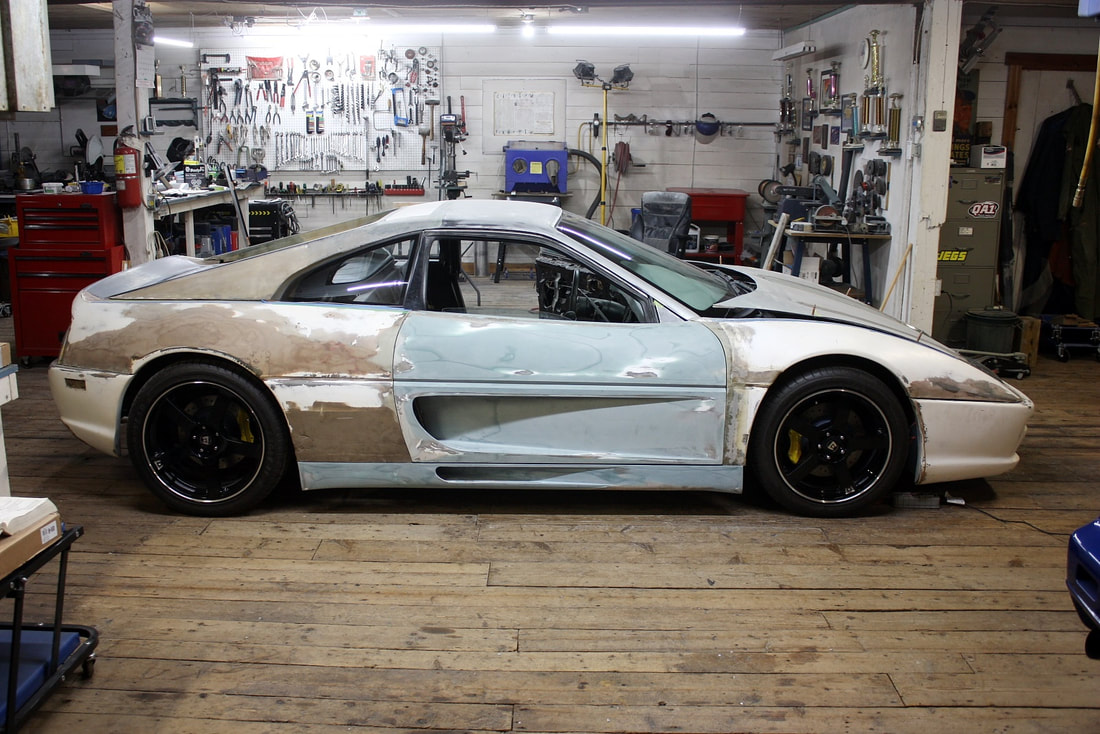
I mocked them up on the chassis to admire how much better the car looks with them on than off. I especially like the new profile of the lower edge at the rear fender well:
I mocked them up on the chassis to admire how much better the car looks with them on than off. I especially like the new profile of the lower edge at the rear fender well:
I even had the time to start brainstorming door sill trim plates… I’m thinking carbon fiber inserts with an embedded brushed aluminum Ferrari script.
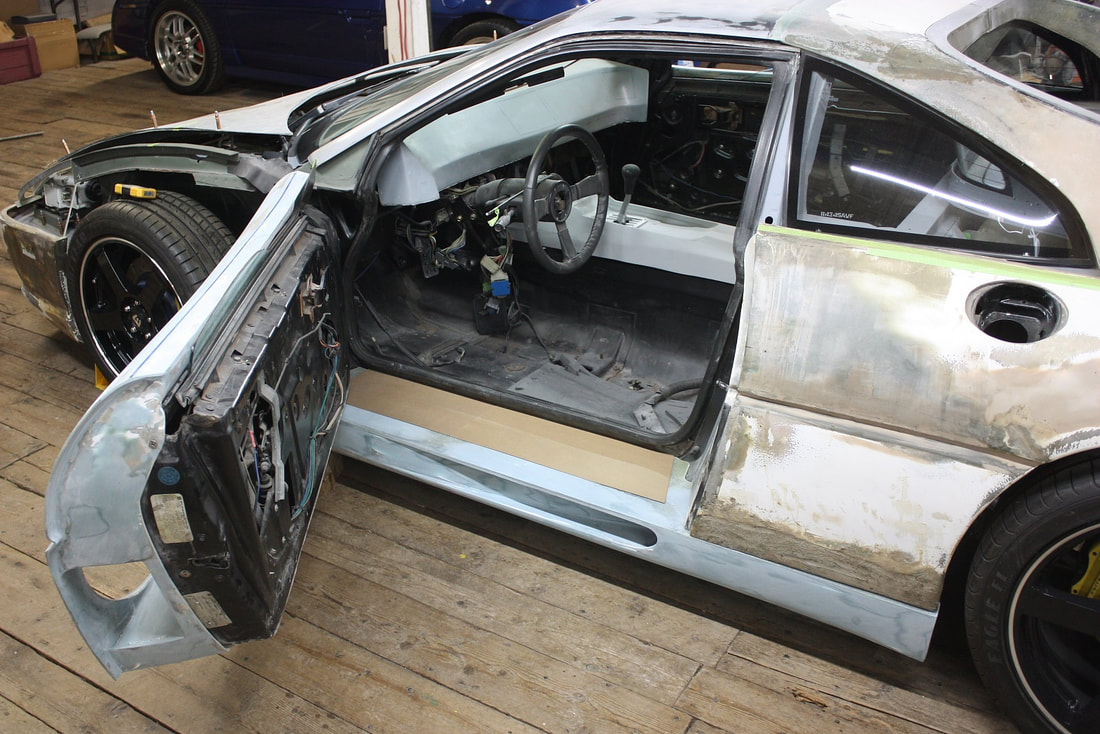
I’ll be glad when I have time to sweat the little details, but for now, I’ve got other body panels waiting for their turn under the knife.

 RSS Feed
