Each time I finish a panel, I lie to myself that the worst is over. It’s a self-preservation technique that makes me feel better until I start examining the next panel on the list. Fresh off the high of completing the rockers, I was back at the bottom of an even steeper ladder called “the rear quarters”.
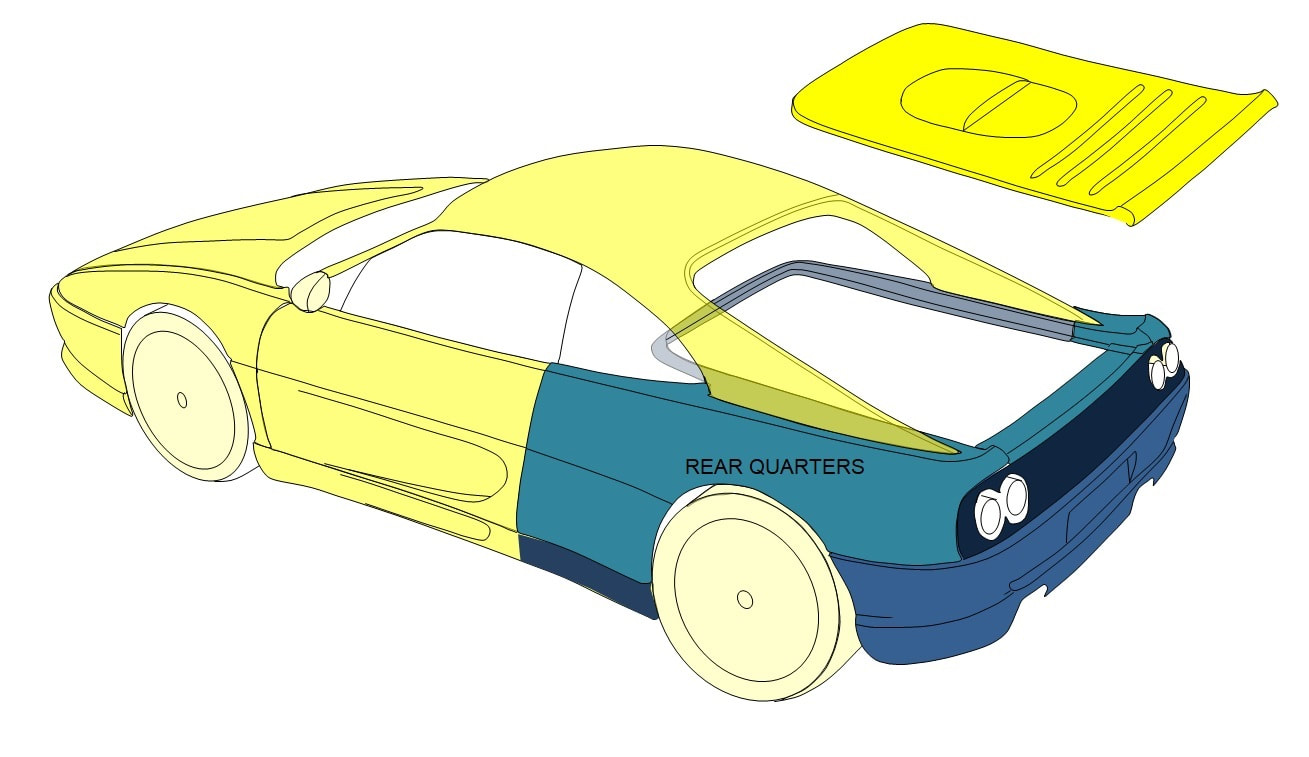
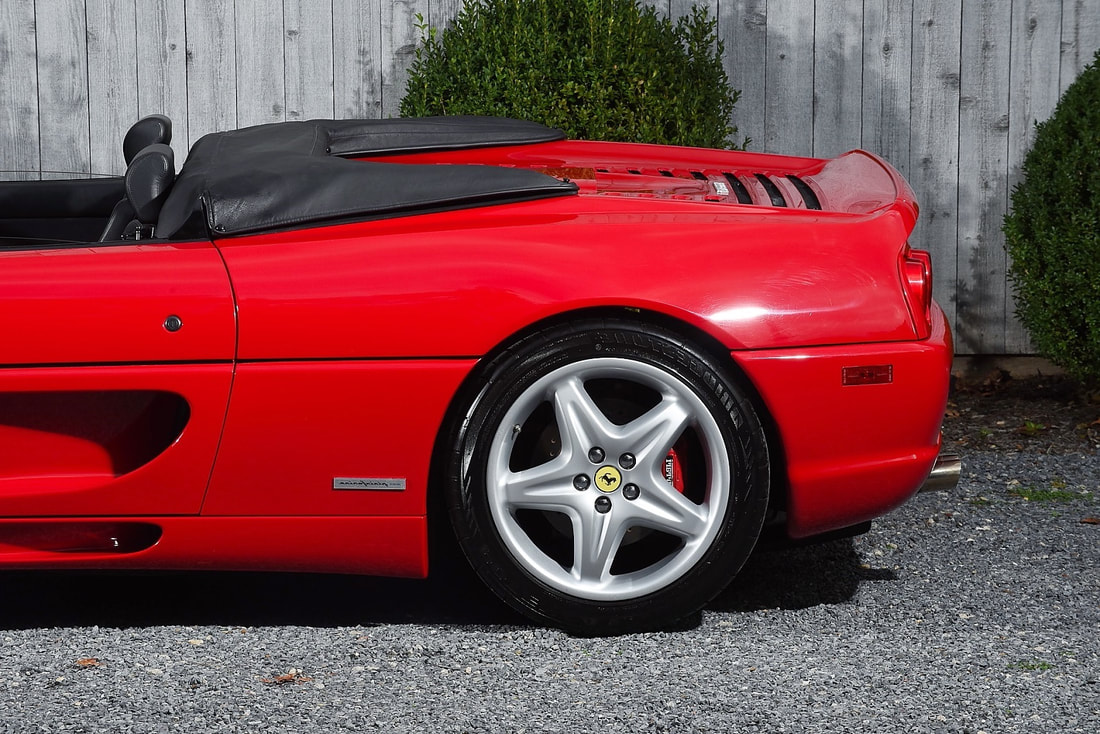
The IFG rear clip used to be one very large wraparound piece including part of the rockers, the fenders, rear fascia, tail light panel, and decklid surround; in other words everything in various shades of blue in this drawing and photo:
Each time I finish a panel, I lie to myself that the worst is over. It’s a self-preservation technique that makes me feel better until I start examining the next panel on the list. Fresh off the high of completing the rockers, I was back at the bottom of an even steeper ladder called “the rear quarters”.
The IFG rear clip used to be one very large wraparound piece including part of the rockers, the fenders, rear fascia, tail light panel, and decklid surround; in other words everything in various shades of blue in this drawing and photo:
The trouble with one large complex piece is that an alignment tweak in one area causes unwanted misalignments in other areas. The fibreglass is usually flexible enough to be bent or twisted into making small adjustments, but to avoid future stress cracks it’s best that the piece be made properly in the first place without any strain.
That would be an impossible task with the IFG rear clip. The one-piece quarters would’ve needed simultaneous 3 dimensional alignment along these nine different mating edges: both rear door edges, the tops of both rockers, the tops of both quarters to match the quarter window profiles, the decklid surround to mate with the rear window, and both wheel arches with the wheels.
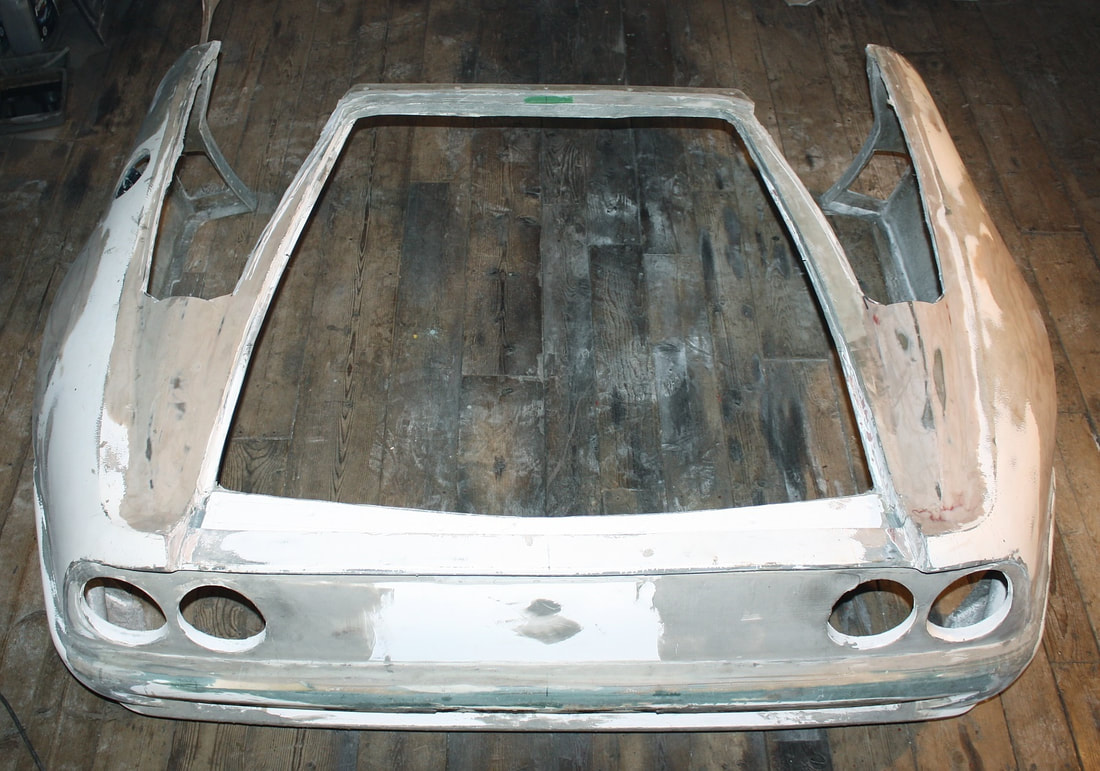
I decided to minimize the number of surfaces needing simultaneous alignment by chopping up the rear clip into manageable pieces. I had already cut the fascia, light panel, and decklid surround, but the two fenders were still attached to each other by a transverse valence above the light panel (red area):
The trouble with one large complex piece is that an alignment tweak in one area causes unwanted misalignments in other areas. The fibreglass is usually flexible enough to be bent or twisted into making small adjustments, but to avoid future stress cracks it’s best that the piece be made properly in the first place without any strain.
That would be an impossible task with the IFG rear clip. The one-piece quarters would’ve needed simultaneous 3 dimensional alignment along these nine different mating edges: both rear door edges, the tops of both rockers, the tops of both quarters to match the quarter window profiles, the decklid surround to mate with the rear window, and both wheel arches with the wheels.
I decided to minimize the number of surfaces needing simultaneous alignment by chopping up the rear clip into manageable pieces. I had already cut the fascia, light panel, and decklid surround, but the two fenders were still attached to each other by a transverse valence above the light panel (red area):

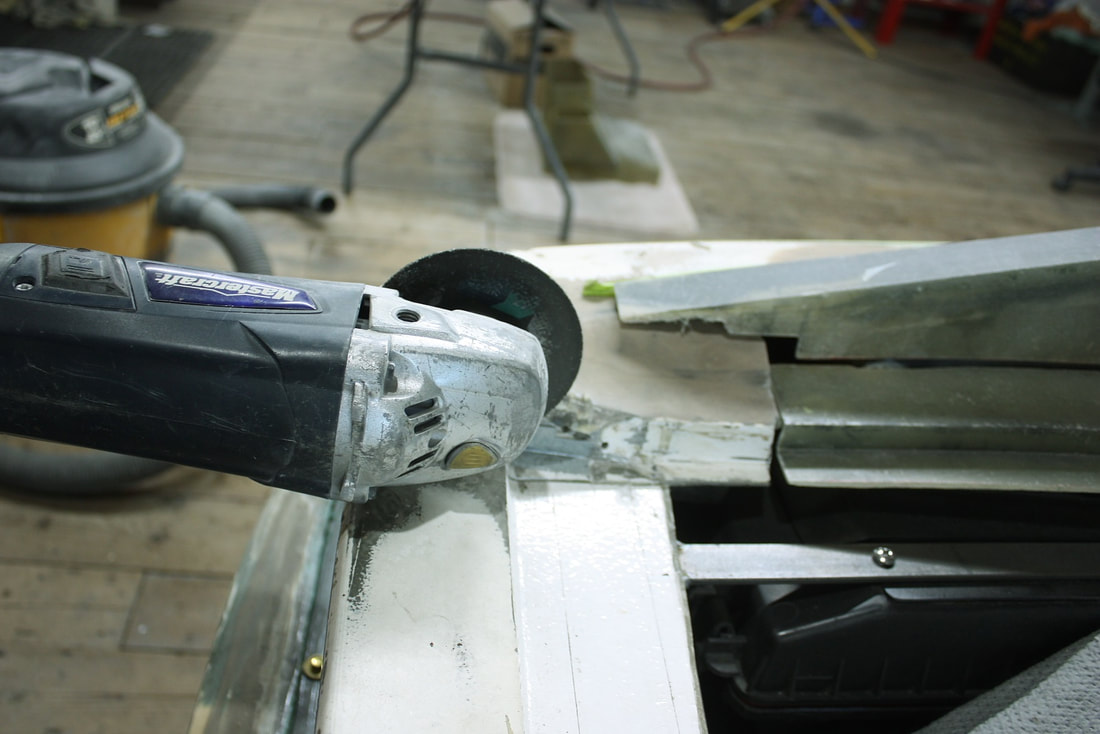
By making two further cuts, both rear fenders would be independent of each other, and infinitely more manageable from an alignment and handling perspective. I made quick work of slicing the valence off the quarters with a thin cut-off wheel in my angle grinder:
By making two further cuts, both rear fenders would be independent of each other, and infinitely more manageable from an alignment and handling perspective. I made quick work of slicing the valence off the quarters with a thin cut-off wheel in my angle grinder:
With that done, I was able to shift the quarters on the chassis to best suit their own optimized locations without affecting anything else. It was by no means a cure-all for the ills of these panels… but it was the first rung up the 20 step ladder of rear quarter shaping.
I started manipulating the driver’s side quarter first since it was the worst of the two in many areas. I pointed out one of the main problems in an earlier post on reshaping the doors: the fender-top profile did not flow correctly:
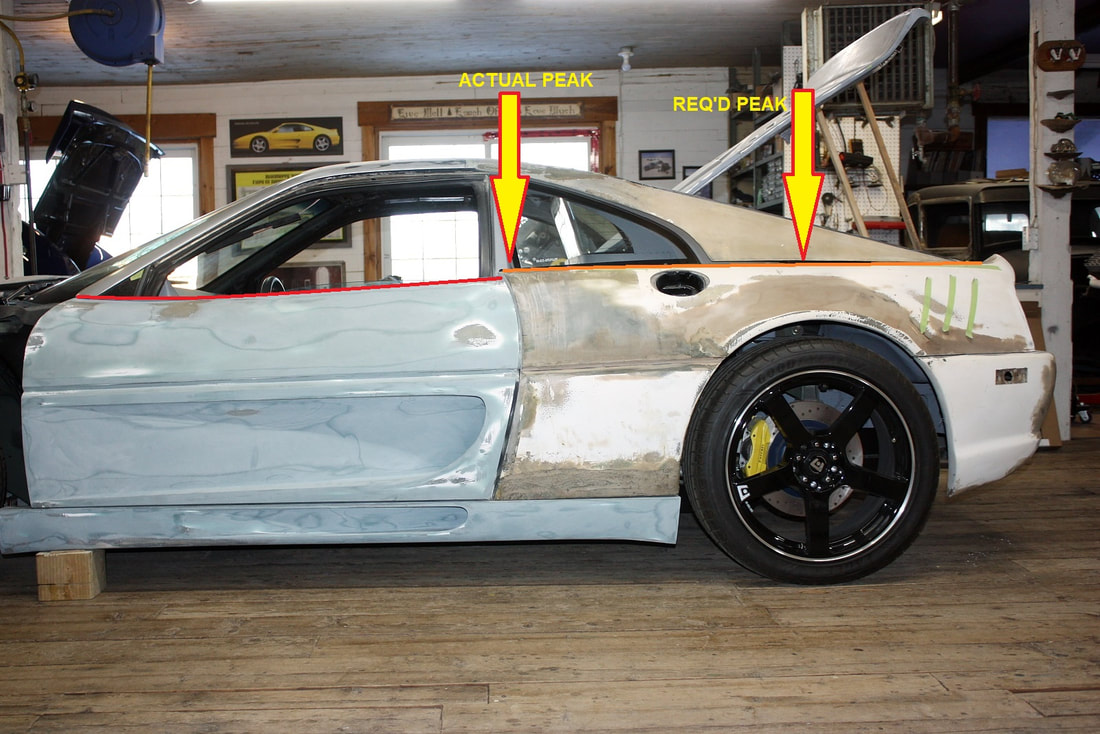
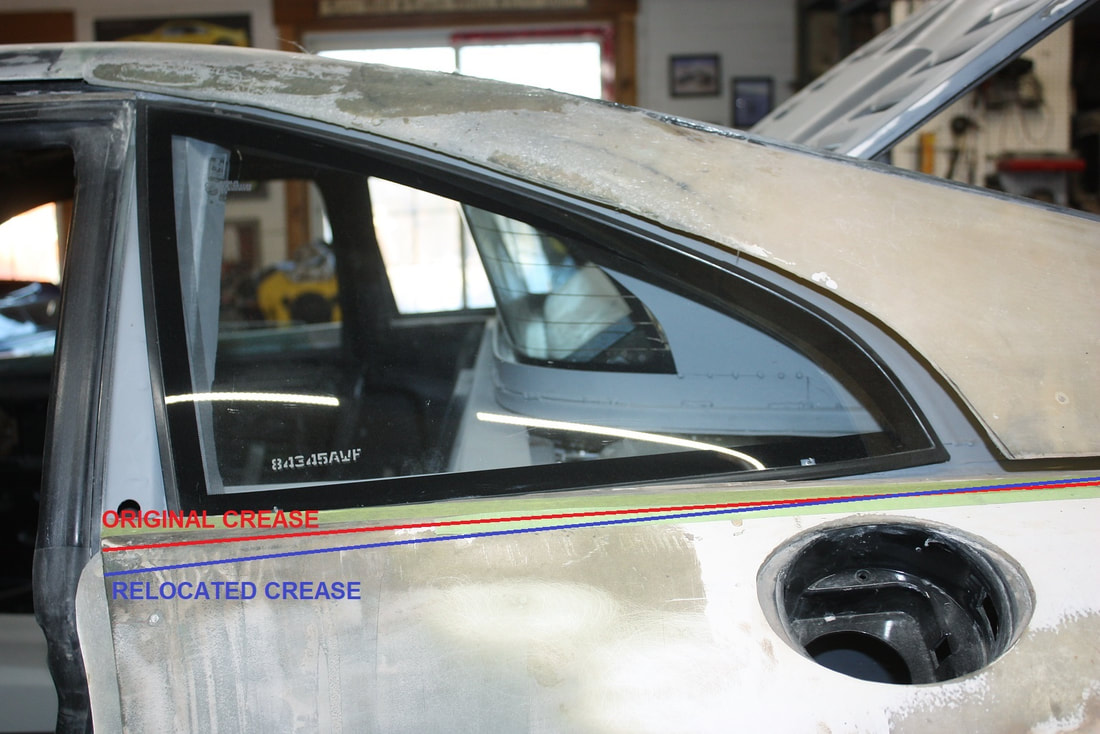
The fender peaked at its leading edge near the door rather than at the centerline of the rear wheel, throwing the entire profile off-kilter. It couldn’t be solved by simply tilting the fender down at the front because that would’ve thrown the alignment off at the other three panel interfaces. This meant a wholesale re-profiling of the fender’s top edge would be needed.
In this close up, I’ve drawn the blue line to show just how far off the upper profile was from the required line under the quarter window. The lines cross at the fuel filler well and result in there being just as much missing above the centerline of the wheel, as there is too much by the cabin door:
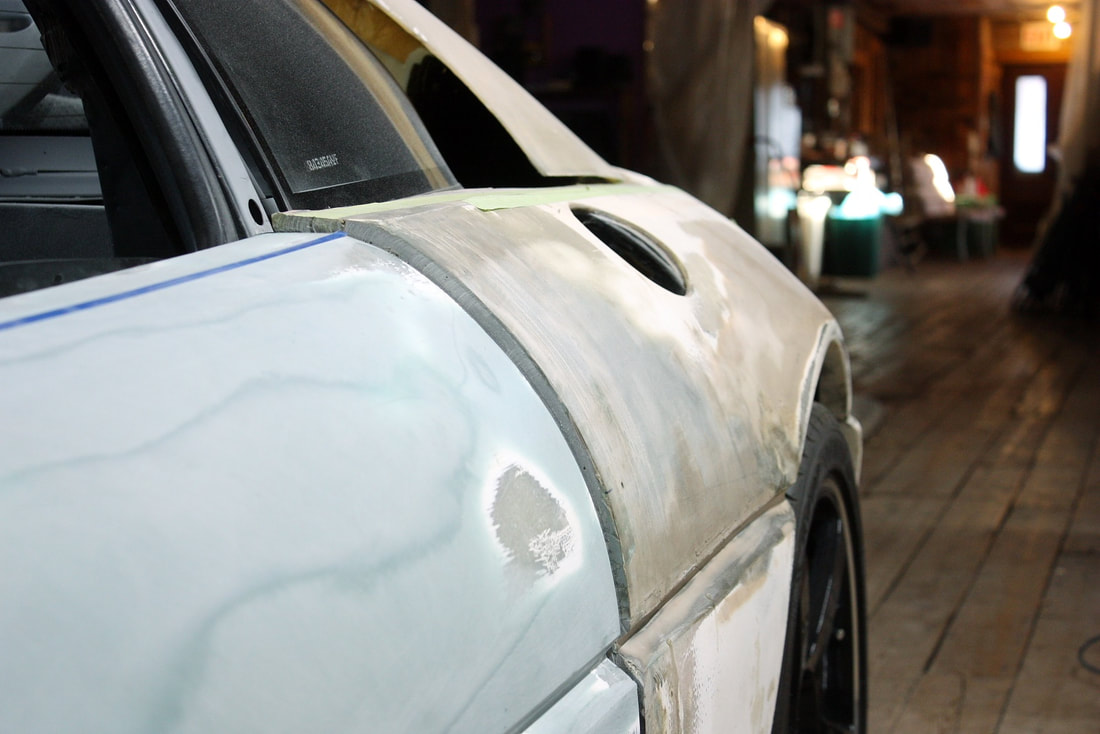
Here’s another view showing just how much thicker the fender panel was than the door skin. Interestingly, below the beltline the quarter panel was back to being flush with the door skin:
Here’s another view showing just how much thicker the fender panel was than the door skin. Interestingly, below the beltline the quarter panel was back to being flush with the door skin:

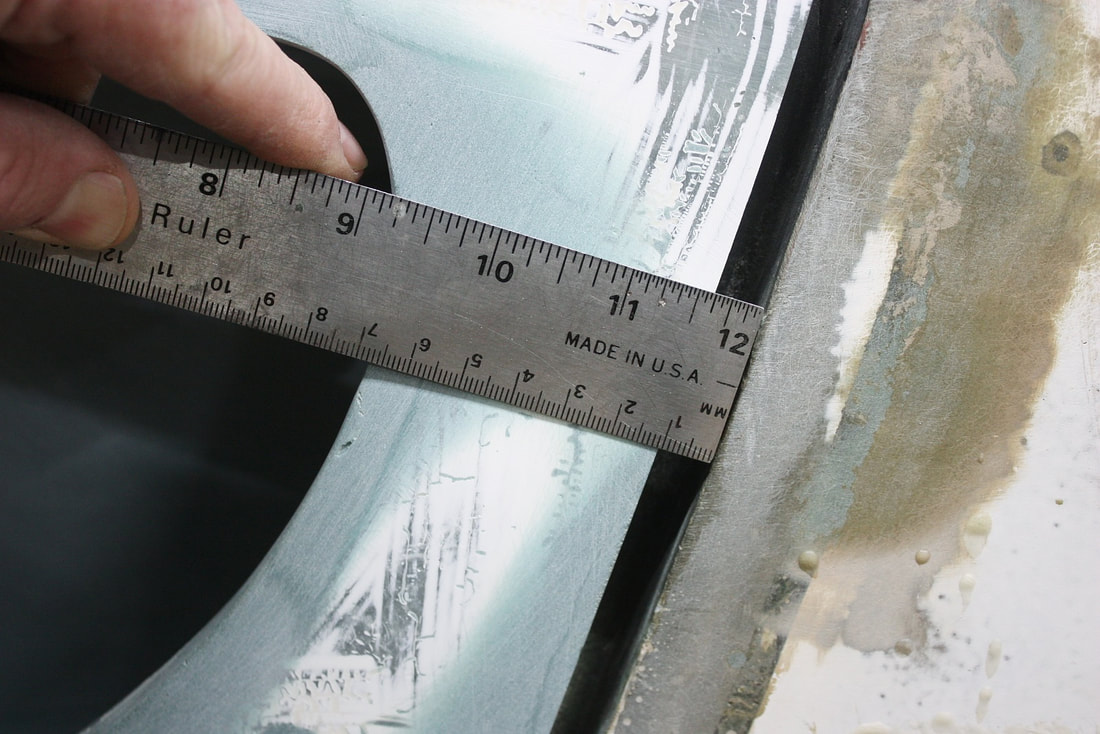
Luckily the quarter panel skin was thick enough for me to plan on shaving it down rather than having to remold it entirely. Check out this slab:
Luckily the quarter panel skin was thick enough for me to plan on shaving it down rather than having to remold it entirely. Check out this slab:

Another problem with the driver’s side quarter was the door gap. It was tight at the top but had a 10mm gap by the time it reached the beltline:
Another problem with the driver’s side quarter was the door gap. It was tight at the top but had a 10mm gap by the time it reached the beltline:

Getting into the nitty gritty details, the panel didn’t sit straight on the rocker (arrows), and the radiator inlet scoop needed to be enlarged to match the larger size of the door scoop (red lines):
Getting into the nitty gritty details, the panel didn’t sit straight on the rocker (arrows), and the radiator inlet scoop needed to be enlarged to match the larger size of the door scoop (red lines):

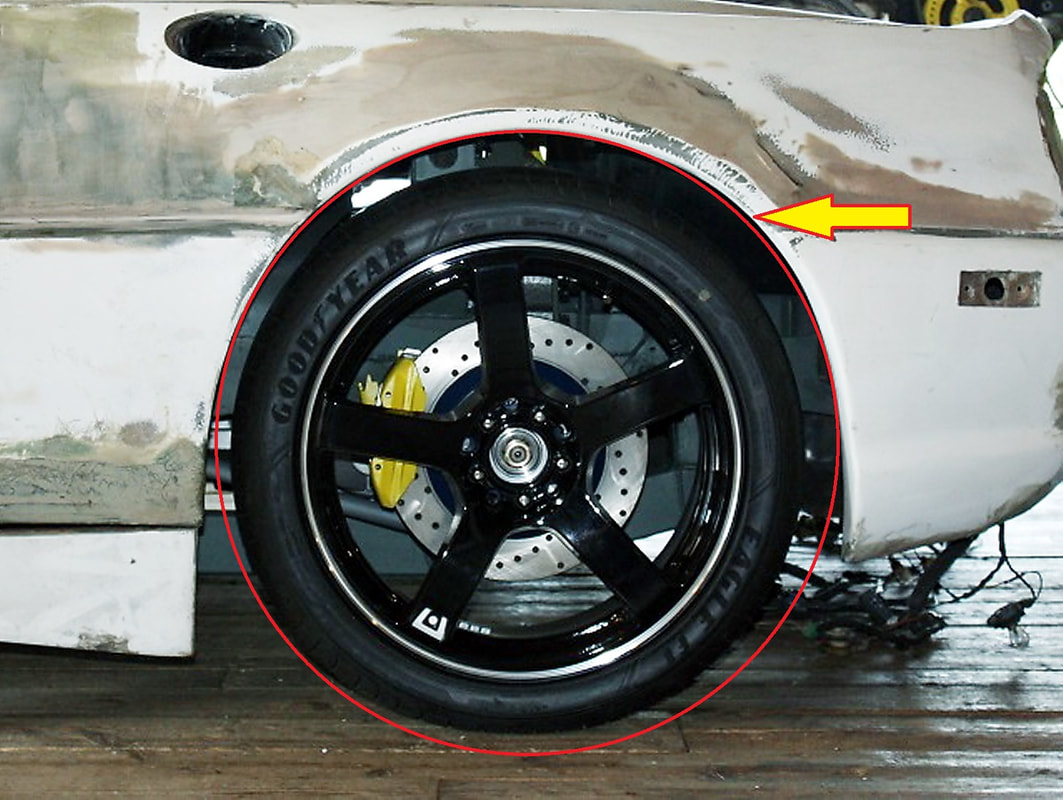
Lastly, while the driver’s side fender arch was fairly circular, it wasn’t perfect (arrow), and it was slightly off-center from the wheel. This last problem can probably be solved by moving the quarter ahead somewhat:
Lastly, while the driver’s side fender arch was fairly circular, it wasn’t perfect (arrow), and it was slightly off-center from the wheel. This last problem can probably be solved by moving the quarter ahead somewhat:
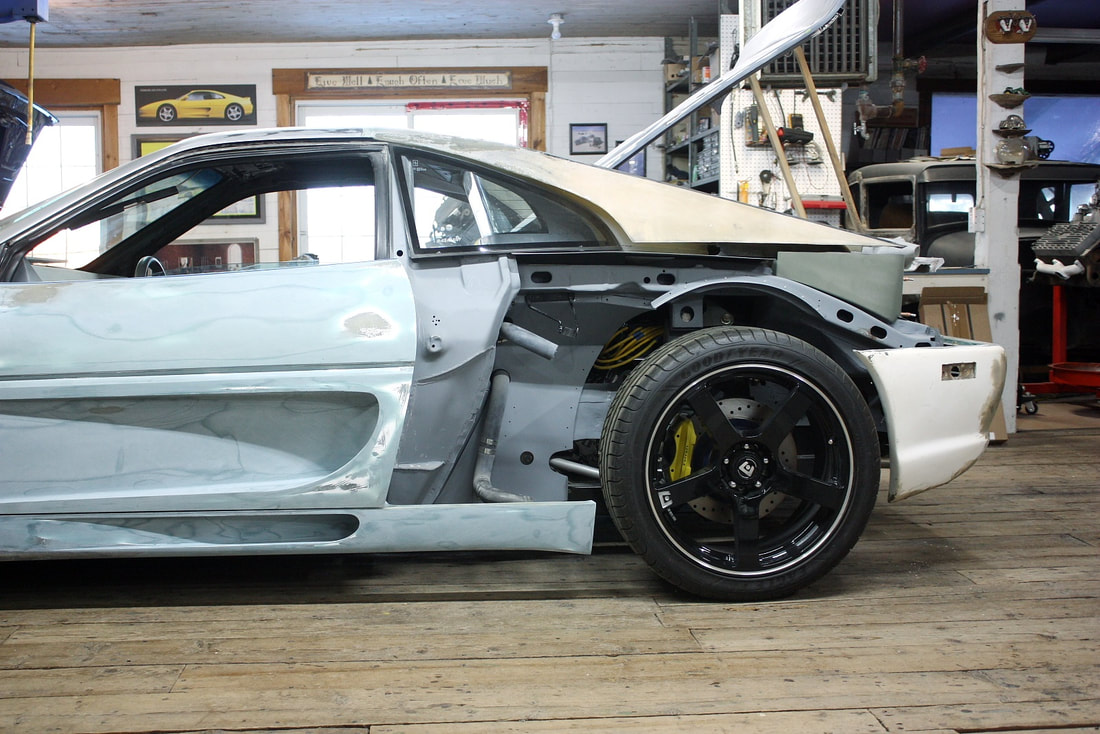
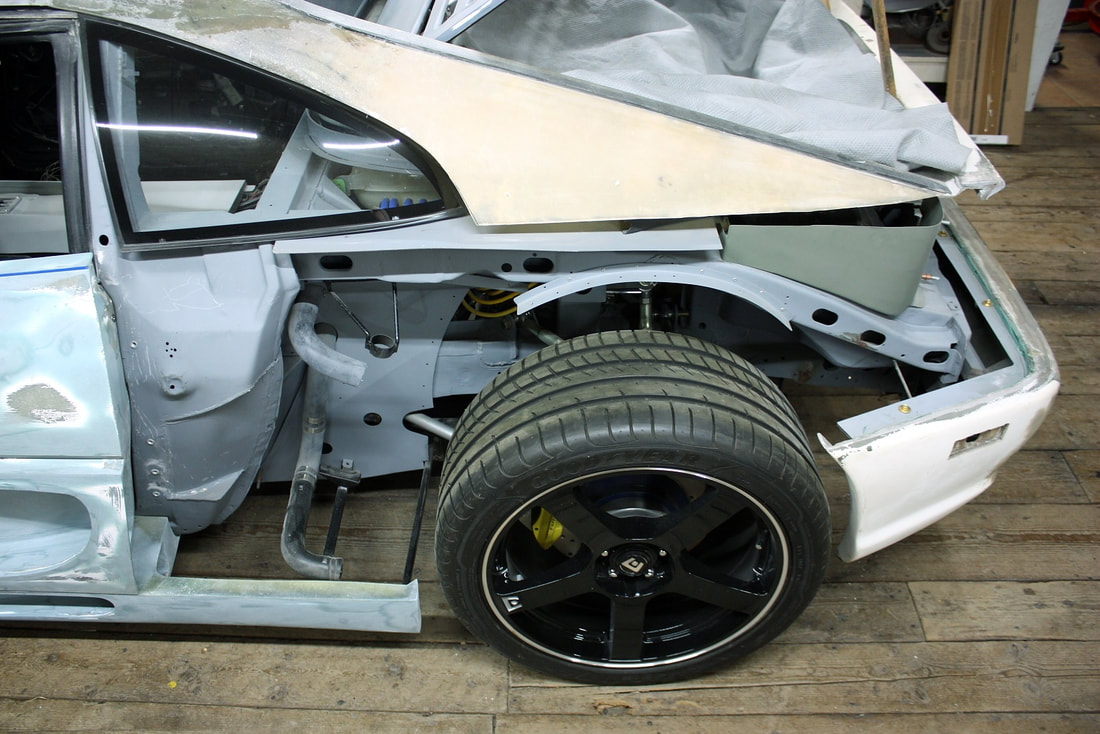
With the majority of the problems mapped out, I removed the driver’s rear quarter panel exposing the underlying sheet metal and the cavern where one of the radiators calls home:
With the majority of the problems mapped out, I removed the driver’s rear quarter panel exposing the underlying sheet metal and the cavern where one of the radiators calls home:
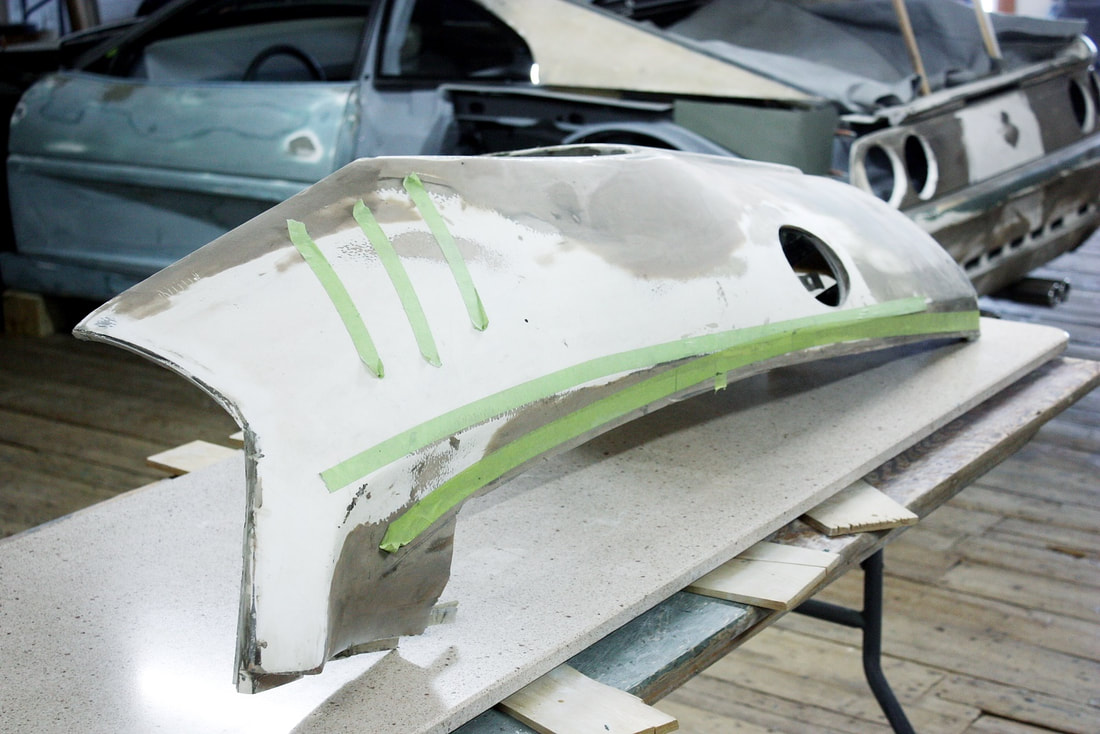
Here’s the unwitting patient sitting on the surgical table. Scalpel!
Here’s the unwitting patient sitting on the surgical table. Scalpel!
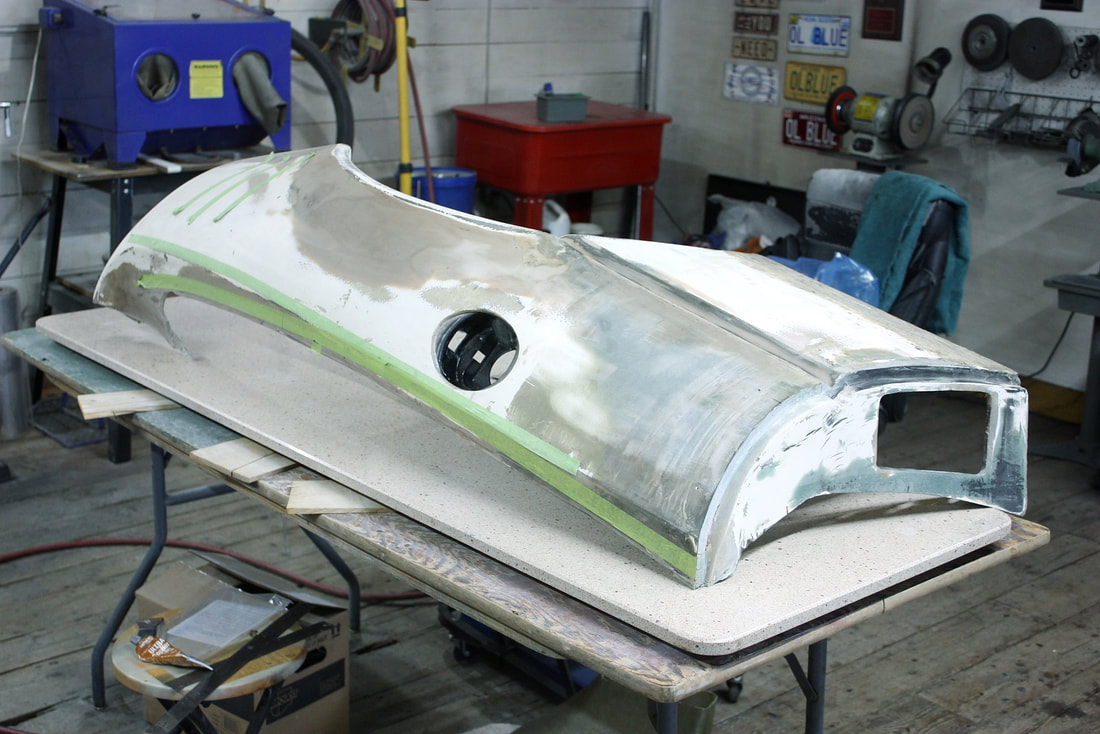
Next up: some serious cosmetic surgery.
Next up: some serious cosmetic surgery.

 RSS Feed
