Boy, I had hoped to cover shaping the driver’s side rear quarter panel in no more than two posts. That was wishful thinking. So here’s part three. It’s loaded with descriptions of straightening the beltline, flattening the lower panel, completing the CAI inlet scoop, and reshaping the radiator shroud... and there’s still more to do!
I left off in my last post by showing how crooked the beltline was where it transitioned from the door to the rear quarter panel, so I tackled that first. Here’s a reminder of why the work was needed:
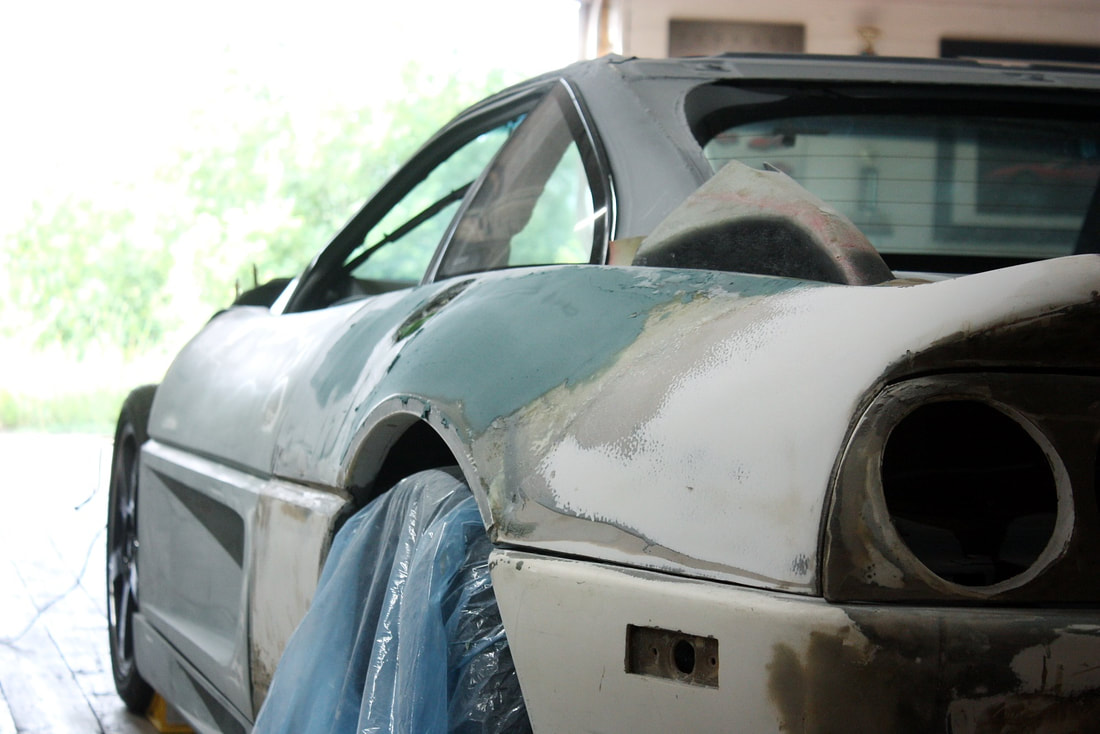
It wasn’t a simple matter of tilting the rear quarter to get the lines to match, since that would’ve created other misalignments with the upper body swoop, the tail light opening, and rear fascia height, to name a few. So to remedy the wayward line, I needed to remold it entirely.
I started by using my laser level to mark a straight line from the door across the quarter panel, then using my 1” pneumatic belt sander, ground away the lower edge of the beltline until it matched:
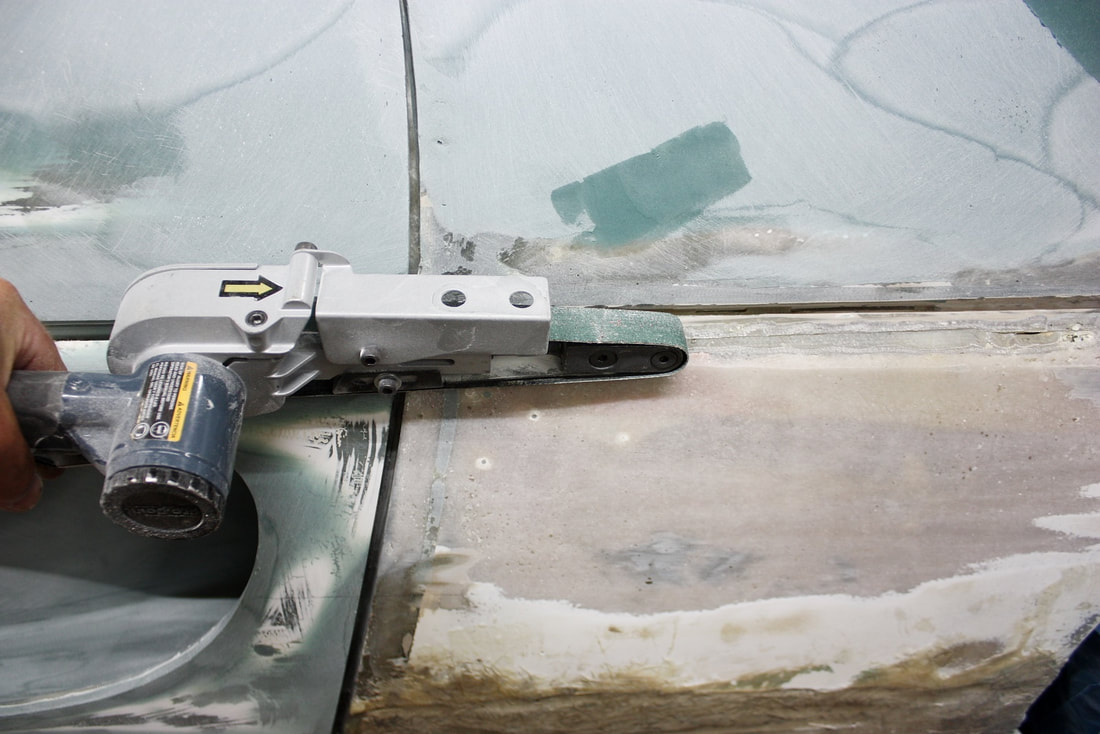
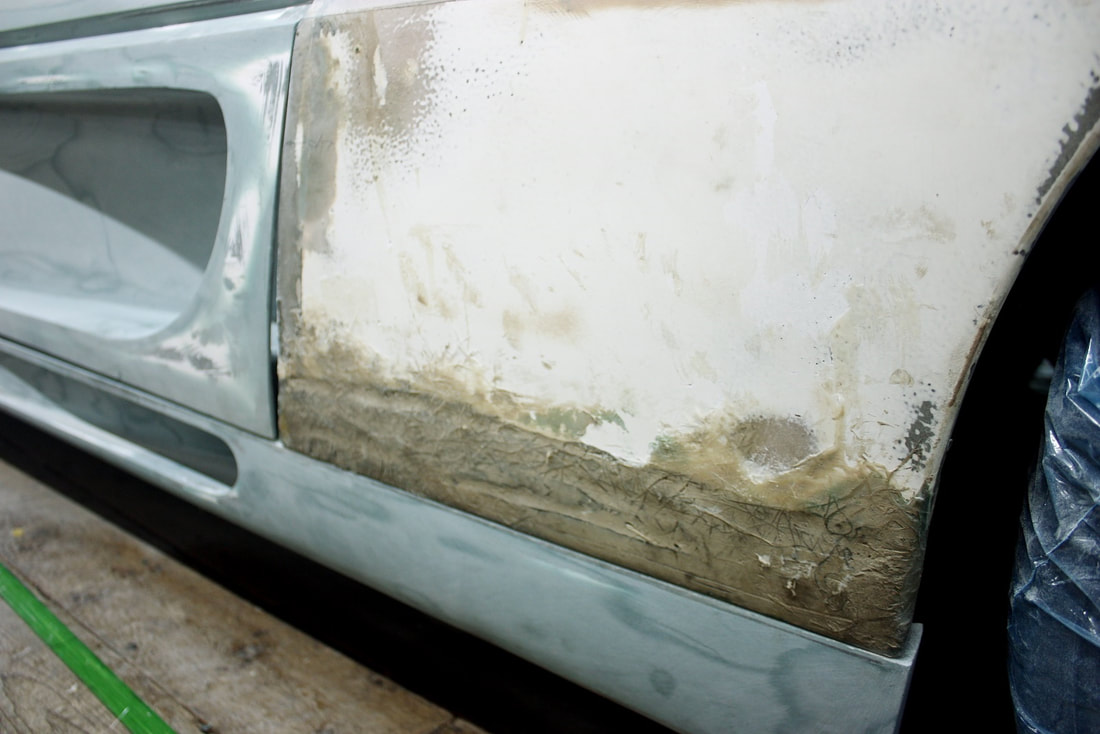
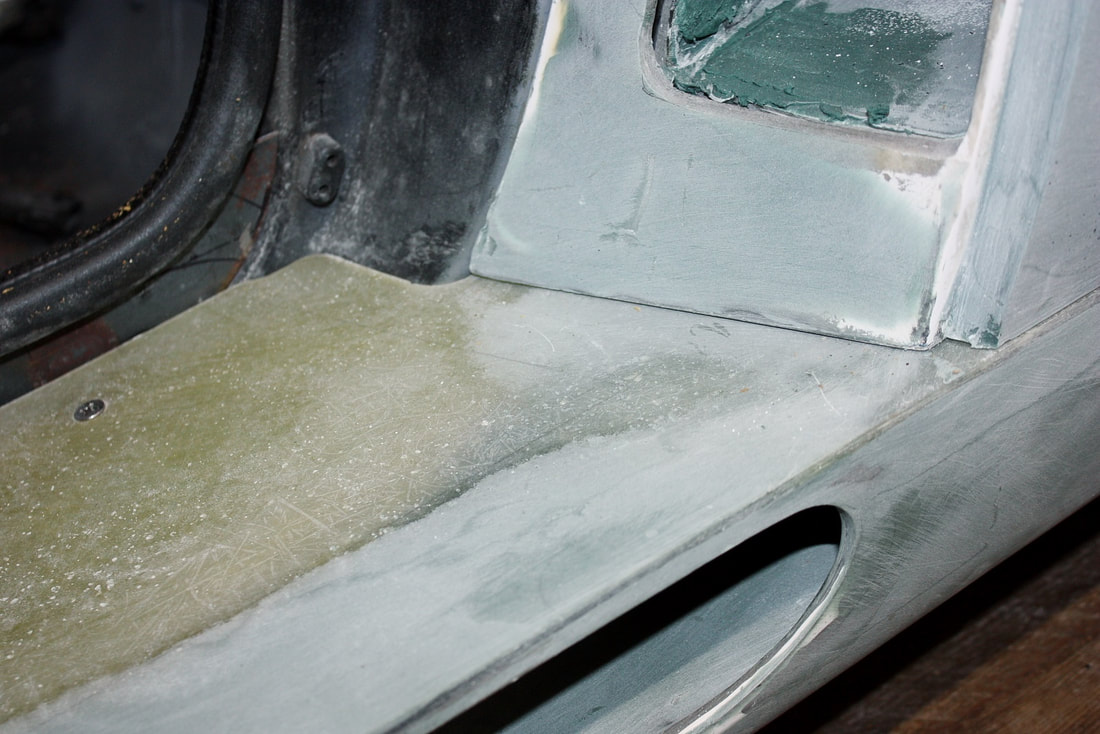
As I suspected, there wasn’t enough material thickness in the door to accommodate a simple grind… I broke through the fibreglass well before I got to the desired shape:
As I suspected, there wasn’t enough material thickness in the door to accommodate a simple grind… I broke through the fibreglass well before I got to the desired shape:
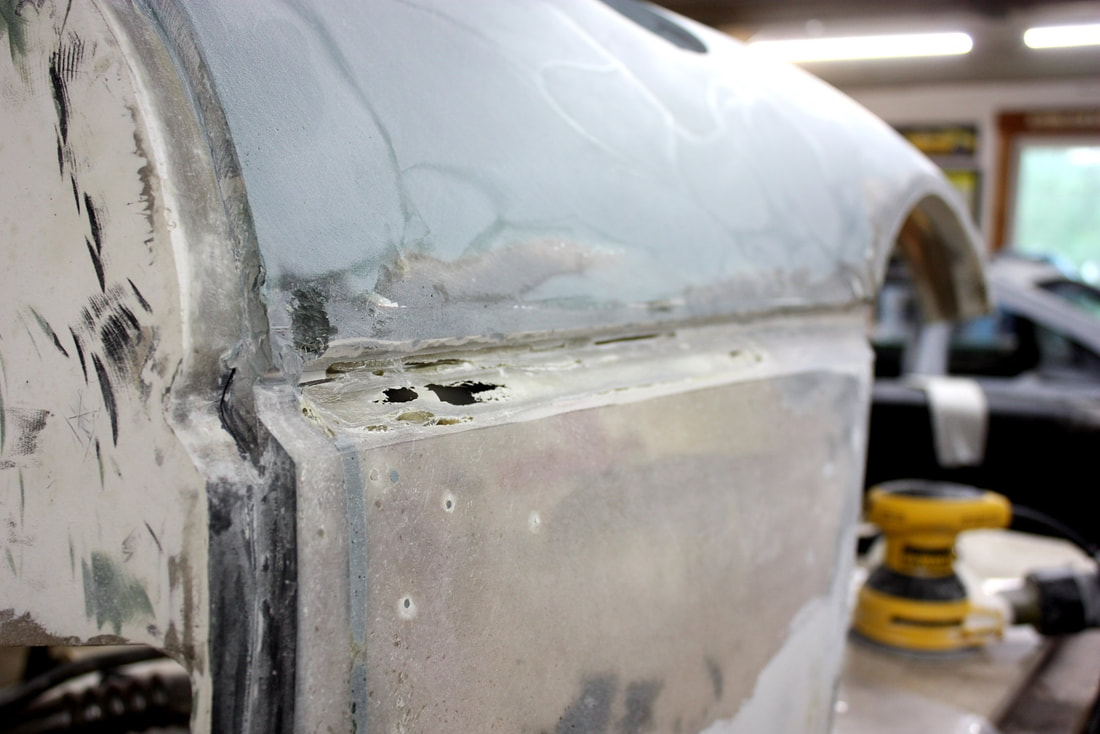
By the time I had straightened the lower edge of the beltline I had ground through a significant portion of the skin:
By the time I had straightened the lower edge of the beltline I had ground through a significant portion of the skin:
From that point I needed to remove the quarter panel to add more material from behind. Before taking the panel off, I measured up and took stock of any other work that would benefit by being done with the panel off the car. That included addressing a large bulge in the area adjacent to the door, bonding the quarter window scoop to the panel, and digging out the old polyester body filler Don used along the lower edge:
From that point I needed to remove the quarter panel to add more material from behind. Before taking the panel off, I measured up and took stock of any other work that would benefit by being done with the panel off the car. That included addressing a large bulge in the area adjacent to the door, bonding the quarter window scoop to the panel, and digging out the old polyester body filler Don used along the lower edge:
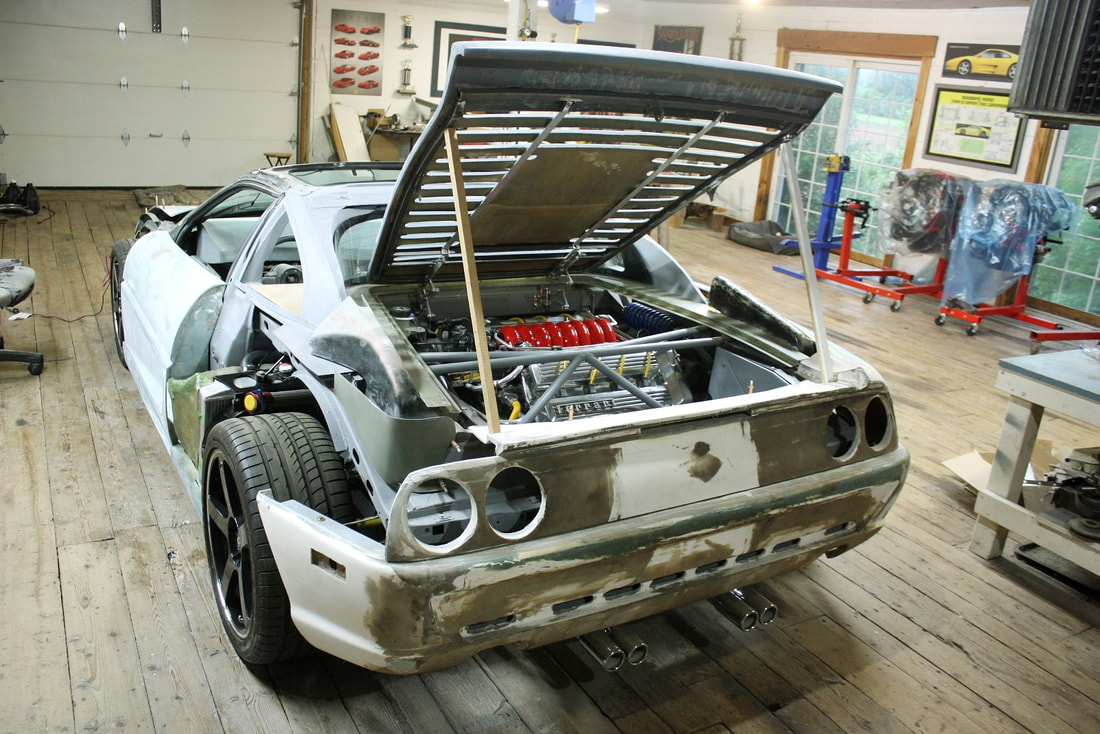
Here’s a quick shot of the chassis after taking the quarter panel off (because it looks sooo cool):
Here’s a quick shot of the chassis after taking the quarter panel off (because it looks sooo cool):
The bulge I needed to flatten in the lower portion of the panel was hard to photograph, but it was clear when sighting down the length of the car from above. With the panel off, the excessive crown was best seen from this angle:
The bulge I needed to flatten in the lower portion of the panel was hard to photograph, but it was clear when sighting down the length of the car from above. With the panel off, the excessive crown was best seen from this angle:

I took care of the bulge quickly using my 4” belt sander with 60 grit paper. Luckily the panel was thick enough in that area to handle the shave. I also ground out the old fillers and fibreglass repair from the bottom edge:
I took care of the bulge quickly using my 4” belt sander with 60 grit paper. Luckily the panel was thick enough in that area to handle the shave. I also ground out the old fillers and fibreglass repair from the bottom edge:
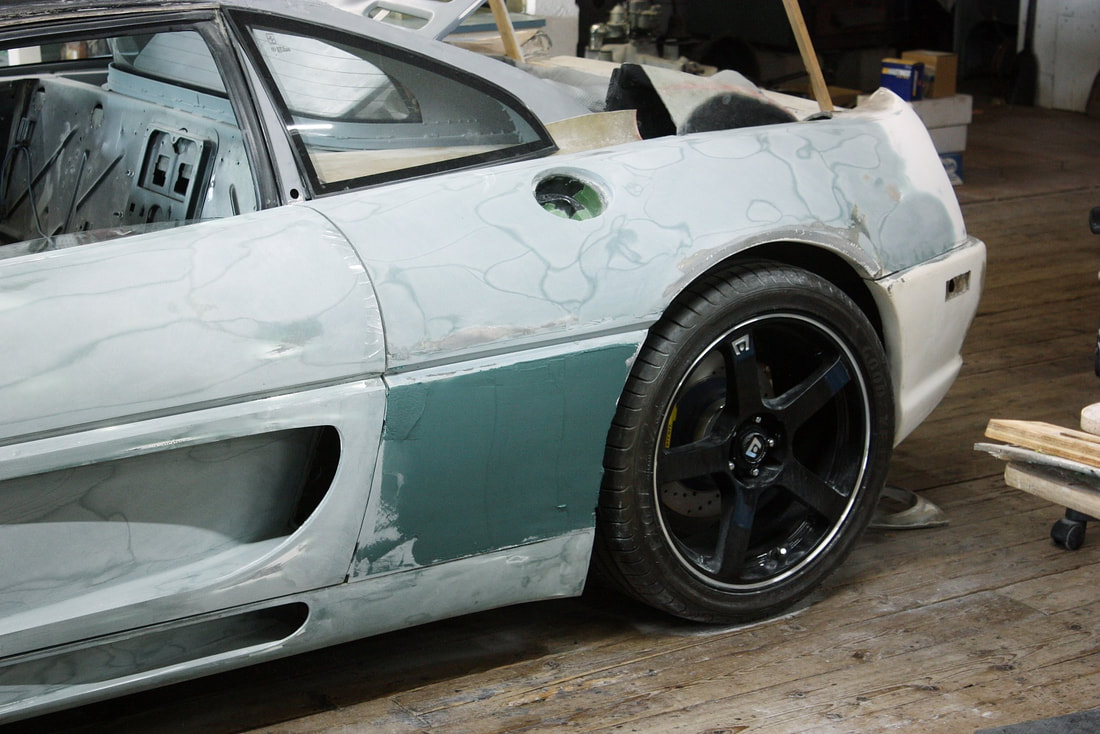
Once done, I flipped the panel over and added an extra layer of 1.5 oz mat to the backside where I re-crowned it, then I built up the area where I had broken through the beltline with several layers of mat. When I reinstalled the quarter panel, I used an aluminum angle to serve as a mold to recreate the V-shaped beltline with structural short hair filler, and used some new kitty hair filler to even out the lower portion of the panel:
Once done, I flipped the panel over and added an extra layer of 1.5 oz mat to the backside where I re-crowned it, then I built up the area where I had broken through the beltline with several layers of mat. When I reinstalled the quarter panel, I used an aluminum angle to serve as a mold to recreate the V-shaped beltline with structural short hair filler, and used some new kitty hair filler to even out the lower portion of the panel:
Once the fillers had hardened, I removed the aluminum angle and fine tuned the edges of the beltline and the lower quarter with 80 grit paper on a variety of sanding blocks:
Once the fillers had hardened, I removed the aluminum angle and fine tuned the edges of the beltline and the lower quarter with 80 grit paper on a variety of sanding blocks:
The last step (at least at this stage) was to give the lower quarter a skim coat of short hair filler to finalize the overall crown:
The last step (at least at this stage) was to give the lower quarter a skim coat of short hair filler to finalize the overall crown:
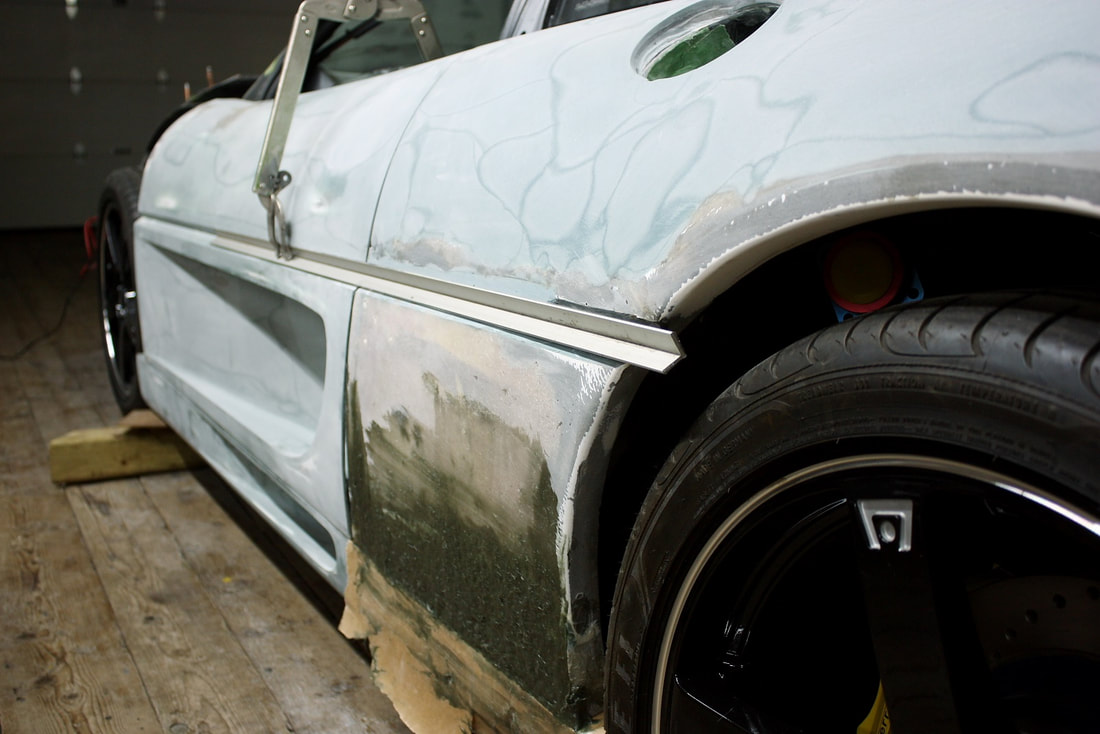
Taking in the results was pretty satisfying… the upper swoop, the beltline, and a consistent crown on the lower portion made it all start to come together:
Taking in the results was pretty satisfying… the upper swoop, the beltline, and a consistent crown on the lower portion made it all start to come together:
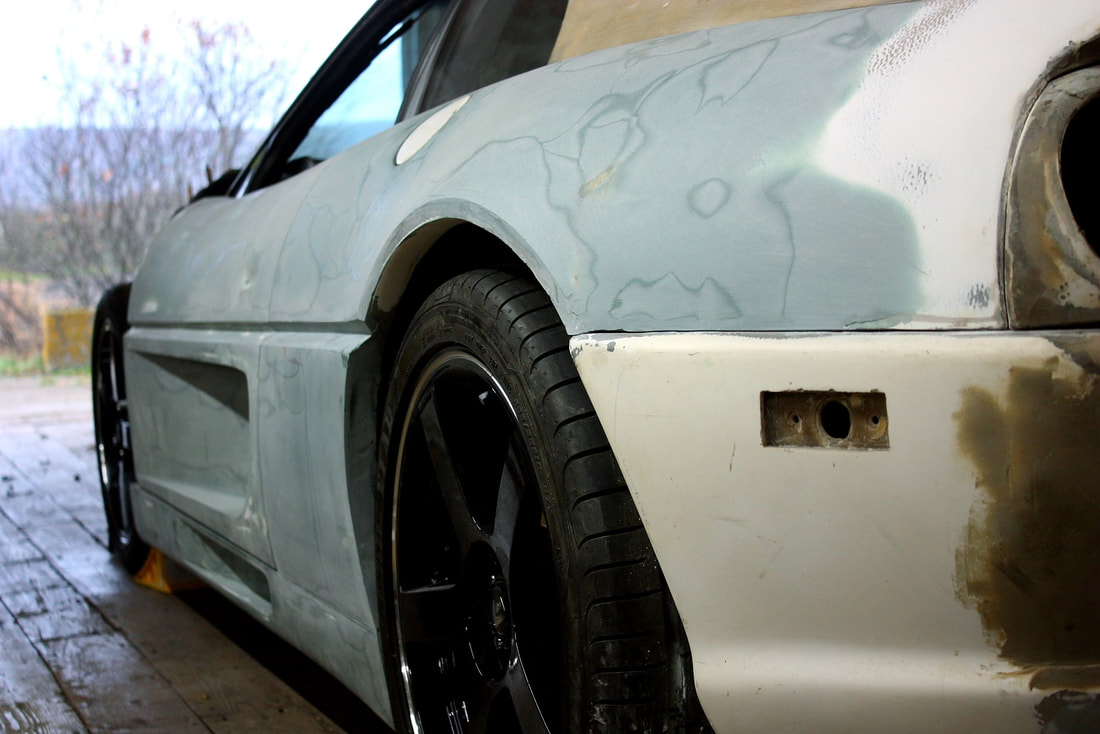
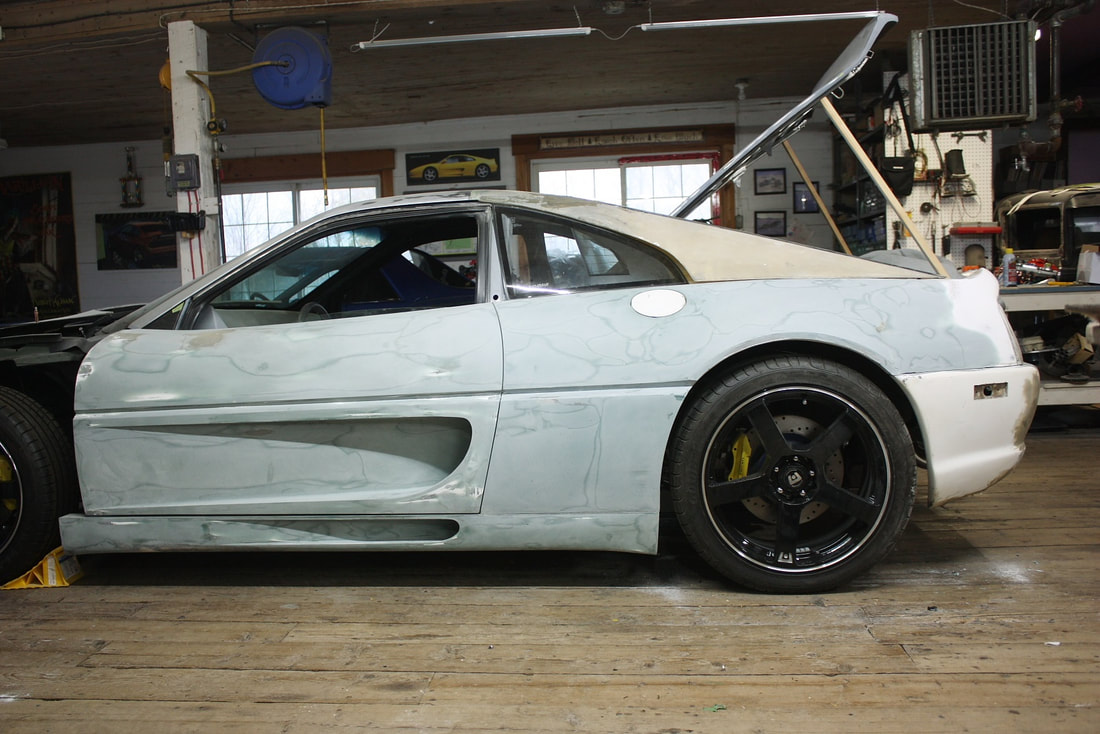
And stepping back, things were starting to look like the sum of a whole thing rather than a bunch of separate parts:
And stepping back, things were starting to look like the sum of a whole thing rather than a bunch of separate parts:
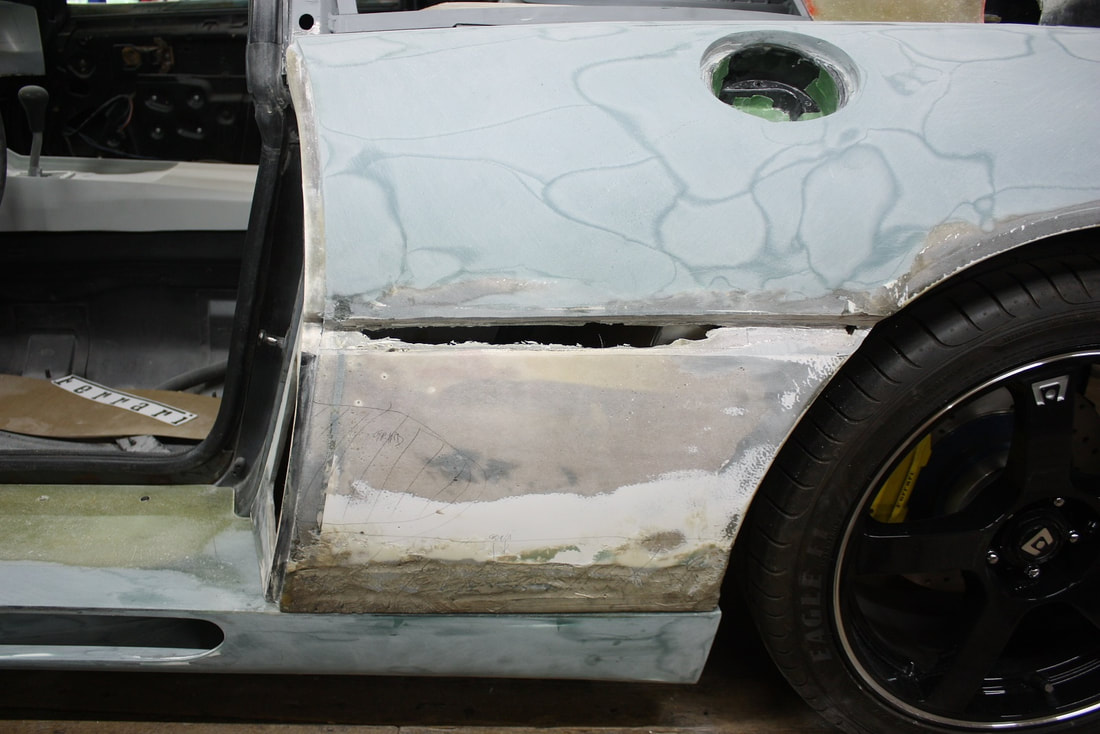
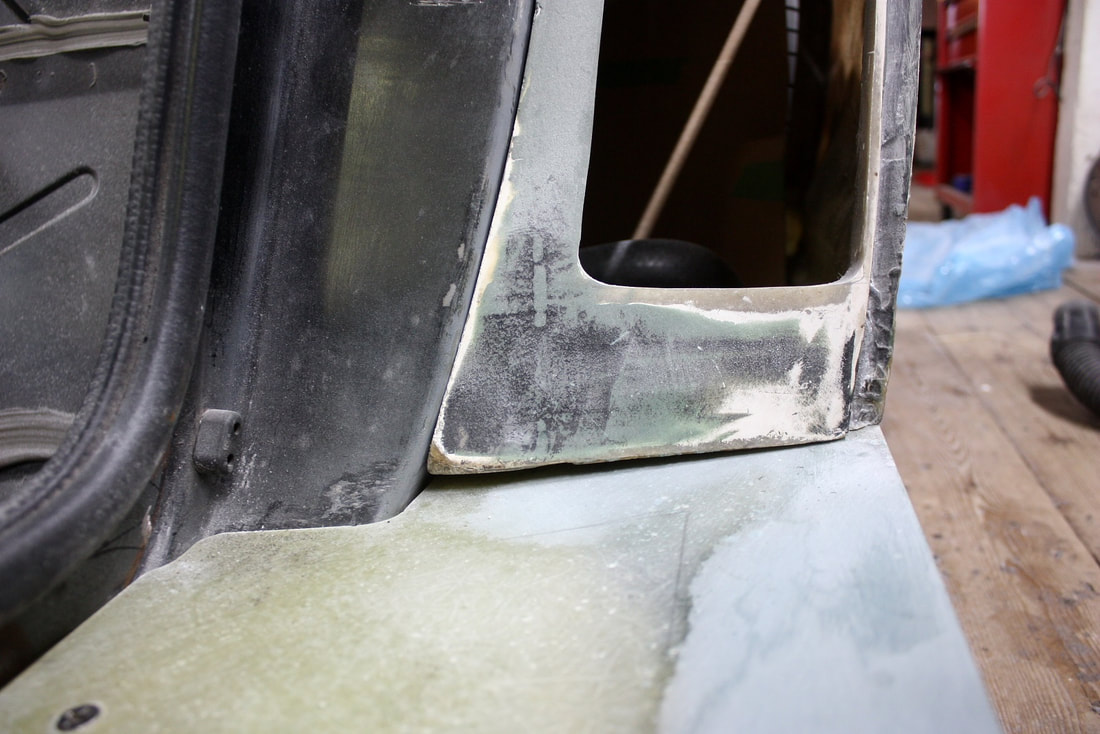
But the devil is in the details. One area that needed more attention was where the lower edge of the quarter panel met the door sill. The fit between the two left an uneven gap:
But the devil is in the details. One area that needed more attention was where the lower edge of the quarter panel met the door sill. The fit between the two left an uneven gap:
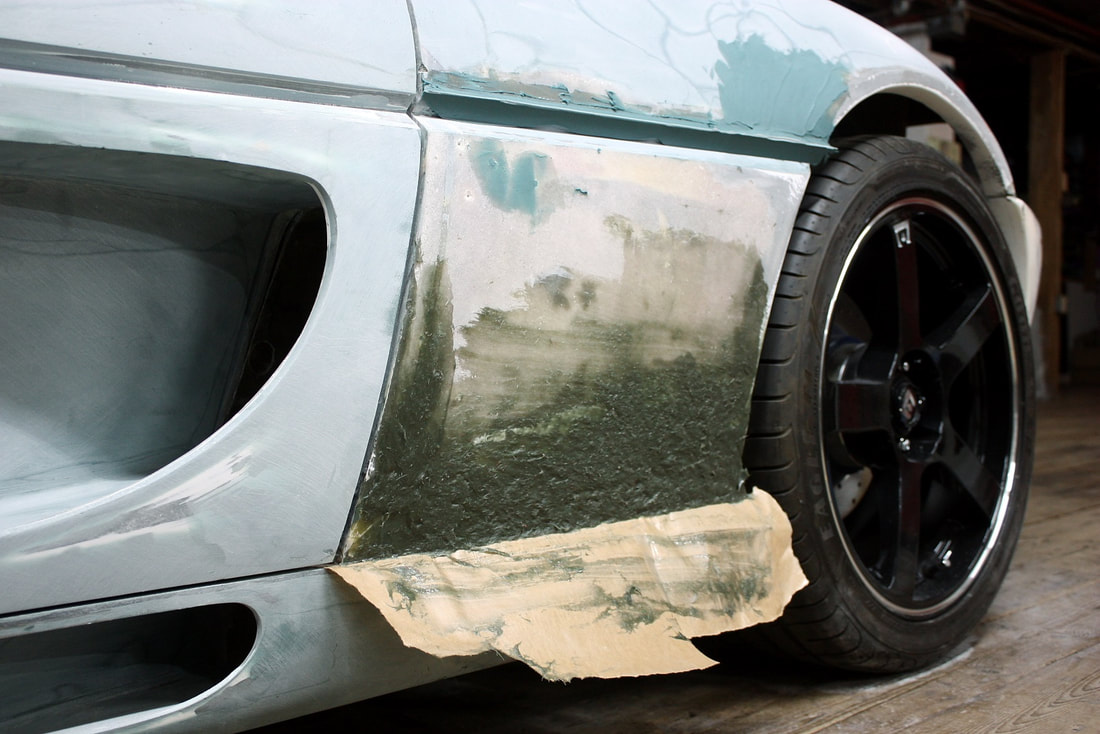
It’s an area that will see no movement between the two pieces since they’ll be fastened to one another with bolts in the area hidden behind the scoop. That meant it didn’t have to be particularly strong, so rather than slice, lower, and re-glass the lower edge of the quarter, I opted to fill the gap with kitty hair filler instead:
It’s an area that will see no movement between the two pieces since they’ll be fastened to one another with bolts in the area hidden behind the scoop. That meant it didn’t have to be particularly strong, so rather than slice, lower, and re-glass the lower edge of the quarter, I opted to fill the gap with kitty hair filler instead:
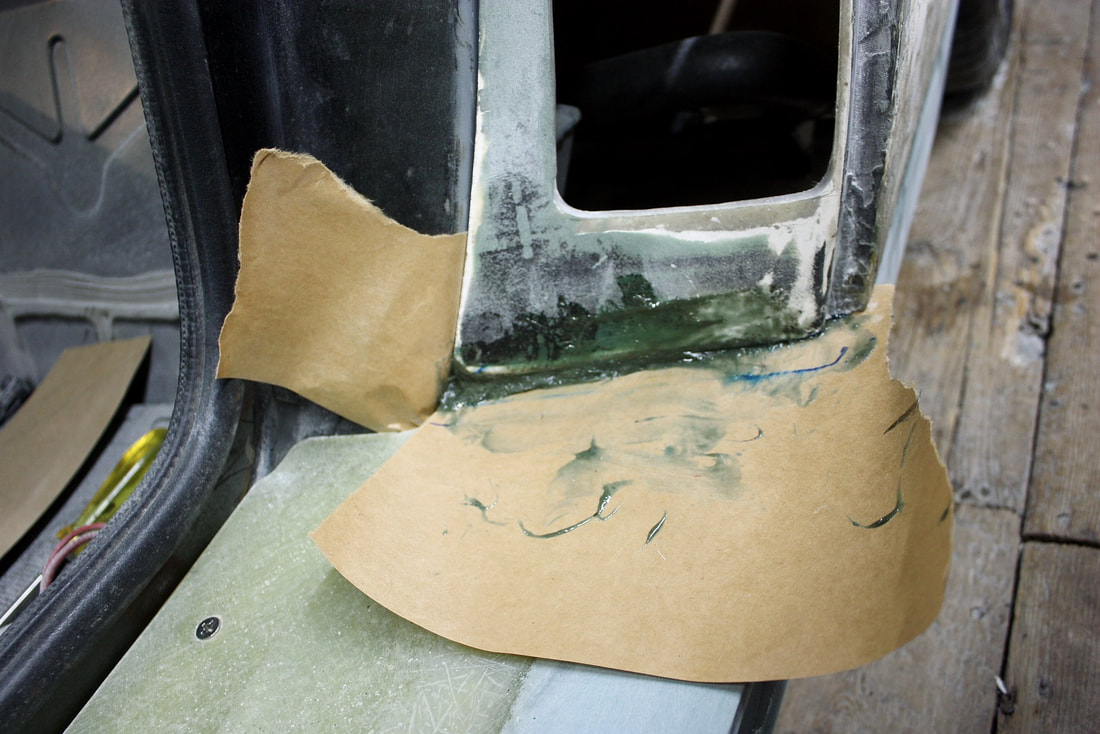
The long hair filler is identical in composition to the fibreglass mat and resin I would’ve otherwise used: it is structural, it just has a higher resin to fiber ratio than laying up mat. Here’s the kitty hair repair once shaped and ready for a skim coat of short strand filler:
The long hair filler is identical in composition to the fibreglass mat and resin I would’ve otherwise used: it is structural, it just has a higher resin to fiber ratio than laying up mat. Here’s the kitty hair repair once shaped and ready for a skim coat of short strand filler:
And here’s the result after final shaping:
And here’s the result after final shaping:
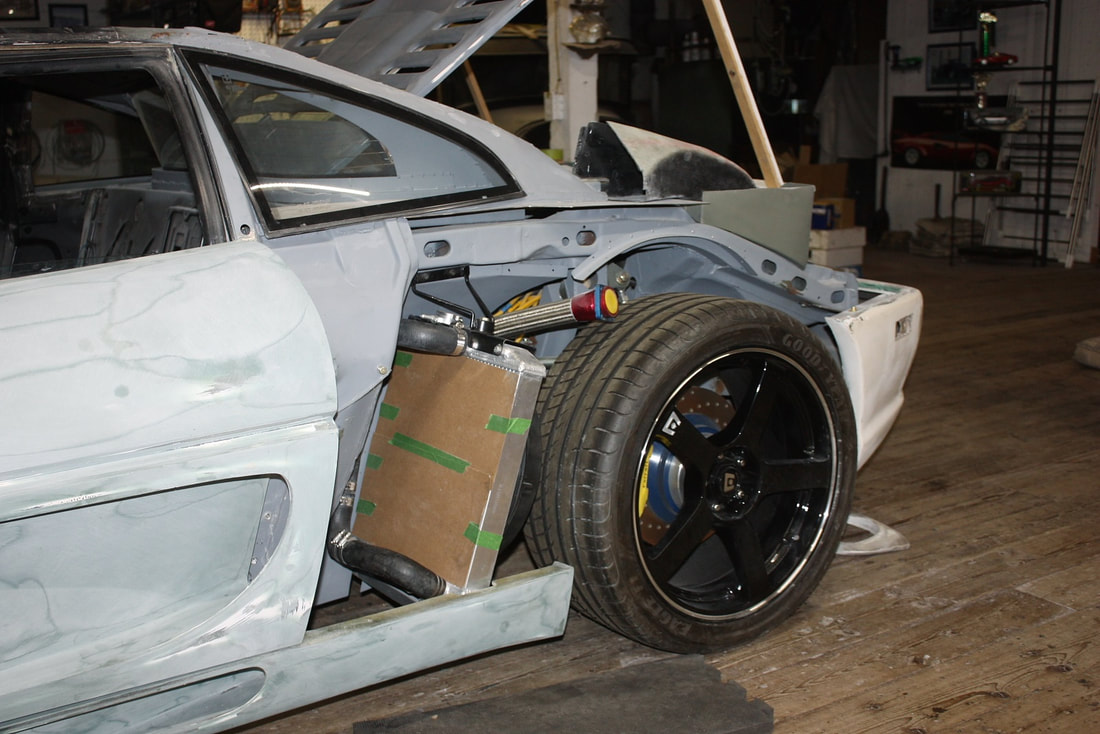
The next thing on the agenda was to rework the radiator shroud… the funnel shaped pieces I made back in posts 71 & 72. In retrospect, it was premature to have made them before I finalized and ultimately enlarged the door and rocker panel air scoops that lead into them. As a consequence, the shroud inlets were much too small and were clearly mismatched to the new size of the scoops when sighting down the tunnels toward the radiators. So I took the rear quarter panel off (again) and taped some heavy cardboard on top of the radiator fins to protect them from the inevitable multiple test fittings of the modified shroud:
The next thing on the agenda was to rework the radiator shroud… the funnel shaped pieces I made back in posts 71 & 72. In retrospect, it was premature to have made them before I finalized and ultimately enlarged the door and rocker panel air scoops that lead into them. As a consequence, the shroud inlets were much too small and were clearly mismatched to the new size of the scoops when sighting down the tunnels toward the radiators. So I took the rear quarter panel off (again) and taped some heavy cardboard on top of the radiator fins to protect them from the inevitable multiple test fittings of the modified shroud:
Rather than mold a new shroud altogether, I decided to slice and splice the driver’s side funnel as an experiment. These next photos show how much larger I had to make the upper inlet:
Rather than mold a new shroud altogether, I decided to slice and splice the driver’s side funnel as an experiment. These next photos show how much larger I had to make the upper inlet:

Once I had the proper inlet dimensions, I braced and propped the mangled pieces in place, then laid up some new mat to bridge the slices, then mocked it up yet again:
Once I had the proper inlet dimensions, I braced and propped the mangled pieces in place, then laid up some new mat to bridge the slices, then mocked it up yet again:
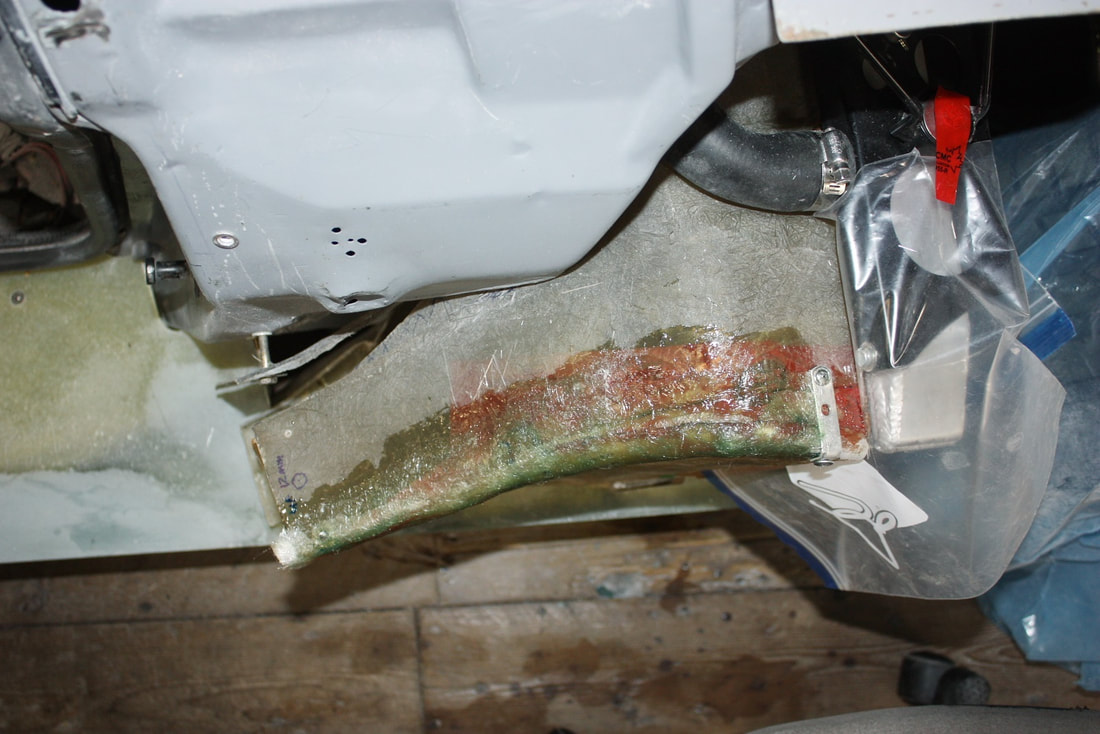
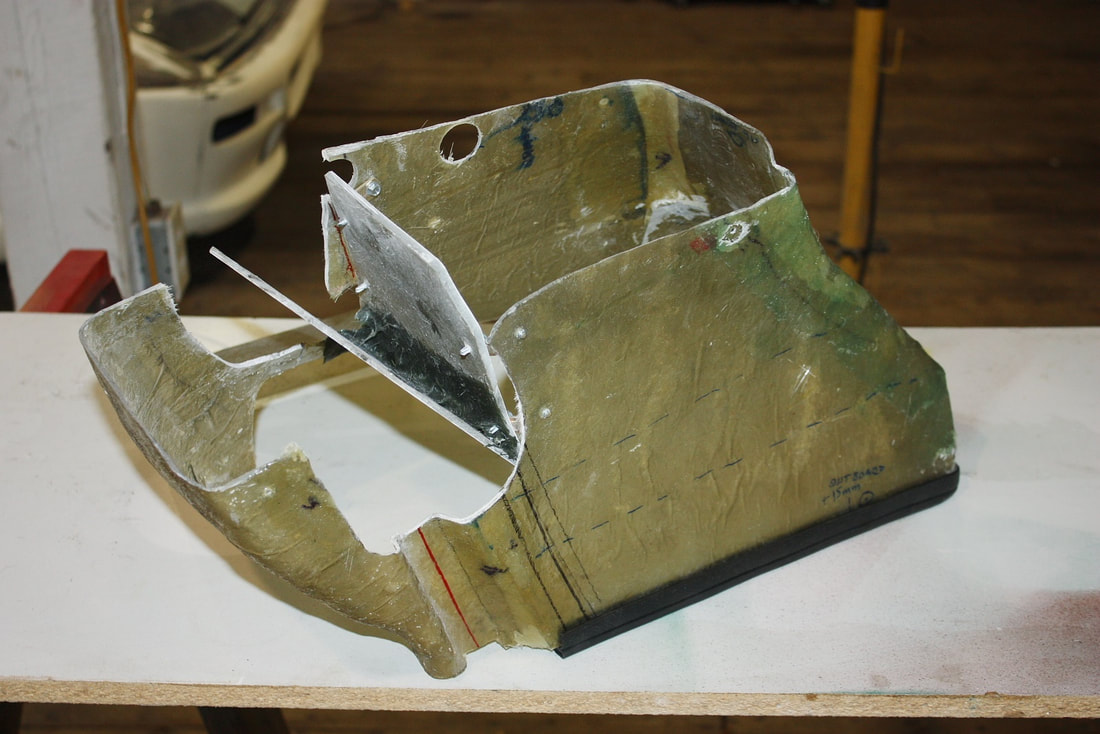
I tried doing the same to the lower inlet as well but the many compound curves molded into it made it much harder to reshape. That meant I needed to do something more drastic:
I tried doing the same to the lower inlet as well but the many compound curves molded into it made it much harder to reshape. That meant I needed to do something more drastic:
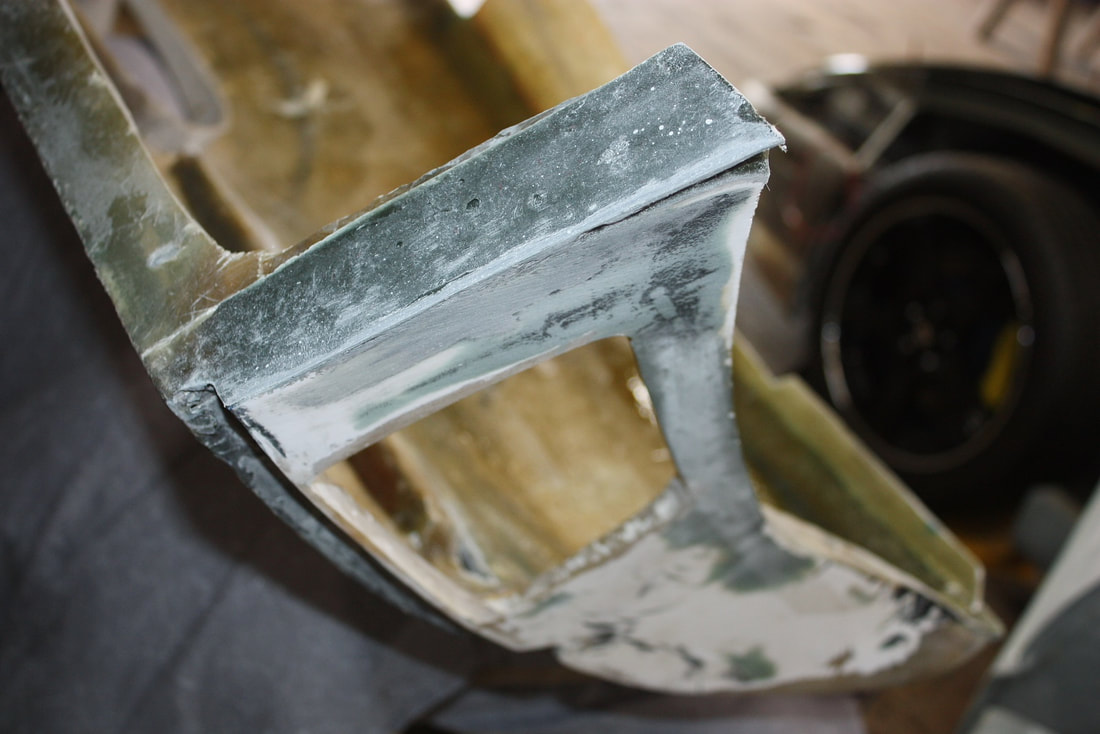
I ended up cutting out the entire section between the upper and lower inlets and replacing it with two flat pieces of fibreglass forming the floor of the upper inlet and the ceiling of the lower inlet:
I ended up cutting out the entire section between the upper and lower inlets and replacing it with two flat pieces of fibreglass forming the floor of the upper inlet and the ceiling of the lower inlet:
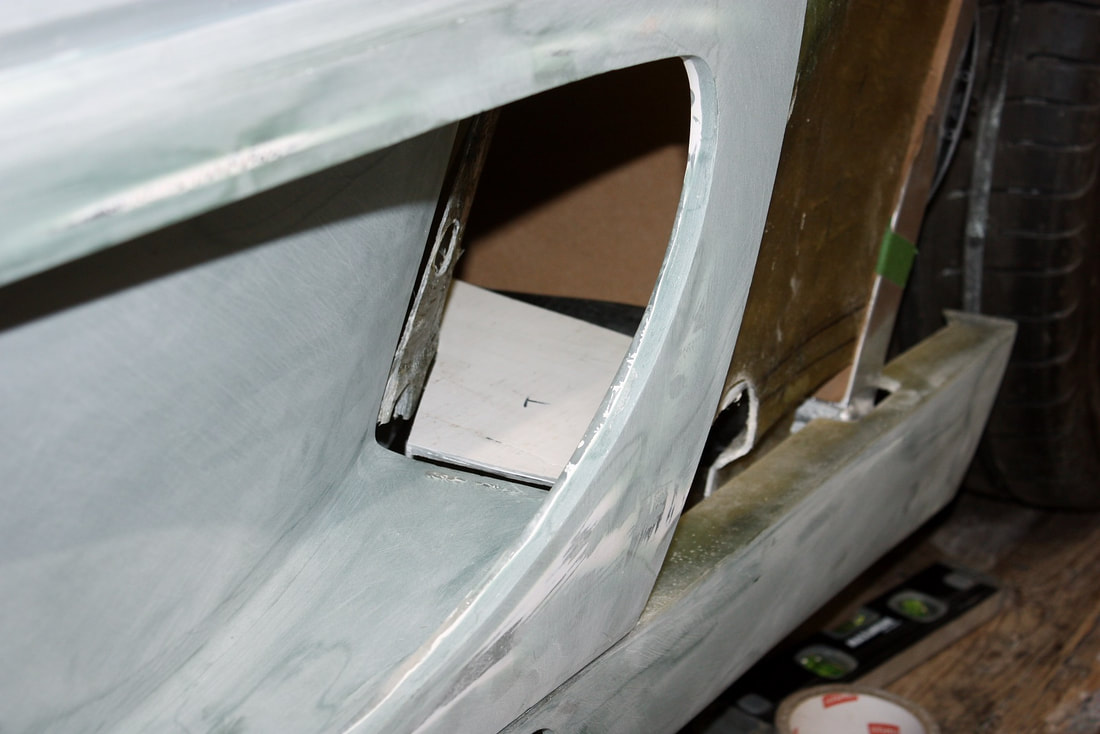
Here’s a view into the door scoop showing the inner wall and floor of the upper shroud beginning to line up with the door scoop surfaces:
Here’s a view into the door scoop showing the inner wall and floor of the upper shroud beginning to line up with the door scoop surfaces:
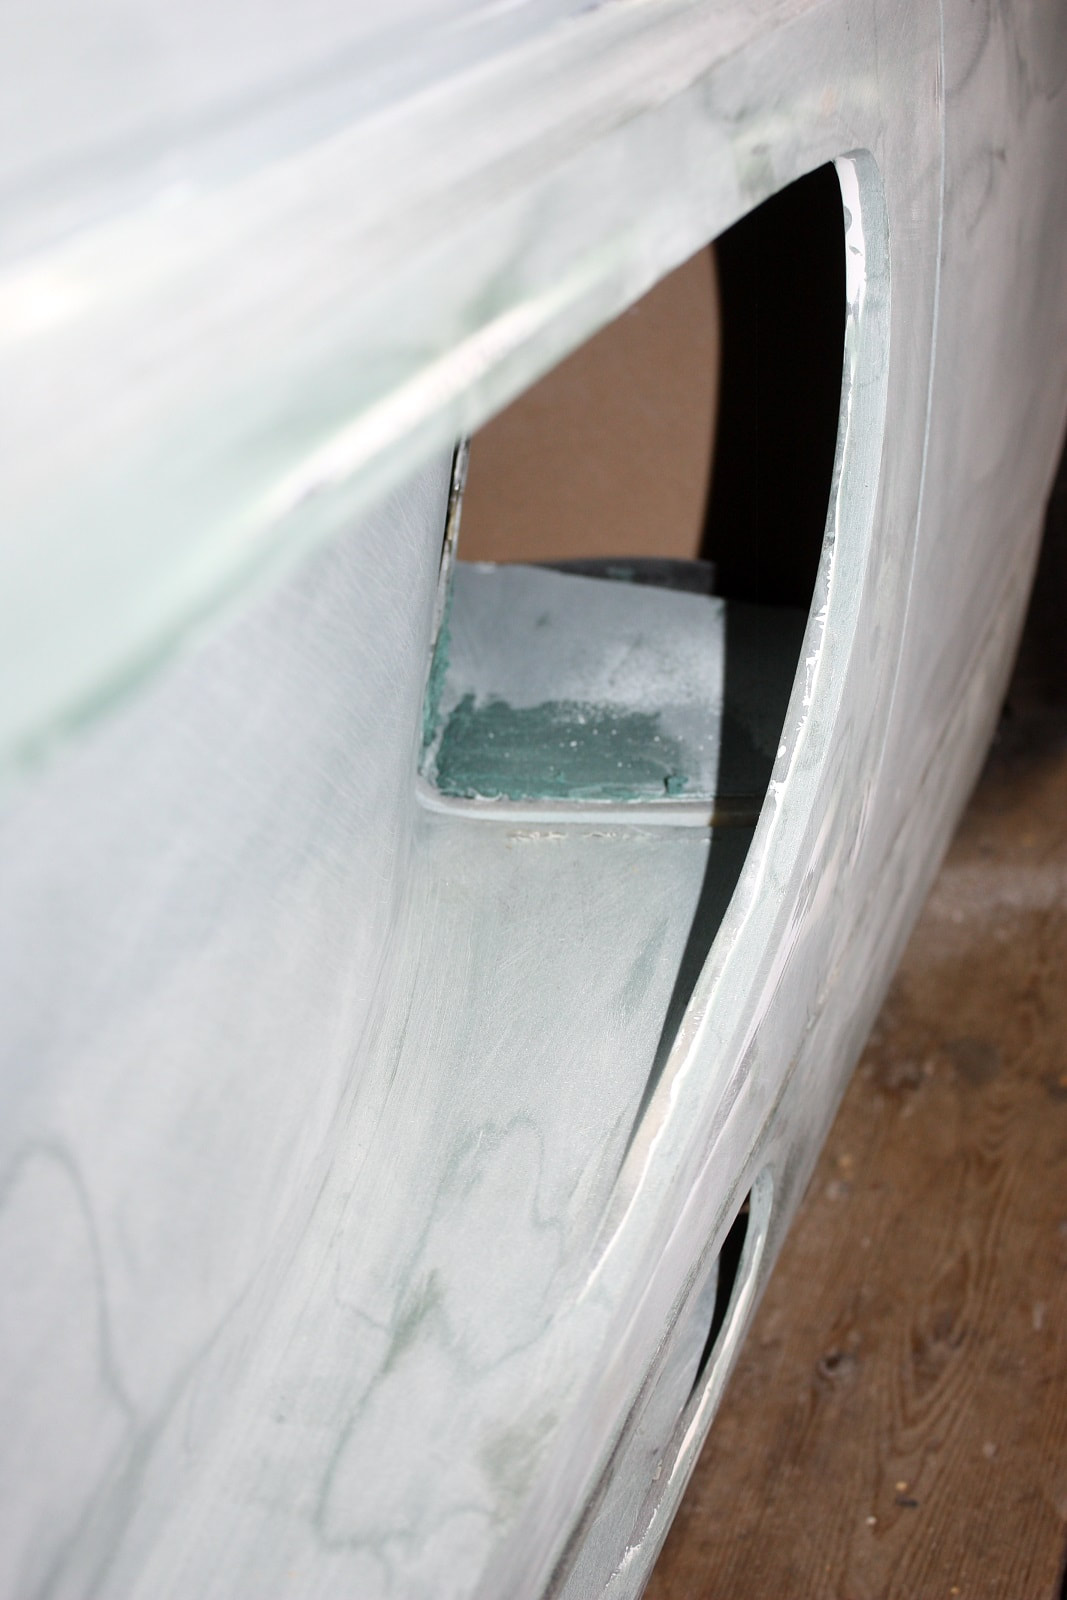
Once the shroud was patched up and refitted, I began smoothing out the transition area between the door and the quarter panel:
Once the shroud was patched up and refitted, I began smoothing out the transition area between the door and the quarter panel:
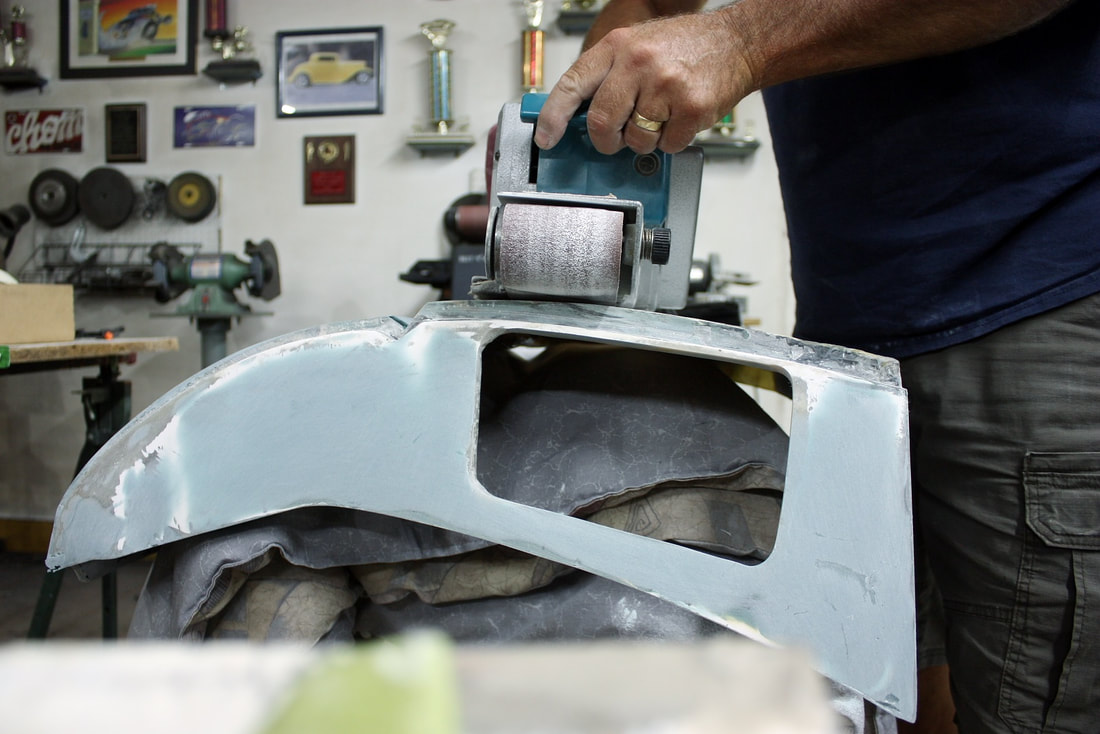
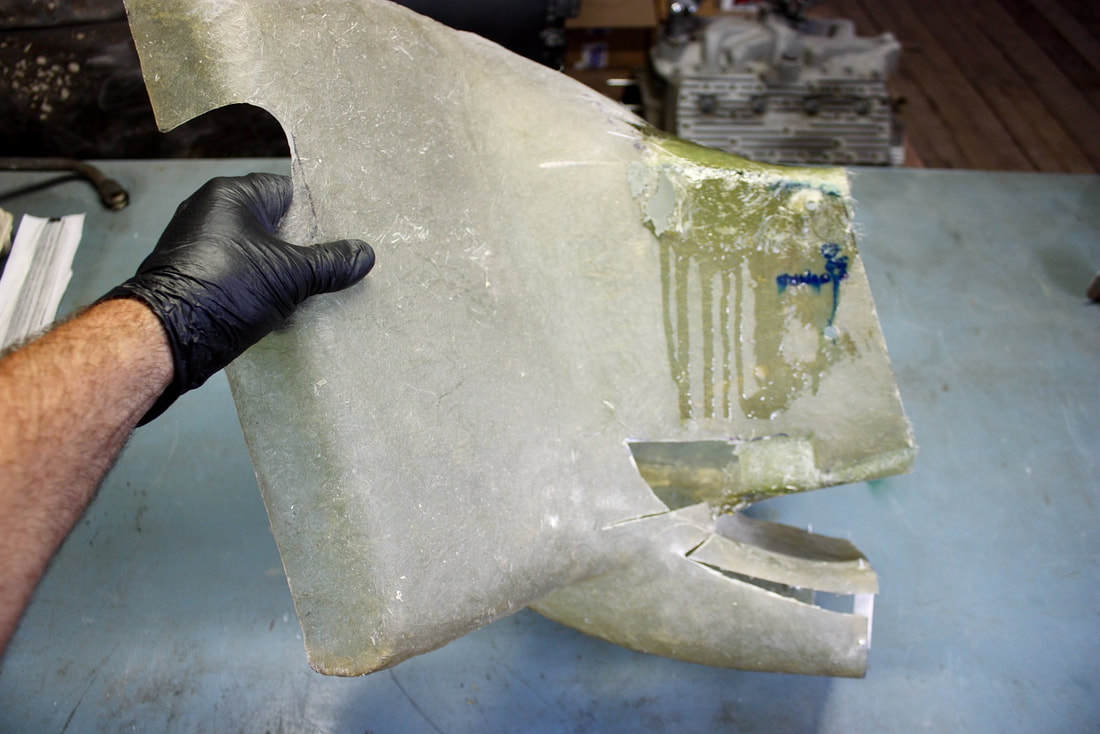
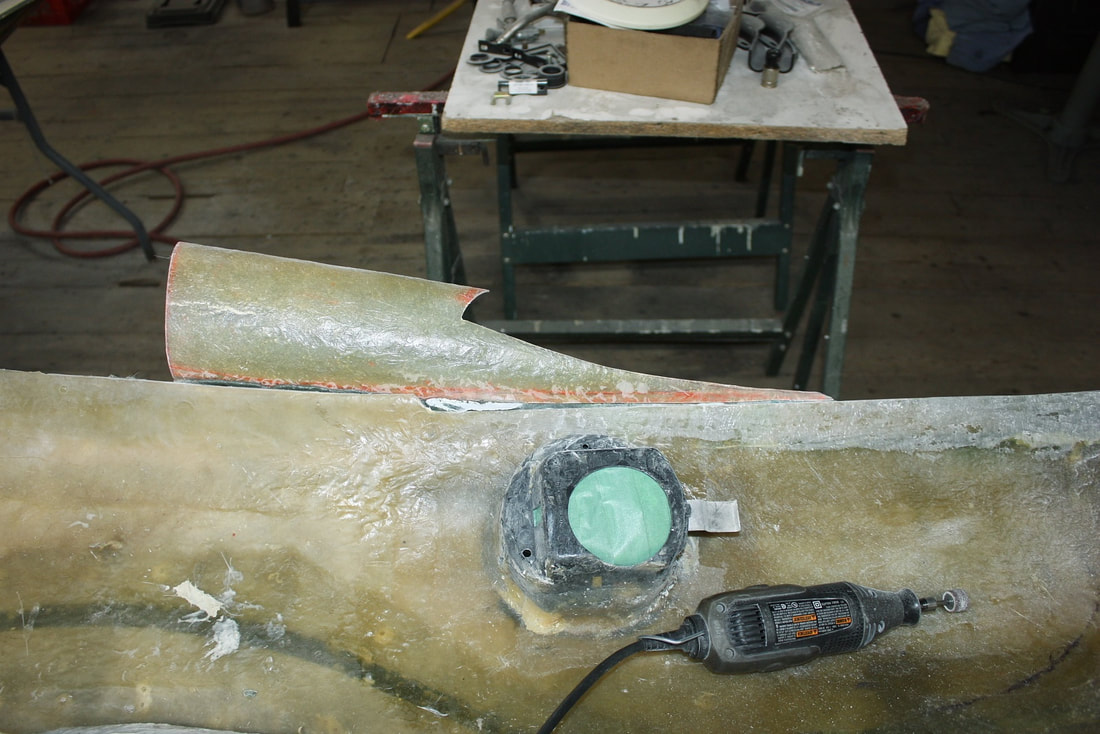
I had one last area I needed to backtrack to: the quarter window scoop. In my last post I had only glued the window scoop in place, with a plan to fibreglass it to the rear quarter later on. So while the quarter was off the car, I flipped it over revealing the rough side of the panel. I used my Dremel tool with a sanding drum to roughen the raw fibreglass in preparation for a few layers of 1.5 oz mat:
I had one last area I needed to backtrack to: the quarter window scoop. In my last post I had only glued the window scoop in place, with a plan to fibreglass it to the rear quarter later on. So while the quarter was off the car, I flipped it over revealing the rough side of the panel. I used my Dremel tool with a sanding drum to roughen the raw fibreglass in preparation for a few layers of 1.5 oz mat:
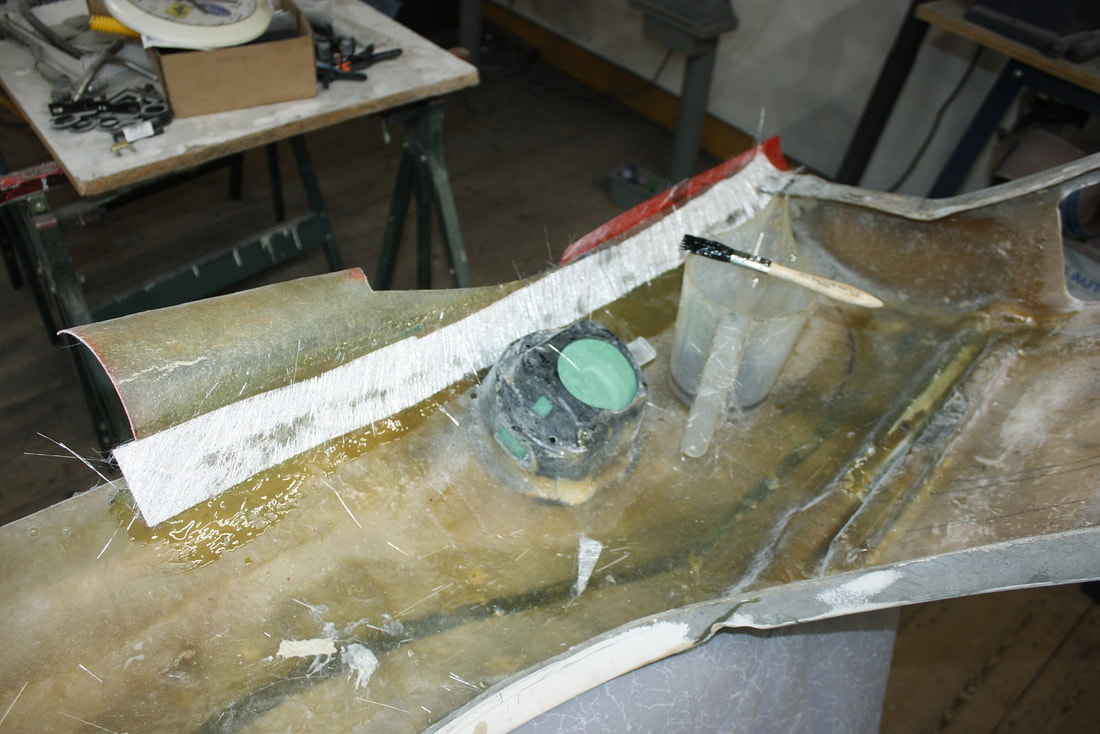
I cut three narrow strips of mat and laid them up bridging the scoop and the panel, essentially making them one piece:
I cut three narrow strips of mat and laid them up bridging the scoop and the panel, essentially making them one piece:
Once the resin hardened, I flipped the quarter panel over and shaped the outside joint with short hair body filler:
Once the resin hardened, I flipped the quarter panel over and shaped the outside joint with short hair body filler:

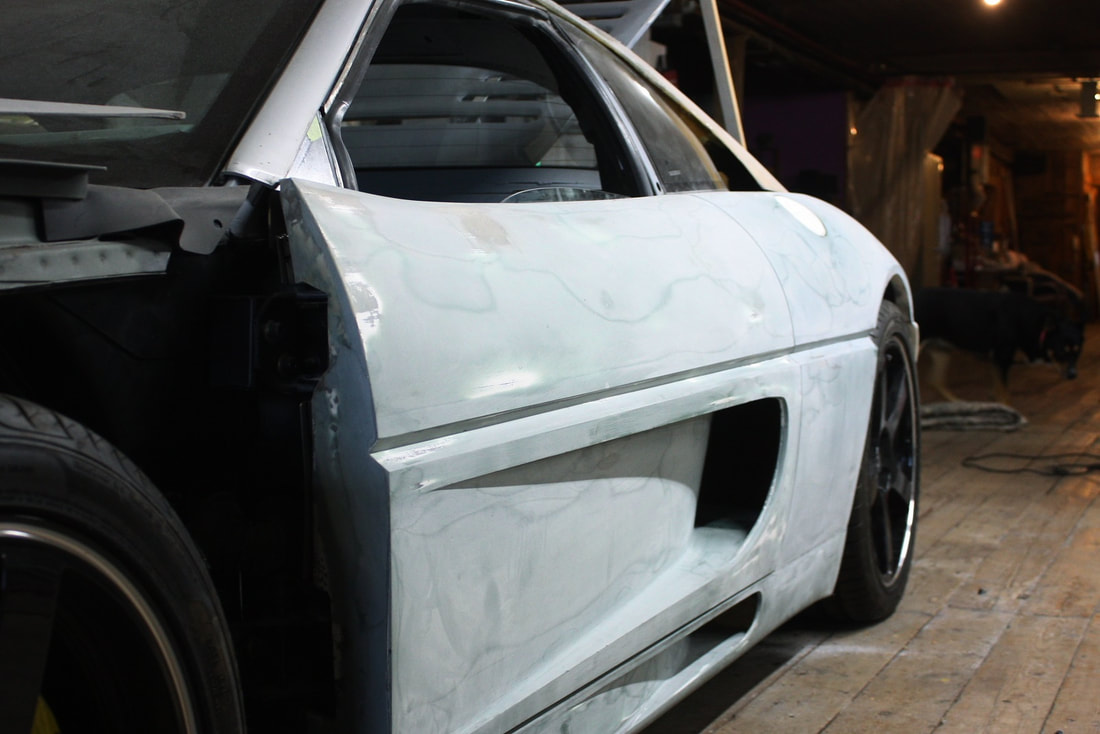
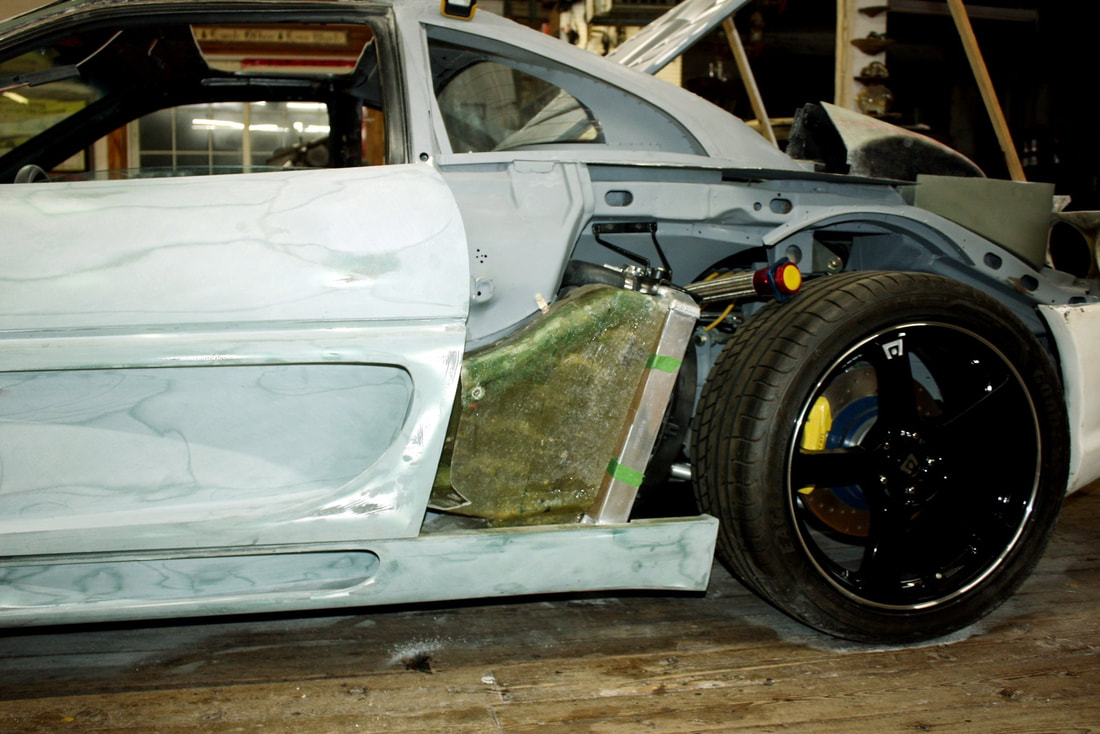
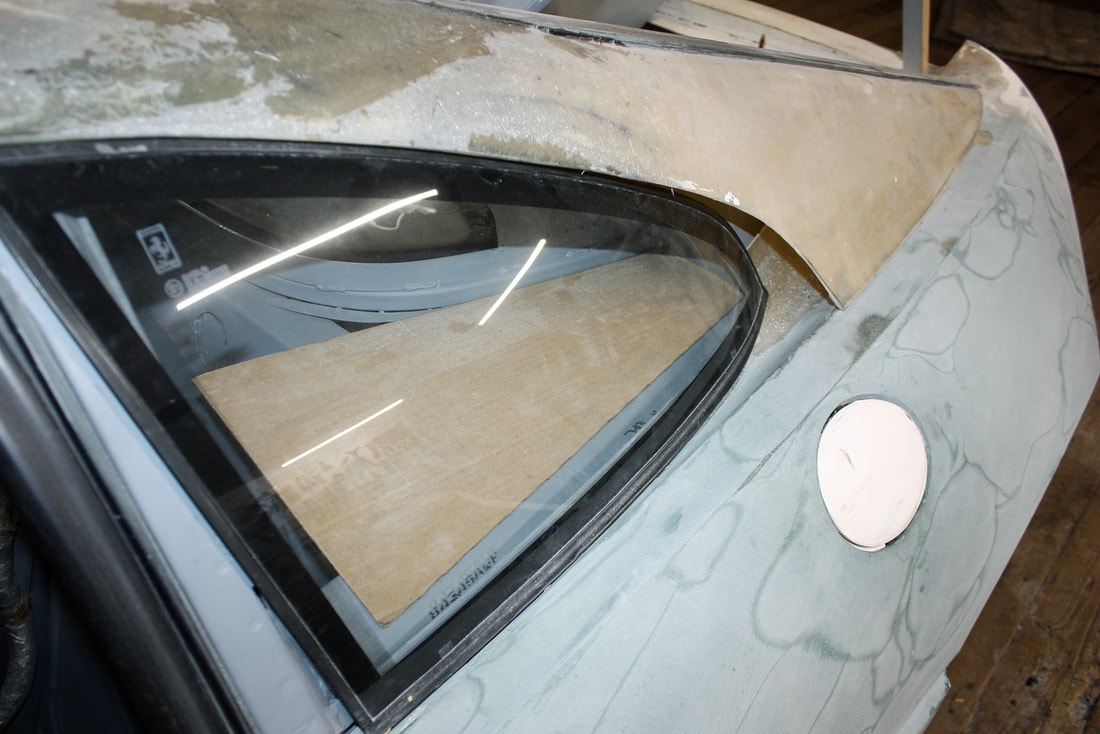
Lastly, I mocked up the quarter panel and fitted the glass to see how things were shaping up:
Lastly, I mocked up the quarter panel and fitted the glass to see how things were shaping up:

Next up: the fuel filler door and hardware, and some gills.
Next up: the fuel filler door and hardware, and some gills.

 RSS Feed
