If you read the three previous posts about the right hand front fender, then this post is going to be a bit of déjà-vu. All of the problems that existed on the right fender also existed on the left. The difference is that I had a head start on the passenger side, whereas on the driver’s side I was starting from scratch. So here, I’ll concentrate mostly on the areas not covered previously:
If you read the three previous posts about the right hand front fender, then this post is going to be a bit of déjà-vu. All of the problems that existed on the right fender also existed on the left. The difference is that I had a head start on the passenger side, whereas on the driver’s side I was starting from scratch. So here, I’ll concentrate mostly on the areas not covered previously:
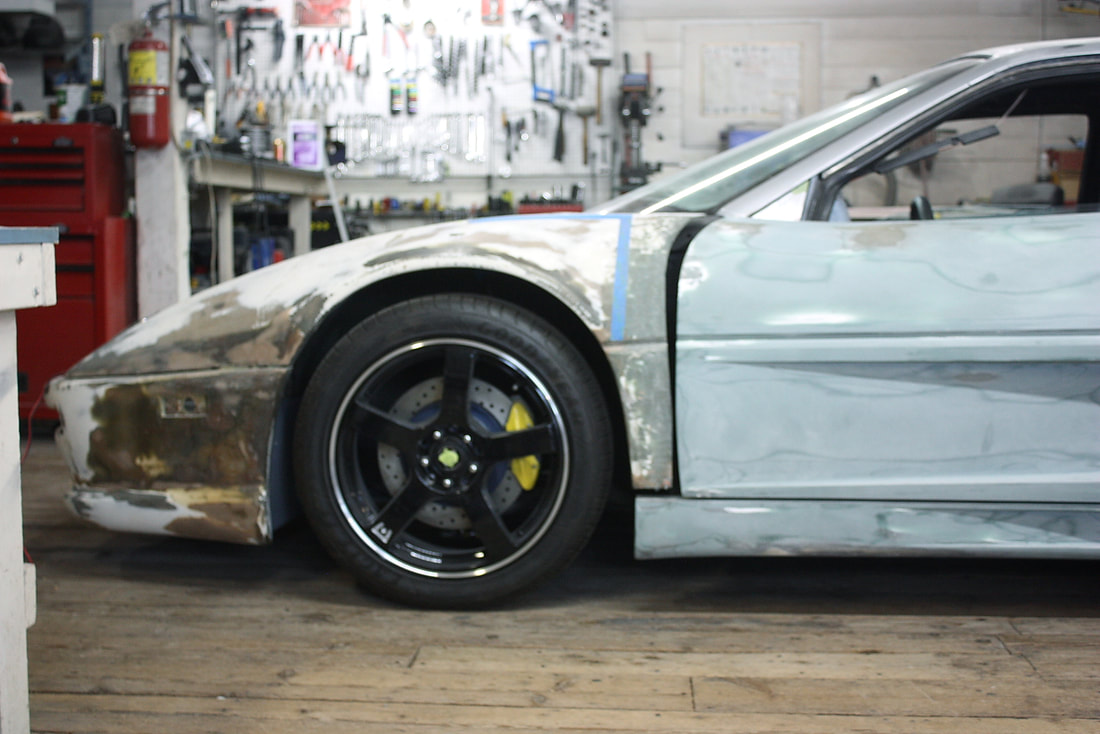
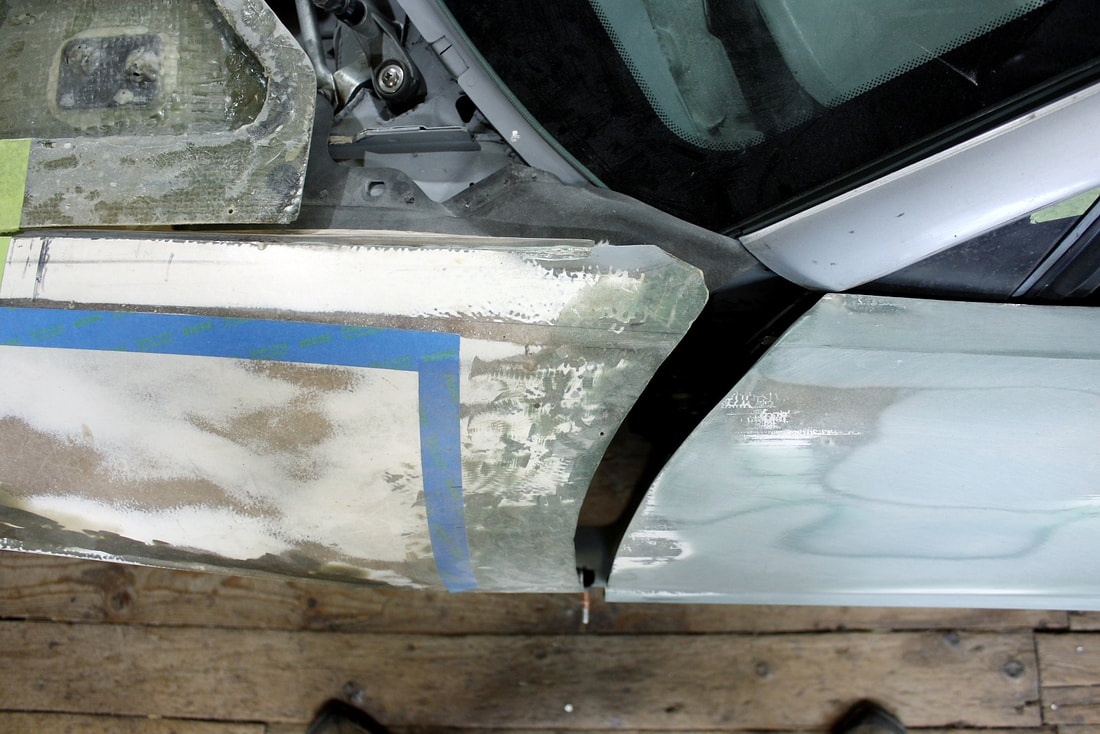
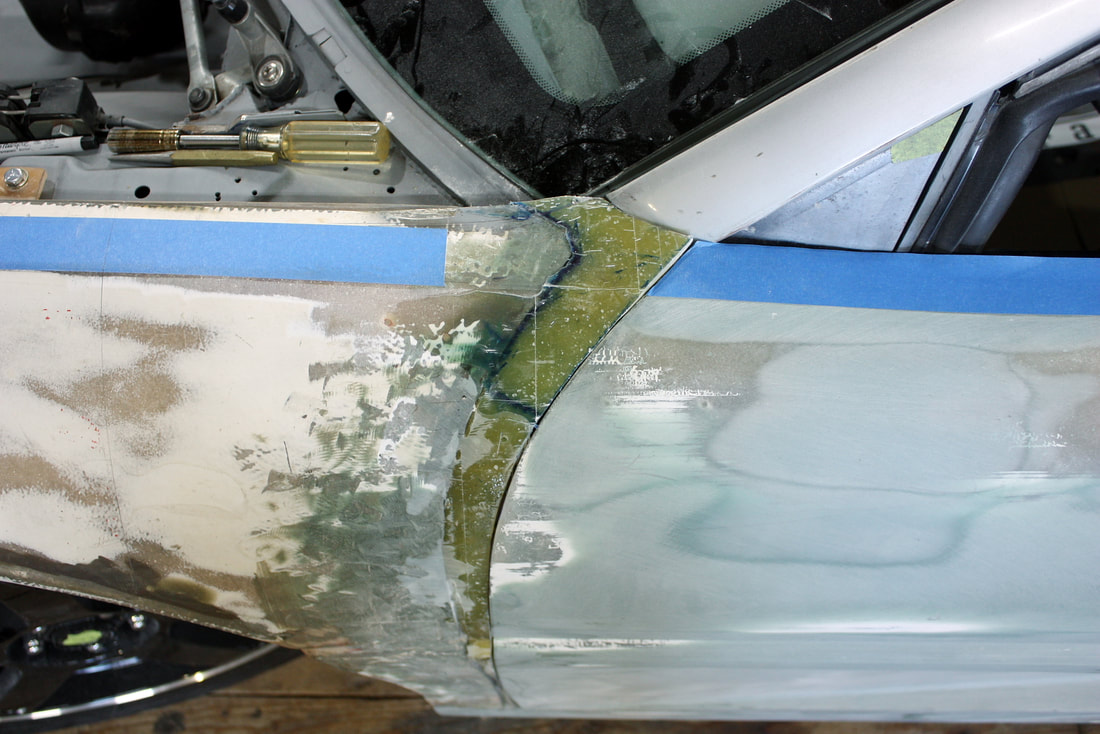
From before, I had tilted the entire front clip downward toward the front to raise the height of the hood at the windshield for wiper clearance, to lower the front ground clearance to an acceptable height, and reduce the wheel gap. The downside was that the belt line drooped and the door gaps were horrendous. But these could be fixed with some time and patience.
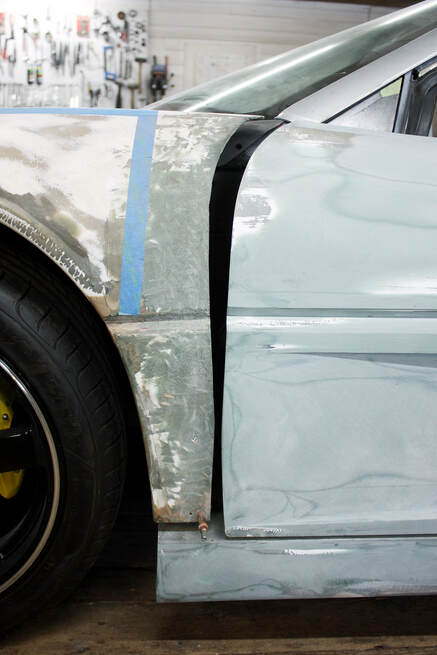
Here’s a closer look at the door gap and the gap between the lower fender and the rocker:
From before, I had tilted the entire front clip downward toward the front to raise the height of the hood at the windshield for wiper clearance, to lower the front ground clearance to an acceptable height, and reduce the wheel gap. The downside was that the belt line drooped and the door gaps were horrendous. But these could be fixed with some time and patience.
Here’s a closer look at the door gap and the gap between the lower fender and the rocker:
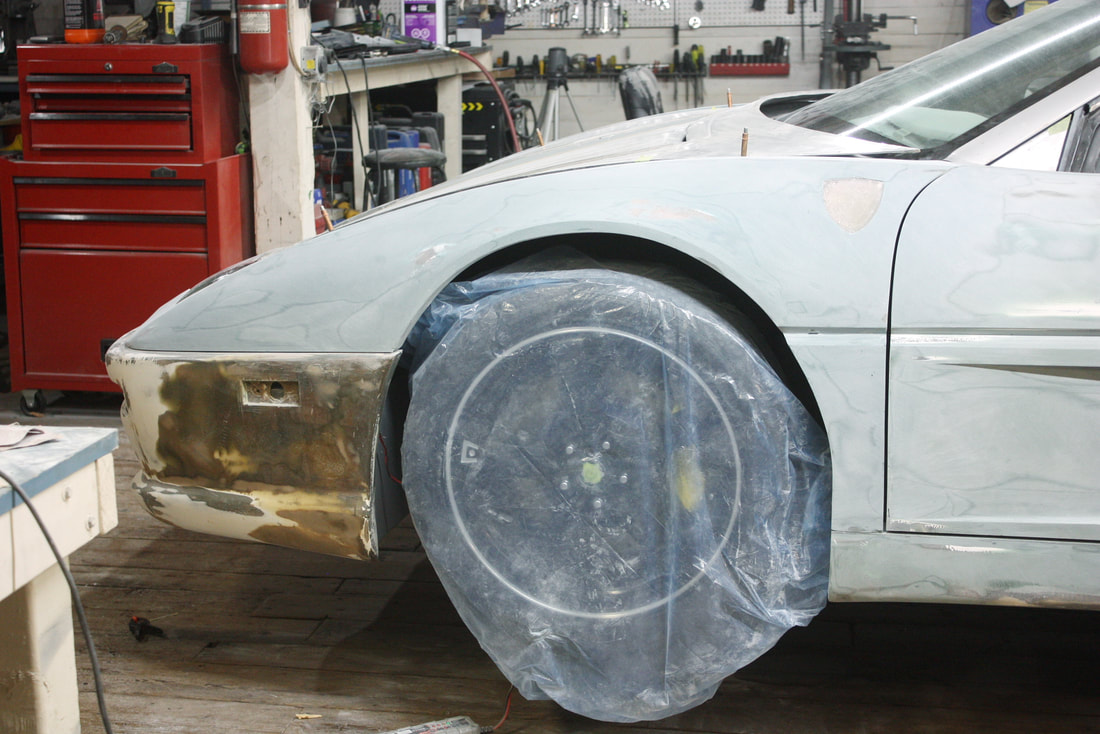
There were other problems that weren’t of my doing as well, like the misshaped wheel arch which didn’t have enough material in some areas:
There were other problems that weren’t of my doing as well, like the misshaped wheel arch which didn’t have enough material in some areas:
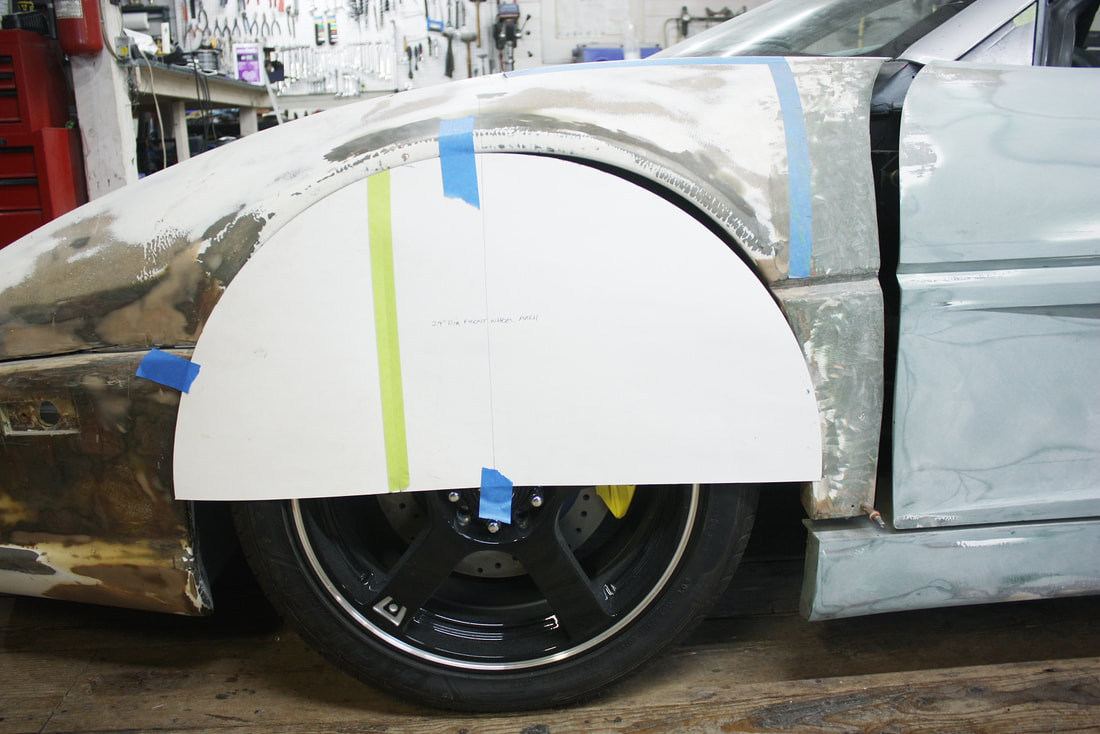
… and had too much in others:
… and had too much in others:
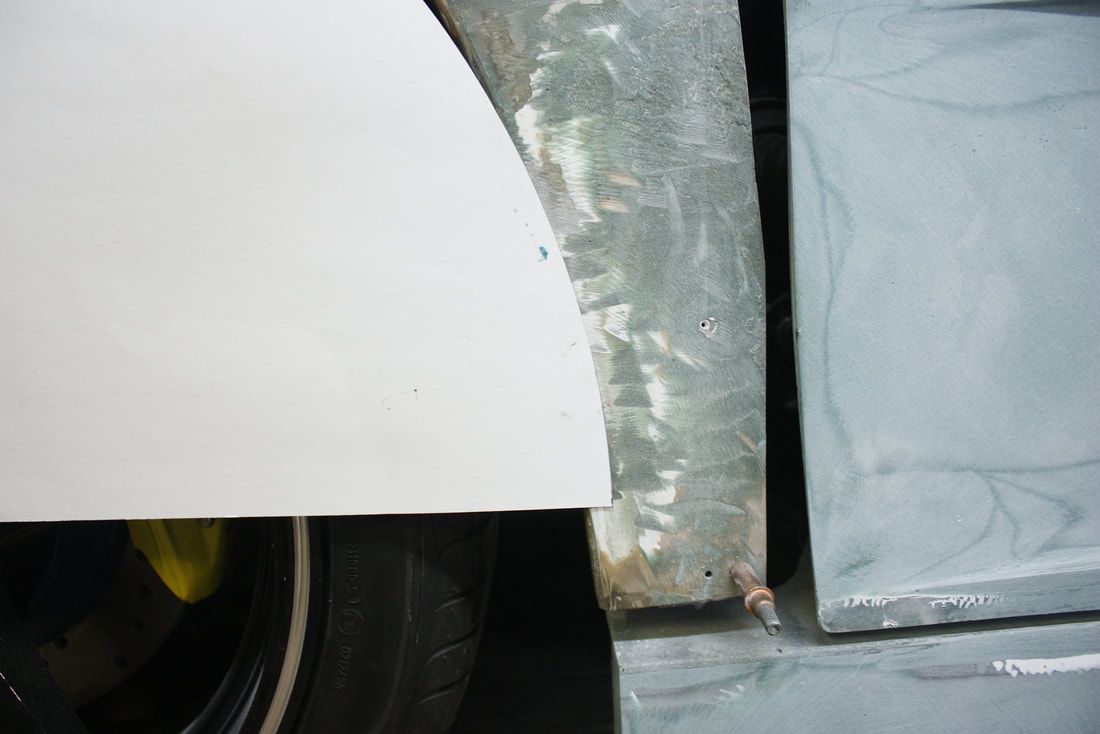
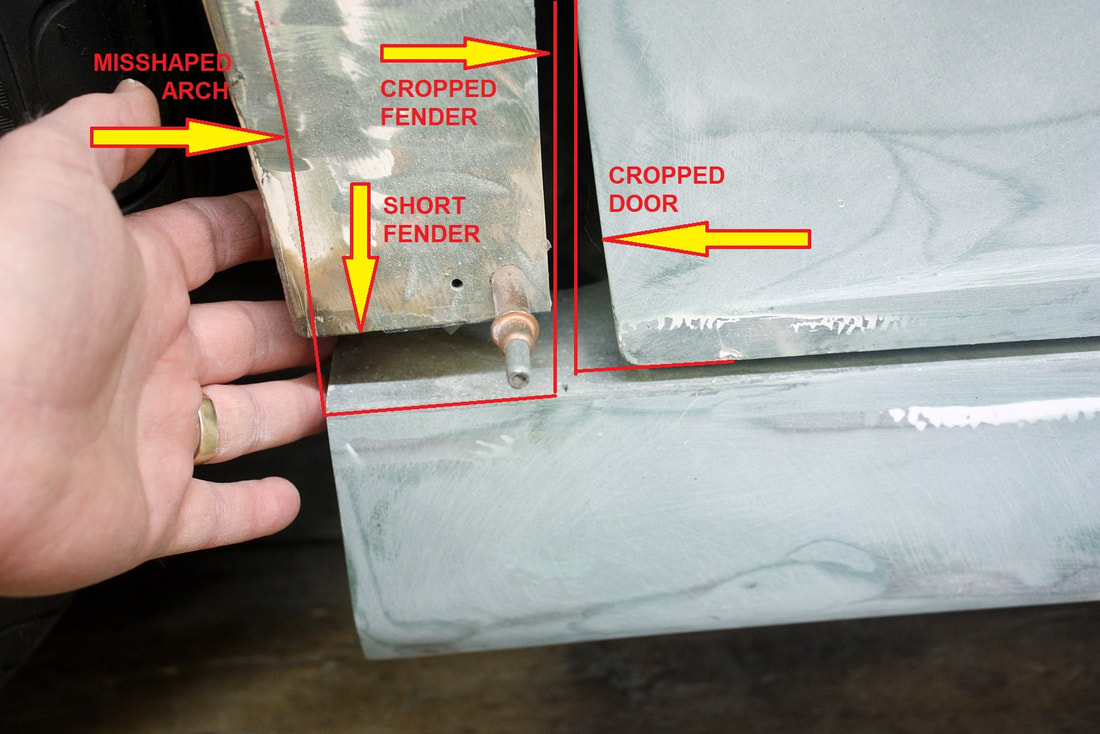
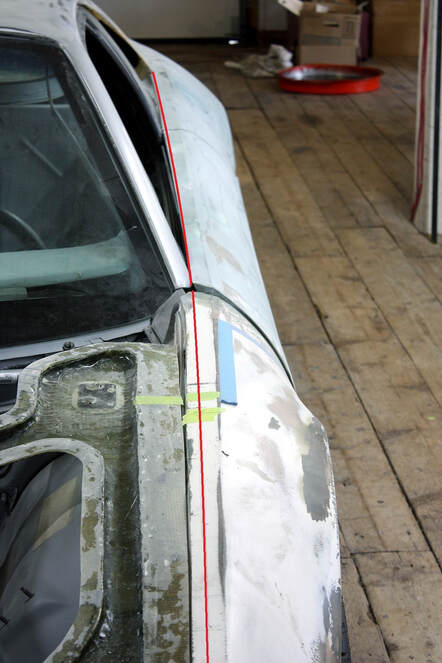
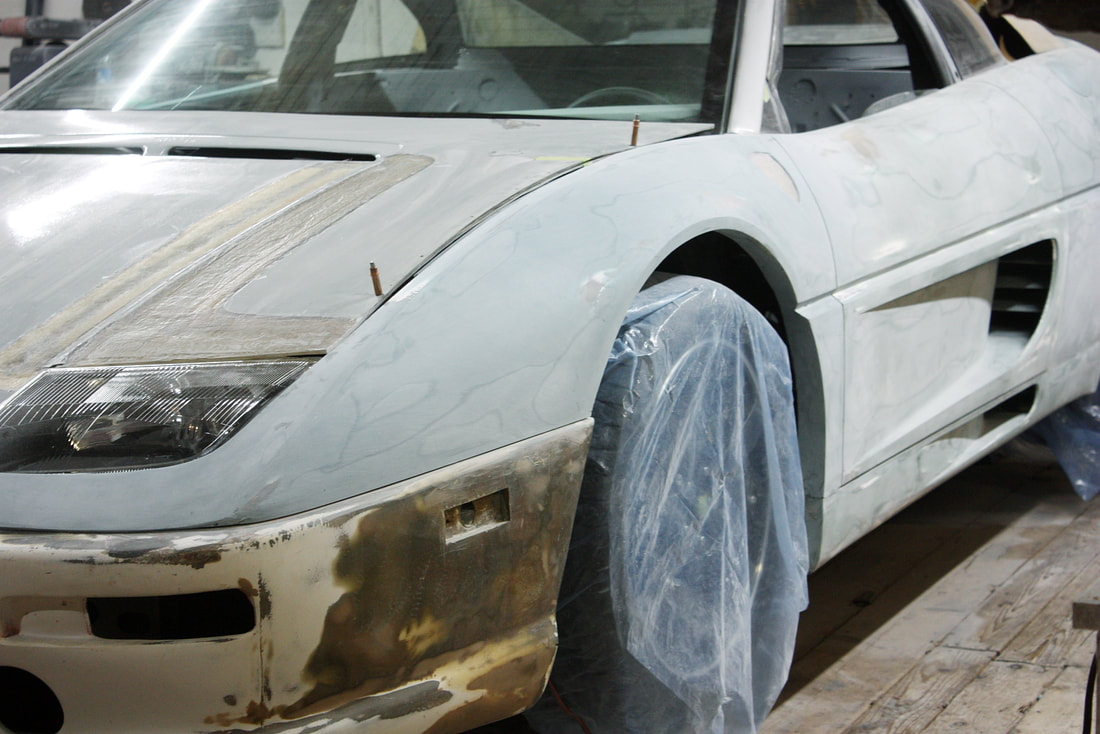
This next photo shows all the lower fender problems in one image including one I hadn’t noticed while reshaping the front edge of the door:
This next photo shows all the lower fender problems in one image including one I hadn’t noticed while reshaping the front edge of the door:
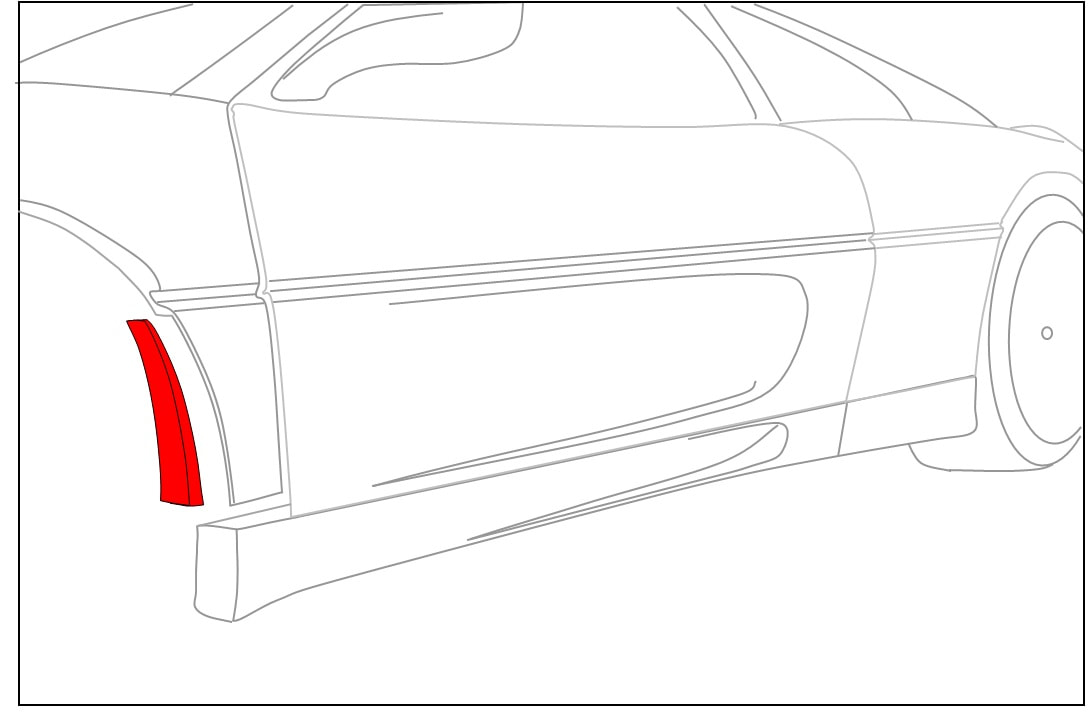
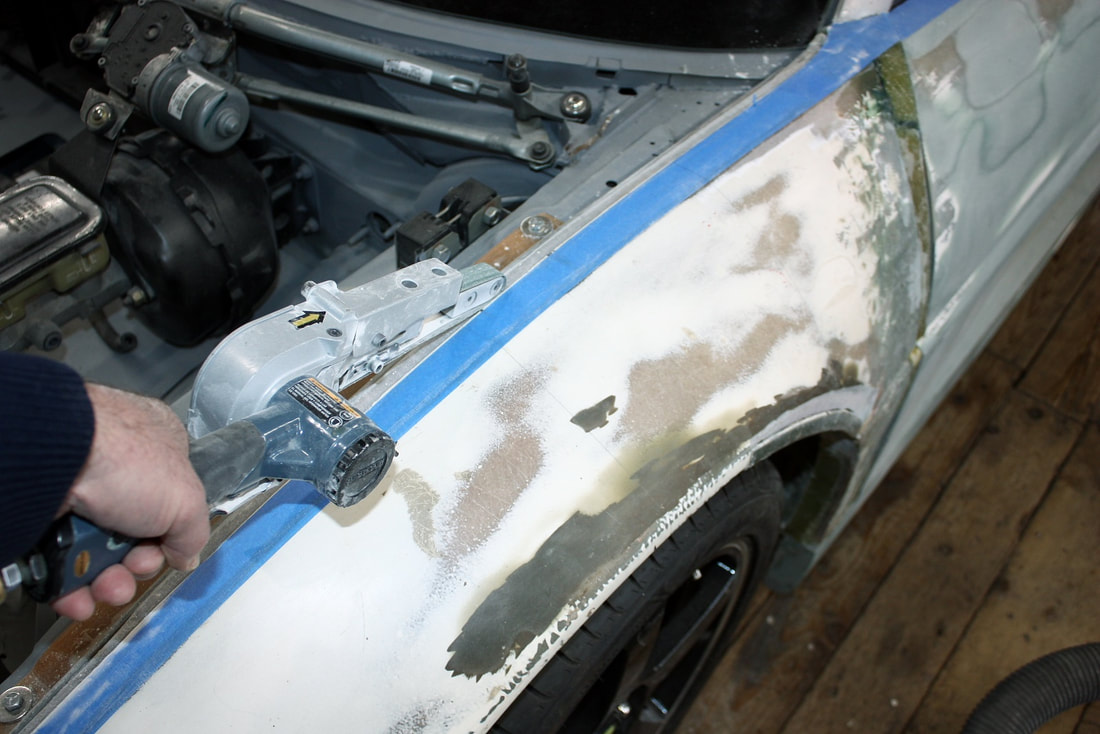
The first thing I needed to do was extend the fender downward to the rocker, creating an integral lower mount. It was also a good time to re-arch the lower fender to make the lower mount and new arch in one go. So I started by lopping off the excess material:
The first thing I needed to do was extend the fender downward to the rocker, creating an integral lower mount. It was also a good time to re-arch the lower fender to make the lower mount and new arch in one go. So I started by lopping off the excess material:
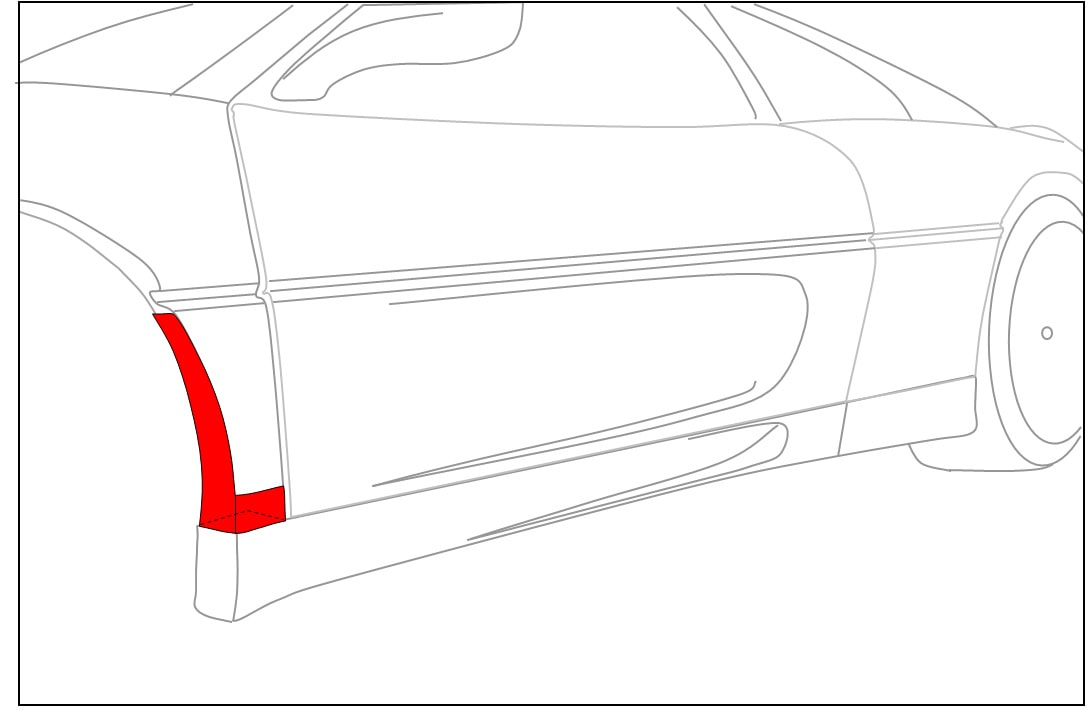
Next I needed an in-situ mold to reform the return flange on the wheel arch and extend the fender to the rocker, like so:
Next I needed an in-situ mold to reform the return flange on the wheel arch and extend the fender to the rocker, like so:
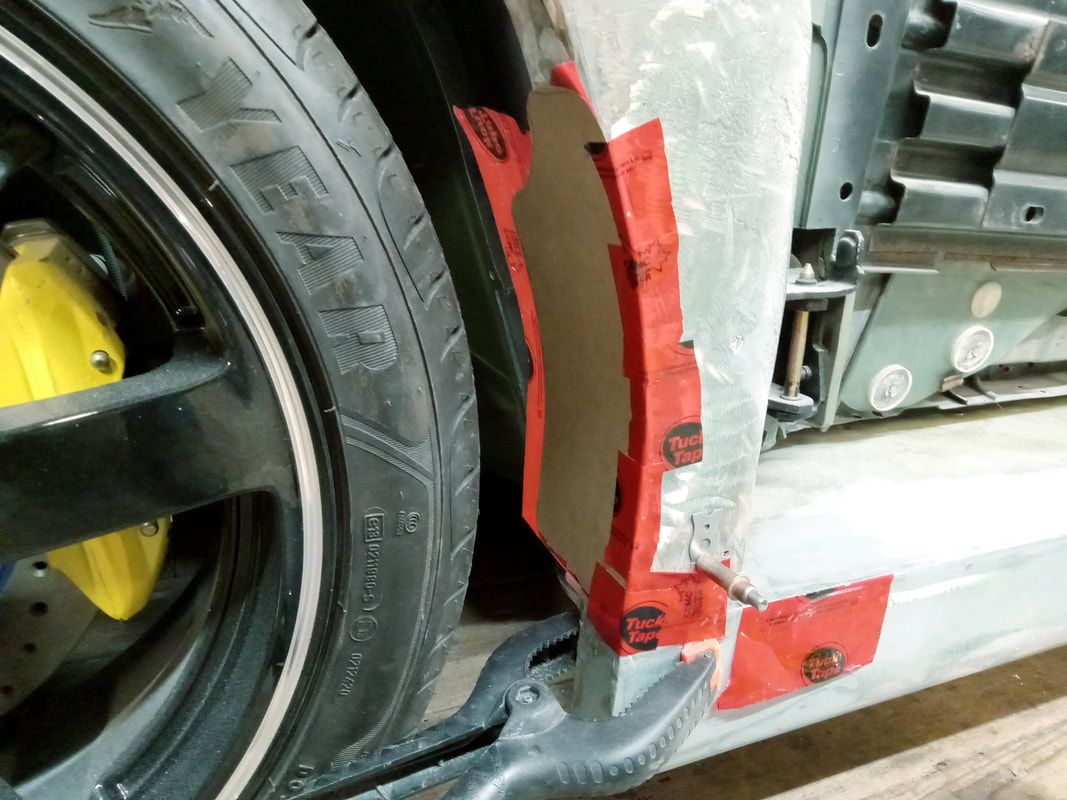
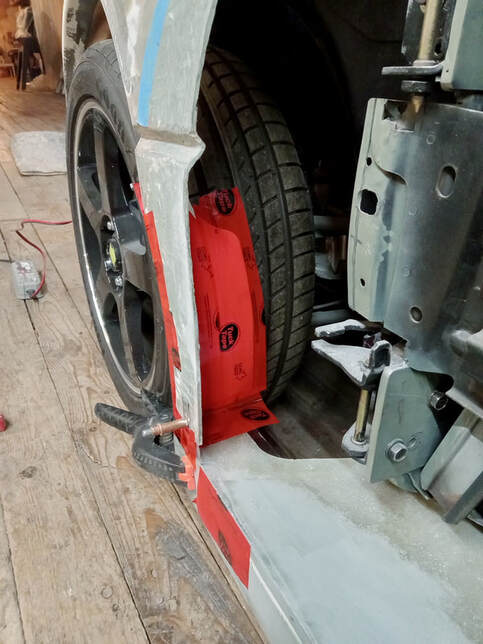
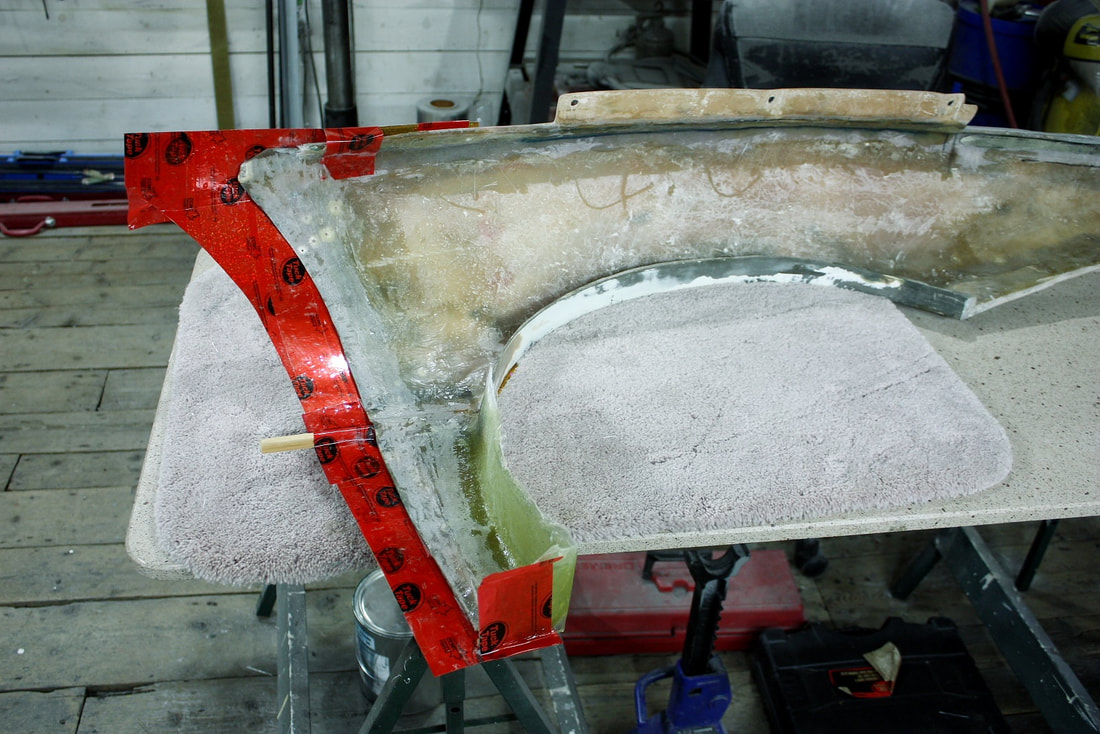
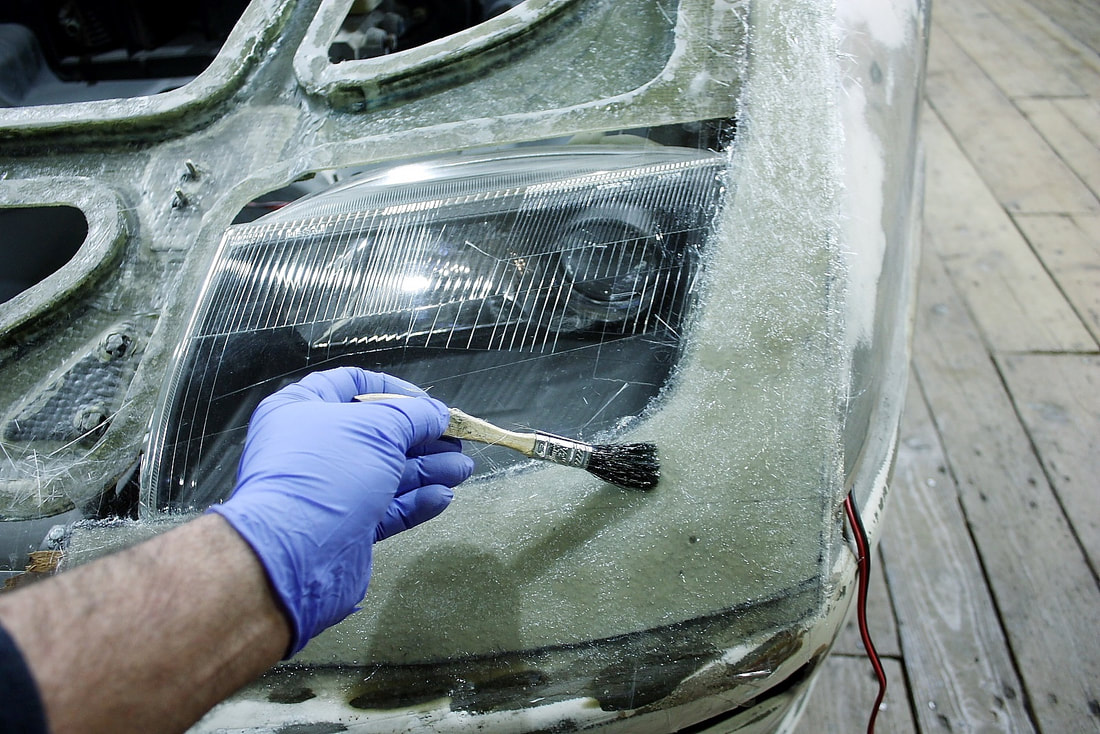
I made a set of cardboard templates, covered them in packing tape to protect them from the polyester resin, and taped them in place directly on the car:
I made a set of cardboard templates, covered them in packing tape to protect them from the polyester resin, and taped them in place directly on the car:
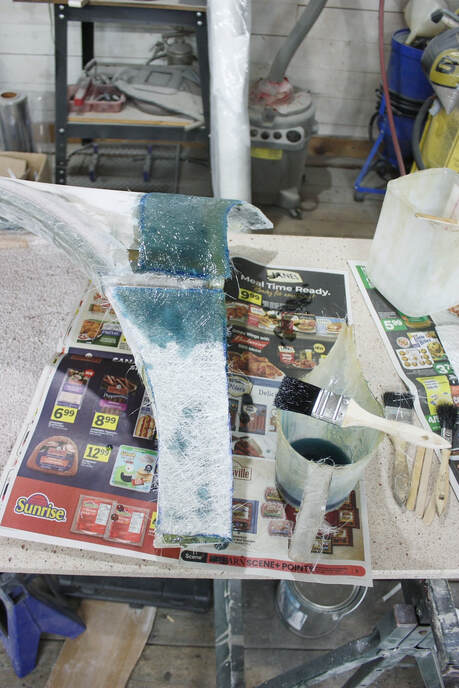
Once the rest of the area was suitably protected from the inevitable resin drips, I cut enough 1.5 oz mat to lay up 3 layers on the inside surface of the fender:
Once the rest of the area was suitably protected from the inevitable resin drips, I cut enough 1.5 oz mat to lay up 3 layers on the inside surface of the fender:

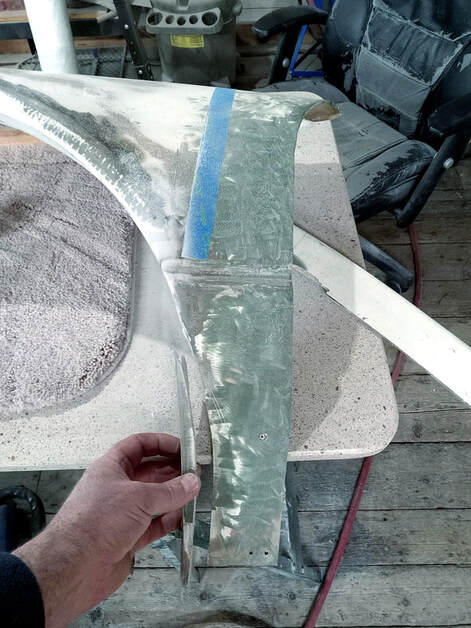
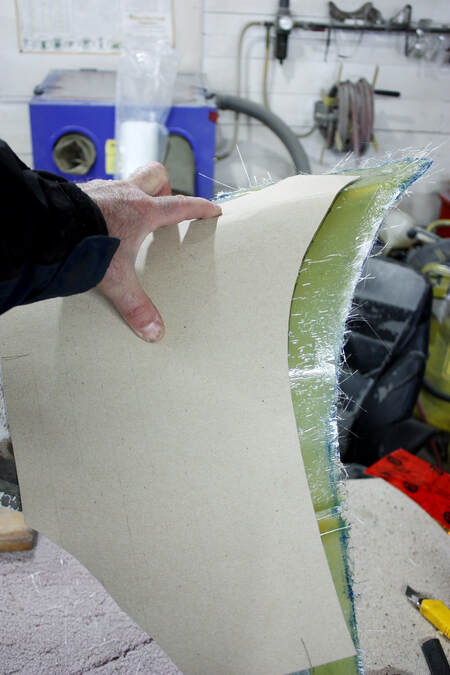
Once it cured, I removed the fender and peeled off the cardboard mold to reveal the new patch panel:
Once it cured, I removed the fender and peeled off the cardboard mold to reveal the new patch panel:
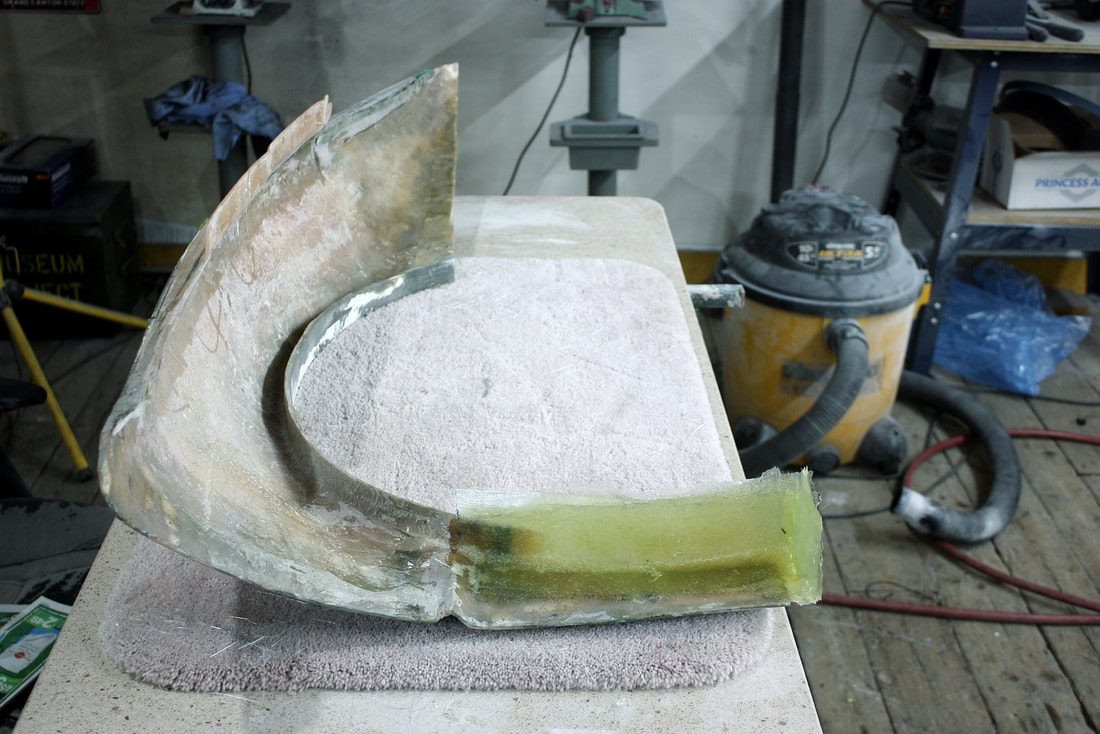
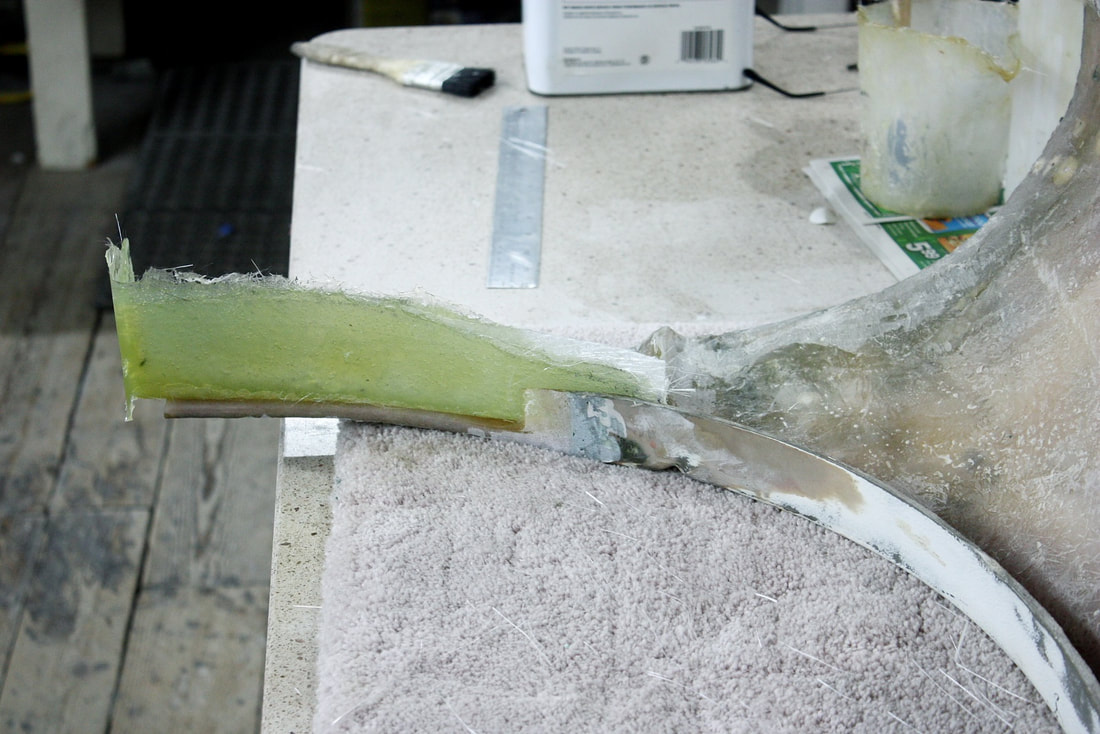
It would need an outer layer or two as well to thoroughly bond it to the old fibreglass, but I decided to wait and do that all in one step with the rest of the modifications.
So next up was to do the same to the upper half of the fender. Again, here’s the gap I needed to close:
It would need an outer layer or two as well to thoroughly bond it to the old fibreglass, but I decided to wait and do that all in one step with the rest of the modifications.
So next up was to do the same to the upper half of the fender. Again, here’s the gap I needed to close:
Having taken a couple measurements, I once again made a long cardboard template running up the entire outside trailing edge of the fender, and taped it up to resin-proof the paper. If you look closely, you’ll also see I added a triangular dowel to make a rough belt line groove:
Having taken a couple measurements, I once again made a long cardboard template running up the entire outside trailing edge of the fender, and taped it up to resin-proof the paper. If you look closely, you’ll also see I added a triangular dowel to make a rough belt line groove:
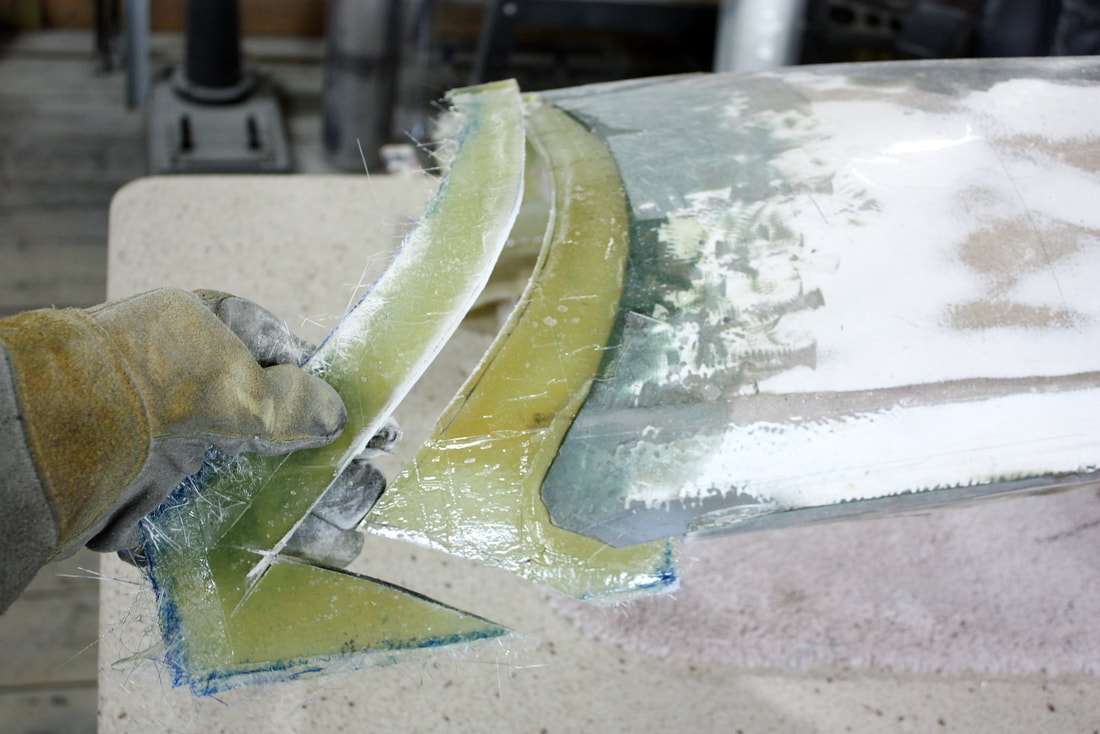
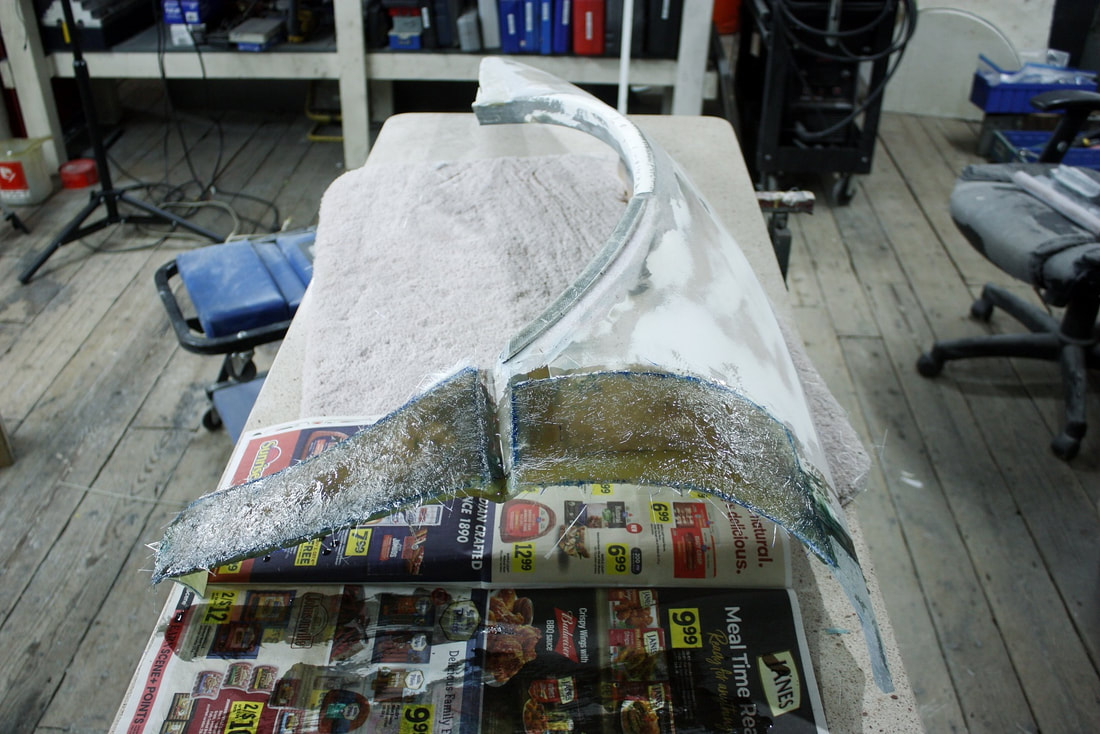
Then, making sure there was ample overlap between old and new, I laid up the extension to the trailing edge of the fender leaving lots of extra material for trimming:
Then, making sure there was ample overlap between old and new, I laid up the extension to the trailing edge of the fender leaving lots of extra material for trimming:
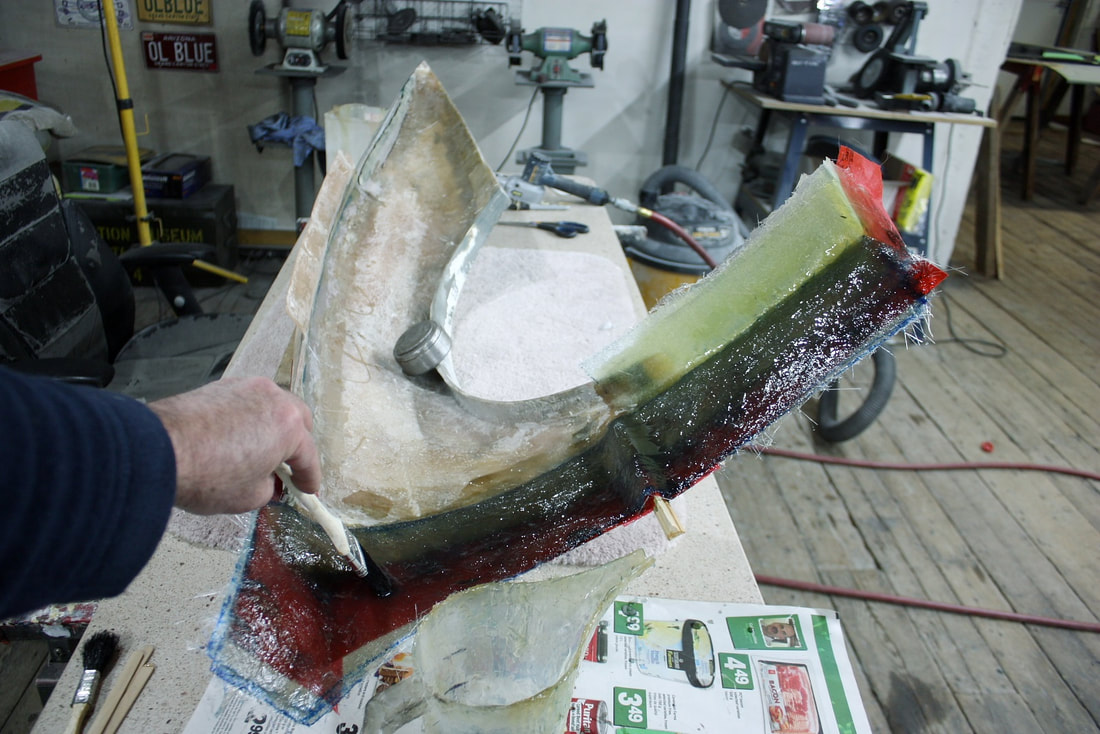
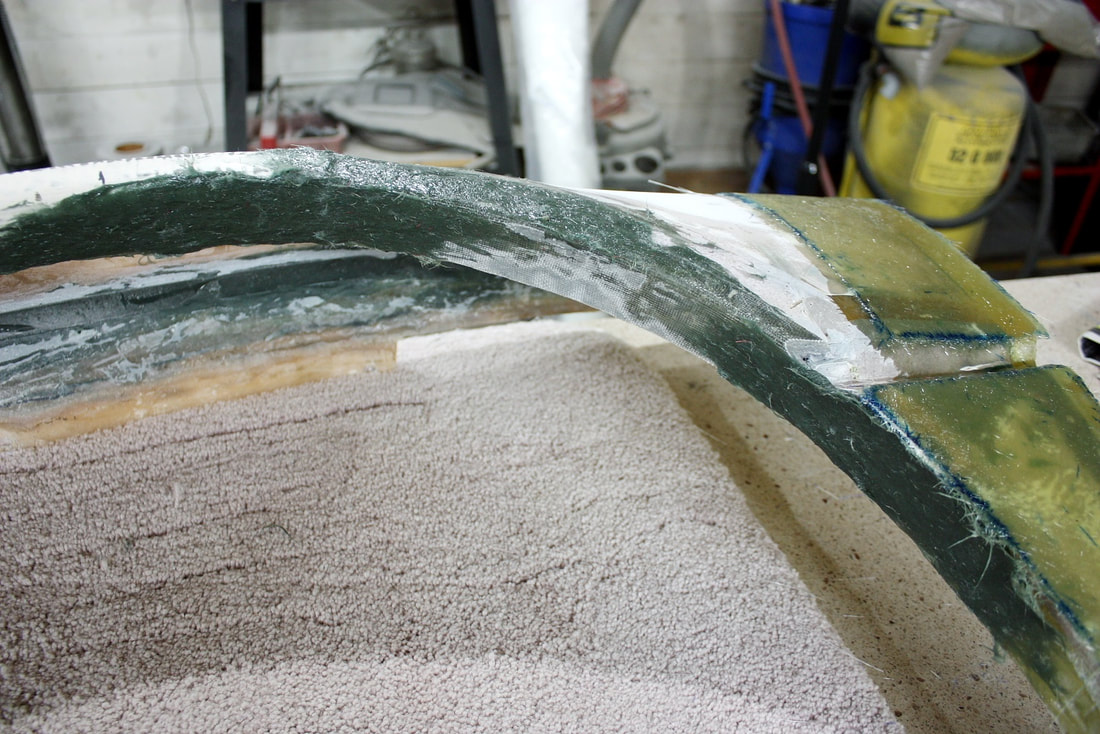
I usually wait about 24 hours to let the resin cure unless it’s against packing tape. For some reason the resin stays tacky much longer if it’s in contact with the tape, so I peeled the cardboard mold off after about 12 hours to let it air out and cure properly. Here’s the result of the extension:
I usually wait about 24 hours to let the resin cure unless it’s against packing tape. For some reason the resin stays tacky much longer if it’s in contact with the tape, so I peeled the cardboard mold off after about 12 hours to let it air out and cure properly. Here’s the result of the extension:
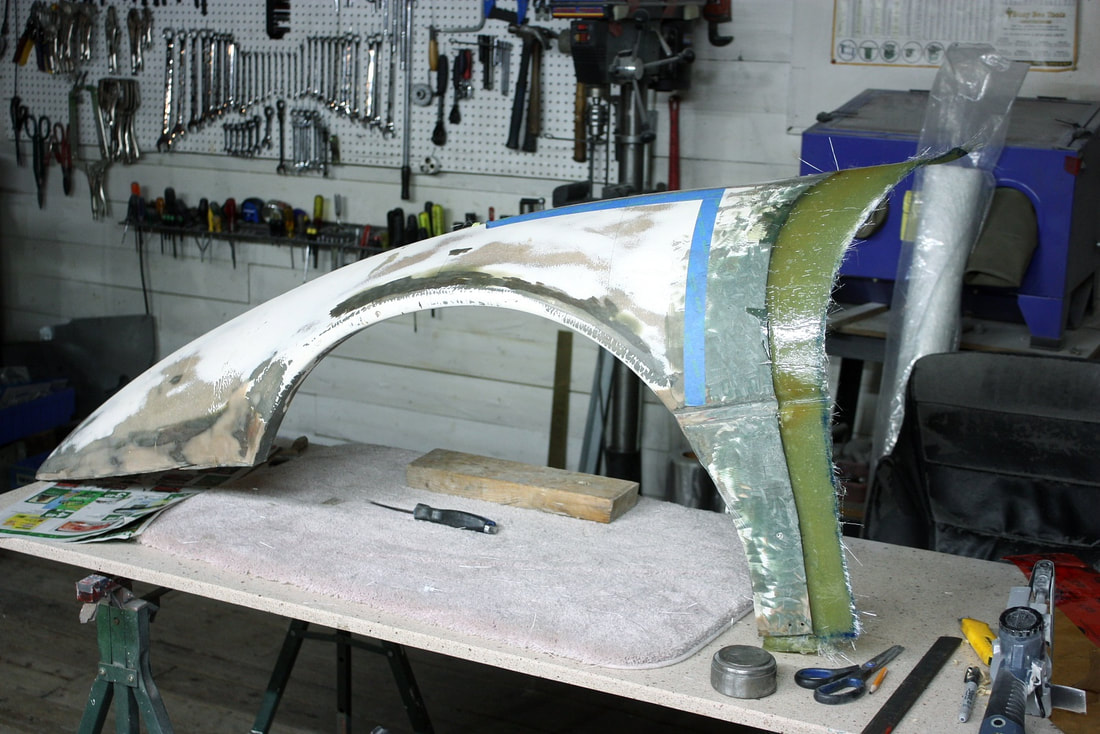
I then traced the exact door gap profile from the passenger fender onto a large piece of cardboard, flipped it around, and traced it onto the driver’s fender. I used a couple of reference marks to be sure I was positioning it correctly, and cut off the extra fibreglass:
I then traced the exact door gap profile from the passenger fender onto a large piece of cardboard, flipped it around, and traced it onto the driver’s fender. I used a couple of reference marks to be sure I was positioning it correctly, and cut off the extra fibreglass:
That allowed me to refit the fender to the chassis to see how things were lining up without the door:
That allowed me to refit the fender to the chassis to see how things were lining up without the door:
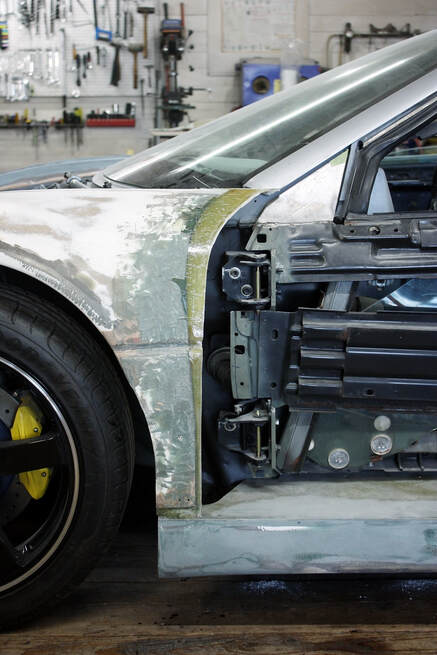
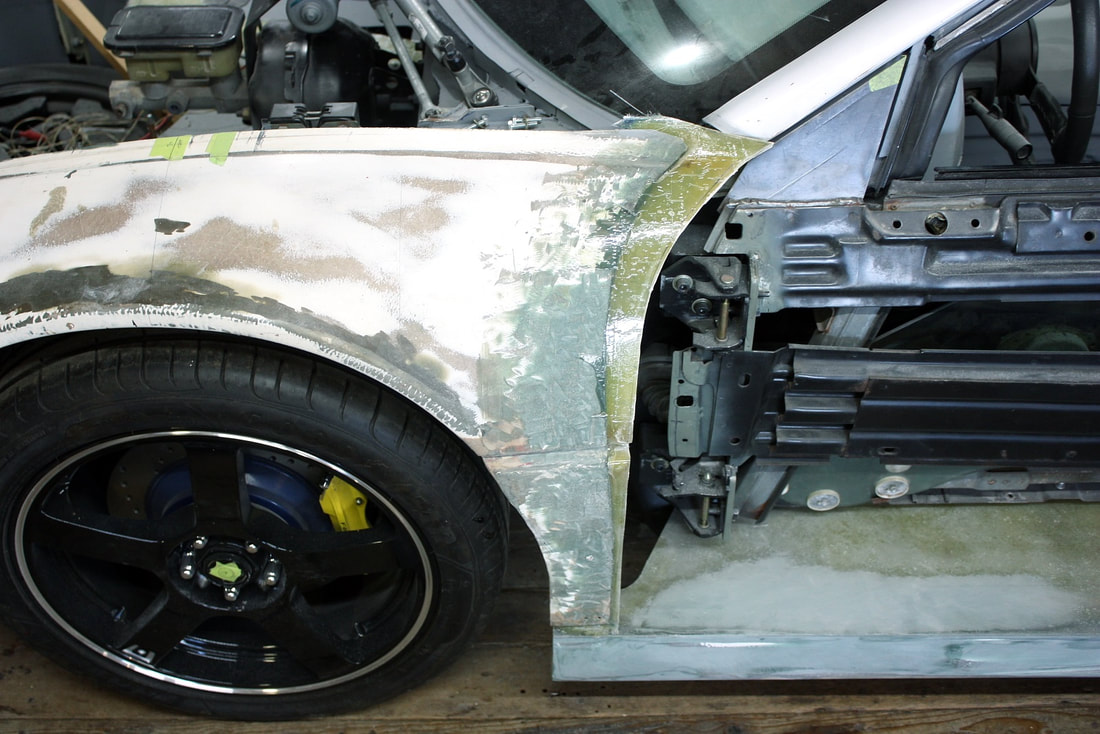
And then with the door. I purposely left the door gap very tight since it’s always easier to remove extra material than add some:
And then with the door. I purposely left the door gap very tight since it’s always easier to remove extra material than add some:
Once again, this new fibreglass would have to be bonded to the outer skin to make the repair bulletproof, but I still had a few steps to go to incorporate all of the needed mods into that last layer.
As with the other fender, the top horizontal surface of the fender was too wide in comparison to the same surface on the door:
So that meant narrowing the surface by grinding the inner edge down, and making the hood opening wider:
So that meant narrowing the surface by grinding the inner edge down, and making the hood opening wider:
That also meant having to reinforce the underside of the fender mounting flange and filling the topside craters where I accidentally cut through the thinner areas, as I did with the passenger side fender.
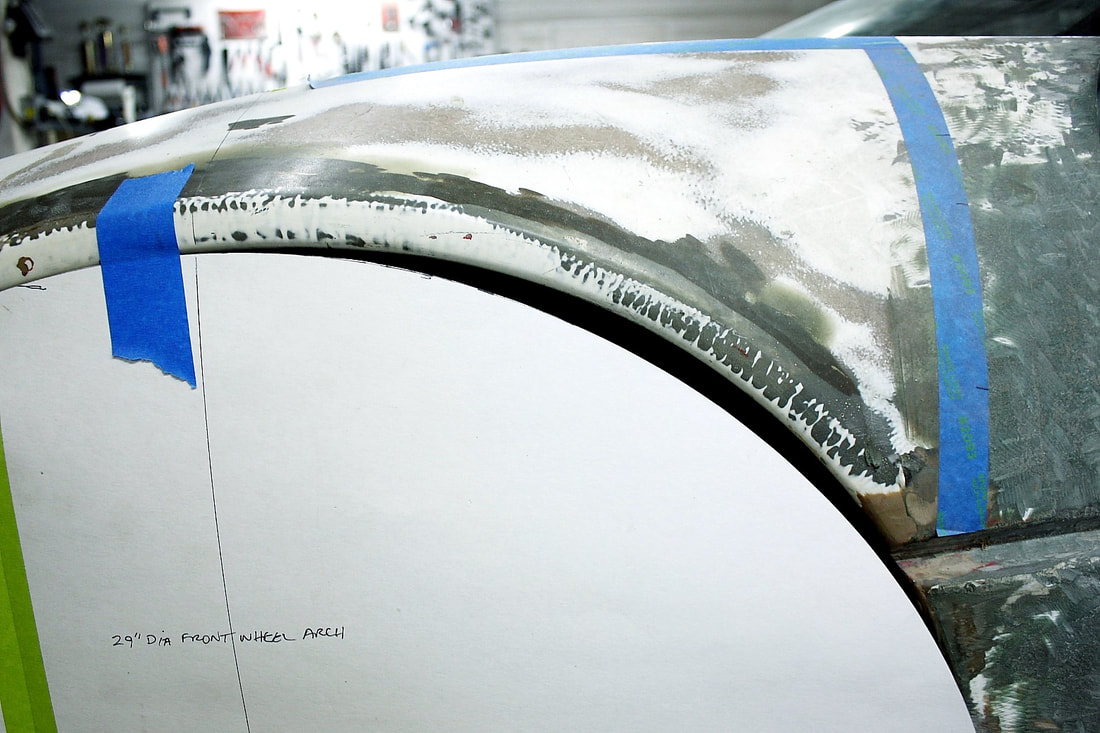
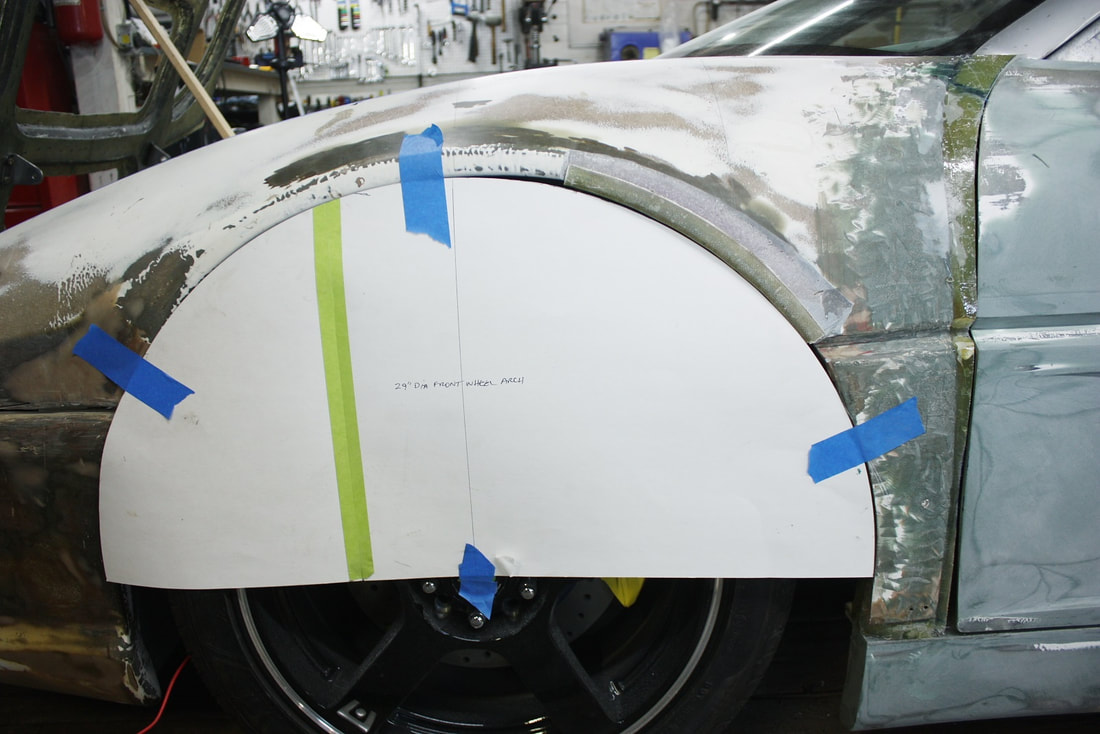
The last step before adding a layer of mat to the outside surface was to complete re-arching the wheel opening. Here’s a closer look at how much the arch deviated from round along the top half:
That also meant having to reinforce the underside of the fender mounting flange and filling the topside craters where I accidentally cut through the thinner areas, as I did with the passenger side fender.
The last step before adding a layer of mat to the outside surface was to complete re-arching the wheel opening. Here’s a closer look at how much the arch deviated from round along the top half:
The amount missing was far too much to be made up with long strand filler, so I made a new fibreglass arch segment using the Styrofoam buck I had made in Post #184:
The amount missing was far too much to be made up with long strand filler, so I made a new fibreglass arch segment using the Styrofoam buck I had made in Post #184:
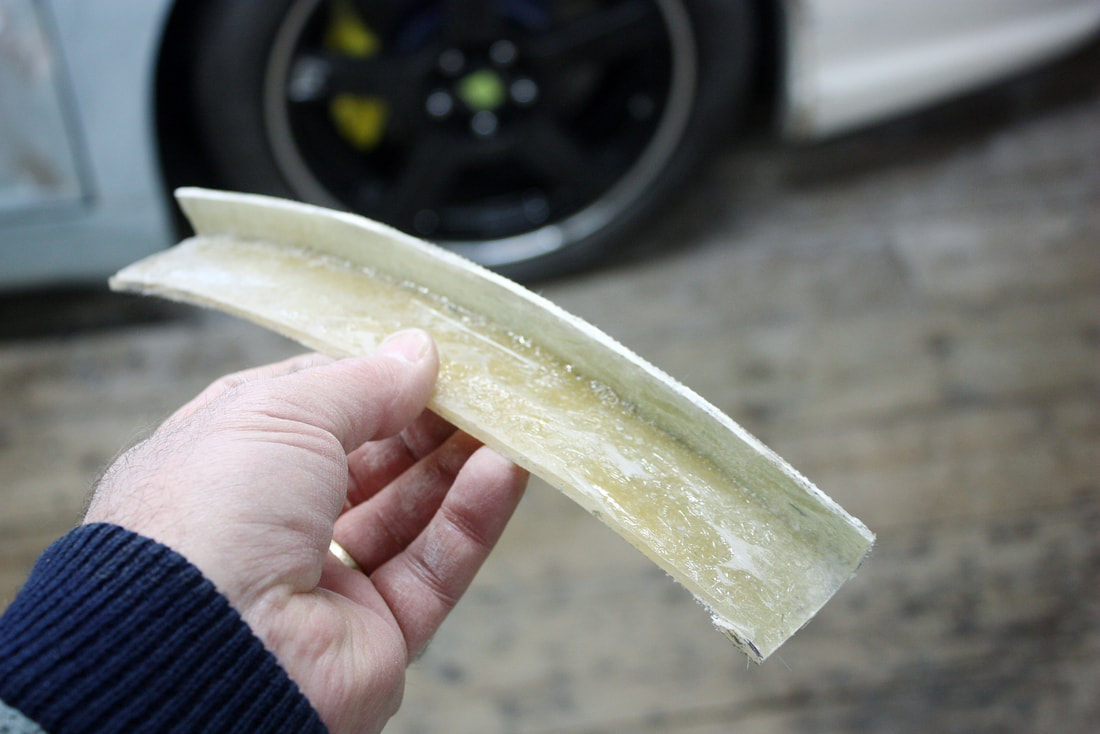
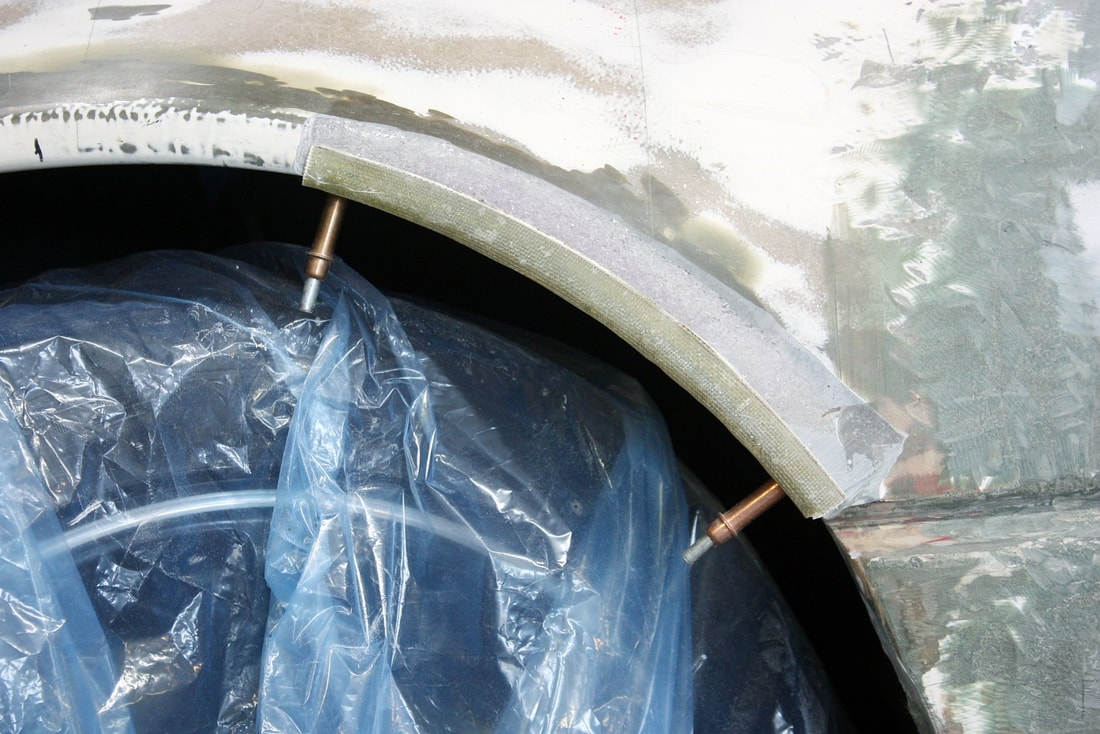
Then I bonded the segment to the fender, filling the lion’s share of the missing material:
Then I bonded the segment to the fender, filling the lion’s share of the missing material:
And with that, I was ready to capture the old fibreglass between the layers I had previously laid up on the inside surfaces, using an additional layer or two on the outside of the panel. It served to strengthen the extensions along the trailing edge of the fender, and to build up the exterior thickness to match that of the adjacent door skin;
And with that, I was ready to capture the old fibreglass between the layers I had previously laid up on the inside surfaces, using an additional layer or two on the outside of the panel. It served to strengthen the extensions along the trailing edge of the fender, and to build up the exterior thickness to match that of the adjacent door skin;
For the wheel arch, the gaps at either end of the new arch patch were small enough to fill with long strand filler:
For the wheel arch, the gaps at either end of the new arch patch were small enough to fill with long strand filler:
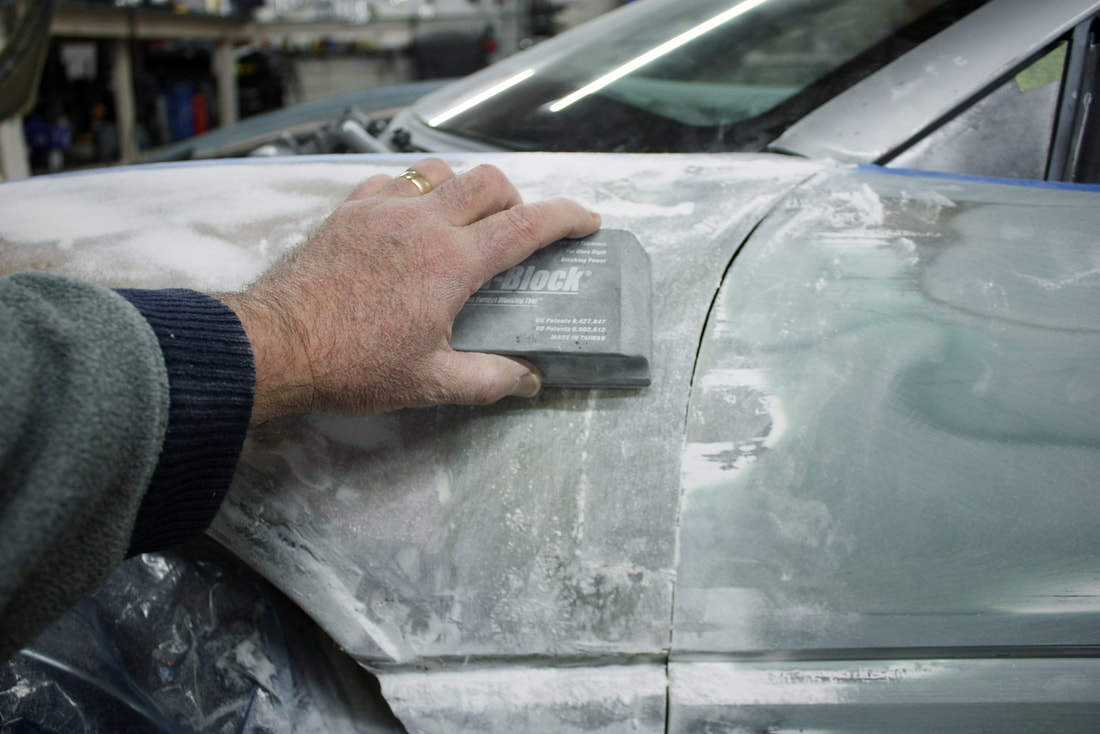
I shaved down and reshaped the larger fibreglass patches along the back edge of the fender to match the approximate profile of the door, then filled the rest with some short strand filler to blend it all in:
I shaved down and reshaped the larger fibreglass patches along the back edge of the fender to match the approximate profile of the door, then filled the rest with some short strand filler to blend it all in:
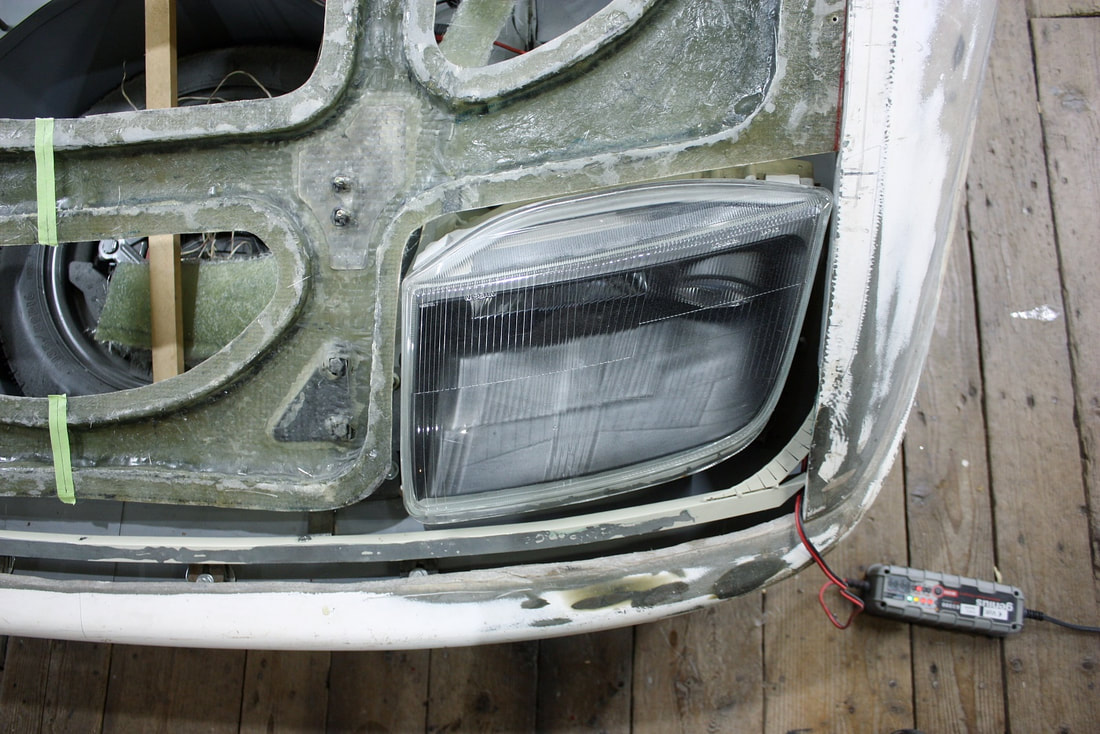
As with the passenger side fender, I needed to make a new headlight surround, so I followed the same steps as before: fabricate an FRP mold form, lay up a fibreglass panel directly on the car…
As with the passenger side fender, I needed to make a new headlight surround, so I followed the same steps as before: fabricate an FRP mold form, lay up a fibreglass panel directly on the car…
…bond it to the fender using epoxy, and skim-coat it with short strand fillers for blending:
…bond it to the fender using epoxy, and skim-coat it with short strand fillers for blending:
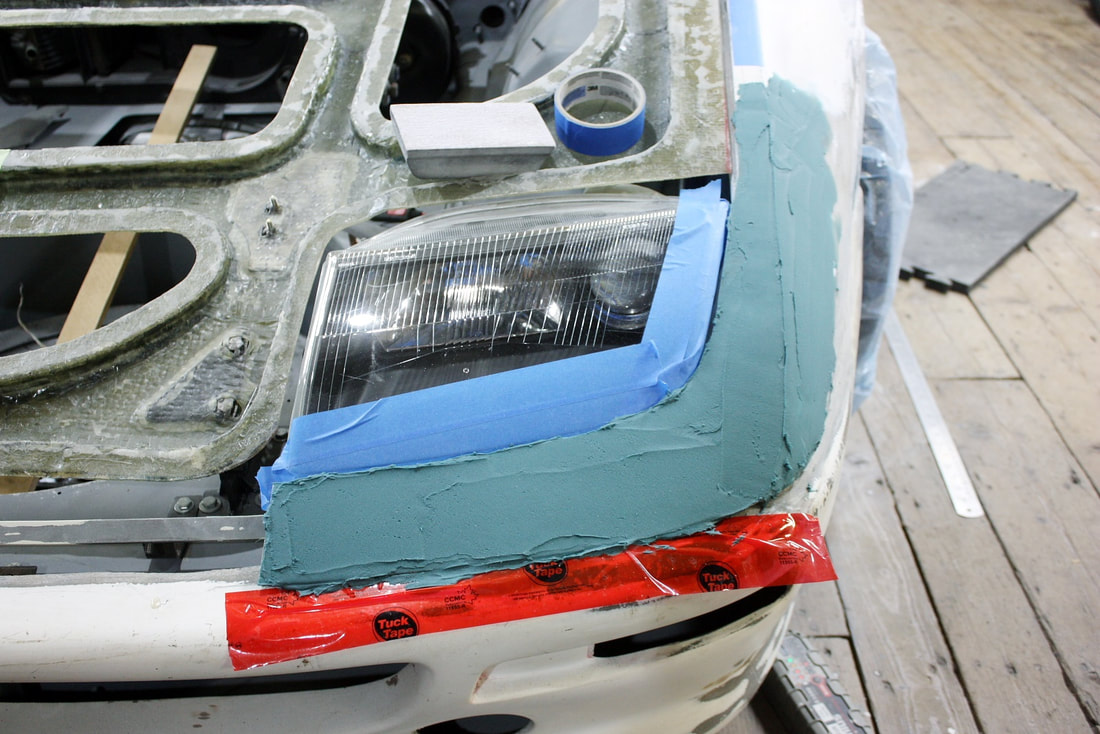
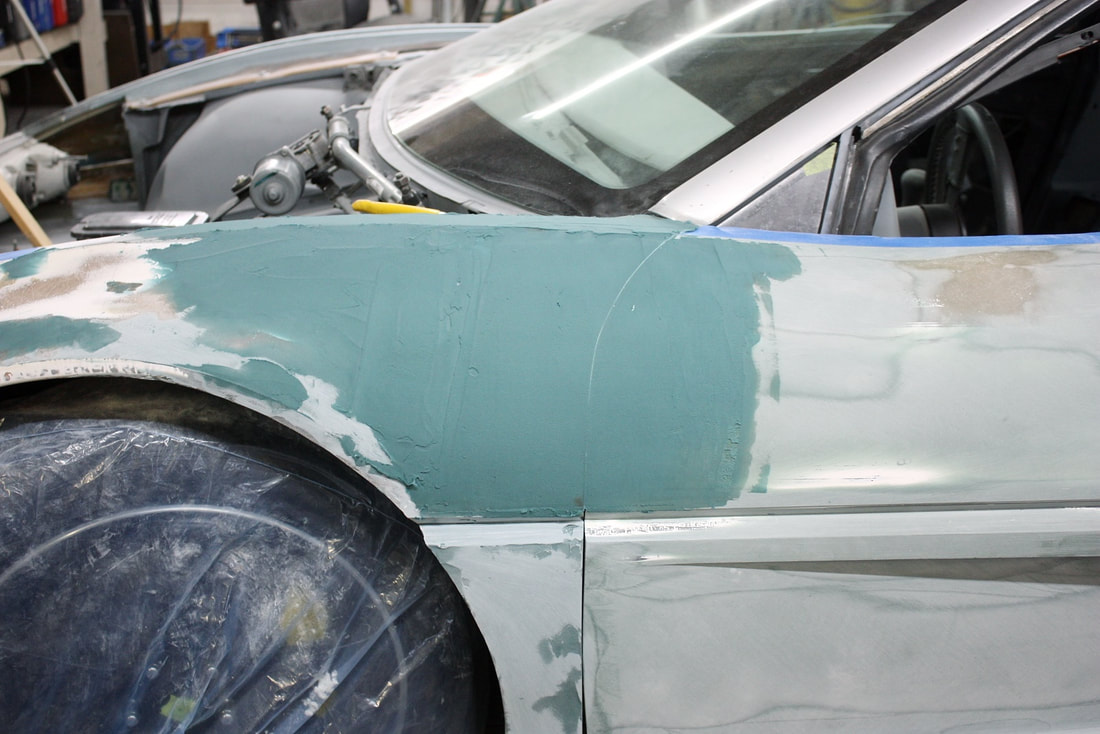
I then skim-coated the entire panel with short strand filler to blend all the changes made to the fender, and sculpted out a recessed area for the Scuderia Ferrari shield:
I then skim-coated the entire panel with short strand filler to blend all the changes made to the fender, and sculpted out a recessed area for the Scuderia Ferrari shield:
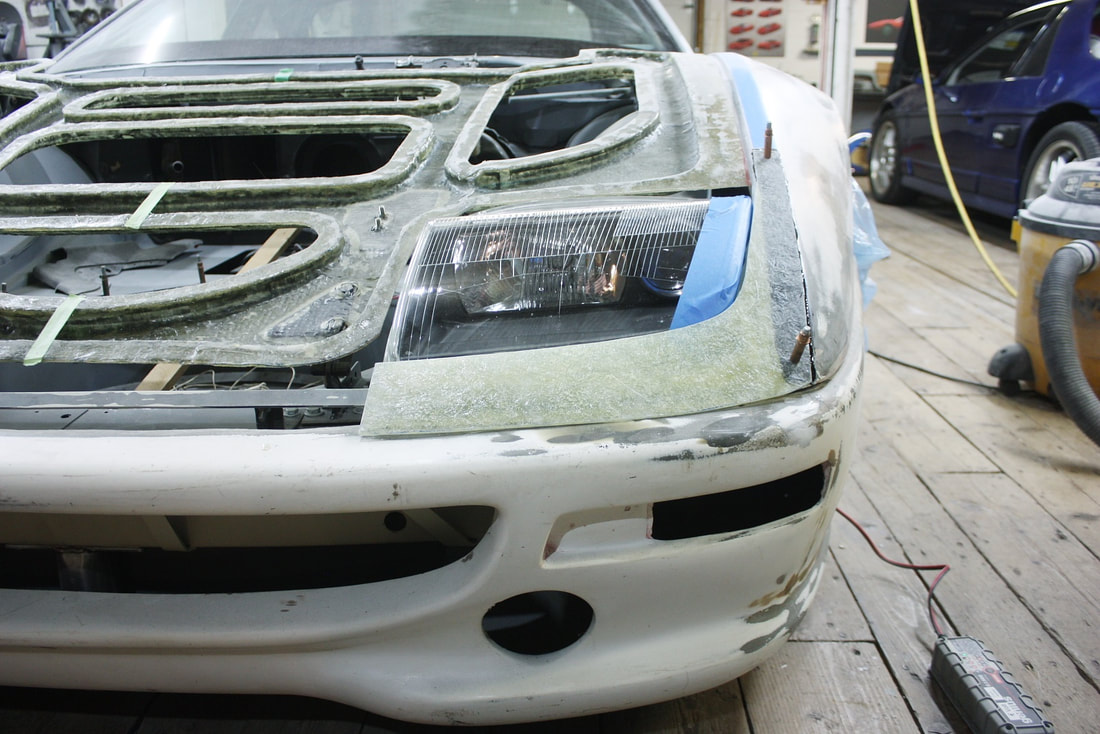
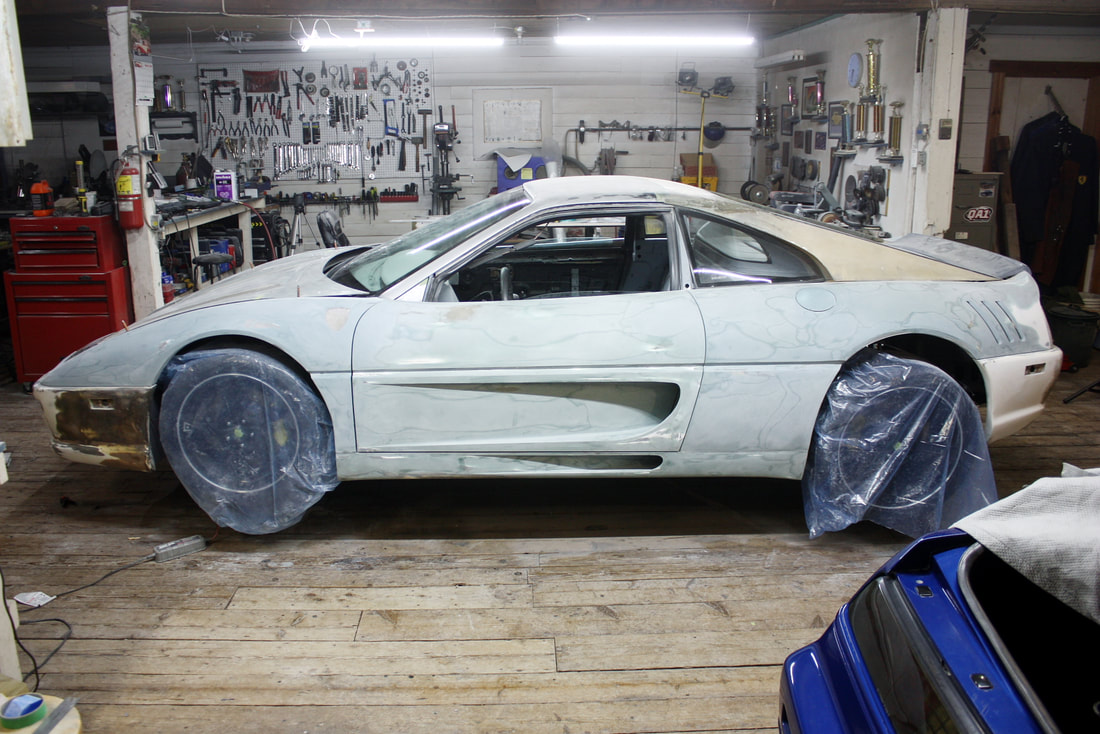
Taking a wider view of the car showed how far the left hand side had come from its humble IFG beginnings:
Taking a wider view of the car showed how far the left hand side had come from its humble IFG beginnings:
Next on the agenda was to take a friend up on an offer I couldn’t refuse.
Next on the agenda was to take a friend up on an offer I couldn’t refuse.

 RSS Feed
