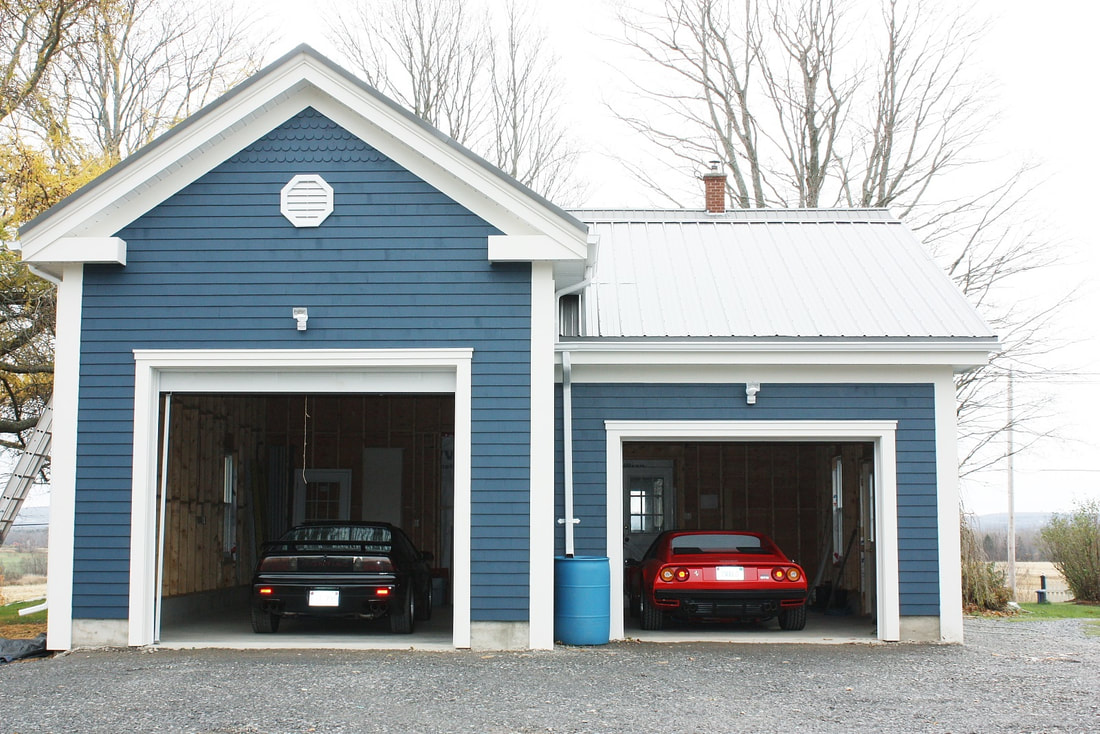
Whew! Seven months to the day since my last post... but at least my sabbatical was for a good cause. I needed a garage space for my daily drivers and wanted the ability to install a hydraulic lift in the near future. (I store 85 cars for other people and leave mine outside... go figure). I decided to tear down an old, unstable addition made to the house about 100 years ago, and replace it with a 30' x 30' attached garage. I couldn't help but temporarily park two of my fun rides in it to christen it:
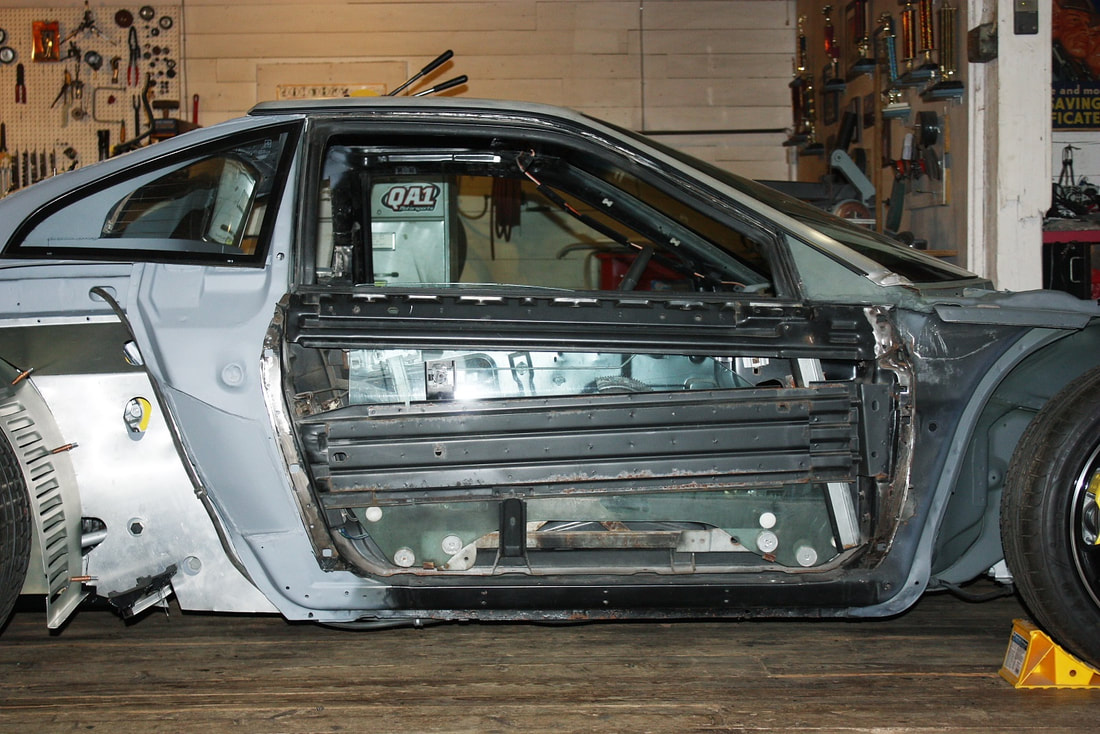
Well, I've finally reached the point where most of the remaining mods to the chassis have to be made in conjunction with the exterior body panels. So that means the body installation is now close at hand.
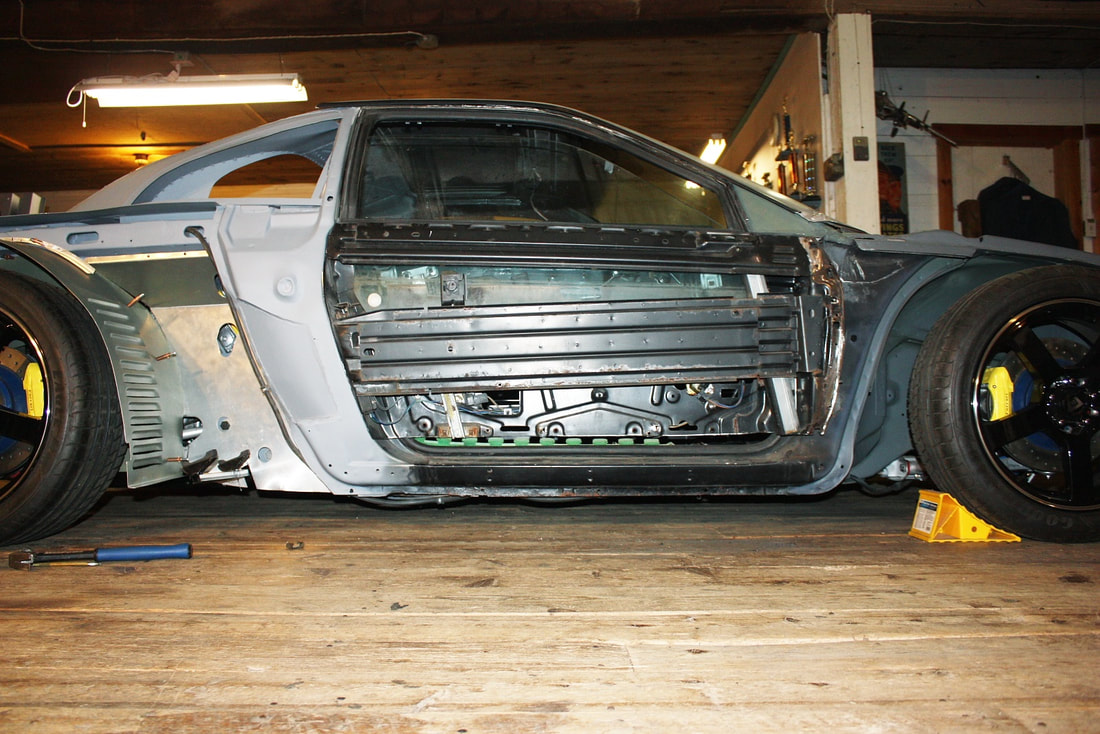
The first of these mods is to the underlying steel structure of the stock doors. Here's what the passenger side stock door looks like:
The exterior door panels on the actual F355 bulge considerably further out than the Fiero panels, which is no problem. But they're also shorter in length and less tall than a stock Fiero door. To account for the shorter length, the IFG design requires the builder to trim off an inconsequential flange from the rear edge of the metal door:

I used a silver Sharpie marker on the black paint to mark where it needed to be trimmed off, then used a cut-off wheel in my angle grinder to make the cut:
The rear flange was originally used as a means to fasten the stock Fiero door skin. It provided no structural purpose. Here's the door closed, with the flange cut off:
The next step would have been simple if I had decided to use the IFG door panels "as-is". IFG designed their door panel and lower rocker panel as a single piece making the exterior panel taller to hide the large underlying Fiero door. Here's what a nicely finished IFG door panel looks like (photo from the internet):

Notice how the vertical door gaps extend down into the rocker panel. Aside from it not being totally accurate, the trouble with this design is what it looks like when the door is opened. The top surface of the rocker panel normally forms the door sill, however on this design the rocker panel is integral to the swinging door. So when the door is opened, one is greeted to a gaping void where an extra-wide door sill is expected. Unfortunately I couldn't find any photos of this on the internet, so you'll have to use your imagination to picture how disconnected the front and rear of the car looks when there is no door sill.
To prevent this, I decided to separate the IFG door panel into its two distinct parts and modify the underlying metal door instead. Luckily for me, when I bought a second set of fibreglass body panels, the former owner Don Ostergard, had already performed the surgery to the panels. I'll get into more detail about all the other changes he made to the doors in the "Body" section of my blog.
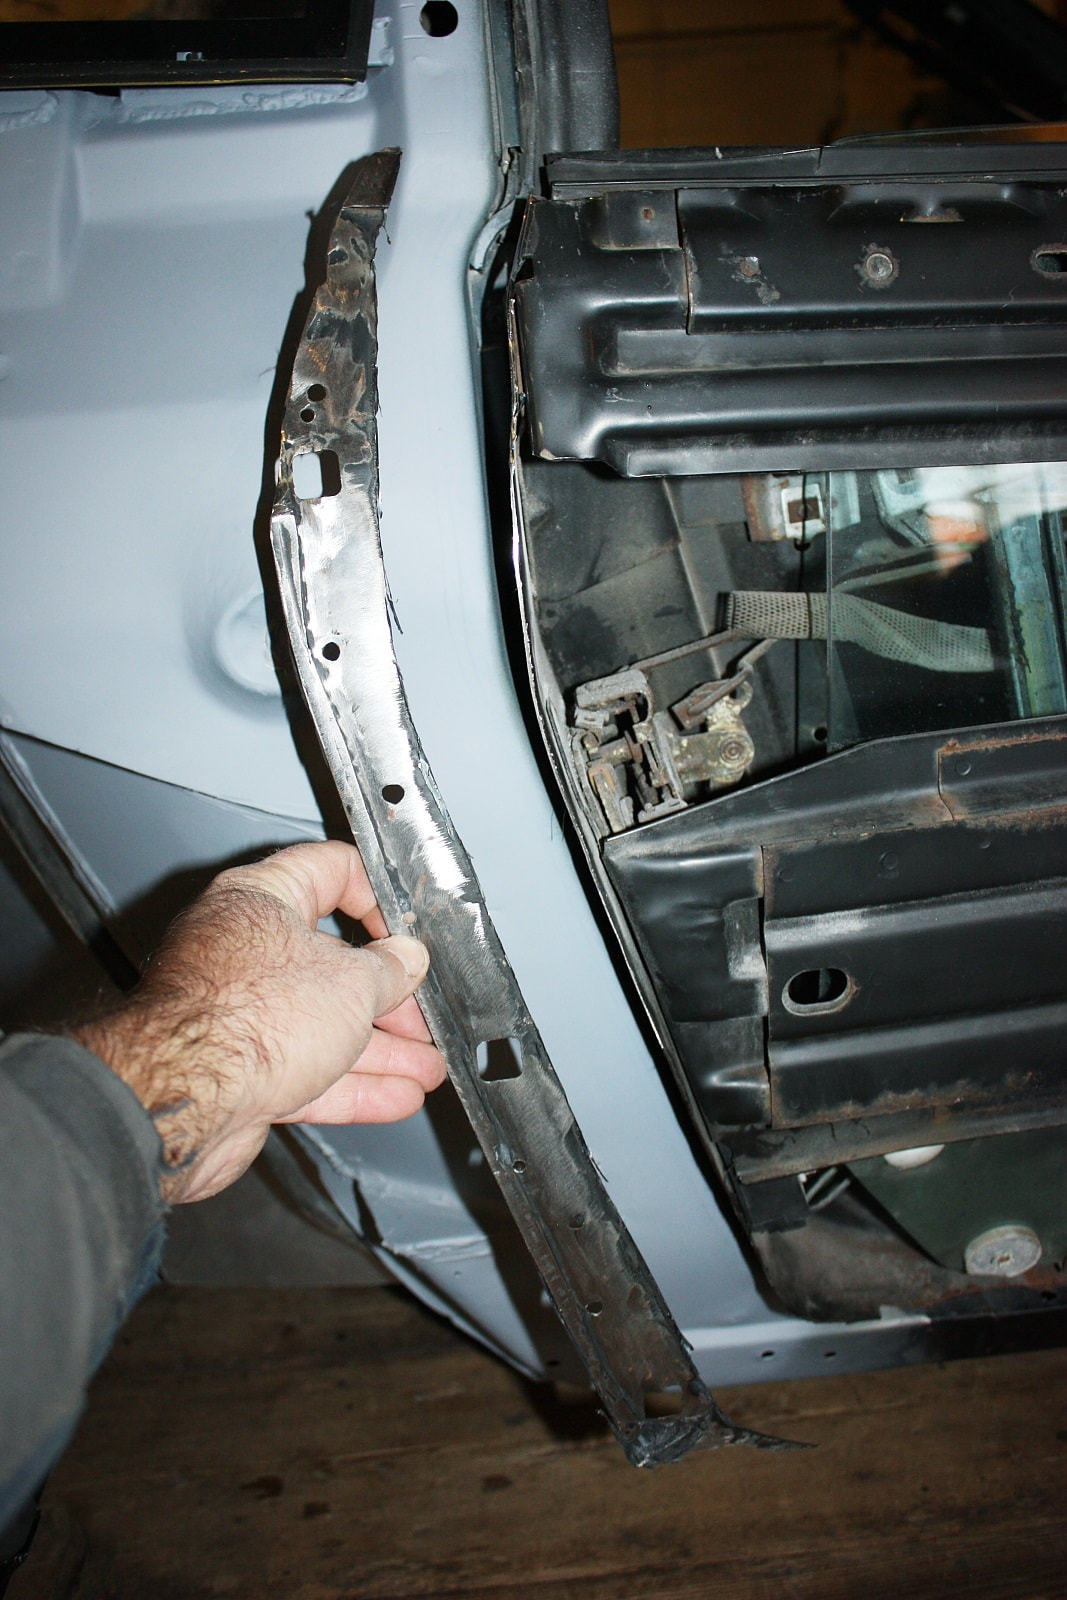
Using the lobotomized door skins, I was able to take a few measurements to find out how much I needed to lop off the bottom of the metal doors. This next photo shows a few things I considered:
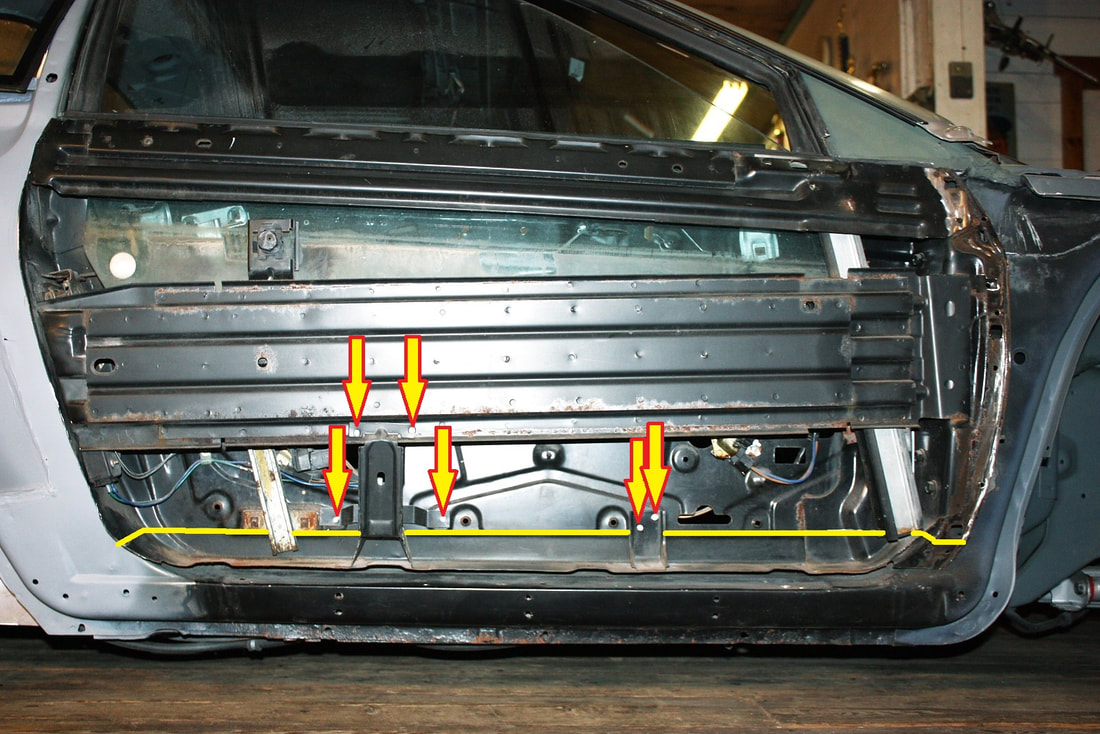
The yellow line denotes where I needed to make the cut. The most important part of the piece being cut off was lower bump stop for the glass window. It's the part surrounded by the four arrows. Rather than cut the bump stop bracket in two, I drilled out the spot welds (yellow arrows) holding it to the upper part of the door. I'll relocate the bump stop higher up later on. Of course that will prevent the window from going all the way down, but then the top of the door skin is higher too.
Next, I made the cut with my angle grinder, being careful not to affect the window regulator, bump stop bracket, and track adjustment bolts:
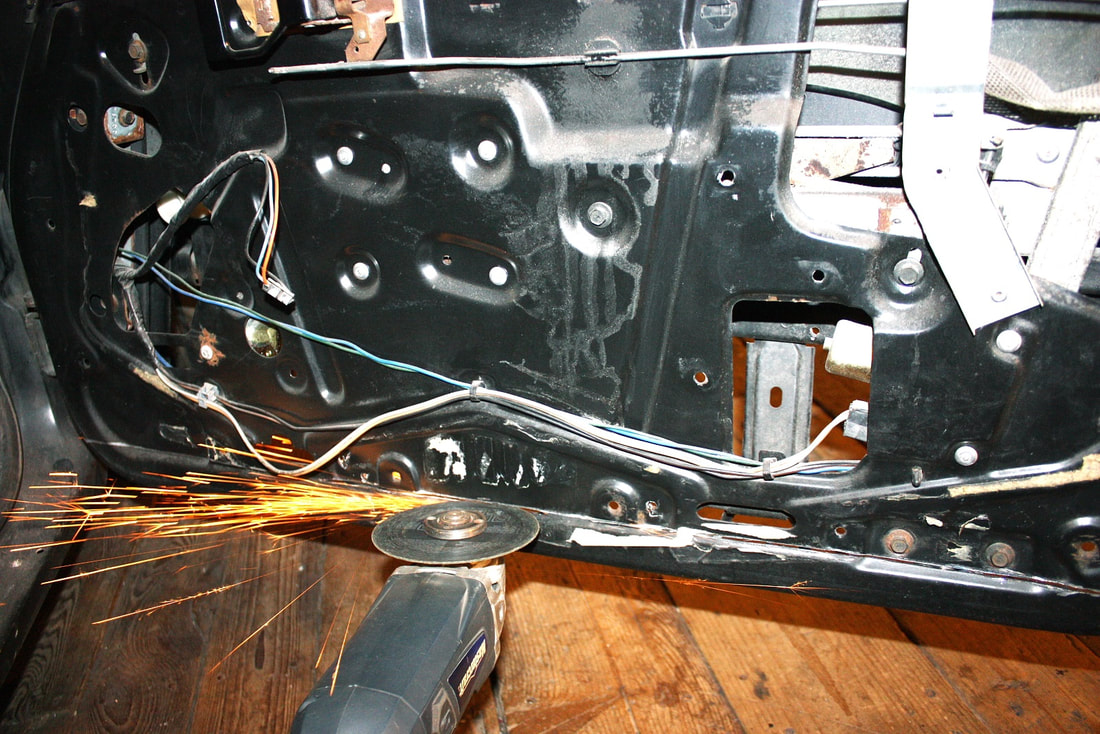
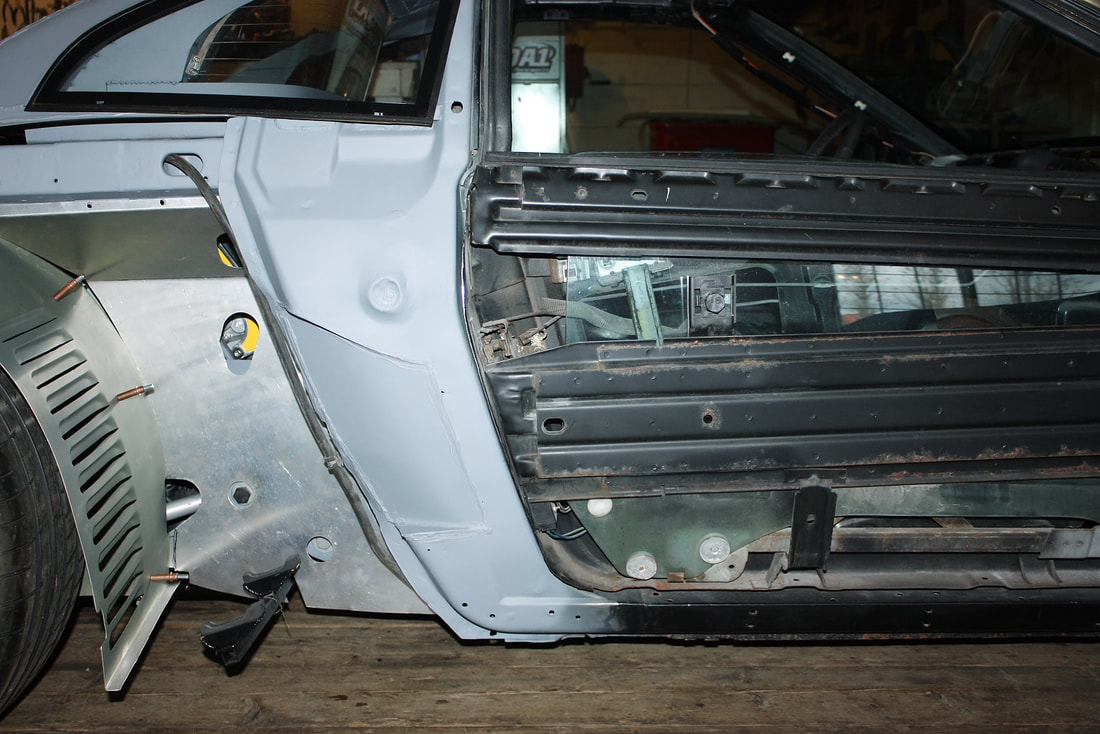
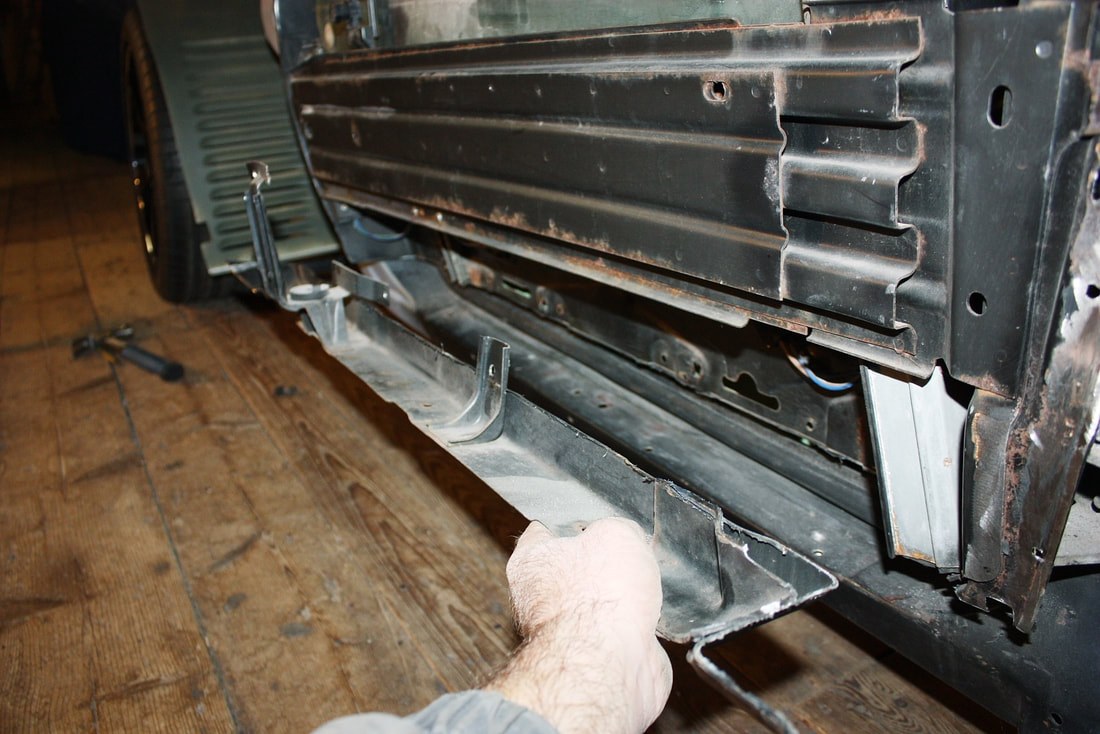
Here's the offending piece once the cutting was finished... note how in the foreground near my hand, there's a double wall. That extra thickness combined with the proximity of that area to the door frame made it quite difficult to finish the cut in the front corner of the door with the door installed on the chassis. I had to finish the cut with an open ended hacksaw:
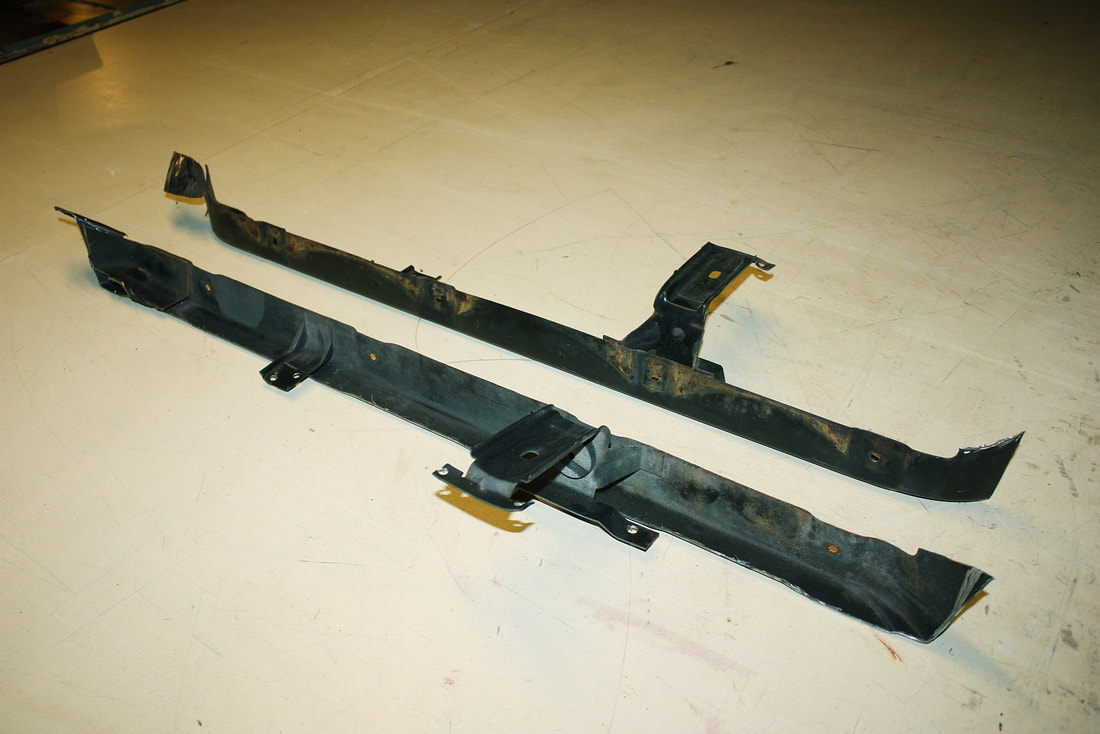
Then I had to set about making the same modification to the driver's side door. Here are both pieces (I still need to harvest the window bump stops):
Finally, here's the modified door. The green you see is the edge of a foam mat through to the other side inside the cabin:
There are still many more door modifications required, such as to the lower seal area, exterior handle mechanism, the aforementioned window stops, and on and on... but these will necessarily be covered at the same time as the body installation to allow for correct placement.
It feels good to be working on this again.

 RSS Feed
