Next up for the front LH corner of the engine bay was setting up the throttle control. The Northstar came with a throttle body bracket for mounting the accelerator and cruise control cables, but as with nearly everything else, it wasn’t going to work without modifications:
Next up for the front LH corner of the engine bay was setting up the throttle control. The Northstar came with a throttle body bracket for mounting the accelerator and cruise control cables, but as with nearly everything else, it wasn’t going to work without modifications:
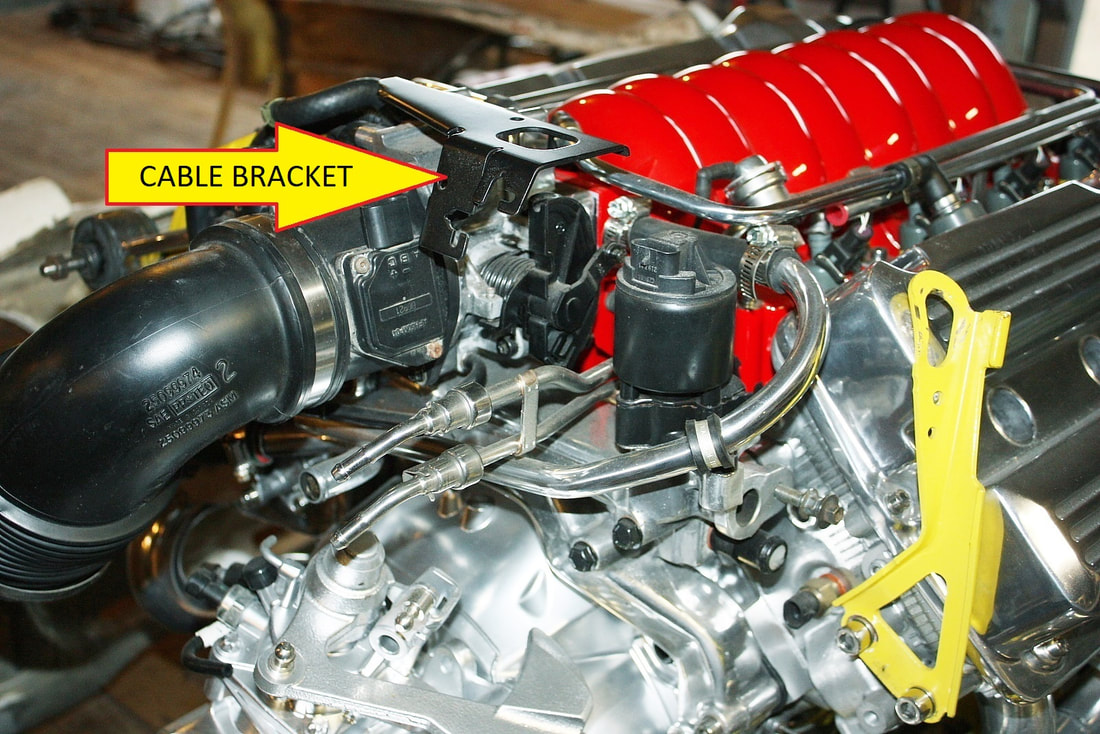
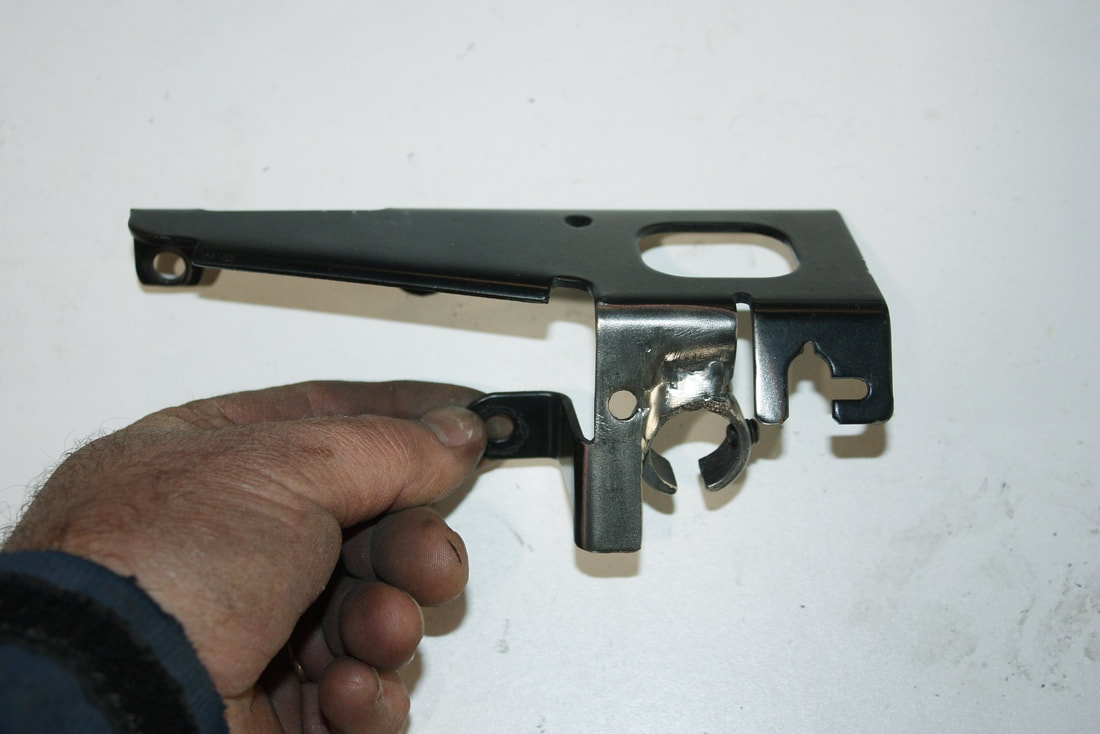
Here’s the bracket removed from the engine showing the unique slots to capture the accelerator and cruise control cables (left and right respectively):
Here’s the bracket removed from the engine showing the unique slots to capture the accelerator and cruise control cables (left and right respectively):

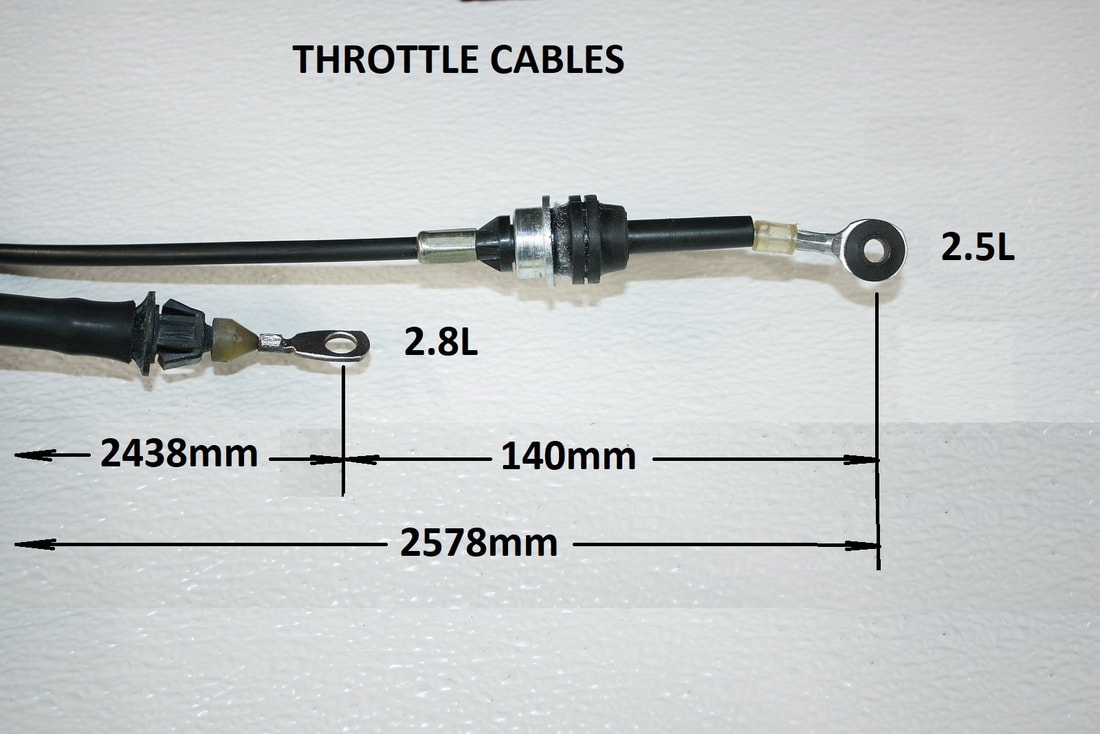
The bracket wasn’t going to work as-is because the Fiero accelerator cable has a different set up for capturing the end of the cable in the bracket. Again, I couldn’t use the Caddy cable because it’s far too short, so I had to resort to making the bracket fit the cable. Further complicating the situation was the 3” chassis stretch which meant that the stock V6 Fiero cable I had on hand would not reach the Northstar throttle quadrant.
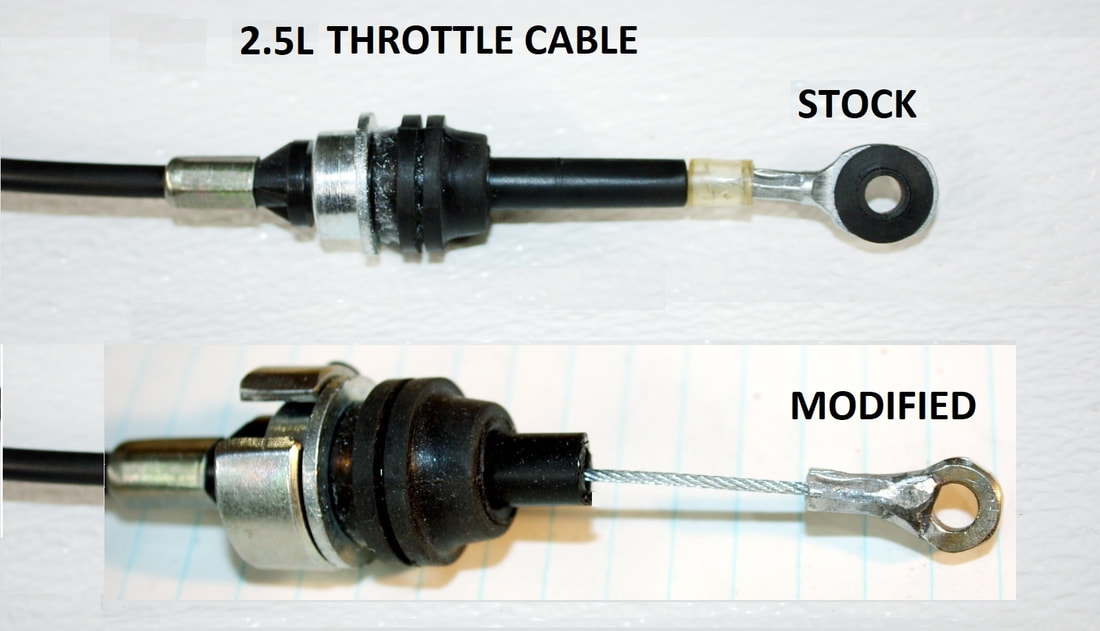
I researched the forums and found that other Northstar swappers used the unique-for-1988 four cylinder throttle cable since it not only is 140 mm (5.5”) longer than the V6 cable, it also has the correct end fittings for the Northstar throttle quadrant. Then I learned these cables have been out of production for a decade or more, so I bought the alternative: an early generation four cylinder cable hoping to make it work. Here’s a photo showing other differences between the 2.8L and early 2.5L throttle cables:
The bracket wasn’t going to work as-is because the Fiero accelerator cable has a different set up for capturing the end of the cable in the bracket. Again, I couldn’t use the Caddy cable because it’s far too short, so I had to resort to making the bracket fit the cable. Further complicating the situation was the 3” chassis stretch which meant that the stock V6 Fiero cable I had on hand would not reach the Northstar throttle quadrant.
I researched the forums and found that other Northstar swappers used the unique-for-1988 four cylinder throttle cable since it not only is 140 mm (5.5”) longer than the V6 cable, it also has the correct end fittings for the Northstar throttle quadrant. Then I learned these cables have been out of production for a decade or more, so I bought the alternative: an early generation four cylinder cable hoping to make it work. Here’s a photo showing other differences between the 2.8L and early 2.5L throttle cables:
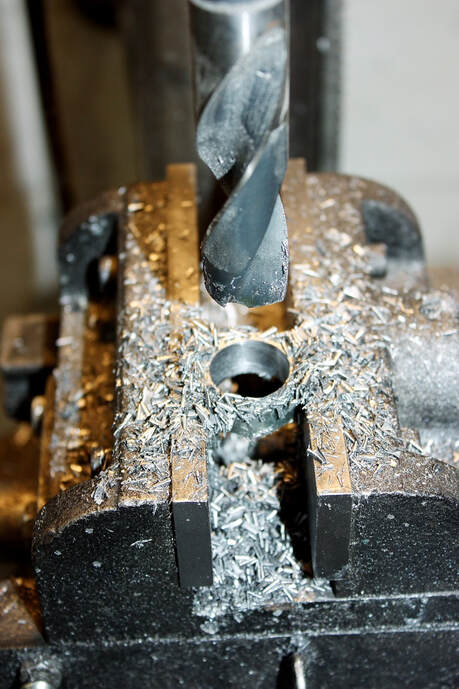
From the photo above it’s clear that the metal collar around the end of the cable housing wasn’t going to fit the slots in the Northstar cable bracket, so I began modifying the bracket. The first step was to bore out a steel bushing to fit the diameter of the cable collar:
From the photo above it’s clear that the metal collar around the end of the cable housing wasn’t going to fit the slots in the Northstar cable bracket, so I began modifying the bracket. The first step was to bore out a steel bushing to fit the diameter of the cable collar:
Then I slotted the new bushing so I could slip it onto the end of the cable and around the collar, and then drilled and tapped a hole for a set screw to hold it:
Then I slotted the new bushing so I could slip it onto the end of the cable and around the collar, and then drilled and tapped a hole for a set screw to hold it:
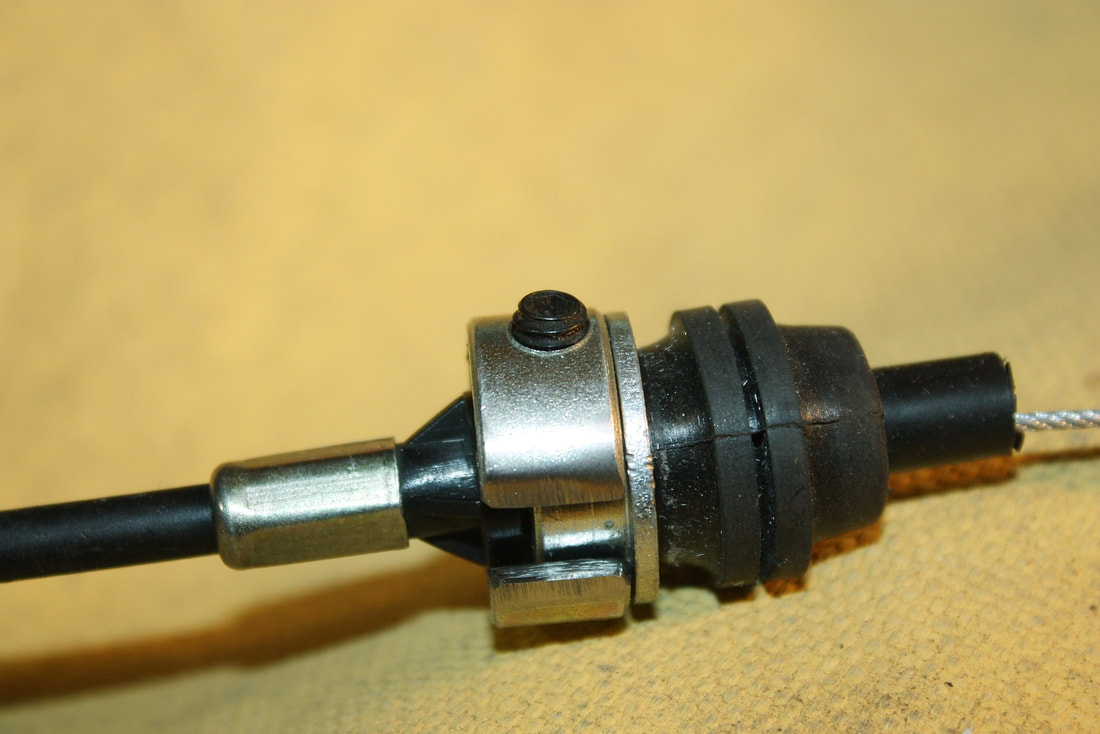
Lastly, I trimmed the plastic guide back from the end of the cable and welded a new, smaller eyelet to the end:
Lastly, I trimmed the plastic guide back from the end of the cable and welded a new, smaller eyelet to the end:
Once the modified cable was mocked up, I was able to measure where to weld my new cable bushing to the Caddy bracket, and came up with this:
After it cooled, I reinstalled the bracket to the throttle body, slipped the cable through the slot in the bushing, and tightened the set screw to lock the collar (and cable) to the bracket:
After it cooled, I reinstalled the bracket to the throttle body, slipped the cable through the slot in the bushing, and tightened the set screw to lock the collar (and cable) to the bracket:
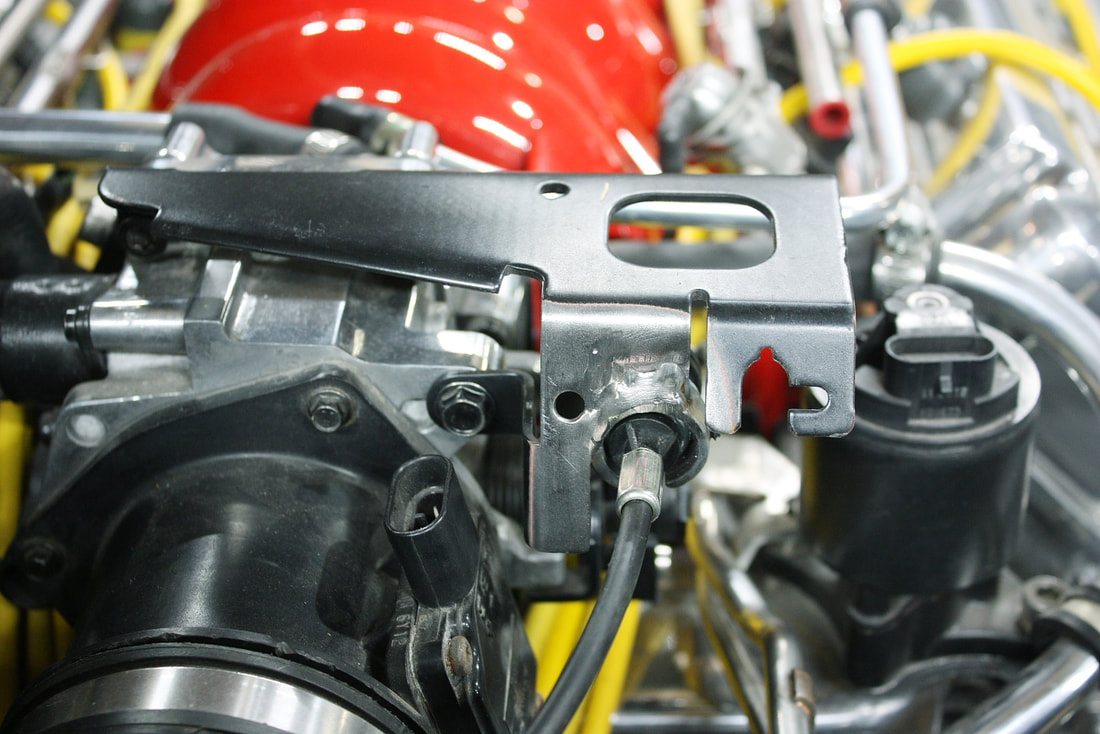
The last step at this end of the cable was to wrap the cable end around the groove in the quadrant, and run a small bolt attaching the eyelet to the quadrant.
The last step at this end of the cable was to wrap the cable end around the groove in the quadrant, and run a small bolt attaching the eyelet to the quadrant.
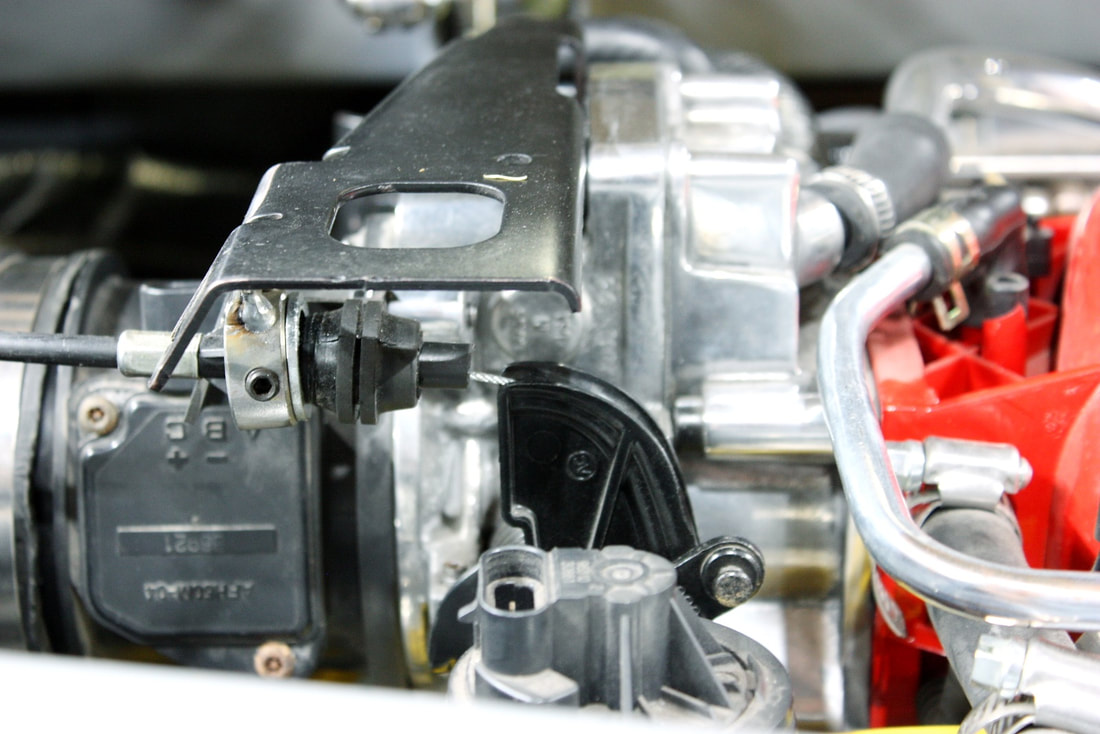
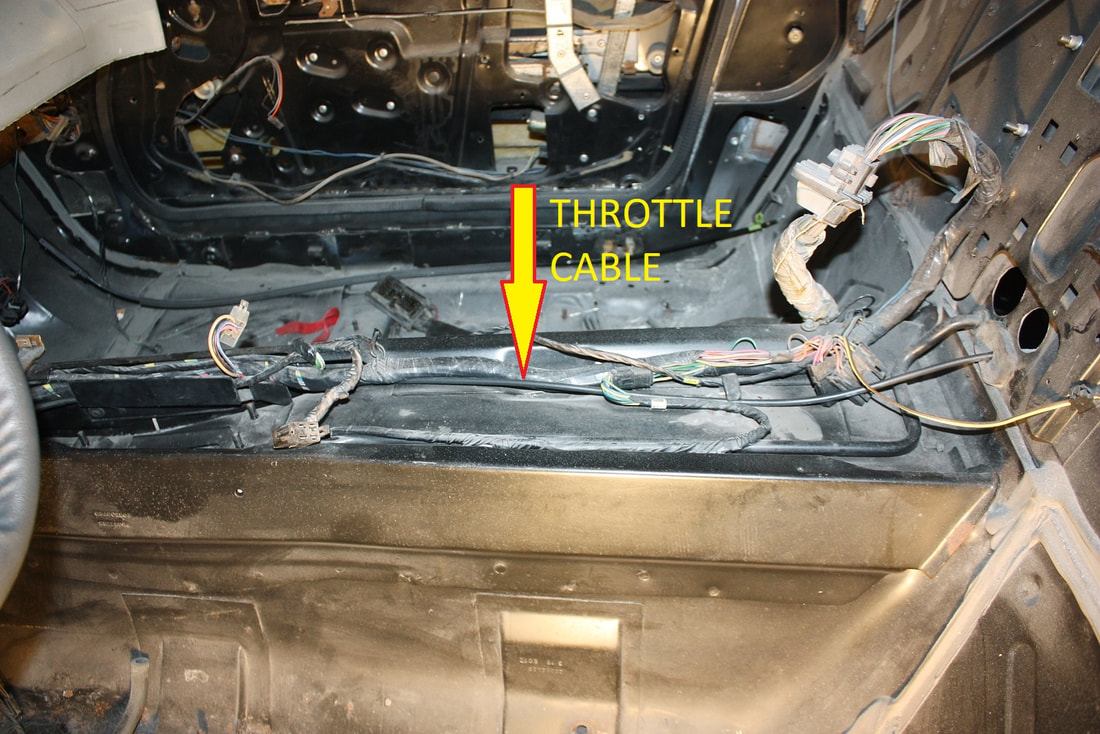
Next up was to run the cable through the firewall to the gas pedal. The cable runs along the top of the central gas tank tunnel:
Next up was to run the cable through the firewall to the gas pedal. The cable runs along the top of the central gas tank tunnel:
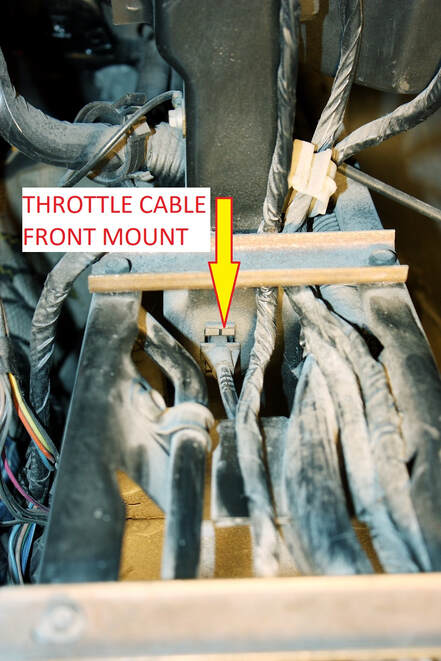
At the front end of the gas tank tunnel, the cable passes through a square hole that the cable housing locks to. The multi-strand portion of the cable ends up in a hollow area on the other side of the square hole:
At the front end of the gas tank tunnel, the cable passes through a square hole that the cable housing locks to. The multi-strand portion of the cable ends up in a hollow area on the other side of the square hole:
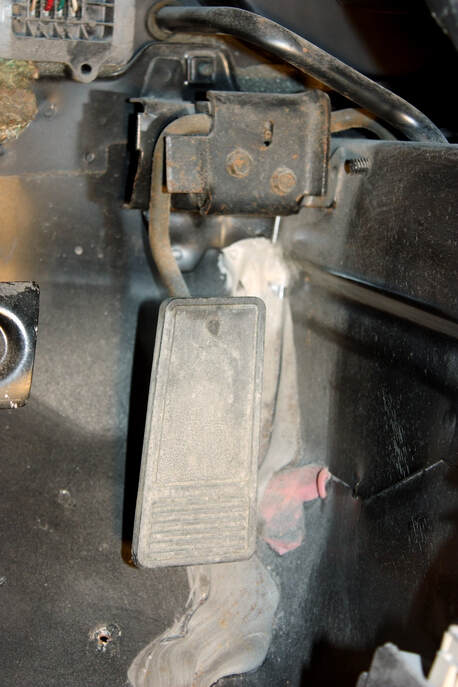
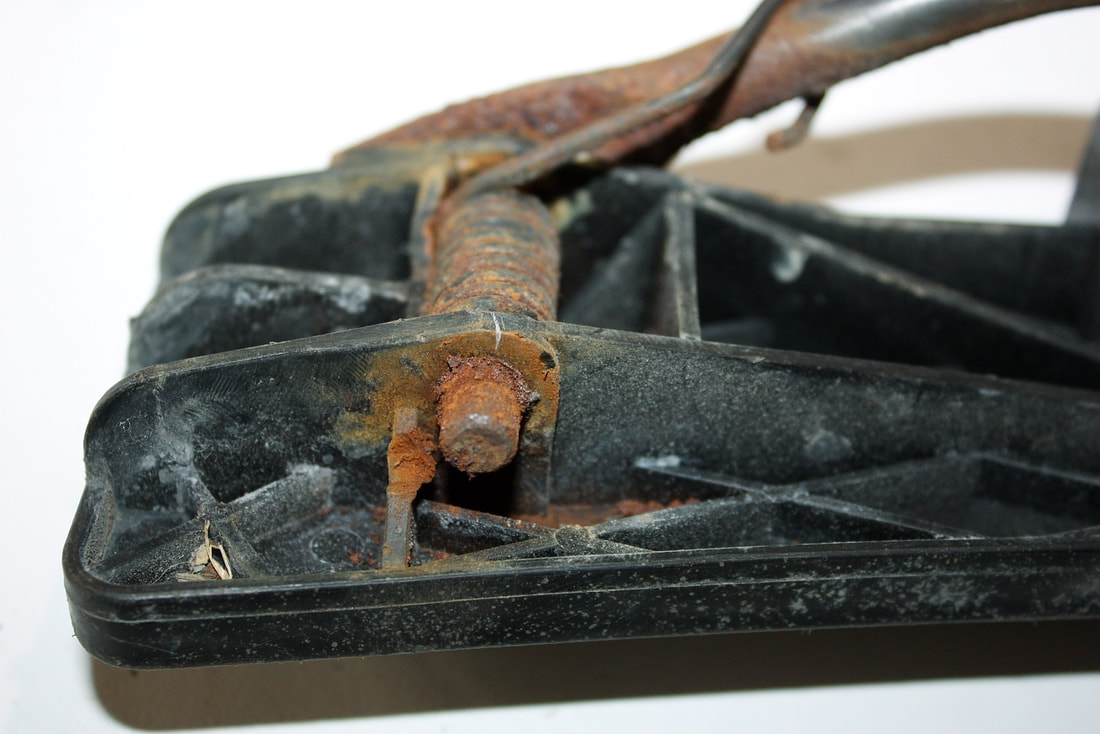
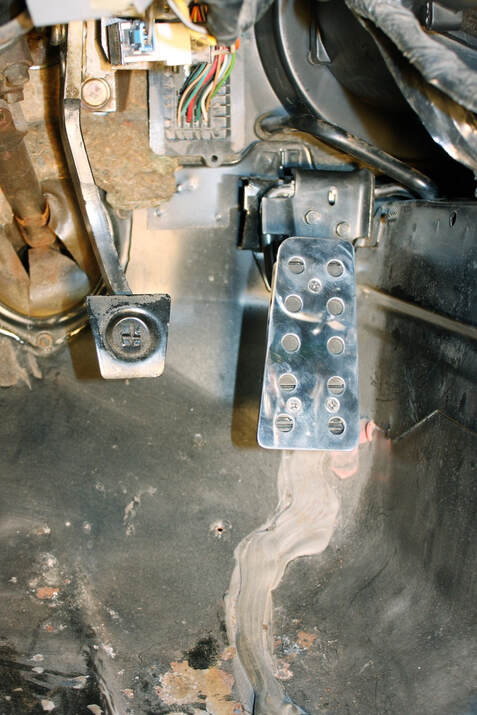
That hollow area is where the gas pedal lever loops over the tunnel wall and connects to the cable. Follow the metal lever up from the pedal, out the other side of the black hinge box, to where the lever disappears over the central tunnel wall and down:
That hollow area is where the gas pedal lever loops over the tunnel wall and connects to the cable. Follow the metal lever up from the pedal, out the other side of the black hinge box, to where the lever disappears over the central tunnel wall and down:
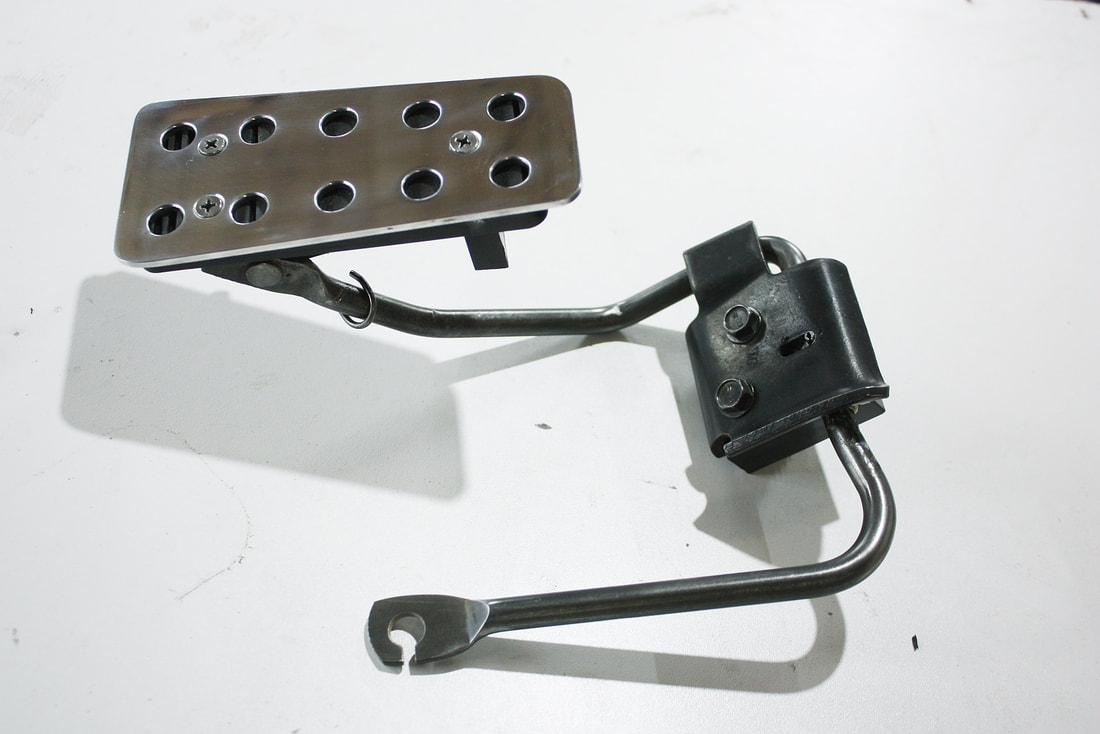
When the pedal assembly is removed, it becomes clear how the lever is looped over the wall to capture the cable end:
When the pedal assembly is removed, it becomes clear how the lever is looped over the wall to capture the cable end:
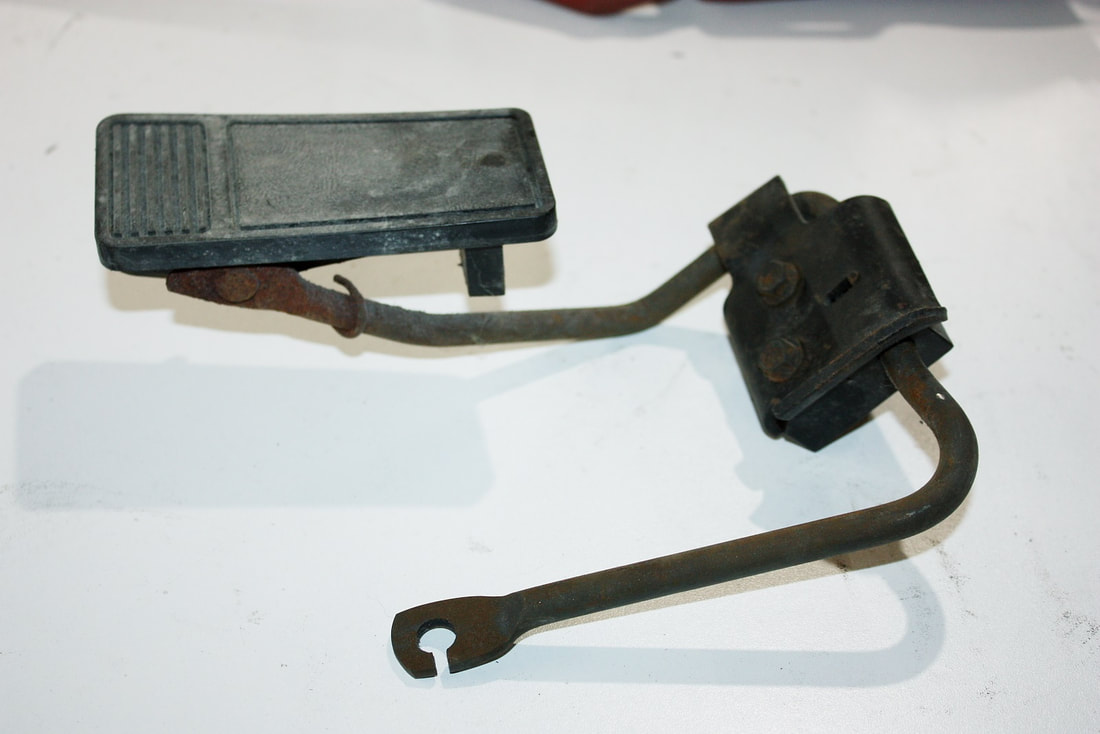
The pedal hinge point was corroded on my car to the point where the pedal no longer swiveled about the lever:
The pedal hinge point was corroded on my car to the point where the pedal no longer swiveled about the lever:
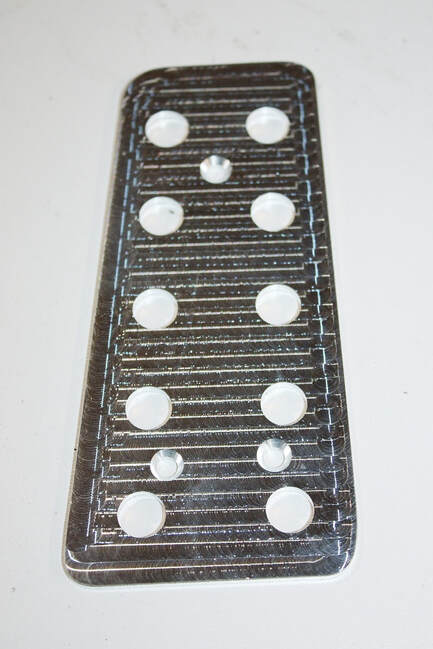
A while ago I decided I would dress up the pedals with Rodney Dickman’s Ferrari pedal covers, so I got the gas pedal cover out and realized it had lots of machining marks on it:
A while ago I decided I would dress up the pedals with Rodney Dickman’s Ferrari pedal covers, so I got the gas pedal cover out and realized it had lots of machining marks on it:
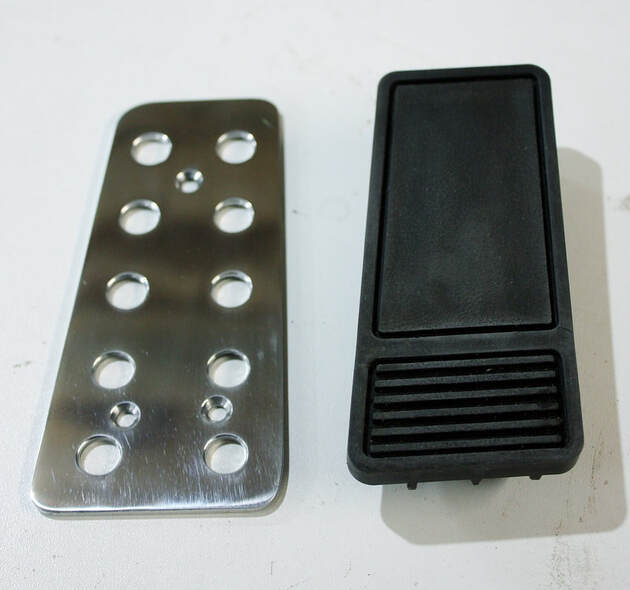
I spent an hour sanding it smooth and polishing it on the 8” buffer to get it looking a lot cleaner:
I spent an hour sanding it smooth and polishing it on the 8” buffer to get it looking a lot cleaner:
I screwed it onto the OEM pedal, cleaned up the corrosion, and re-greased the top hinge assembly:
I screwed it onto the OEM pedal, cleaned up the corrosion, and re-greased the top hinge assembly:
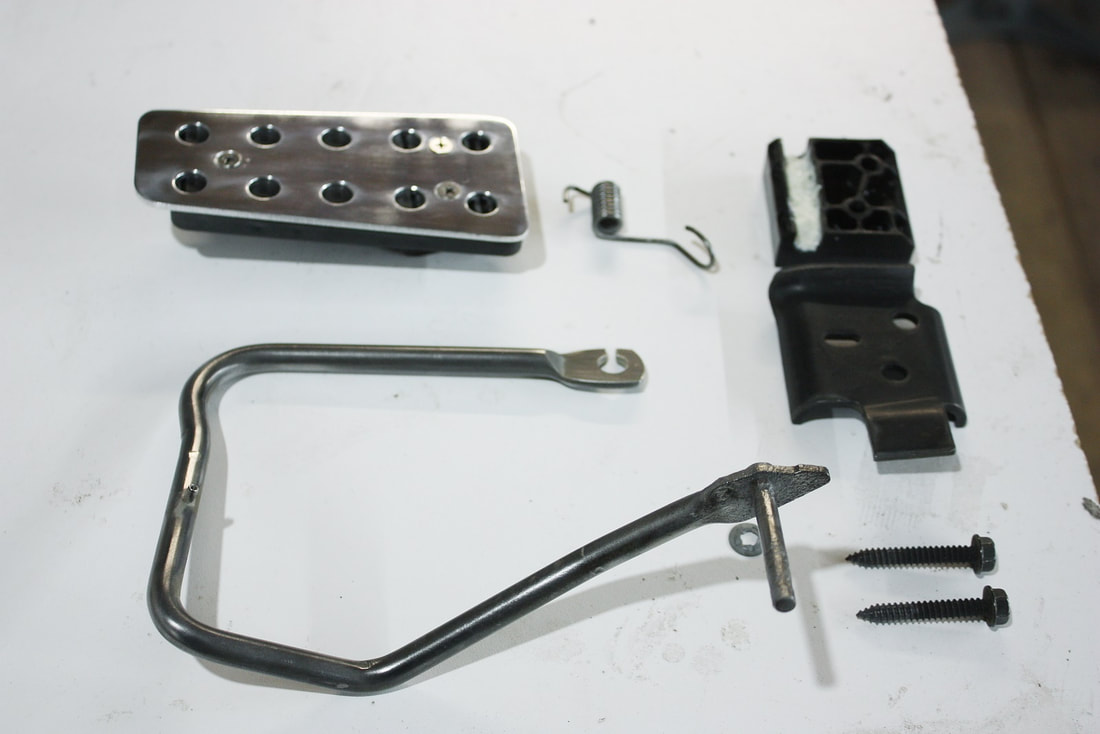
Then I reassembled the pedal…
Then I reassembled the pedal…
… and reinstalled it in the foot well after attaching it to the end of the cable:
… and reinstalled it in the foot well after attaching it to the end of the cable:
 RSS Feed
