The next modification I made to the engine block was a major one. The biggest problem with Northstar engines is that they were notorious for blowing head gaskets. GM discovered that the thermal expansion of the engine block caused fatigue failure of the head bolt threads deep in the block. GM's cure to the problem was to drill out the threads and install larger threaded steel inserts to spread the loads on the bolts over a larger area.
The cost of that modification at the dealership would have rung up just shy of $1000, if all went well. That's not including the work to pull the engine out and reinstall it! According to a Caddy technician on one website, about 50% of the blocks got junked during the repair process due to poor porosity of the engine block material.
Norm Huhn (www.huhnsolutions.com) developed his own insert kit that’s marketed as superior to the Cadillac insert kit. His inserts have an even larger diameter and coarser thread giving his inserts greater load spreading capacity and holding strength. The best thing? His entire kit, including 21 solid inserts and the optional bore-alignment jig, was only $500 delivered to my door after taxes. Here’s what the kit looks like (I know, I know... $500... doesn't look like it goes very far... but this is a Cadillac engine! Everything is more expensive.)
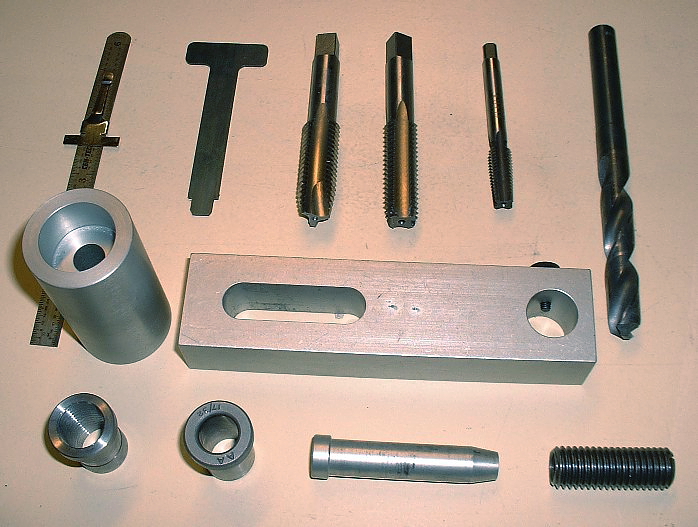
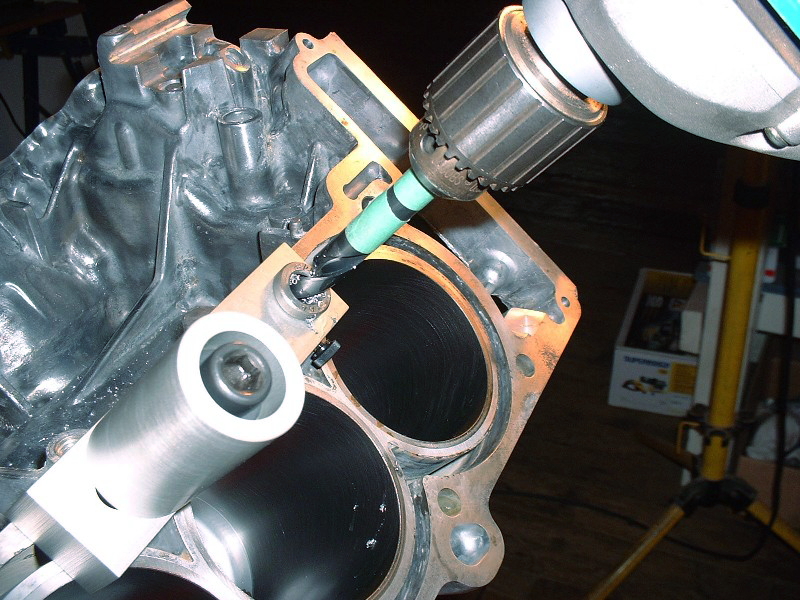
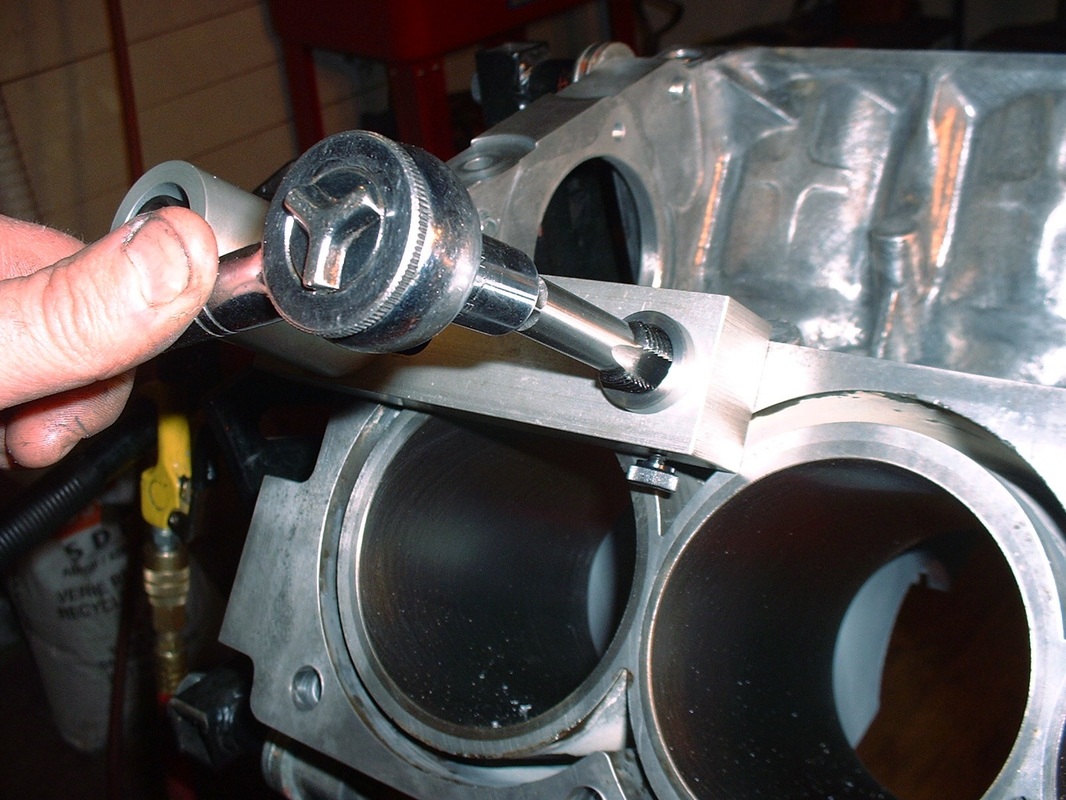
The jig is bolted to one bolt hole using an old head bolt, and is swivelled around to drill and tap the adjacent holes. Separate collars and a guide pin that slides through the collars accurately locate the jig before drilling and tapping.
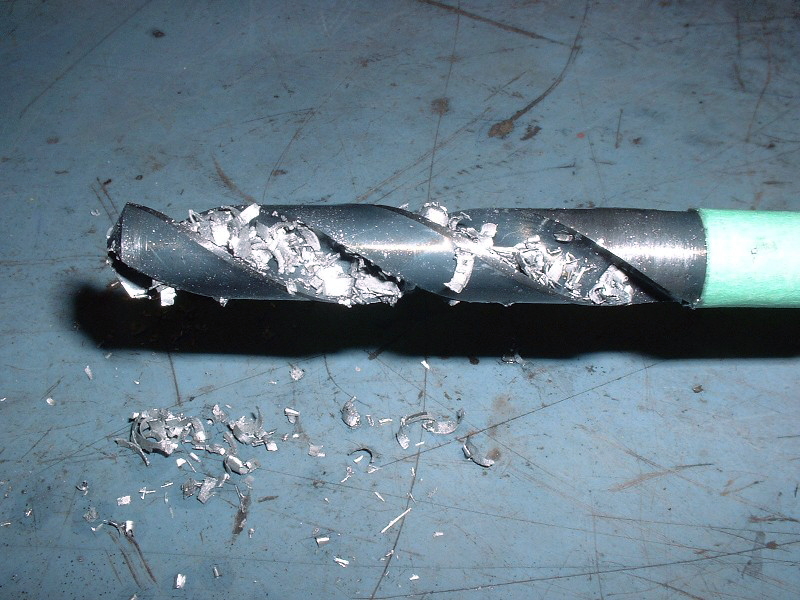
The instructions say that because of the depth of the holes, the soft nature of the aluminium, and the aggressive pitch of the drill bit, you have to drill without using a lot of pressure and you have to pull the bit out and clean the flutes three to four times before hitting the bottom of each hole. If you don’t, the shavings accumulate and gall-up the hole and can cause you problems when re-threading. I found this to be good advice.
Here’s the nature of the shavings that came out… I found that if I placed any more than a light pressure on the bit, it would bite hard into the block and twist the drill right out of my hands. Notice the tip of the bit… Norm even thought about removing the cutting edge from the tip to prevent you from going any further down into the block than the original hole. As an added precaution, I stuck a piece of masking tape on the bit to mark the maximum depth:
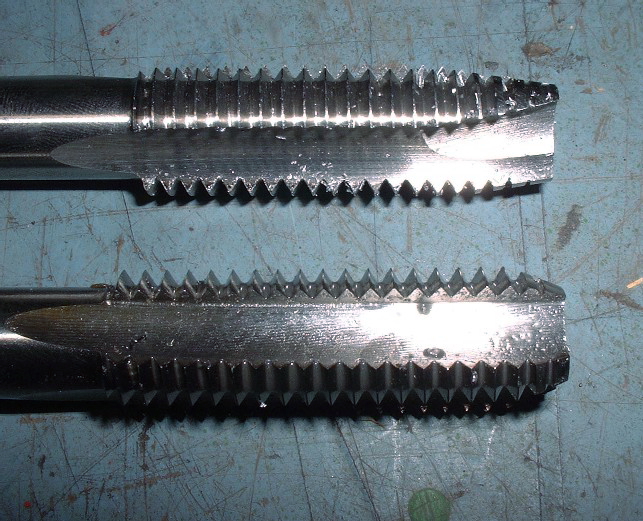
After drilling out the factory threads, the next step was to tap the new holes for the inserts. Notice that the top bit is more tapered at the end than the lower bit. The top one is the tap that’s run through first. It’s tapered to make each cutting thread take a progressively larger bite out of the aluminium instead of trying to do it all at once. The lower tap is a "bottom tap" used to finish up the last few threads that the tapered tap can’t do:
Tapping the holes is much like drilling the holes except that it's done by hand and you have blow out the chips more often to prevent them from galling your newly cut threads. I found that with the engine on the stand, it was easier to rotate the engine upside-down and then blow the chips out with compressed air than trying to blow them out with the engine right side up:
Once each hole was tapped, I had to inspect the new threads to be sure that I didn’t come across any porosity that would lead to junking it. Porosity shows up as chunks missing from several threads here and there. Luckily, all of my holes tapped well:

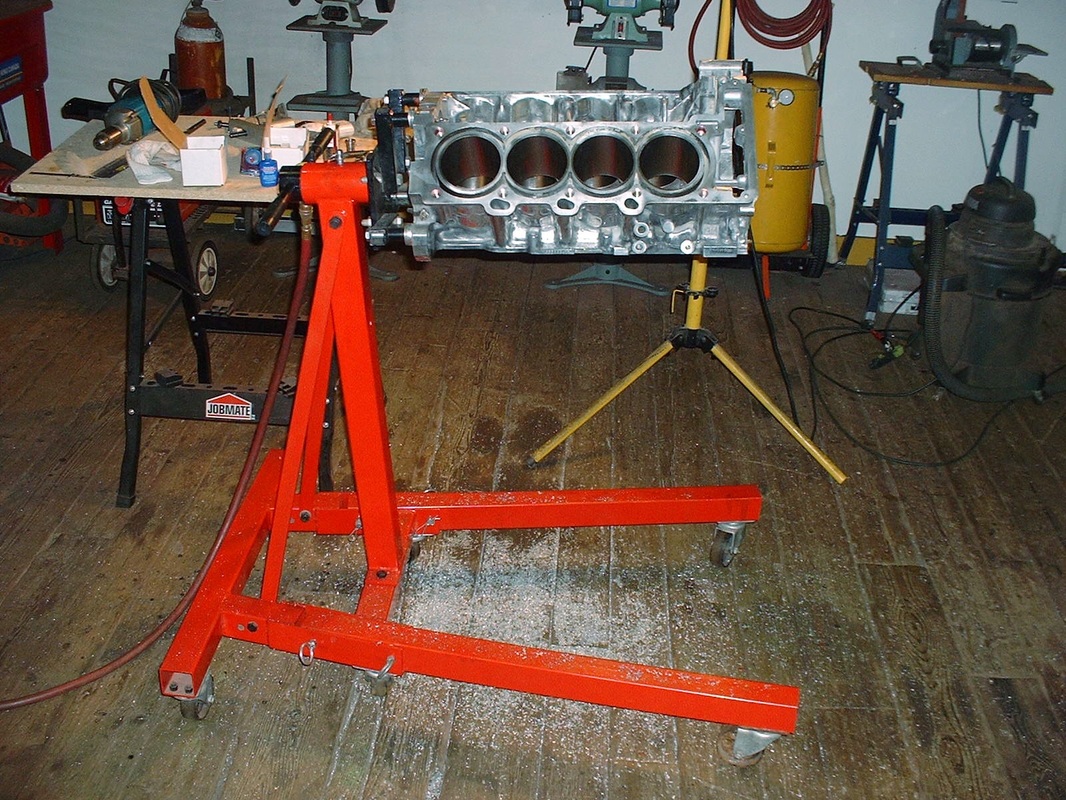
It’s a pain-staking process to do all 20 holes and you can’t be in a rush. There’s a learning curve that goes with it too. In reviewing my build notes, I see that it took me 4.5 hours to set up the alignment jig and drill and tap the first 10 holes. With experience behind me, I was able to do the other cylinder bank in 2.5 hours, and from there, it took a final half hour to apply Locktite and screw all those inserts in. If you weren’t counting, that’s 7.5 hours in total... a full day's work! Here’s the pile of chips left on the floor after I was done all the drilling and tapping:
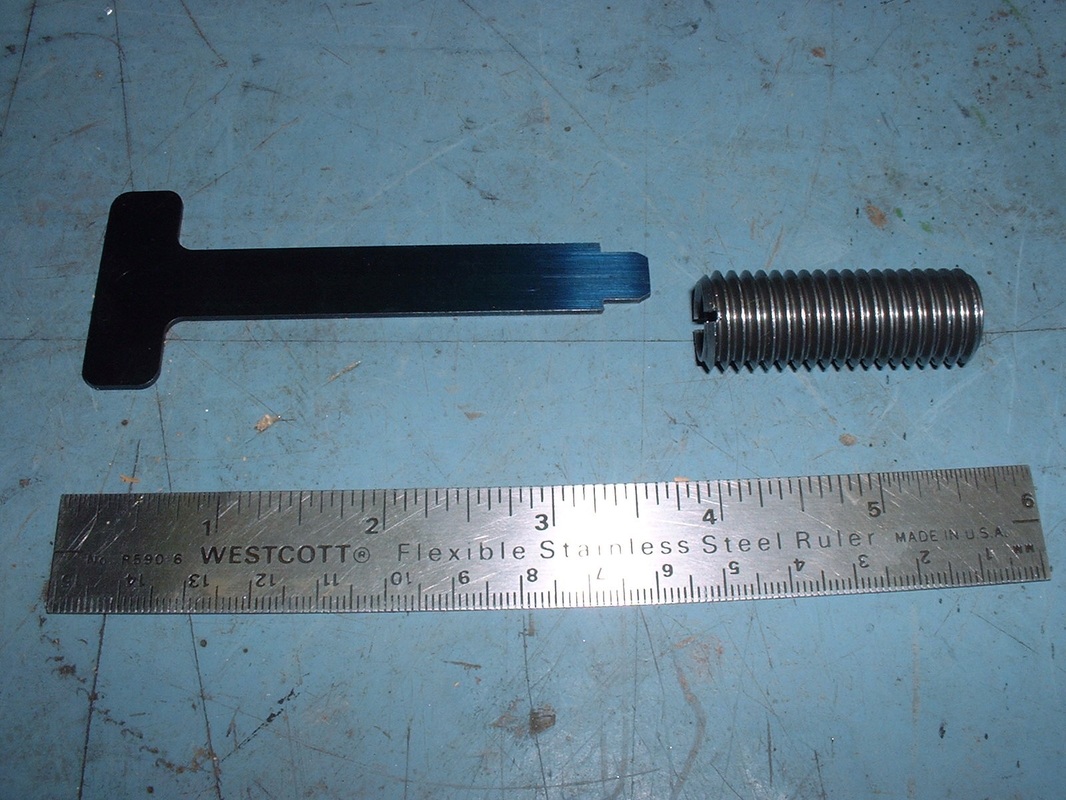
Here’s a close-up of Norm’s new threaded inserts. They’re gigantic compared to the Cadillac inserts, and they’re solid too… not a wound spring-like insert. The T-handle is the tool to thread them into the new holes.
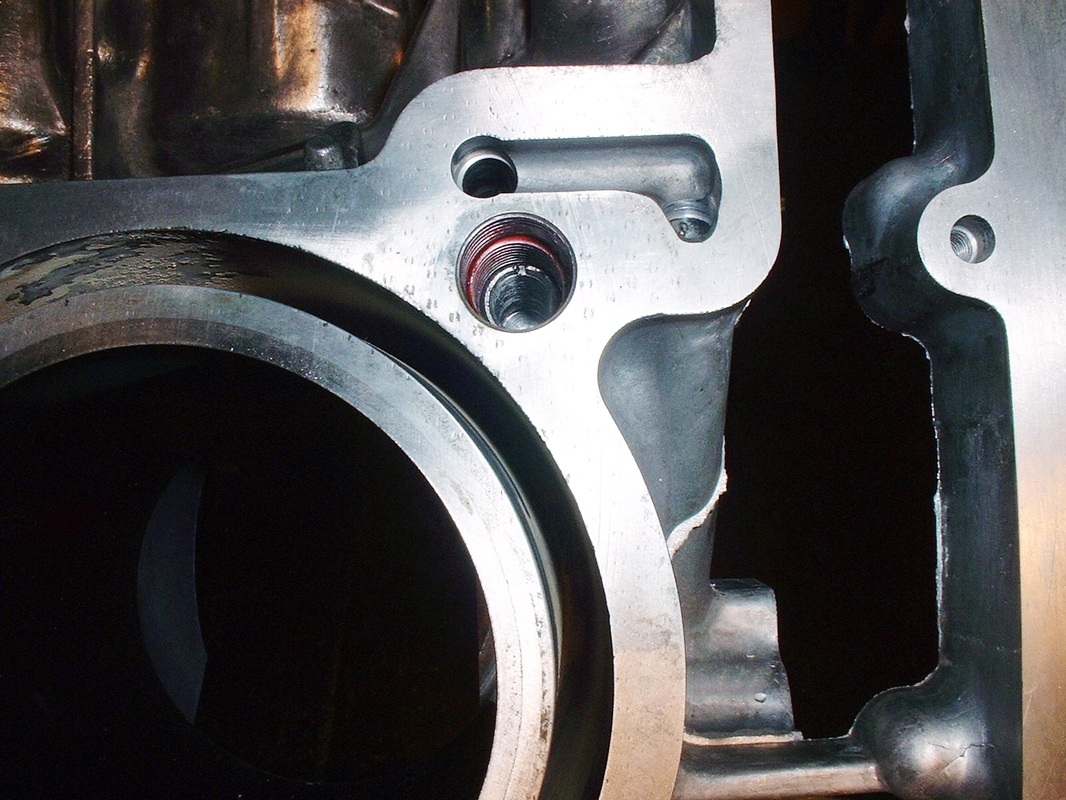
Before applying the Loctite, I had to thread all the inserts into the block and make a final measurement to be sure they seated at a specified depth. Then I had to remove them all and re-tap any hole that wasn’t quite deep enough… (it happened on one hole for me) and re-install the inserts with the thread locker:
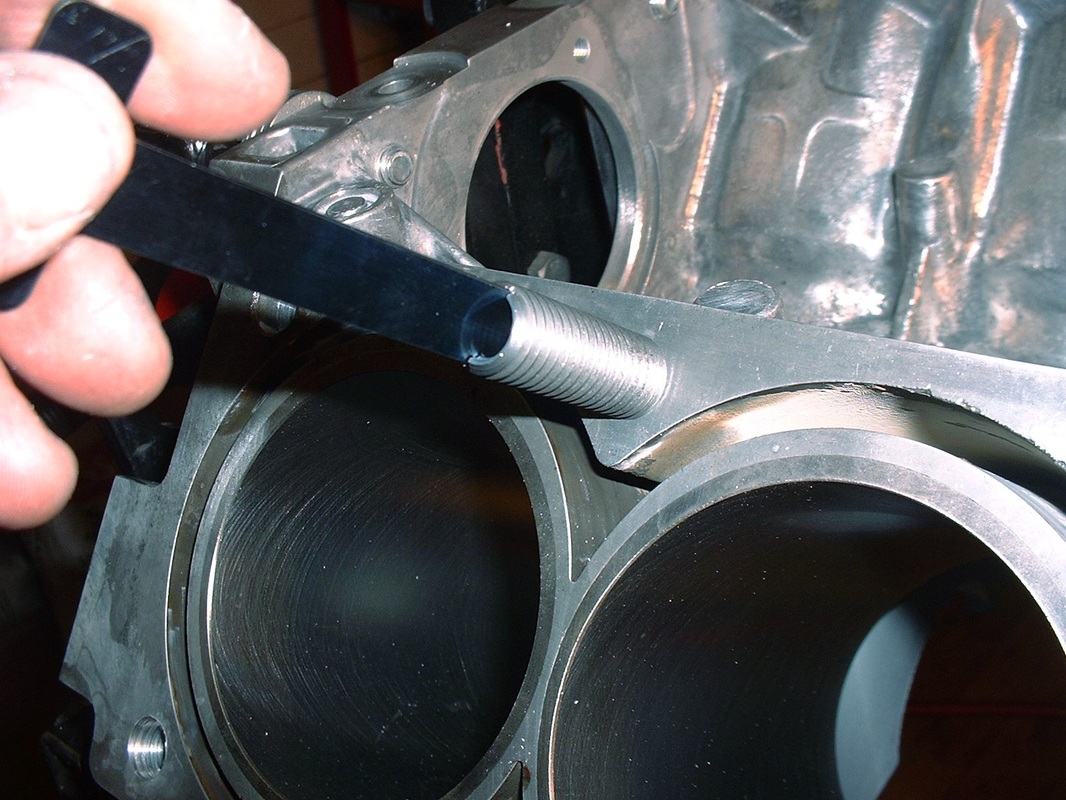
Finally, here’s what the insert looks like fully threaded in and locked in place. Pretty deep down in there eh?

 RSS Feed
