The stock Northstar engine, like many modern engines, is bestowed with a "beauty cover" to hide all the ugly business-parts of the powertrain. I've always preferred the raw mechanical looks of an actual engine to a plastic cover plate though, so I decided early on that I would ditch the cover and perform a facelift with the parts beneath it.
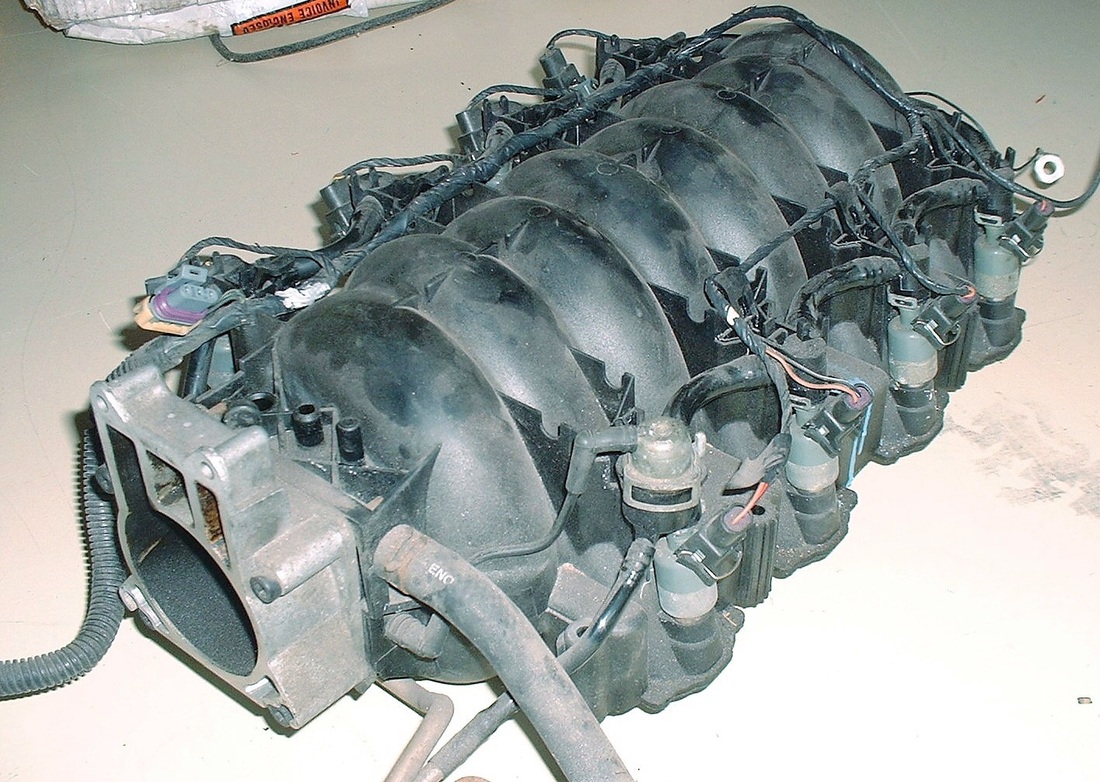
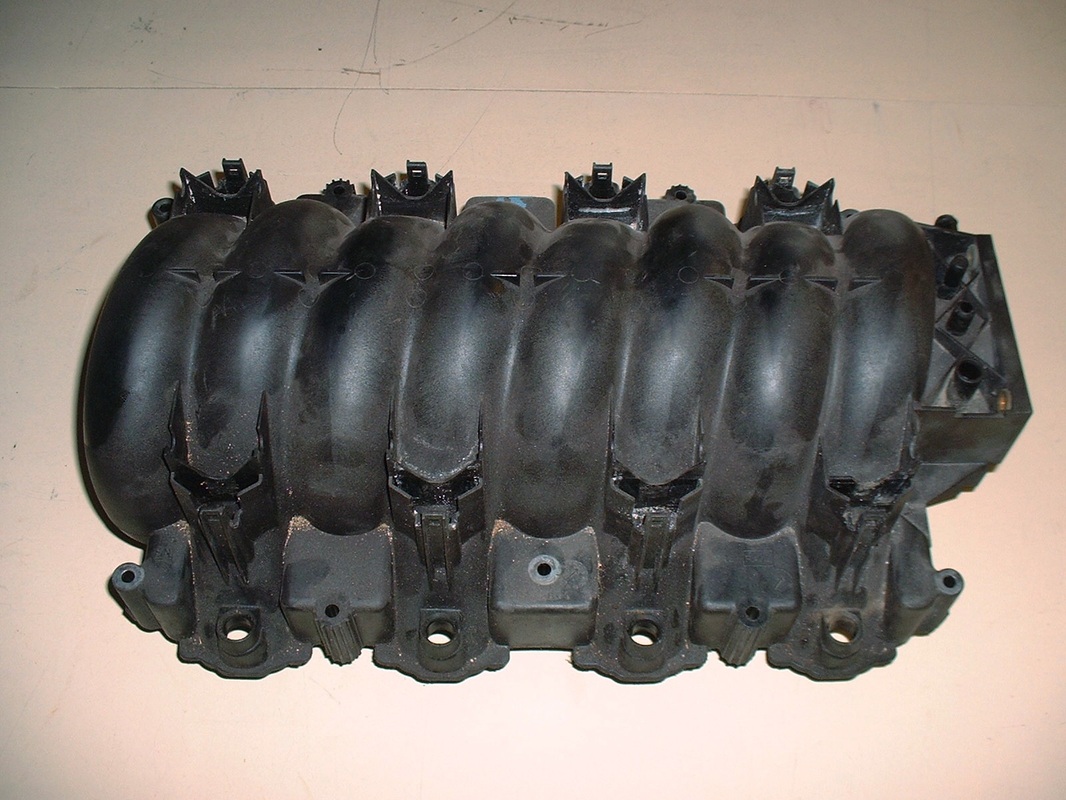
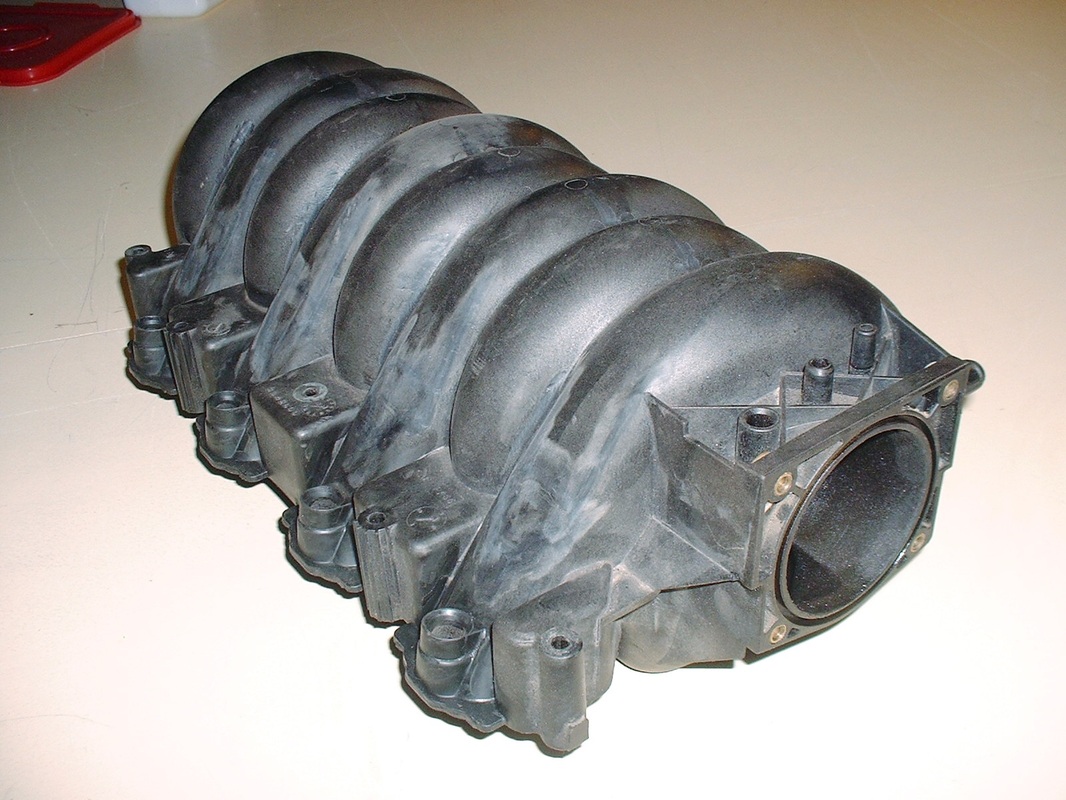
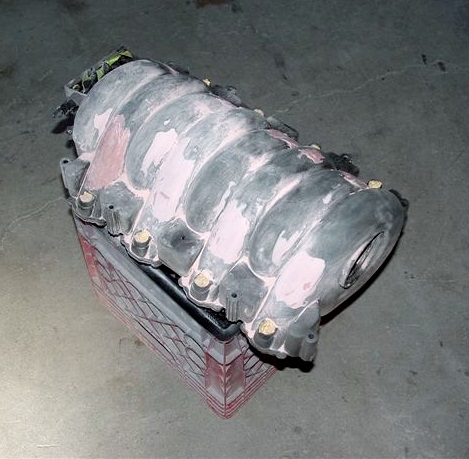
Under the cover lies a mess of vacuum lines, wire harnesses, fuel hoses, and a black plastic intake plenum. My plan was to replace the rubber lines with stainless steel, and give the plenum some colour. But a pig with lipstick is still just a pig, so after removing the fuel rail and hoses, I came up with a plan to make the ugly duckling into, well, a race horse. Here’s the plenum in all its stock complexity:
Under the cover lies a mess of vacuum lines, wire harnesses, fuel hoses, and a black plastic intake plenum. My plan was to replace the rubber lines with stainless steel, and give the plenum some colour. But a pig with lipstick is still just a pig, so after removing the fuel rail and hoses, I came up with a plan to make the ugly duckling into, well, a race horse. Here’s the plenum in all its stock complexity:
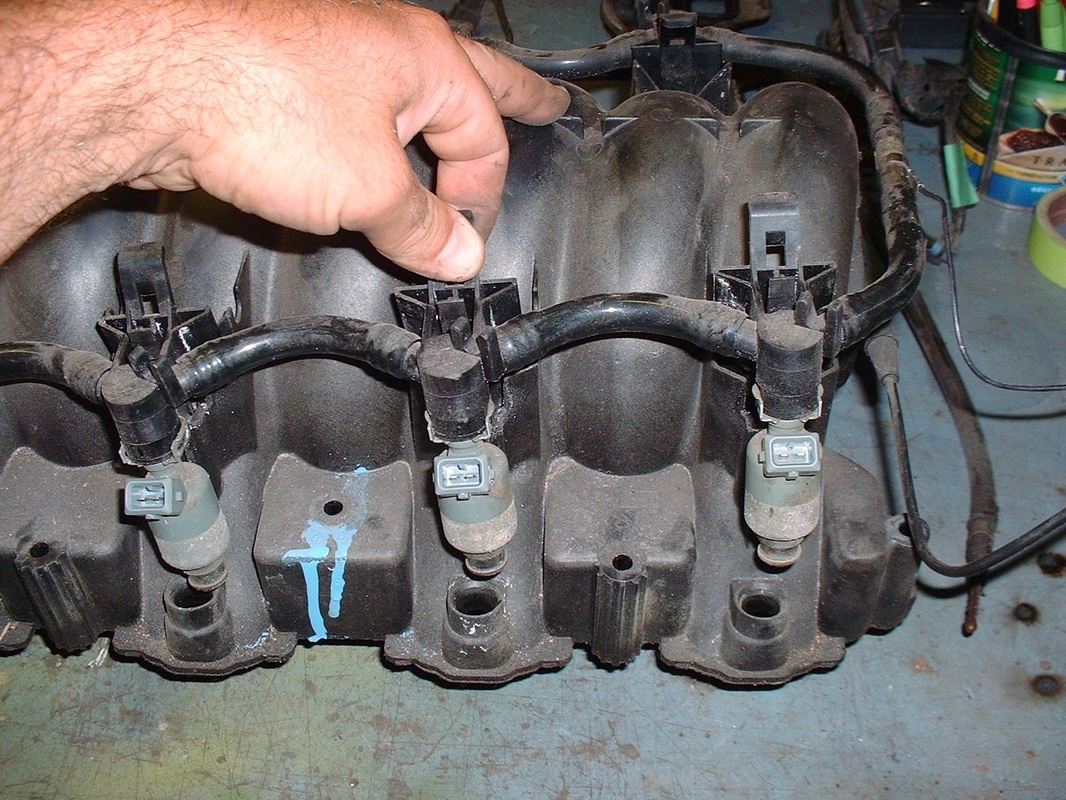
I started the dismantling process by removing the wire harness, disconnecting the injectors, then the bolts that hold the plastic fuel rail to the manifold, and finally the fuel rail:
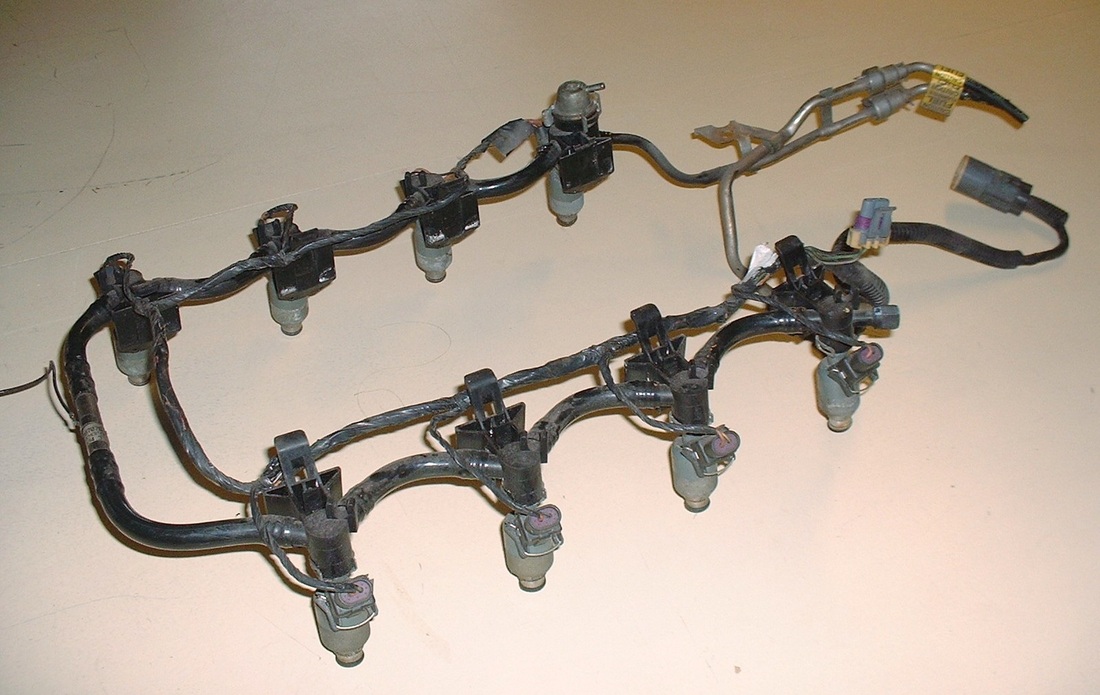
So here’s the old rail. In a future post, I cover injector cleaning to get them ready for the stainless rail:
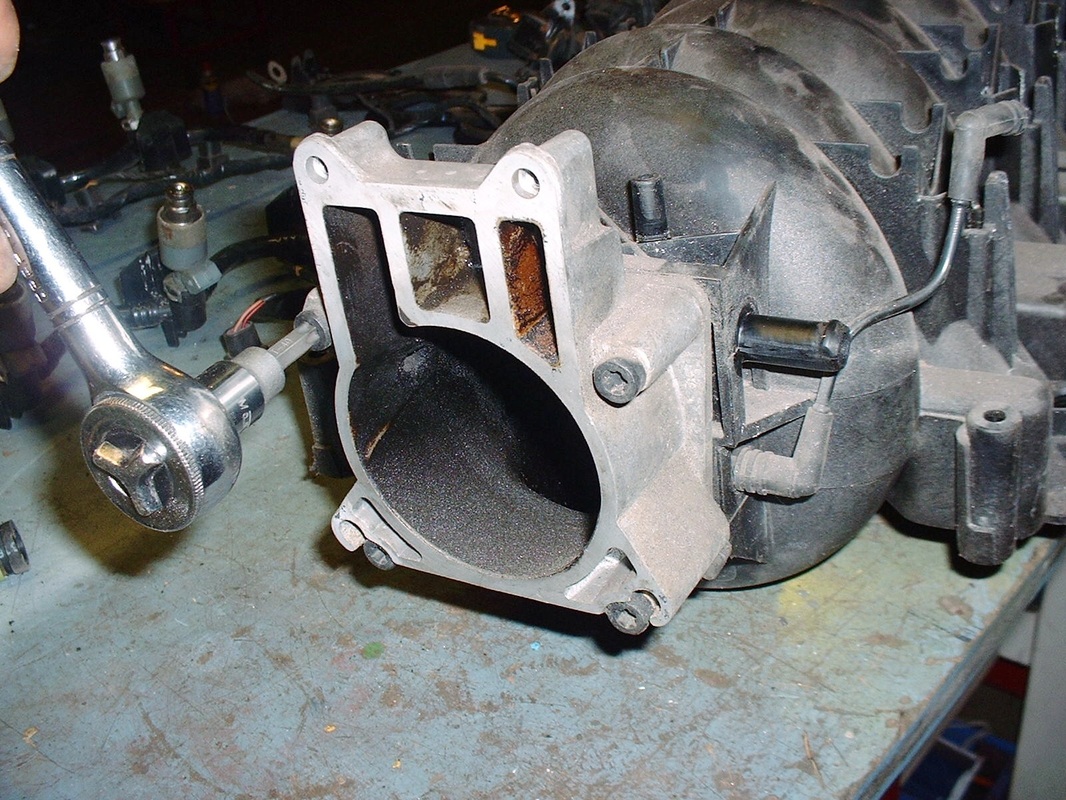
Next I removed the throttle body:
And finally the backfire relief valve from the other end of the plenum:
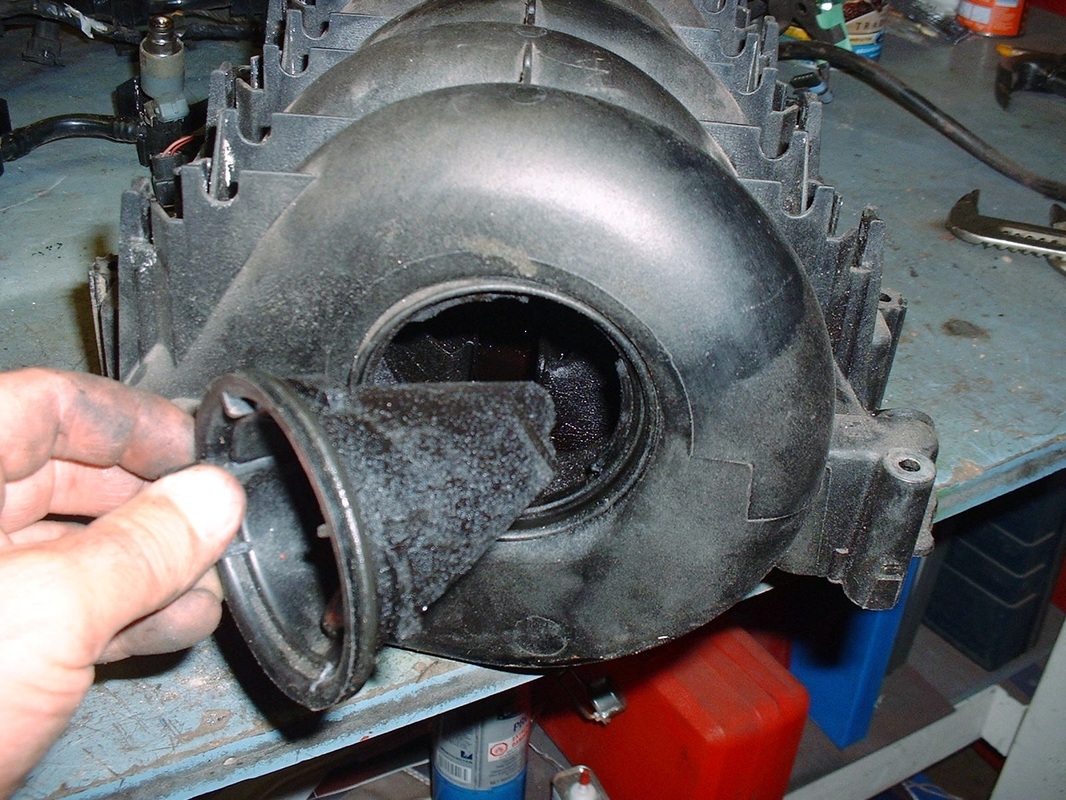
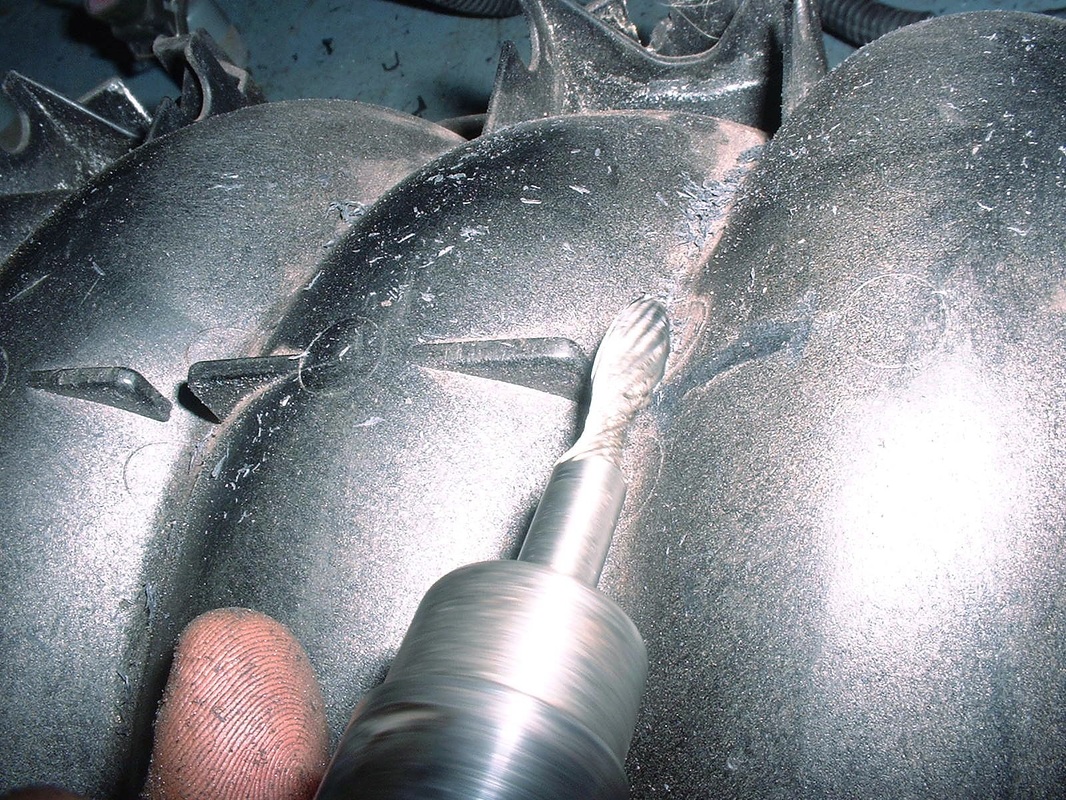
The inside of the plenum was coated in oil and carbon deposits from the positive crankcase ventilation (PCV) system, but before giving the plenum a bath, I figured I’d get some of the messy work done and over with. I decided to give this porcupine a shave & haircut:
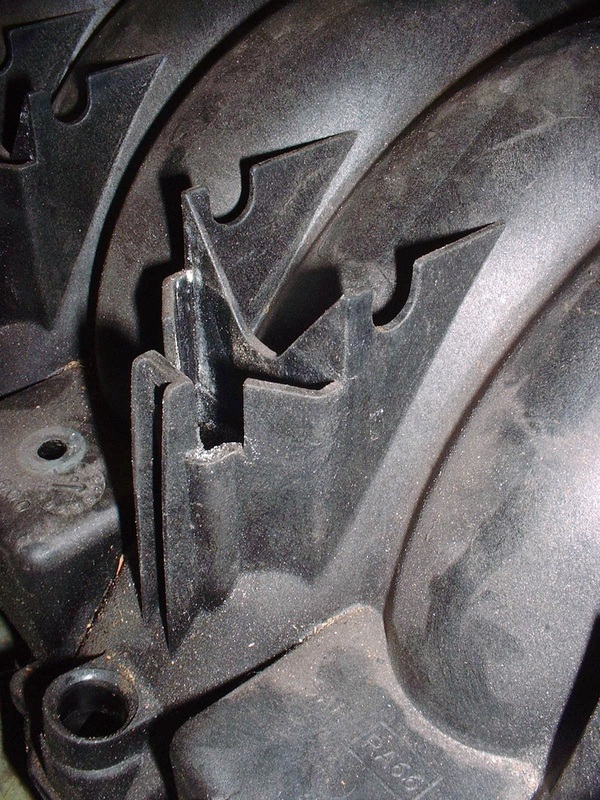
Notice all the fuel rail mounting brackets molded into the sides of the plenum? Here’s what they look like close up.
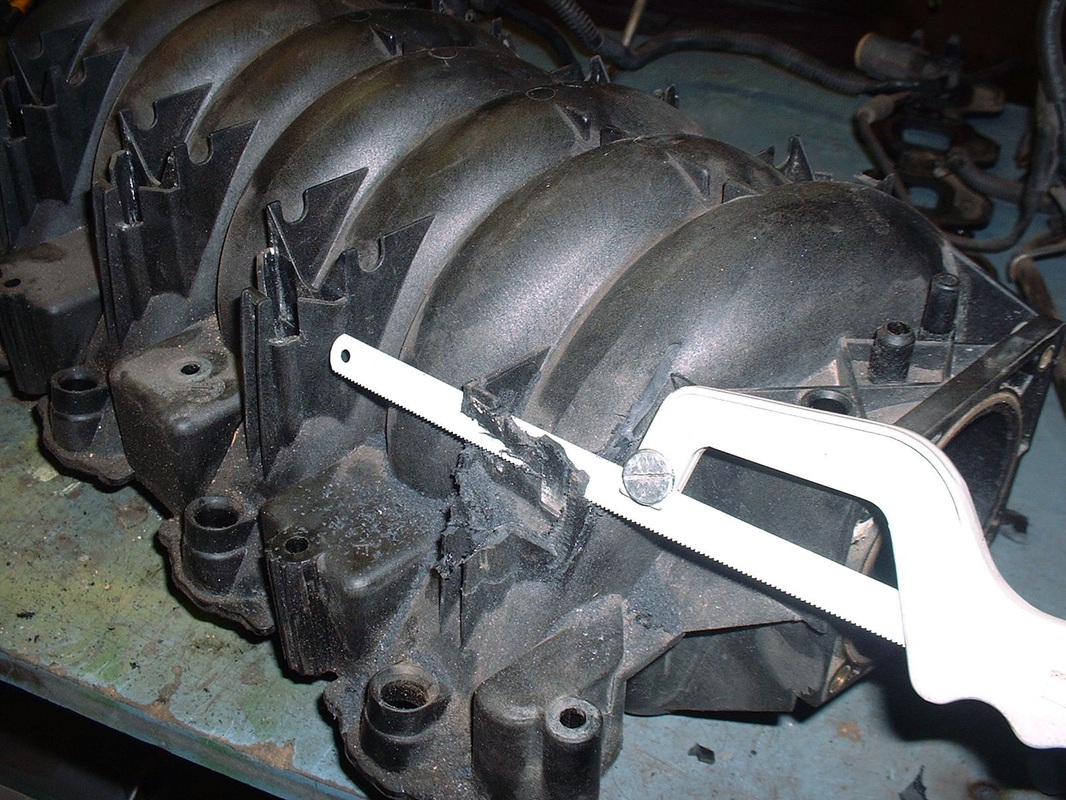
Step 1 in tidying up the manifold was to shave all of these mounting flanges off. Using a hacksaw I was able to remove the lion's share of the brackets:
Then using a combination of a high speed burr in my die grinder, and a small sanding drum in my Dremel, I was able to give a closer shave:
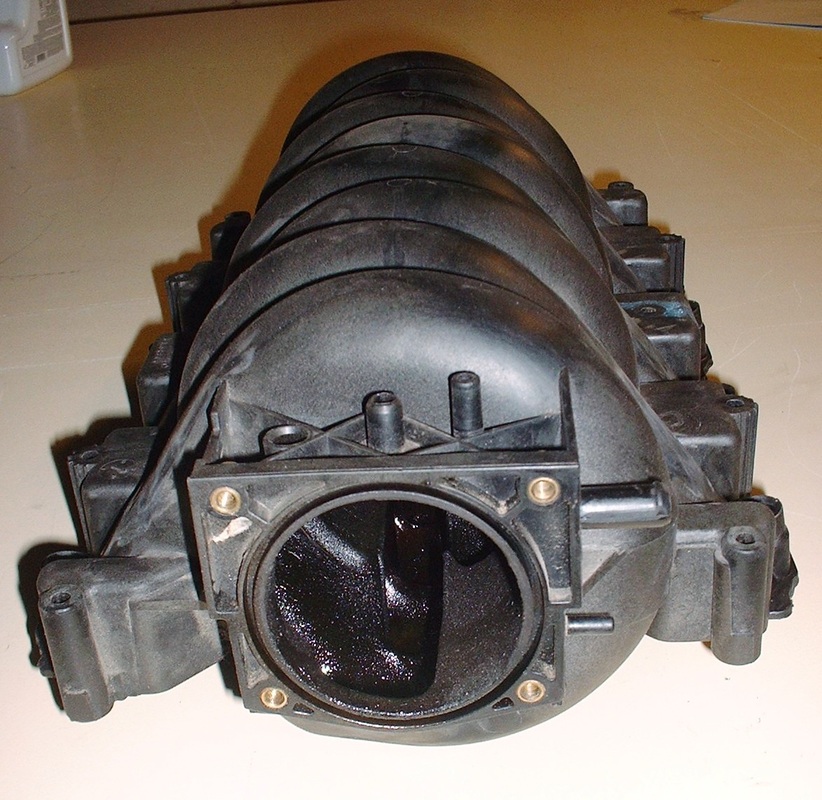
Here’s a couple shots of the intake plenum with all the unnecessary brackets shaved off, and with only two or three little nicks. Bring on the aftershave and the Kleenex bits! Next stop… the hot tub.
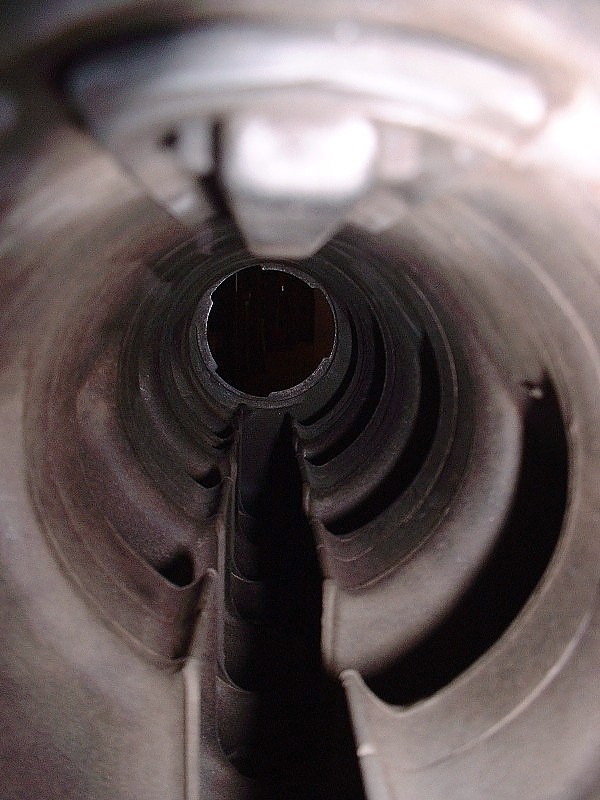
Here's a close up (albeit a little out of focus) of the plenum insides:
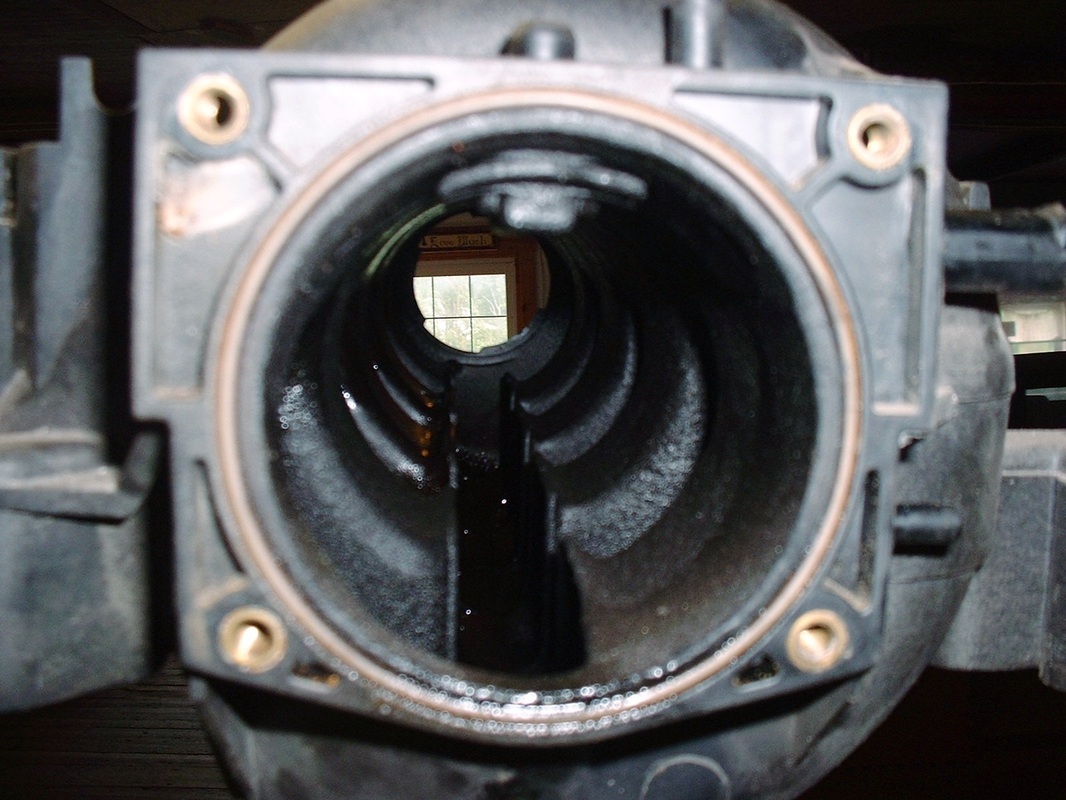
I dropped it off at the same place that rebuilt my cylinder heads, since they have a steam cleaning machine that uses only hot water and detergent rather than chemicals which I feared might melt my plenum. Once it was clean, it was a lot easier to see the internal configuration of the intake runners. All the runners open into the common central part of the plenum at the bottom. They curl around a total of about 270* of which the first 180* are circular, and the last 90* gradually straighten out into a flat run into the intake port:
It was finally time to drop it off at the paint shop for final smoothing and lipstick. The paint shop recommended to do it the proper (read:expensive) way with a special flexible epoxy filler directly on the plastic. Here it is with the body filler applied. It’s the same stuff they use to fill the flexible bumper covers on cars. Apparently there are around three different levels of flexibility of the stuff… they used the stiffest:
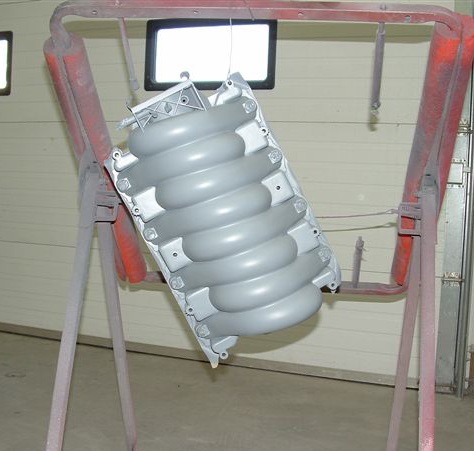
The body man who I know to be very experienced and also a perfectionist, said it took him 5 hours to properly shape the filler to the contours of the runners. He had originally thought it would take about two hours. With it fully shaped, the next step was the application of an epoxy primer. Here you can really see how much cleaner the lines of the plenum are:
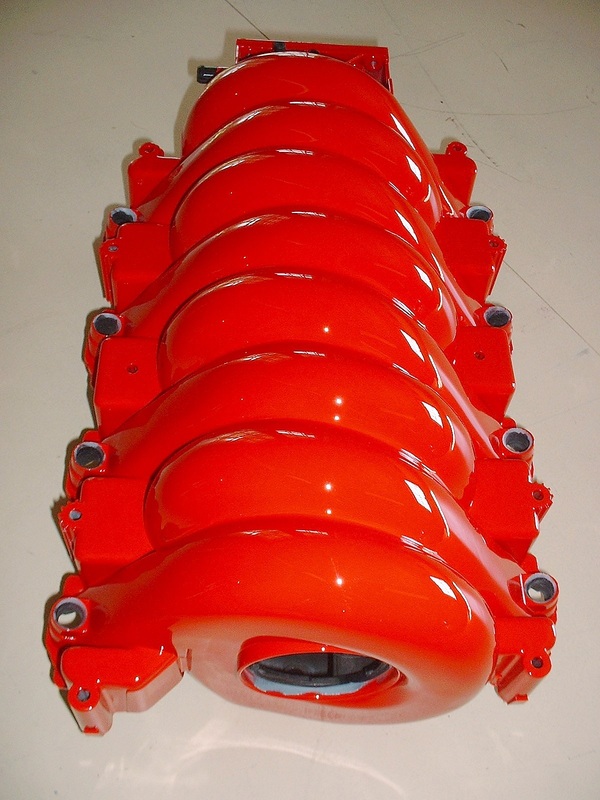
I had searched for just the right colour when I saw a late model Mazda in “True Red”. The color code is A4A and is a basecoat/clearcoat system. This thing looks like a whole bunch of Rolling Stones lips all puckered up and ready for a big wet kiss… something the painter thought I would give him when he saw how happy I was at the way it turned out:
Before I could install the plenum on the block, I had to finish up the wiring to the starter and the knock sensor since they're in the valley underneath the plenum:
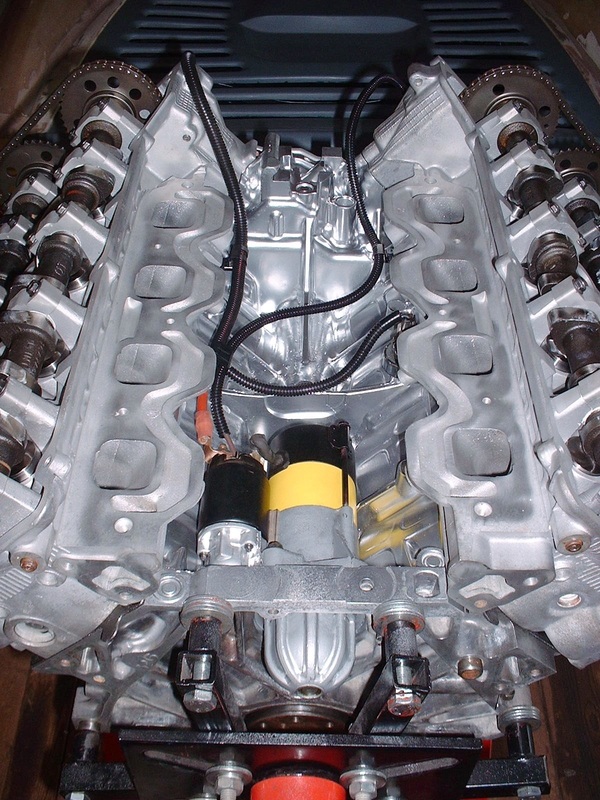
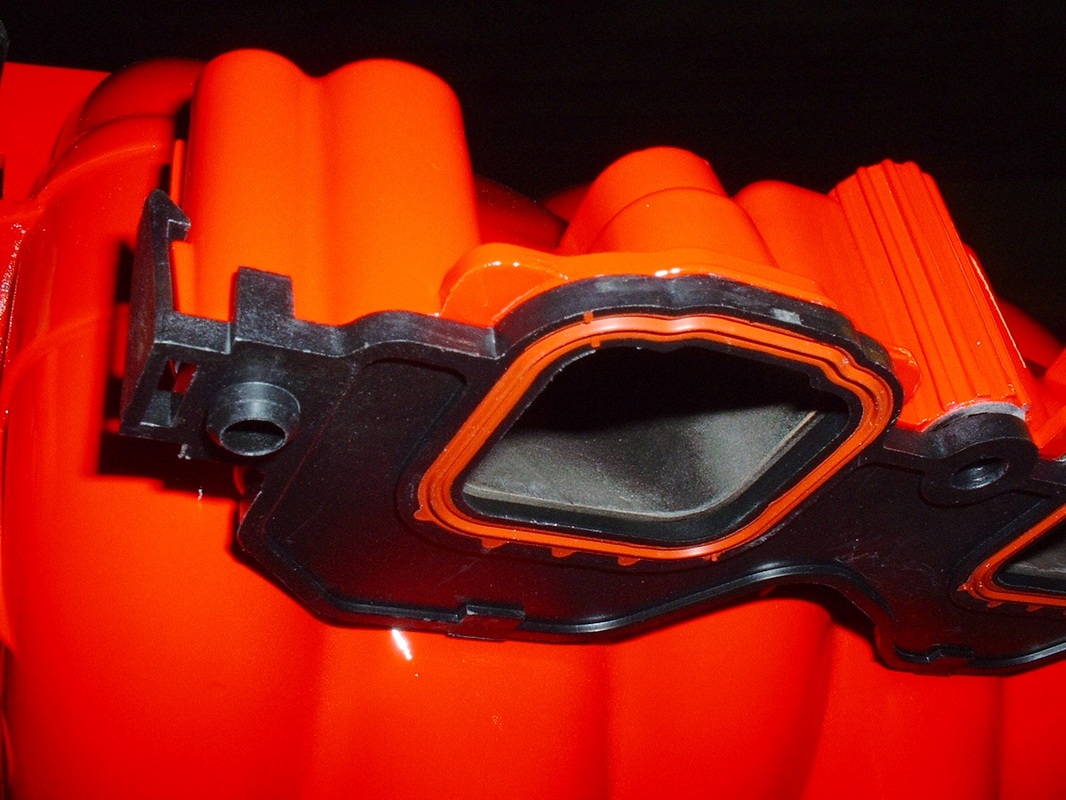
New intake seals were included in the FelPro Cylinder Head Seal Kit. They’re an ABS-type plastic with neoprene-like injected seals around the base of each runner:
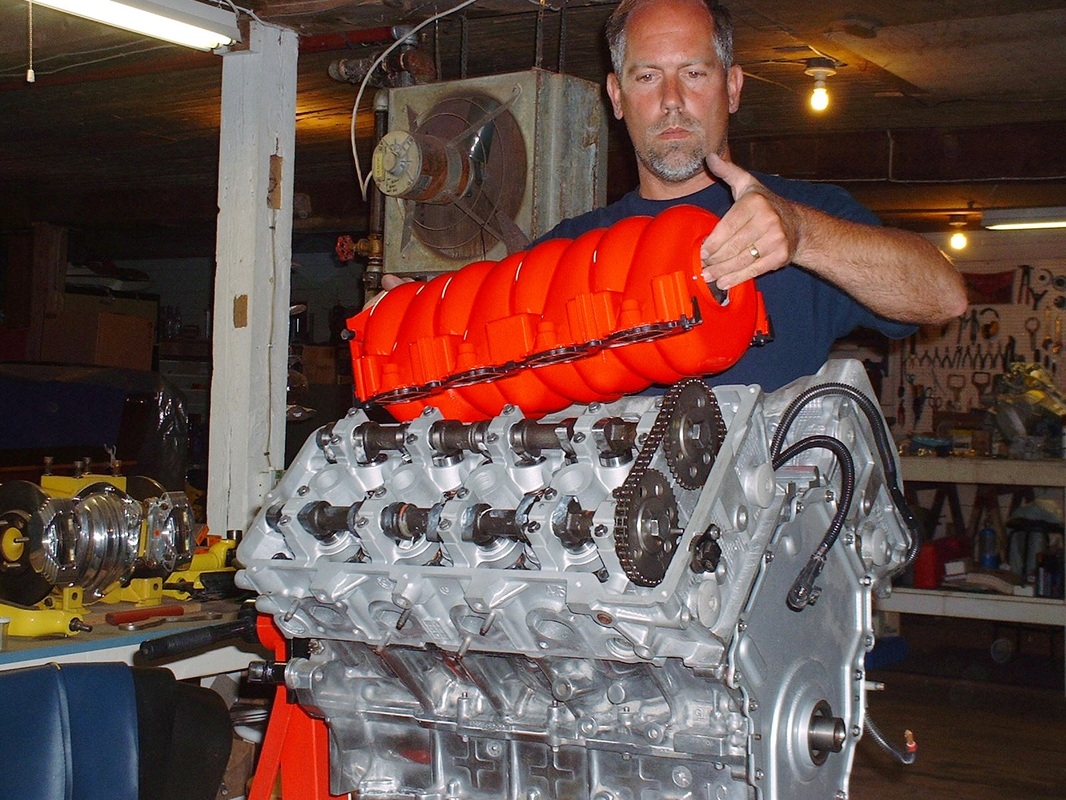
Finally it was time to install the plenum. It just lowered straight down onto the intake port “shelf” of the two heads. It's held in place with ten bolts, some of which need sealant applied to the threads because they penetrate into the coolant passages:
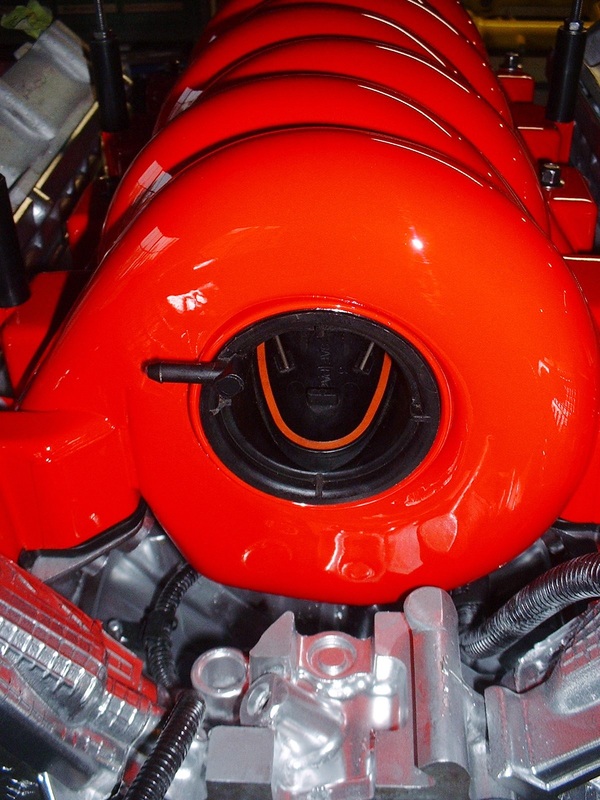
The last thing to do was to install the freshly cleaned backfire protection valve:
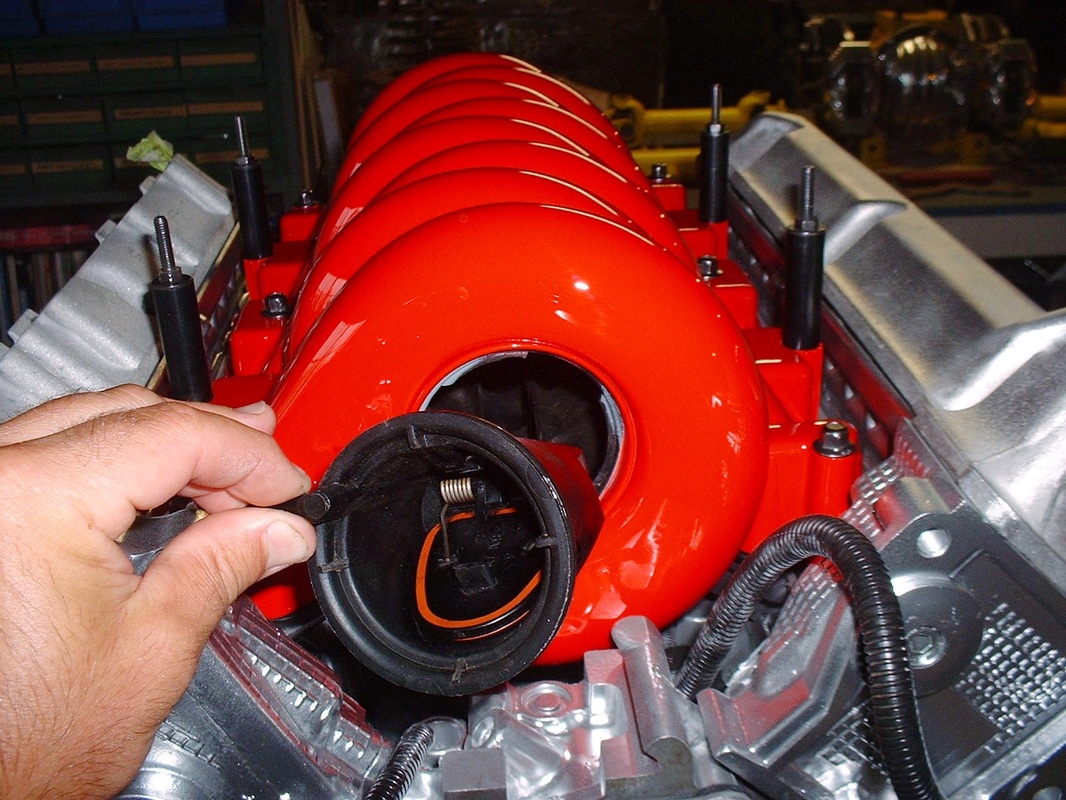
Here it is snug in it’s hole, hopefully never to be needed:

 RSS Feed
