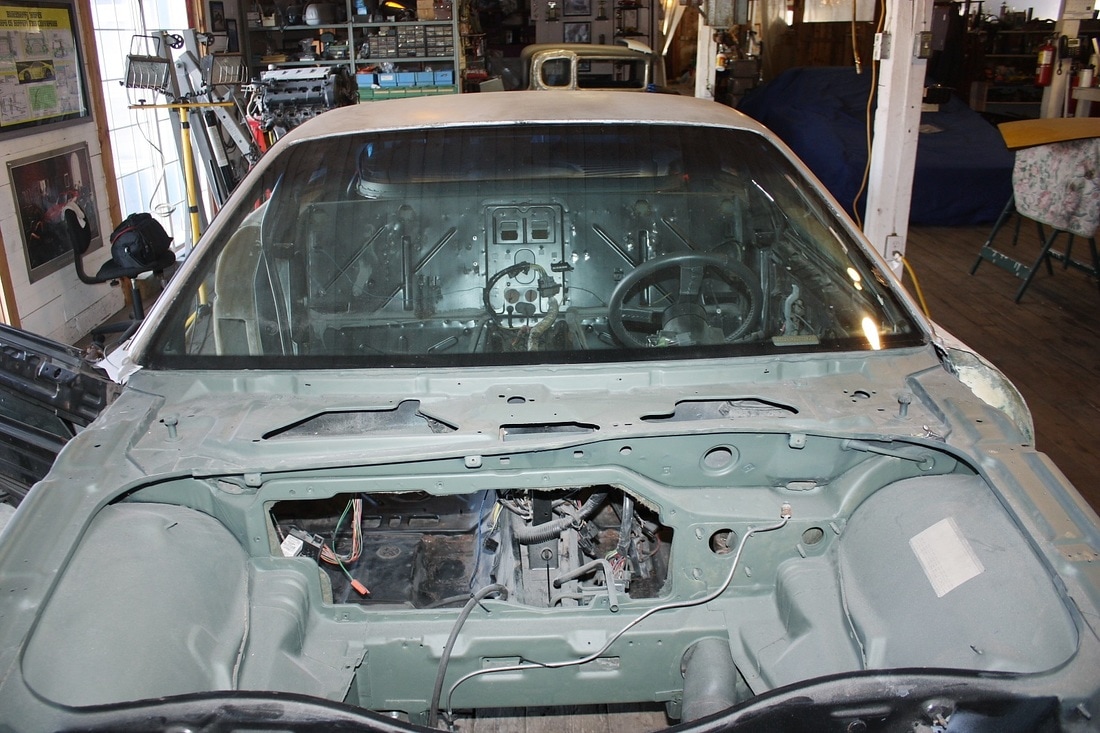
One of the tell-tale signs that give away many Fiero-based replicas is the use of the OEM windshield with its only slightly rounded base, barely extending beyond the A-pillars. Here's a look at the front view showing how the base of the windshield is almost square:
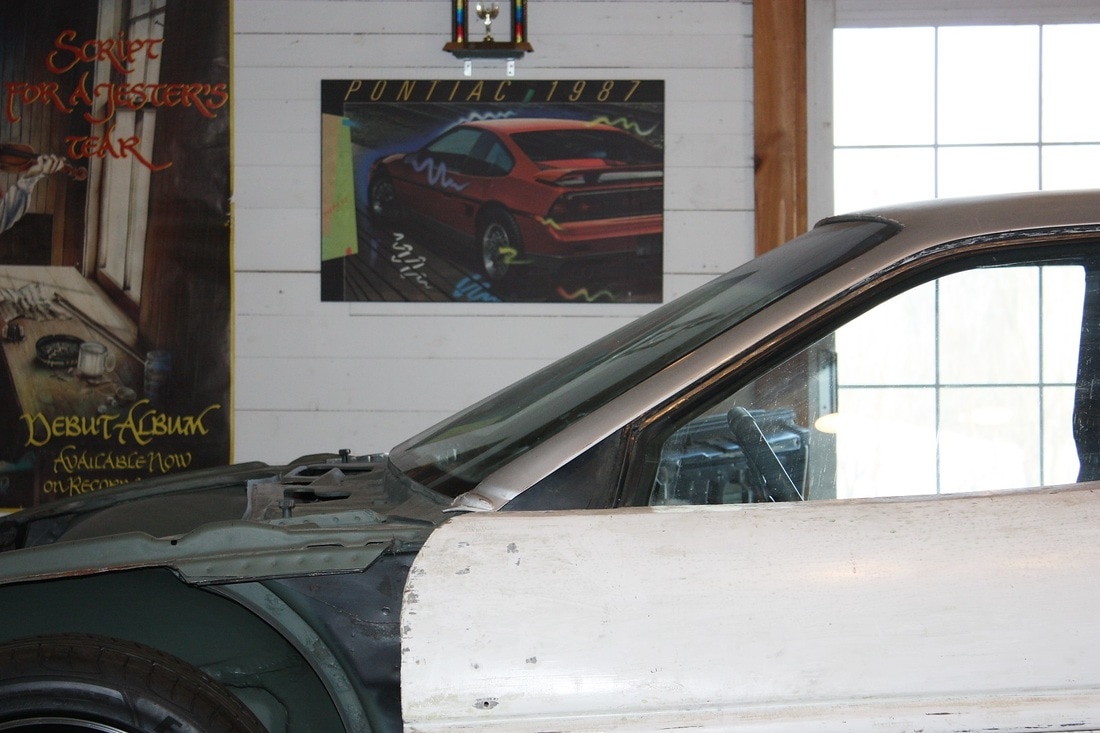
From the side view, the base of the windshield centreline extends about two inches forward of the A-pillars:
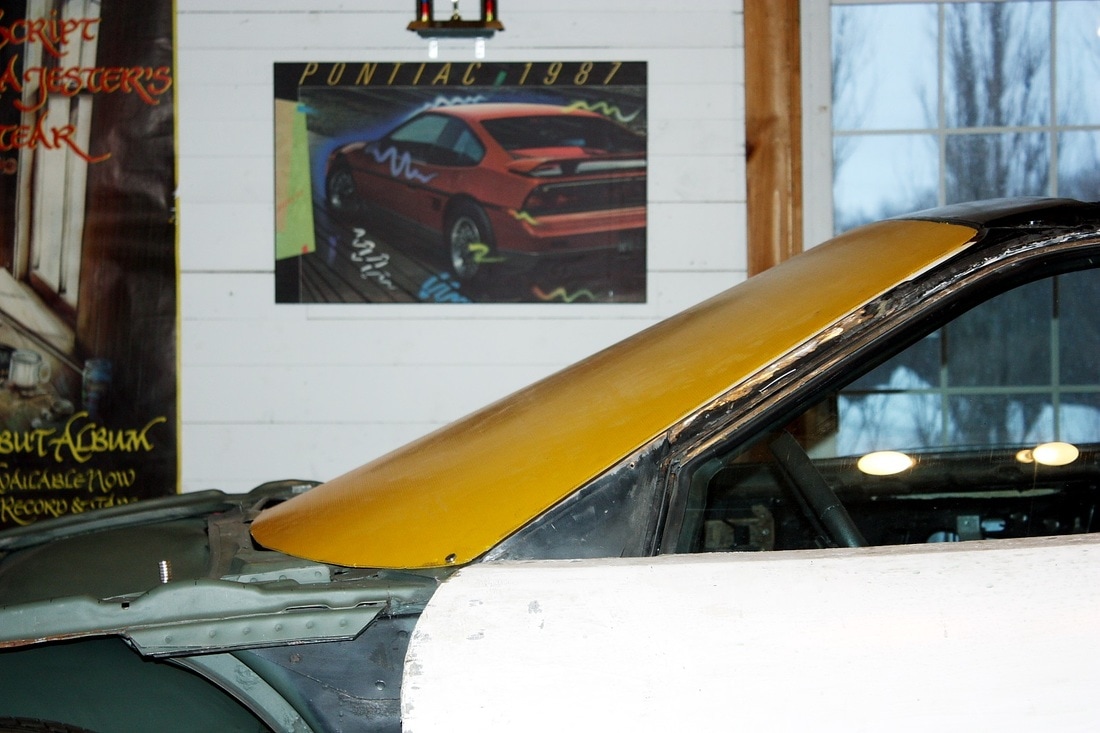
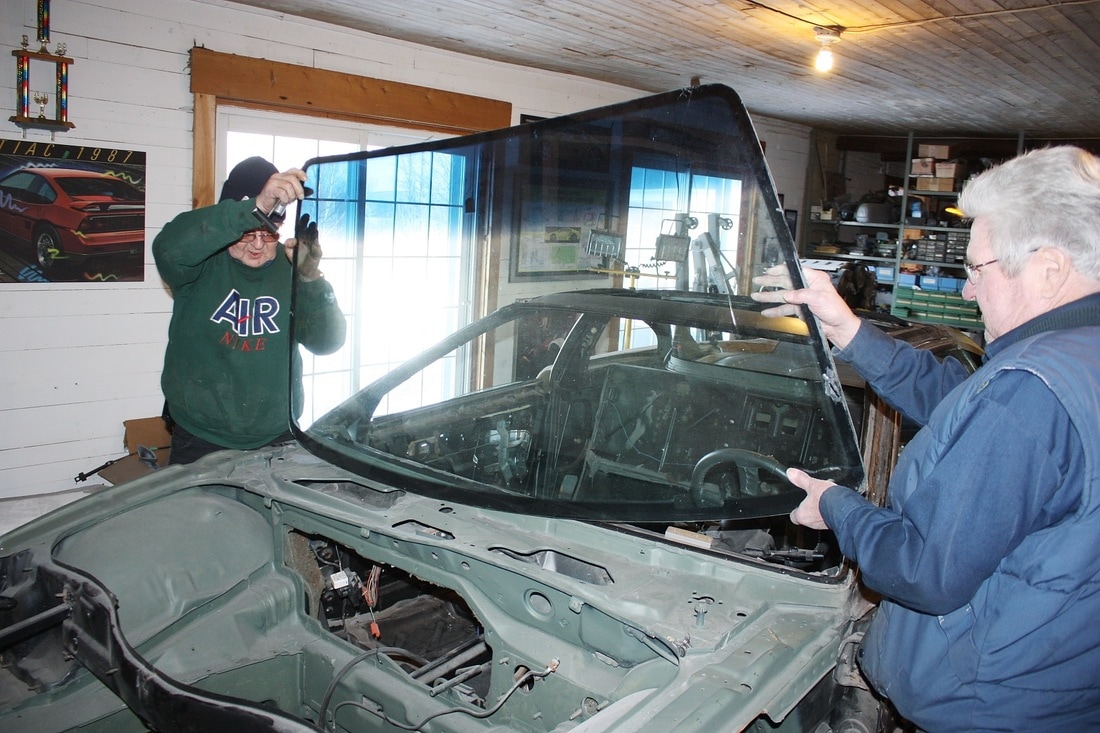
Ferrari windshields on the other hand are usually quite curved and extend significantly further forward of the A-pillars. Luckily for me, I stumbled across a deal on some custom-made windshields made specifically to fit the Fiero, yet extend a full 7 inches further forward at the base. My friend Graham and I each bought two, and made Coroplast templates to make prototyping work much easier and safer than moving the glass around. (Graham's F355 Convertible build thread can be found at www.ns355.weebly.com):
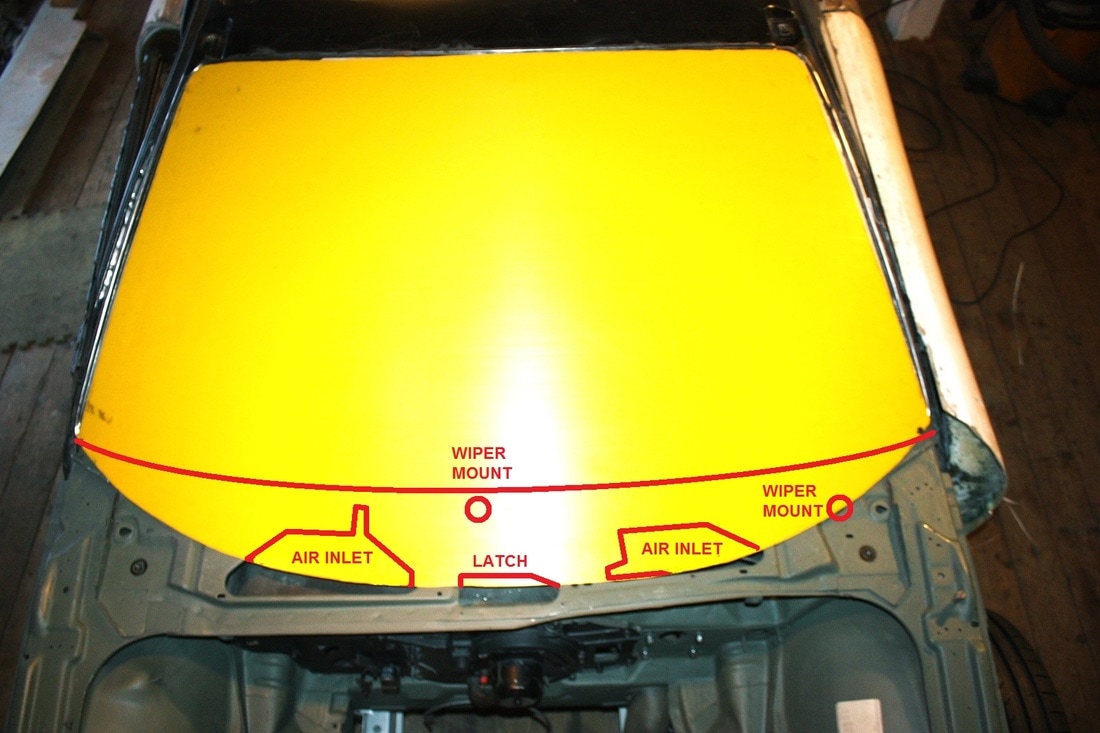
While the new windshield will look great, it comes with a fairly significant set of consequences. The main issues are that the new windscreen reaches so far ahead it interferes with the stock wiper arms, HVAC inlets, and hood latch. And of course a new lower windshield frame is also required:
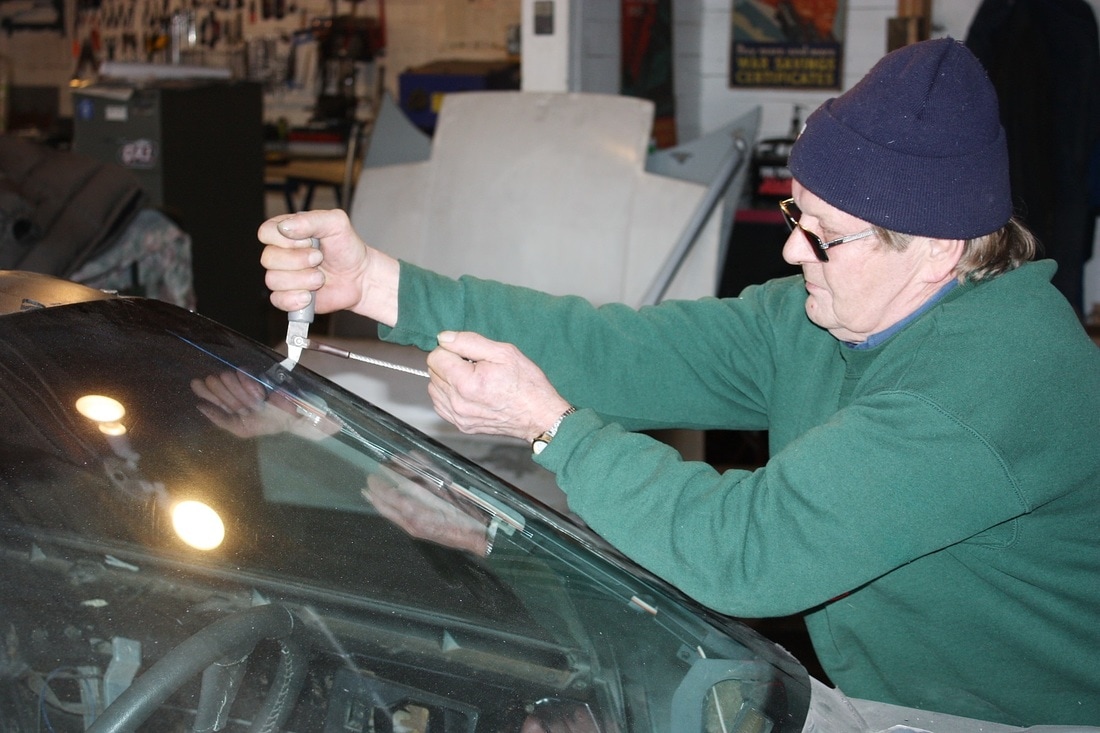
I wasn't going to let these issues deter me though, so the first step was to hire a glass pro to remove the old windshield. Here, he's cutting the adhesive with a special tool:
This windshield was cracked so it needed replacing regardless. Once the butyl adhesive had been severed, the windshield popped out like nobody's business:
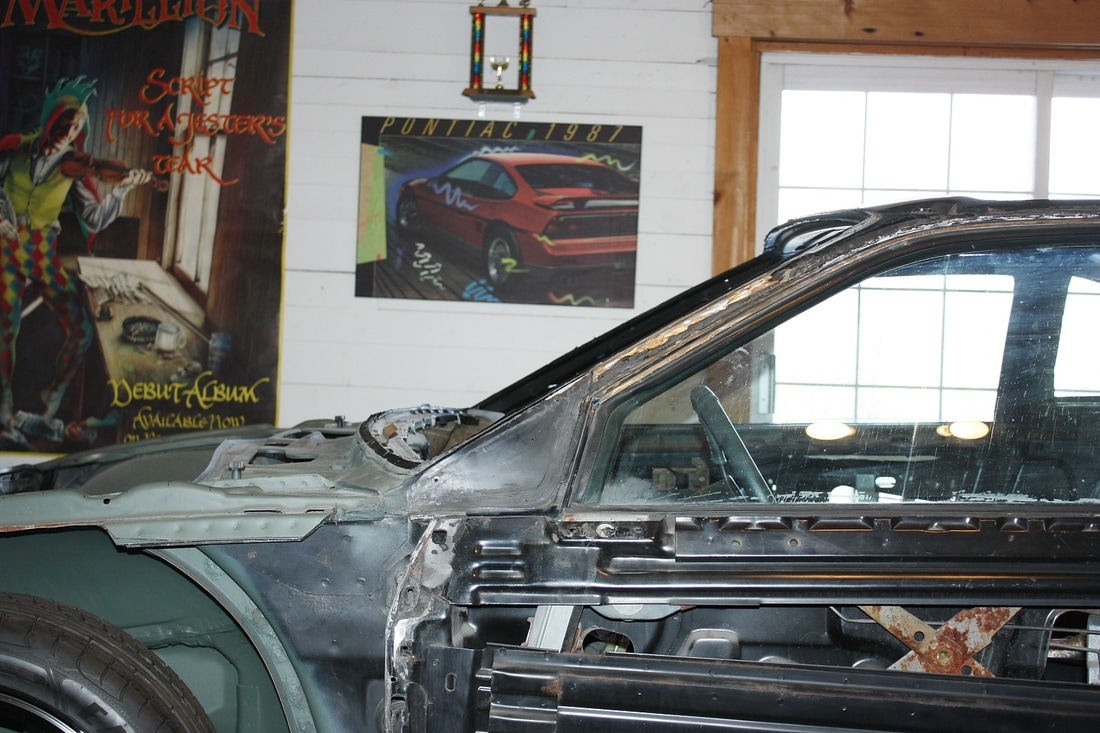
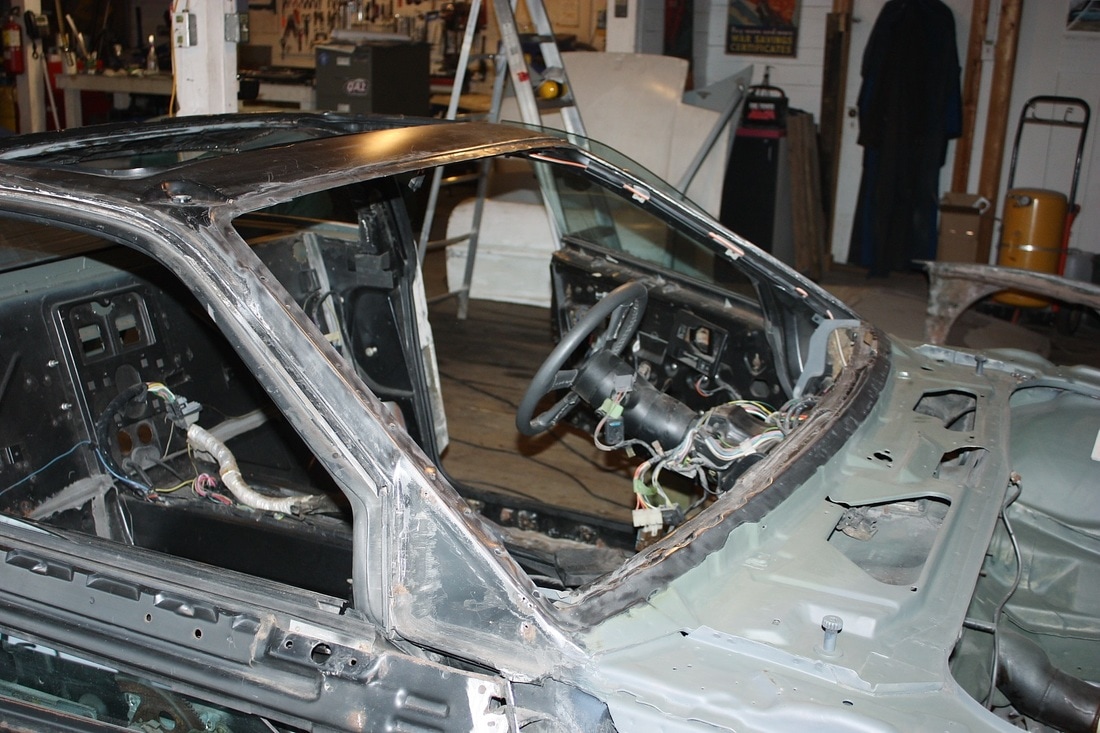
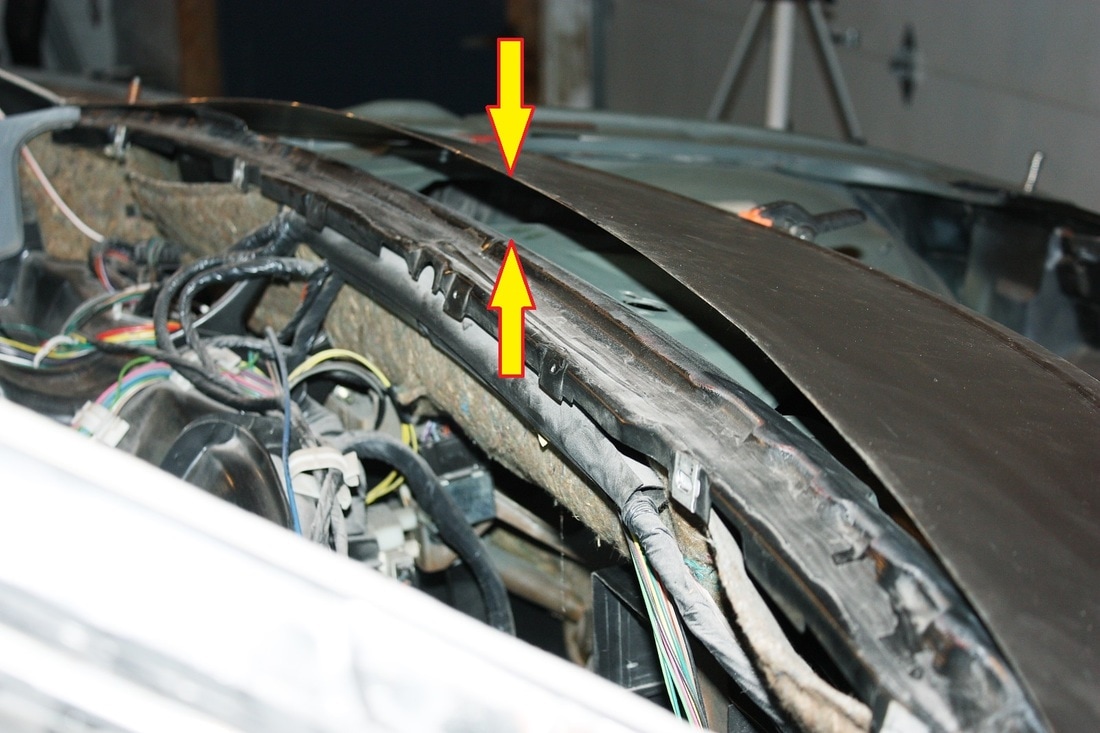
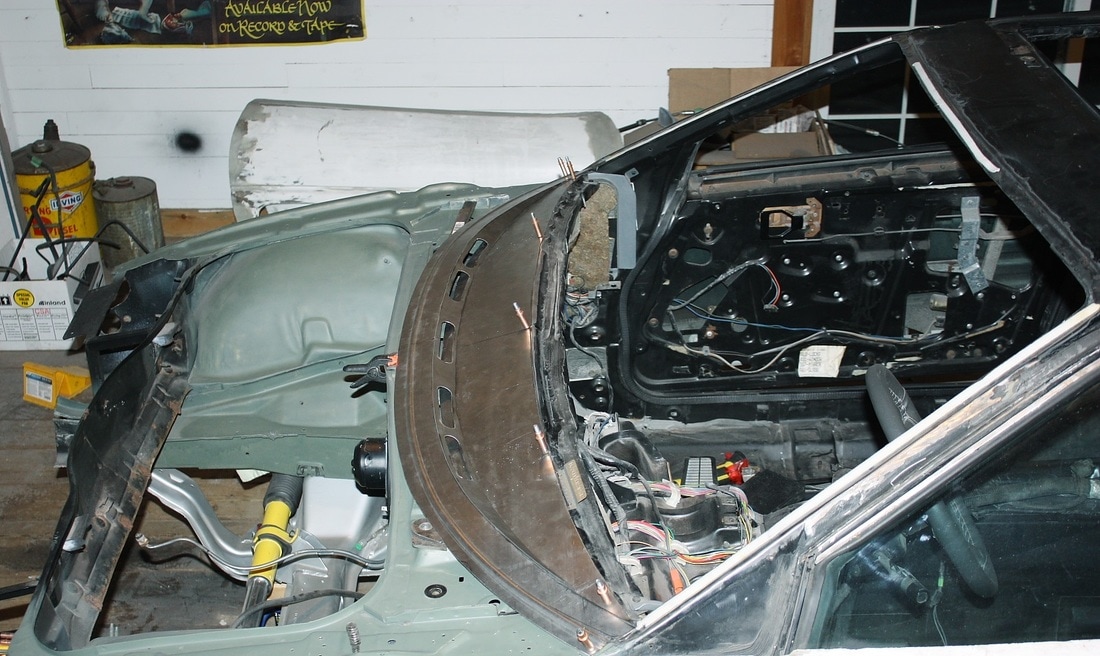
It's amazing how bare and empty a chassis looks without a windshield! Here's the side view once again with the glass removed. Notice how much more substantial the mounting base appears in this view... clearly a structural element.
I paid the guys $20 to cut out the old glass, so obviously I was left to my own devises to clean up the frame. The bulk of the butyl adhesive came off pretty easily:
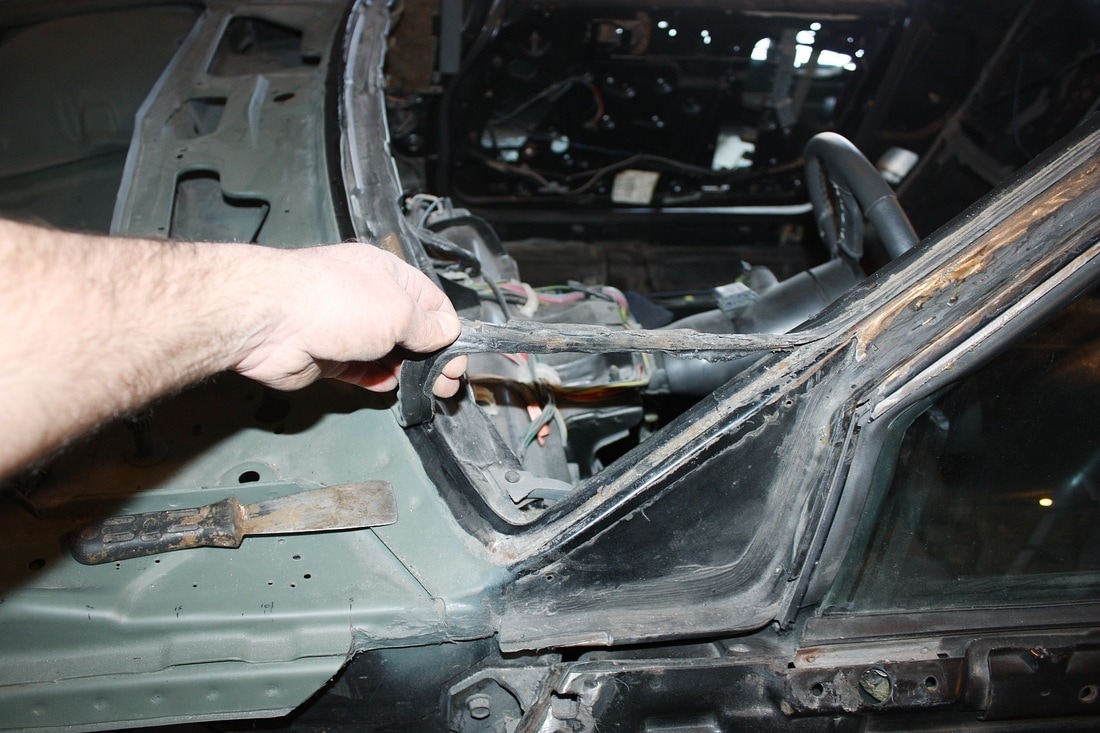
I had to scrape off the remnants with a razor blade and finish off with a gnarly wire wheel in my angle grinder. Here's the cleaned up windshield frame ready for whatever results from brainstorming the interference issues:
Since the wiper, hood latch, HVAC, and lower windshield frame are all physically interconnected by the cowl, I initially spent a lot of time contemplating a variety of half-baked ideas trying to solve everything at once. Then I realized that the design of the new lower windshield frame had to come first. Everything else would have to be adapted to fit around it.
I'm not the first guy to use an extended windshield on a Fiero, so I searched the internet for examples of what others had done before me. Of those that posted any information at all, every one riveted or glued a custom-laid fibreglass tray to the cowl area to act as a windshield mount. I didn't like the idea since anchoring the windshield to fibreglass seemed structurally unsafe. I did borrow the idea to make a tray out of metal though:
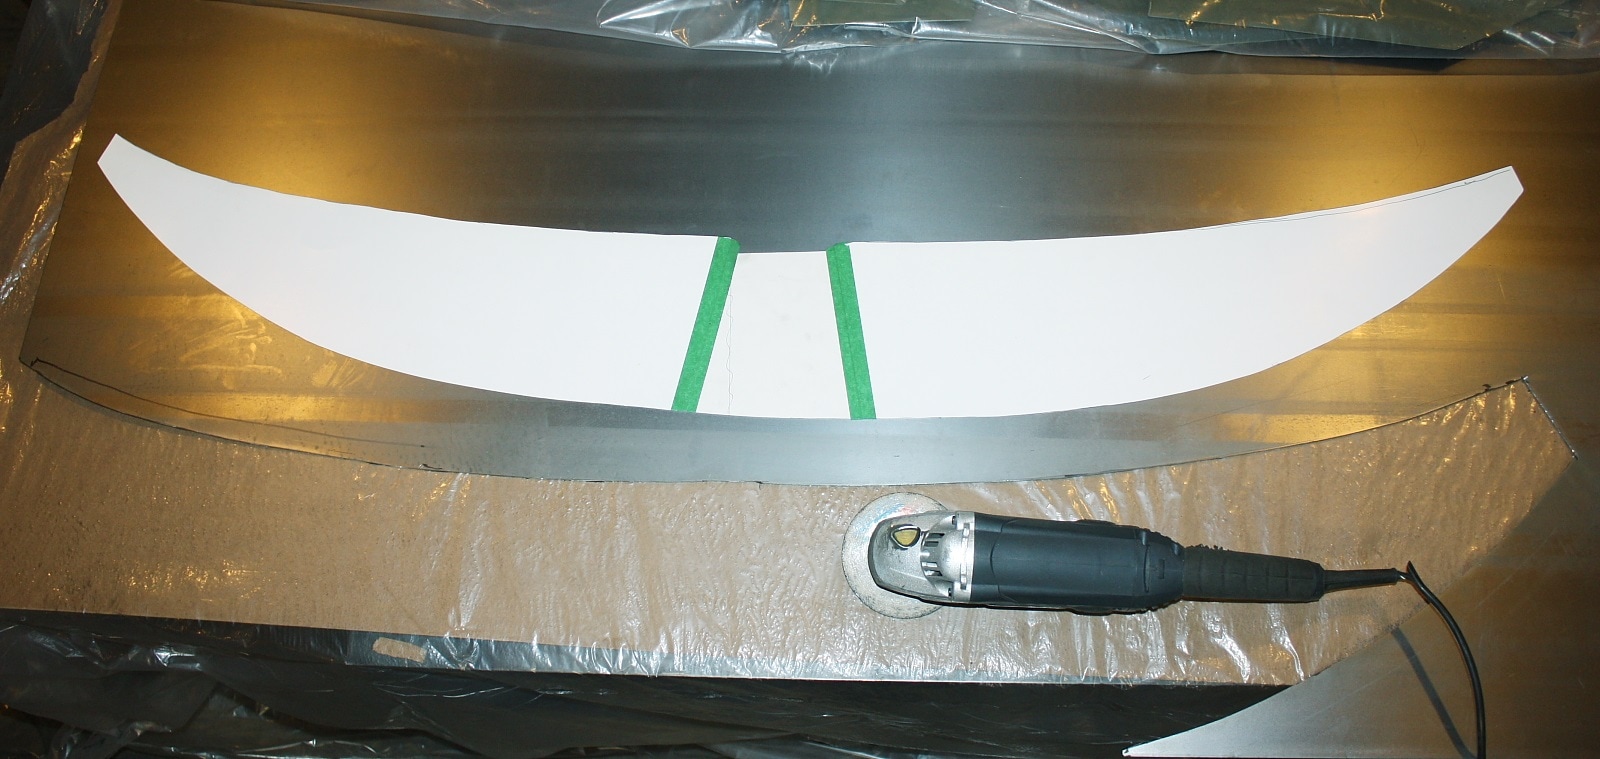
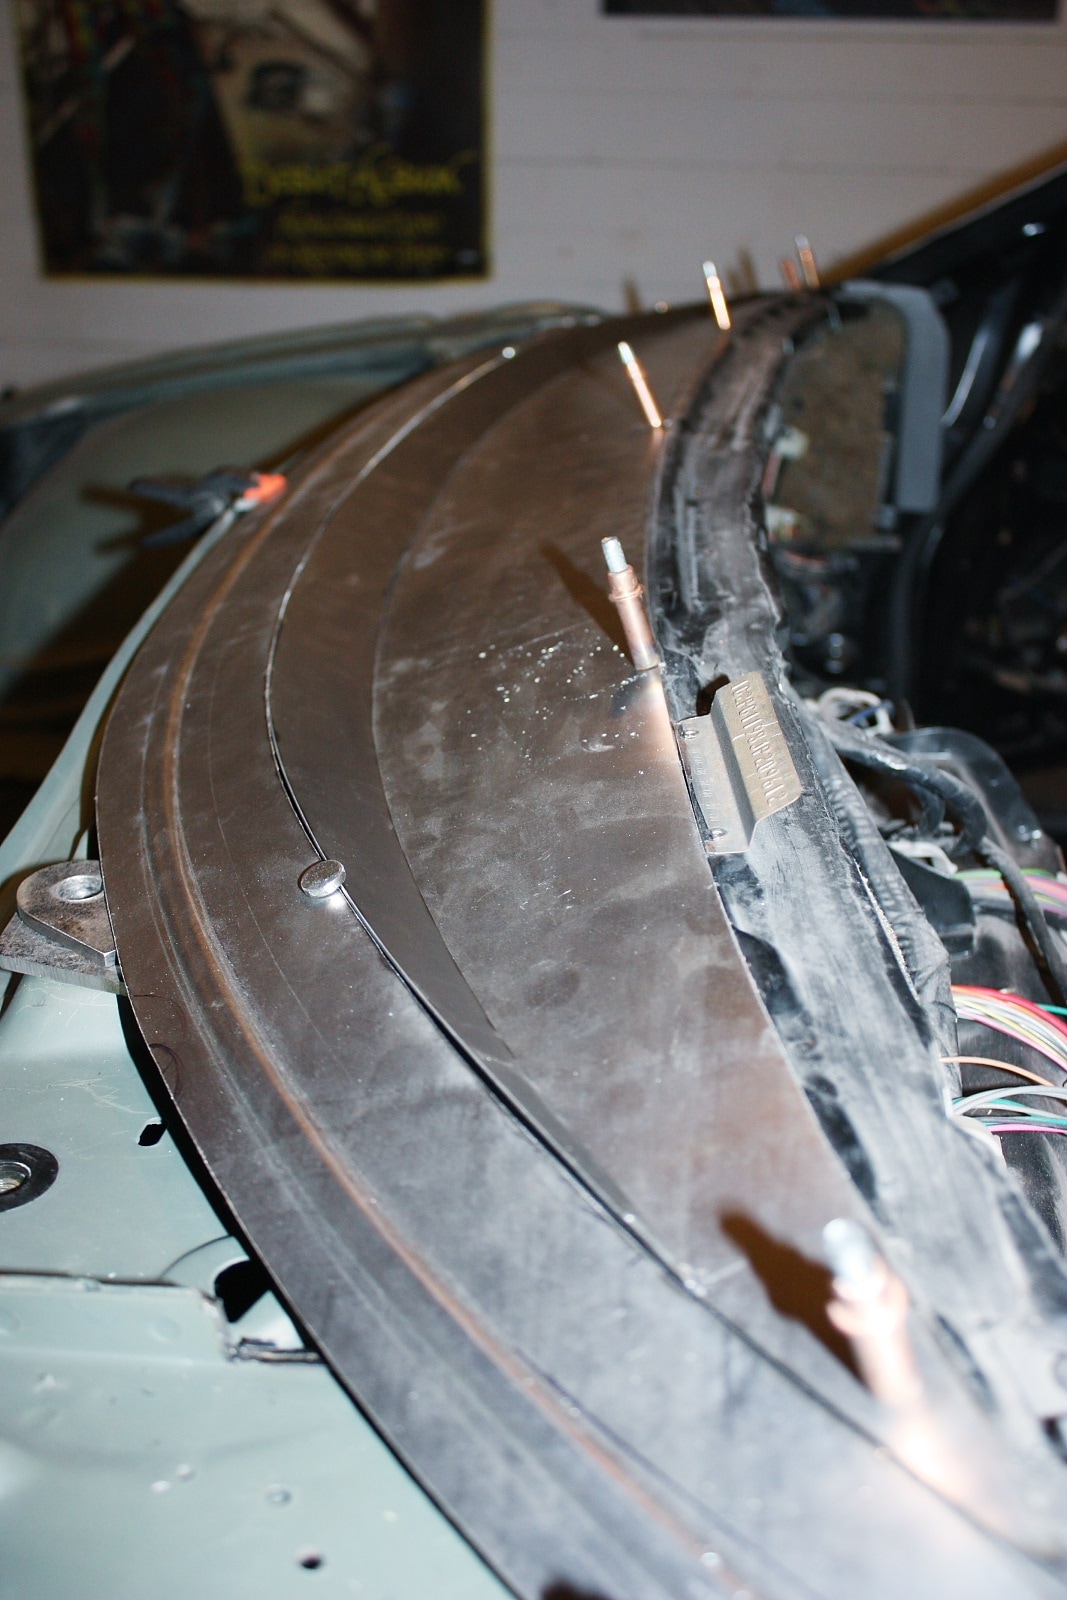
I laid out some cardboard on the cowl, then set the windshield in place on top of it, and traced the outline of the base to make a template. After cutting it out of 18 gauge sheet metal, I rolled a bead in the leading edge for the base of the windshield to have something to butt up against:
I quickly found that when the leading edge of the tray was angled to suit the windshield rake, the trailing edge bowed up and away from where I was hoping to weld it to the chassis. A one piece tray would have required some serious stretching and shrinking to fit properly... something I wanted to avoid for simplicity's sake:
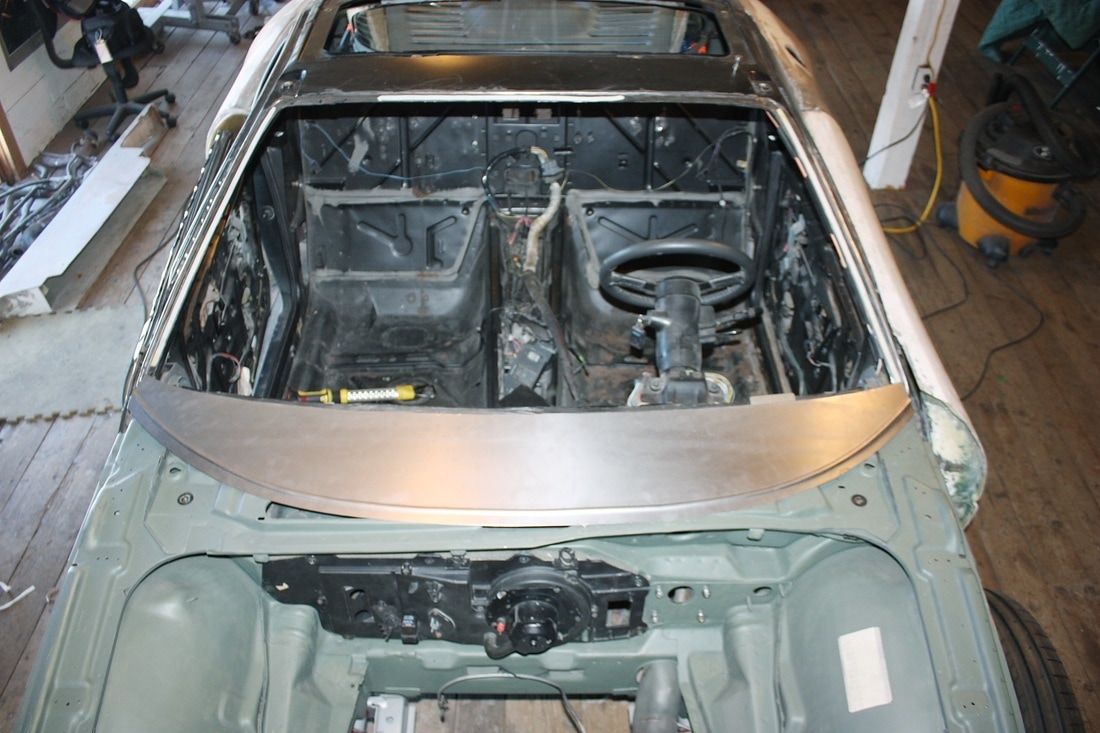
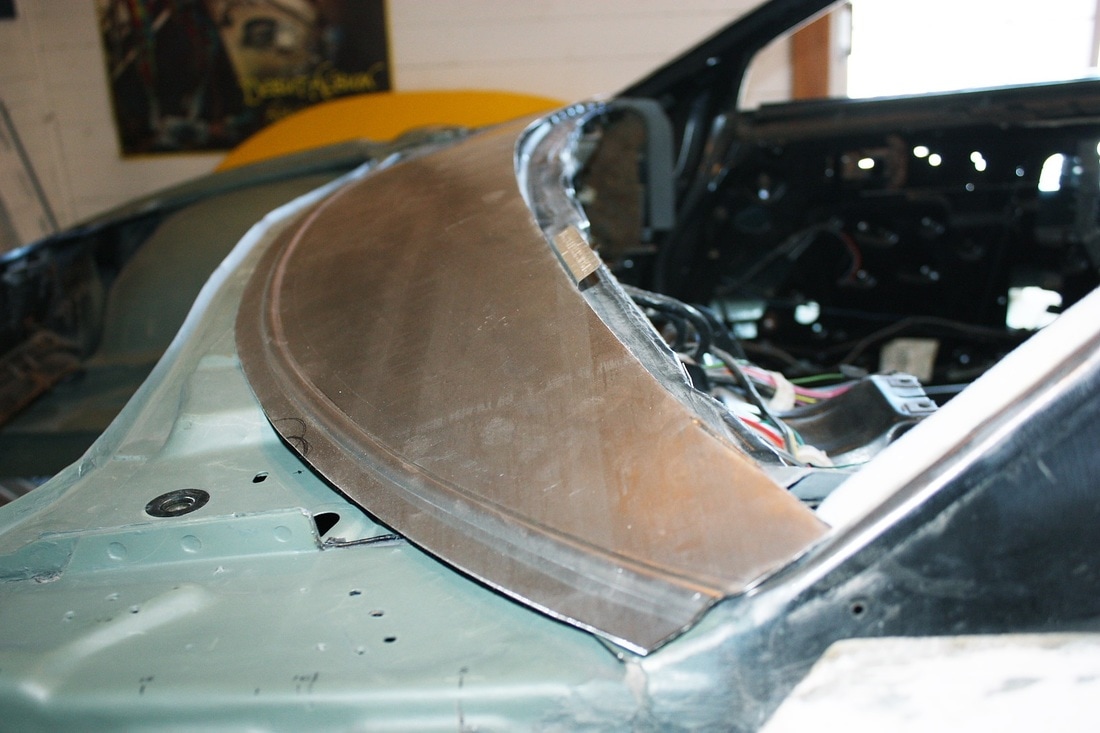
This led me to a eureka moment. I simply sectioned the tray into two pieces, leaving the leading edge of the tray with the rolled bead at the correct rake to mount the windshield. Then, I let the aft half of the tray drop to a natural angle with part of it resting on the OEM windshield mount, and part of it on the lower cowl. Then I bridged the gap with a long, thin, crescent-shaped filler panel:
The benefits of this design are four-fold:
1. it does away with the need for a compound formed tray;
2. it allows the windshield to be anchored to steel;
3. it reduces the wedge area inside the cabin between the base of the windshield and the dash where small objects and debris can be very difficult to remove; and
4. it may solve the issue of relocating the interior defroster vents to the base of the windshield
Developing the fourth point further, I had read on one website that some people had difficulties defrosting the lower half of their extended windshields using the stock defroster outlet on the dash. With this in mind, I quite happily found that my new crescent shaped filler panel lined up perfectly with the air inlet holes in the cowl. Perhaps with a bit of ingenuity I may be able to repurpose the inlets to air outlets for the defroster.
That's the subject of a future post, but at least for now I could make the necessary modification to the filler panel to accommodate the idea if it turned out to be fruitful:

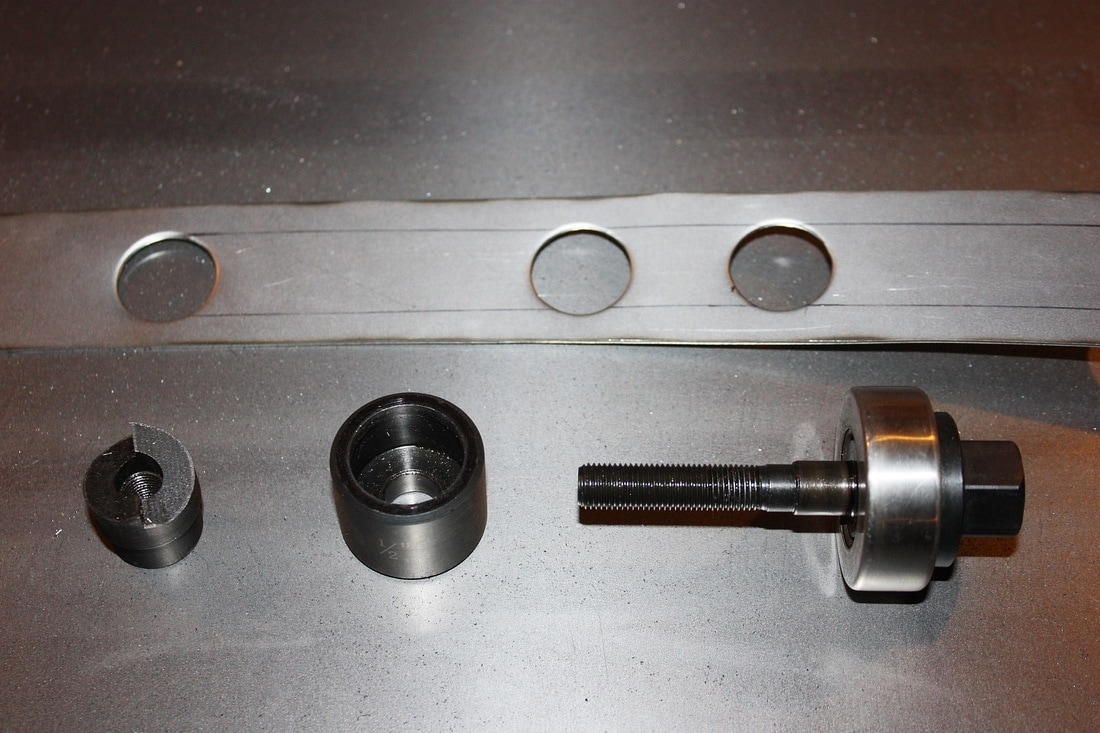
I transferred the locations of the two air inlet holes and the latch hole onto my crescent shaped dash panel, then used a 3/4" metal punch to define the edges of the slots I was about to make:
Once the holes were punched, I connected the five pairs of holes into slots by cutting out the material in between them:
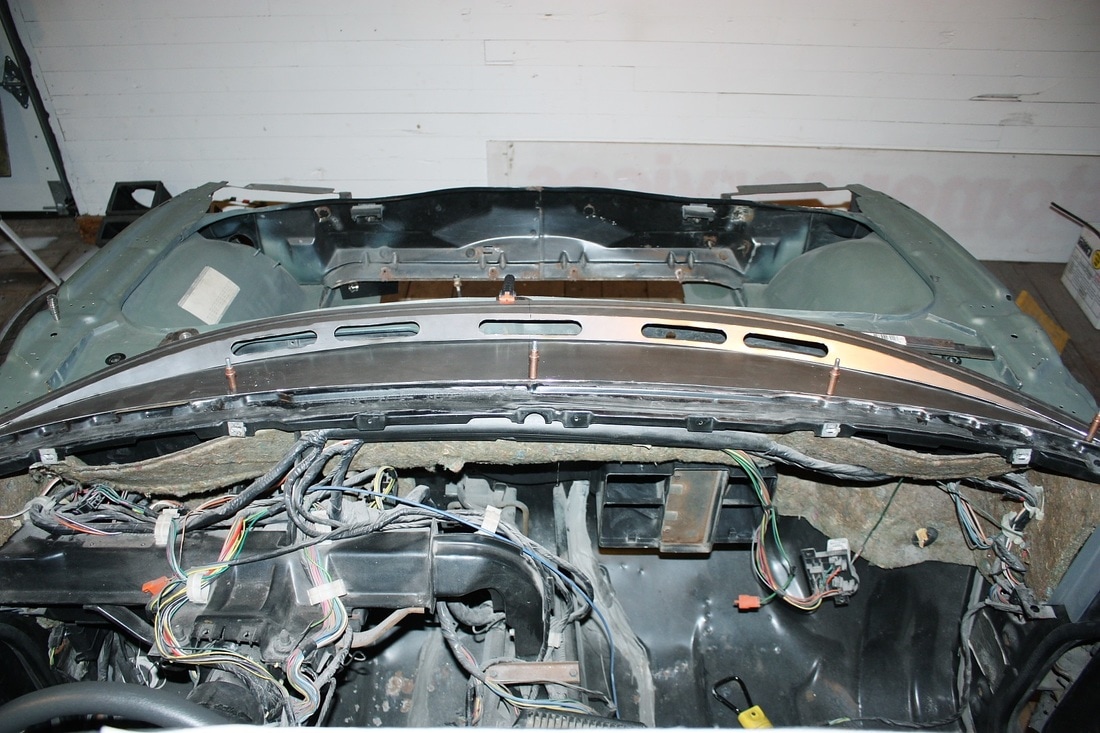
With all three sections of the new extended windshield tray mocked up, the design was taking on an air of completeness... though it was still far from it:
I still needed to find a way to secure the leading edge to the irregular shaped cowl underneath it. That'll be covered in my next post.

 RSS Feed
