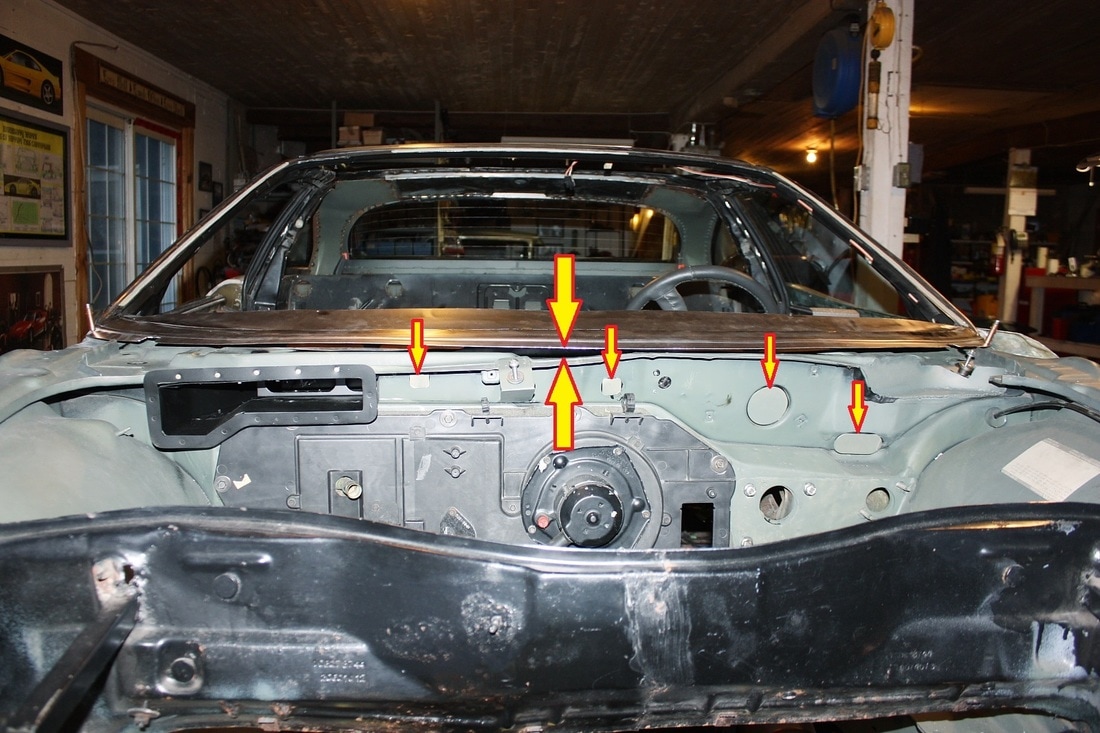
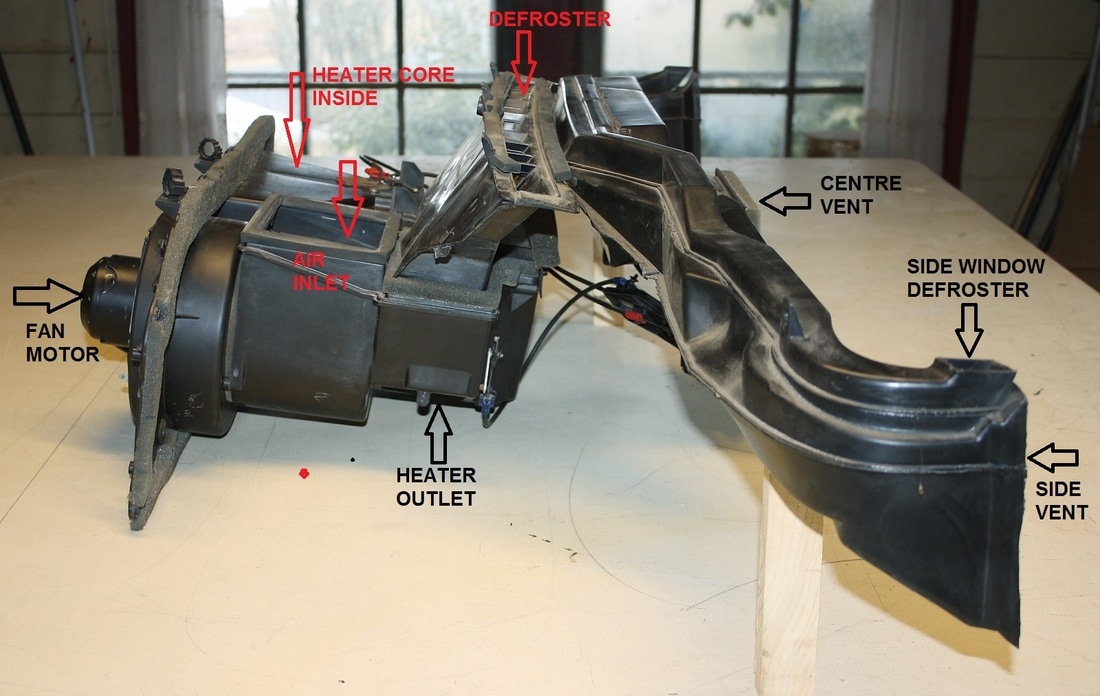
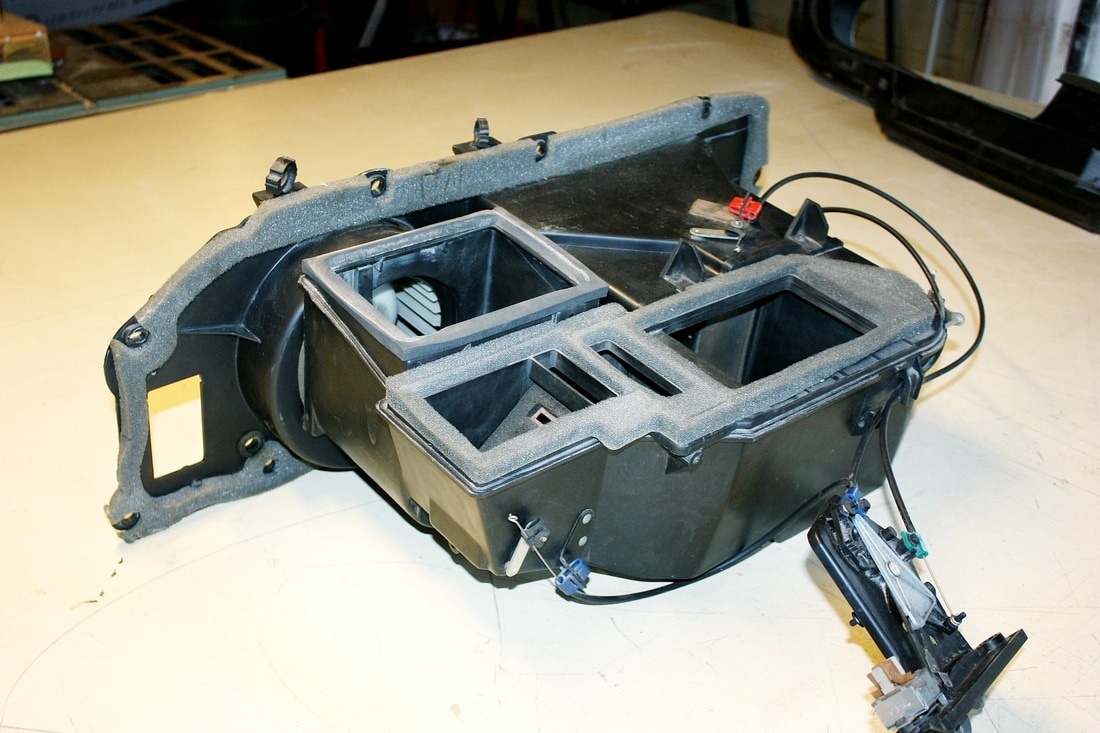
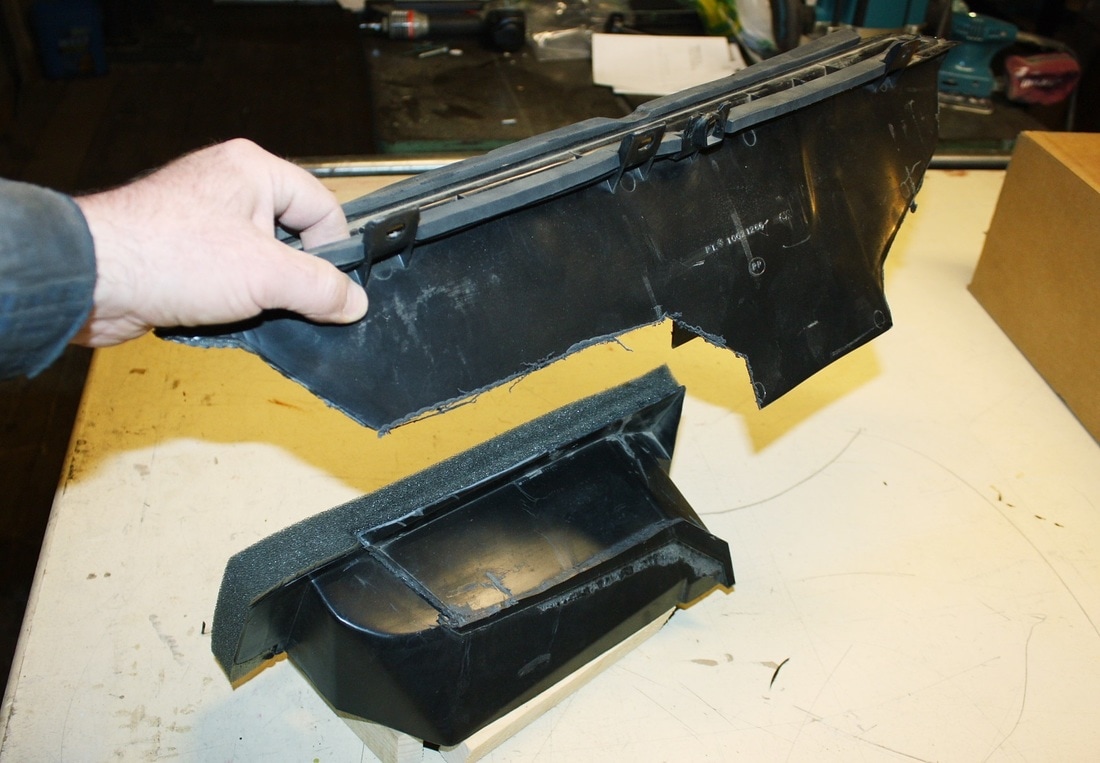
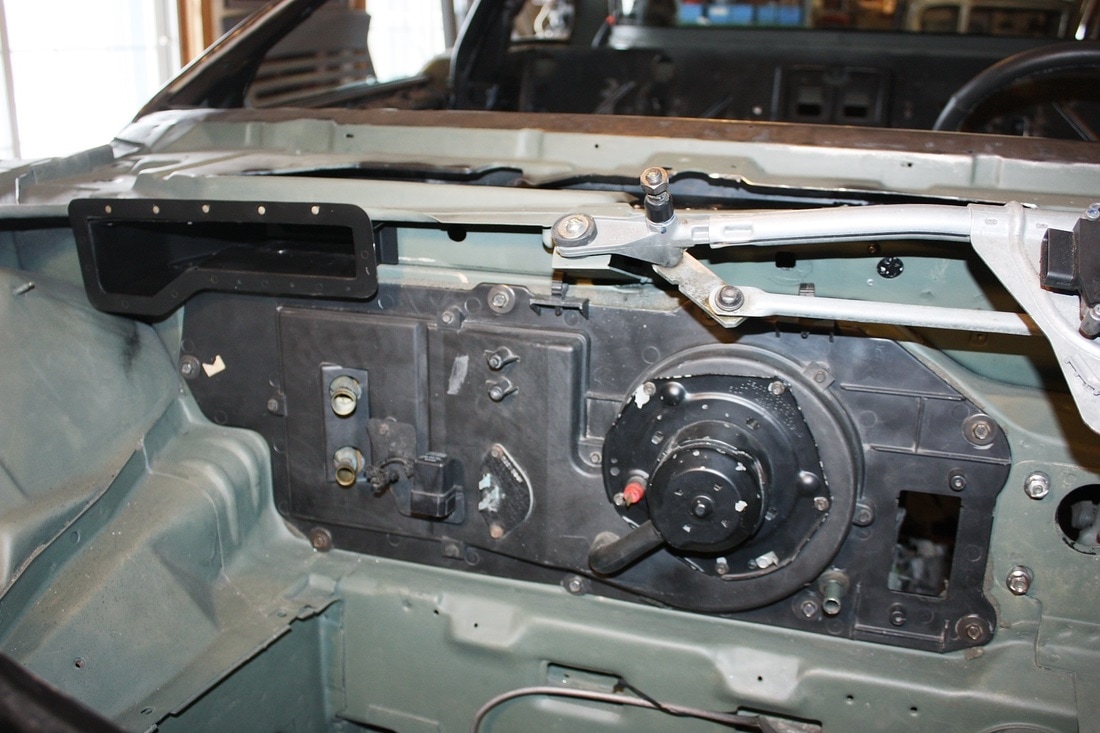
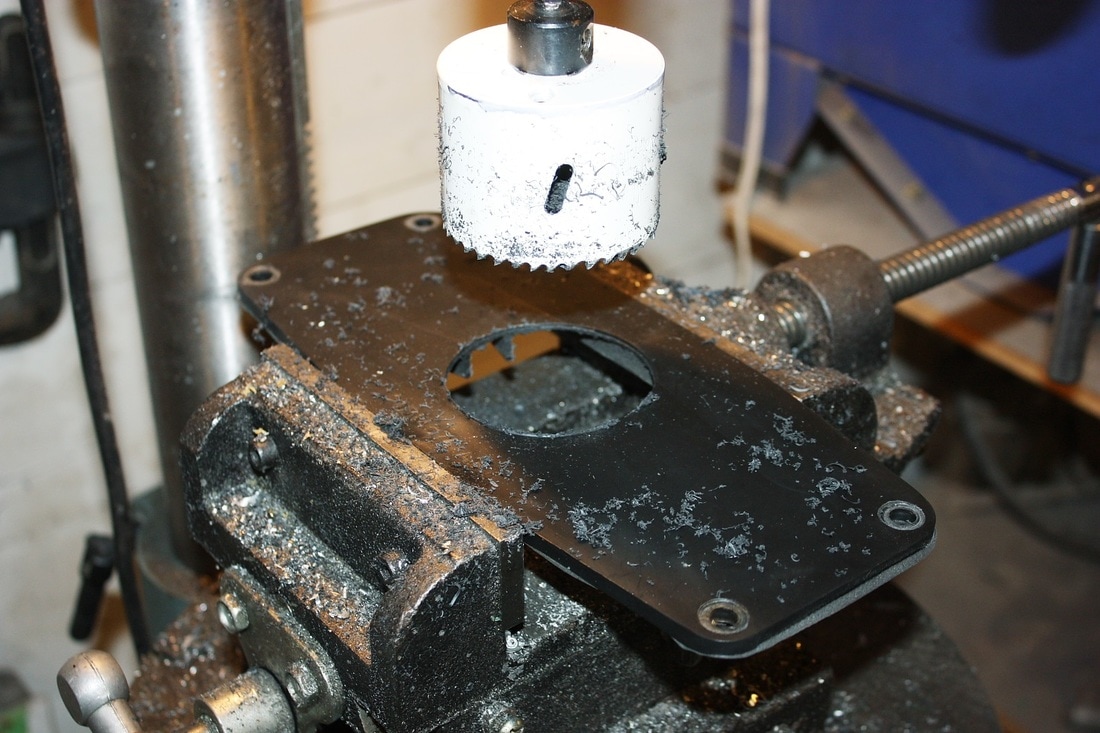
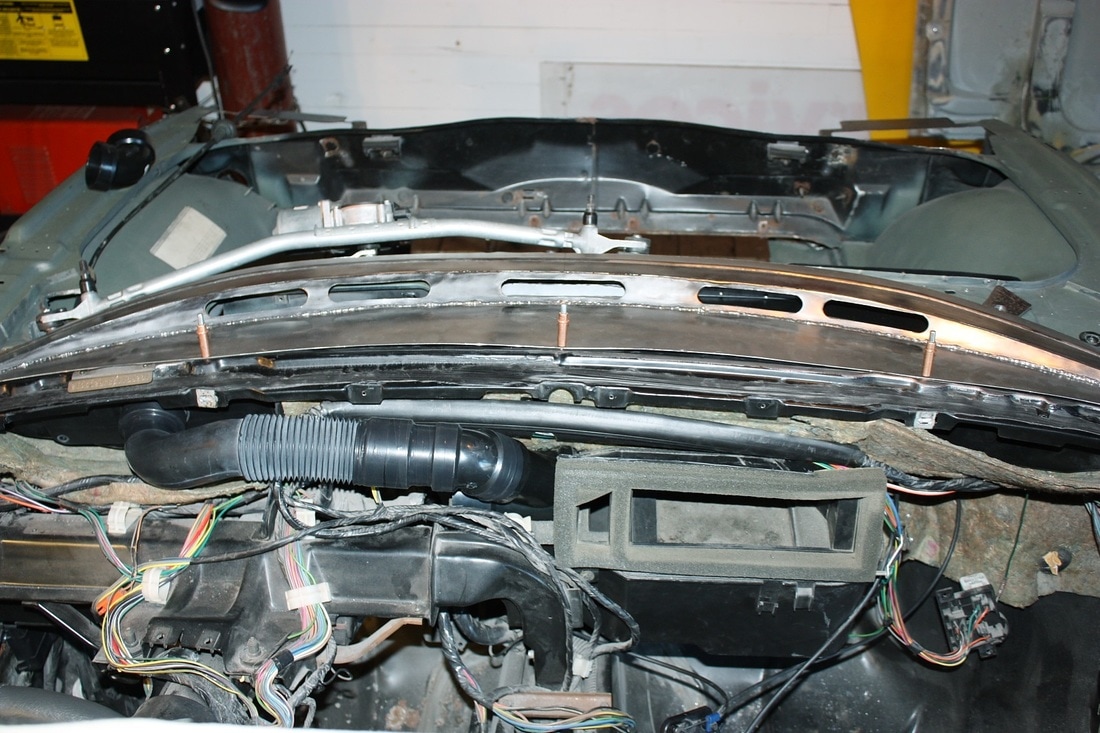
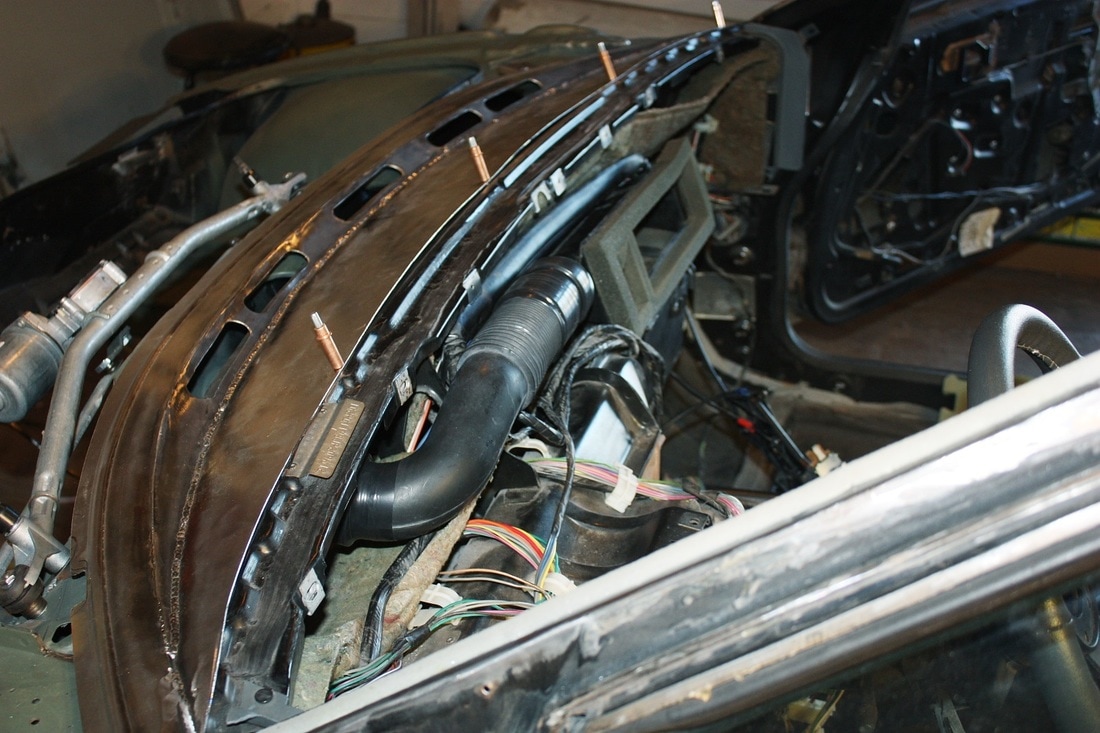
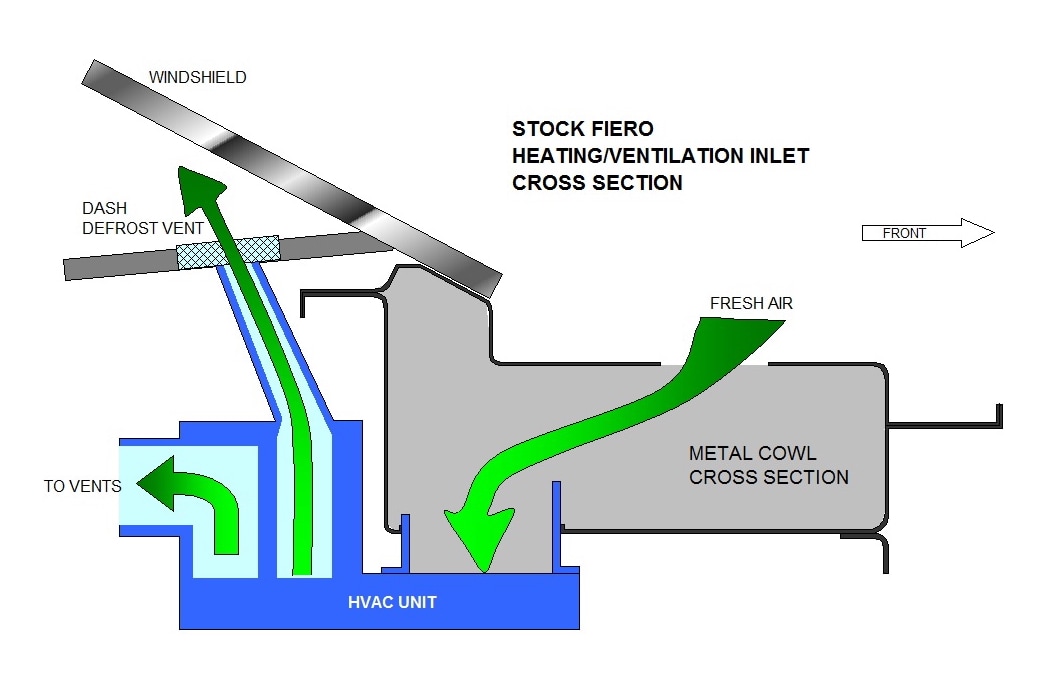
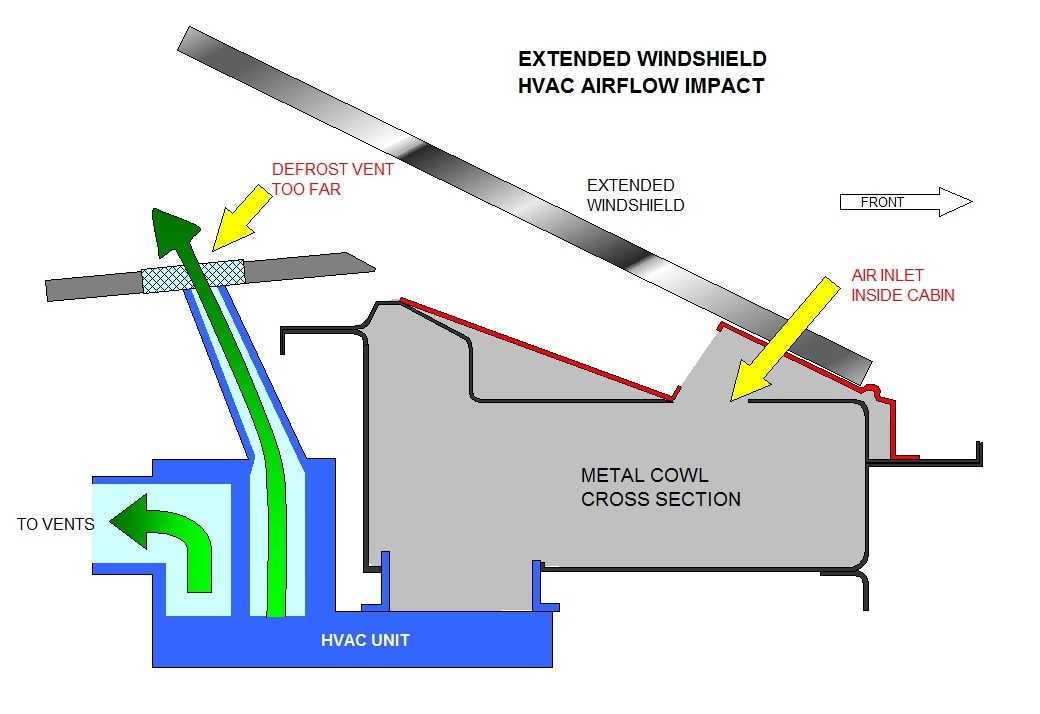
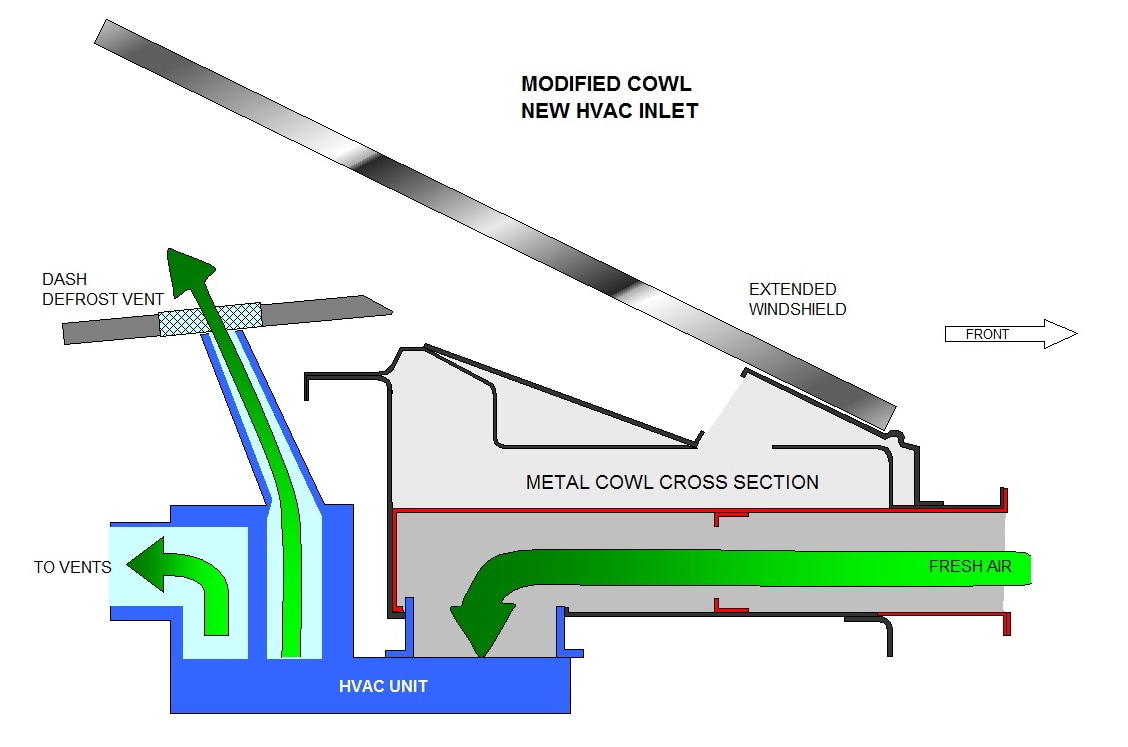
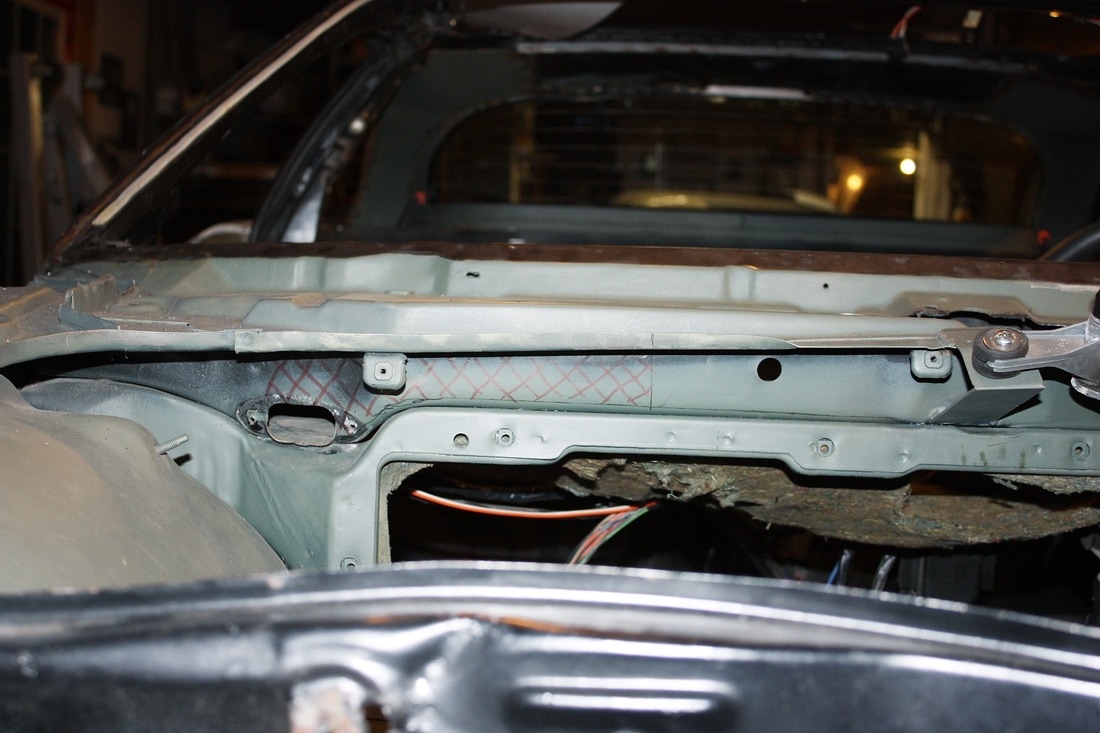
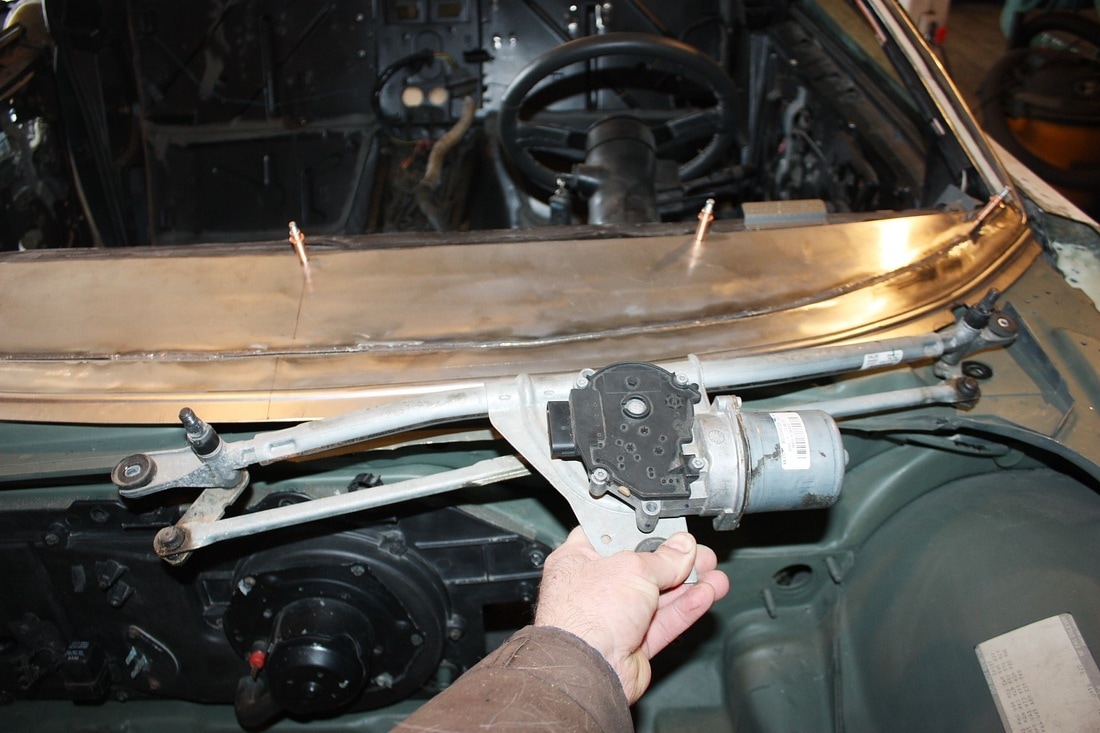
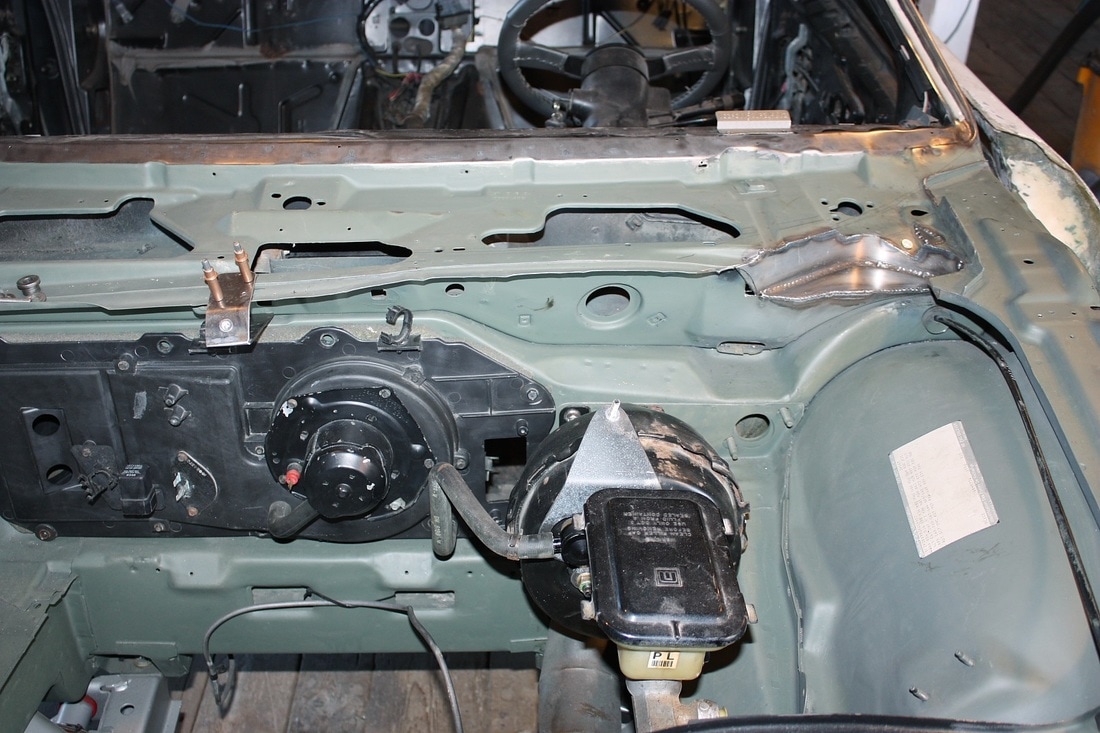
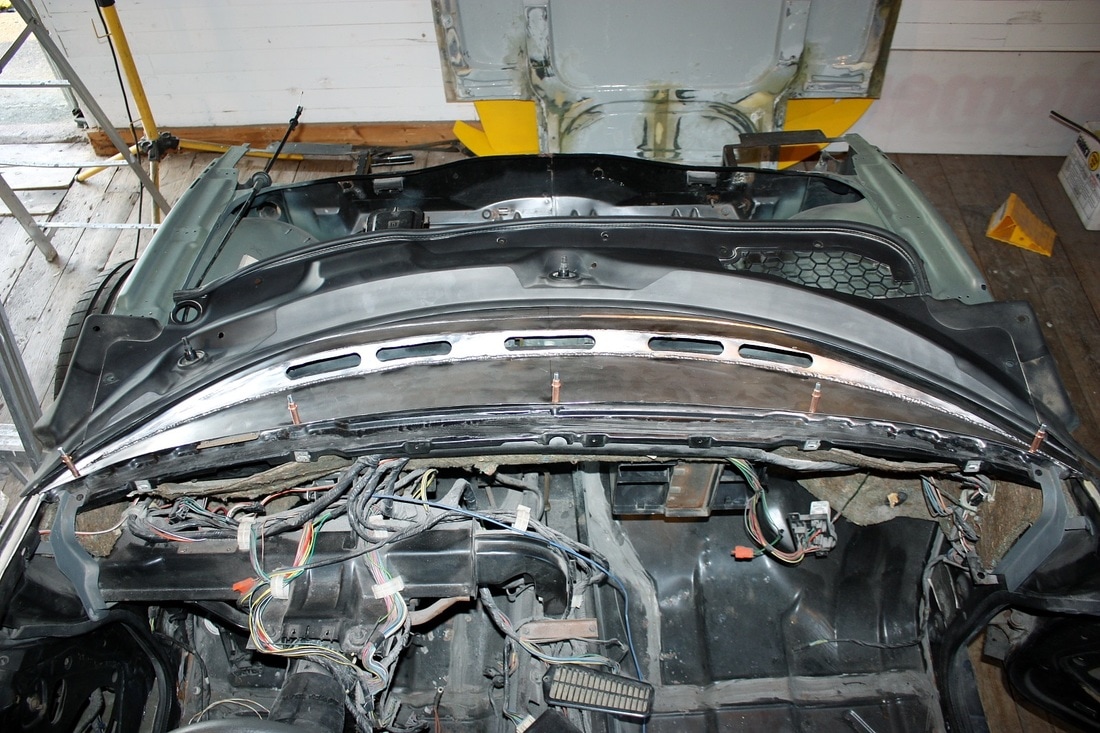
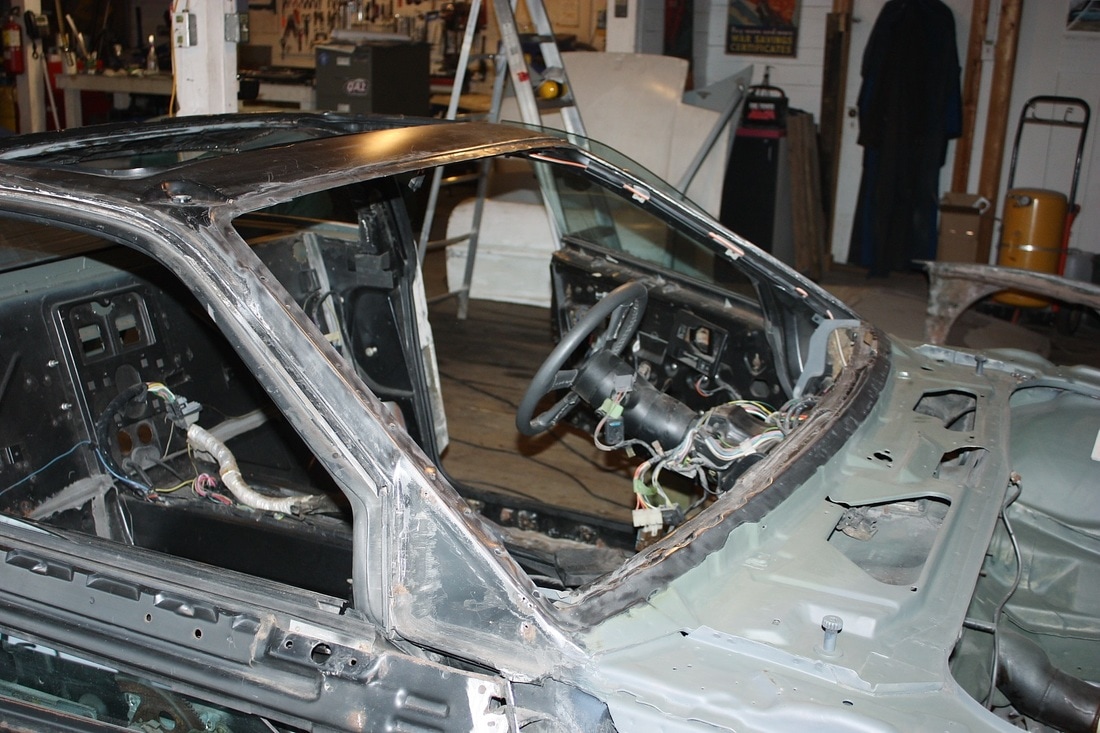
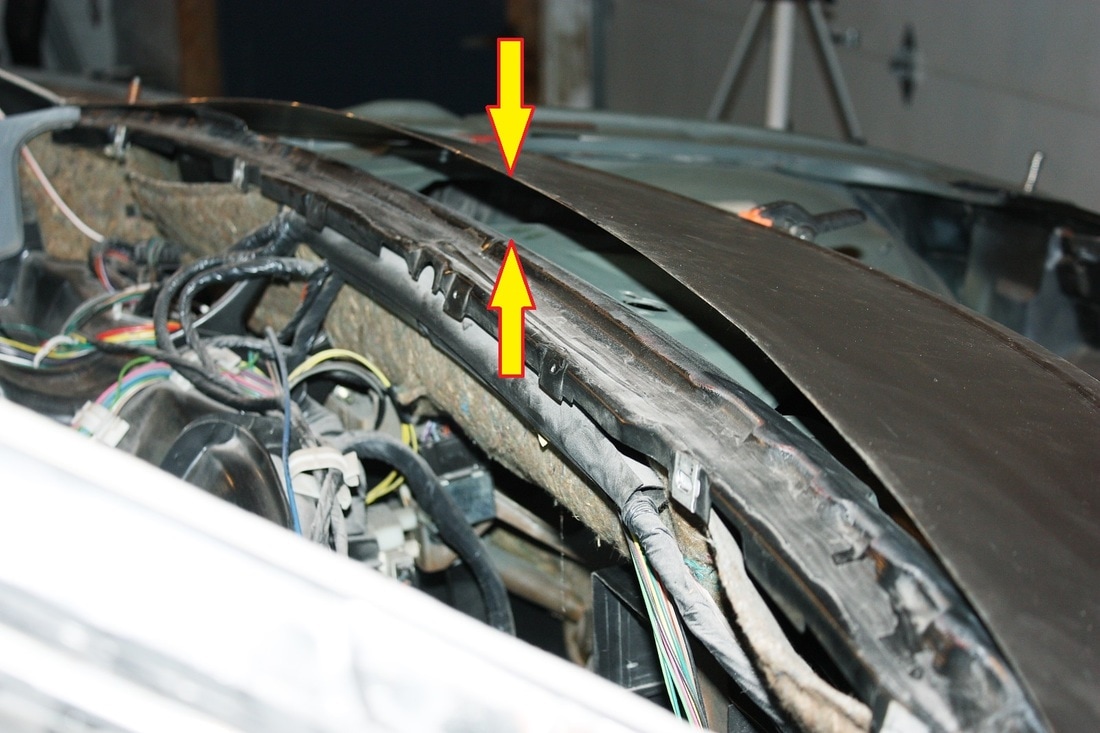
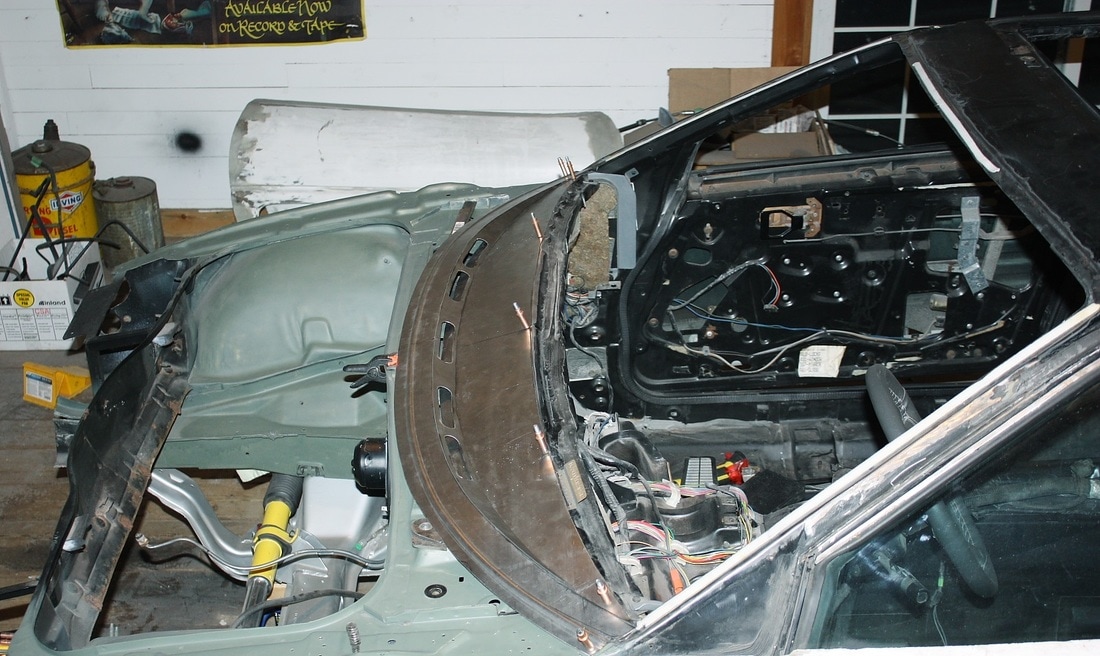
I left off the last post with the intent to test the HVAC blower motor to make sure there were no whistles or other undesirable noises in the new ducting. The inlet ducting worked just fine but I quickly discovered a bunch of OEM holes I had overlooked in the cowl where much of my defrost air would've leaked out.
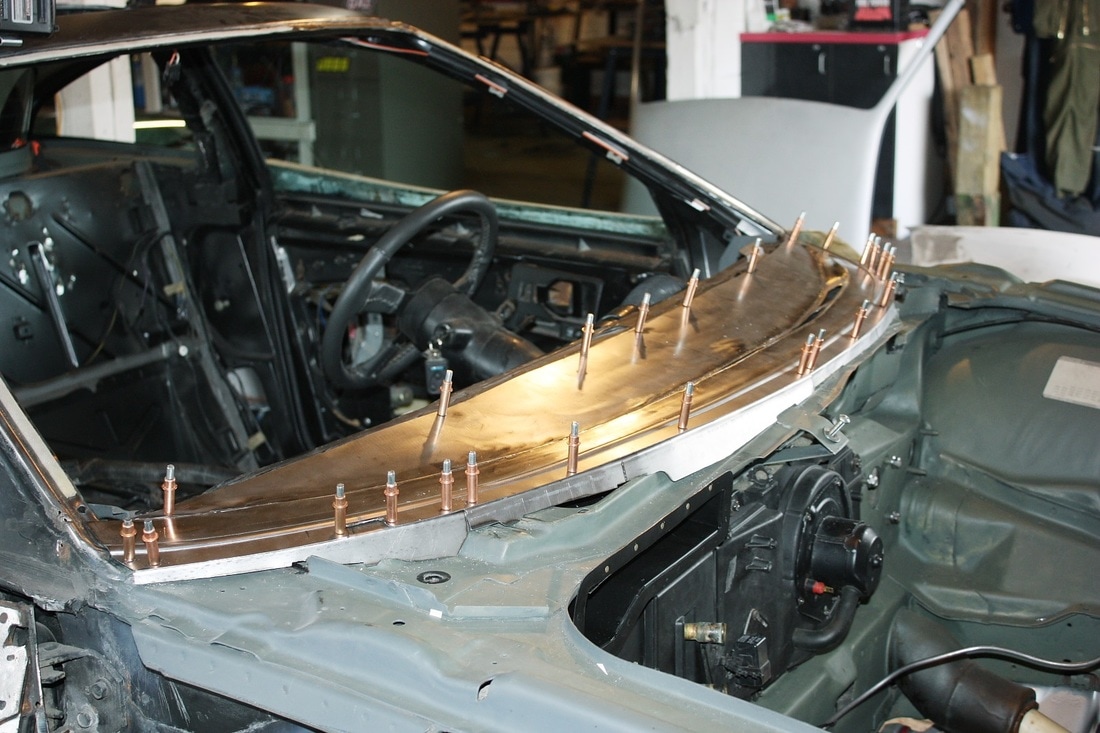
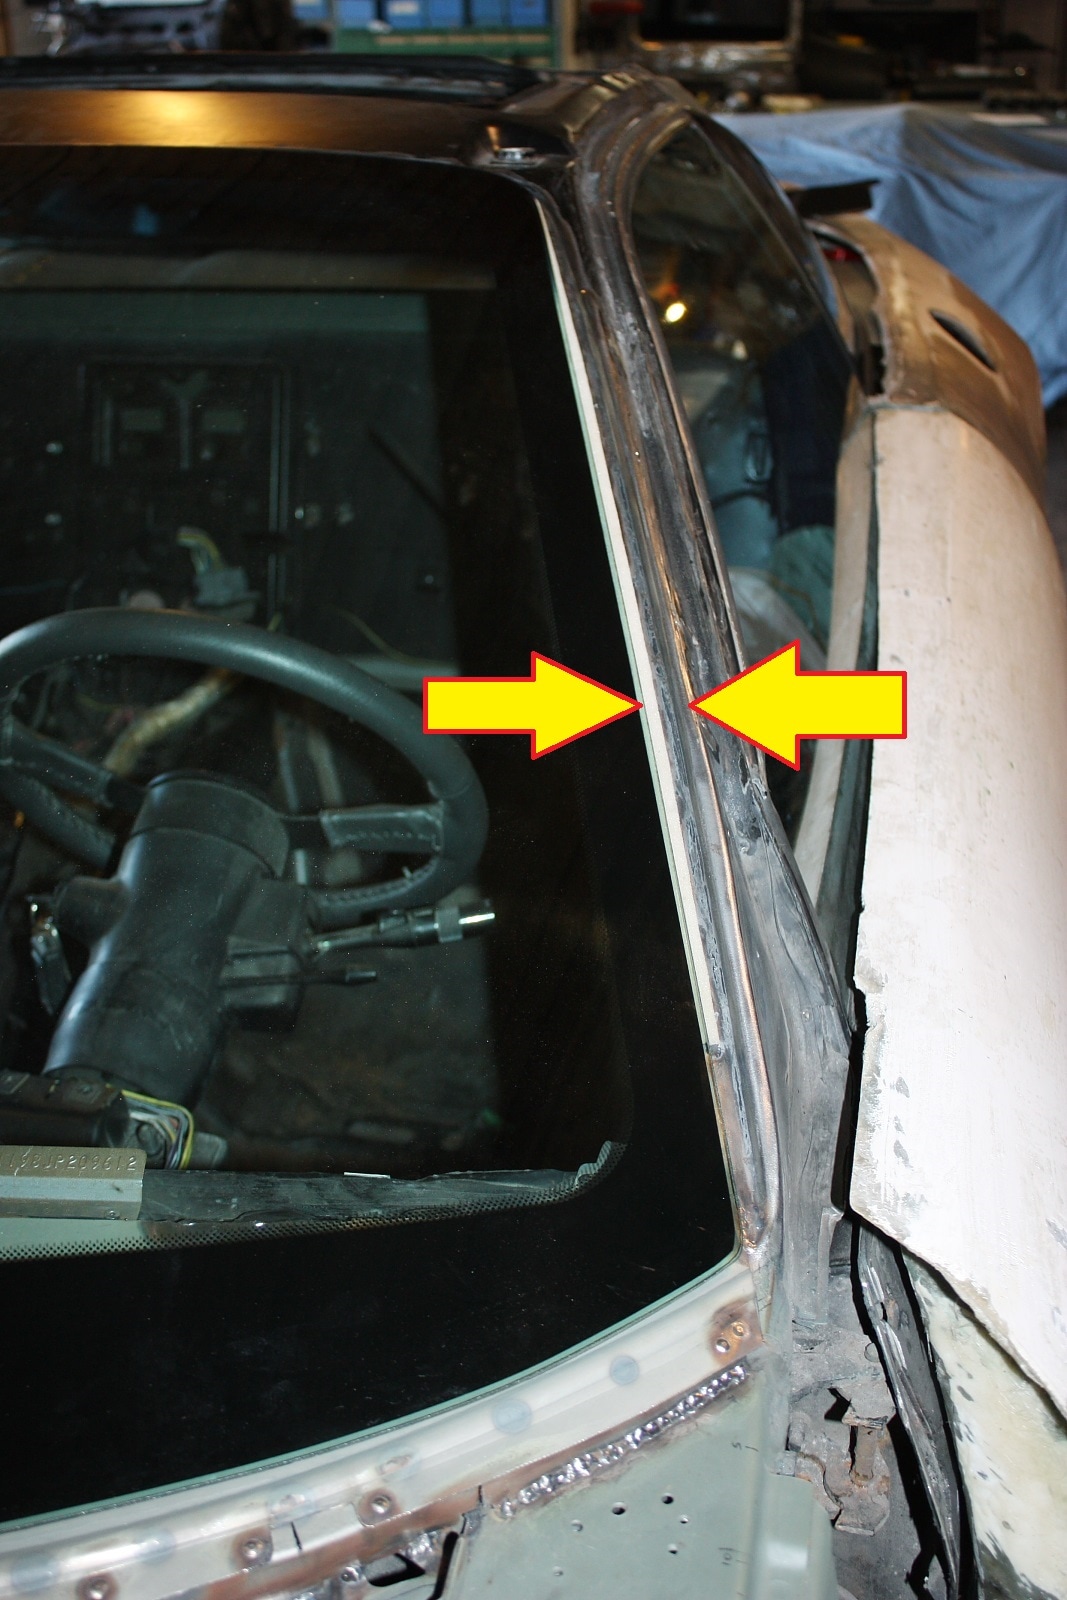
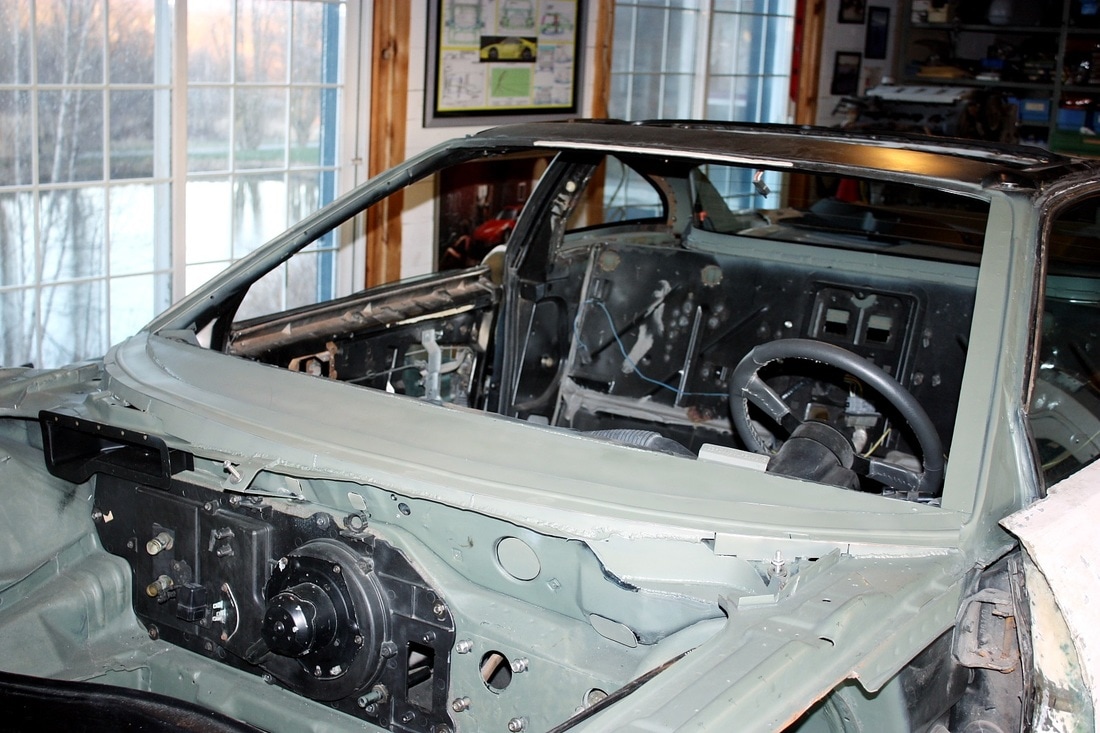
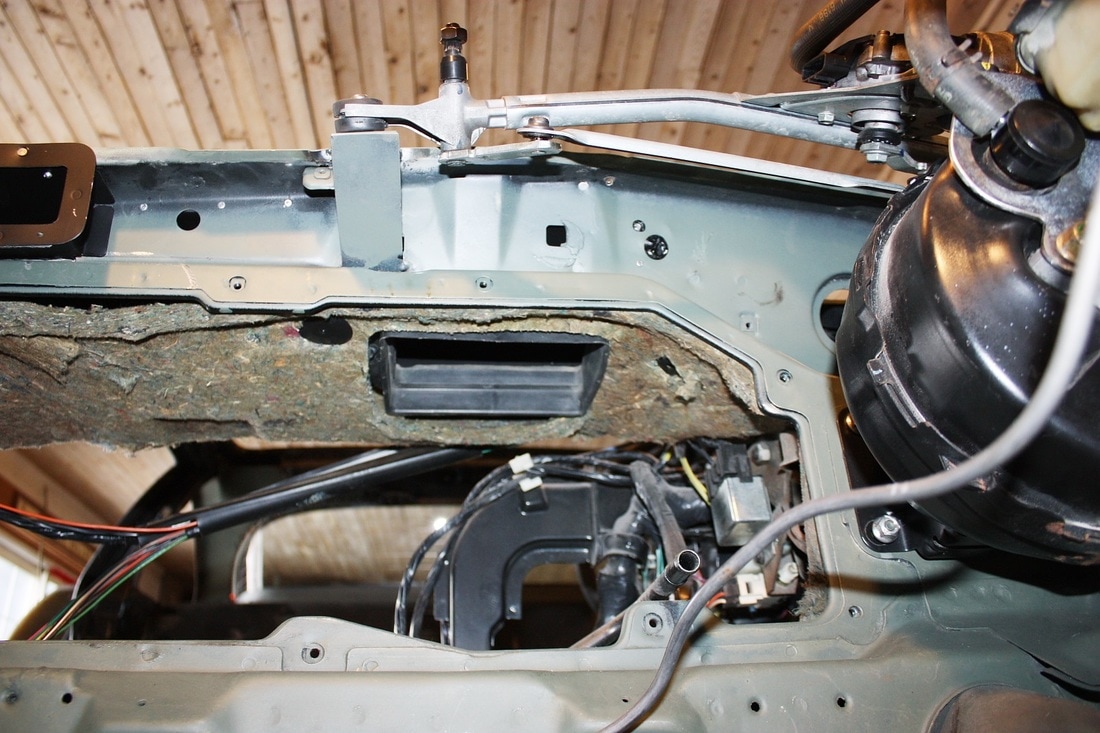
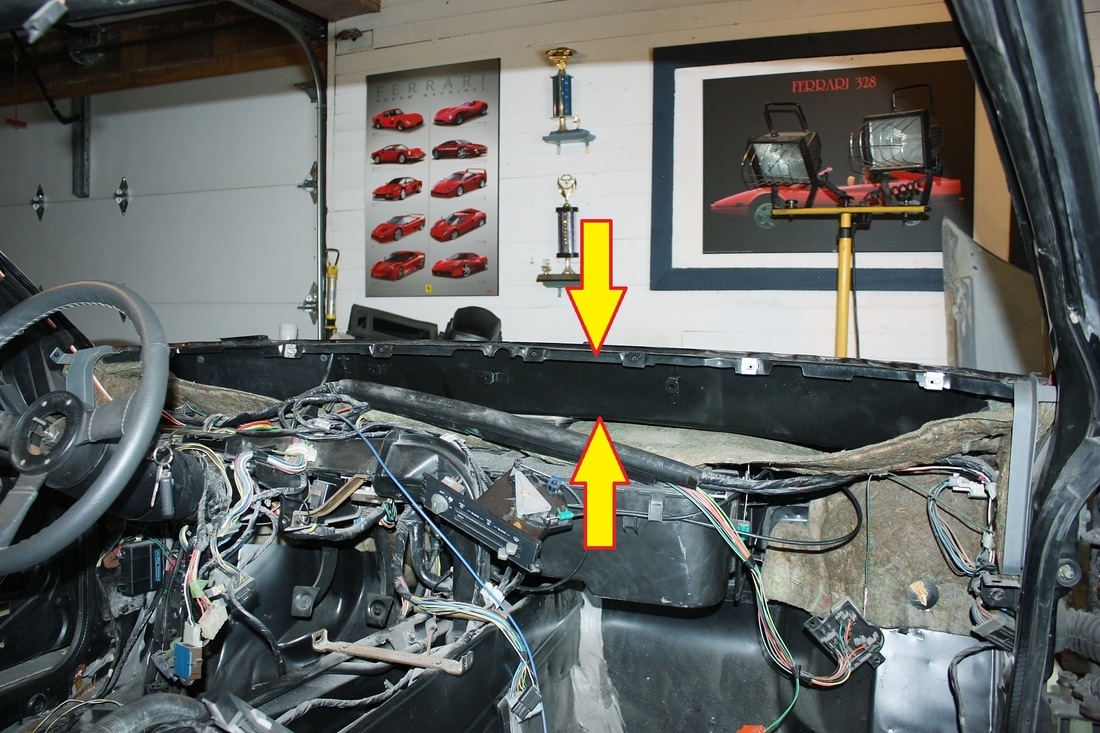
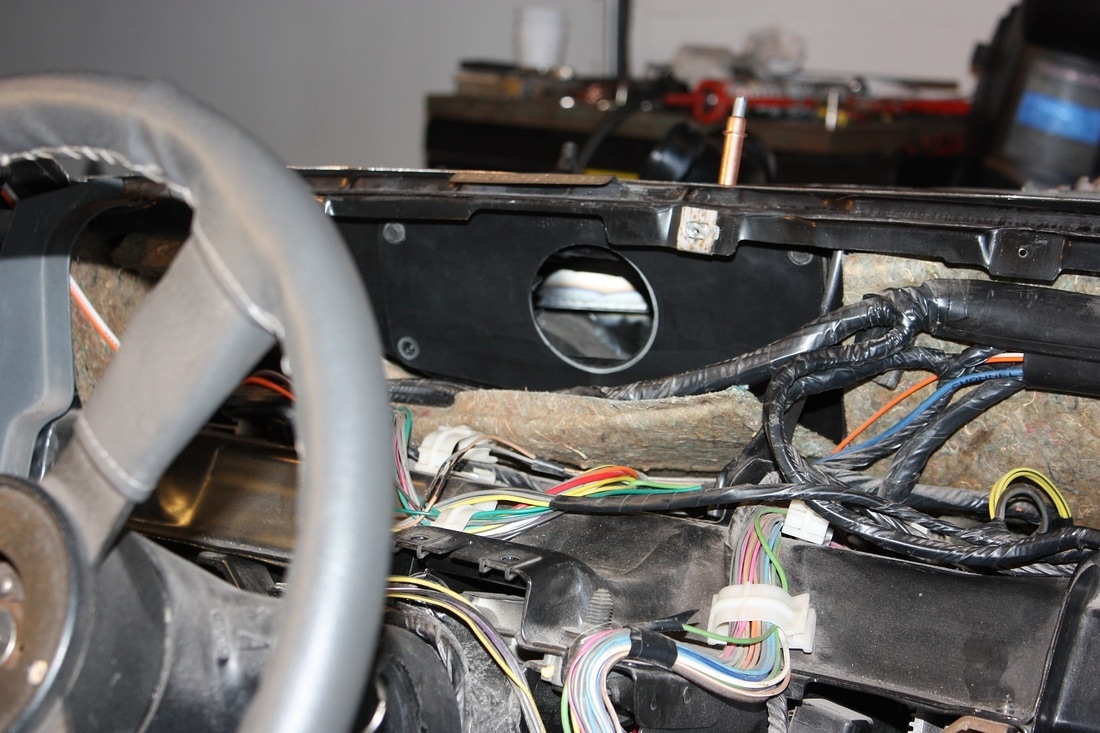
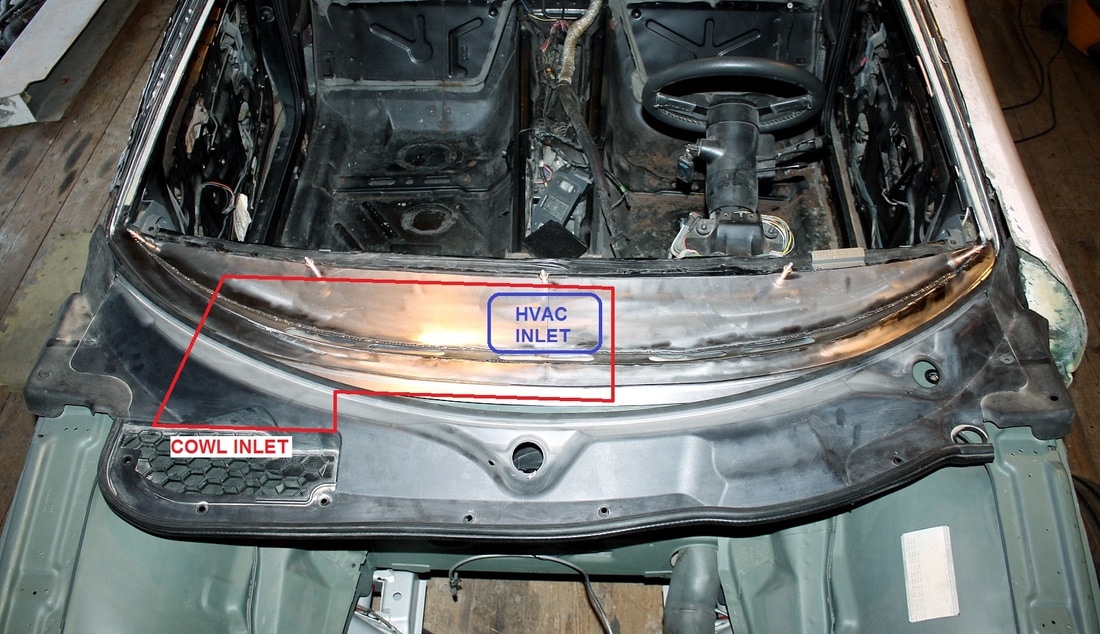
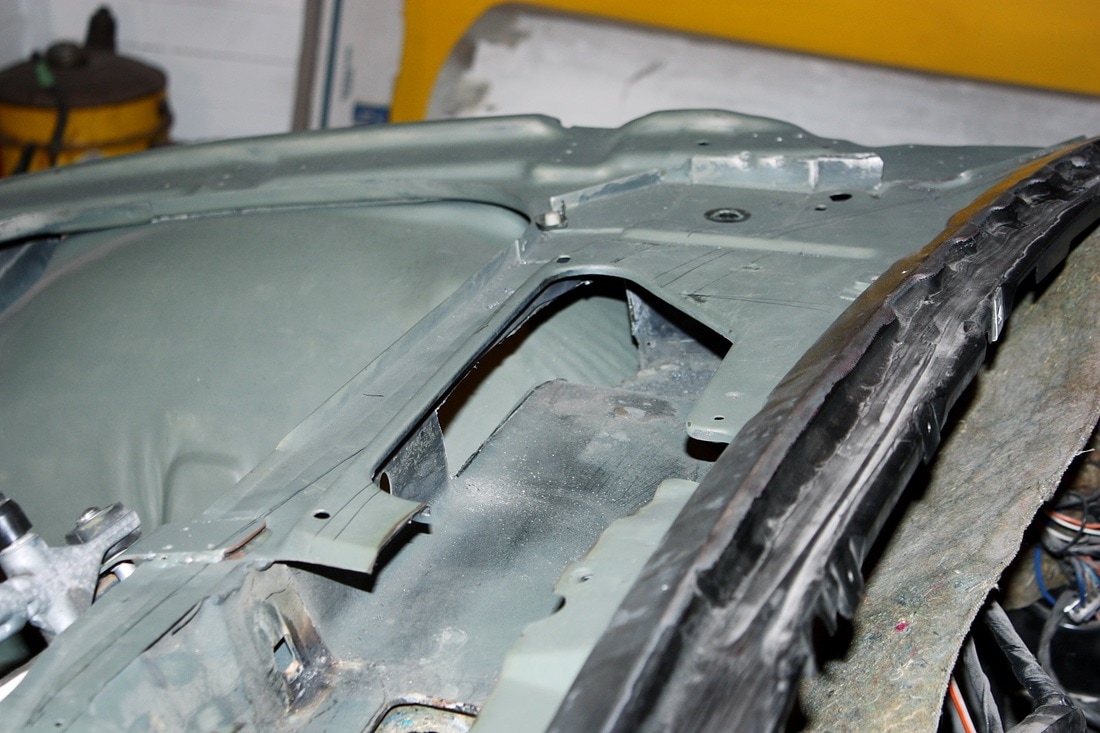
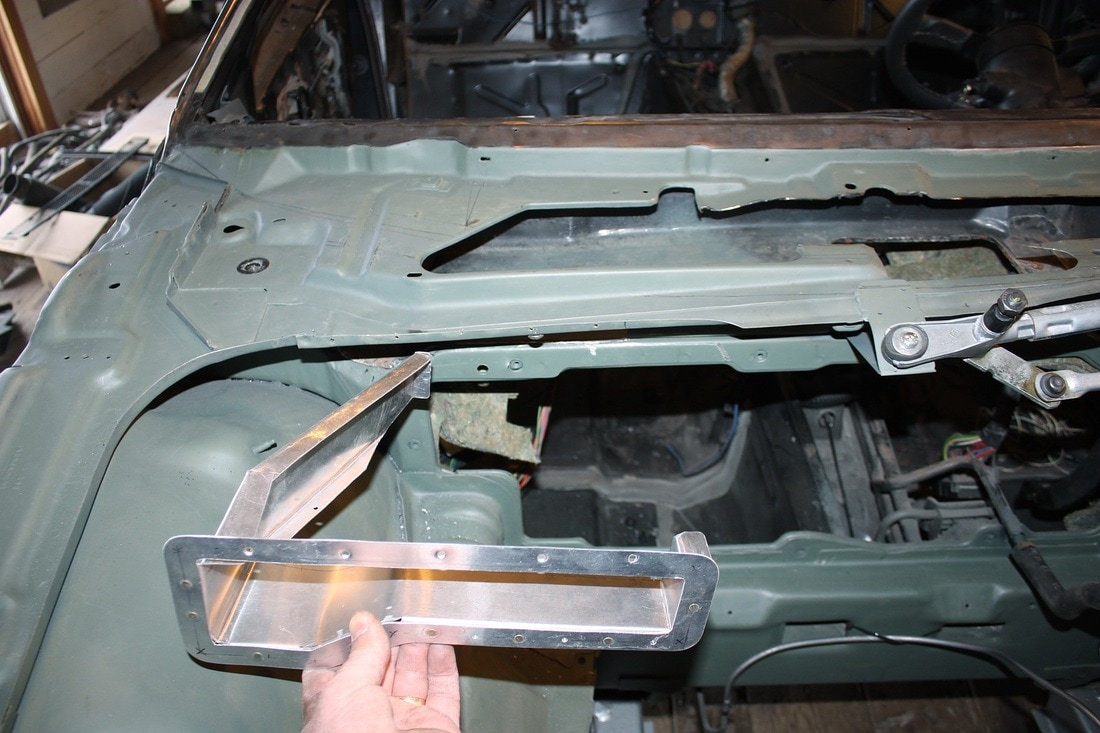
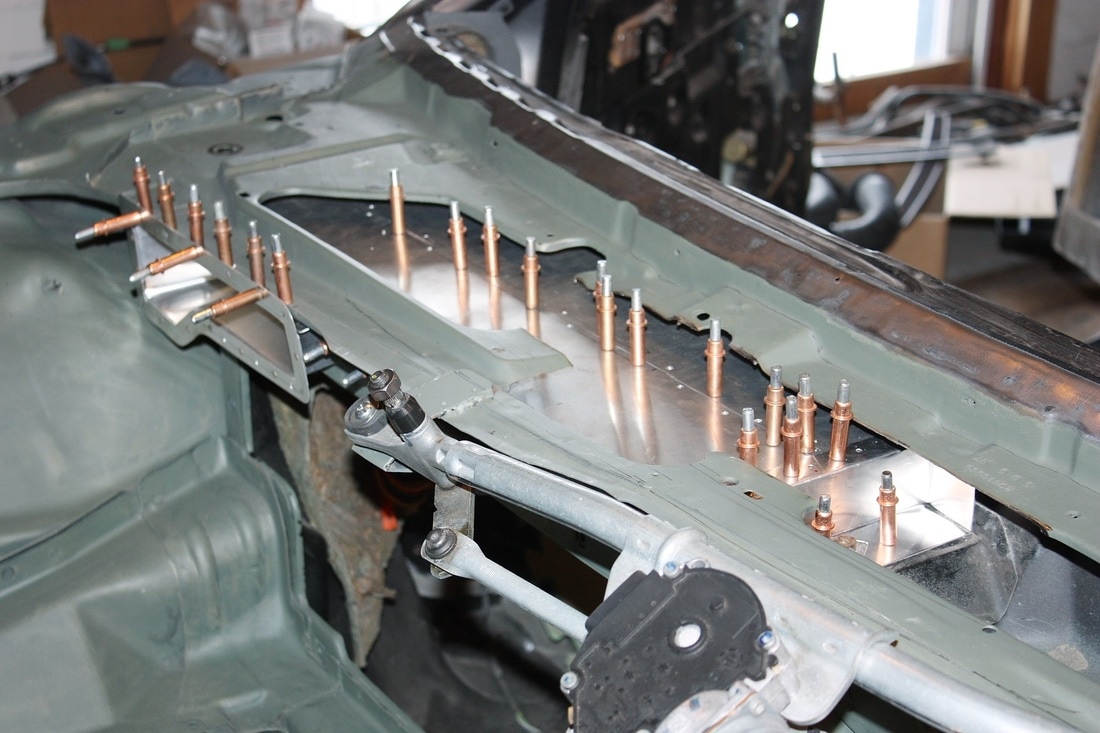
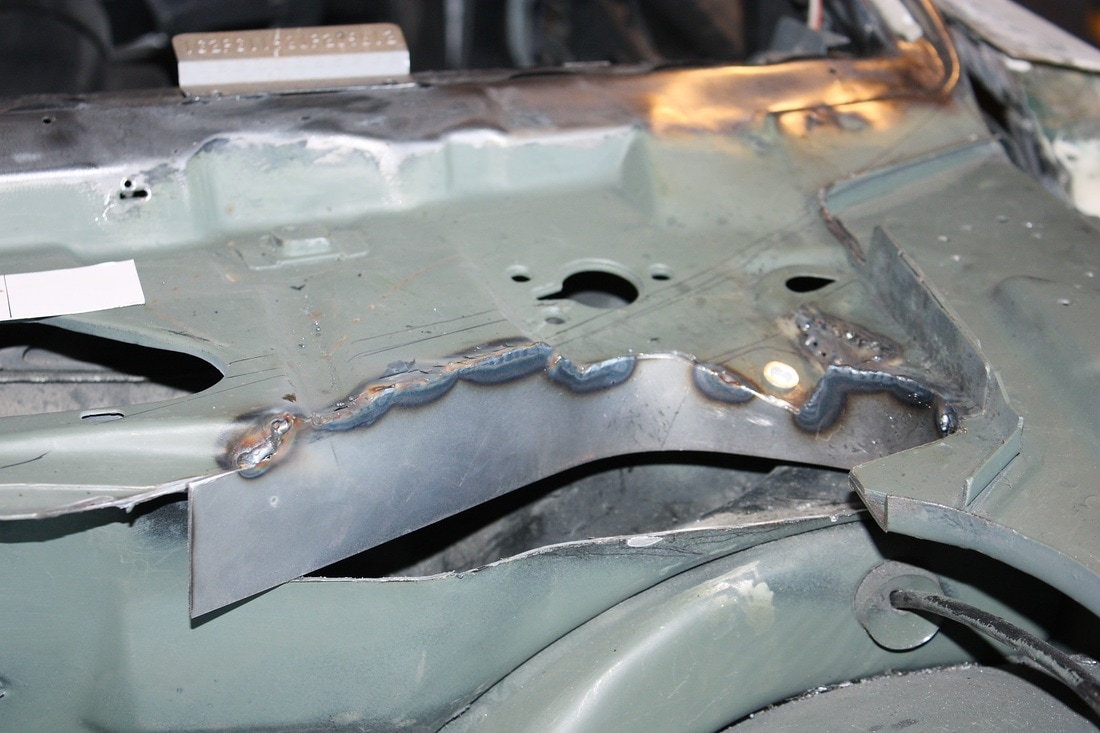
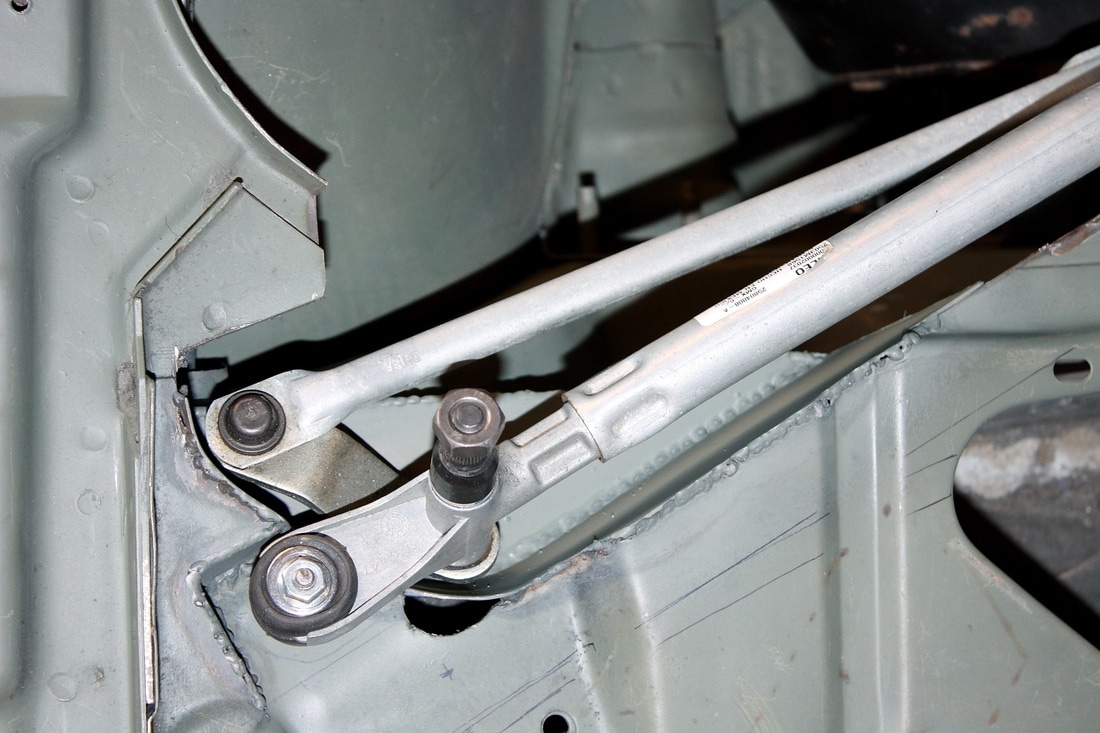
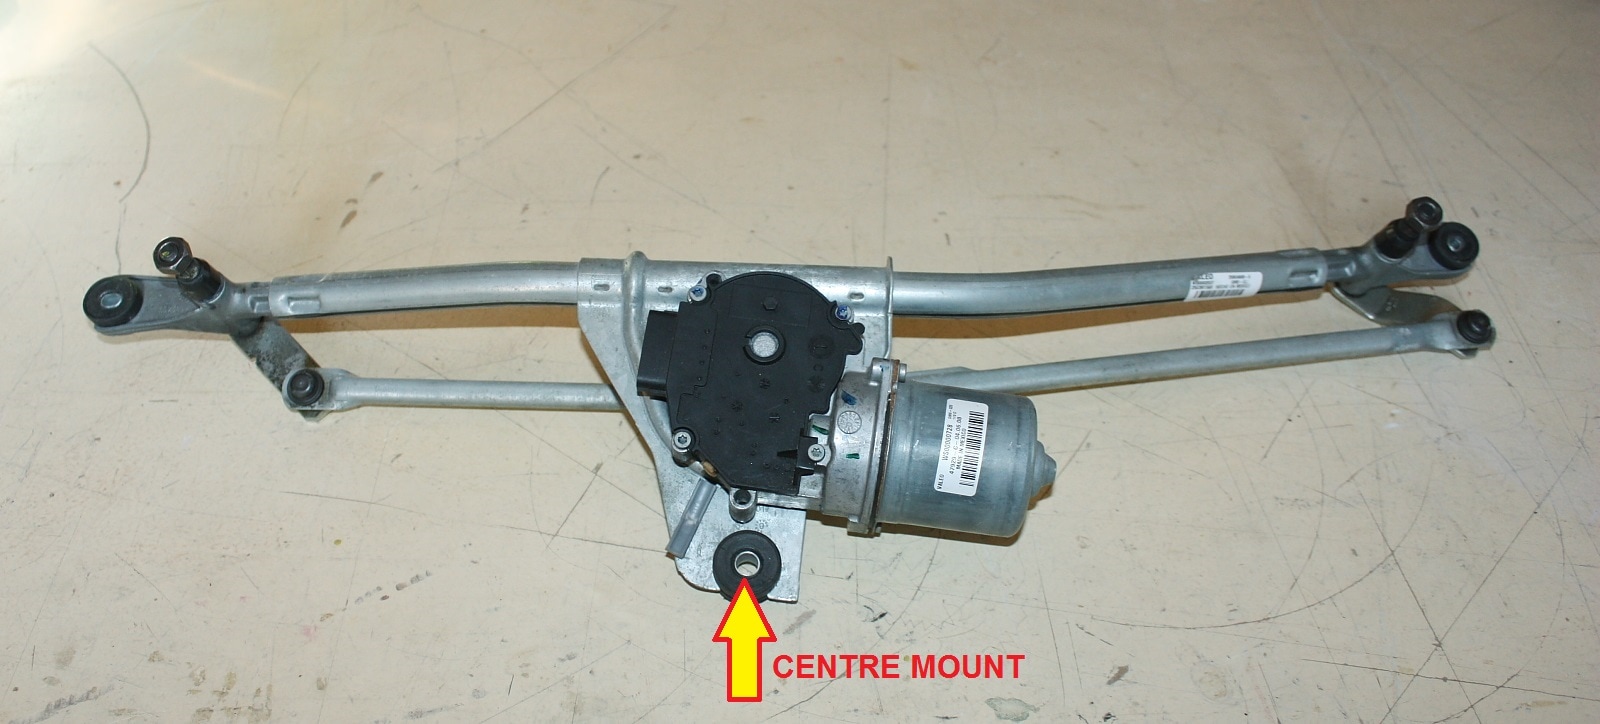
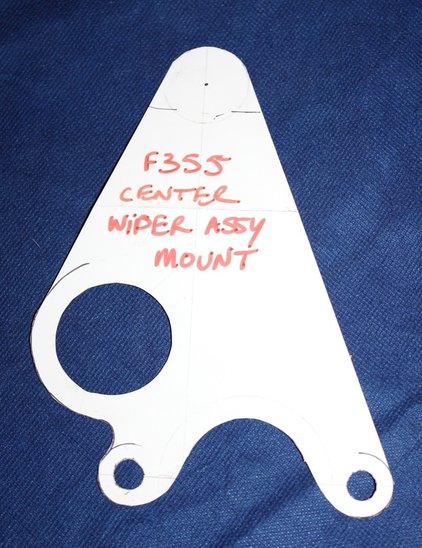
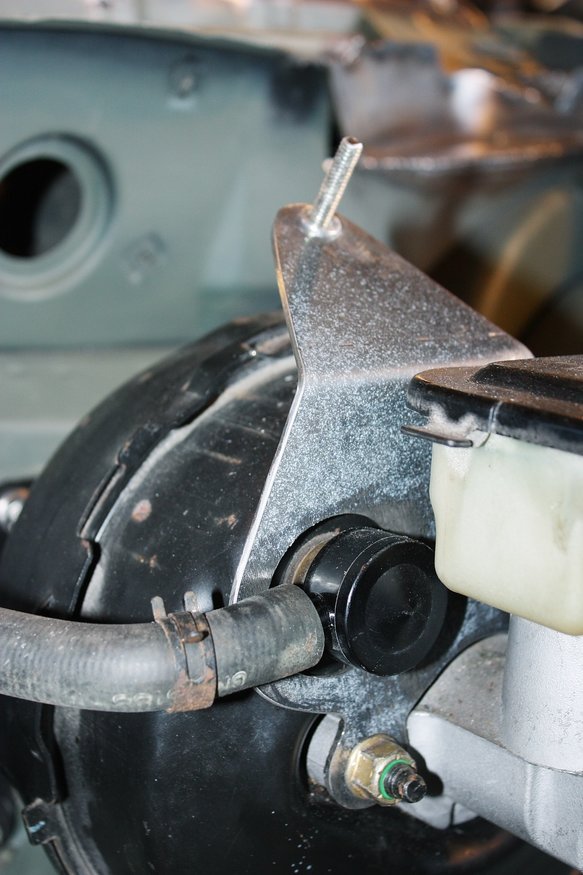
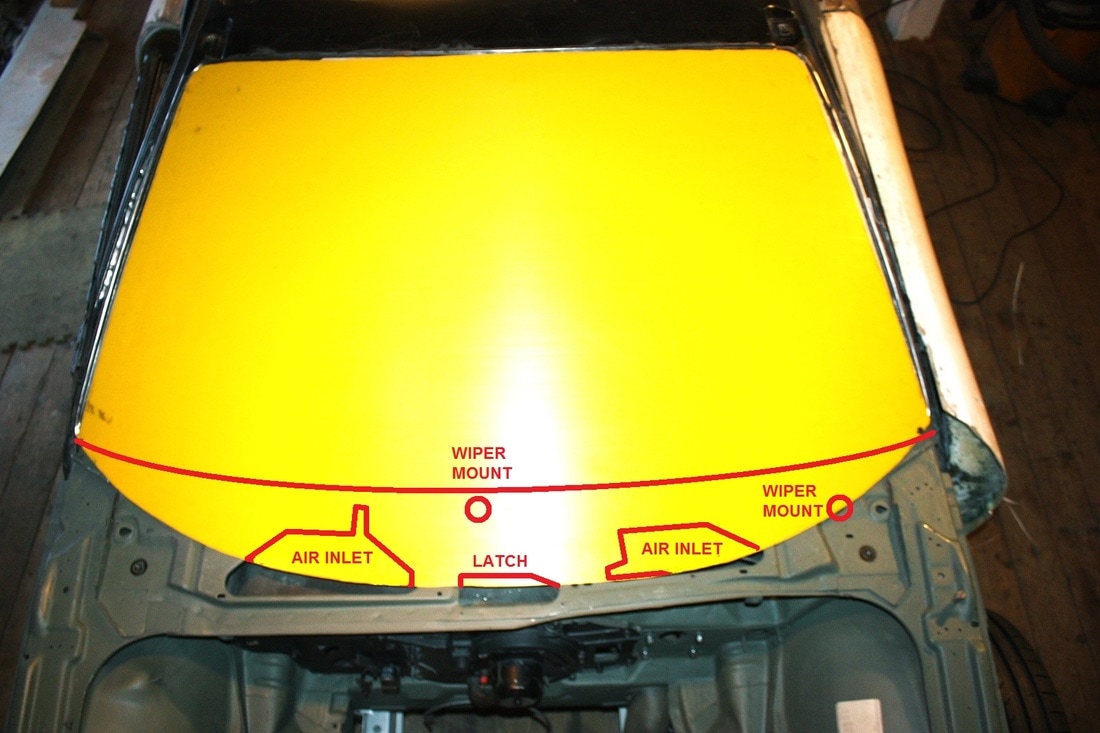
The small arrows in this next photo point to holes in the firewall for obsolete things like OEM wiper mounts, and cowl drains that needed to be plugged. The larger two arrows point out the gap between the front edge of my new windshield tray and the OEM cowl. This gap runs the whole width of the tray, varying in width by the contour of the odd-shaped cowl beneath it:
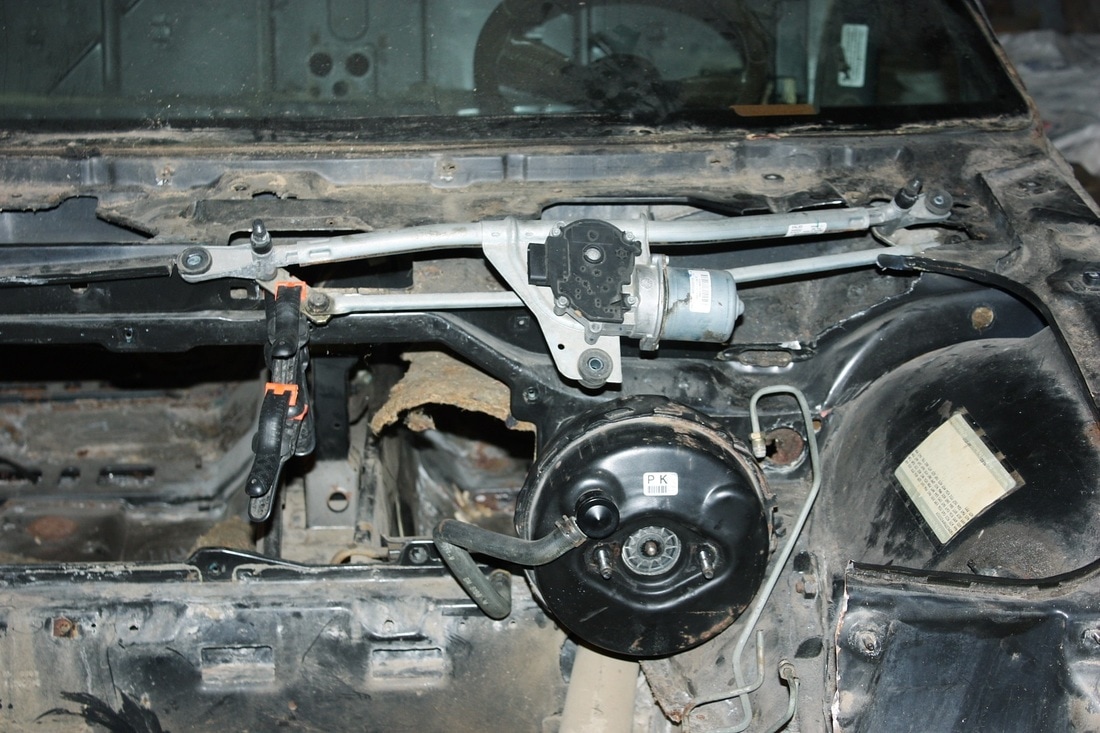
I left off the last post with the intent to test the HVAC blower motor to make sure there were no whistles or other undesirable noises in the new ducting. The inlet ducting worked just fine but I quickly discovered a bunch of OEM holes I had overlooked in the cowl where much of my defrost air would've leaked out.
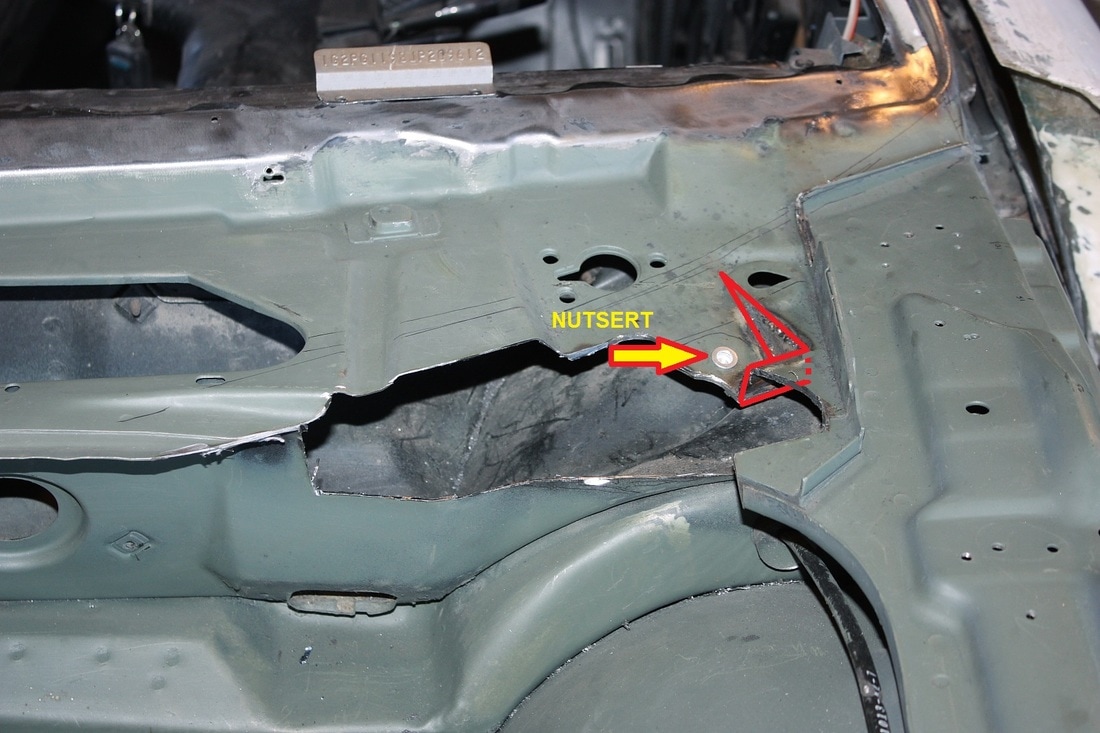
The small arrows in this next photo point to holes in the firewall for obsolete things like OEM wiper mounts, and cowl drains that needed to be plugged. The larger two arrows point out the gap between the front edge of my new windshield tray and the OEM cowl. This gap runs the whole width of the tray, varying in width by the contour of the odd-shaped cowl beneath it:
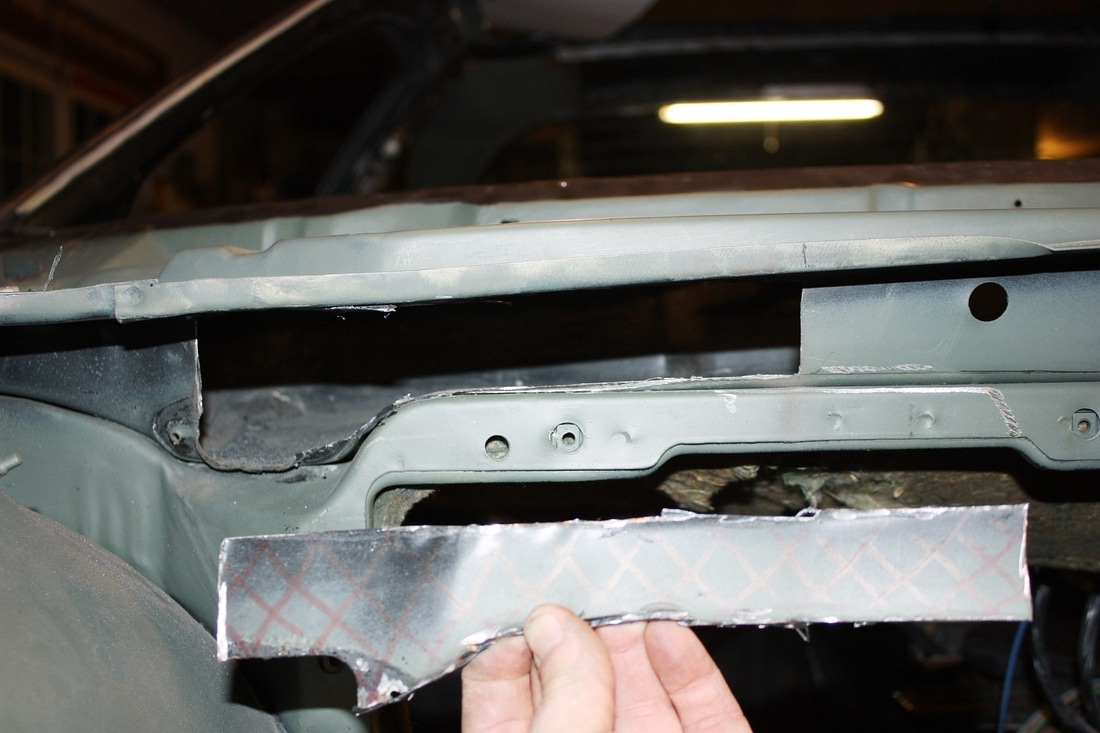
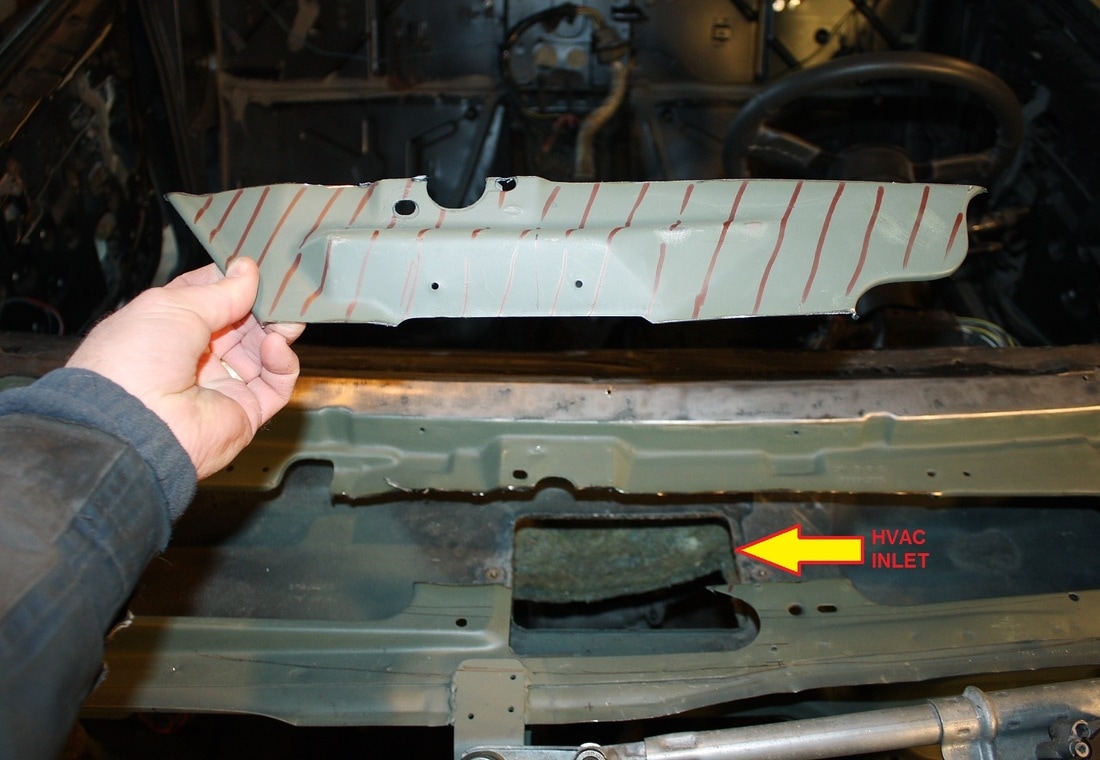
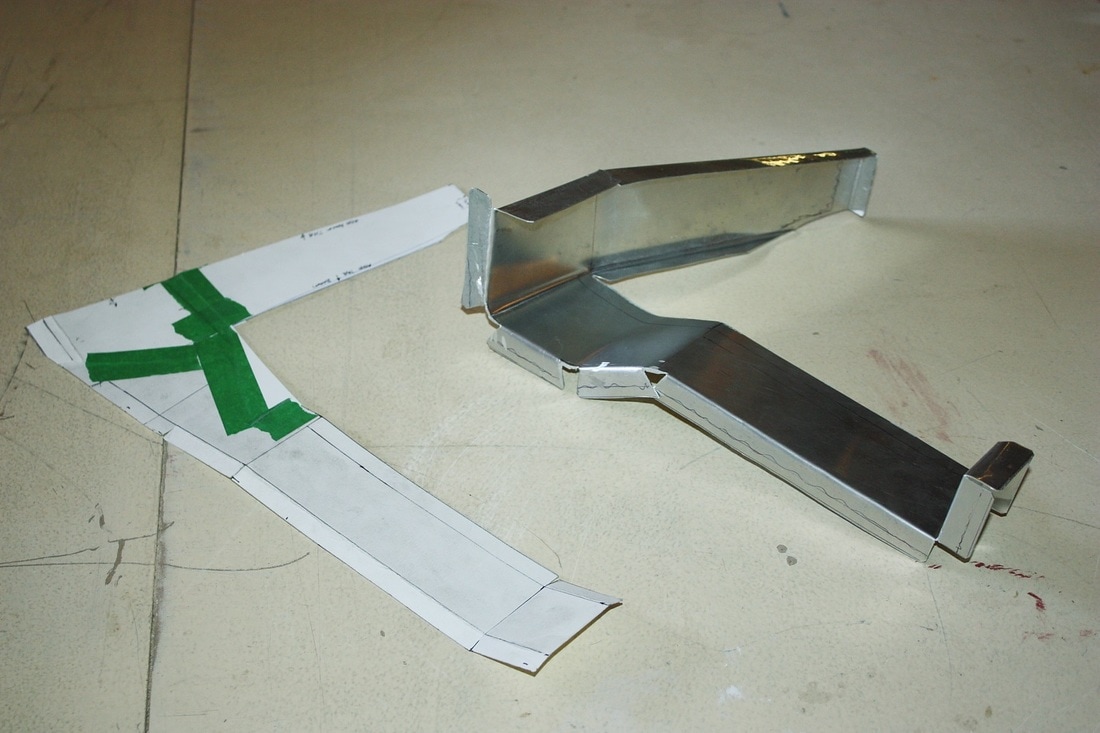
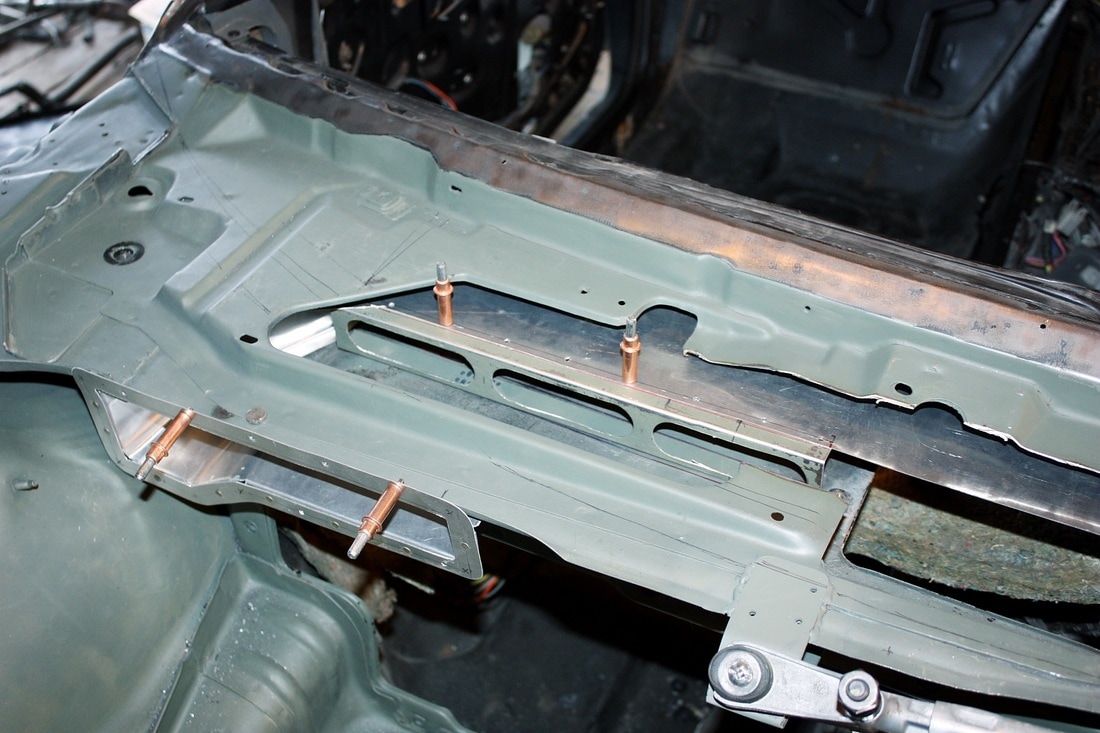
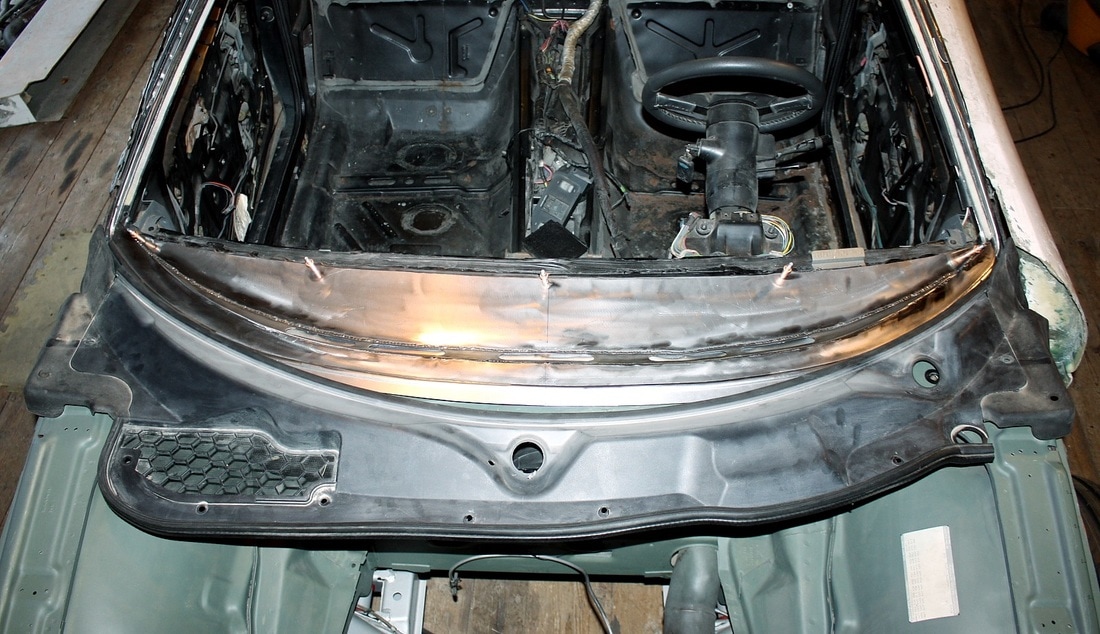
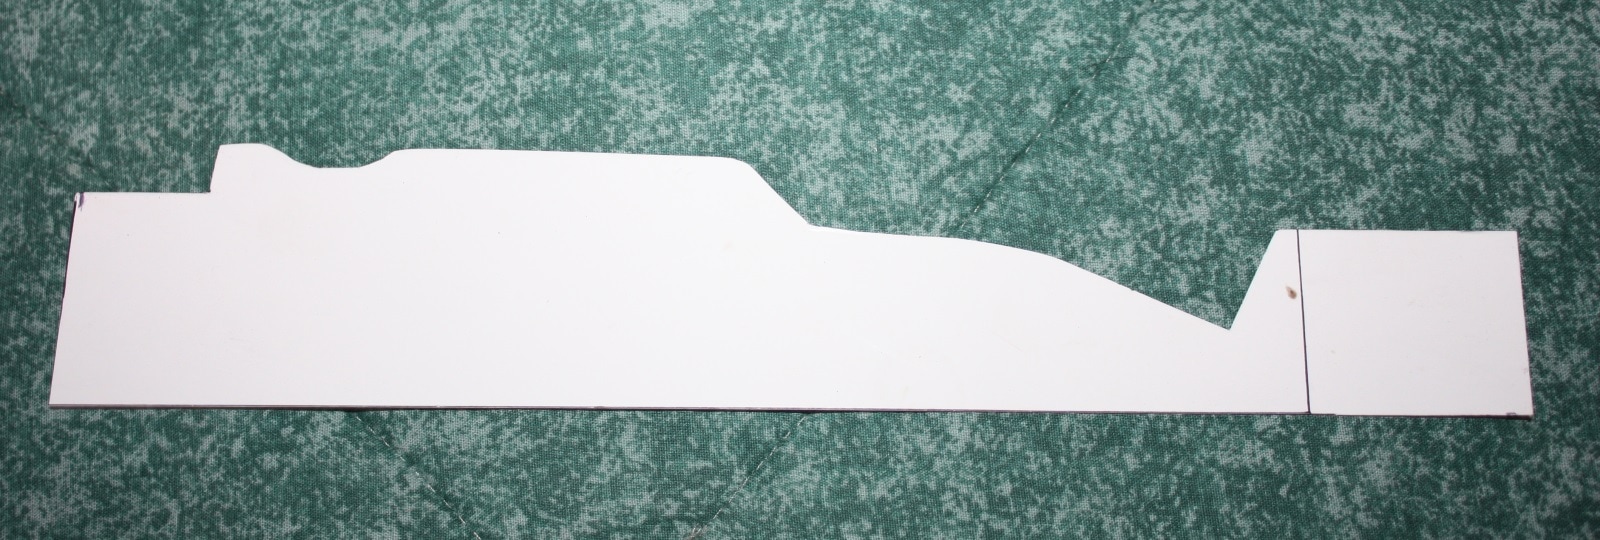
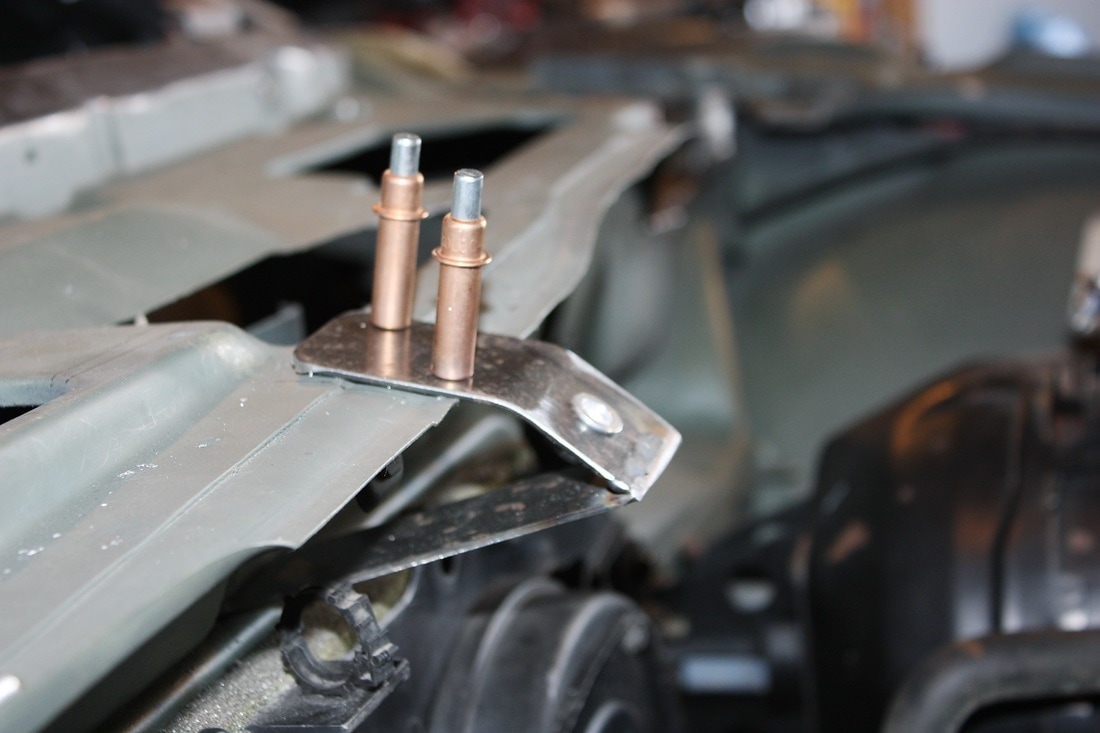
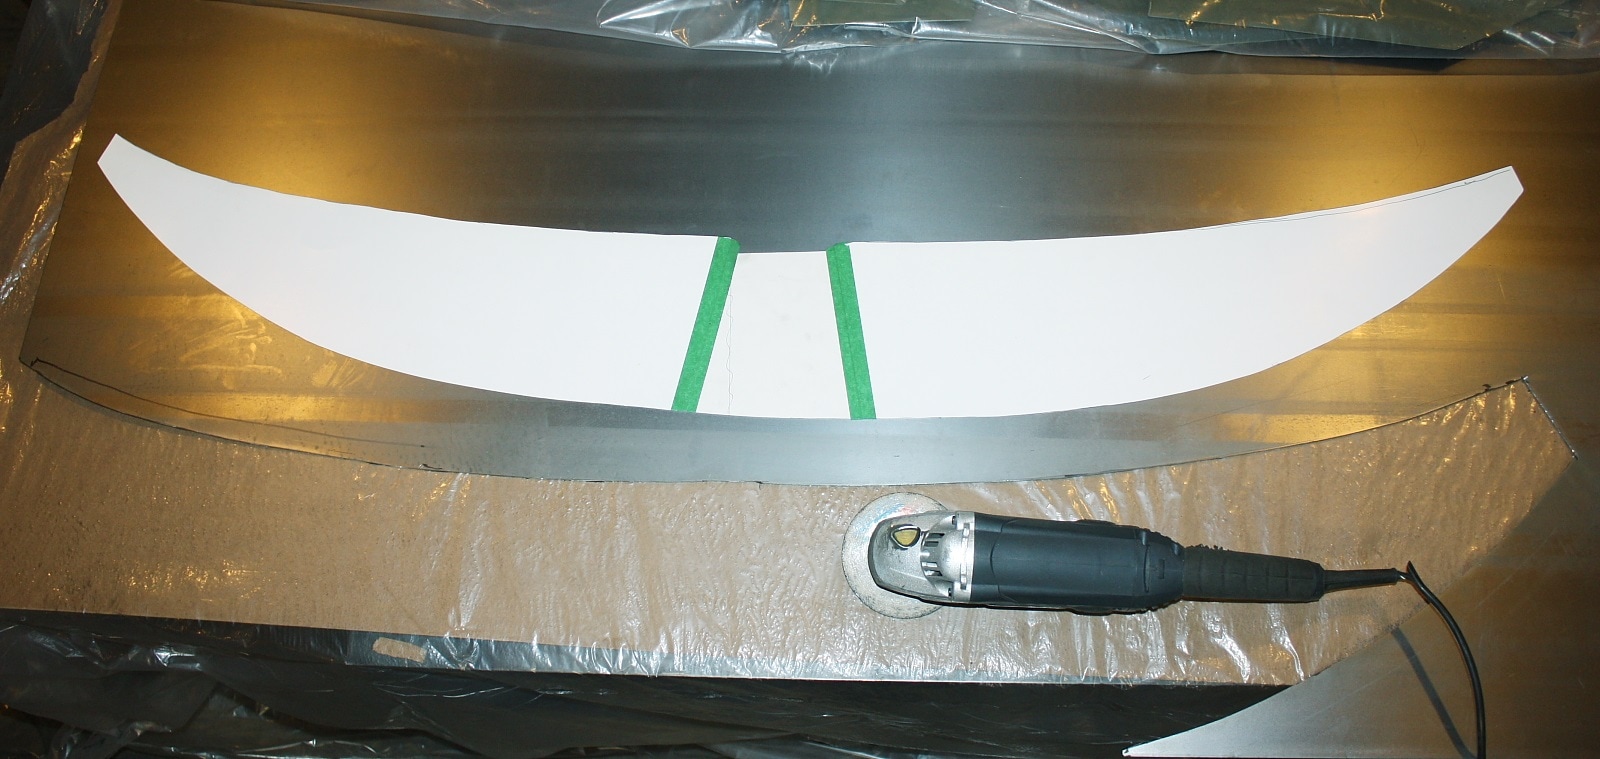
Plugging the small firewall holes was easy... I just cut out some sheet metal plugs and glued them in place with seam sealer. The large gap at the base of the windshield was another story. First I had to massage the front edge of my new windshield tray to accurately fit the base of the glass windshield. Then I had to play with cardboard templates to bridge the compound curves of the tray to the constantly varying profile of the OEM cowl. I had to make it in four pieces... here are the first two templates in place:
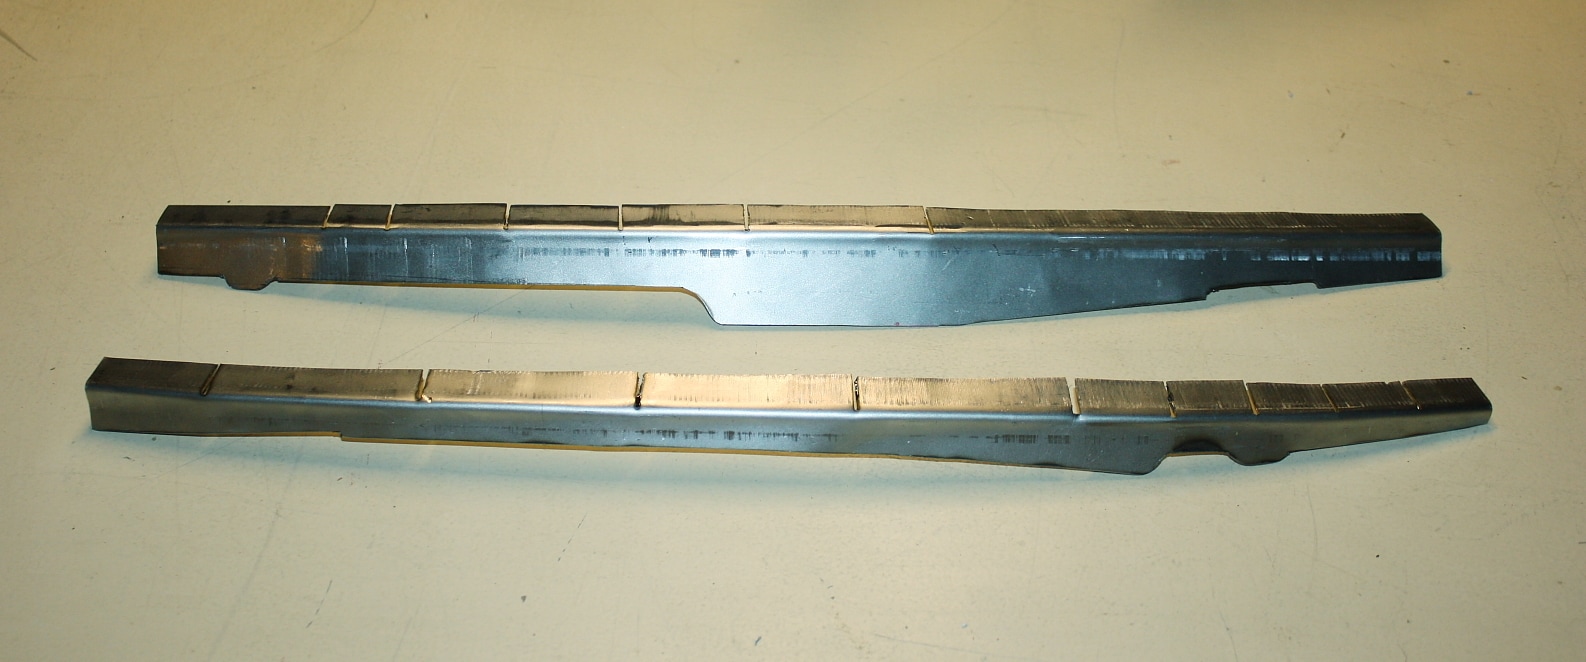
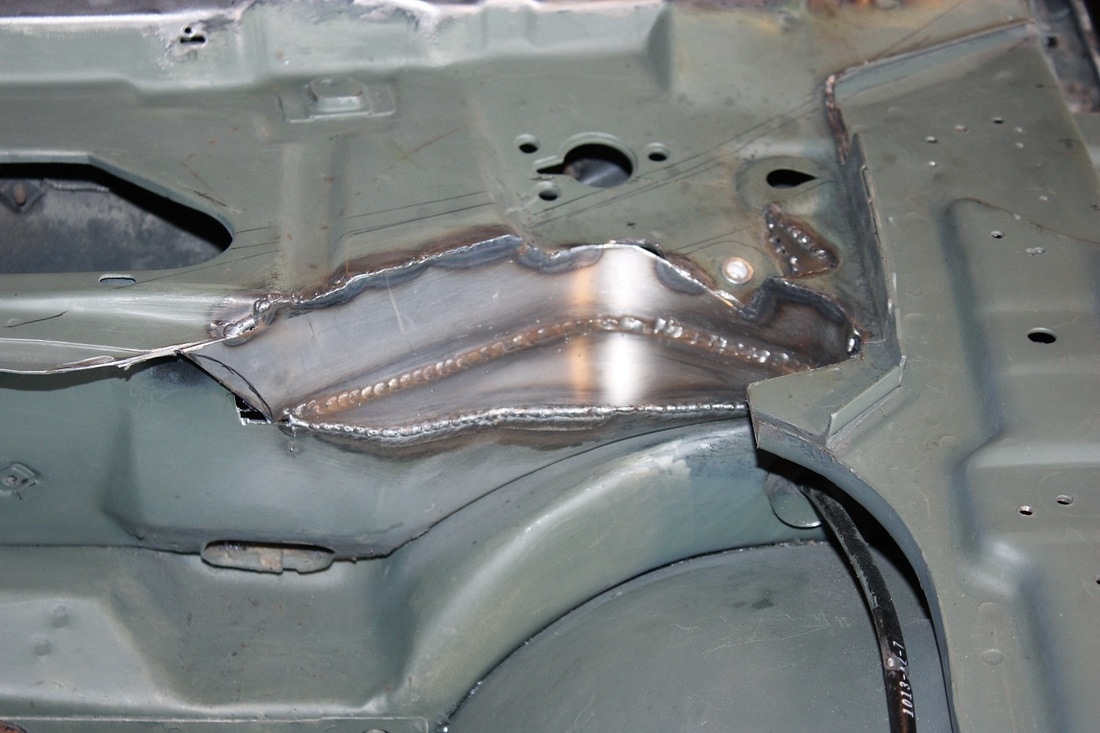
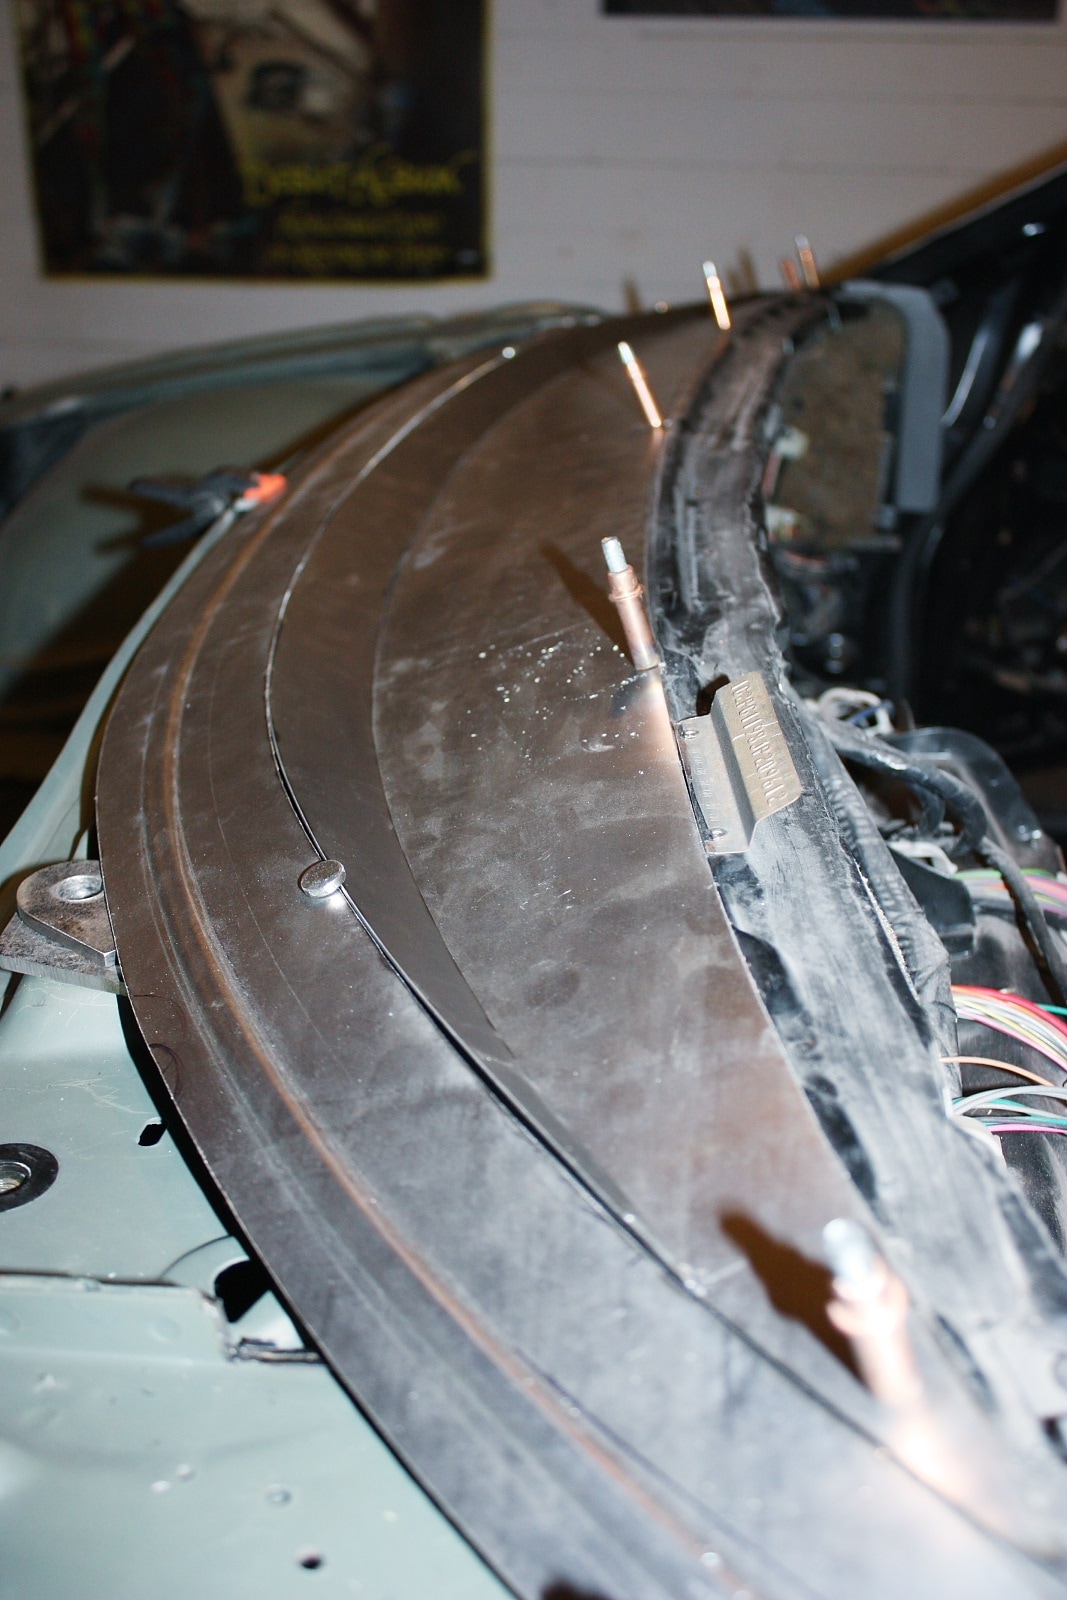
I made the filler pieces by bending long strips of steel into angles. One leg of each angle was then sliced every couple inches to follow the curvature of the windshield tray. (My sheet metal shrinker just wasn't heavy-duty enough):
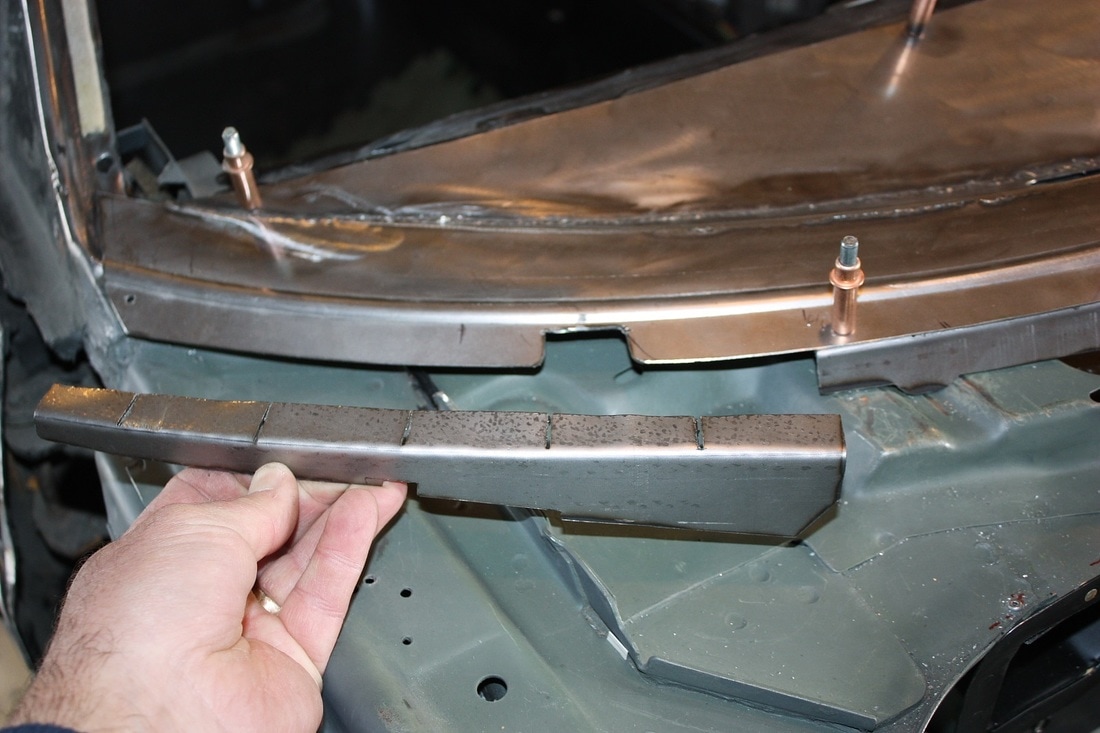
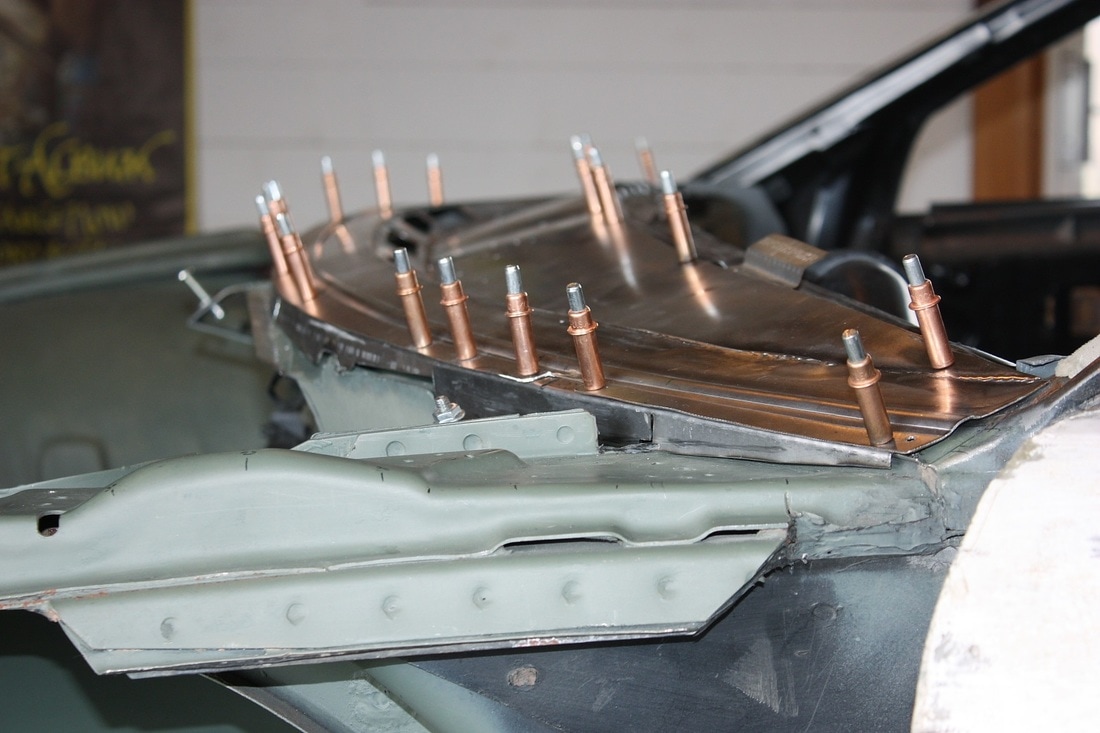
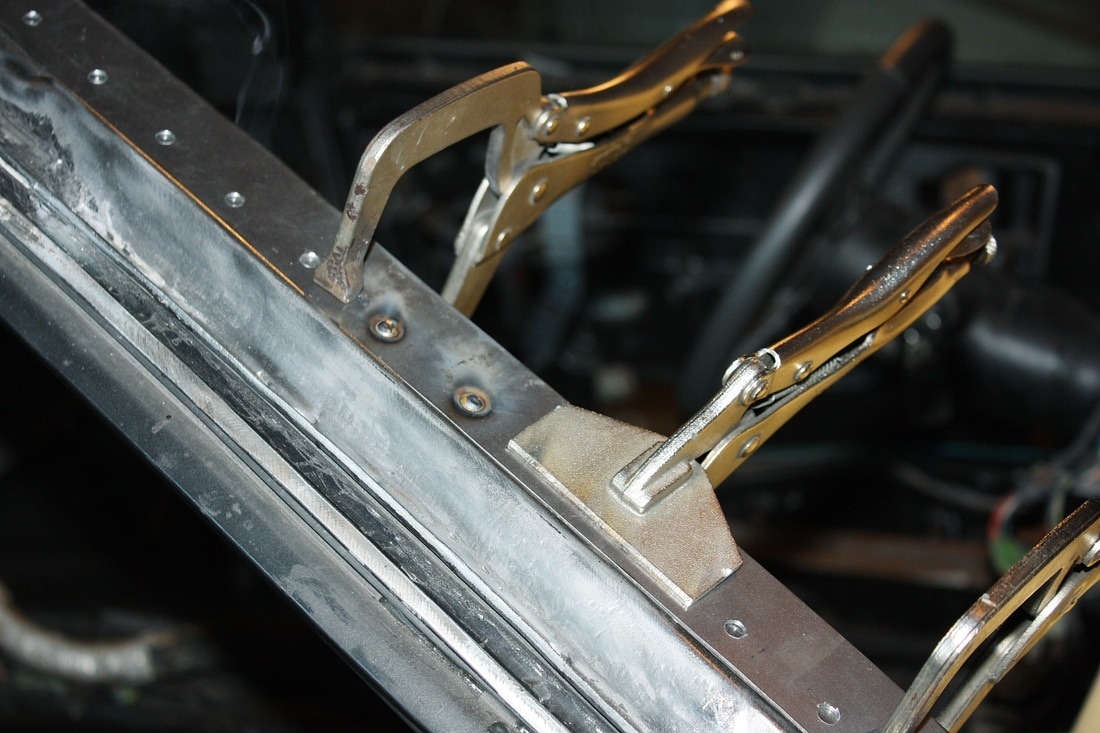
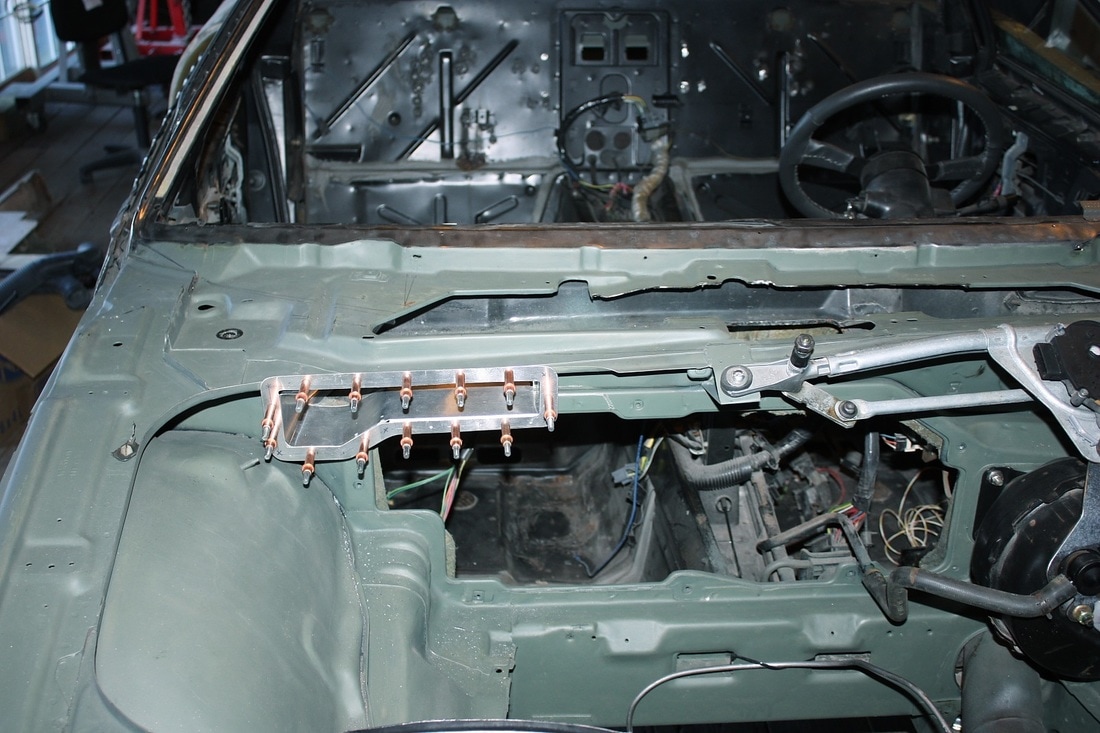
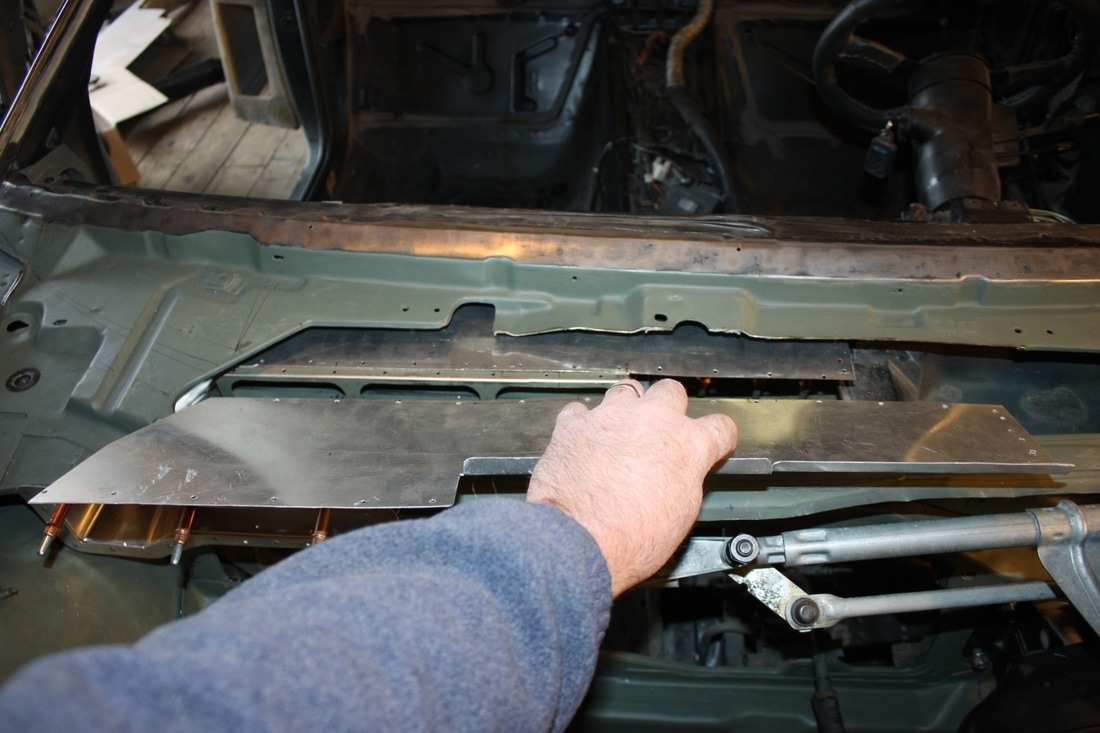
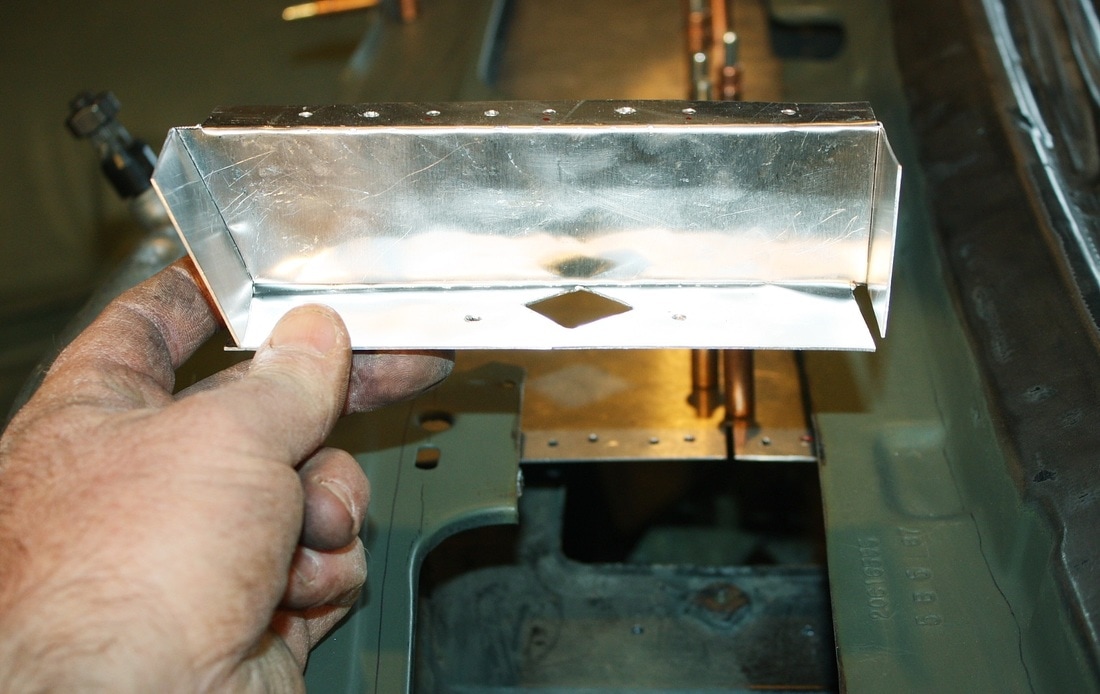
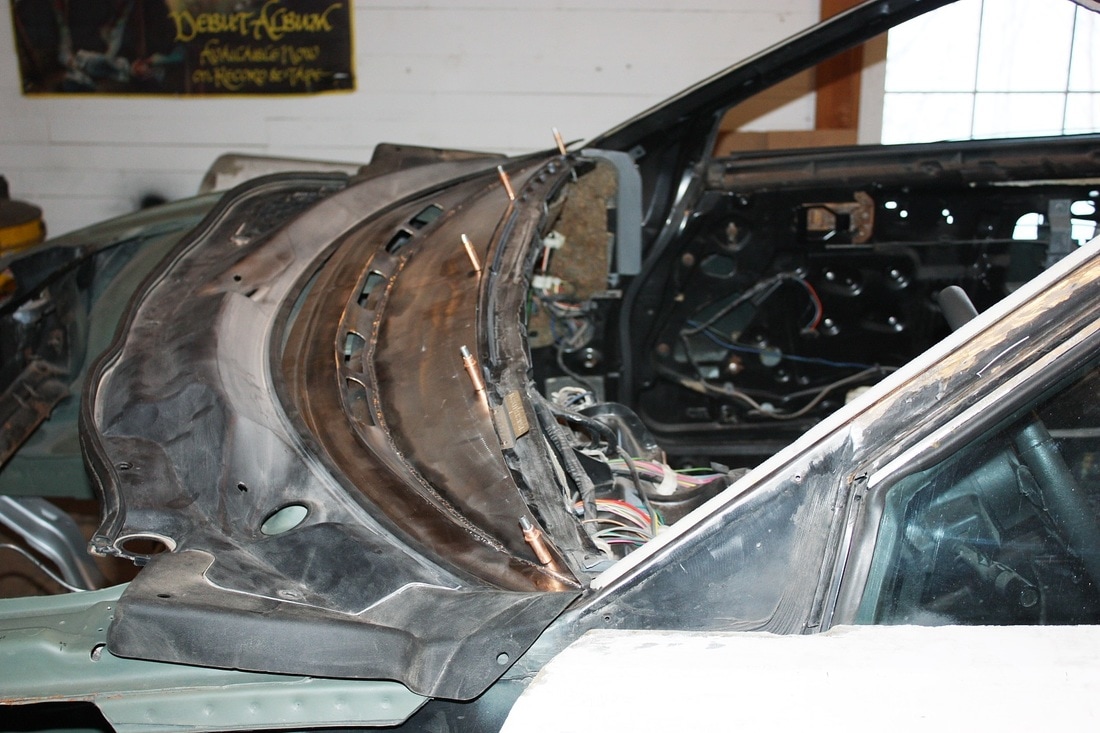
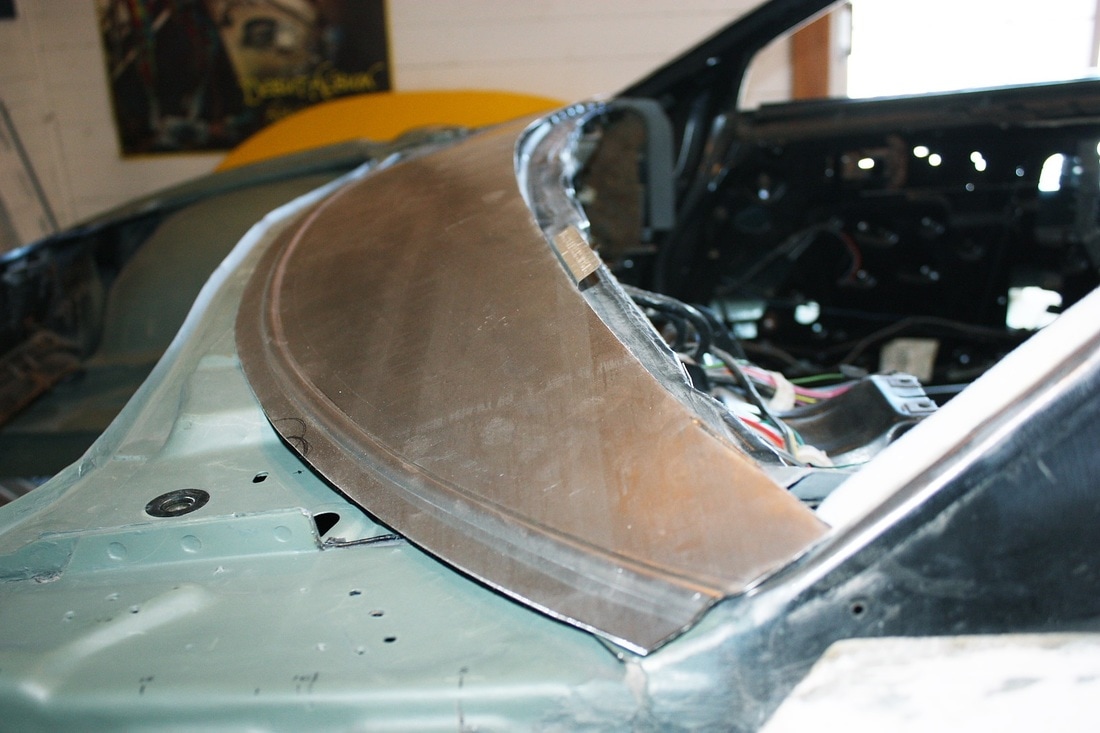
I held the two centre pieces in place with Cleco fasteners while I measured and completed the two end pieces. Here's the passenger side filler piece:
This was a lot more time consuming than it appears. Each time I'd fasten a new piece, the windshield tray would "oil can" and pop up or down somewhere else, changing the clearances and throwing my measurements for a loop. Of course each time that happened the tray would no longer be true to the shape of the glass either. I eventually tamed the beast though, and held it in place with enough Clecos to hold it down:
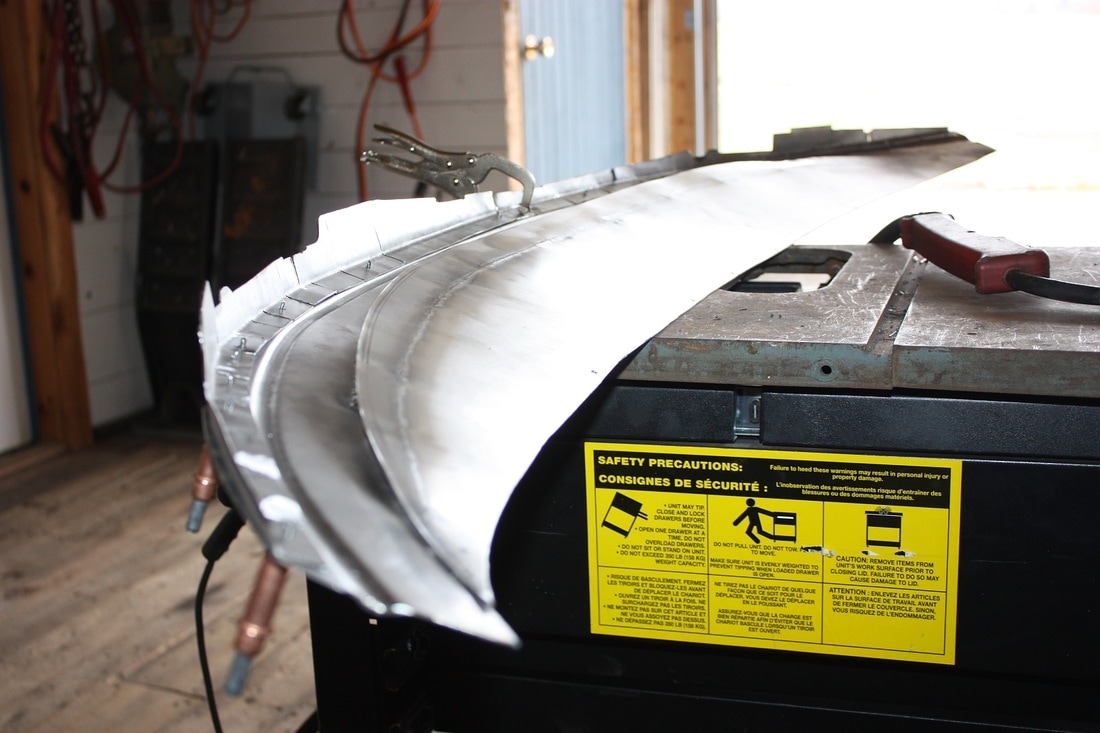
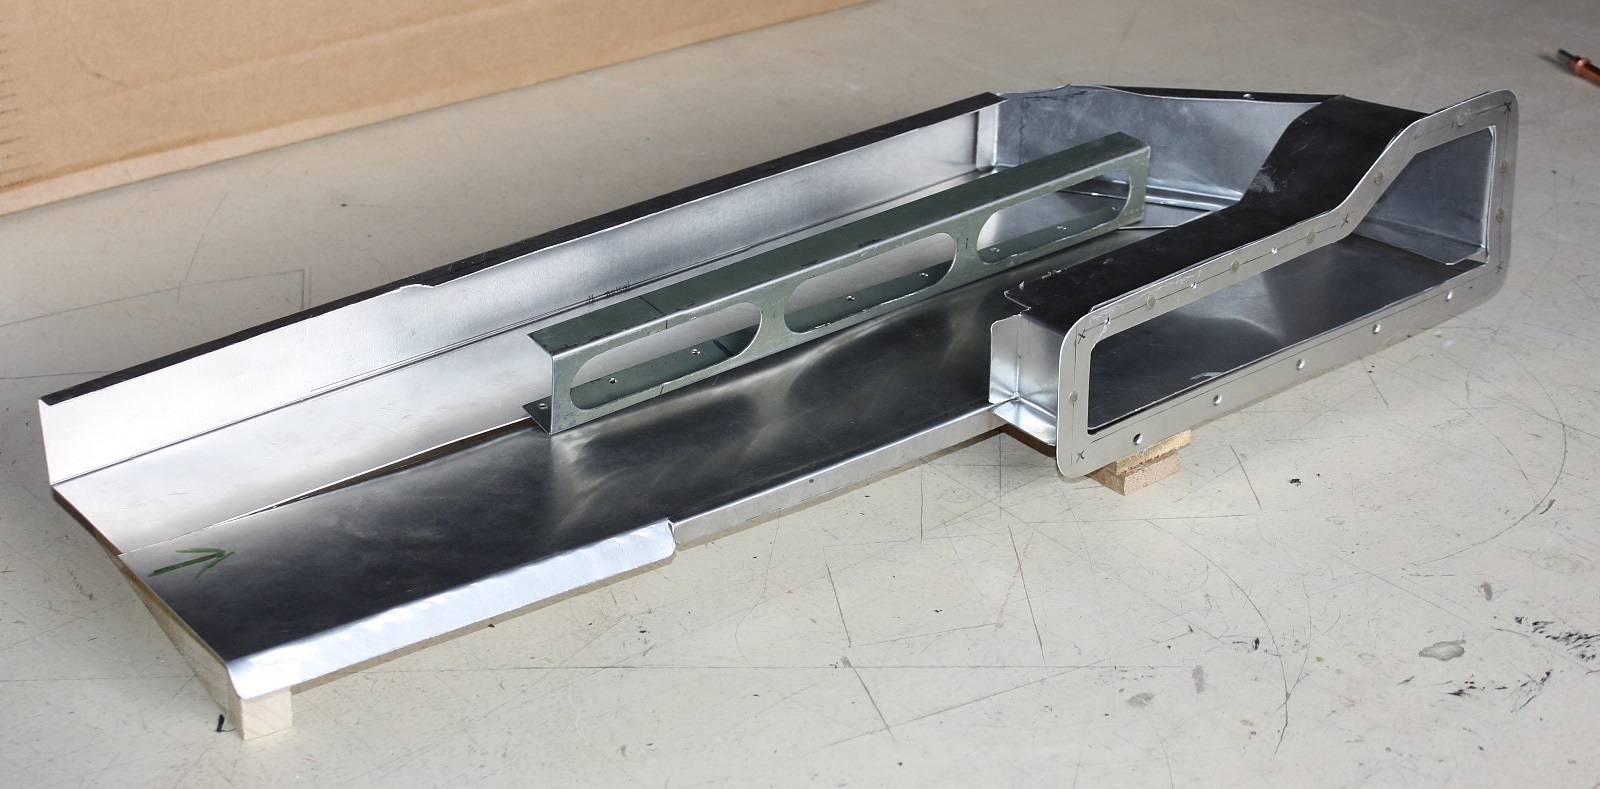
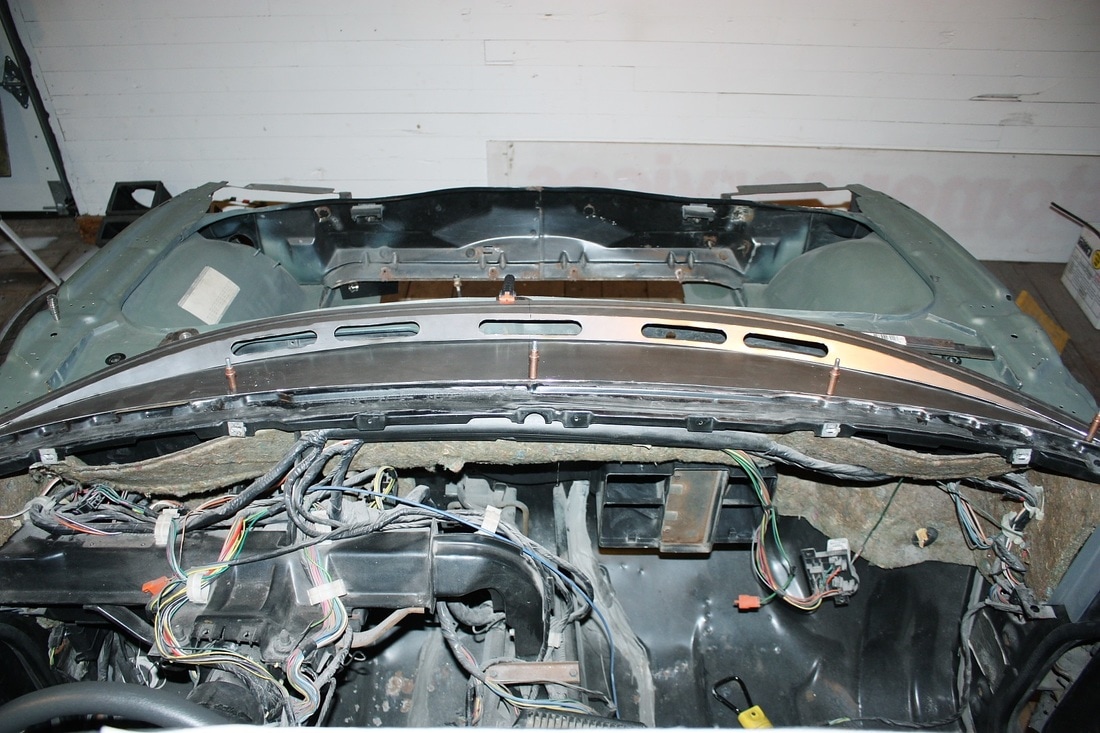
I removed it one last time to weld the filler pieces to the front edge of the tray, and prime the underside. Here's the upside-down tray ready for welding:
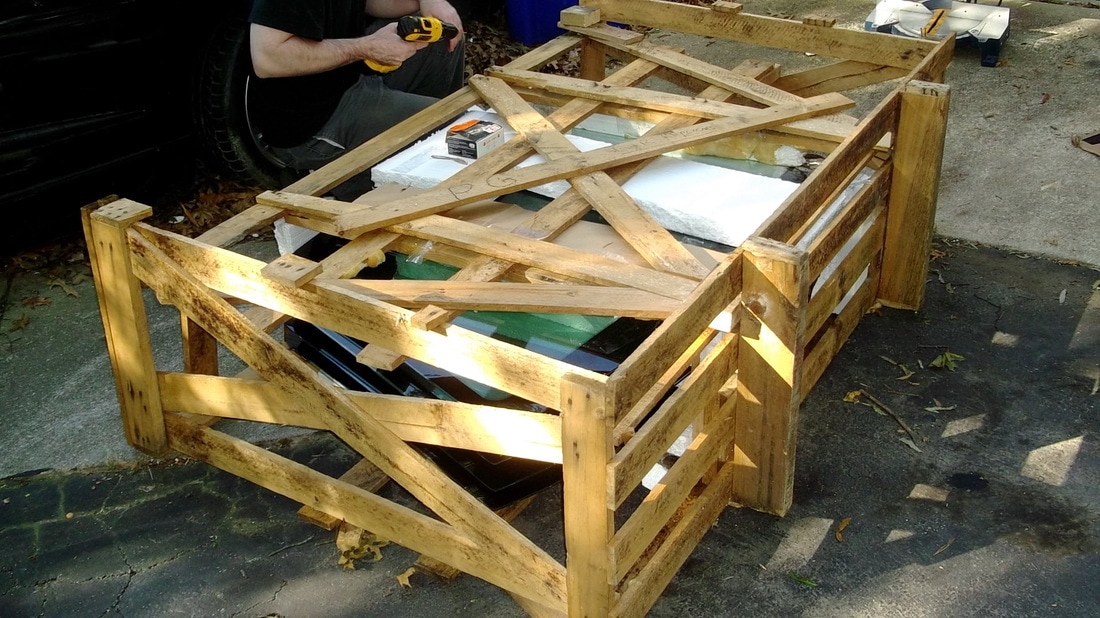
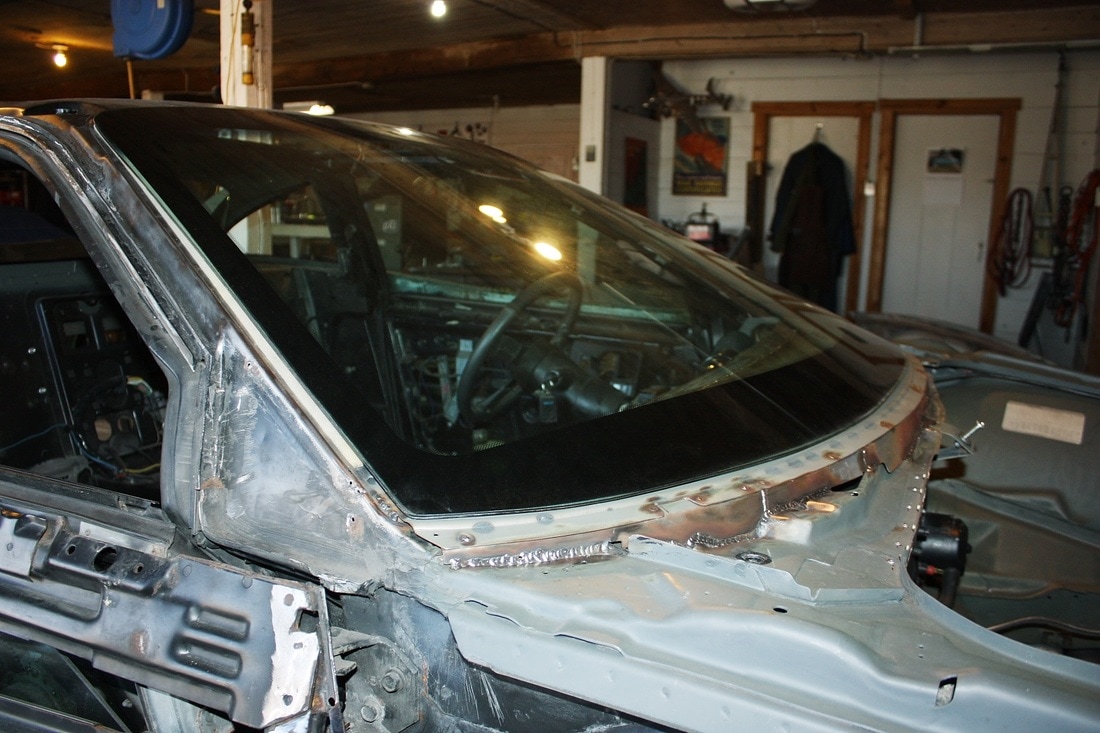
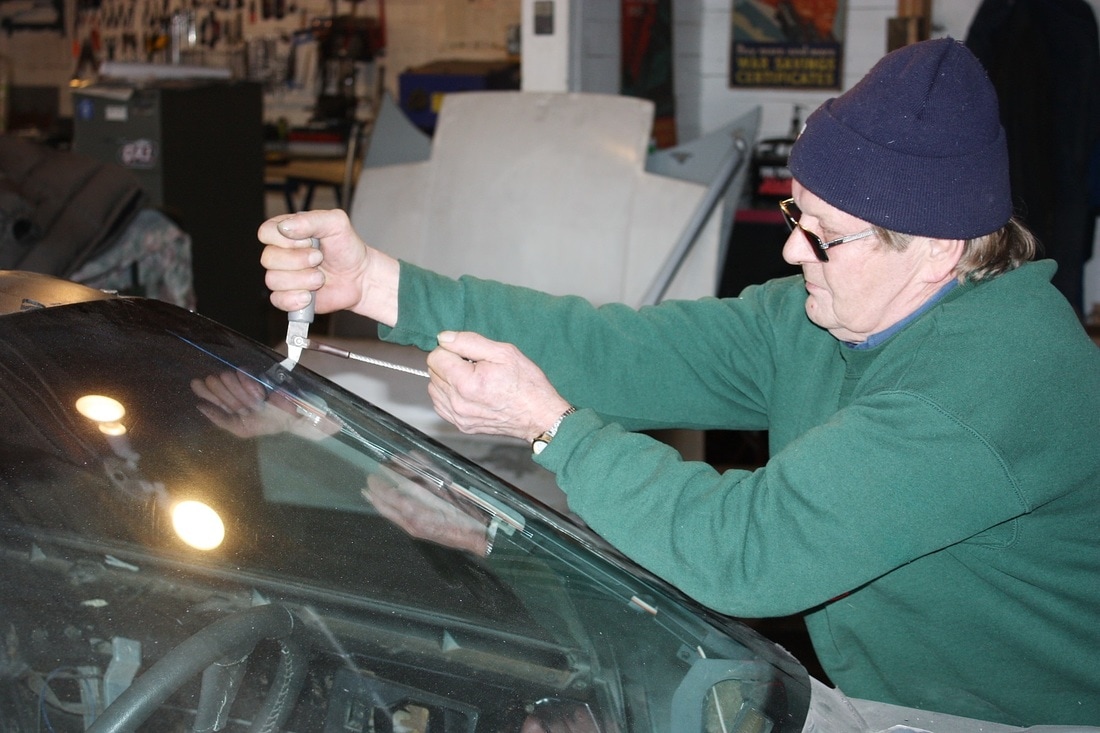
I then welded the tray to the chassis and was ready to unpack a glass windshield. I mentioned before that my friend Graham and I bought four windshields in a package deal. They were well-crated and survived the bumpy road trip from Pennsylvania to Nova Scotia undamaged:
They have a fairly wide black-out strip along the bottom, which looks odd while uninstalled, but disappears under the wiper arms on the finished car:
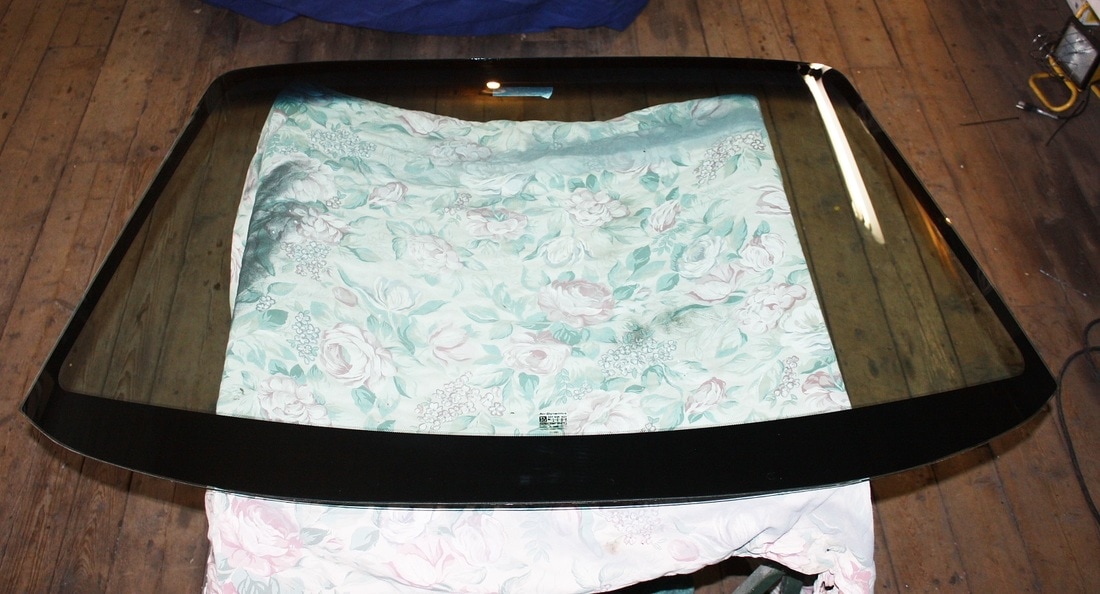
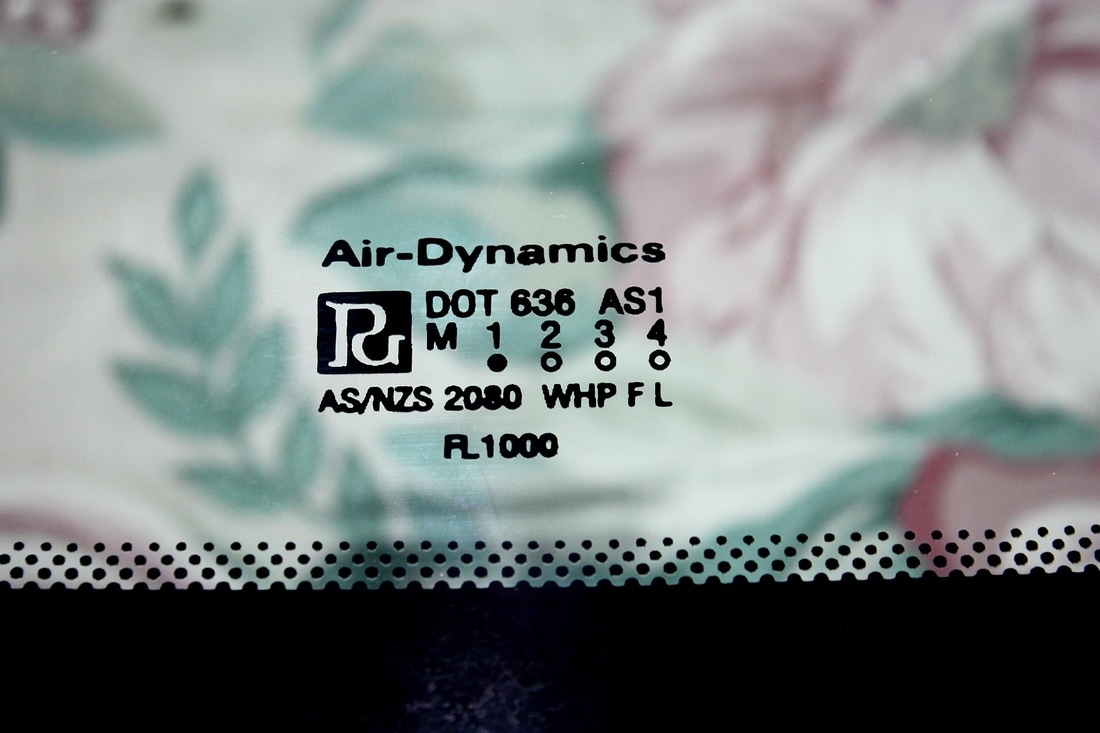
They were custom made by a company called Air Dynamics and are DOT certified:
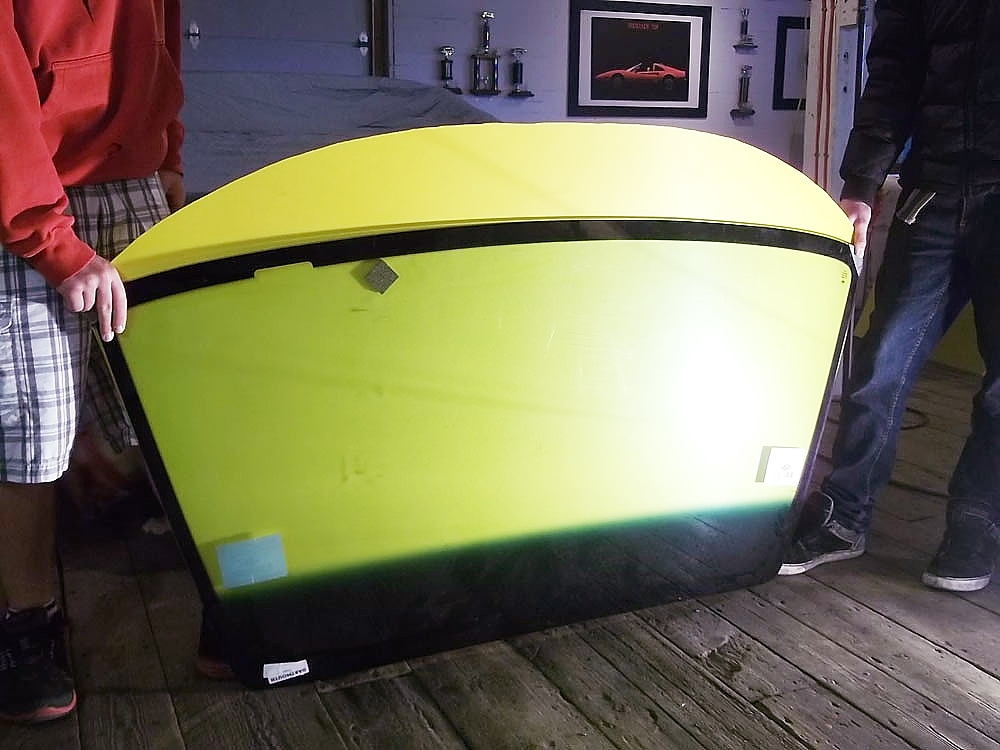
Here's a very vivid indication of just how much longer these windshields are than stock. I borrowed this photo from Graham when his boys held the template up against an OEM windshield:
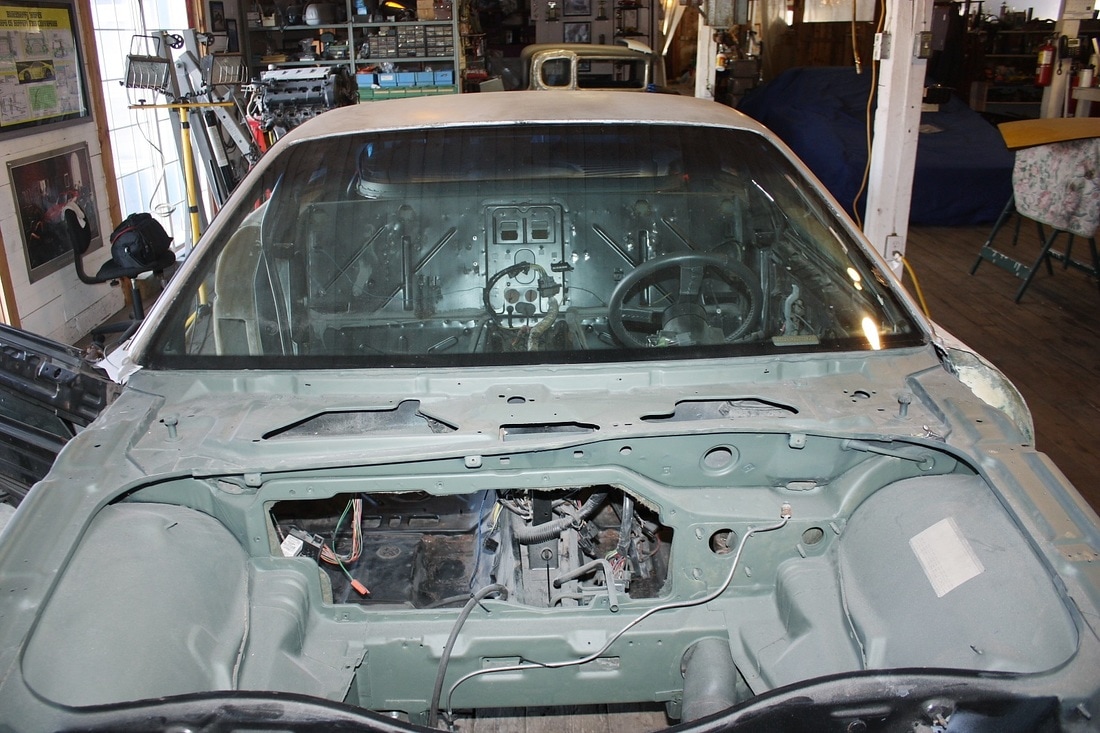
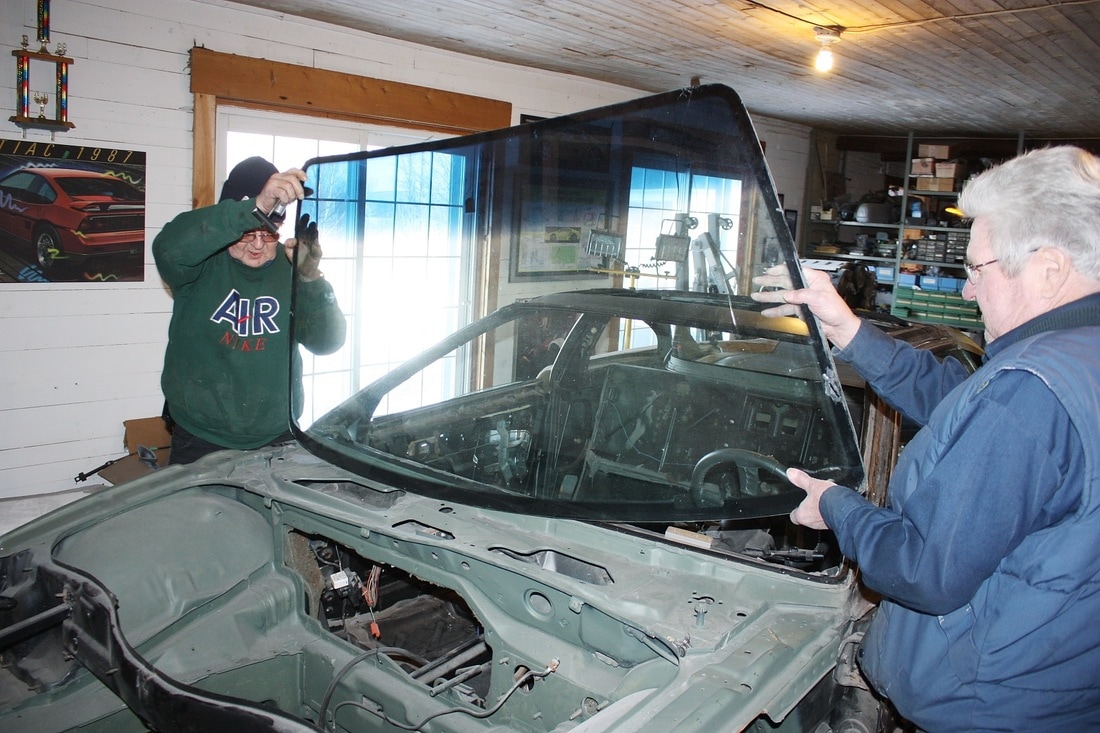
And here's the difference between OEM and the Air-Dynamics windshields on the car:
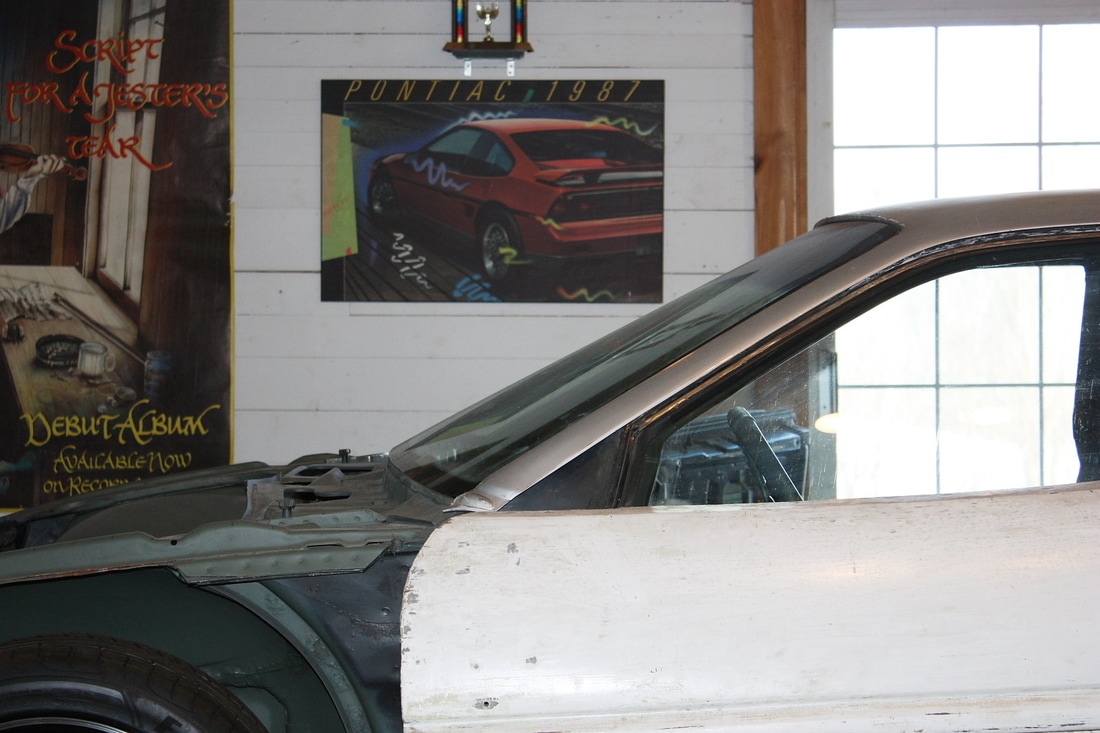
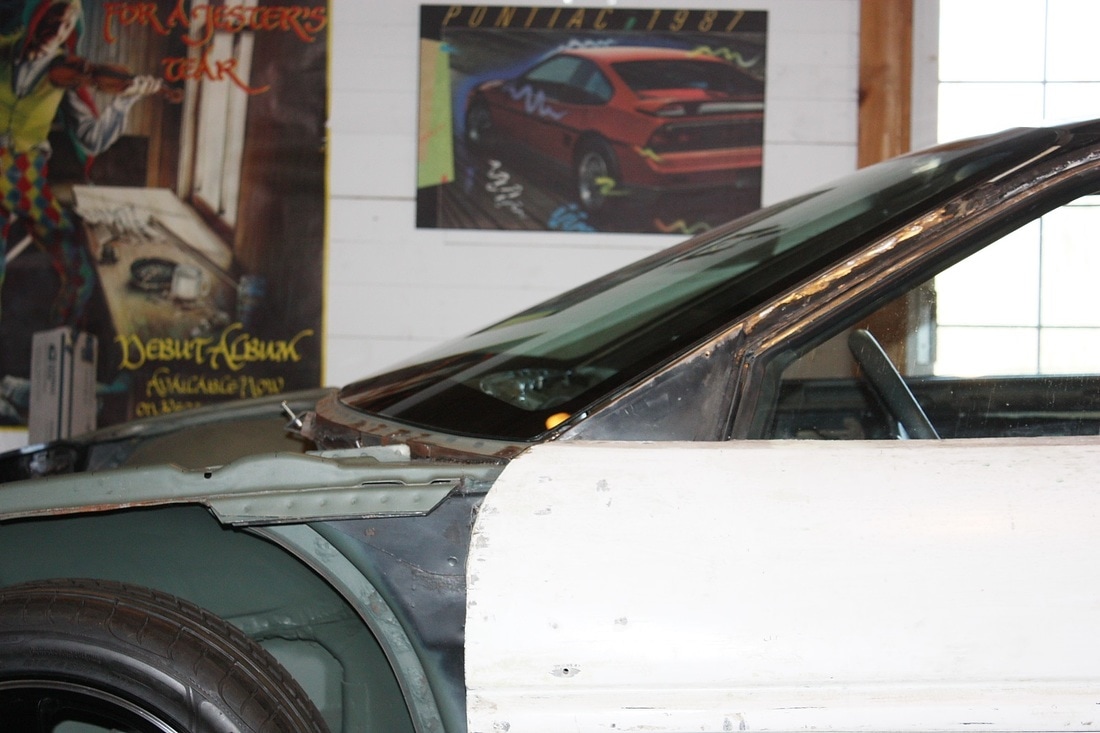
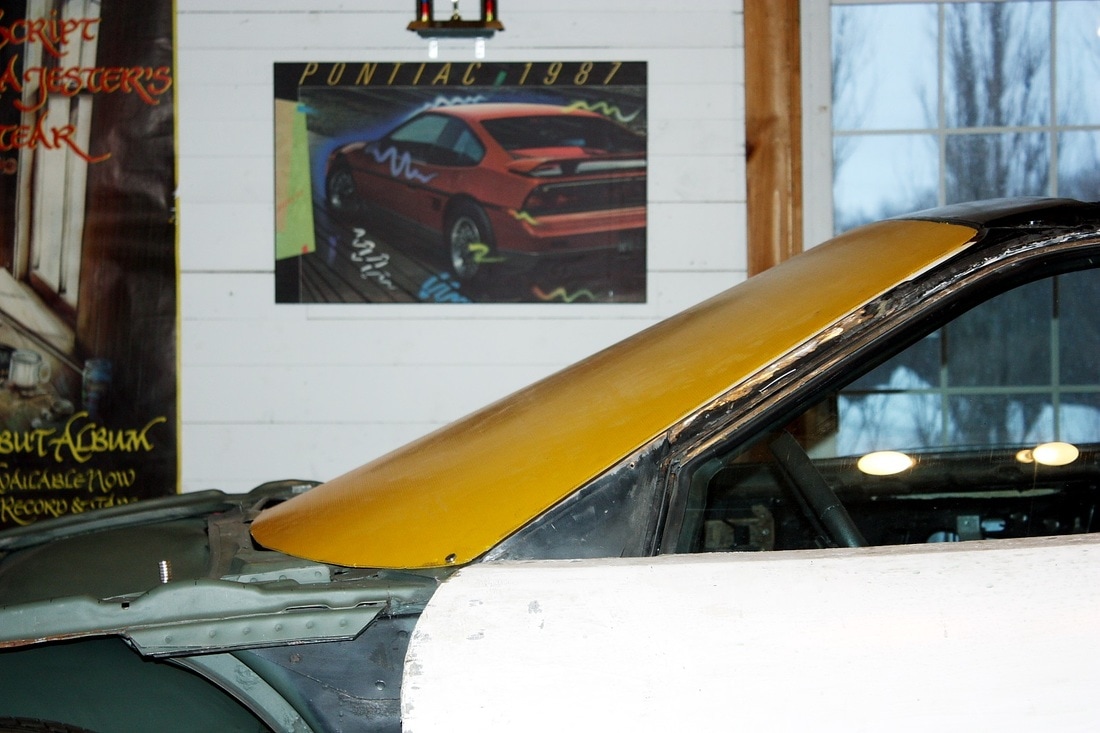
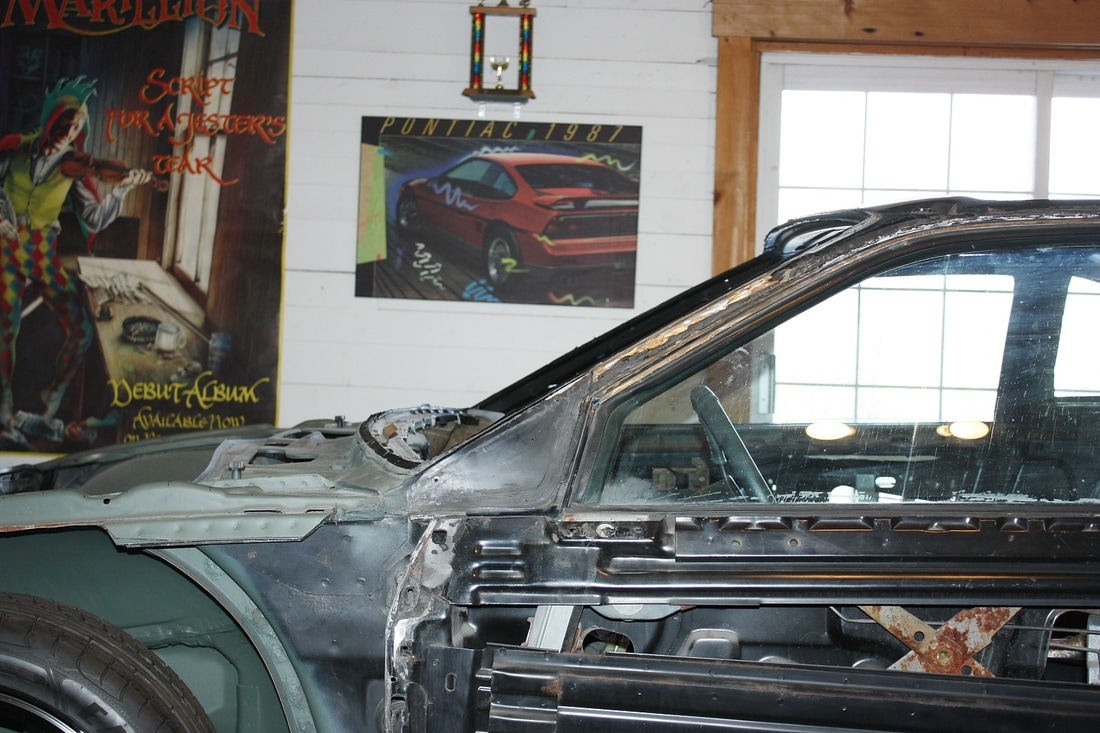
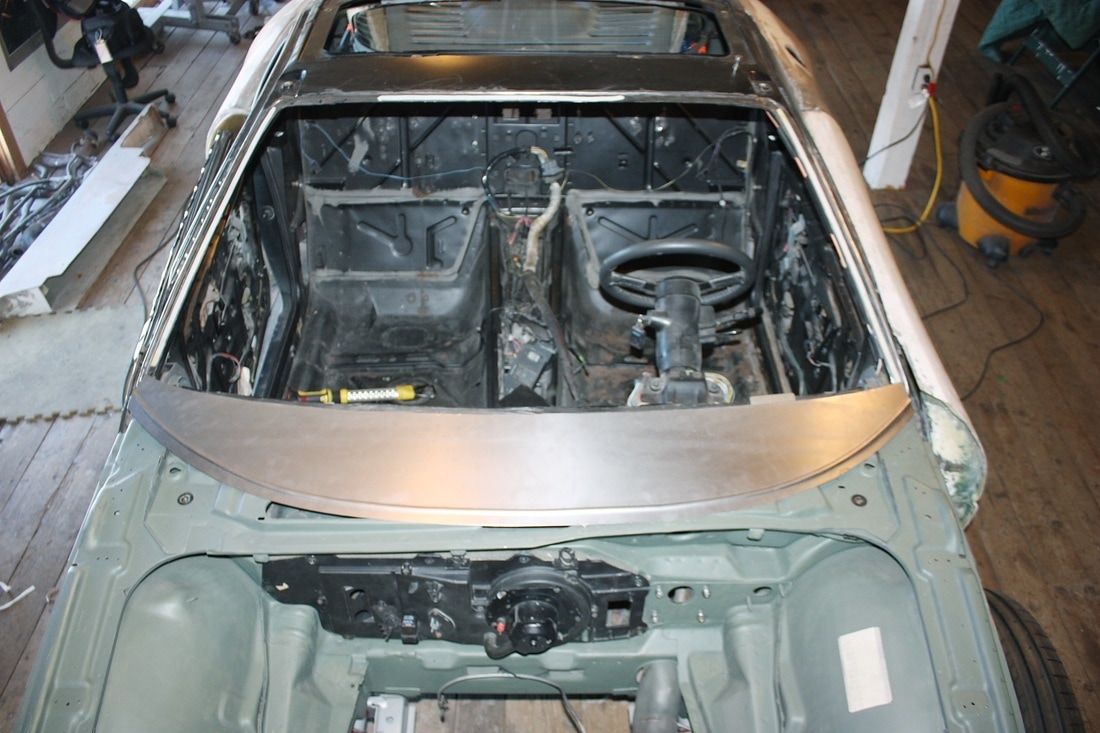
The new rake really changes the look of the car dramatically, which is hard to capture with a camera in tight quarters. Here's a shot from the passenger side showing how nicely the new windshield tray follows the glass contour:
One thing I noticed right away was that that the glass is about 1" narrower than stock. Along the A-pillars, the glass overlapped the mounting flanges by only 1/8"... definitely not enough to secure it to the chassis:
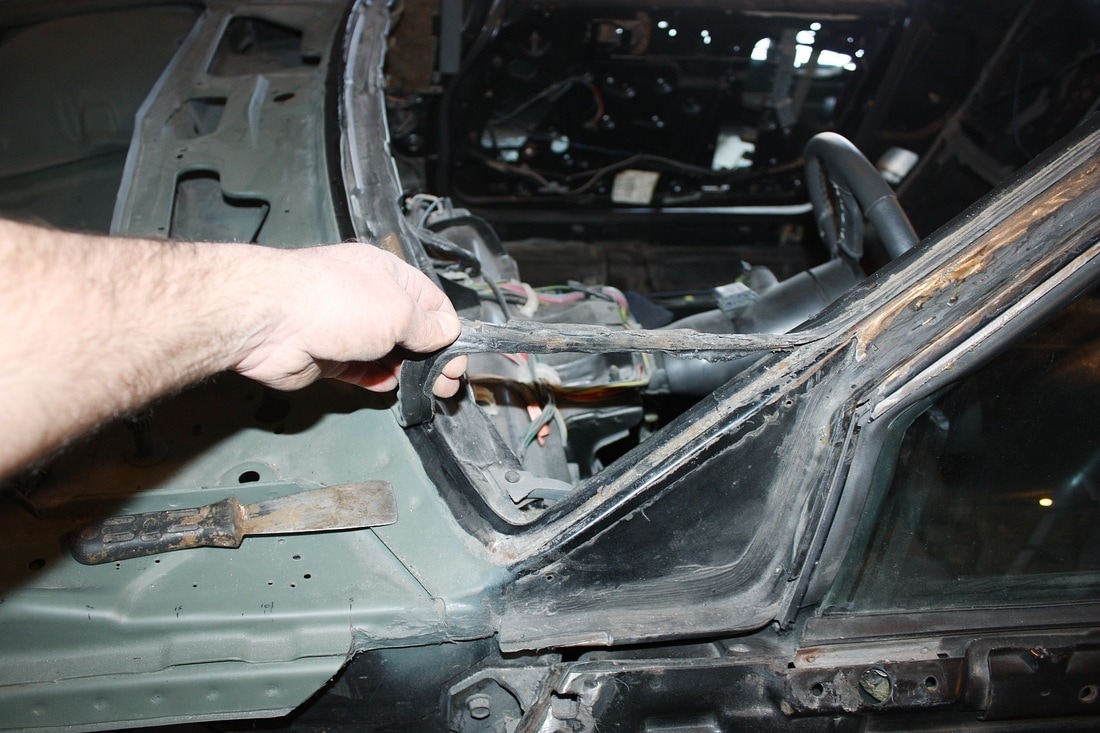
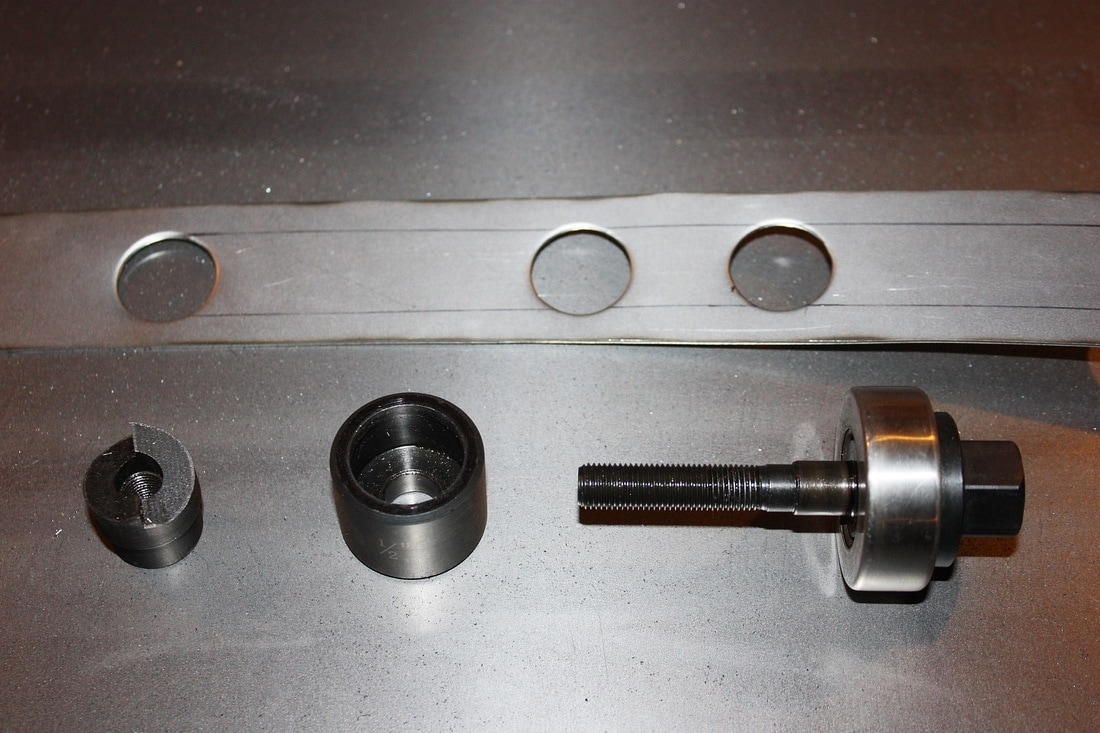
The solution was simple, I cut a couple of 1.5" wide steel strips to run up the A-pillars and overhang the stock mounting surfaces by about 1/2":

I drilled the new strips to rosette-weld them to the chassis, then ground the buds flush to prevent pressure points on the glass:
Lastly, I cleaned up the bare steel tray and A-pillar extensions and primed them with Duplicolor self-etching primer:
I mocked up the door skin to get a better idea how well the curves flowed and was quite happy with the outcome:


 RSS Feed
