My next challenge was to find a space-saver rim that would have the correct bolt pattern to fit my hubs, and have the right offset and overall diameter and clear my brake hardware. I wanted a space-saver primarily to save money: a full size Motegi alloy wheel and performance tire here in Canada would’ve cost me upwards of $450, and might never be used, whereas a junk yard space-saver might cost $20, and save a bit of weight and space.
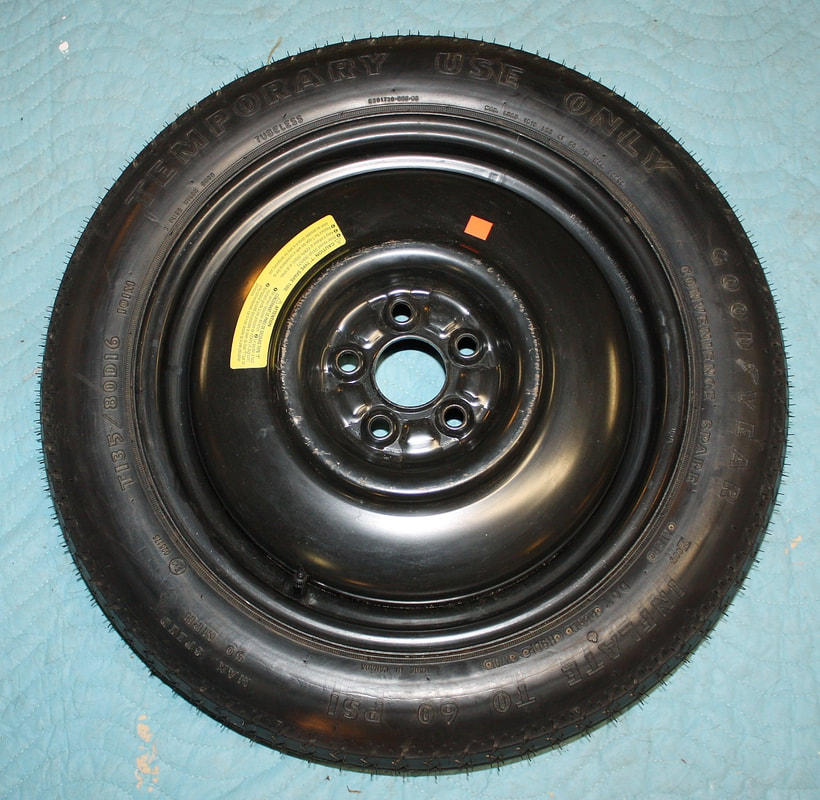
My job was made considerably more difficult when I discovered the local salvage yard removes all the spare wheels from their vehicles, using them to prop up the carcasses of stripped out chassis. After 2 hours of searching I found a spare wheel in a 1st generation Subaru Outback that they had forgotten in the trunk. The rim looked nearly perfect with a 16” dia, 5 x 100 mm bolt pattern, and a 48 mm offset. The hub bore was 1 mm smaller than needed, and the tire size was too large, but both of those issues could be managed:

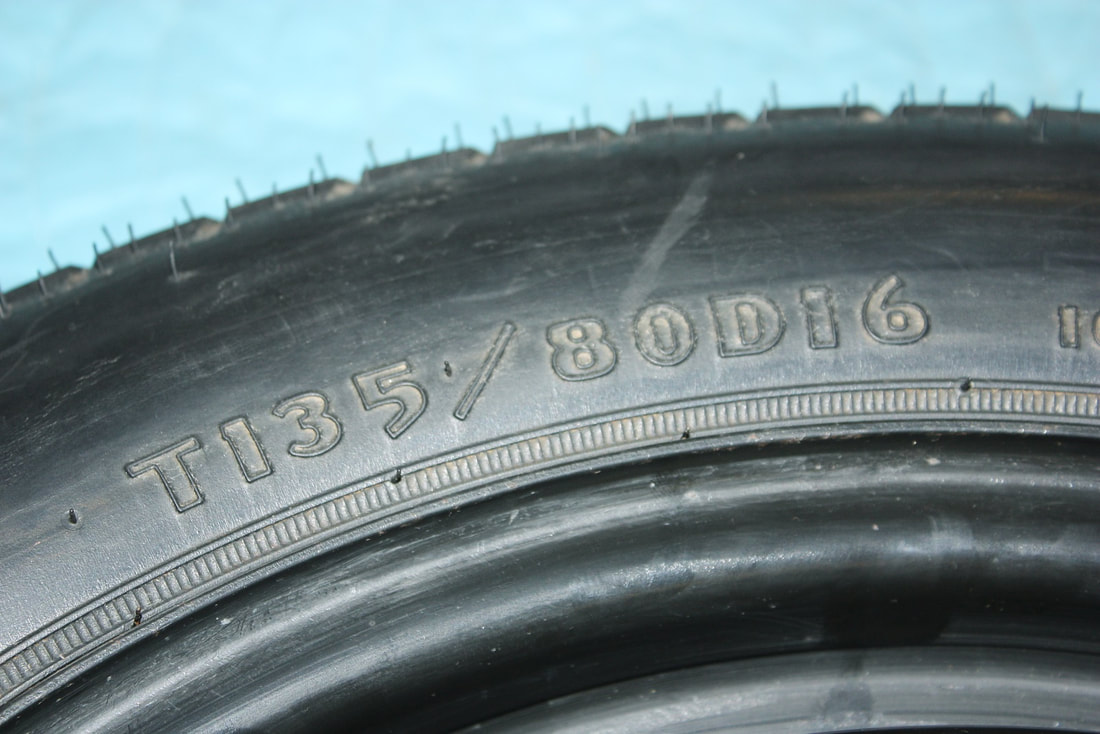
The stock T145/80/16 tire was about 5/8” too big in diameter, so I scrounged around for another hour before finding a T135/80/16 tire from 2014 Honda Insight. Of course the Insight’s rim was all wrong, but all I needed was the tire. So for $20 I left the salvage yard with two wheel assemblies and a plan to make my Franken-wheel. Another $10 was spent at the local garage to swap the tires and I came away a happy customer:
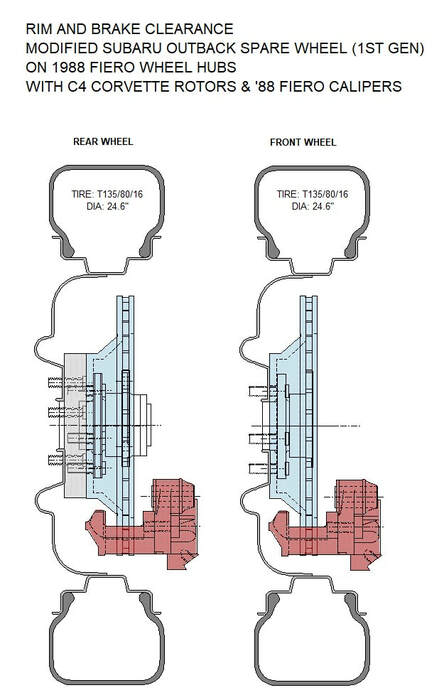
My field calculations told me that the Subaru rim would clear my C4 Corvette brakes, but I test fitted it to make sure. Then I drew up this schematic showing by how much I was in the clear:
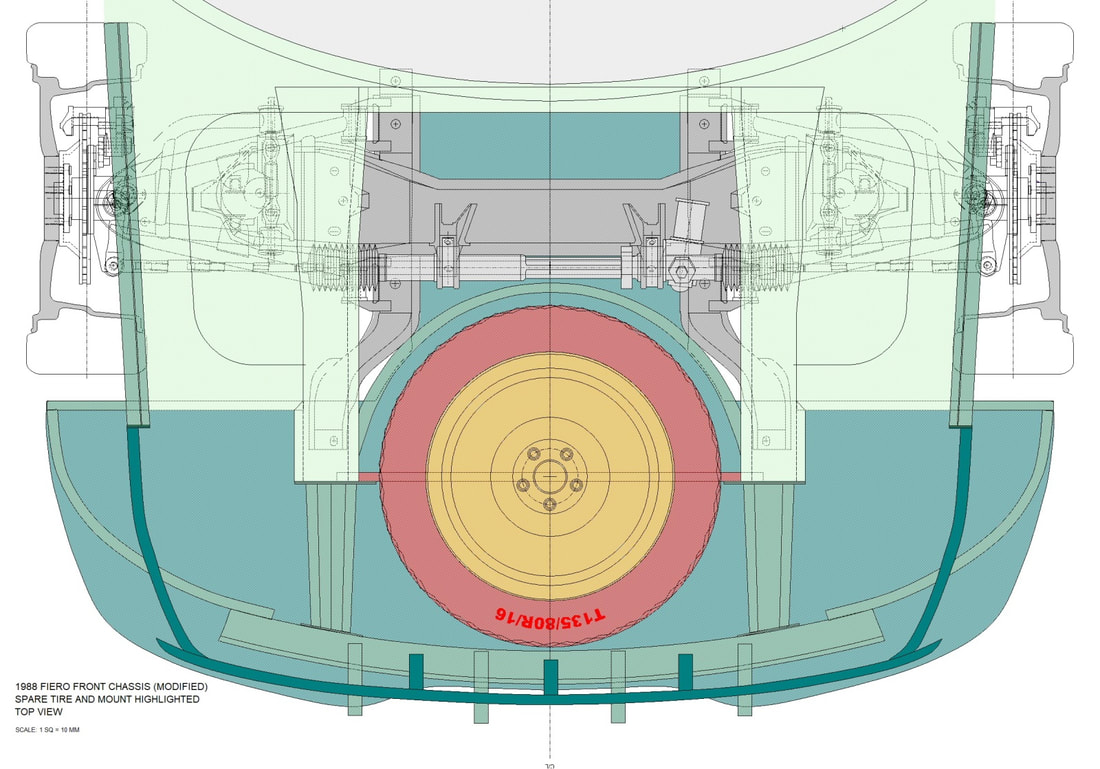
Then, I updated my digital chassis drawing to include the new hybrid temporary spare wheel:
I also test-fitted the wheel to my new spare tire compartment, then marked and tapped the square tube support under it, for the hold-down bolt. I used the hold-down hardware I scarfed from the Subaru:
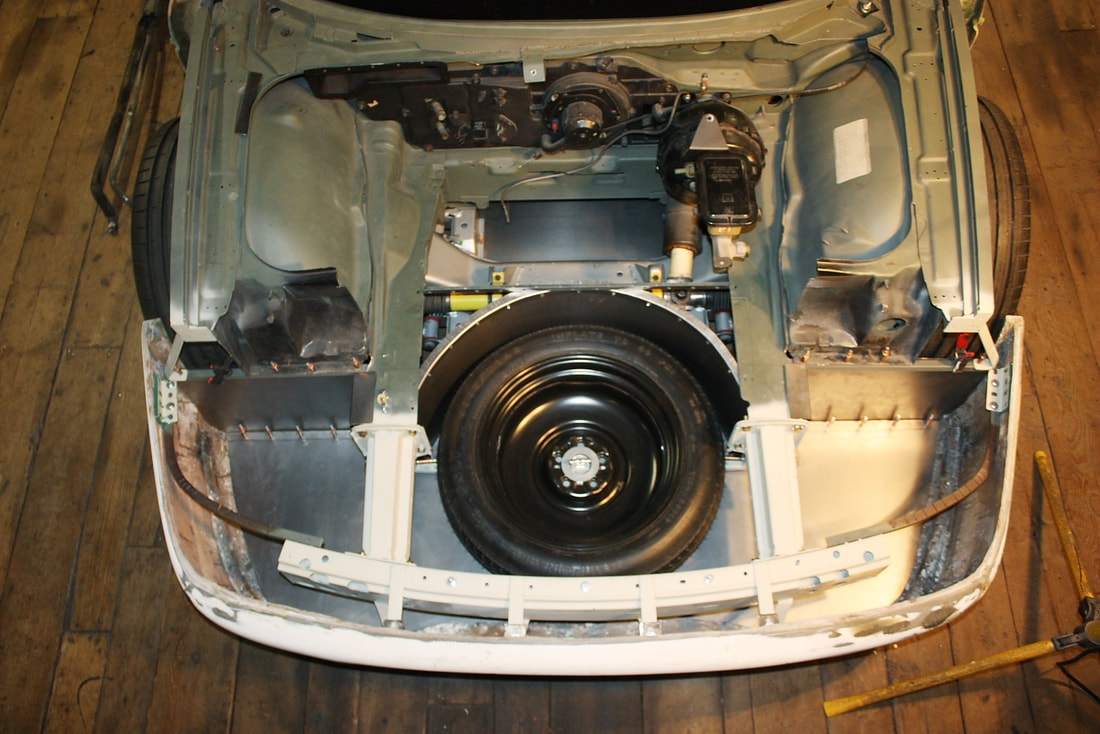
As luck would have it, while I was pilfering the salvage yard, I came across a late model Subaru Outback whose spare tire had been removed, but the foam-mounted jack kit was left behind. After checking the diameter, I found it would fit perfectly inside my spare tire rim. Not a bad find for an additional $20:
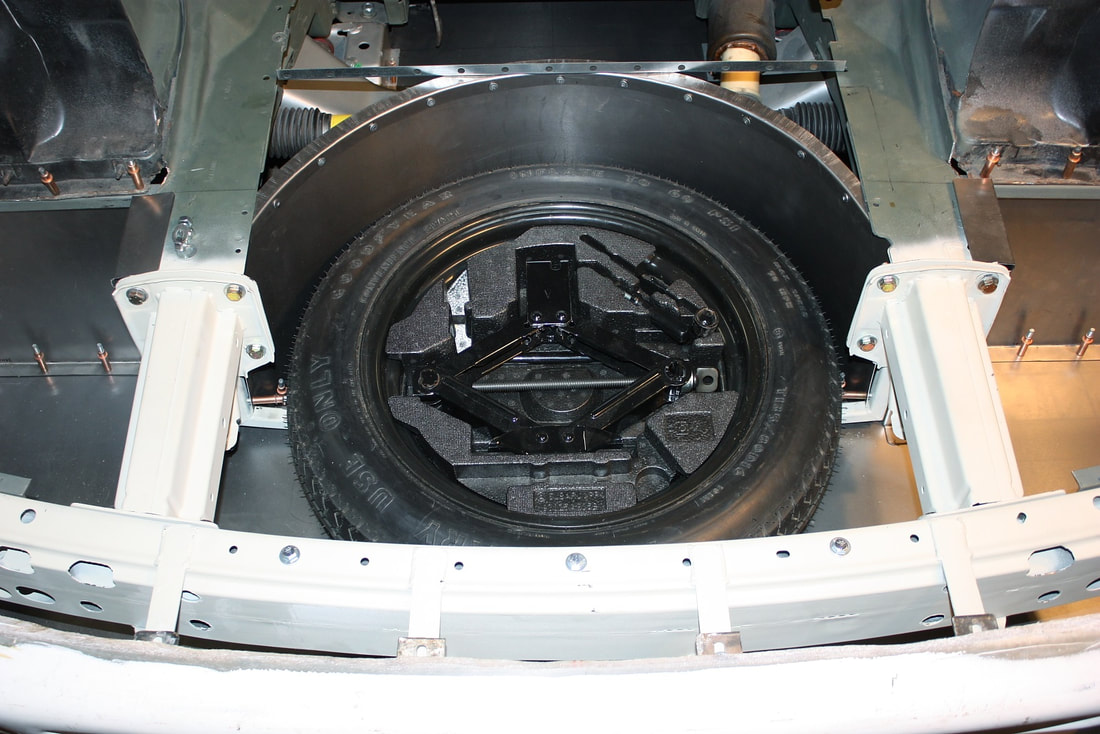
I may have to modify the top pad of the scissor jack for my frame, but that’s an easy task with a cut-off wheel and a welder.
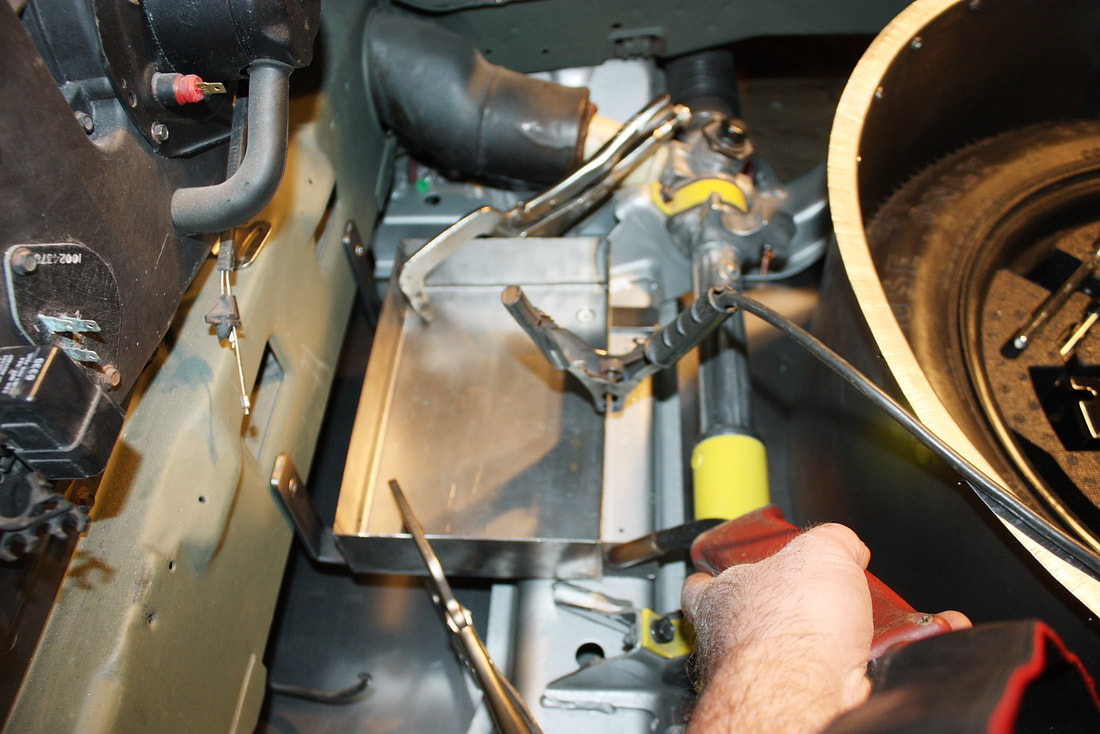
The next item on the agenda was to mount the battery. A basic Fiero hot-rodding trick is to move the 50 lb battery up front to help with better weight distribution. I didn’t have much choice since I was quickly running out of real estate in the engine bay.
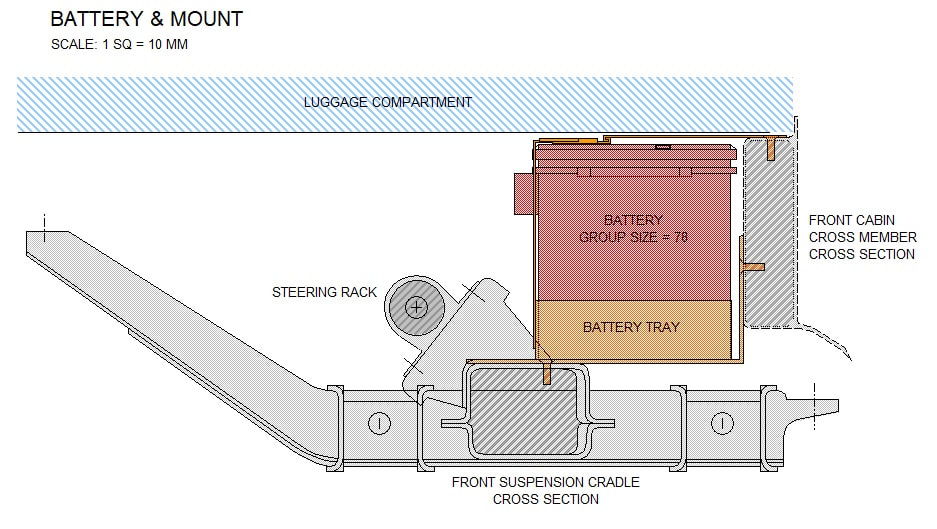
After a few measurements, it became clear the best place weight-wise, and for crash protection would be in the middle of the front suspension cross member. Some folks like to mount them ahead of the passenger front wheel, but that increases the polar moment of the car, and isn’t the best place in a front end collision. Besides, I have other plans for that space!
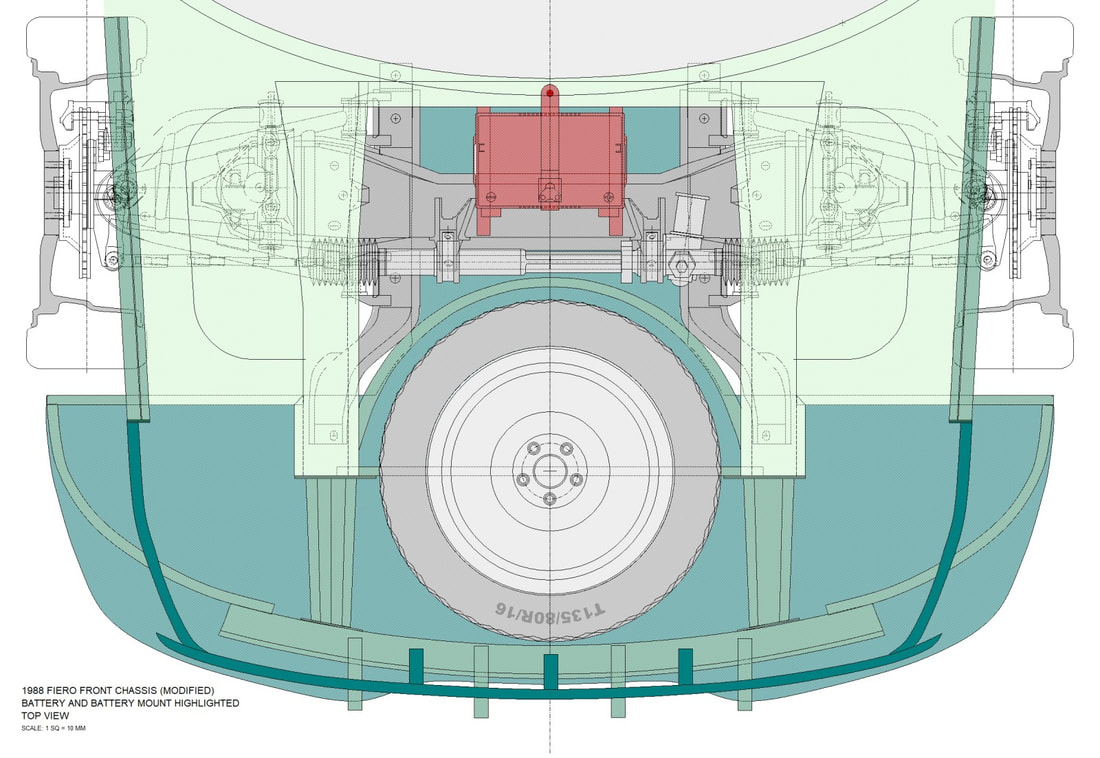
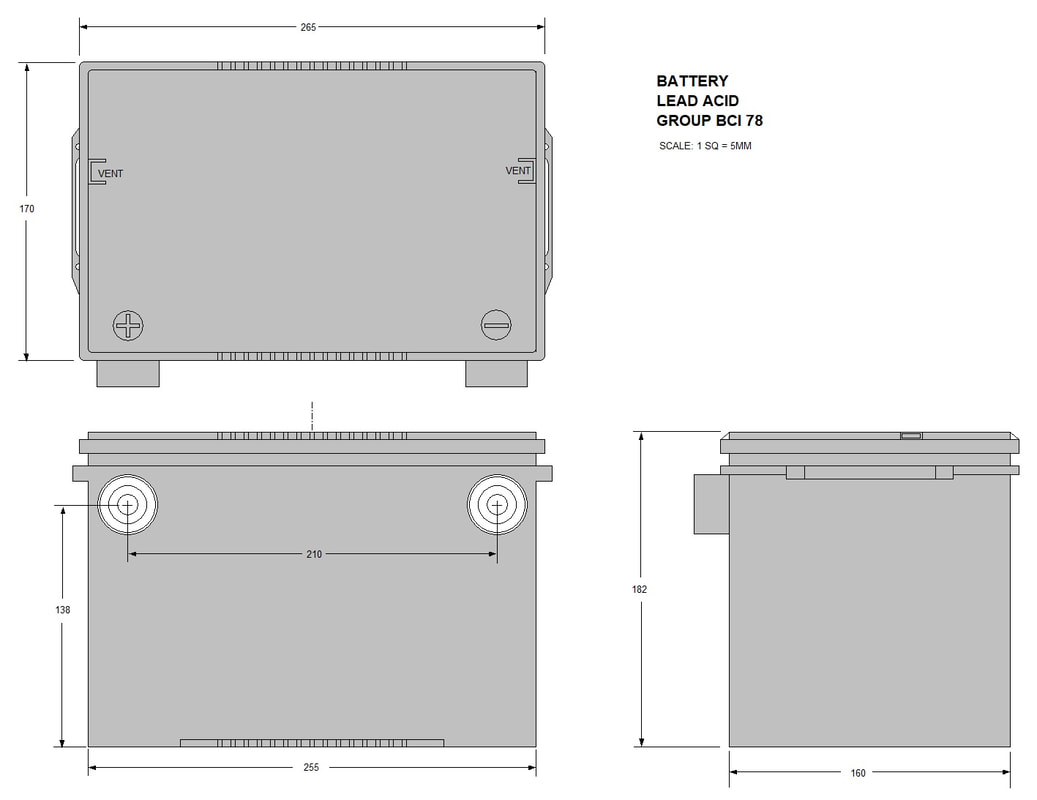
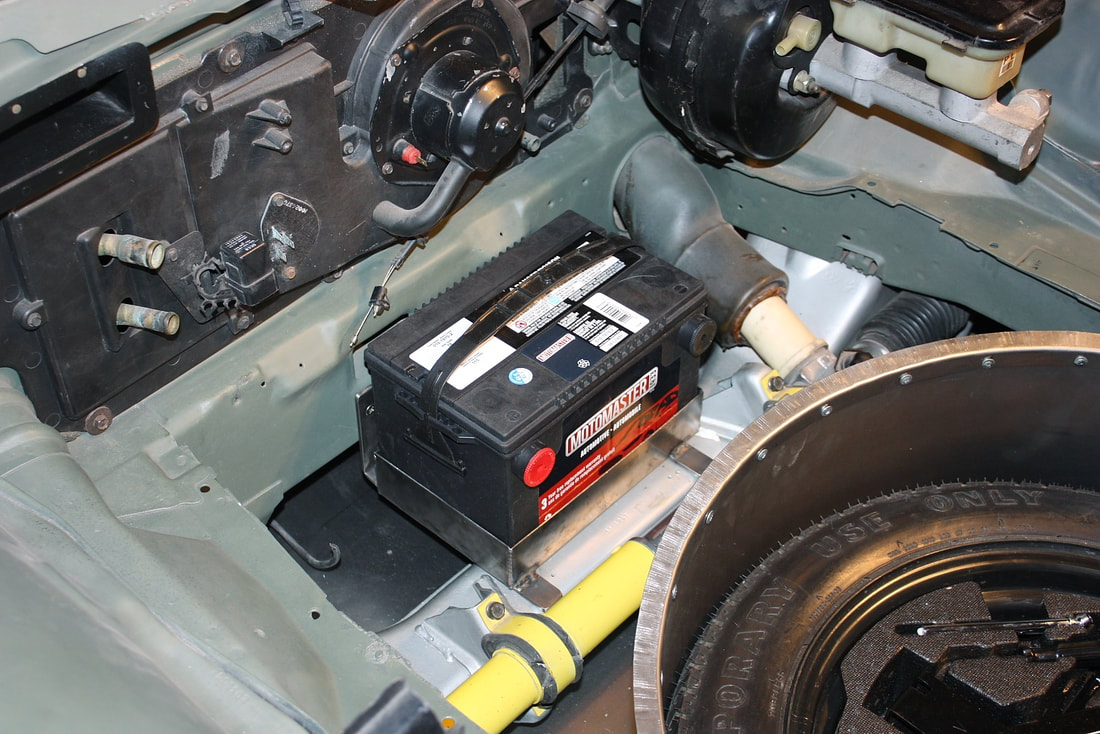
Space permitting, I wanted the amperage of the larger Cadillac battery (Group 78), which is one size up from the stock Fiero battery (Group 75):
Luckily, there was just enough room between the steering rack mounts to accommodate the larger power pack. I would’ve also preferred a top post, rather than a foul-prone side-post battery, but the terminals would’ve ended up sticking into my planned luggage compartment floor:
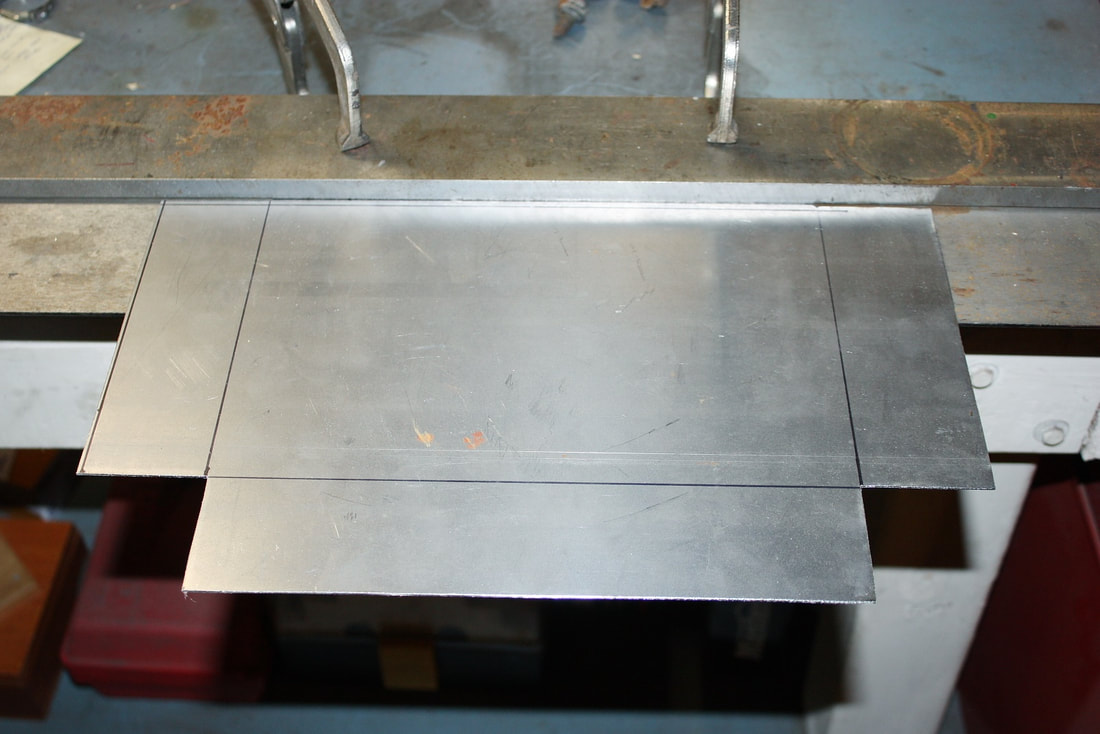
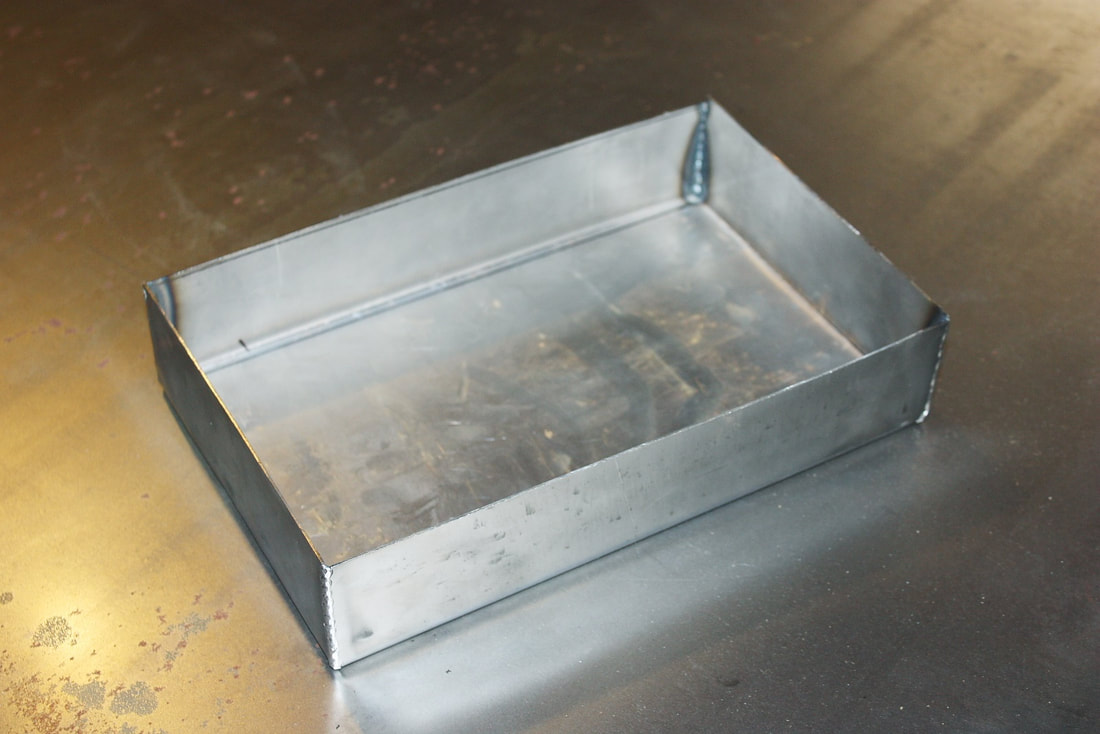
With my plan in hand, I set off to make the battery tray out of some 18 gauge steel to hold it in place laterally and longitudinally. After cutting out the basic box form, I folded the sides in my bench brake:
Then I zip-zapped the corners with my MIG welder:
To support the battery tray, I bent a pair 1/8” x 1” flat steel bars into “L” brackets, drilled two countersunk holes in each, then drilled and tapped matching holes in the front suspension cross member, and the front cabin cross member to attach them to:
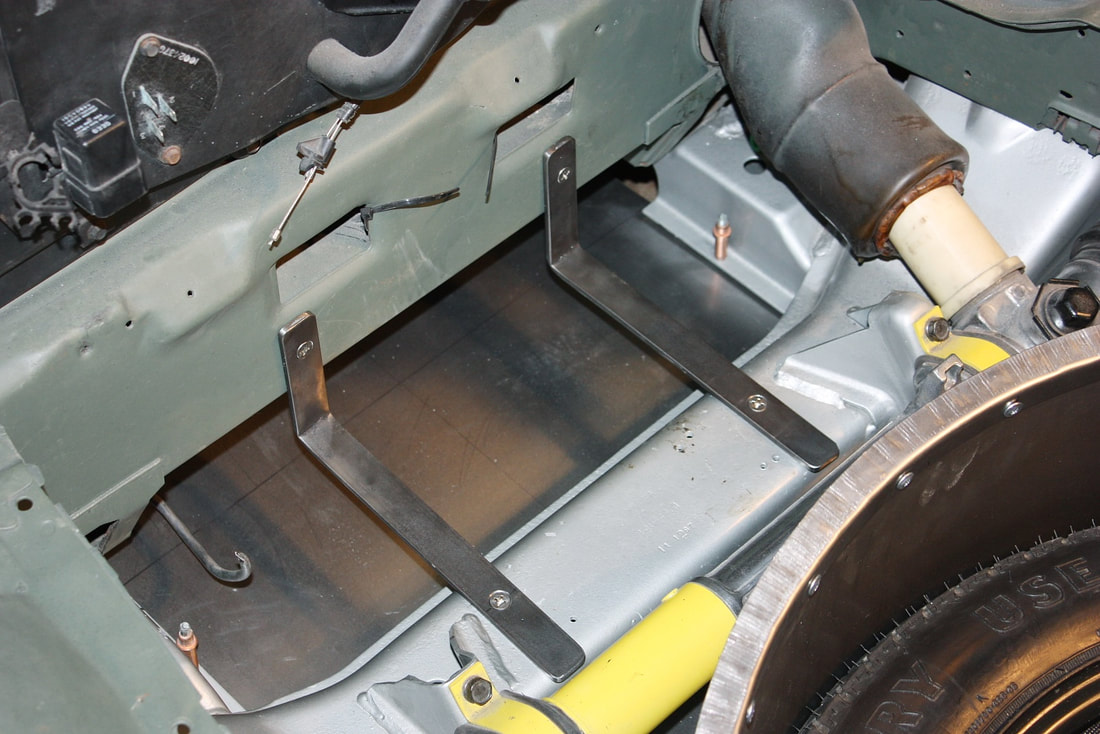
Then I clamped the battery tray to the supports, and welded the tray to them:
And voila! A tidy, low-CofG, safely protected battery. All that I needed more was an over-battery strap to keep it in place in the event of a roll-over:
I scratched my head a bit before stumbling upon a neat little low profile butterfly latch in a drawer I keep all sorts of odds and sods:
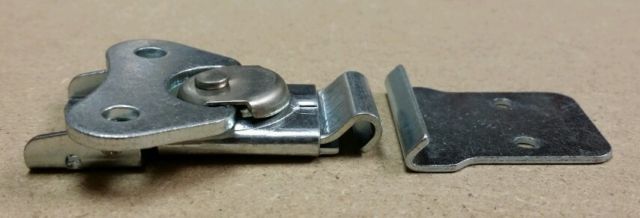
I riveted the latch to some 1-1/4” wide spring steel strapping, then riveted the lower end of the strapping to tray, while attaching the upper end to the cabin cross member with a single pivoting screw. To remove the battery, I undo the latch, and swing the upper strap out of the way:
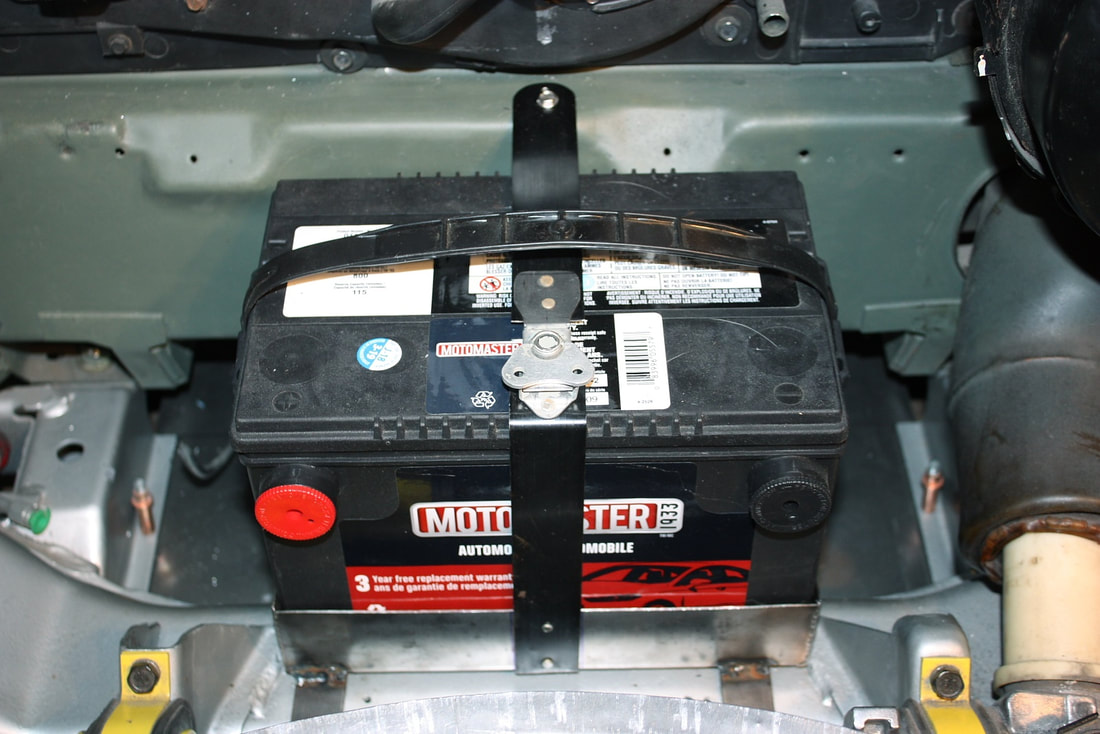
With the battery centered, there's still plenty of room on either side to pass the heater hoses and brake lines that head to the back end of the chassis.

 RSS Feed
