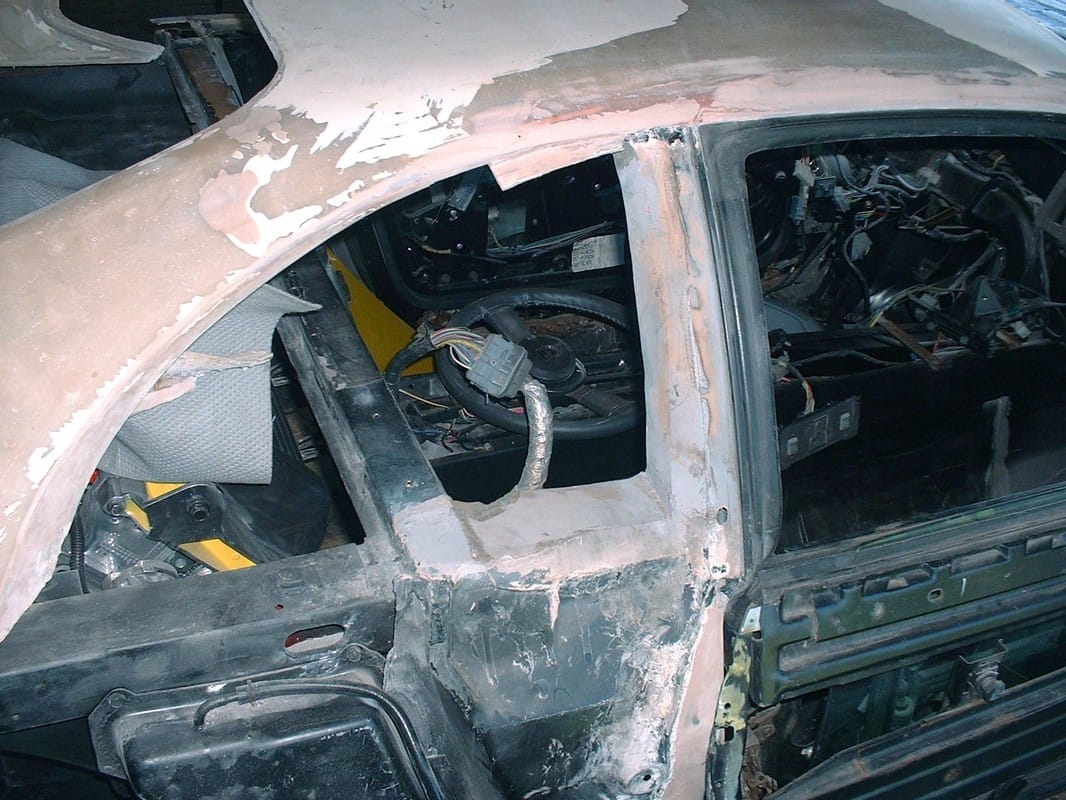
When I bought this "partly started" kit, I was either blind to, or deliberately overlooked a number of issues mainly because the price was right. One of the things I didn't pay much attention to was the quality of the roof modifications, mostly because everything was either hidden under fibreglass panels, or in the rough stages of being smoothed over with Bondo. Here's what the passenger side B-pillar looked like when I originally bought the car:
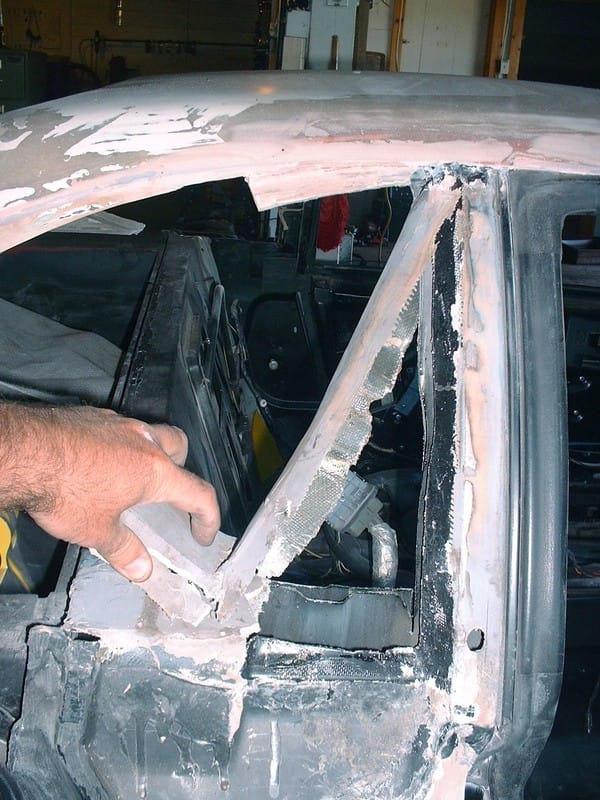
Bondo's fine on structural metal when it's used to smooth out a warped surface, but after poking around I found that it had been used as a substitute for the metal structure!
Here's a quick summary of why the B-pillars needed more than a cosmetic makeover once they'd been chopped down from the stock configuration. Figure A in the diagram below shows what the stock cross section of the B-pillar looks like. It's formed from three sheet metal stampings spot welded together to make a hollow chamber:
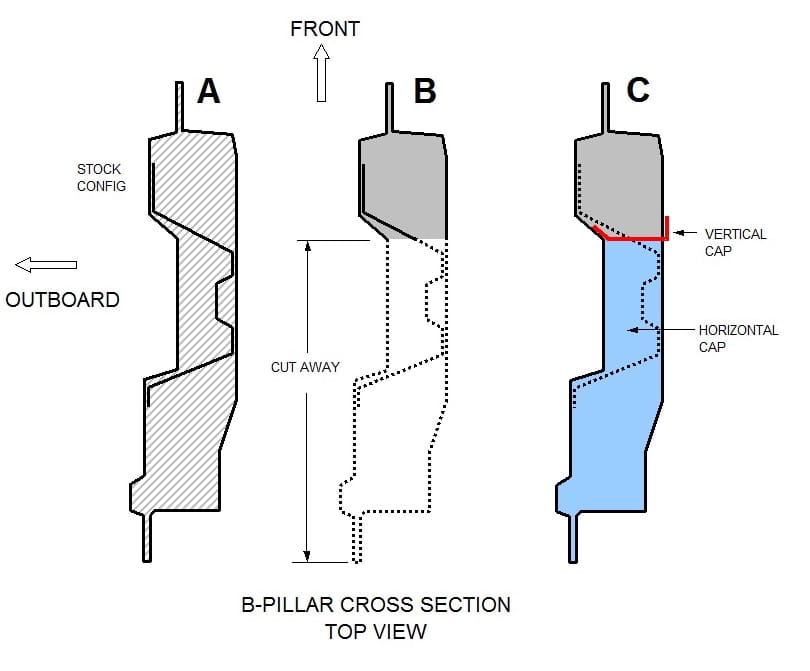
The dotted lines in Figure B show the portion of the stock B-pillar that was removed to make way for the quarter windows, and to give a nice slender B-pillar. The trouble with the slender B-pillar is that the three stampings that form it are no longer a closed chamber, and lose strength not only from the decrease in overall cross section, but also from the B-pillar becoming an open channel.
Figure C shows what's needed to regain some of the lost rigidity. First, the slender B-pillar had to be closed off with a vertical cap (in red) recreating a chamber (similar to boxing in a C-channel frame on hot rod, only smaller in scale). The second was to bridge the inner and outer walls of the cut-away portion with a horizontal cap (in blue).
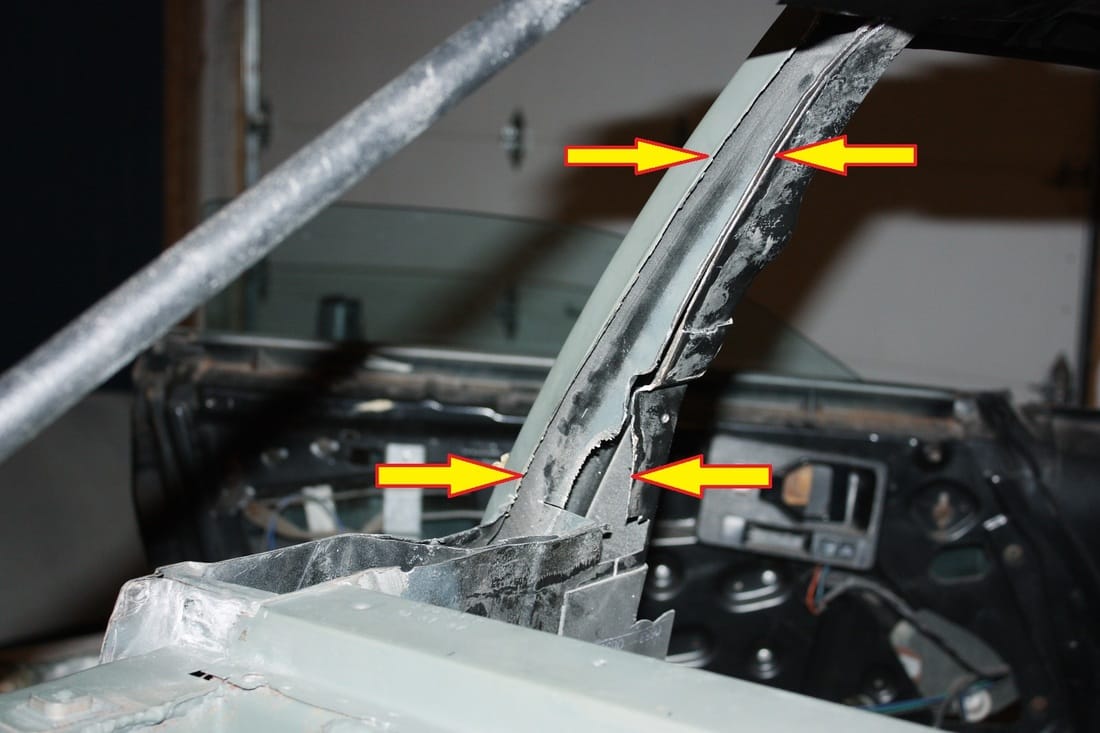
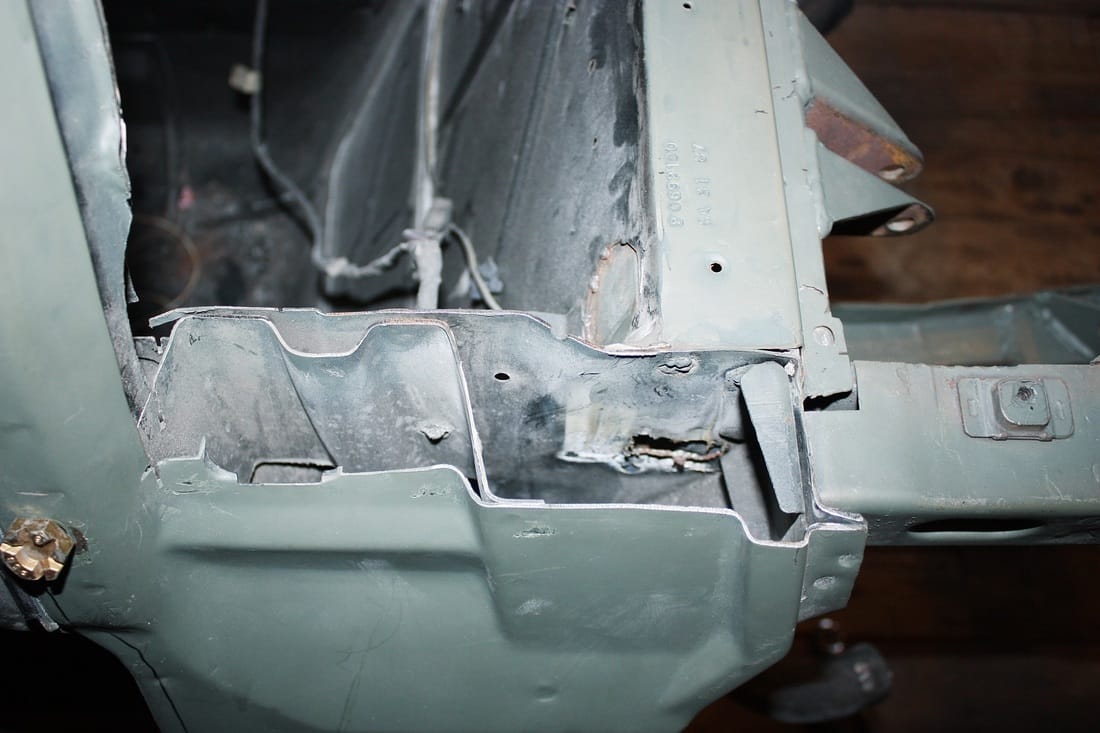
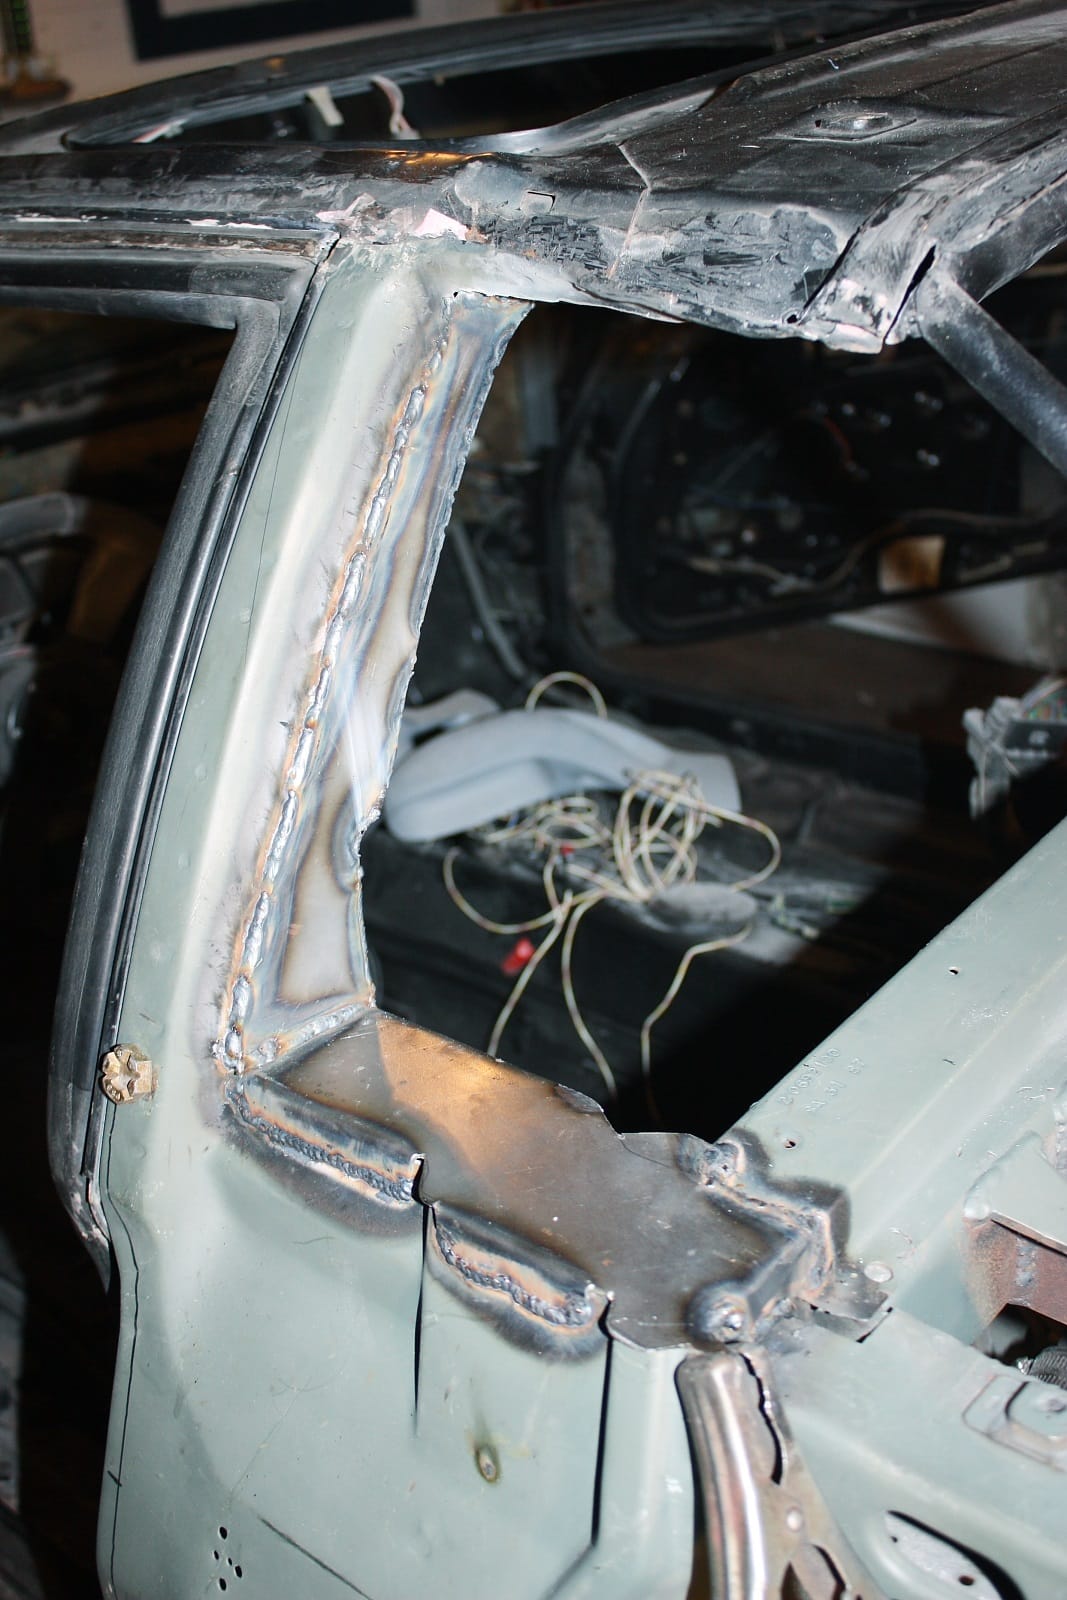
Here's the driver's side B-pillar as seen looking towards the front of the car. The Bondo's all been cleaned up to show the width of the open seam (red arrows) that resulted from having cut the aft 2/3's of the B-pillar off:
And here's the gaping cross section of the cut-away B-pillar. This photo is taken looking down on the driver's side pillar... the front of the car is to the left in the photo:
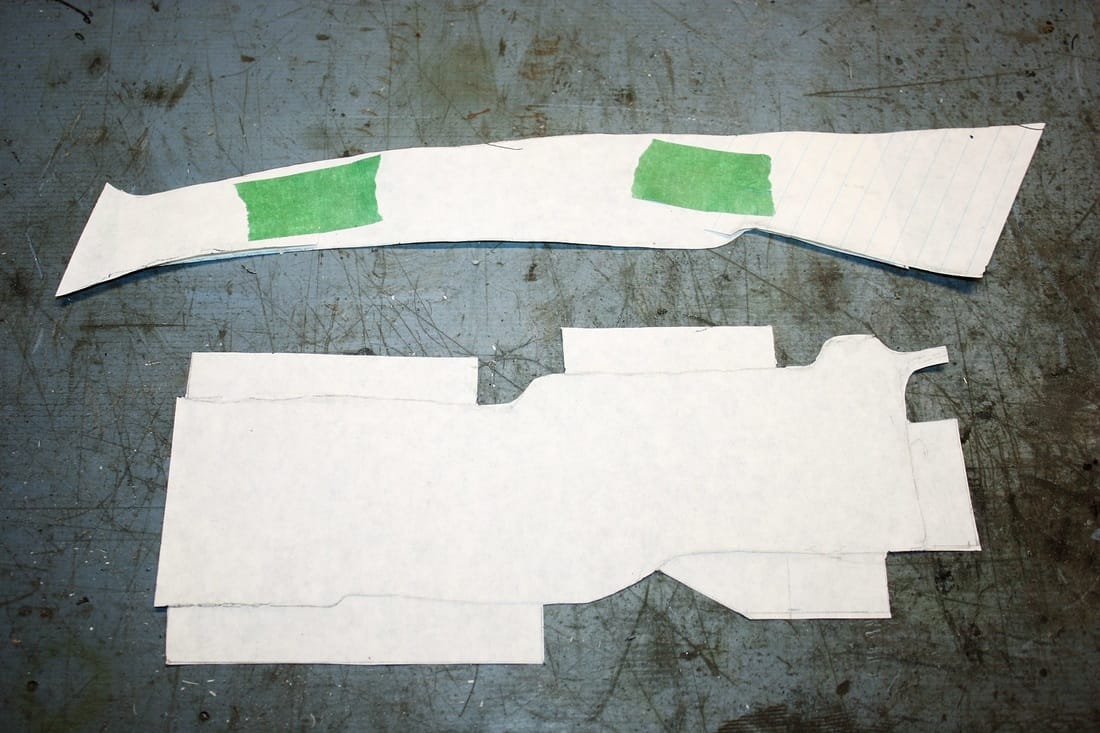
To repair the B-pillar, I used some cardboard to fabricate some templates:
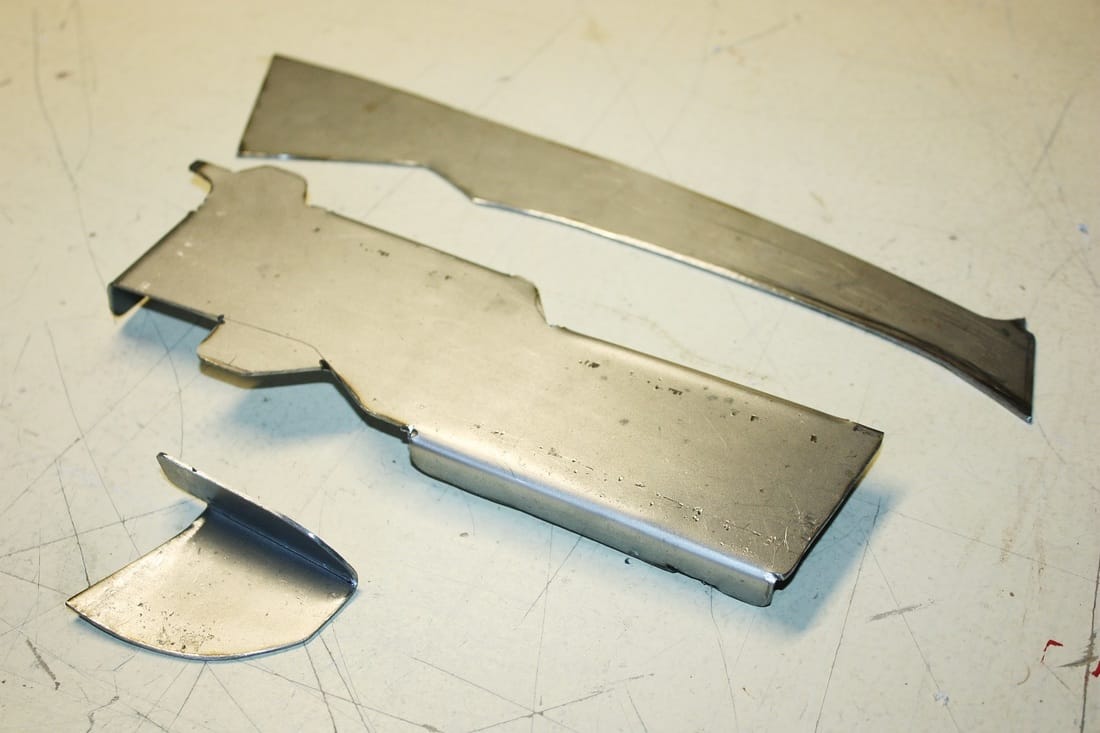
Then traced the templates onto some 20 gauge steel, and cut them out with a cut-off wheel in my angle grinder:
I test fitted the parts and tweaked them to suit each side. Here's the passenger side B-pillar with the reinforcement caps mocked up:

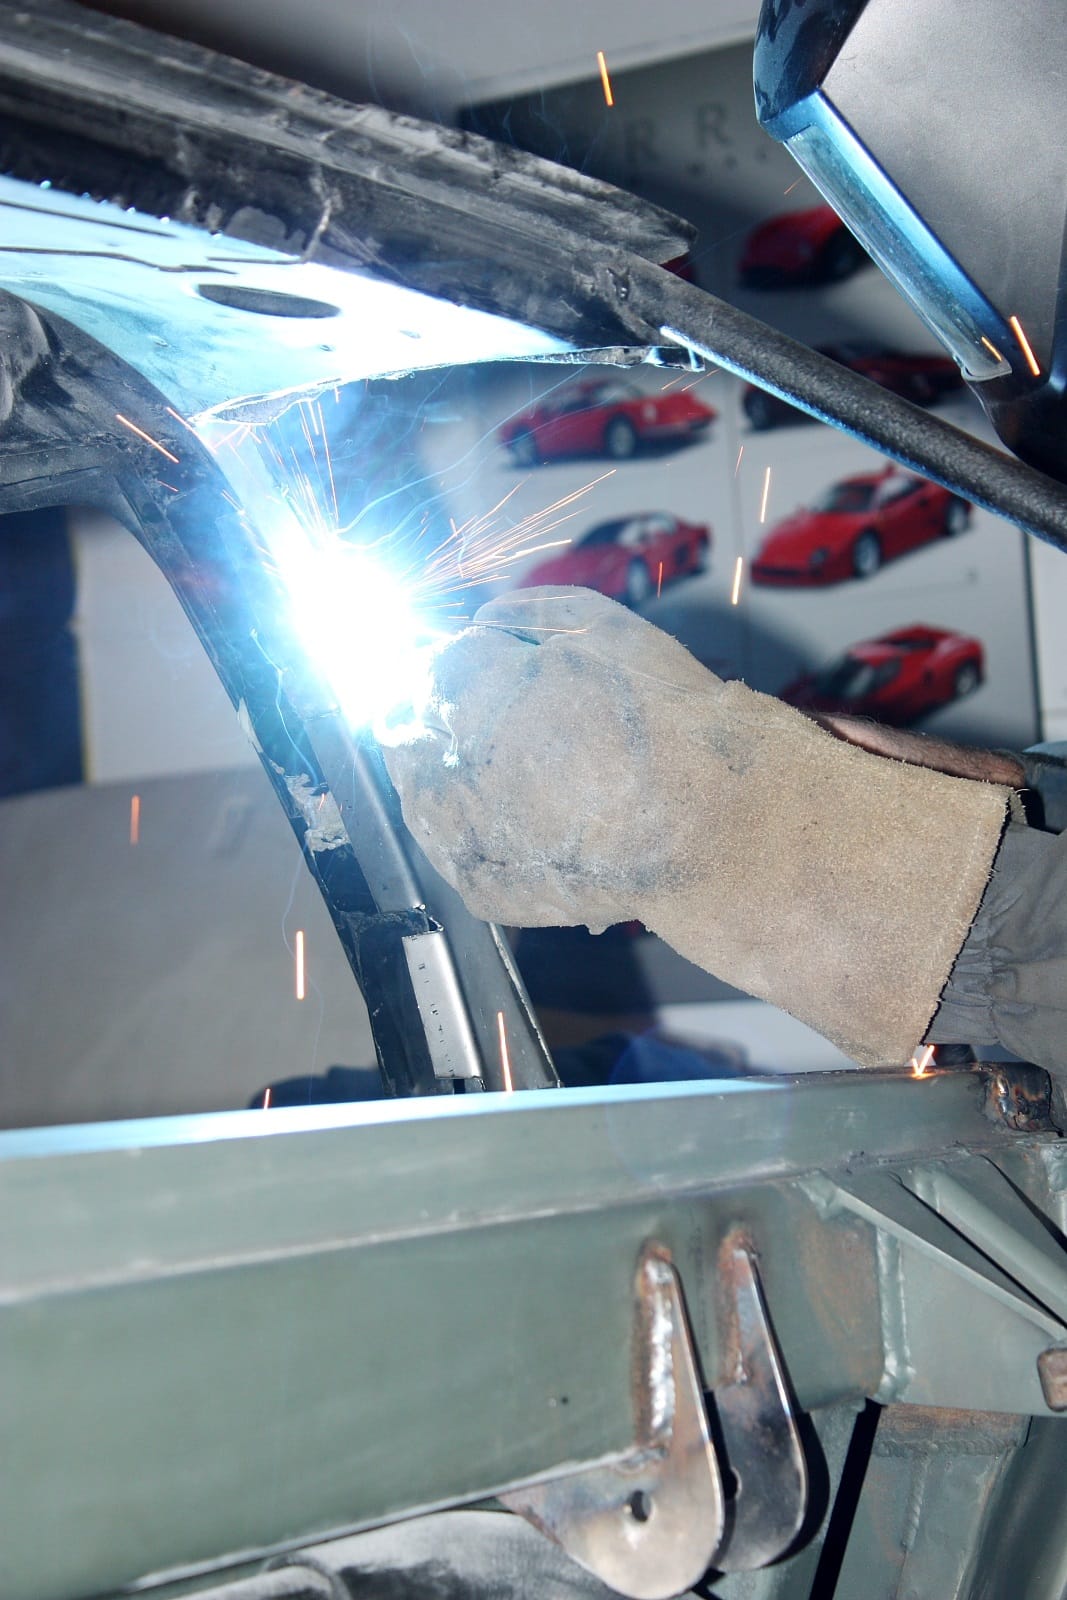
When I was happy with the fit, I welded the reinforcements to the chassis:
Here's the driver's side repair once it was completed:
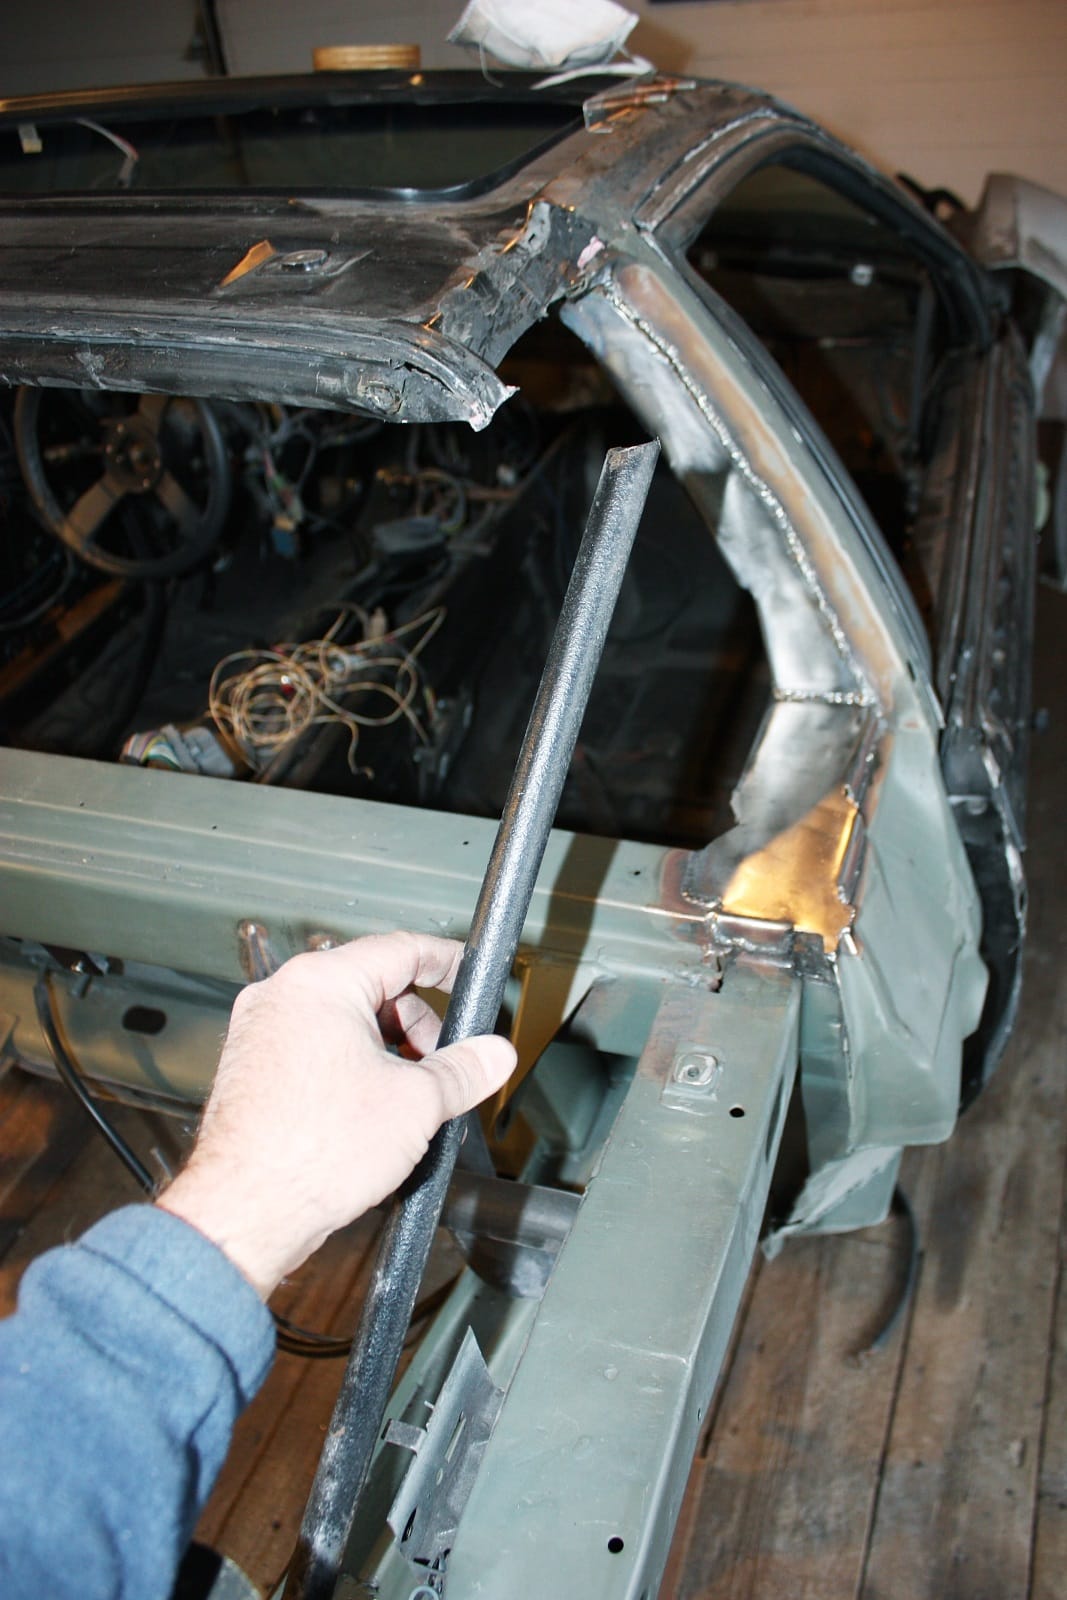
Once the B-pillars were reinforced, I turned my attention to the C-pillars installed by the previous owner. In Post #91 I described why I needed to lower the rear edge of the metal roof to accommodate a more realistic F355 roofline. To lower the rear roof edge, I needed to remove the C-pillars that held it up. It was a good thing I removed the rear fibreglass quarters and roof panel despite the previous owner having permanently installed them. Here's how I found the top of the C-pillars attached to the roof:
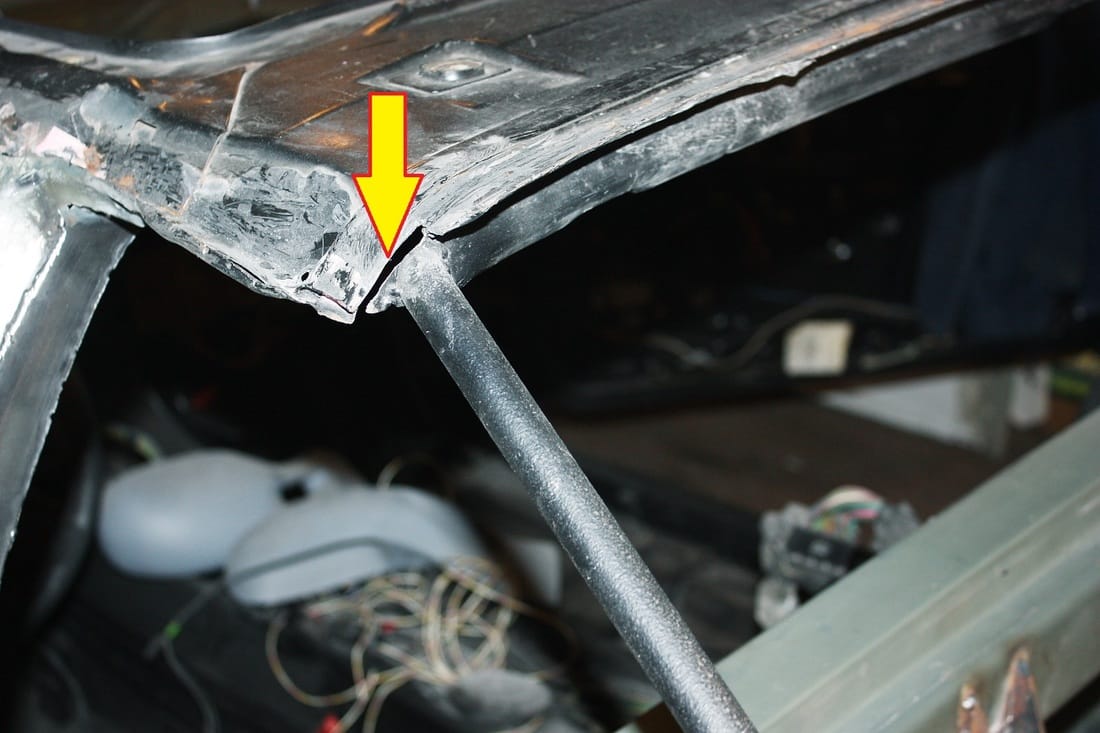
The top of the C-pillars were butt-welded to a thin metal tab! They were utterly useless from a structural standpoint. This, combined with the way the B-pillars had been weakened, would have significantly reduced the torsional and bending stiffness of the chassis. Given the way they were installed, I felt I wouldn't affect the frame alignment one iota by removing them:
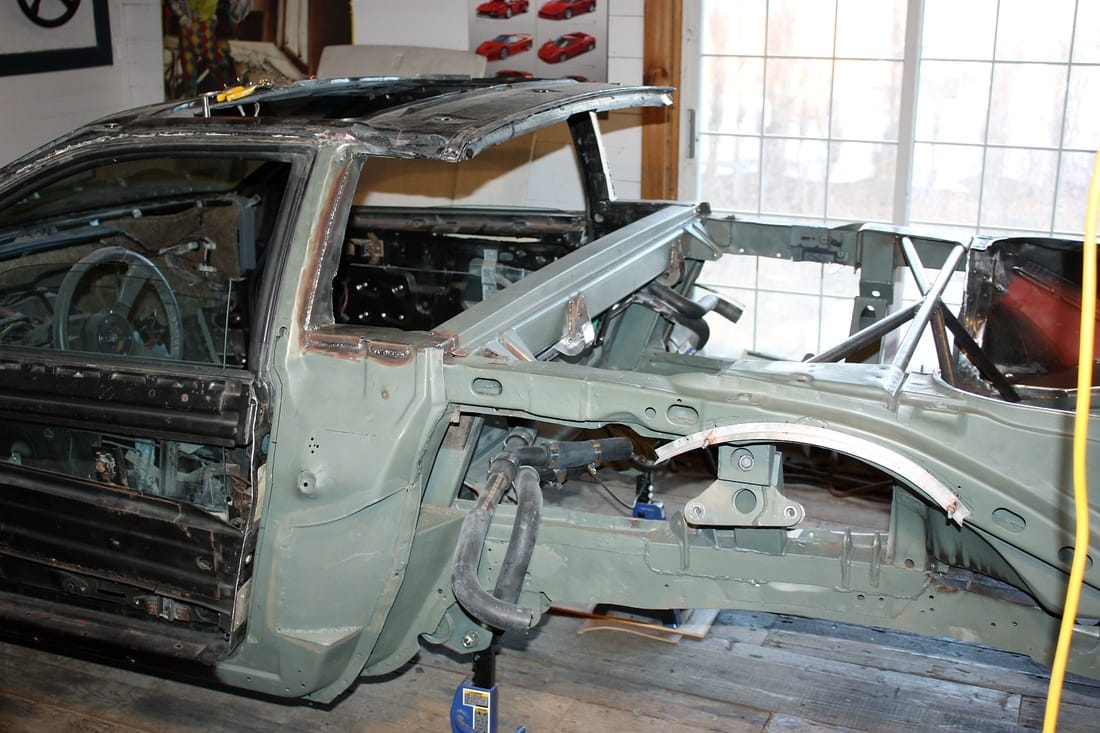
Stepping back for a moment, here's what the B and C-pillar mods looked like at this point:

 RSS Feed
