I've mentioned several times that I plan to use the authentic Ferrari F355 quarter windows for my project. I ordered them from Exotic Auto Recycling for about $300 each... a hefty sum given they're probably not high demand items. I could've used Plexiglas or Lexan but I preferred the look and durability of real glass especially since they won't be easy to replace once installed.
The downfall to using the F355 quarter windows is that from the side view, the leading edge is canted while the B-pillar and trailing edge of the Fiero door glass is vertical:
The downfall to using the F355 quarter windows is that from the side view, the leading edge is canted while the B-pillar and trailing edge of the Fiero door glass is vertical:
This leaves a visual discrepancy between the two windows. To conceal this as best as possible, the kit car fabricator Air Dynamics cleverly employed a gloss black triangular filler panel between the two. It's not a perfect solution, but it is what I plan to do as well.
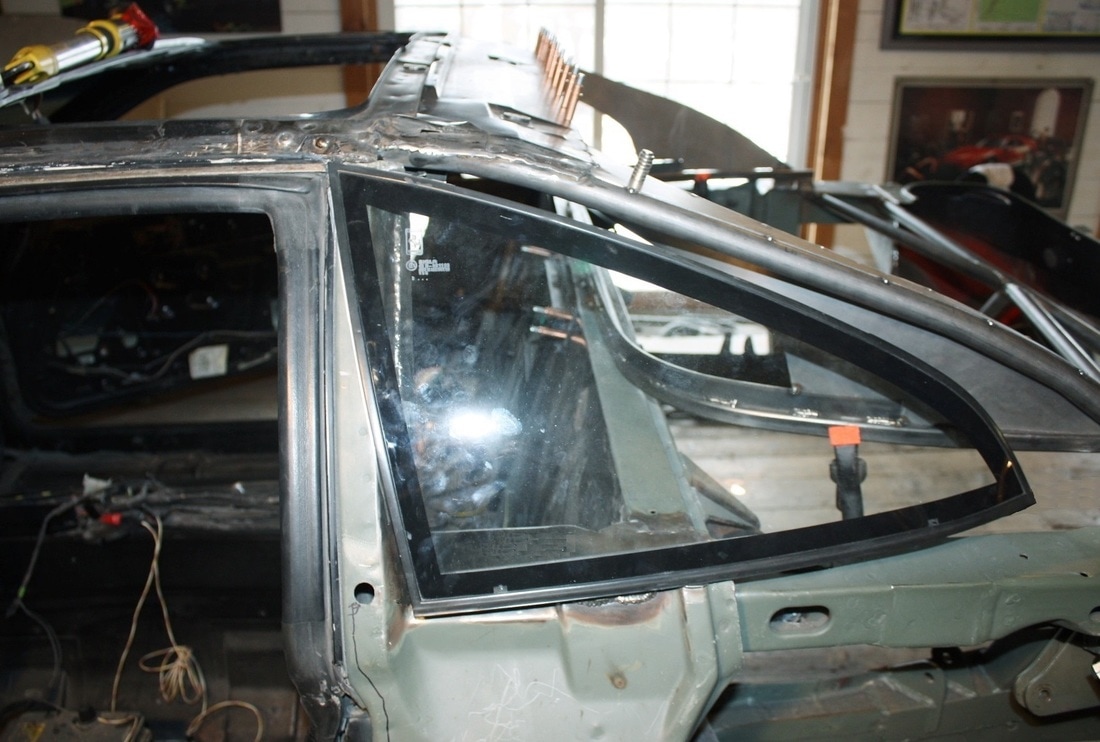
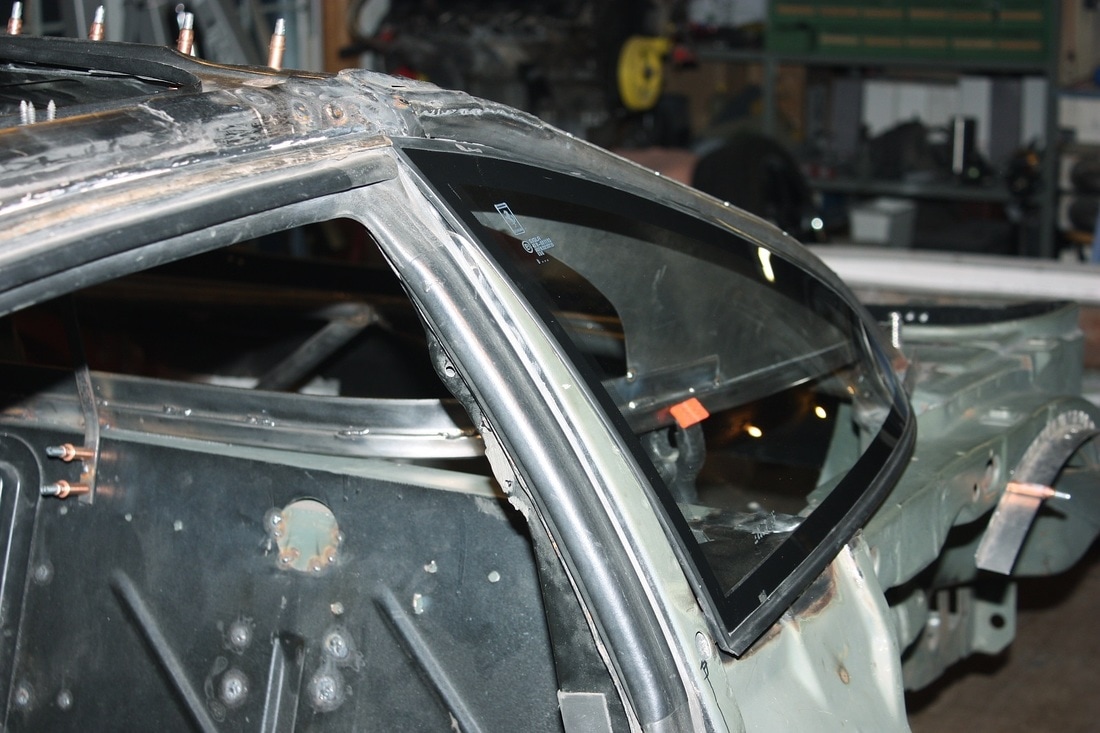
Luckily from the front view, the Ferrari quarter glass has exactly the same curvature as the B-pillar and door glass, making that aspect easier to deal with:
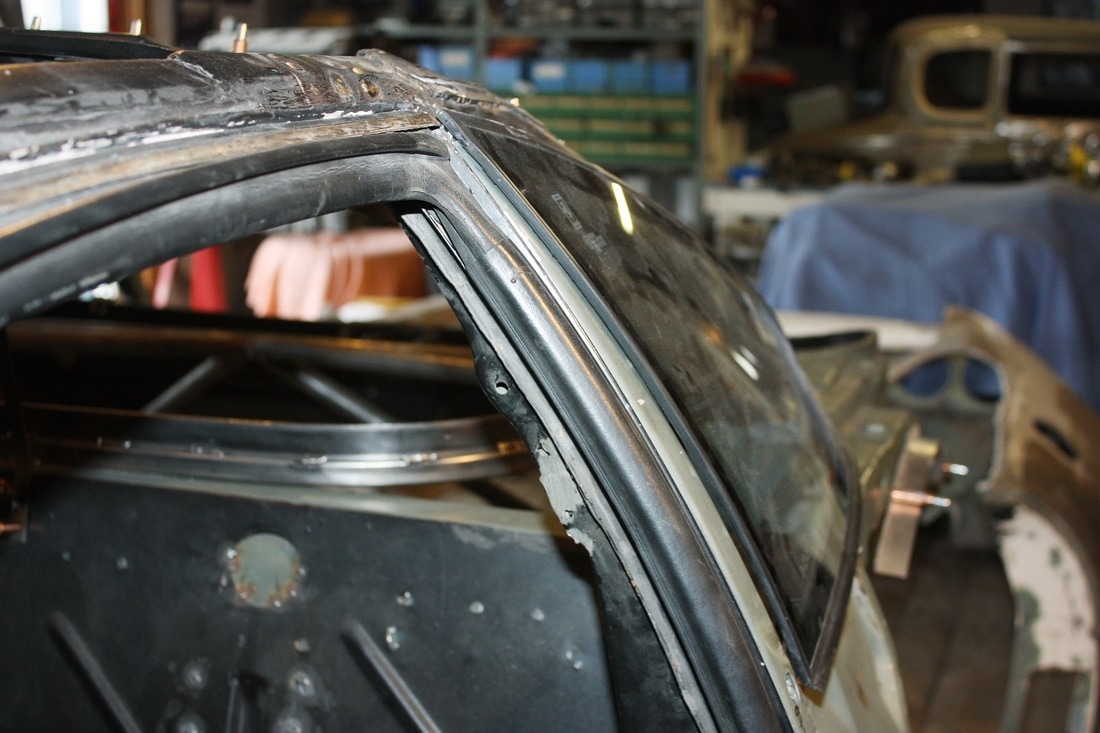
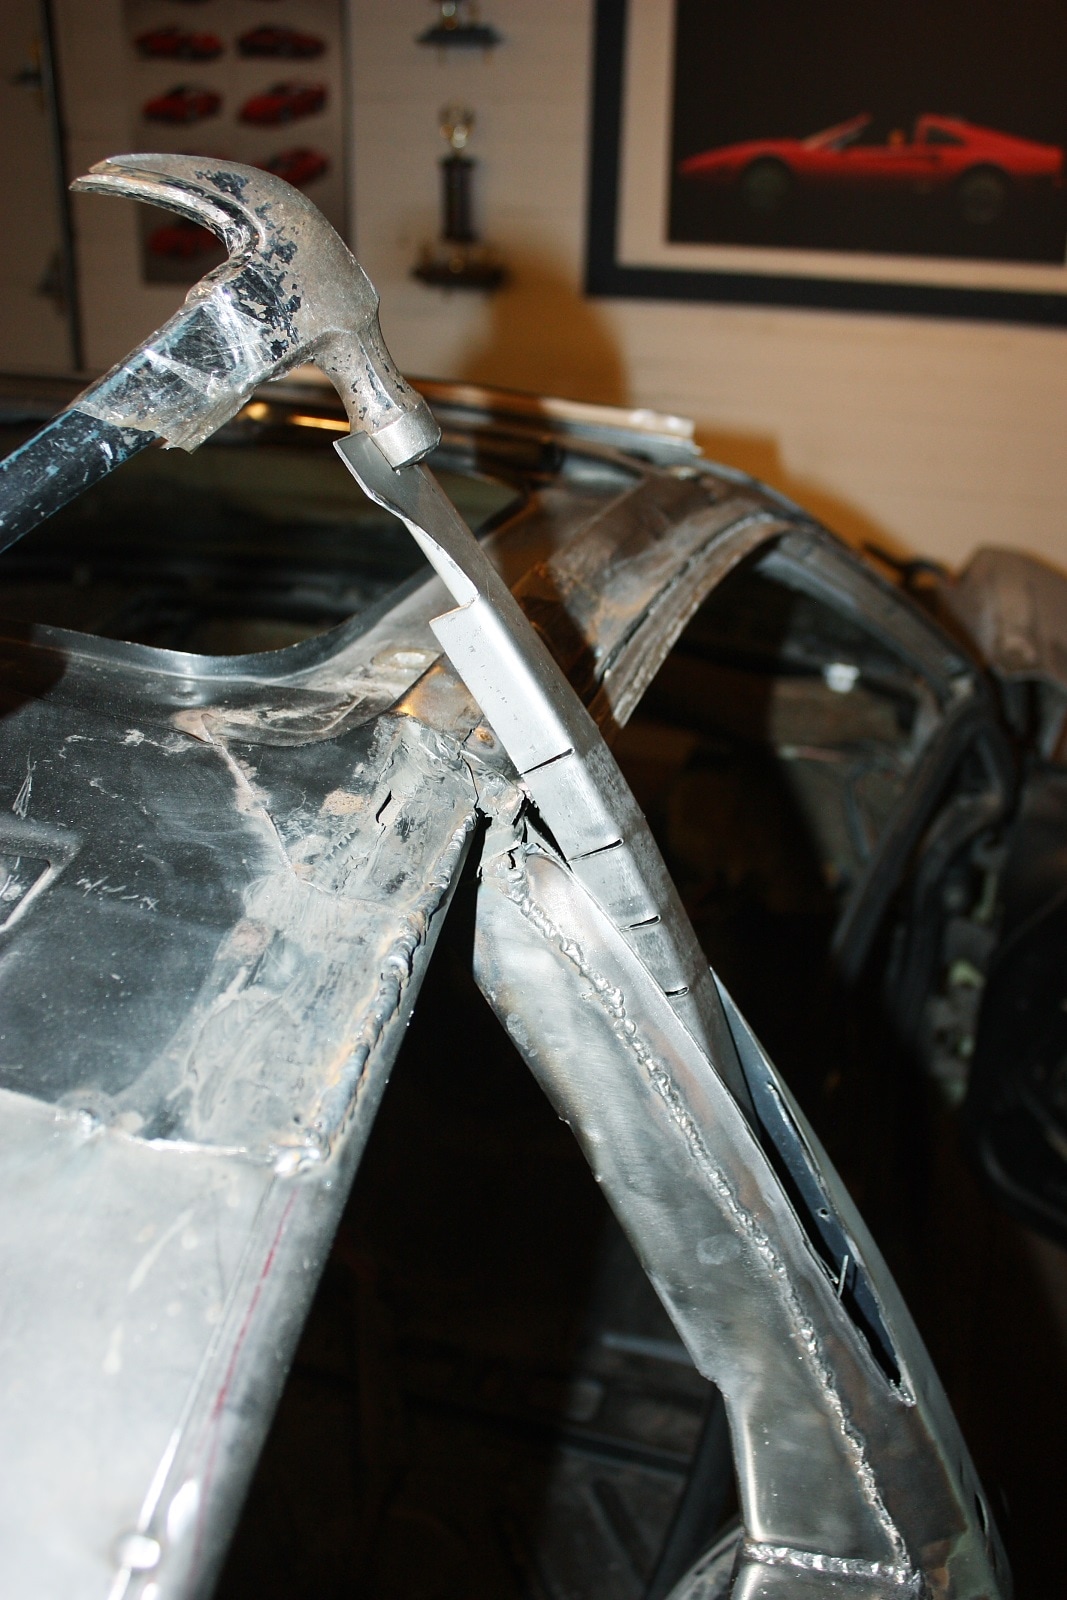
There is one hitch though. If installed directly onto the metal B-pillar, the Ferrari quarter glass stands out 3/8" further than the door glass. I couldn't capture the effect with the camera, but it just stood out like a sore thumb in my eyes. I felt that when viewed at a shallow angle, the door glass and quarter glass should appear in the same plane. I figured I could do something about it at this stage rather easily. After marking out the offending area, I zipped it out with my angle grinder:
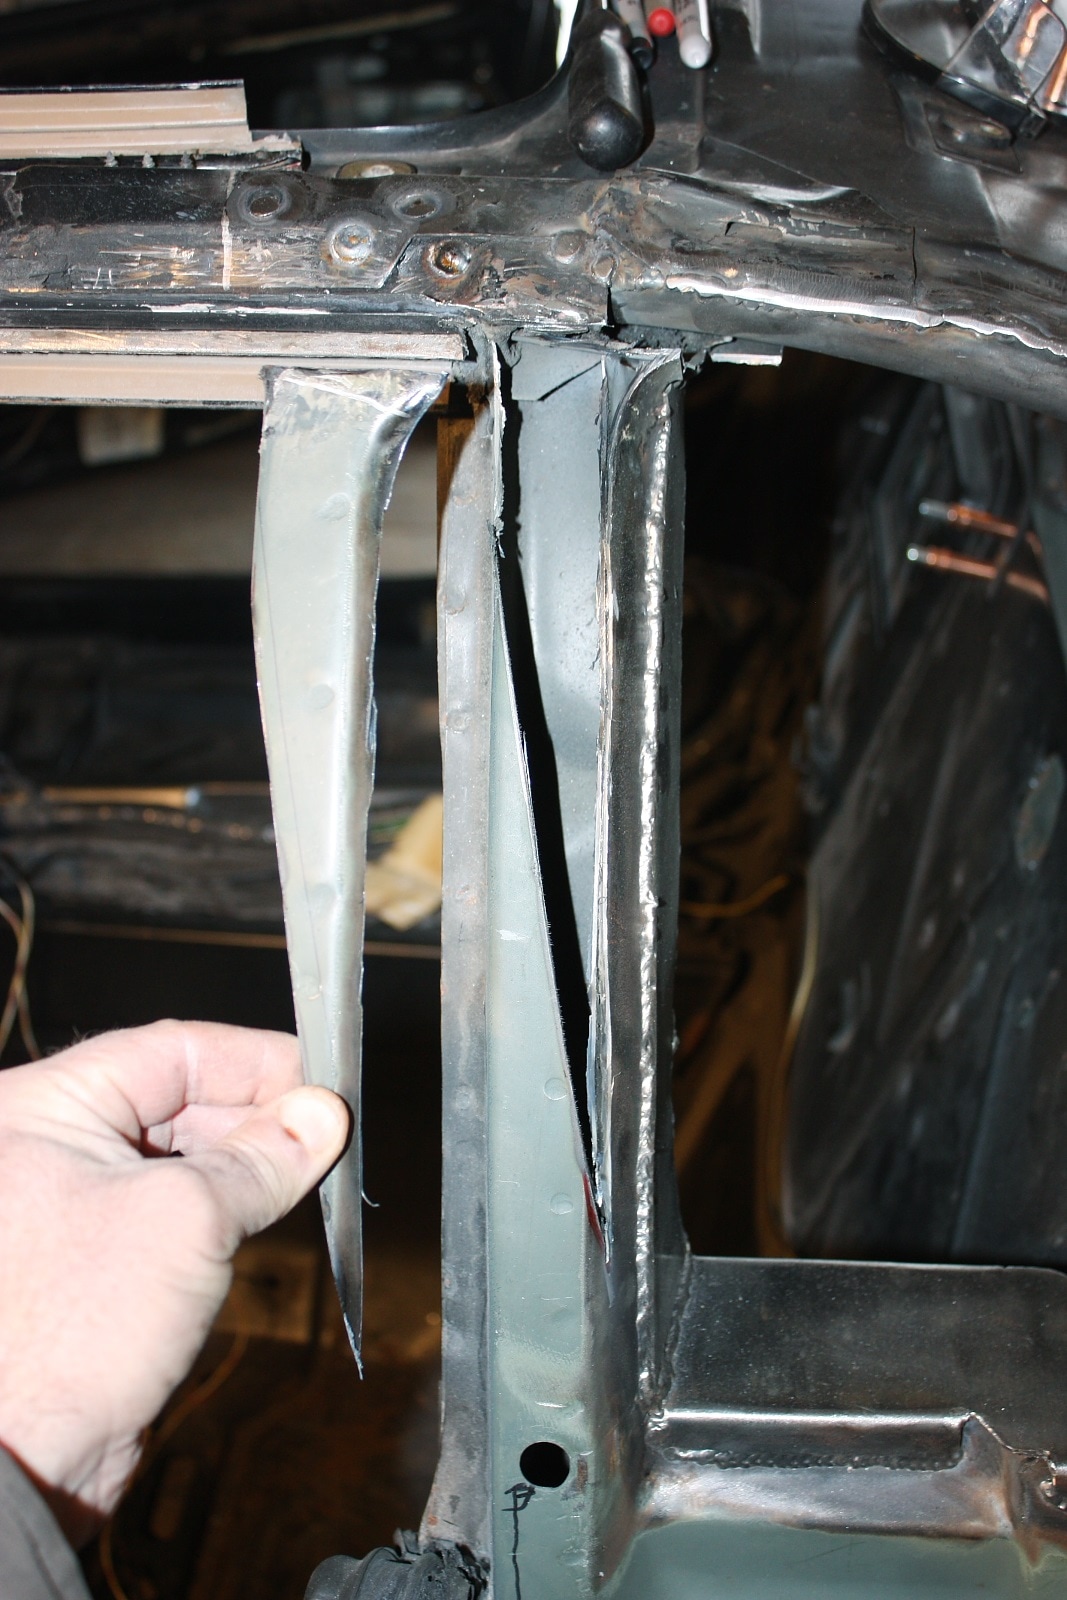
Then I made a cardboard template to help me get the correct dimensions for a new filler panel to replace and offset the trimmed section:
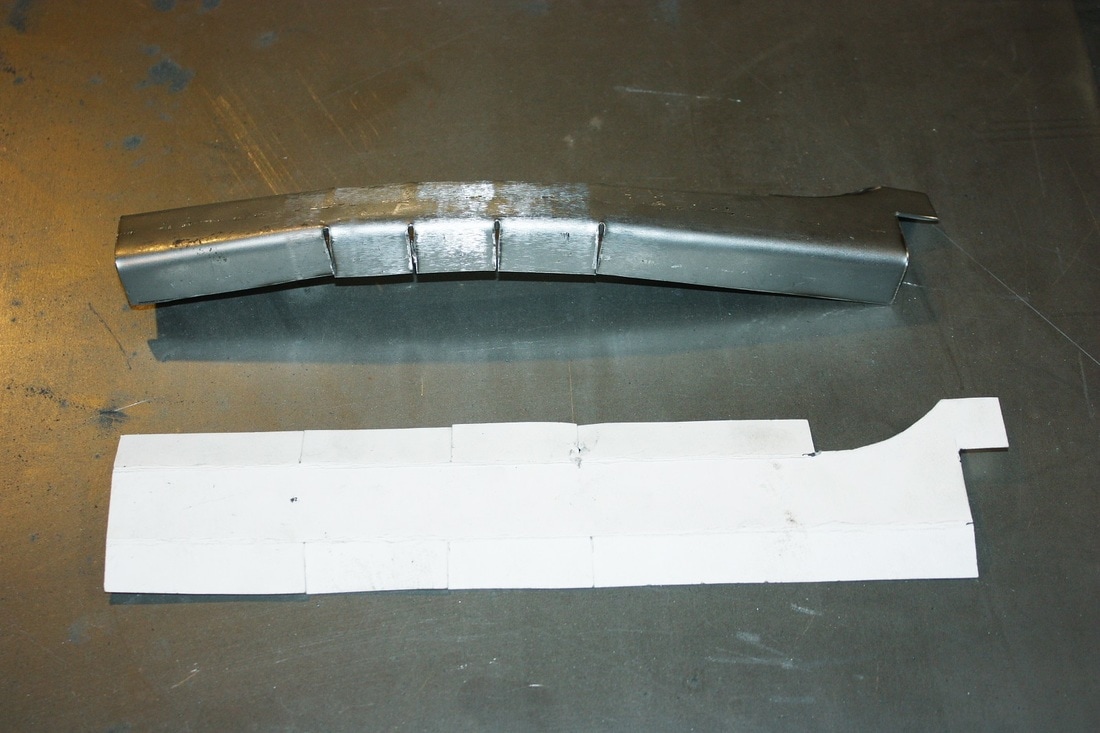
I made the piece to fit inside the B-pillar with as tight a fit as possible. Here, I'm tapping it into place on the passenger side pillar:
I fussed with the curvature and placement of both new filler panels until I was satisfied:
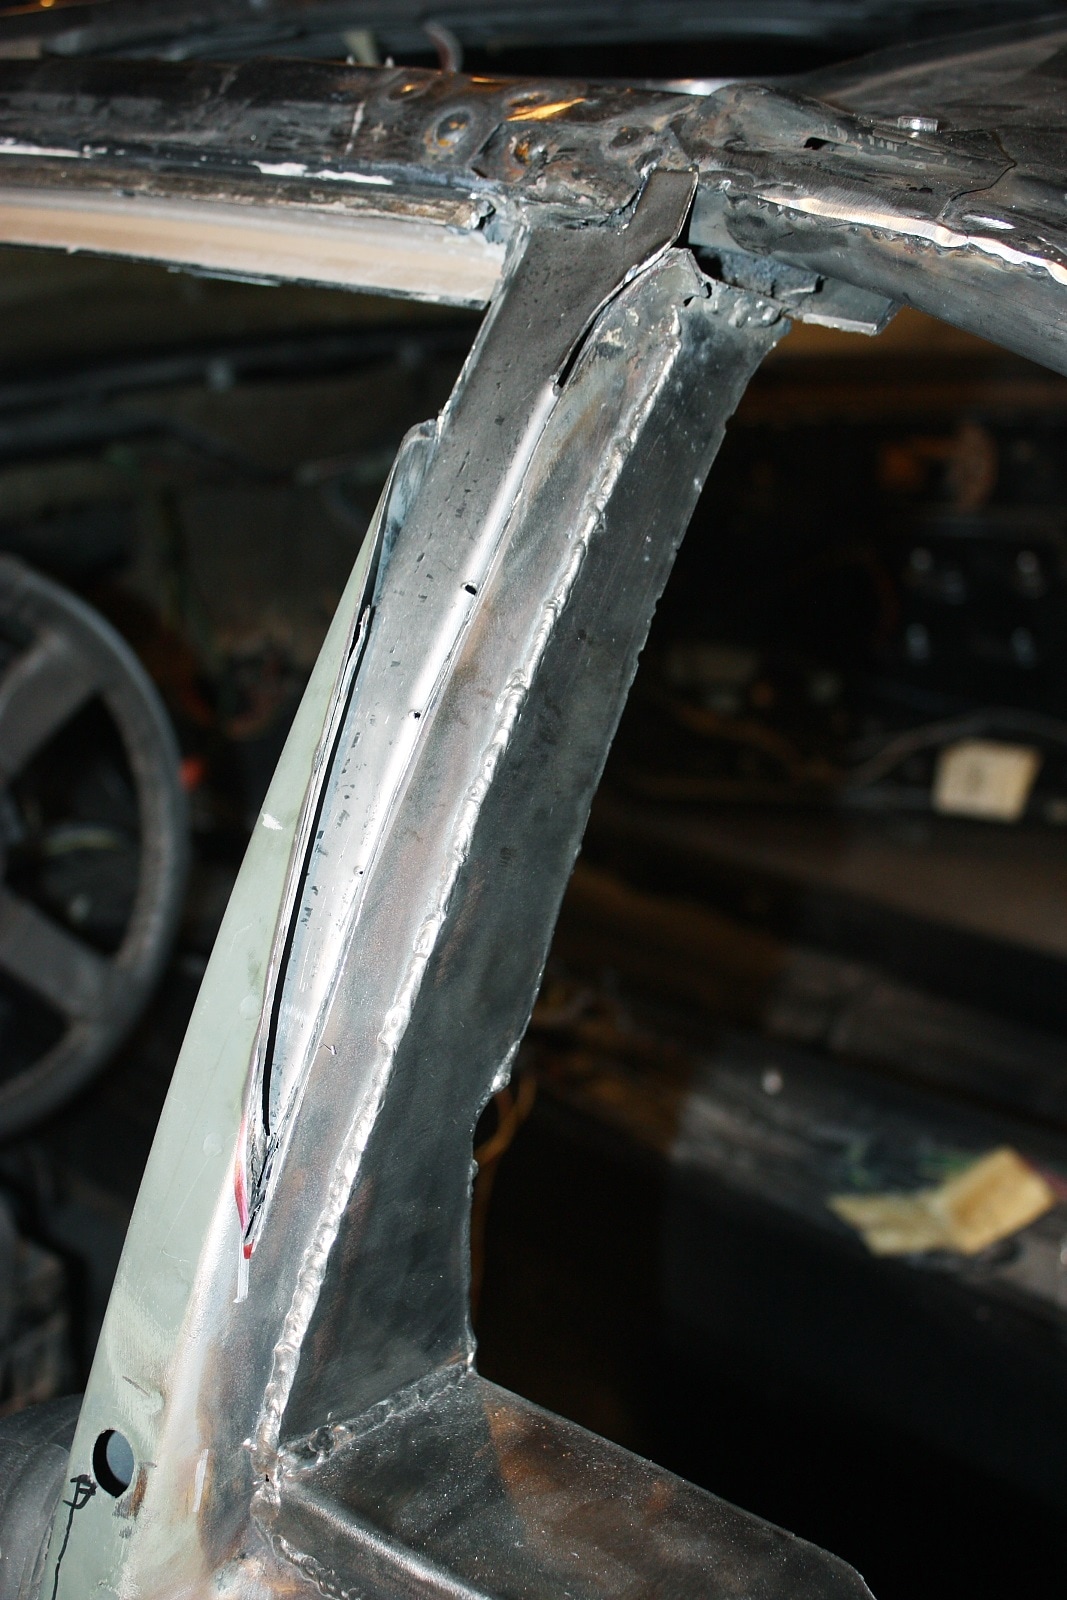
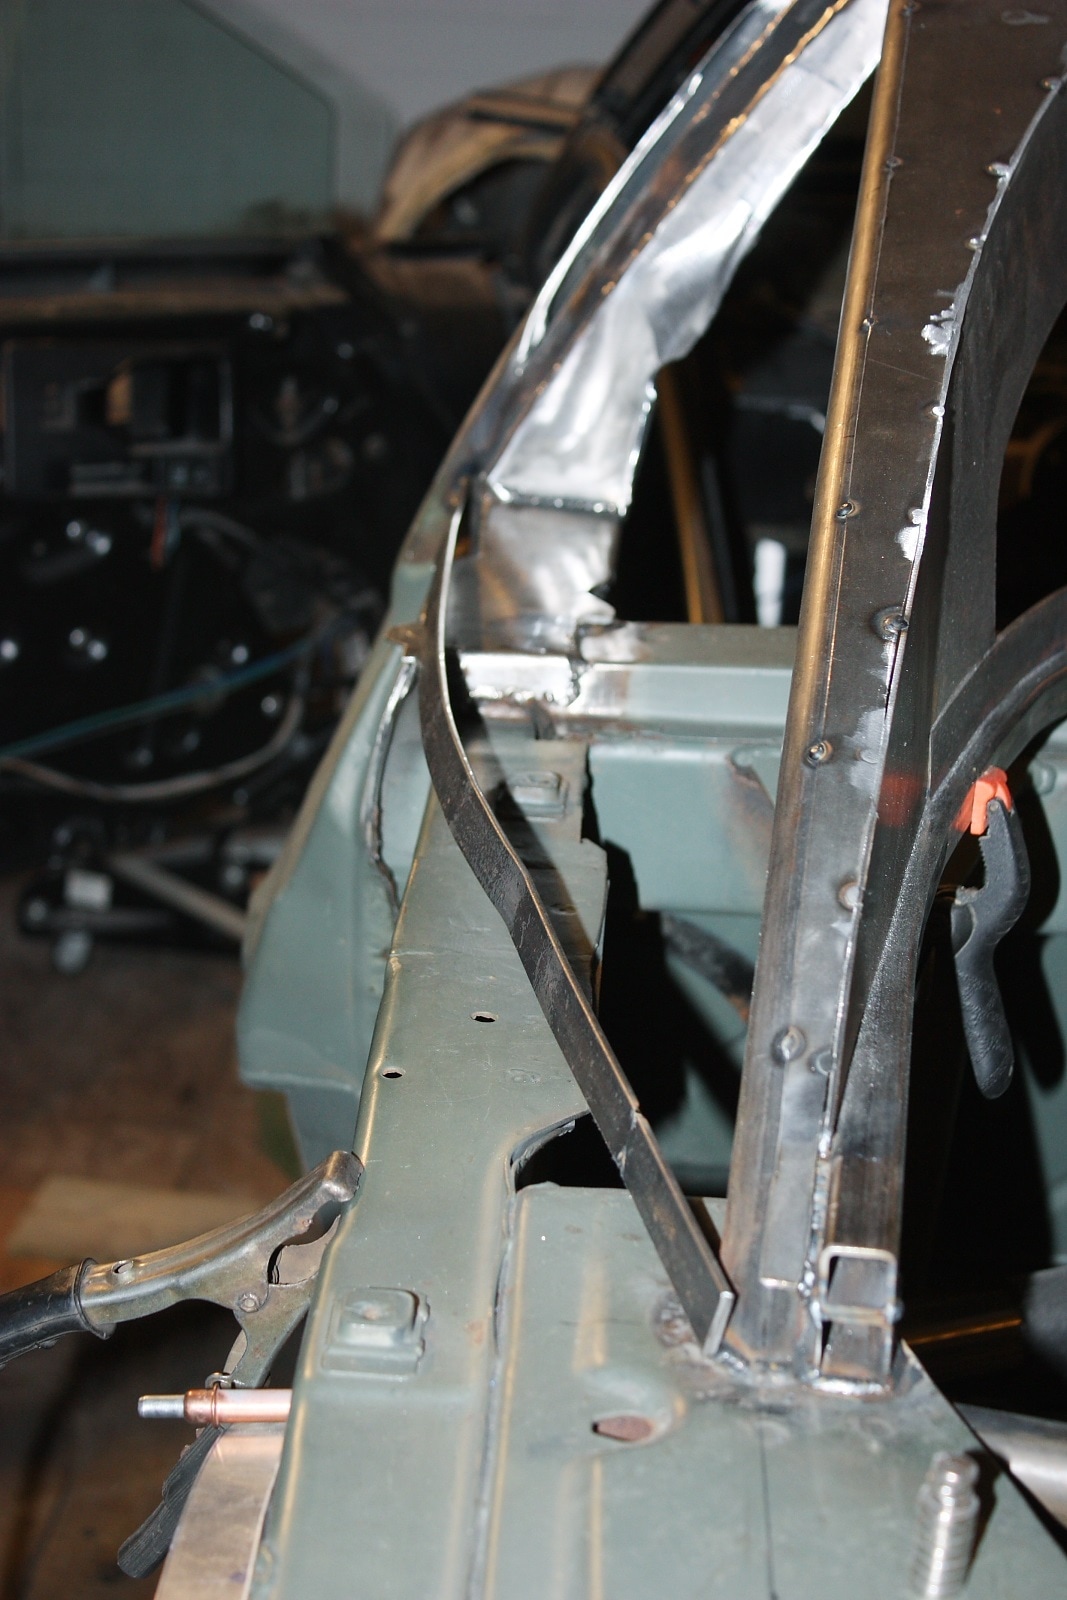
Then I welded them in place. Because the glass will be glued against this new metal, I ground the welds flush to prevent any high spots from creating pressure points on the glass:
The forward surface of the new panels were hidden inside the B-pillar so I drilled the stock sheet metal and rosette welded the two together. Again, I had to grind the welds flush since this surface is used to mount the channel that retains the weather seal.
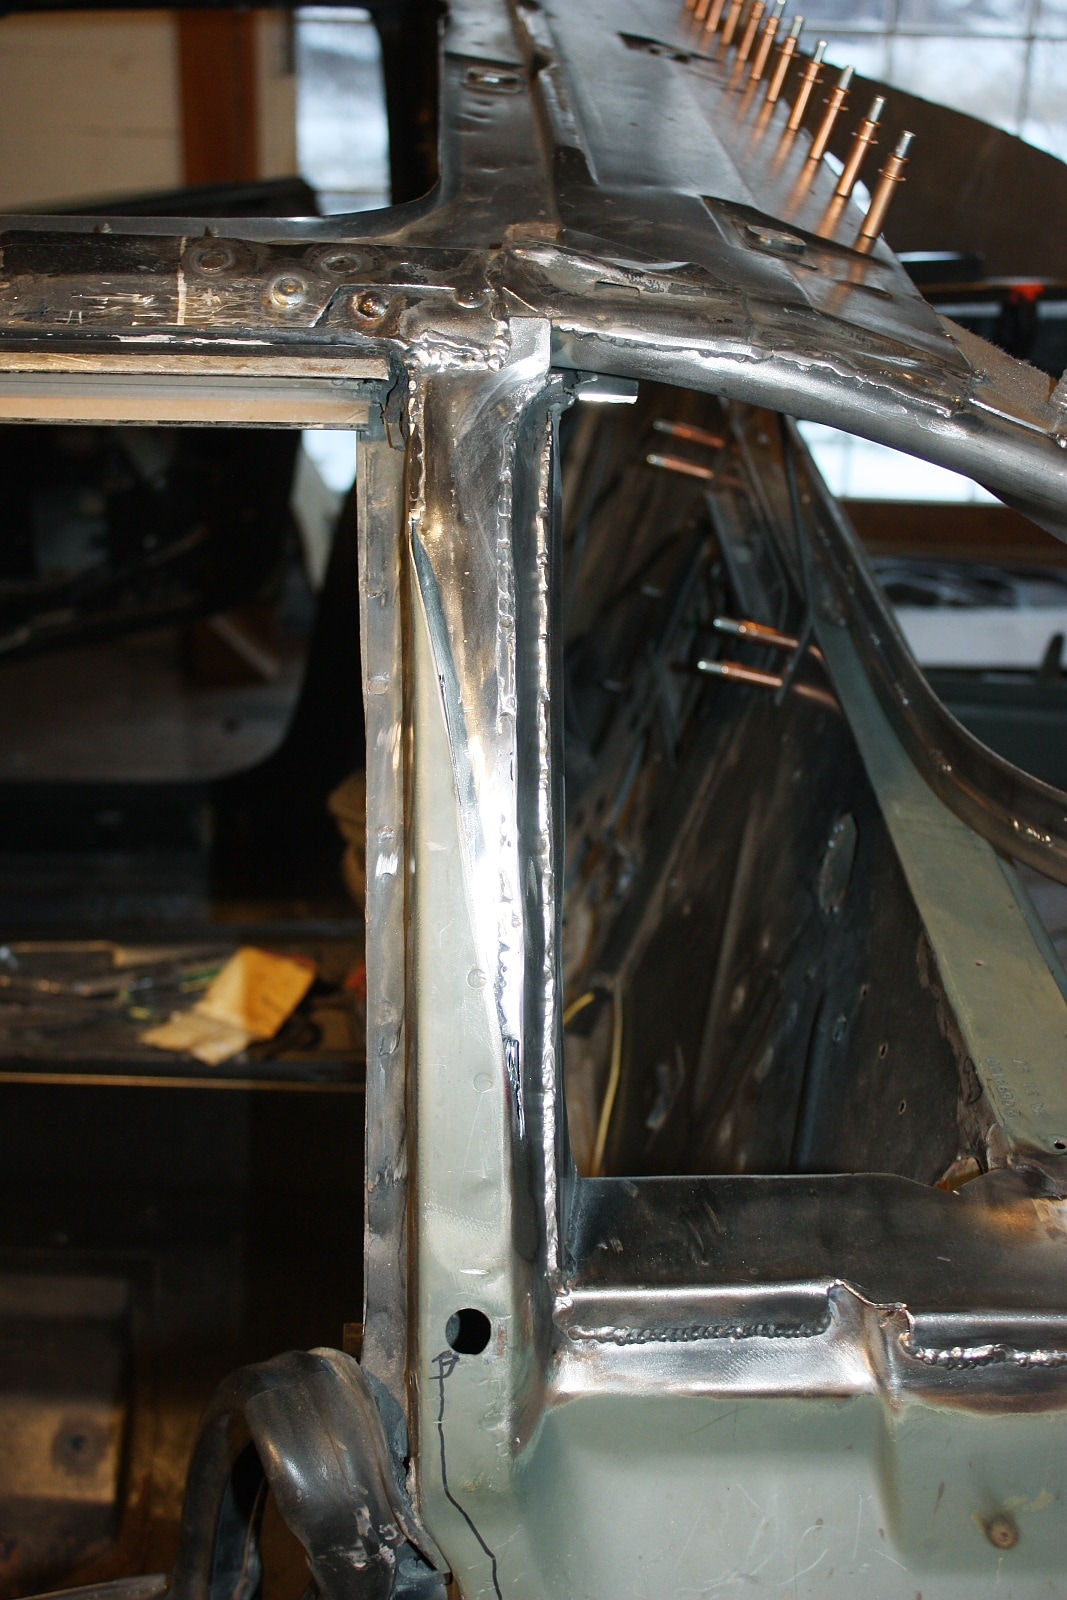
Once the weather seals were reinstalled, I mocked up the quarter windows and was much happier now that they sat flush with the B-pillar instead sitting on top of them:
Next up was fabricating the lower frame for the quarter window. It was relatively simple: I used some 1/8" x 3/4" flat bar and bent it to conform to the lower edge of the quarter glass. Here's the view from behind, looking towards the front of the car:
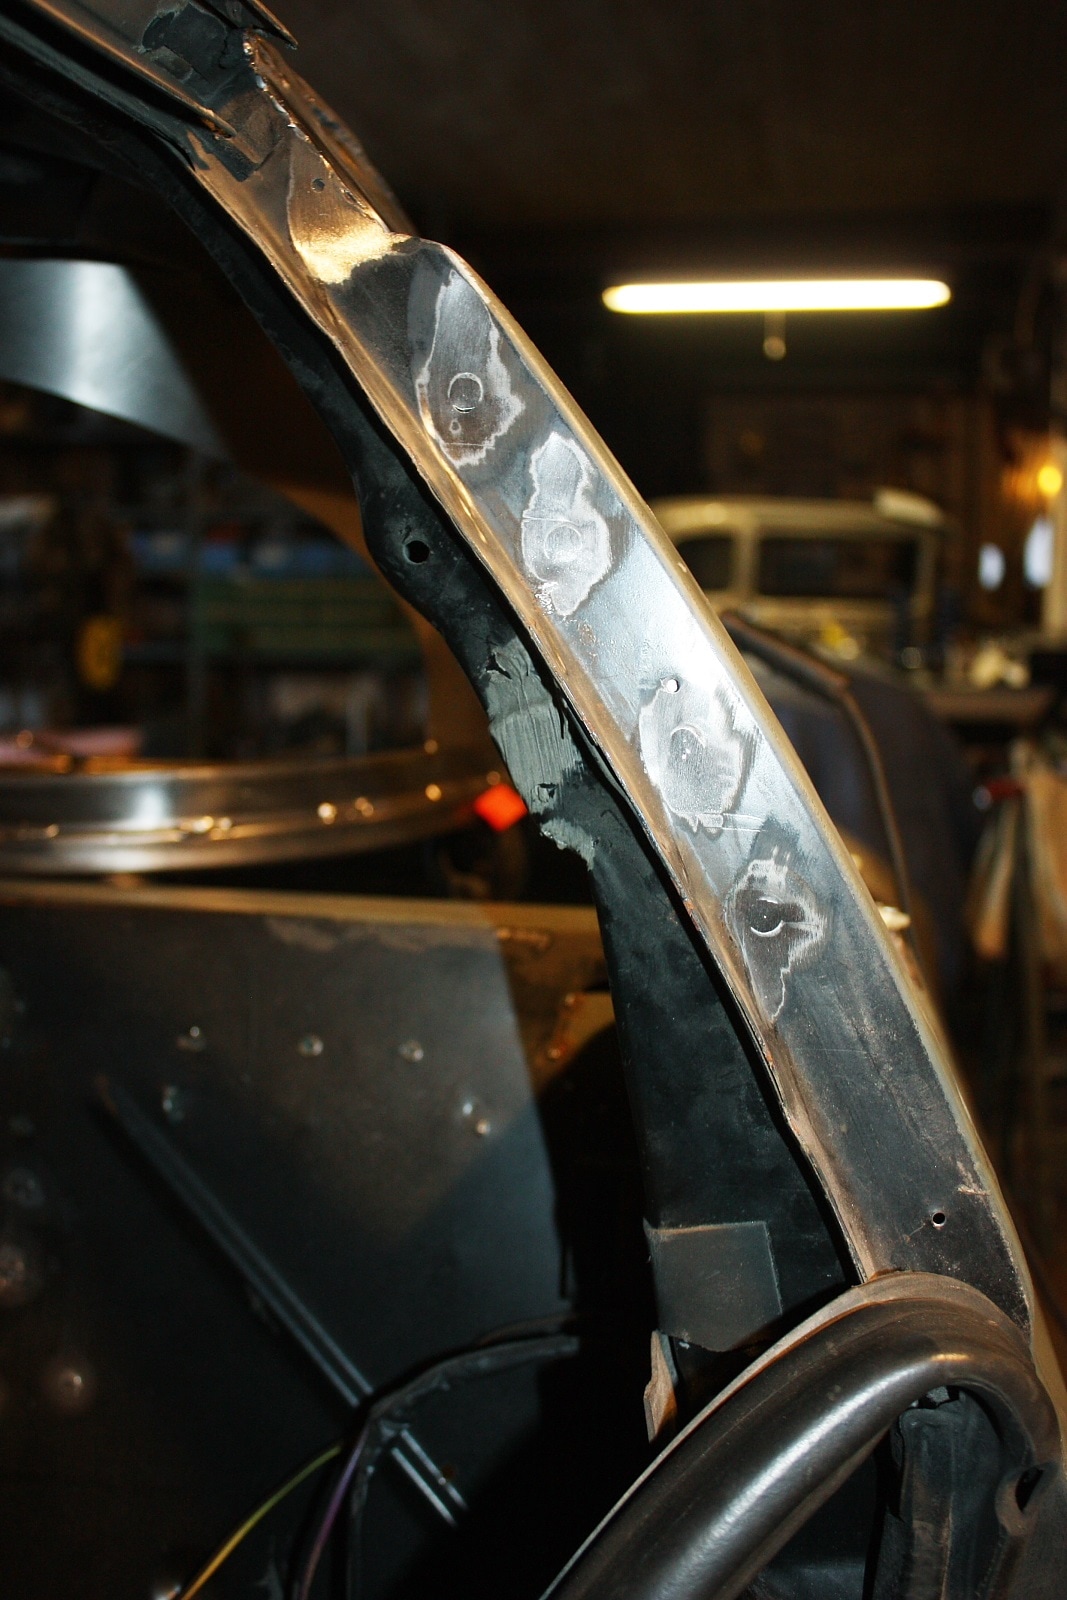
Again, after mocking up the actual glass and pinching the lower frame in just the right orientation, I welded it to the base of the B-pillar, to the new cap on the sectioned B-pillar, and to the base of the C-pillar:
A quick double-check confirmed that everything stayed put while welding. Here's the mocked up quarter glass with metal frames for the front and lower edges:
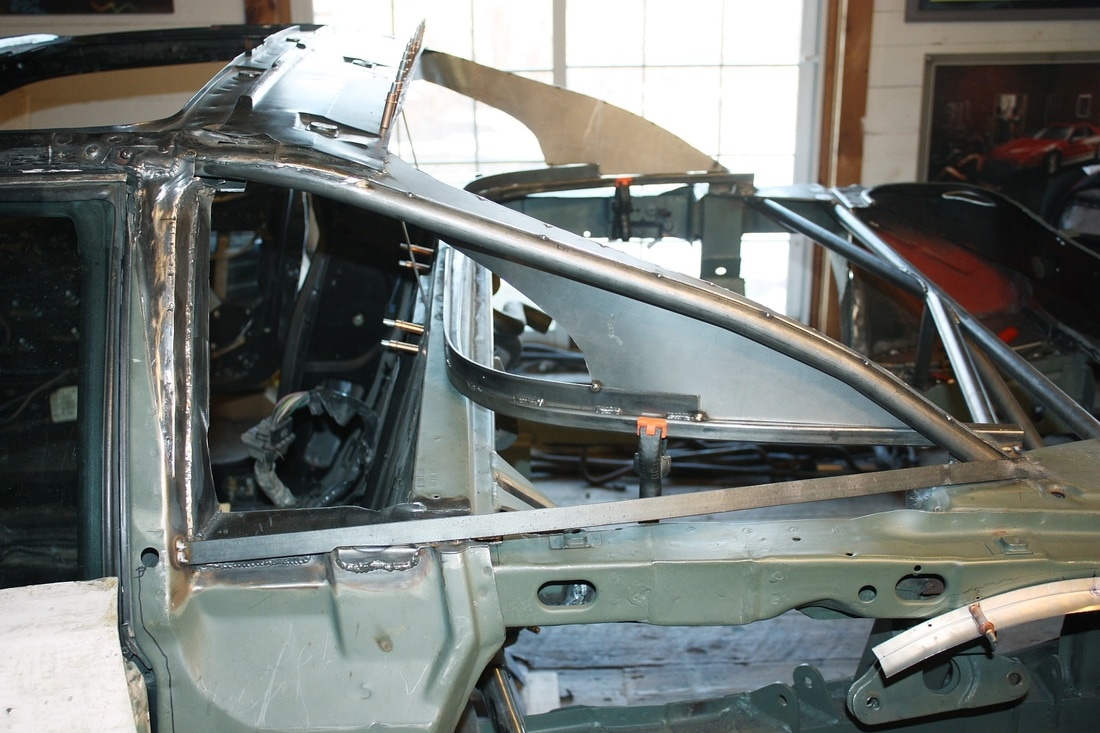
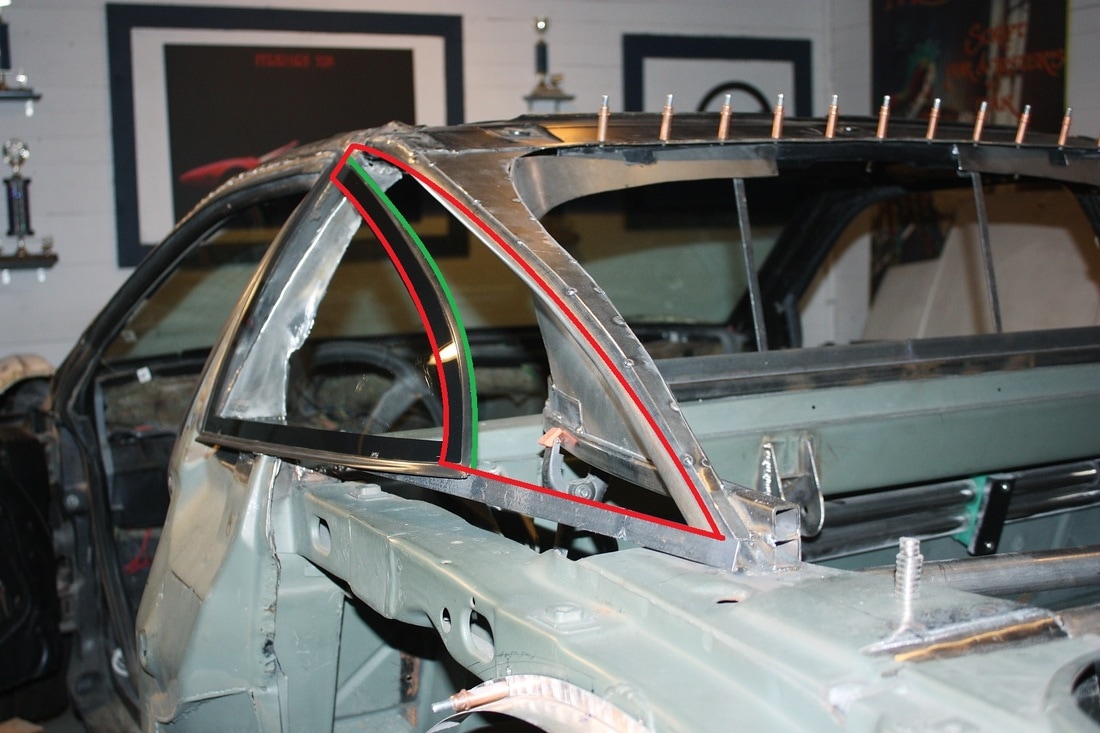
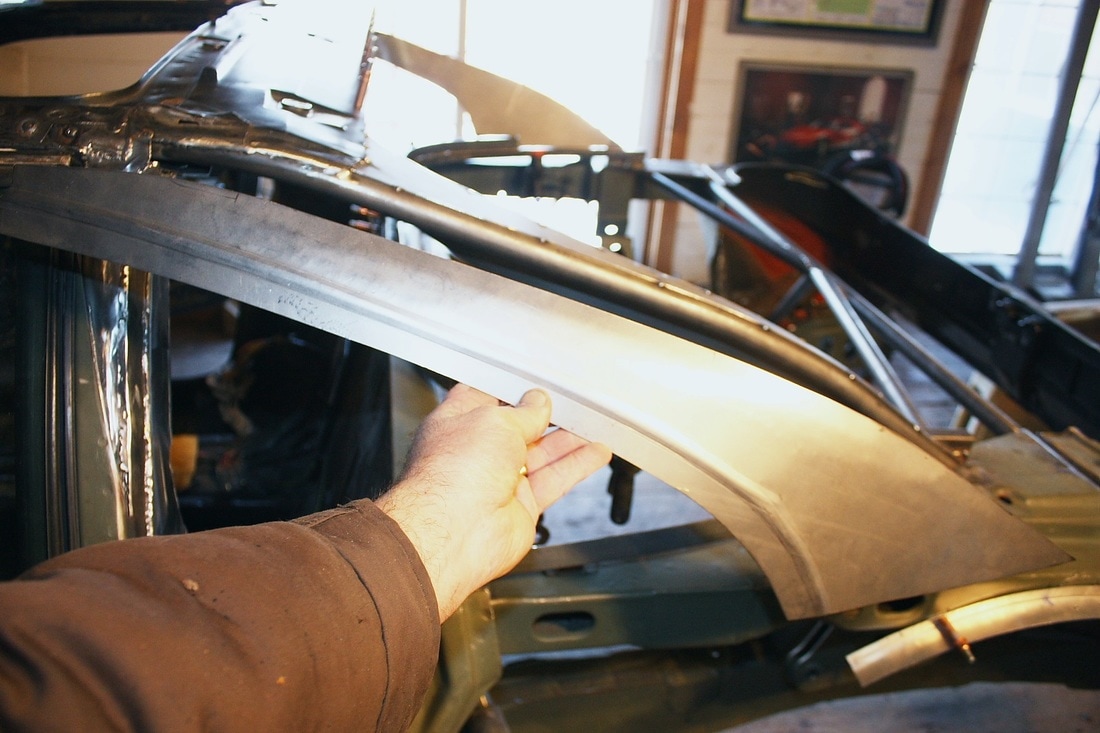
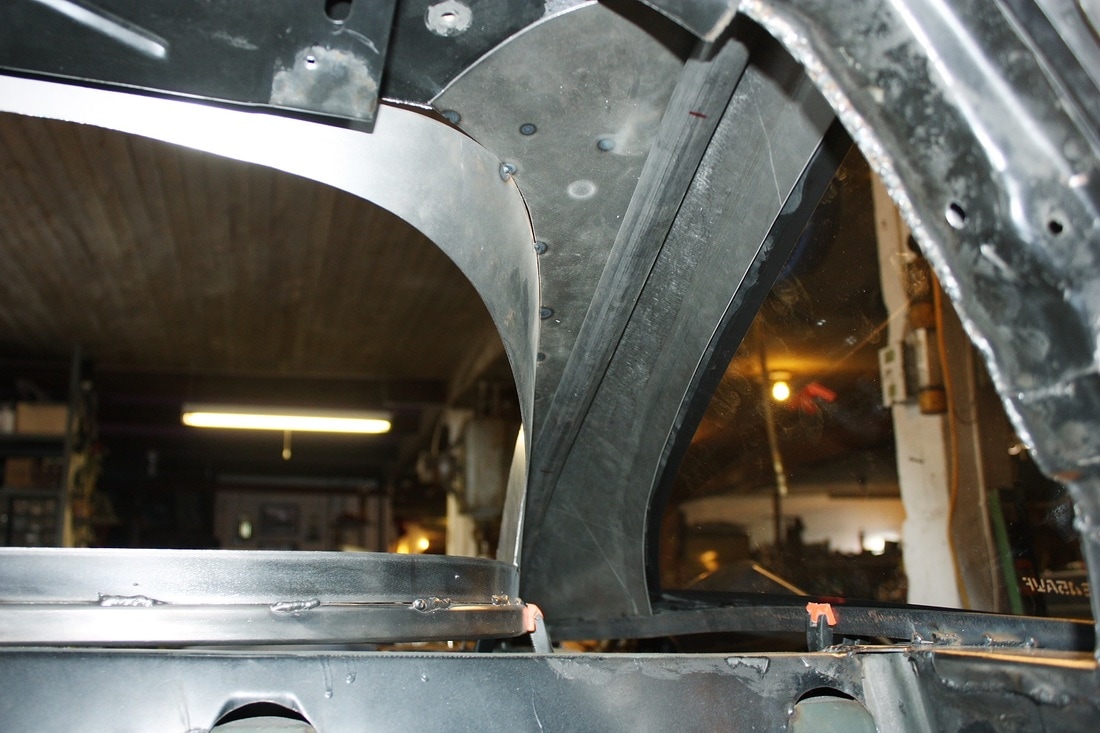
The final step for the quarter glass was to create the upper framework. This piece was a bit more challenging because of the intricate shape and compound curvatures.
The difficulty lay in creating a single, long, narrow piece that followed the compound curvature of the glass along one edge, and a different compound curve along the C-pillar edge. The green line in this next photo shows the intersection of where both sections meet:
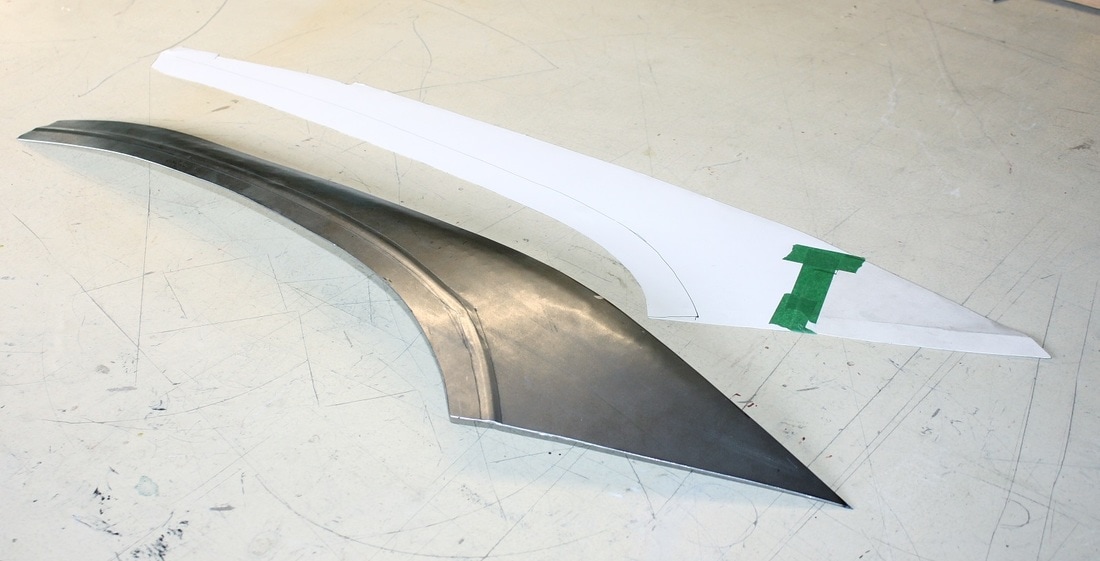
I used more cardboard to mock up the filler panel as best as I could, but it was like trying to wrap a basketball with a flat sheet of paper. The template was only a rough approximation of the size and shape needed.
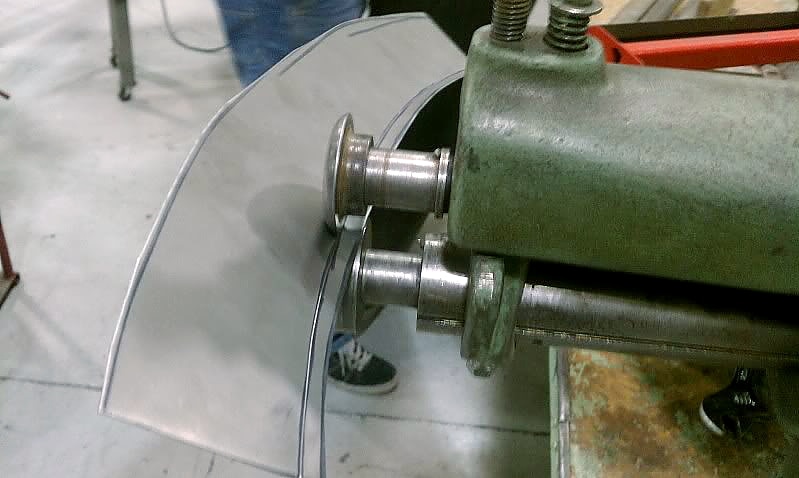
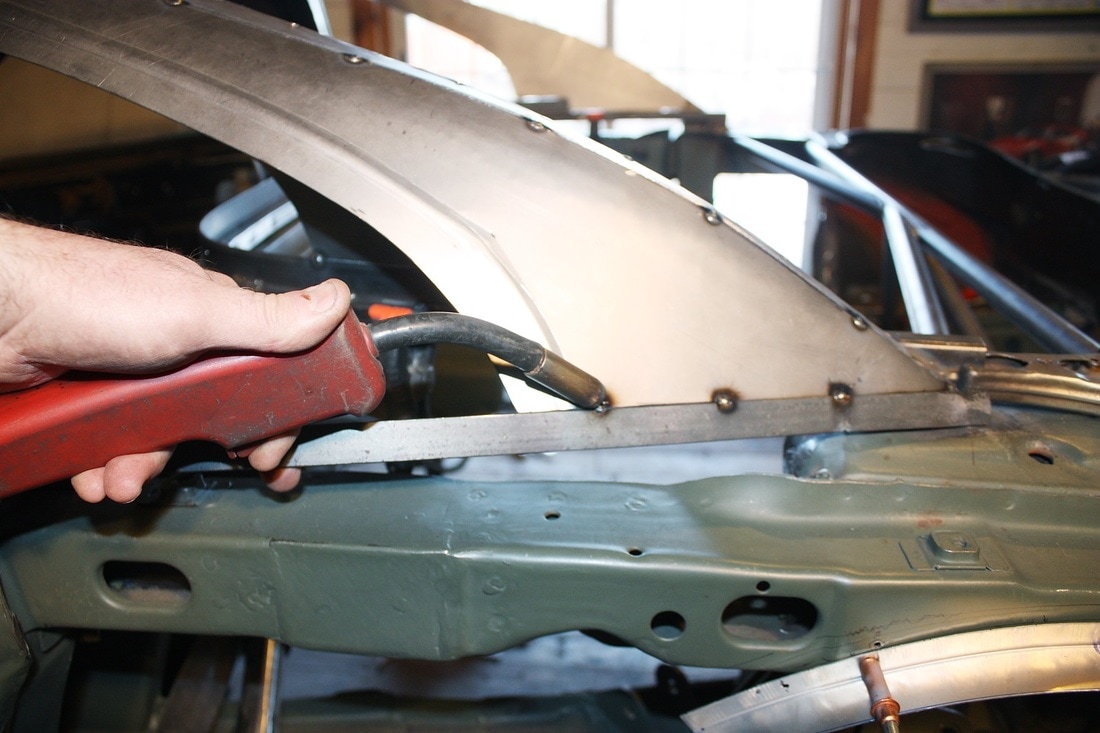
Once the basic shape had been cut from some 18 gauge sheet steel, I needed to mechanically separate the two different regions of the panel so that neither side would be affected much as I formed the other. The way I did that was to visit a friend with a bead roller and ran a bead along the green line, making a sort of barrier. I didn't take any photos while doing that, but here's a sample from the internet that looks similar to what I did:
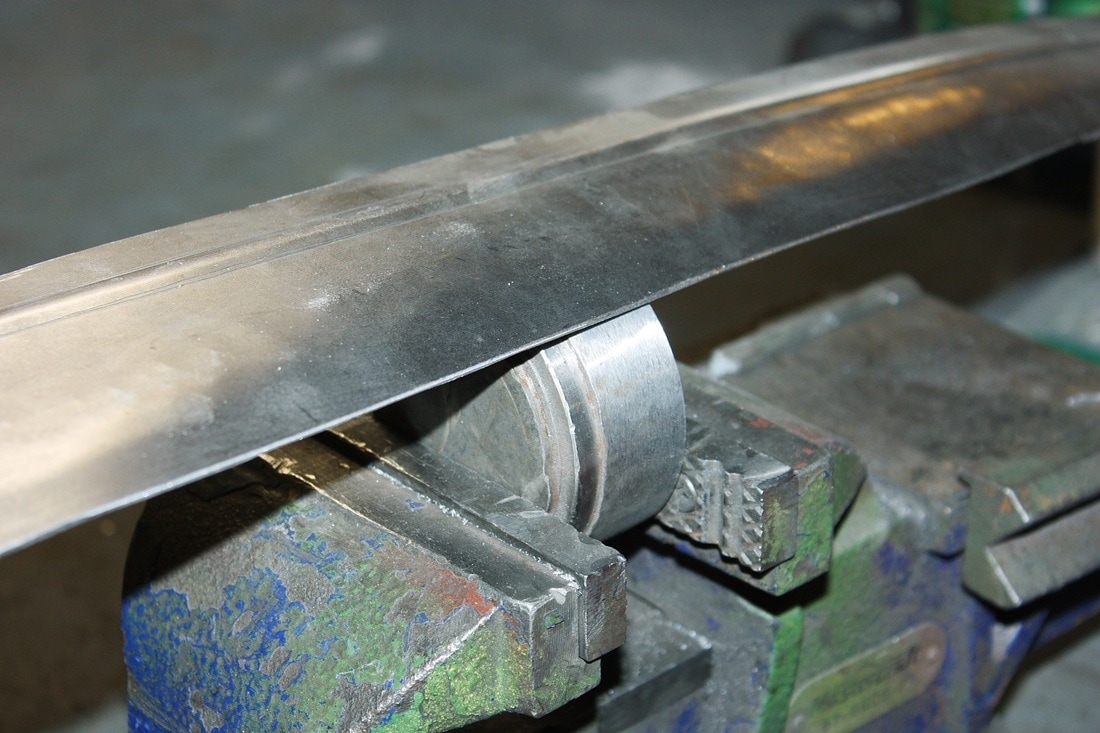
The beading process by itself helped curve the panel a fair bit in one of the directions. For the other direction, I clamped a 3" solid round bar in my vice and gradually worked my way along both edges curling them just the right amount with a dead blow hammer:
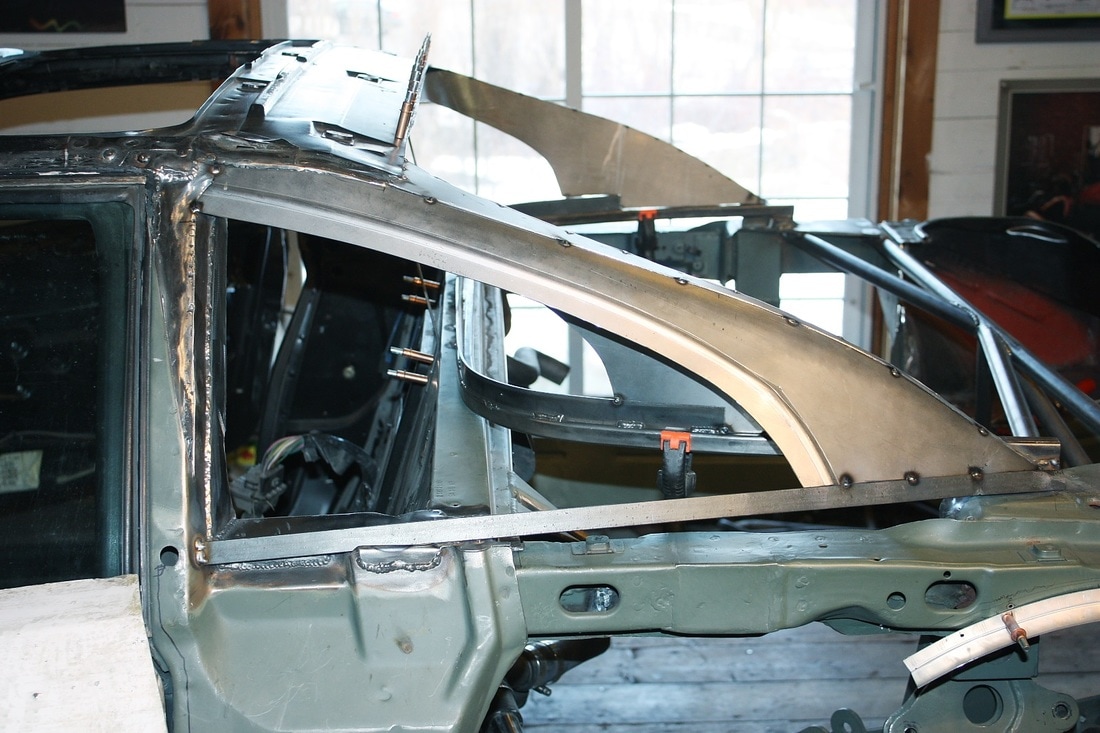
My vice is about 20' from the chassis so I did a lot of walking back and forth checking and re-checking the fit:
When I was finally satisfied, I mocked it up on the chassis one last time:
And tacked it in place:
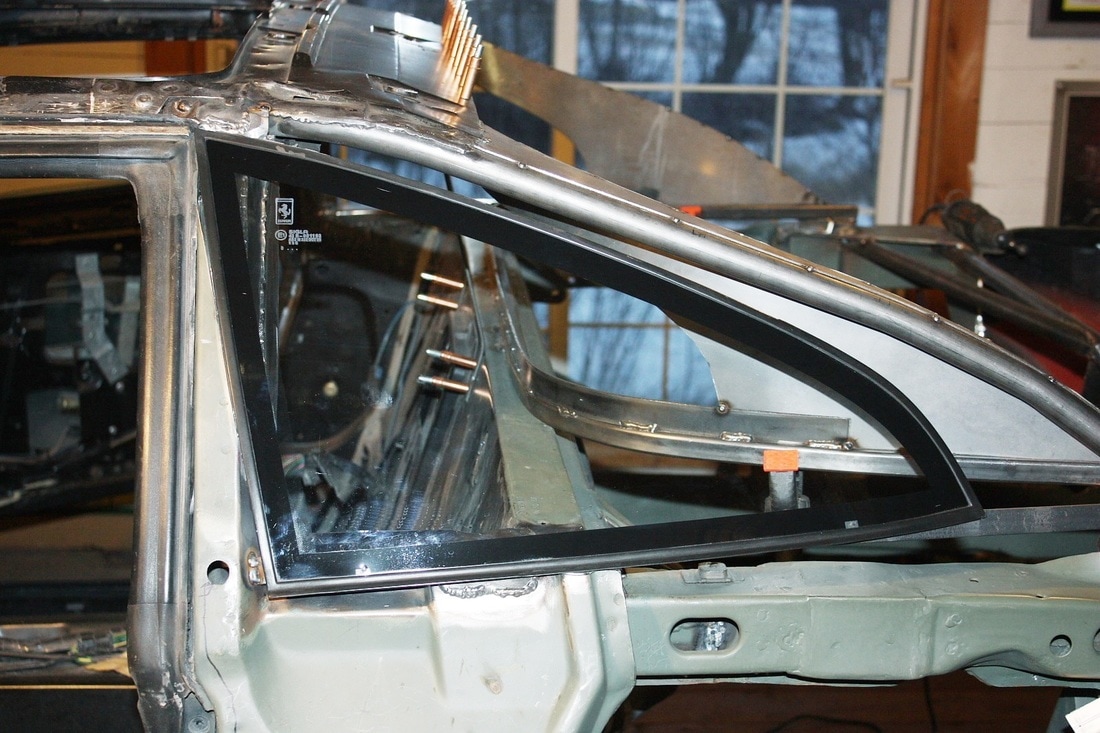
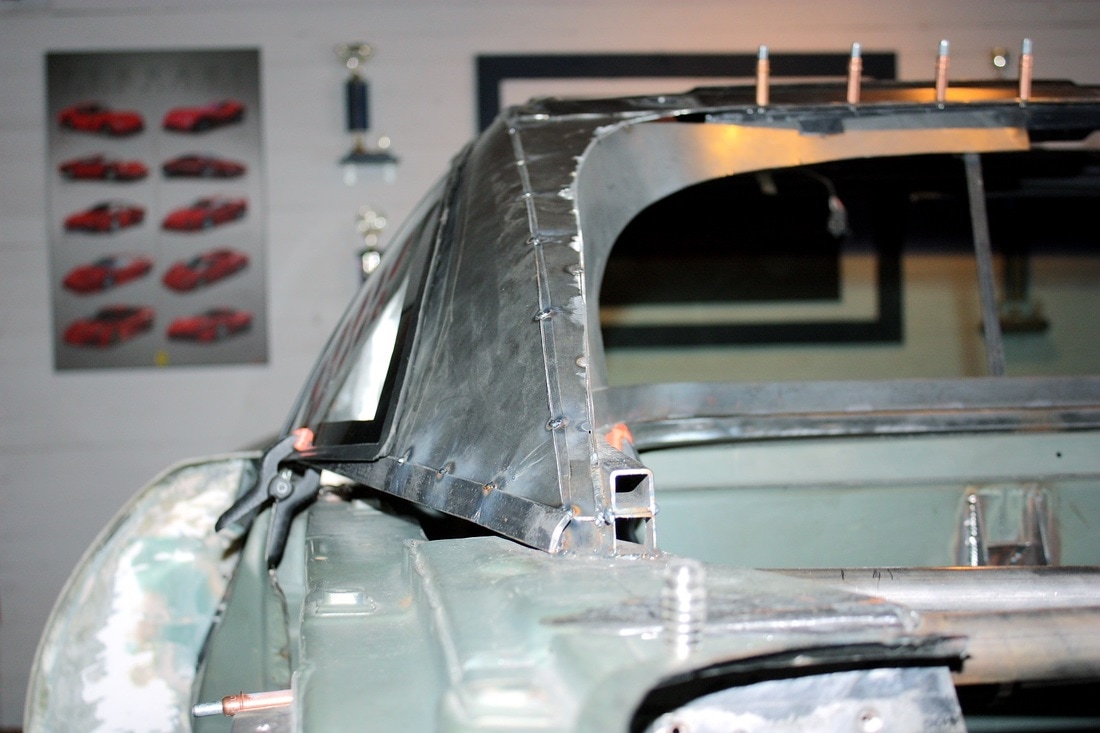
Lastly, I test fitted the quarter window to make sure it still fit tightly against the framework. I also temporarily hung the door skin to give a better impression of how the quarter window follows the upsweeping line of the door:

And here's a view that summarizes everything done around the rear windows to date:
Likewise, here's a view from inside the cabin showing what's been done, and what's next:

 RSS Feed
